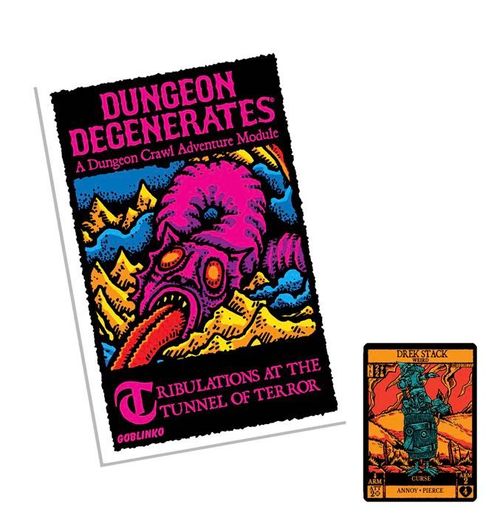
Dungeon Degenerates: Tribulations at the Tunnel of Terror
Dungeon Degenerates: Tribulations at the Tunnel of Terror Rulebook
Table of Contents
Table of Contents
Achtung!
Before you start playing, you should note that this adventure isn't to be played sequentially, you start at the beginning but the sequence of the adventure is told to you by the entry that you are on.
The Rules
Tribulations at the Tunnel of Terror ("TTT" for short) is a roleplaying game-like dungeon crawl adventure module for the Dungeon Degenerates: Hand of Doom (DD:HoD) boardgame. It plays like a choose your own adventure book or a solo/co-op dungeon crawl roleplaying adventure.
Instead of the Würstreich map, your party will move mostly on the map provided with this booklet. Each numbered area on the map counts as a Location for rules purposes, such as Resting. For clarity, the word "Tessellation" is used to distinguish the map in this module & its areas from locations on the Würstreich map. (If you're wondering, a tessellation is a flat geometric pattern, e.g. a fancy & alliterative word for a dungeon).
Most of the Encounter Phase rules apply normally, with a few exceptions.
You only need the DD:HoD box to play this module. Options are provided to use supplements, such as Mean Streets (DD:MS) or Dungeon Breakout (DB), the Eyeball Kid card is included in Die Würst #4 ), but these are by no means mandatory.
If you've already played the module Grime & Gold at the Ghostgates (GGG), TTT plays essentially the same, albeit with a few differences related mostly to the specifics of the Tunnel of Terror location & some clarifications to make the game run more smoothly.
Option: See Dungeon Degenerates: Guide to the Würstreich - Pigskin Port & The Highlands for deeper background about the Highlands & the Tunnel of Terror.
Setup & Mission Deck
The mission starts at Pigskin Port (only once you reach the Tunnel of Terror & enter the Tessellation, should you set the Monster cards aside). These form distinct Mission Decks from which you will be picking cards.
- EPIC LOOT MISSION DECK: Mirror Shield, Morbadicon.
- EPIC MONSTER MISSION DECK: Übergrinder (DD:MS) or Bandit King (if you don't have the Übergrinder).
- MISSION LOOT DECK: Blasting Charge, Scratch, Mystery Meat.
- SETTLEMENT DECK (DD:MS): Back Alley Scratcher.
- BANDIT MISSION DECK: All BANDIT cards from the Highlands Monster Deck plus Bee Keeper & Cultist from the Lowlands Monster Deck.
- NACHT DREK MISSION DECK: All monsters with DREK in their name from the Highlands Monster deck (Stilt Drek, Gas Drek, Nacht Drek Knight, etc.) Remember to include the new Dek Stack card!
- SPECIAL MISSION DECK: Eyeball Kid (from Die Würst 4 ), Watcher (Highland Monster deck)
- BIZARRE MISSION DECK: All WEIRD cards from the Highlands Monster deck, plus the Bogshadow from the Wetlands Monster deck.
The cards above make up your Mission Decks. This list may include cards featured in expansions which you don't have (e.g. the Übergrinder from DD:MS) or cards you lost (e.g. your dog ate them). That's no issue as their use is optional (alternatives are suggested). You can always replace a missing card by another random card worth the same XP (if a monster) or GP (if Loot) if possible, but it's not a big issue if it isn't. This is a map crawler game, not Kasparov's chess tournament. Fun should trump precision!
Keep the Deck types separate (e.g. Bizarre Mission deck separate from Bandit Mission deck). You will have to shuffle those decks back & forth a lot: Do not shuffle the monsters worth 3XP in the decks unless:
- You play in campaign mode & it was already reshuffled, OR
- Your adventurers have, on average, at least 2 skill cards each, OR
- The module tells you to.
Moving On The Map
As a location, the Tessellation is both a Port, Indoors, Perilous & above all Metaphysical. Normally, entering this location would require a status or Disease because of the Metaphysical icon (see DD:HoD p.5), but this time it will be different. You see, the section of the Tunnel of Terror which you will be exploring at first is the mundane part, featuring mostly brigands & physical dangers. This can result in having non-metaphysical encounters in the Tessellation.
When moving on the Tessellation map, refer to the number of the area shown on the map & read the corresponding entry. If you return to (or stay in) an area, things can often change as you will be asked to tick boxes or note keywords to keep track of your former actions.
You may be invited to make a choice of action, which will refer to a choice of numbered entries that are NOT areas on the Tessellation. Once all threats are overcome or choices made, you may move your party to an adjacent area by reading the entry with the number shown on the map. Areas must be connected by a doorway to be adjacent (you cannot move through walls). Note that (unless otherwise instructed) you can choose to stay in an area & action the entry in its current state (ticked box etc.) but dallying too long is not recommended!
STANCES: Remember to pick a stance (Bold or Cautious) before moving on to the next area.
COUNTERS & CARDS: Use an Adventurer standee to show where you are on the Tessellation & map counters (destroyed, perilous etc) when instructed. You will need your adventurer cards as well as skills, items & the like. You will need a pencil & paper to take notes, such as keeping track of keywords.
SPLITTING THE PARTY: Splitting the party would make the game unmanageable. For simplicity's sake, the party cannot be split. Doing so would unfortunately cause them an immediate & painful death from a hidden trap. However, party members may Escape to an adjacent area, as long as all they do is wait for the combat to finish.
ESCAPING: An Escape action by default leaves the party in the same space as they escaped from, which is not possible with this module. Therefore, Escape in this module means that the escapees return to the area whence they came. They must wait for the combat to finish, then the party regroups again (see Splitting the Party, above).
Modified Rules
Except where noted otherwise, this adventure module uses the regular rules of DD:HoD. Some rules will work differently in this module. As a rule, what happens in the dungeon stays in the dungeon, & what happens inside the dungeon doesn't affect what's outside the dungeon. The initial Danger Level of the Tunnel of Terror is an exception, as it applies to the entire Tessellation.
The following exceptions apply:
PHASES: Ignore both the Map Action Phase & the Danger Phase while in the Tessellation. The Tunnel is a Perilous location. While that would normally mean you cannot Rest, you may attempt Rest actions if you are directed to. Likewise, you will draw Danger Cards only when the module tells you to, such as when checking for Wandering Monsters. The Encounter Phase works as usual unless otherwise noted in an area's description.
HAND OF DOOM: Ignore the rules for the Hand of Doom except where the text explicitly mentions it. Should you play this module as part of a campaign play, you cannot enter the Tessellation while the Hand of Doom is at the Tunnel of Terror. Should the Danger Level in The Tunnel of Terror increase beyond 6, keep it at 6 then apply the Sign of Power card 'The Finger of Scorn' immediately. Discard it afterwards. If the Level goes beyond 6 a second time, the Hand of Doom crushes the section of tunnel you are in, literally sealing your fate.
DANGER LEVELS: Do NOT automatically reduce the Danger Level at the Tunnel of Terror if you are victorious. The text will indicate if a fight reduces the Danger Level.
LOOT: When you make a successful Loot roll in this module, pick from the regular Loot deck. Don't use the Loot set aside for the Loot Mission deck unless the text specifically tells you to (This is different from the rules in GGG). Should an entry tell you to take an Item you already have, place a Wound token on the card to denote each extra copy of the item you obtain.
REST ACTIONS: You can't Rest as the Tunnel of Terror is a Perilous location, except in specific circumstances indicated by the text. (This also differs from GGG). When allowed at all, the only Rest Actions allowed are Recover, Explore & Improve. Whenever you Rest, check for Wandering Monsters afterwards (see below).
WANDERING MONSTERS: If adventurers tarry by Resting or being Fatigued, they might attract unwanted attention. Heroes touched by the supernatural are more likely to draw the attention of the Nacht Drek, the misshapen mutants that emanate from the nefarious oneiric emanations of the Tunnel of Terror like the fetid flatulence of fevered fens, but other threats lurk in these passages. See the Appendix for the rules on how to check for Wandering Monsters.
STATUS CONDITIONS: Per the usual rules, they are removed when a Recover action is taken, except that it's much harder to remove a condition in the Tessellation. Some conditions apply differently in the Dungeon:
DETAINED: If your party becomes Detained, draw a Danger card, increase the Danger Level at the named location & remove the Detained status. (This differs from GGG).
FATIGUED: When you are Fatigued, you move slower. You must check for Wandering Monsters each time you enter an area already visited, even if the area's text says there are no monsters.
RALLY/SUMMON: All monsters Rally/Summon other monsters from the same Mission Deck unless otherwise noted.
THE MORBADICON: When you find pages of the dread book you will be instructed to first draw the Morbadicon Epic Loot card & then add Wound tokens to the card to show how many extra texts you uncover after the first. While you have any texts, you may use the action on the card (If you already had the Morbadicon before starting this mission, you soon realize the one you had before was a cheap fake, so do not add it to your count!).
MONSTER NUMBERS: To balance the encounters with the party size, some entries will mention 'Extraneous Monsters'. The text will tell you what additional monsters your party will face on top of the threat(s) already listed. Note that you can face more than one monster of the same type. As you only have one card for each monster, use the reverse sides of other monster cards to represent the extra monster, placing Wound tokens on that card to track their Wounds separately.
Campaign Play
Should you play this module as part of a campaign, place the Undercity Dungeon map overlay at the Tunnel of Terror (north-western Highlands) to indicate the entrance to a dungeon module. TTT is well suited to be played between On The Run & Visions at the Peak (from DD:HoD's Missions booklet), but it's not a requirement.
ENCOUNTER LEADER: To make play enjoyable for all players & resolve arguments, it's recommended that players be given alternating control over how the party reacts as a group. This role of "Encounter Leader" is rotated clockwise after each encounter. An encounter can be defined as "anything that happens in a single area". For example, upon entering a new area in the Tessellation, the current Encounter Leader would decide whether the party attacks or negotiates, etc. Which combat action is taken remains a question of individual player choice, but if the Encounter Leader decides to deal peacefully with a dungeon denizen, all players must abide by this decision & may not attack. Discussion & consensus is encouraged but the last word goes to the Encounter Leader. Likewise, the Encounter Leader decides whenever there's an evenly split opinion. Entering an empty area doesn't involve a switch of Encounter Leader, only actual encounters that involve decisions. Players who don't want the position of Encounter Leader may pass on the role if they wish.
Prologue
Scuttlebutt scuttles at Pigskin Port as disheveled traders from the Highlands, their cargo stolen by inebriated bandits of lackadaisical hygiene gossip conspiratorially. The rumors concern pages of the heretic Brother Bellringer's nefarious book "The Revelation of Lord Scrott" – allegedly later transcribed by the heretic monk Stücrepus in the sulfurous Morbadicon – which claims that the Blight brought forth from the Temple of Madness will cleanse the Würstreich of its wickedness & bring about a new age of purity. Such pages, it is asserted, are scattered like leaves throughout the Tunnel of Terror. Needless to say, the Holy Inquisition's punishment for carrying these writings is dire: live stuffing of the culprit (with cherries) then ground with peppers into delicious würst.
Despite the ecclesiastical repression, no less than three suspicious ne'er-do-wells at Pigskin Port are offering a substantial reward for the defrocked friar's scribblings.
LAZAR, NECROMANCER'S ASSISTANT: The suspicious grave digger offers 20 GP & a Loot item of your choice (from the Loot Deck) in return for at least three of Brother Bellringer's documents "for cultural purposes". If asked about his involvement with the Bell Ringers cult, Lazar mutters something about fraternity not being a crime & says no more on the matter.
LEMMY SLICK, RIVER RAT GANGSTER: His boss, Bruno the Bandit King at the Bandit Camp, wants the Bell Ringer Cult out of the Highlands. He'll use Bellringer's texts to draw out the cultists & slaughter them all. Lemmy offers you 20 GP & the Gang Member card (from the Triumph Deck) for at least two of Bellringer's texts.
WALLY WHISKER, TAVERN KEEPER: Wally has a client interested in the crazy monk's texts & will offer you 8 GP for each of them. Moreover, Wally is looking for his son, Tim, who disappeared after stealing his scrying ball, a magical bowling ball with which the kid likes to "play pretend with imaginary otherworldly beings". Return with news of the kid for a 5 GP reward, plus 10 GP if you actually bring him back (alive & unamputated).
Starting
The mission starts (& ends) at Pigskin Port. From there, the most direct path to the Tunnel of Terror will take you through the Foothills via the Windmill. Use the normal travel rules until you get to the Tunnel of Terror, then go to entry 1.
Before that, if you want, you can waste precious time at the Windmill making an Explore action (go to entry 4). You could likewise waste even more time making an Explore action on any path in the Foothills (go to entry 13). When you leave the Tunnel of Terror, use the normal DD:HD map travel rules. When you get back to Pigskin port, go to the Epilogue.
Tessellation Entries
1. Entrance to the Tunnel of Terror
Horrible & glistening, the wormlike form of the Tunnel of Terror is unsettlingly suggestive of the petrified form of an ancient, blasphemous god. The maddening roaring of the wind rushes out of the tunnel's entrance like the exploding lungs of a lunatic.
☐ TICKED BOX: You've become familiar with the slippery tongue bridge & don't need to roll again as you've caught your footing.
UNTICKED BOX: The Lingual Bridge: Set up the Monster Mission Decks before continuing. Make an AGI Test for each adventurer. PERFORMERS & WILDS may roll 3 dice & pick any 2. Those who fail slip & fall into the foetid waters, gaining the Slimed Status. Unfortunate adventurers who "critically fail" (two 6s) fall into the repugnant Stinkenblüt waters. Not only are they Slimed, they take D3 Piercing Damage from drowning & find themselves back at Pigskin Port (unless they have the FISHOID class). They'll have to trek back alone per the usual travel rules; the rest of the Party may decide to travel to rejoin them via Port or Road travel, but cannot Rest at the Tunnel for them.
THE WIND OF INSANITY: If you have the keyword BEESWAX, you're unaffected by the outrageous howling of the insane wind. Any adventurer without the keyword becomes Suppressed & cannot make Rest actions in the Tessellation (note the keyword NOREST as a reminder). All BANDITS (but not WEIRDS) met within the Tunnel of Terror carry beeswax (or a flabbergasting abundance of cerumen) to protect them from the roaring wind. For each BANDIT defeated inside the Tunnel of Terror, one adventurer may note the keyword BEESWAX & remove the Suppressed Status & NOREST keyword.
EXIT: You can either enter the Tessellation map (go to entry 10) or return to the main Würstreich map to leave the Tunnel of Terror. If you wish to return to the main Würstreich map & have the keyword BEHOLDEN, first go to entry 7. If there is a Voidgate token on the Tessellation, move it to the Temple of Madness location on the Würstreich map.
2. The Gospel of Infection
As the bell's toll stops, you notice that the inside surface is nailed with uncountable shredded pages from Bellringer's unholy & insane scripture! Take the Morbadicon card (or place a Wound token on the card if you have it already). Any adventurer with the Infected status gains 1 Luck. More monks stream towards the bells, intent on getting them ringing before Lord Scrott notices the silence...
If you have not done so already, tick the box at entry 8. You may leave for any adjacent area, leave the Tessellation to enter the Temple of Madness (go to entry 40) or attempt to stop another bell (go to entry 36).
3. Übergrinder's Buttocks
For years, the Übergrinder's use of pages from Brother Bellringer's holy script as a cushion resulted in its text reverse-printing on the bandit leader's fat buttocks.
You can either scrape the latter's unwashed hindquarters or transcribe the words of doom on a less odoriferous medium. Moreover, the Unlicensed Surgeon discovers all sorts of unknown & fascinating diseases in Otto's malodorous fundament & becomes Invigorated. Take the Morbadicon card (or place a Wound token on the card if you have it already).
4. Windmill
Huge bees are flying about everywhere, tended by an odoriferous fat man who apparently has never heard of bathing.
☐ TICKED BOX: Ignore this encounter & play the normal rules for map exploration.
UNTICKED BOX: Bee Hives: Tick the box above. Barnabeus the Bee Keeper (Highlands Monster Deck) has a grudge against PURITANS & MILITANTS for tormenting his beloved grandmother (Mrs. Schrödinger) & will always fight parties that include them. His favorite targets are PURITANS (this takes precedence over what's written on his card).
Otherwise, Barnabeus is willing to sell you beeswax for the brazen price of 3GP per adventurer.
Should your party have the "Servants of Lord Scrott" or the "Agent of the Secret Brotherhood" Triumph card, the Bee Keeper winks (you presume, since he's wearing a mask) & gives your entire party beeswax for free.
If you fight Barnabeus, then Escape, return to the Würstreich map. The Bee Keeper will have disappeared should you return. If you kill Barnabeus, his only Loot is beeswax enough for your whole party. Should your party acquire beeswax by any means, note the keyword BEESWAX on your party's sheet (if only some of your party bought beeswax, note their names). This might be helpful later.
Return to the Würstreich map.
5. Gates to the Hidden Halls
A low ceiling leads to nasty-looking vault doors hammered into what may be a demon's face or buttocks (or maybe both). Bored guards with tattooed blue thumbs whistle folk tunes while a diminutive Nacht Drek plays on a lacquered red banjo.
☐ TICKED BOX: Check for Wandering Monsters but use the Bandits Mission deck. Any bandits met will always be Blue Thumbs.
UNTICKED BOX: A patrol of Blue Thumb bandits are watching the entrance to the Hidden Halls. Should you have Bakshi's safe conduct (blue Doom token), they will warn you to stay away & leave but won't attack unless you attempt to bypass them to enter the Hidden Halls.
BOLD STANCE: Adventurers get one free out-of-sequence attack before the combat starts.
CAUTIOUS STANCE: Adventurers may retreat back to their previous area without being noticed.
FIGHT: Each adventurer is targeted by a Hired Guard (Bandit Mission deck) - ignore normal targeting rules. Tick the box above if you slay them & check for Loot as usual. Should you have the Dungeon Breakout game, you can enter the Hidden Halls (see entry 26). Otherwise, the vault doors to the Halls can't be unlocked, try as you might.
6. Herr Horseface Mörder
A fiery whinnying sets the air alight as a demonic inverted centaur appears - you are face to face with Herr Horseface Mörder! The fiendish equine has been harvesting slaves in bloody iron cages for its Morbad masters, challenging the archfiend Lord Scrott's dominion in his own domain!
BOLD STANCE: You launch with a roar against Herr Horseface Mörder! HUNTERS using a two-handed weapon may roll one more Power die against Herr Horseface Mörder.
CAUTIOUS STANCE: Herr Horseface Mörder's fierceness overwhelms the meek with dread. You can't Attack during the first turn, but can Defend as normal.
HERR HORSEFACE MÖRDER: ATT 6, HP 9, ARM 3, Target: ALL, 4 XP, 4 GP. PURSUE. He has the Classes Brute & Daemon. Special Rules: The Horseman's painful whip lashes force its targets to Attack using MRL, whatever weapon or skill they use. PURITANS & LYCANTHROPES can't use Power dice when fighting the Devil Horse Man.
EXTRANEOUS MONSTERS: None. Instead, add 3 HP to the Herr Horseface Mörder per adventurer after the first.
VICTORY: Reduce the Danger Level by 1 & check for Loot as usual. If you wish to release the Devil Horse Man's captives, draw & play the Prisoner card (Highlands Encounter deck). If you have the keyword GLUEMAKER, one adventurer may take Herr Horseface Mörder's undying head as a trophy: they become Demoralized as its endless cursing & insults are insufferable - note the keyword NOGGIN & tick the box at entry 15.
7
You have attempted to leave the Tunnel of Terror before bringing Otto's head back to Waldo the Watcher - you will have to fight the irate ogler! Fight the Watcher card (Special Mission deck). If you are Victorious, check for Loot as normal then return to the entry whence you came.
8. Bell Ringer Bell Chapel
Clad in rags or stark naked, elderly monks of perfectible hygiene cavort & shout scripture aloud. The mushroom-like signs & livery of Lord Scott are everywhere.
The monks pull all of their weight to ring seven house-sized bells whose noise is beyond deafening. According to hearsay, the bells are the cause of the awful roar at the Tunnel of Terror's entrance. Some even say that stopping them will anger Lord Scrott & destroy the world. You don't have enough fingers to count all the monks.
AWFUL NOISE: You can't use Power dice when using MAG or MRL based Combat Actions or Attacks. (If using Skills or items that require a MRL or MAG Test roll 3 dice & use the highest 2).
BOLD STANCE: Rushing in, you get surrounded in haste by the frolicking monks & must fight them for at least 2 turns before attempting to Escape. Each adventurer is targeted by a Cultist (Bandit Mission Deck - ignore normal targeting rules). Cultists summon more Cultists that target the same adventurer as the Cultist that summoned them. You can't use ranged weapons during this fight. PURITANS become Invigorated at the sight of this foulest of heresies. PERFORMERS can attempt to pass as monks & avoid this fight with a successful MRL Test. If you are victorious, do not check for Loot - you may leave quickly (see Exit) or attempt to stop one of the bells (go to entry 36)
CAUTIOUS STANCE: It's so loud & busy that nobody notices you unless you interfere. You may cross the room freely (see Exit) or attempt to stop one of the bells (go to entry 36).
ESCAPE: Adventurers who Escape must pass a CON Test or become Infected.
EXIT: You may leave this area for any adjacent area. Should you wish to leave the Tessellation & enter The Temple of Madness, go to entry 40.
9
You boldly charge into the melee, swearing oaths to obscure, bloody gods.
Draw 2 BANDIT cards per adventurer from the Bandit Mission Deck. Reshuffle & redraw any card worth 3 XP or more as the bandits' leaders will be killing each other off.
ESCAPE: Adventurers who Escape become Suppressed.
VICTORY: Reduce the Danger Level by 1. You automatically get 2 Loot cards (for the party).
Return to entry 10 & write "X" in its box.
10. Gang War
Two bandit gangs have been fighting over this area for a long while, leaving too many corpses laid about to count.
☐ TICKED BOX: If the box is noted with a letter, go to entry 16 & read the paragraph for that letter.
UNTICKED BOX: Explosions & gunshots can be heard above the booming howl of the Tunnel of Terror. Two vicious bandit groups are trading shots using cannons, makeshift blunderbusses, copious refuse & the foulest insults.
If the River Pirate adventurer is in your party, or you have the Gang Member card (Triumph), you recognize the River Rats' chief as Crumb the Cruel, an ally. Go to entry 17. Otherwise, read on.
BOLD STANCE: Adventurers will be assumed by both sides to be enemy reinforcements. In that case, the Encounter Leader, after consulting all players, must choose whether to take the side of the Blue Thumbs (go to entry 18), the River Rats (go to entry 17) or neither (go to entry 9).
CAUTIOUS STANCE: Adventurers can fight (see Bold Stance) or attempt to pass unnoticed. Make a PER Test to dodge the melee. FIGHTERS, PERFORMERS & ROGUES may roll 3 dice & pick any 2. If they fail, take Piercing Damage equal to the lowest single die. Pass or fail, these adventurers may avoid this encounter & exit to any adjacent area.
11
The River Rats' leader, Crumb the Cantankerous, thanks you for your assistance with sweat & splutters. "Those Blue-Thumbed deviants were stealing our territory & hard-earned loot! Take this so me lads won't harm you landlubbers."
Crumb hands you a half-rotted rat with a red ribbon as a token of safe conduct. Place a red Doom Counter on an adventurer's Character sheet as a reminder of your fragile friendship with the River Rats. Should you ever run out of red Doom Counters, remove it from the adventurer's sheet & place it on the Doom Track.
Reduce the Danger Level by 1 & check for Loot as usual (Crumb makes sure to keep the lion's share of the Blue Thumb's hoard). In addition, you find that Bakshi had Scratch (Loot deck). When you're done, return to entry 10 & write "R" in its box.
12. Votive Candles of the Maiden
Mangled corpses wearing the colors of the River Rats bandits lay about, half consumed by glowing moss. Burning candles rise out of them, sculpted by unskilled hands in the fashion of a young girl's face.
☐ TICKED BOX: If you make a Rest action here go to entry 45. Otherwise, roll on the Supernatural Encounters table (see Appendix).
UNTICKED BOX: Tick the box above, then each adventurer must make a CON Test. If you pass, you become Exalted, otherwise, you become Poisoned. You may leave a tribute for the Maiden - each HUMAN adventurer may spend 1GP to make a MRL or MAG Test. If you pass, recover Wounds equal to your lowest single die. If you pass with doubles, gain 1 Luck.
13. Foothills
Thousands of amputated toes drying on iron strings make for an unusual artistic display.
☐ TICKED BOX: Ignore this encounter & play the normal rules for map exploration instead.
UNTICKED BOX: Rather than play a Danger Card: read the encounter below instead.
THE TOE TAKER: This ostentatious maniac has taken residence at the base of the foothills, training his pet Tongue Runners to attack unwary travelers so that he may share with them his favorite hobby. You must fight the Toe Taker (Highlands Monster Deck) & his pets! Despite his irrepressible fondness for transmetatarsal amputation, the Toe Taker is notoriously family friendly & morally responsible. His attacks are therefore directed at any child in your party first, such as the Eyeball Kid (or, failing that, the Alley Cat), lest their innocent minds be troubled by his "artworks" (this takes precedence over what's written on his card). While the Toe Taker targets the Eyeball Kid, he takes 2 Wounds each combat turn - If the Kid takes 4 Wounds, remove the keyword EYEBALL & discard his card if you have it).
BOLD STANCE: The Toe Taker's pets smelled your presence & ambush you! You can't use Power dice on the first combat turn.
CAUTIOUS STANCE: Adventurers with PER 7+ can make one free Quick Action (DD:HoD) before combat starts. Moreover, an ad-venturer with the Sneak Attack skill may perform one free out of sequence attack.
EXTRANEOUS MONSTERS: The Toe Taker has a full menagerie of Tongue Runners (Highland Monster Deck) but most of them are half-strangled by rusty chains. Fight one Tongue Runner per adventurer after the first, but no more than the total Danger Level at that location.
VICTORY: Tick the box above. Do not check for Loot. Instead, the Toe Taker's Loot is a Blasting Charge (Mission Loot card) made of nitroglycerin & fermented toenails.
EXIT: Tick the box above whether you Escape or slay the Toe Taker. Return to the Würstreich map after resolving this encounter.
14
Bakshi the Barbarian, leader of the Blue Thumbs, is eager to thank you for helping.
"Those Gütter buggers have been stealing from our turf! Here, take my seal, my boys will let you pass."
It's more a necklace of thumbs than a proper token of safe conduct, but it will have to do.
Place a blue Doom Counter on a single adventurer's Character sheet as a reminder of your fragile friendship with the Blue Thumbs. Should you ever run out of blue (Lowlands) Doom Counters, remove it from your adventurer's sheet & place it on the Doom Track.
Reduce the Danger Level by 1 & check for Loot as usual (Bakshi only leaves you scraps of the spoils). In addition, Crumb had dropped a "wanted" poster for the Child Maiden, a putative prophet held as holy by a northern mercenary gang, the Maiden's Men. Oddly, the poster also features the inimitable likeness of Wally Whisker from Pigskin Port: note the keyword ARSCHLOCH.
Moreover, Bakshi offers you a quest: he's lost control over his Nacht Drek underlings ever since Herr Horseface Mörder showed up, terrorizing the denizens as he gathers slaves for his Morbad masters. Return to this area with its head & he'll give you 10 GP - note the keyword GLUEMAKER. Afterwards, return to entry 10 & write "B" in its box.
15. Patrolled Passages
Rusted iron cages, distant whinnying & the pungent smell of horse apples make these passages a harrowing experience.
☐ TICKED BOX: If at least one adventurer is Exalted, roll on the Supernatural Encounters table (see Appendix). Otherwise, one adventurer must pass a PER Test or you must draw one card per adventurer from the Bizarre Mission deck. If you have the keyword EYEBALL, you can avoid either encounter altogether if a WARLOCK or REPTILIAN looks in the kid's eye & passes a MAG Test. After dealing with this encounter, if you have the keyword WANDERING one adventurer may make a PER Test. If you pass, go to entry 37.
UNTICKED BOX: Roll 2D6 for each adventurer if you are in Bold stance or D6 for each one if in Cautious stance.
So long as you keep moving through the Patrolled Passages, (so from area 15 to another area 15 without stopping or moving to a differently numbered area), you must make a note of any results of 6 on your party's sheet. You can then count these dice rolled towards your roll in the next area 15. For example, a party of two adventurers in Bold stance rolls 1,3,5 & 6. They note on their party's sheet that they have rolled one 6. They choose to move cautiously to another area 15 for their next move, & roll 4 & 6. They now have a total of two 6s. They then move to area 29, which removes these results from their sheet.
Should you ever have a total of three or more 6s (666!), go to entry 6.
16
(X): Slaughtered corpses bleed out everywhere & the smell is awful. You may take a Rest action here but if you do, increase the Danger Level in the Tunnel of Terror by 1. Should your party include the Corpse Burner, he can burn enough corpses to avoid this increase by passing a STR Test.
(B): Smoking bandits are playing cards & looting corpses. Parties allied with the Blue Thumbs (blue Doom token) may Rest here & may play the Game of Cards event card (Highlands Encounter deck).
If you have the keyword NOGGIN, Bakshi is thrilled to take possession of Herr Horseface Mörder's head & looks around the Tunnel for the best wall to mount it on. True to his word, he gives the party 10 GP. Remove the keyword NOGGIN.
(R): Hurried bandits are stocking goods for shipment on rotting boats moored on the rancid river. Parties with a safe conduct for the River Rats (red Doom token) may Rest here & may play the Caravan event card (Highlands Encounter deck).
17
The Blue Thumbs roar like tigers as they charge onto you. You must fight their leader, Bakshi & his unwashed retinue.
BAKSHI THE BARBARIAN: Vermus Puppeteer or, if you don't have that card, an Ogre Thug with a Bandit Berserker sidekick (Bandit Mission Deck).
EXTRANEOUS MONSTERS: Draw 1 BANDIT card from the Bandit Mission Deck per adventurer after the first. If the party size is 3 or more, draw 1 additional card. Reshuffle & redraw any WEIRD or non-BANDIT card or opponents worth more than 1 XP.
VICTORY: If you win, go to entry 11.
18
Gunshots & arrows fly above your head as you engage the River Rats' leader, Crumb the Controversial & his fetid footpad retinue.
CRUMB THE CONTROVERSIAL: Mountain Warlock or, if you don't have that card, an Outlaw Wizard with a Tooth Taker sidekick (Bandit Mission Deck). Any summoned monster will be a Bogshadow (Bizarre Mission Deck).
EXTRANEOUS MONSTERS: Draw 1 BANDIT card from the Bandit Monster Deck per adventurer after the first. If the party size is 3 or more, draw 1 additional card. Reshuffle & redraw any MILITANT or non-BANDIT card or opponents worth more than 1 XP.
VICTORY: If you win, go to entry 14.
19. Disputed Passage
The passage is crawling with loitering bandits.
Determine their gang as described in the Bandit Encounters table (see Appendix) - they all belong to the same gang. If you have safe conduct from their leader, roll on the Bandit Encounter Table - otherwise, you will have to fight. For each adventurer, draw one card from the Bandit Mission deck. Unlike most areas in the Tessellation, stances don't have any special effect here due to the corridor's echoes.
20. Eyeball Kid
A child with an immense eyeball for a head drops from above with a sudden shrill shriek.
☐ TICKED BOX: The area is empty. You can make a Rest action if you want but if you do, all adventurers become Suppressed from the horrible fungus-themed nightmares spilling from the Temple of Madness nearby. If all party members are already Suppressed, roll on the Supernatural Encounters Table (see Appendix).
UNTICKED BOX: The Eyeball Kid* freezes for the briefest moment - tick the box above & note the keyword WANDERING.
BOLD STANCE: Your frothing fury might scare the Eyeball Kid into fleeing. If at least one adventurer is a PERFORMER go to entry 37. Otherwise, roll D6. If the number is under your party size, the child flees immediately. If the number is equal to or greater than your party size, the kid hesitates long enough that you may choose to fight him (go to entry 34) or let him flee.
CAUTIOUS STANCE: Go to entry 37.
* Eyeball Kid card included with Die Würst #4.
21. Otto the Übergrinder
You have entered a hideout of the Maiden's Men gang. The walls are adorned with rotting banners portraying a saintly girl.
☐ TICKED BOX: Check for Wandering Monsters. With Otto & his men defeated, the Nacht Drek have taken over this place, so use the Nacht Drek Mission Deck.
UNTICKED BOX: Sweaty & stinky, Otto the Odious holds his dismal court in this rocky cesspool. His gang is in the process of applying "enhanced interrogation techniques" on a Blue Thumbs captive with a barrel filled with live lampreys, vinegar & pickles. Besides a portly organist drones a dwarf with a cardboard head, singing sanctimonious praises to the Maiden Child.
BOLD STANCE: The brigands rise as a wave as you blaze into the cave. Adventurers with ranged weapons get a free out-of-sequence attack before the combat starts. If you don't want to fight, one adventurer may make a MRL Test (PURITANS may roll 3 dice & pick any 2). If you pass this Test, change your stance to Cautious & read on. If you fail - go to entry 43.
CAUTIOUS STANCE: You may persuade Otto to let you live by meeting one of these conditions:
- If your party includes a Dishonored Knight, Hermit Ascetic, Mendicant Monk or Witch Smeller who agrees to swear loyalty to Otto's patron, the Maiden & offers all his gold in tribute to her (they must have at least 1 GP of their own to donate).
- If you do NOT have the keyword BOGROLL & have the keyword NOGGIN, you may give Otto the head of the heretical Herr Horseface Mörder. Remove the keyword NOGGIN & go to entry 38.
- If you have the keyword EYEBALL, show Otto the Eyeball Kid, which he will take for a blessed sign from the Maiden if an adventurer manages to convince him by passing a MRL Test: WILD or non HUMAN must roll 3 dice & take the 2 highest. PURITANS roll 3 dice & pick any 2. If you pass & do NOT have the keyword BOGROLL, go to entry 38.
- Provide Otto with evidence that you are sent on a holy mission by the Maiden. If you have the Soothsayer's Head, he'll take this for her holy decapitated head. Any item with special benefits for PURITANS will do - discard the item.
- If you have the keyword ARSCHLOCH, you could give him the Wanted Poster you found which, being analphabetic, he'll take for the Maiden's holy writ (remove the ARSCHLOCH keyword).
- Have a SCHOLAR or PERFORMER sing him the holy gospel of the Maiden (pass a MRL Test).
- Give him ALL your gold in donations for the Maiden. The amount must be equal or more than your party size.
- Give him at least 3 Herb or Food cards (but not sausages - he's vegan).
If you do not placate Otto, go to entry 43. If you placate him & do NOT have the keyword BOGROLL, he grumbles darkly about a Horse Headed Heretic that he greatly wishes to see retired before dismissing you - note the keyword GLUEMAKER if you do not already have it. You may Rest here without checking for Wandering Monsters.
22. Nacht Drek Court
A myriad of beaked mutants in tarnished finery play out an absurd pantomime of an imperial court's ball. Seneschals, courtiers, servants, knights, all revel in elaborate & bloody dances under the terrified gaze of crucified bandits.
☐ TICKED BOX: Go to entry 48.
UNTICKED BOX: You could fight the entire court if you wish: go to entry 33. Or you may partake, at the court's invitation, in a challenge of either Dancing or Jousting.
BOLD STANCE: Adventurers will be invited to Joust: Each jouster will have to fight a Nacht Drek Knight (from the Nacht Drek Mission Deck) in a one-on-one duel. The Bloodsport Brawler may replace any 1s on Power dice by 3s during this fight as she knows how to win a crowd. Ranged weapons & spells are not tolerated & will result in the cheater being pecked to death by the crowd. You cannot
ESCAPE: As it is tradition that the loser be eaten with cranberries. If you win, take the Mystery Meat card (Loot Deck); an adventurer with the Gourmet Skill can use that card twice as he makes sausages out of his foe (place a Wound token on the card). Should the adventurers defeat at least three Nacht Drek Knight Jousters, Lord Scrott will be pleased: remove one Yellow Doom Counter (Highlands) from the Doom track.
(Editor's note: the printed text breaks off after "You cannot"; the ESCAPE rule is printed as a separate labelled paragraph, transcribed as printed.)
CAUTIOUS STANCE: Adventurers will be invited to Dance: The adventurer must make three successive AGI Tests to try to impress the court (PERFORMERS may roll 3 dice & pick any 2). The Fugitive Fop & the Carnival Drifter may furthermore replace any 6 on a die by a 5. Each failed Test results in the court throwing refuse & darts at the boorish adventurer, causing Damage equal to the lowest die.
EXIT: After all adventurers have partaken in a dance or joust, tick the box above, then you must move to any adjacent area.
23
You may deal in peace with the River Rats. You can buy Scratch from them if you want (Mission Loot Deck). Moreover, if you have DD:MS, play the Back Alley Scratcher card (Settlement deck). You may also play the Game of Cards encounter (Highlands Encounter deck) & if you have Scratch Dealer (Triumph card), you may also play this here even though it's not a Settlement.
24. Bandit Bivouac
On the sides of the river rot giant mutated fish & cephalopods. Soiled tents & the roasting aroma of sausages indicate a recent human presence.
☐ TICKED BOX: Roll on the Bandit Encounters table (see Appendix) or draw a Settlement Card (from DD:MS) discarding & redrawing until you draw one with the Highlands location. They always belong to the River Rats gang. If you have a safe conduct from Crumb (red Doom counter), they will not fight you & you can take a Rest action here.
UNTICKED BOX: A dozen ne'er-do-wells bearing the colors of the River Rats are quartering huge mutant wormfishes & stocking them into barrels bearing the sigil of Pigskin Port's Meaters' Guild. Contraband! If you've got a safe conduct token from Crumb the Cruel (red Doom token) you may pass unharmed (tick the box then go to entry 23), otherwise check your stance below.
BOLD STANCE: The bandits react in uproar at your sudden arrival. Adventurers with ranged weapons get a free out-of-sequence attack before the combat starts (see Fight).
CAUTIOUS STANCE: Every adventurer who passes an AGI Test may cross the room unnoticed, hiding through the junk while the bandits are complaining about a giant horse-headed monster raiding them. HUNTERS & ROGUES may roll 3 dice & pick any 2. Those who fail must fight. A MERCHANT may try to pass instead as a contact in the Meaters' Guild: if a MRL Test is passed, tick the box then go to entry 23.
FIGHT: Draw 2 cards per adventurer from the Bandit Mission Deck, in this order: Billywürst, Back Alley Bruiser, Toe Taker, Drunken Yokel, Mutant Scum, Mutant Maniac, Tooth Taker, Mancatcher.
COLLAPSIBLE ROOF: You can discard the Blasting Charge Loot card to place a Destroyed counter in this area. Your party must leave immediately whence they came. Everything in the room, including Loot, is lost & you gain no XP or GP.
VICTORY: Tick the box above & check for Loot. MERCHANTS may draw one more Loot card & pick the one they prefer.
25. Watcher's Lair
A gigantic, luminous eye opens up in the darkness. It smiles.
☐ TICKED BOX: If you have the keyword DEADEYE, go to entry 35. Otherwise, go to entry 32.
UNTICKED BOX: You have stumbled into the lair of Waldo the Weighty Watcher! The floating eye beholds your puny group with contempt.
If you have the keyword EYEBALL, go to entry 27.
If you have the keyword EYEPOPPING, the Watcher is enraged & will immediately fight, targeting ALL adventurers - ignore its normal targeting.
Otherwise, Waldo will still probably kill you, unless you can show proof of your devotion to Lord Scrott with either the Servants of Lord Scrott Triumph card or at least one devotional text of Brother Bellringer. A PERFORMER, REPTILIAN or WARLOCK could also try a MRL Test to spin the eyeball horror a convincing yarn: roll 3D6 & pick the highest two results. If you pass the test or otherwise placate him, avoid the fight & note the keyword BLAGGER.
FIGHT: Draw the Watcher card from the Special Mission Deck. Waldo is no ordinary Watcher but rather their Grand Master of Flowers: add 1 HP to Waldo's card for every "W" in the real-world names of the players playing this module (e.g. add 5 HP if your players are named Wanda White, Wally Wallace & George W. Bush). If you have the keyword EYEBALL, one adventurer must pass a MRL Test or the Eyeball Kid will fight on the side of the Watcher - add him to the fight (see Appendix for his stats).
VICTORY: Tick the box & reduce the Danger Level at the Tunnel of Terror by 1, then note the keyword DEADEYE. If the Eyeball Kid escaped or was destroyed, remove the keyword EYEBALL. If you destroyed the Eyeball Kid, also note the keyword EYEPOPPING. Waldo's loot bears the seal of the Picklebarrel Guild: any MERCHANT can sell it for twice its normal GP value at the Pickle Baron's manor in Pigskin Port - note the keyword PICKLE & the name of these loot items on your party's sheet.
With Waldo dead, you may search his Lair; all adventurers must make a PER Test. If more fail than pass, go to entry 35. Otherwise, go to entry 47.
26. Inside the Hidden Halls
(Requires Dungeon Breakout)
Beyond the vault doors extends a labyrinthine set of spiral corridors where the Blue Thumbs hide their cargo. It goes as far as Bandit Camp & far deeper, scuttlebutt went, even as far as the dreaded Tunnel of Terror - Scuttlebutt confirmed!
You may leave that wretched place & return to the even more wretched Tessellation or explore the Hidden Halls. They are played out like a randomly generated dungeon map. You will need the Dungeon Breakout (DB) game's Map tiles & Monster cards, which you will combine with the components of the Dungeon Degenerates – Hand of Doom (DD:HoD) game.
To explore the Hidden Halls, follow the rules below.
Setup: The Hidden Halls has its own Danger Level: Set it at 1 + Party Size (so at 3 for a party of 2 adventurers etc). Use Danger counters to keep track of this in the normal way. Draw your starting Map tile as per the DB rules. Put your adventurer standees on it. Each turn consists of these 3 steps:
- Generate a Map tile. Draw one tile & place it in any legal space as per DB rules. When an adventurer places a Map tile with a Loot, Monster or Jailor icon, place a matching DB card face down on that tile. Exit tiles count as Jailor tiles, but NOT as exits.
- Draw a DB Monster card. If it is value 2 to 4, discard it, but if it is value 5, place this card next to you in a Special Pile face up.
- The adventurers MUST move one tile unless they can Rest (see below).
When you enter a tile with a DB card, remove it. If it is a Loot card, draw a Loot card from the DD:HoD Loot deck unless it is a Bomb, in which case, keep it to use following DB rules. If it is a Monster or Jailor card with a value 5, place it in the Special Pile. If there are three 5s in the Special Pile, see "Epic Monster" below. If the value is less than 5, compare the card's value with the Hidden Halls Danger Level. If it is equal to the Danger Level or lower, draw one card from the Bandits Mission deck for each adventurer on the Map tile then play the fight as per DD:HoD rules. Bandits will always belong to the Blue Thumbs gang but will fight you regardless if you're an ally or not as you're trespassing.
EPIC MONSTER: Whenever the Danger Level reaches 6 or you get three 5 cards in the Special Pile, shuffle them back with the unused DB Monster cards (do NOT shuffle back discarded cards), then take the Bandit King card from the Epic Monster Mission Deck. Adventurers must now fight the epic monstrosity. Add the Hired Guard (Bandit Mission deck) if your party has two adventurers, a Hired Guard & Mancatcher if you have three adventurers & a Hired Guard, Mancatcher & Vagabond Swordsman if you have four adventurers.
If you are Victorious in any combat, roll D6. If the result is lower than the current Danger Level, reduce the Hidden Halls Danger Level by 1.
ESCAPE: A successful Escape from combat allows the adventurers to return whence they came, but not to go forward. As each Map tile represents several hundred yards of knee-high corpse-infested waters, the bandits won't pursue escaping cowards as they'll find easier prey where they stand.
REST: Instead of moving, an adventurer can attempt a Rest Action only at a Map tile with a Loot icon. Once all adventurers present have rested, place a Perilous counter on that Map tile. No more Rest actions can be made at that tile.
Should you ever enter a Map tile with a Perilous counter or Monster/Jailor icon but no Monster/Jailor card (as you had entered the tile previously) roll D6. If the result is higher than the current Danger Level, increase the Hidden Halls Danger Level by 1.
EXITING THE HALLS: When your adventurers enter a newly placed tile that is 8 or more tiles away from the Starting tile, roll 2D6. If the total is under the number of tiles explored in the Hidden Halls, you've found the exit! If not, you can only roll again when entering a newly laid tile.
All adventurers who exit the Hidden Halls this way become Invigorated by the fresh air (or at least, fresher) & gain D3 XP or 1 Luck. Leave the Tunnel of Terror & relocate your adventurers at Bandit Camp on the Würstreich map. If there is a Voidgate token on the Tessellation, move it to the Temple of Madness location on the Würstreich map. If you have the keyword BEHOLDEN, go to entry 7. Otherwise, your adventures in the Tunnel end here, unless you wish to cross the Halls in reverse. If you adventure in the Würstreich & later return to Bandit Camp, you won't be able to find the entrance to the Hidden Halls again as it appears that the complex has reconfigured itself. That's why they call them "Hidden Halls". Should you wish to return to the Tunnel of Terror, you'll have to make the journey via the Würstreich map.
27
"Tim! You're back!". The Watcher's smile grows as the Eyeball Kid hugs it. "You told me I'd become like you! When am I going to lose my limbs? I'm tired of waiting." The monster's smile becomes predatory as its eye turns to you. "All in good time, Tim, all in good time. Your friends are going to help us."
The Watcher has a score to settle with Otto, the leader of the Maiden's Men. "This sanctimonious fool has been hampering the holy expanse of our Lord Scrott, dampening my sorcerous powers! Bring me his head & I will give you the pages you seek". If you agree to help, note the keyword BEHOLDEN. Otherwise you must return to entry 25 & fight the Watcher.
28. Abandoned Tunnel
The collapsing tunnel is laden with petrified sausages & life-like stone statues in terrified poses.
☐ TICKED BOX: You may attempt to Rest here - if so, go to entry 49.
UNTICKED BOX: If the majority of the adventurers are Exalted, for each adventurer draw one card from the Nacht Drek Mission deck. If the Danger Level is 5 or more, draw one more card. Otherwise, each adventurer is targeted by a Log Lurker (Bizarre Mission deck) - ignore normal targeting rules. If party size is 3 or more, also add the Tree Terror (Bizarre Mission deck) to the fight.
Any loot bears the seal of the Picklebarrel Guild: a MERCHANT can sell it for twice its normal GP value at the Pickle Baron's manor in Pigskin Port. If so, note the keyword PICKLE & the name of these loot items on your party's sheet.
29
Roll on the Supernatural Encounters table (see Appendix) each time you enter this area. Once this encounter is resolved, you can take a Rest action if you want, but in that case resolve the Wandering Monsters action before performing the Rest action.
30
Roll on the Bandit Encounters table (see Appendix) each time you enter this area. These bandits always belong to the Blue Thumbs gang. If you have a safe conduct from Bakshi (blue Doom counter), they will not fight you & you can take a Rest action here.
31
If you have the keyword GRINDED or the Servant of Lord Scrott Triumph card, roll on the Supernatural Encounters table (see Appendix). Otherwise, draw 1 card from the Nacht Drek Mission deck for each adventurer each time you enter this area. If you have the keyword BOGROLL, draw 1 additional card from the Nacht Drek Mission deck as Lord Scrott's minions see you as an ally to their enemy.
32
If you have the keyword BLAGGER or BINOCULAR, this area is empty & you may Rest here.
If you have the keyword BEHOLDEN, Waldo berates you for Otto's continued existence & herds you towards area 28. Move there, or fight the Watcher by going to entry 25 (see Unticked Box).
If you have the keyword GRINDED, Waldo makes good on his promise: Take the Morbadicon card (or place a Wound token on the card if you have it already). Moreover, upon returning to Waldo with Otto's head, the Eyeball Kid will be transformed into another Watcher, becoming Waldo's long awaited heir & chess partner - remove him from your party. There are now two identical Watchers in this area, Waldo & Tim. Remove the Keyword GRINDED & note the keyword BINOCULAR.
33
You must fight all of the monsters from the Nacht Drek Mission Deck. Rather than the targets shown on the card, these monsters target ALL adventurers & each gains the Monster Ability Regenerate (n) where n is the party size.
You soon realize that there are too many to kill the entire court, but if you should somehow emerge Victorious from this battle, surviving adventurers must retreat to the area from whence you came.
34
You think you have the Eyeball Kid cornered, but he is slipperier than he looks - You must fight (see Appendix for his stats).
VICTORY: Remove the keyword WANDERING & note the keyword EYEPOPPING. If the Danger Level at the Tunnel of Terror is less than 6, increase it by 1. Don't check for Loot, the kid always has a Mirror Shield (his own eyeball head). The adventurer who carries the Mirror Shield always has the Slimed status as it's always bleeding, gooey & gross - place the Slimed counter on the Mirror Shield to remind you.
35
The Watcher's demise has torn a rift in reality! Play the Waves of Madness card from the Highlands Encounter deck. Moreover, if there is no Voidgate token on this area, the adventurer with the lowest MAG must pass a MAG Test or a Voidgate opens here! If they fail, place a Voidgate token on this area.
36
The mob of Bell Ringer monks rushes against you in outrage.
Each adventurer is targeted by 2 Cultists (Bandit Mission Deck - ignore normal targeting rules). Cultists summon more Cultists that target the same adventurer as the Cultist that summoned them - any single adventurer can never be targeted by more than 4 Cultists.
ESCAPE: Adventurers who Escape must pass a CON Test or become Infected.
VICTORY: Don't check for Loot. Pick an adventurer to make a MAG Test to see if the world ends. If you fail, add 1 Yellow Doom token on the Doom track. If you roll two 6s, add 2 Yellow Doom tokens. If your lowest die is lower than the number of yellow Doom tokens, go to entry 41. Otherwise, go to entry 2.
37
The Eyeball Kid stands nervously before you, unsure of your intentions. If you choose to attack him, go to entry 34. Otherwise, one adventurer may make a MRL Test to calm the child & convince him to follow you. PERFORMERS may roll 3 dice & pick any 2. If you know the Eyeball Kid's true name, you may reroll one die.
If you fail, he flees once more. If you pass, remove the keyword WANDERING & note the keyword EYEBALL (take the Eyeball Kid card as a reminder that he has joined your party if you have the card). He won't partake in fights, but neither will he be attacked unless the text specifically says so. Also take the Mirror Shield card (Epic Loot Deck) as long as the kid is with you, one adventurer can look into his eye for Eldritch vision.
38
For years, the Ubergrinder's use of pages from Brother Bellringer's holy script as a cushion resulted in its text reverse-printing on the bandit leader's fat buttocks. Otto happily gives you shredded papers stuck on his bum. Take the Morbadicon card (or place a Wound token on the card if you have it already). Note the keyword BOGROLL.
39
As you push forward, waves of light distort your vision. One adventurer must make a MAG Test (Roll 3 dice if you have the keyword EYEBALL & pick any 2). If they pass, they see enticing esoteric visions - they may either:
- Gain {MAG Test} XP, then move to any adjacent area or
- Each adventurer recovers Wounds equal to the lowest single die, then move to any adjacent area or;
- Push their psyche even further & go to entry 46.
(The printed entry gives no outcome if the test is failed; none is supplied here.)
40. Temple Of Madness
You stand at the back entrance to the Temple of Madness. If you want to travel beyond to the insane labyrinth-palace of Lord Scrott, archdemon of fungi & craziness.
Move to the Temple of Madness on the Würstreich map. Your party must meet the conditions for a Metaphysical Space (DD:HoD p.5). If there is a Voidgate token on the Tessellation, move it to the Temple of Madness location on the Würstreich map. If you have the keyword BEHOLDEN go to entry 7.
Having found this secret back entrance, you may return to the Tessellation's Map via this entry whenever you visit the Temple of Madness location in future.
41
The prophecies, for once, were true. Silence falls, a deep disquieting silence of all things, as the Universe itself seems to stop its eternal hum, a sound previously not noticed until its horrifying absence is felt in your every fiber. The world ends, not with a bang nor even a whimper... Your adventure (& everyone else's!) ends here.
42. Crumbling Passages
Proximity to the Bells over unknown Centuries has collapsed large sections of the passage between the Temple of Madness & the tunnel's rear exit. You may Rest here.
EXIT: Adventurers may return to whence they came or claw a way through the debris. Each adventurer must pass a STR Test or take {CON Test} - 6 damage. If any adventurer has the Grave Shovel each adventurer may roll 3 dice & pick any 2 for both Tests. Surviving adventurers may then go to entry 40.
43
You must fight Otto & his men! Draw the Ubergrinder card (Epic Monster Mission Deck). If you don't have it, draw the Bandit King card instead. If Otto is still alive after the 5th turn, draw 1 more Extraneous Monster per adventurer as reinforcements barge in screaming.
EXTRANEOUS MONSTERS: For each adventurer after the first, draw 1 BANDIT card from the Bandit Mission Deck. If the Bandit's XP is a greater number than the adventurer who drew the monster has Skill cards, place it at the back of the deck & redraw until you draw a BANDIT with XP worth no more than their number of Skill cards.
VICTORY: Tick the box at entry 21 & check for Loot as usual. Reduce the Danger Level by 1. If you have the keyword BEHOLDEN, remove that keyword & note the keyword GRINDED. When you're done, & if you do NOT have the keyword BOGROLL, go to entry 3.
44. Scintillant Chamber
The tunnels ahead increasingly glow with weird indefinable colors... the tunnel slowly opens out into an iridescent chamber of hypnotic rays.
☐ TICKED BOX: The colors radiate hatefully, driving you back - you must return to the area whence you came.
UNTICKED BOX: The party may retreat to the area whence they came or press on by ticking the box above & going to entry 39.
45
After carrying out the Rest action, all adventurers become Poisoned by the candle's toxic fumes. Untick entry 12's box.
46
The light seems to illuminate inner mysteries & burn out weakness... but what if you are all weakness?
The same adventurer must make another MAG Test (Roll 3 dice if you have the keyword EYEBALL & pick any 2). If they pass, gain XP equal to {MAG Test} & each adventurer recovers Wounds equal to the lowest single die. If they fail, each adventurer loses XP equal to the lowest single die. If XP would fall below 0, also take Piercing Damage equal to the lowest single die.
47
You spot Waldo's hidden stash, located in a hard to reach (for any non-floating beings) nook. One adventurer can attempt to reach them by making an AGI test. The climb is made additionally hazardous by concealed nibbling rock dwellers. The adventurer takes {AGI Test} - 6 damage. If they fail the AGI Test, go to entry 35. Otherwise, go to entry 50.
48
The court is bored of you - You can avoid attracting unwanted attention from the Nacht Drek court with a successful PER or AGI Test (PERFORMERS may roll 3 dice & pick any 2). Those who fail must bribe the court with an item (discard) or fight (draw a card from the Nacht Drek Mission Deck for each failing adventurer - ignore normal targeting). If an adventurer who avoided the fight joins in, they also must draw a card.
49
Roll D6. If the result is higher or equal to your party size, you may Rest here normally. Otherwise, you are harassed by animated loot - carry out the Rest action (draw Danger card, check for Wandering Monster etc.) but do not recover any Wounds.
50
You reach the stash, which reveals D3 loot items carefully wrapped in pages from Bellringer's text! Take the loot & the Morbadicon card (or place a Wound token on the card if you have it already).
Epilogue
You return to the stinking alleys of Pigskin Port to the general indifference of the people, in pride or in shame according to your deeds.
Decide to whom you offer Bellringer's texts, if any, then read the text below - you can't offer the same item to more than one patron:
LAZAR, NECROMANCER'S ASSISTANT: If you sell at least three of Bellringer's documents to Lazar, you get 20 GP & a Loot item of your choice. Cultist activity will increase in the Highlands as a result: increase the Danger Level at the Tunnel of Terror by 1.
LEMMY SLICK, RIVER RAT GANGSTER: If you sell two or more of Bellringer's texts to Lemmy Slick, you get 20 GP & the Gang Member Triumph card. In addition, increase the Bounty Level by 1 as the Holy Order crushes the cults.
WALLY WHISKER, TAVERN KEEPER: Wally will be delighted if he gets his boy back despite his strange new looks (discard the Eyeball Kid card or remove the keyword EYEBALL) & pays you 10 GP. Otherwise, if you have the keyword BINOCULAR gain 5 GP, or if you have the keyword EYEPOPPING & one adventurer fails a MRL Test, you can spin a yarn about poor Tim's demise that doesn't involve you to gain 5 GP. If you pass, instead increase the Bounty Level by 1.
His mysterious client will also pay 8 GP for each of Bellringer's unholy texts. Increase the Danger Level by 1 at the Graveyard. Moreover, if you sell at least three such texts, increase the Town Level at Pigskin Port by 1.
Should you have the keyword ARSCHLOCH, you may denounce Wally Whisker as a heretic to the Holy Order for a 10 GP reward (increase the Bounty Level by 1) or blackmail him for 5 GP.
If you have the PICKLE keyword, a MERCHANT may sell any listed Loot items at twice their cost.
As you contemplate the reflection of the rising sun in your newfound gold coins, the heart-warming sensation of undeserved looting brings a smile to your adventurers' unwashed faces. Once more, greed prevails!
Appendix
WANDERING MONSTERS - check when RESTING or FATIGUED: Pick a Danger Card. If it tells you to increase the Danger Level in a Highlands space, increase the Danger Level at The Tunnel of Terror by 1 instead. Otherwise, the Danger Level does not increase. If the number on the card matches or is lower than the Danger Level at The Tunnel of Terror, draw cards from:
- The Nacht Drek Mission Deck, if at least one adventurer has the Exalted or Suppressed status, otherwise;
- The Bizarre Mission Deck.
Draw a number of cards equal to the party size, discarding (but NOT redrawing) any that have XP higher than the party size - then fight any monsters not discarded.
ENCOUNTER TABLES: Roll 2D6 & apply the lowest die. Draw the matching card immediately from the Highlands Encounter deck (unless otherwise noted). Should the encounter require a combat (noted with ¢) draw one card from the noted Mission deck per adventurer.
BANDIT ENCOUNTERS TABLE: Bandit Mission deck: Roll D6 for bandits' gang: 1-2 Blue Thumbs, 3-4 River Rats, 4-6 Maiden's Men. (The printed ranges overlap at 4; transcribed as printed.)
- Toll (¢ - ignore if gang is friendly)
- Game of Cards (If an adventurer wins at cards at least 3 times during this module, pass a MRL Test or take the Compulsive Gambler card (Weakness))
- Prisoner
- Fugitive (¢ - draw from Bandit Mission deck not Law deck, as a rival gang is chasing the fugitive)
- Alchemist
- Contamination
SUPERNATURAL ENCOUNTERS TABLE: Nacht Drek Mission deck.
- Inhuman Voices (¢)
- Glowing Mist (¢)
- Endless Labyrinth
- Metamorphosis
- Waves of Madness
- Fungal Infestation (if you have DD:MS use the Settlement Encounter deck version)
EYEBALL KID: (card included with Die Würst #4) ATT 4, HP 4, ARM 2, Target: Lowest PER, 1XP, 1GP. THIEF. He has the classes Weird & Filth. Special Rules: If he takes no Wounds in a turn, he will flee unless one of your adventurers is using a Hunting Net.
Component Note: Drek Stack Card
This module ships with an exclusive monster card, the Drek Stack, which the Nacht Drek Mission Deck includes (see Setup & Mission Deck). Its printed face reads:
- Name: DREK STACK
- Class: WEIRD
- Value: 2, with a further 2 beside a lightning-bolt icon and a further 2 beside a money-bag icon in the top corners (read against the base rulebook's icon key)
- ATT: 2 (target icon)
- ARM: 2
- HP: 4
- Keywords: ANNOY, PIERCE
- Printed label: CURSE
No further rules text is printed on the card.