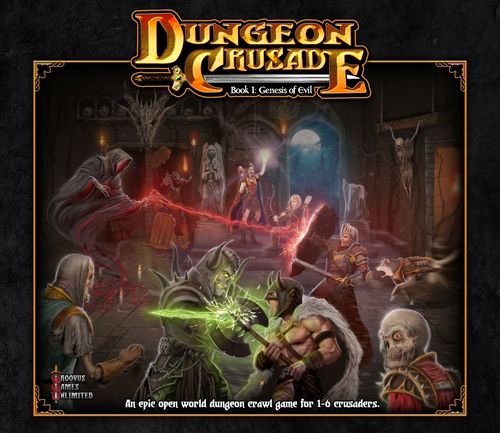
Dungeon Crusade: Book I – Genesis of Evil
Dungeon Crusade: Book I – Genesis of Evil Rulebook
Table of Contents
Table of Contents
- Overview
- New Features and Revisions
- Editions of the Game
- The Avalon Adventure Board Game
- The Treasure Chest Decks
- Placing the Runes Across Avalon
- Summary of a Turn
- How to Flop
- Traversing Avalon
- Moving into an Unexplored Area
- The Events & Encounters
- Battles and Using the Battleboards
- The Fundamentals of the Combat System
- Health & Toughness of a Monster
- Events & Encounters that Test an Attribute
- Gaining a Quest Item from an Event or Encounter
- After an Event or Encounter in an Unexplored Area
- Moving into an Explored Area
- When Heroes Acquire Gold
- Rejuvenation Potions
- The Fate Track
- Recovering the Runes of Eternity
- Recovering Blue Runes
- Ending the Game
- Victory, Defeat, and Hero Cards
- The Village Board
- How to Play Dungeon Crusade
- The 5 Phases That Comprise a Turn
- Actions a Hero Can Perform on Their Turn
- Free Actions
- Monster Phase
- Celebration Day
- Combat
- Classic Combat System
- Revised Combat System
- Scalable Difficulty Reference Card
- The Minion Movement Speed Track
- How to Accomplish a Quest and Collect Rewards
- Rallying Heroes
- Attribute Tests, Resistance Tests, and Chamber Tokens
- Quest Tokens and Secret Rooms
- Albus: the Heroes' Fetchound
- Loot and Items
- Blacksmith Chart to Sell Gear
- Underworld Artifacts
- Mining and Crafting
- Dungeon Board Details
- The Tomb of Kaladar Dungeon
- The Solo Crusader Game Mode
- Setting Up the Game for the Solo Crusader Mode
- Mercenary Camp
- Shopping Phase
- Playing the Solo Crusader Mode
- Dismissing a Mercenary
- Hiring a Mercenary if Your Hero Is Within the Dungeon
- Hiring a Second and Final Mercenary
- Repopulating the Mercenary Camp on Each Celebration Day
- Leveling Up Your Mercenary
- Obtaining Victory
- Playing the Avalon Adventure Board Game Before the Solo Crusader Mode
- The House of Chance Games
- Game Variants, Rules Clarifications & FAQ
- Additional Difficulty Monster Decks and Game Variants
- How to Set Up the Ancient Ruins, Tomb of Kaladar, Castle Blackwood, and Cavern of Lost Souls Dungeons
Overview
Welcome to Dungeon Crusade - the world's first open world dungeon crawl board game. Dungeon Crusade is a hybrid game inspired by two of the golden ages of gaming: board games and computer RPG's circa the 1980's to the 1990's. Dungeon Crusade was built from the ground up for the soloist gamer, but can be played co-operative just as easily.
You will take control of 6 legendary Heroes and their trusty fetch-hound, as they set out in a massive, open world dungeon to complete various quests. The possibilities are endless as you search for villagers, find ancient treasure chests, discover secret rooms, gain Lifeforce, mine for minerals to craft powerful gems for your gear, smash open crates, plus have new encounters at every turn. You can receive gifts from the villagers on Celebration Day, shop in the village, and gamble at the House of Chance. Experience a "living dungeon" with the exclusive game mechanic the "Patrol Route System," where monsters move through the dungeon with unpredictable and random movement patterns. Battle Minions who are attempting to raid the village, fight the Champions who lurk in the chambers of the dungeon, and come face to face with the Guardians of the dungeon, all the while trying to clear the quest tables to achieve victory and save the village!
New Features and Revisions
Whether you're a new Crusader or a veteran, here are some of the new features and revisions made to Dungeon Crusade to give you the best experience.
- The most significant feature added to Dungeon Crusade is the Solo Crusader mode. This is when a player selects one hero and takes on the dungeons of Avalon solo! However, they can hire a mercenary (or two) at the Mercenary Camp, a new building associated with the village board. This mode also provides a shorter game time.
- There is now a Scalable Difficulty Reference card for when heroes encounter traps, trapped treasure chests, and challenges and events within the Encounter deck.
- There is now a Minion Movement Speed track that has been added to the dungeon U.I. board. This track offers a few options on how fast (or slow) minions traverse through the dungeon.
- Newly revised combat systems. One of the most significant revisions was how heroes combat minions of the dungeon. This revision greatly reduced game time while providing players with a quick, thematic, and fun combat system while fighting minions.
- A player can now select between the classic combat system or the revised combat system for combating the champion monsters and Guardians of the dungeon. The classic combat system offers a more in-depth, tactical, and challenging combat experience, while the revised combat system offers a more fast-paced, action-oriented combat experience with a shorter game time.
Editions of the Game
There are 2 different editions of Dungeon Crusade. Here is what each edition should consist of:
Crusader of the Realm edition includes: 1 double-sided dungeon board (The Ancient Ruins / The Tomb of Kaladar), 1 Tower Attack board (House of Chance game), 1 dungeon U.I. board, 1 Village board, 193 Loot Cards, 30 Blessing Cards, 18 Celebration Gift Cards, 60 Hero Special Ability Cards, 20 Secret Room Cards, 54 Gem Recipe Cards, 6 Pickaxe Cards, 90 Minion Monster Cards, 64 Champion Monster Cards, 32 Guardian Monster Cards, 86 Encounter Cards, 30 Treasure Chest Cards, 136 Mining Cards, 15 Main Quest Cards, 15 Side Quest Cards, 7 Tavern Task Cards, 36 Affliction Cards, 200+ various tokens, 40 cardboard coins, 16 red marker tokens, 20 damage tokens, 24 lifeforce tokens, 44 cardboard doors, 44 black plastic bases, 45 cardboard miniatures, 17 Trap Cards, 20 dice, 12 Hero Cards, 18 plastic clips, 2 Albus hero cards, 1 rulebook, 1 scenario book, 1 Scalable Difficulty Reference Card, 1 full color map of the land of Avalon, 67 plastic bases (16 red, 16 green, 16 blue, 4 yellow, 8 purple, 7 clear), 1 Avalon Adventure game board, 50 red tracking markers/tokens, 1 warbanner cardboard miniature, 9 rune tokens, 6 rejuvenation potions, 52 Adventure Cards, 1 double-sided Battleboard, and 12 player aid cards.
Slayer of the Realm edition includes everything in Crusader of the Realm, plus: 1 double-sided board (Skull Jack game board on the front side, Heroes vs. Monsters game board on the back side), 8 Challenge Cards, 17 cardboard tokens, 1 deck of 52 Skull Jack playing cards, 1 The Adventures of Bravely the Knight game board, 1 red plastic spinner, 1 Bravely cardboard miniature, 1 Bravely hero card, and 1 Classic Patrol Route Die.
With the Slayer of the Realm edition of Dungeon Crusade, you will also receive each of the add-ons below in your game box. This is everything currently available for the game.
- Expansion heroes: This add-on includes the Ranger, Paladin, Warlock, Bard, Priest, and Battlemage hero. Also included are 60 special ability cards, 6 clear plastic bases, and 12 hero cards.
- Double Dungeon pack: This add-on includes 1 double-sided dungeon board that features the Castle Blackwood dungeon on one side and the Cavern of Lost Souls dungeon on the reverse side. It also includes 15 Main quest cards, 15 Side quest cards and 37 new quest items.
- Expert Difficulty Monster Decks: This add-on includes an additional 186 monster cards that will increase the difficulty of the game. These decks include 90 Minion monster cards, 64 Champion monster cards and 32 Guardian monster cards. (The game ships with Normal difficulty monsters.)
- Heroic Difficulty Monster Decks: This add-on includes an additional 186 monster cards that will significantly increase the difficulty of the game. These decks include 90 Minion monster cards, 64 Champion monster cards and 32 Guardian monster cards. (The game ships with Normal difficulty monsters.)
Please note: It is possible to mix all of the difficulty decks together for a greater challenge!
The Avalon Adventure Board Game
Start your journey with the Avalon Adventure board game (optional). The Avalon Adventure board game is a highly thematic and innovative twist on the choose your own adventure genre. It was designed in a way that a player will never see the same adventure twice and offer an unlimited amount of replayability.
This game can be played before playing a game of Dungeon Crusade. After a player selects the six heroes they will control in this game and Dungeon Crusade, they will begin the setup of the Avalon Adventure board game.
A player will follow the basic setup in the rulebook for the heroes and will be using the heroes' cardboard miniatures in the Avalon Adventure board game for the many battles that will take place.
Objective: The heroes will need to traverse the land of Avalon and explore the various ruins, crypts, towers, dungeons, tombs, and villages to locate the three randomly scattered Runes of Eternity that will shatter the curse on the dungeon so they may gain entry and eradicate the evil that dwells within.
Along the way the heroes will engage in battles, find themselves in a variety of unique events & encounters where they must test various attributes to escape harm or danger, as well as acquire gold, loot and potions that may be carried over and used while playing Dungeon Crusade.
Please note: If a player plays the Avalon Adventure board game, they do get a shopping phase at the start of playing Dungeon Crusade before descending into the dungeon. (Please refer to page 3 in the Scenario Book for more information.)
Components needed to play: Avalon Adventure board, 51 Adventure Cards, 50 Red Tracking tokens, 6 Rejuvenation Potion tokens, Warbanner Cardboard Miniature and 1 black plastic base, 9 Rune tokens, 1 double-sided Battleboard, the loot deck from Dungeon Crusade, all the dice from Dungeon Crusade, all of the monster cardboard miniatures from Dungeon Crusade, the 6 initiative tokens from Dungeon Crusade, 4 doors from Dungeon Crusade, 1 red marker token.
Setup: First, place the Avalon Adventure board in the center of the table. Then place the six level one hero cards directly under the board, lined up from left to right. It is a good idea to have each of the heroes' cardboard miniatures near their respective hero cards for when battles are initiated. It is not necessary at this time to have their starting weapons.
A player will then gather the six initiative tokens. In the Avalon Adventure board game, a player will only be using the side of the token with numbers upon it. Place one initiative token by each hero card with the number facing up. It is recommended to place them sequentially from left to right under each hero card.
During many of the events & encounters in the game, an adventure card will instruct the player to randomly select a hero or a certain number of heroes. This is done by rolling 1D6 and using the result to select the hero for the upcoming event or encounter. This will be discussed further along in this section.
Once the hero cards and initiative tokens are finally placed, a player is not permitted to move them at any point in the game. They must remain where they are for the entirety of the game.
Then, place the six rejuvenation potion tokens somewhere near the board.
Looking at the adventure cards, you will notice there are three different types of colored banners: green, tan and red. These should be arranged in those three color groups. These also correspond to the three different regions of Avalon. When finished, place the deck at the top of the board where it reads "Unexplored."
The Treasure Chest Decks
During the heroes' adventures across Avalon, there is a good chance they will come across different types of treasure chests. Some treasure chests are more rare than others and hold powerful pieces of gear or a sizeable amount of gold. Sometimes both! We are now going to discuss how to prepare the bronze, silver and gold treasure chest decks.
First, take the loot deck and divide it into seven piles. These piles should consist of the common loot (white), uncommon loot (green), rare loot (blue), epic loot (purple), legendary loot (orange), junk loot and the underworld artifacts. Fabled gear should be placed in the appropriate pile for what rarity it is, such as white, green, blue, purple and orange.
When finished, place the underworld artifacts aside and any starting weapons that will not be used for the heroes selected. These certain cards are not used while playing the Avalon Adventure board game.
Take each of the six remaining piles, shuffle, and place them face down going across from left to right in this order: junk, common loot (white), uncommon loot (green), rare loot (blue), epic loot (purple) and legendary loot (orange). This is so a player will know which pile contains which type of loot when creating the treasure chest decks.
We will now create the three treasure chest decks. While creating these, it is important not to look at the cards that will make up each deck.
Let's first create the bronze deck. From the junk deck, draw three cards and set them aside. This is the start of the bronze treasure chest deck. Next, draw eight cards from the common deck and place them on the bronze treasure chest deck. Then, draw three cards from the uncommon deck and place them on the bronze treasure chest deck. Finally, draw one card from the rare deck and place it on the bronze treasure chest deck. Take that deck, shuffle, and place it to the left of the board where it reads "Bronze" and there is an icon of a treasure chest.
Now let's create the silver deck. From the junk deck, draw three cards and set them aside. This is the start of the silver treasure chest deck. Next, draw eight cards from the uncommon deck and place them on the silver treasure chest deck. Then, draw three cards from the rare deck and place them on the silver treasure chest deck. Finally, draw one card from the epic deck and place it on the silver treasure chest deck. Take that deck, shuffle and place it to the left of the board where it reads "Silver" and there is an icon of a treasure chest.
Finally, let's create the gold deck. From the junk deck, draw three cards and set them aside. This is the start of the gold treasure chest deck. Next, draw eight cards from the rare deck and place them on the gold treasure chest deck. Then, draw three cards from the epic deck and place them on the gold treasure chest deck. Finally, draw one card from the legendary deck and place it on the gold treasure chest deck. Take that deck, shuffle and place it to the left of the board where it reads "Gold" and there is an icon of a treasure chest.
Many of the events & encounters your heroes will experience through the adventure deck will let a player know when the heroes or hero has discovered a treasure chest. It will let you know what type of treasure chest it is so a player can draw from that specific deck.
Now that we explained how to create these three decks, here is an easy reference to consult when creating the three different treasure chest decks. Each deck should consist of:
- Bronze: 3 Junk loot, 8 Common (white), 3 Uncommon (green), 1 Rare (blue)
- Silver: 3 Junk loot, 8 Uncommon (green), 3 Rare (blue), 1 Epic (purple)
- Gold: 3 Junk loot, 8 Rare (blue), 3 Epic (purple), 1 Legendary (orange)
Lastly, a very important rule to remember is when the heroes obtain any treasure chest, it can not be opened until the very end of the game. In other words, when a player draws a loot card from any of the decks, it must be placed face down somewhere in the hero area. At the very end of the game, a player can flip over the cards and see what their heroes have discovered in the land of Avalon! This loot can be carried over to use when a player begins a game of Dungeon Crusade.
Placing the Runes Across Avalon
We will now discuss how the runes are randomly placed across the land of Avalon. This is just one aspect of this game where a player will never see the same game twice even after multiple plays.
First, gather the nine rune tokens needed. There will be six blue runes that have an identical symbol on one side. The other three runes are the Runes of Eternity. These are the ones the heroes must locate. There is a green, yellow and red one.
What a player will do now is flip all nine of these tokens over to the side that has the image of a stone and a purple question mark.
Notice that there are small colored crystals on each token in the bottom right corner. There are three green, three yellow, and three red. These are in direct correlation to the three regions in Avalon. Shuffle these tokens around so you have no idea where the three Runes of Eternity are within these tokens. Next, we'll be using the adventure deck to randomly place the runes in each of the three regions.
How to place the Runes: Take the adventure deck and locate all of the adventure cards that have a green banner at the top of the card. Give them a quick shuffle and, from the bottom of the deck, draw three adventure cards. Notice how each adventure card is a location in Avalon with a green banner. Without looking, take the three rune tokens that have a green crystal and place one on each location for the three cards you just drew.
Use this same method for placing the yellow and red runes. When finished, place all the adventure cards you have just used back into the stack of adventure cards.
When a player finishes placing the runes, there should be three runes in each of the three regions of Avalon where the small colored crystal on the rune token matches the region it is in. As you can see, in every game the runes will show up in different locations. The heroes must now traverse the land of Avalon to discover where the three Runes of Eternity lie! The heroes are now ready to begin their adventure and quest for the Runes of Eternity!
Summary of a Turn
A turn in the Avalon Adventure board game is quite simple and straightforward. Here is a quick summary of what a turn will consist of.
- A player will move the warbanner, which represents the six heroes, to a location adjacent to its current location, crossing the white dotted line.
- If the location is unexplored (no red tracking token), a player will find the adventure card for that particular location and roll 1D12. The result is compared to the same value associated with the event or encounter on the adventure card the heroes must experience.
After the event or encounter has been processed on an unexplored location, a player will place a red tracking token on this area. The red tracking token symbolizes that this location has been explored.
- If a location is explored (a red tracking token is upon this location), a player will find the adventure card for that particular location and roll 1D6. The result is compared to the same value associated with the event or encounter on the adventure card the heroes must experience.
- After an event or encounter has been processed, a player is free to recover any rune that resides in this location.
- At this time, a new turn would begin.
How to Flop
Whenever a player begins a new game, the first thing they will do is place the cardboard miniature of the warbanner on the game board at the location known as Hope's Reach.
The warbanner represents all of the six heroes within that location. As a side note, heroes always stay together throughout their journey in Avalon. After the warbanner has been placed, a player will read the Hope's Reach adventure card to see what is transpiring in Avalon. After reading the adventure card, the heroes will be ready to plot their first move.
Traversing Avalon
When a player wishes to move into a new area of Avalon with their heroes, they will take the warbanner and move it into a location adjacent to where the heroes currently reside. A player is never allowed to move into more than one area within a turn.
A good rule to remember is heroes may only cross one white dotted line on a turn.
Moving into an Unexplored Area
When the heroes arrive in an unexplored area, the first thing they will do is find the matching adventure card for that area. When the adventure card is in hand, a player will roll 1D12. Notice that there are values associated with each of the unique events and encounters on the adventure card. A player will use the result of the D12 to find the event or encounter with that same value on the adventure card. Finally, a hero or heroes will experience whatever the event or encounter may be.
Also, if a rune resides within this area, it is not to be taken and revealed until the event or encounter has been processed.
The Events & Encounters
There are many unique, various, and different types of events & encounters the heroes will experience in the Avalon Adventure board game. It would be nearly impossible to list them all here, but each event and encounter is explained very well on the adventure card for the player. Let's go over a few types of these right now.
Battles and Using the Battleboards
While traversing the land of Avalon, the heroes will more than likely see a fair share of combat against evil factions, creatures, ruffians, marauders, monsters, guardians and many more types of opposing forces. Any time one of the events or encounters start off with the word, "BATTLE!", the heroes will be engaging in some form of combat and the Battleboards will be used.
Let's take a look at a battle event from the Ancient Ruins adventure card, break it down, and discuss it more in depth.
1-2: BATTLE!: Randomly select (2) heroes. As these heroes ascend a small stone stairway to the massive wooden doors of the ruins, two Skeletal Grunts come bursting out, shattering the doors into pieces! Each hero must combat a Skeletal Grunt. A Skeletal Grunt has 2 health and a toughness of 7. Give each hero 1D12. Each round of combat, a hero rolls 1D12 and modifies the result with their strength. If the result is equal to or exceeds the grunt's toughness, deal 1 damage. If the result is lower, the hero takes 1 damage.
This will be a battle so we will be using a Battleboard. There are two sides of the Battleboard. One is a dungeon floor, while the other is an outdoor area. A player selects one side to fit the theme of the event taking place. We would now place the Battleboard on the table to prepare for the battle.
Next, the event is telling us we need to randomly select two heroes. A player will simply roll 1D6 and use the result to select the hero who has the matching initiative token. Let's suppose our Battlemage hero, Lyrenna, had initiative token 4. We would roll 1D6 and the result was 4. We would take Lyrenna's cardboard miniature and place it on the Battleboard. We would then need one more hero.
The D6 would be rolled again, but the result is 4 once again. Of course, Lyrenna has already been selected. What a player will do is simply roll the D6 again for a new result. They would continue to roll the D6 until a result came up where a hero could be selected for the event. Finally, the D6 is rolled once more, and the result is a 5. Our Barbarian hero, Melhiliak, has initiative token 5, so he is the second hero that will be selected for the upcoming battle. We would then take Melhiliak's cardboard miniature and place it on the Battleboard.
After the heroes are selected and placed on the Battleboard, take 2 Skeletal Grunt cardboard miniatures and place one adjacent to each hero.
The player would then read a small thematic story of what is transpiring at this location. Feel free to add dungeon doors to the Battleboard for any of the events and encounters to make it even more immersive and thematic!
The Fundamentals of the Combat System
As you can see, the combat mechanics are presented very clearly for what a player must do. But let's go over a few things pertaining to combat. First, know that heroes and monsters never move on the Battleboard. They are simply placed on the Battleboard for a player to keep track of the battle and to add a thematic sense and immersion to the game.
Notice on the card it reads, "Each hero must combat a Skeletal Grunt." Looking at the image, notice how each hero is adjacent to a Skeletal Grunt. When placing heroes and monsters on the Battleboard, they must be placed adjacent to each other. Also, a hero assigned to a specific monster must always attack that monster, and the same goes for the monster. It may only attack the hero it is assigned to.
So for example, let's say Melhiliak managed to slay the Skeletal Grunt he is engaged with. He is not permitted to move adjacent to the Skeletal Grunt that Lyrenna is fighting and join in the fray. Just like if the Skeletal Grunt killed Melhiliak, it would not be able to join the other Skeletal Grunt and attack Lyrenna. A good rule to remember is when a hero and monster are engaged in combat it is one on one.
However, there are a few battle events where up to three heroes will be engaged with one of the guardians in the game. Those types of battle events will explain everything very clearly for the player.
Health & Toughness of a Monster
The Skeletal Grunts the heroes are engaged with have 2 health. When a hero inflicts damage, a player will place a damage marker on the Battleboard by the adversary it has wounded. When the adversary receives damage markers equal to its health, it is slain and removed from the Battleboard.
Every adversary the heroes come across will have a toughness. This is the value a hero needs to meet or exceed when rolling a specific die or dice to land a hit and damage the monster. Pay close attention to the description, as many times the heroes can add something to the roll to bolster the final result. As in this battle, the heroes can add their strength attribute to the result.
A player will have many different types of battles within the Avalon Adventure board game. Sometimes, it will instruct them to use some of the D6 dice to represent a certain group of adversaries when there is not a cardboard miniature to represent them. For these types of battles, the heroes will be rolling D12's. Since all the D6 and D12 dice have matching colors, it is recommended to give the hero the matching color D12 to the D6 it will be combating. In this way, it will be very easy to keep track of.
So for example, let's say Melhiliak is combating a Marauder that is being represented by the red D6. Melhiliak should be using the red D12 when rolling for combat.
However, feel free to add in your own personal miniatures you may have instead of using the dice to represent a certain group of adversaries.
Events & Encounters that Test an Attribute
Any time an event or encounter has a hero or heroes test one of their attributes, such as strength, willpower, agility, wisdom, hide, or evade, they will be rolling 1D20 and may add the value for that attribute on their hero card to the result. As long as they meet or exceed the value shown, they have successfully overcome this event.
For example, let's say Ennwyn was selected for an event where she had to test agility (14) to avoid falling in a hole. She rolls the D20, and the result is 12. However, consulting her hero card for agility, she has +2 to all agility rolls. By adding the +2 to the result of 12, she has successfully passed this test with a 14!
Also, if a hero ever has to test lockpicking for an event, they will roll 1D20 and modify the result with what value is on their hero card under lockpicking. Some heroes are not proficient at all with lockpicking, so don't be surprised if a hero must deduct from the D20 result!
Gaining a Quest Item from an Event or Encounter
Another unique aspect of the Avalon Adventure game is sometimes the heroes will pick up a quest item. When a hero or heroes come into possession of a quest item, there is always a certain villager in one of the villages that will pay very well for it. Once the quest item has been handed over to the villager, place it back into the game box. Quest item tokens can be found in the Dungeon Crusade game.
If the heroes possess a quest item at the end of the Avalon Adventure board game, it is simply placed back into the game box.
After an Event or Encounter in an Unexplored Area
After the heroes process an event or encounter in an unexplored area, this location has now been explored. A player will place a red tracking token in this area as a reminder that this area has been fully explored.
If there is a rune in this area, a player is now permitted to take it and reveal what type of rune it is. It will, of course, be a blue rune or one of the Runes of Eternity.
Finally, a player will take the adventure card for this area and place it above the board where it says "explored."
This would conclude this turn, and a new turn would start.
Moving into an Explored Area
Anytime the heroes move into an area that has been explored, they will search for that adventure card in the explored stack of adventure cards at the top of the board where it reads "explored." Notice by the word explored it also reads D6.
What this means is when the heroes move into an explored area, they must roll 1D6. A player will use the result of the D6 to find the event or encounter with that same value on the adventure card. Finally, a hero or heroes will experience whatever the event or encounter may be.
The heroes must be careful in explored areas! Since this area has been fully explored, none of the good rewards are within these areas any longer. For thematic purposes and gameplay balance, it is considered that other adventurers have ventured into these areas and have found any rewards that were residing here.
When the heroes have completed the event or encounter within an explored area, this will be the end of the turn. There is no need to place a red tracking token in this area again, since one resides here already.
Pro Crusader Tip: Part of the strategy and tactics of playing the Avalon adventure board game is for a player to plot their course accordingly for their heroes. A player should always attempt to move into unexplored areas when possible for a chance of gaining some type of reward, and avoid venturing into explored areas as the risk is quite high of a bad event or encounter occurring.
When Heroes Acquire Gold
During the heroes' venture through Avalon, there will be many events and encounters where the heroes will have a chance to acquire some gold. An important rule to remember is heroes are not permitted to trade gold with each other, unless an event or encounter permits gold to be traded between the heroes or combined for a particular circumstance.
When the heroes return to Hope's Reach with the three Runes of Eternity, it is then permitted for heroes to trade gold and whatever else they like with one another.
Rejuvenation Potions
After the heroes complete some of the events and encounters in the game, one of the rewards they can possibly gain is a rejuvenation potion. When a player declares they would like to use a rejuvenation potion, they simply call out the hero who will receive it, and instantly the hero regains 3 health and 3 essence.
Rejuvenation potions may only be used once, and must be placed back in the stack of them by the side of the game board.
Rejuvenation potions can be used at any time during the game, even in the middle of a battle. Heroes are not equipped per se with rejuvenation potions, instead a player may decide when to use them. If a hero perishes, a rejuvenation potion can not be used to restore health and essence to a dead hero.
The Fate Track
At some point during the heroes' journey, one of the heroes may perish. This is where the Fate Track comes into play.
In the unfortunate event of a hero's death, immediately place a red marker token on the Fate Track at the number one position. As mentioned at the start of the game on the Hope's Reach adventure card, there is thought to be an angel watching over the heroes. Instantly, no matter what is transpiring in the game, this hero is resurrected following this procedure.
- Remove both white plastic clips on the health track and essence track on the hero's hero card.
- A player will then take the white D3, the red D12, and the orange D12. They will then roll these dice together.
- The results are as follows: the white D3 result represents health & essence restored to the hero. So for example, if a 2 was rolled, a player will restore 2 health and 2 essence to the hero being resurrected. The red D12 represents health restored to the hero, while the orange D12 represents essence restored to the hero.
- This hero has now been fully resurrected by the angel and the game can resume.
If another hero should perish, the same procedure would be followed again, except a player will move the red marker token on the Fate Track up by one.
If the red marker token ever reaches the skull, the game immediately ends and the heroes have failed in their quest to recover the three Runes of Eternity.
Recovering the Runes of Eternity
As we have learned, the heroes' task is to traverse the land of Avalon and recover the three Runes of Eternity. When the heroes recover the three runes, they must traverse back to Hope's Reach where Father Jova is awaiting their return. Upon returning to Hope's Reach, the runes are considered to have been given to Father Jova to lift the curse upon the dungeon.
At this time, the heroes may open any treasure chests they may have discovered on their journey. In other words, they may reveal the loot cards and see what they have received.
After this is complete, the heroes can now be imported to the start of a game of Dungeon Crusade. Any loot, gold or rejuvenation potions they have found in the land of Avalon can be carried over into Dungeon Crusade and used.
Heroes are not permitted to journey back into Avalon once they return to Hope's Reach with the Runes of Eternity.
Recovering Blue Runes
When the heroes recover a blue rune, it can be used by the player at any time to reroll any die roll in the Avalon Adventure board game. So for example, it could be used to reroll the D6 when entering into an explored area and a bad event is rolled, it can be used to reroll the D20 for an attribute test, etc. Once a blue rune has been used, it is placed back in the game box.
Blue runes are permitted to be carried over and used while playing Dungeon Crusade.
Ending the Game
When the Avalon Adventure board game ends, set the hero's cardboard miniatures aside, along with their hero cards, starting weapons, and any gold, loot or items they may have acquired during the Avalon Adventure board game. The table is then cleared of all game content, and any content used from Dungeon Crusade is placed back into the game.
A player will now begin to setup Dungeon Crusade to play. First they will do basic setup, then move on to advanced setup.
Victory, Defeat, and Hero Cards
Victory
For the heroes to be victorious in Dungeon Crusade, they must complete each of the 3 quests found on each of the three quest tables.
Quest tables could be thought of as levels. Between each quest table, the Heroes will head back to the village for Celebration Day to heal, possibly level up, gain new special abilities, and much more.
Defeat
The heroes will lose a scenario if the terror level on the village board ever reaches the 'defeated' status. Here's a quick summary of what game events will raise the terror level by 1.
- A minion escaping the dungeon.
- A hero dies.
- The Encounter Deck runs out.
- A hex is placed on the village.
Hero Cards
While playing Dungeon Crusade, Hero cards are used to keep track of a hero's health and essence. Hero cards are also used for consulting a hero's attribute and warfare values for various events in the game.
Let's go over a Hero card in detail.
- This is the hero's name and what class they belong to.
- This is a hero's class rating. Class rating goes from C1, C2 and C3. This is in direct correlation with the target priority box found on minion and guardian monster cards. Basically, class rating is what a monster uses to target a specific hero. The monsters in Dungeon Crusade will always target a hero it can do the most damage to.
- This is the hero's starting weapon.
- This is the art that depicts what the hero looks like.
- This is the hero's current level.
- This is the hero's health track. If a hero's health drops to 0, the hero dies.
- The white circle indicates a hero's starting health. A player will place a white plastic clip on this value. This value can never be exceeded under any circumstance for this hero's current level.
- This is the hero's Strength bonus.
- This is the hero's Willpower bonus.
- This is the hero's Wisdom bonus.
- This is the hero's Agility bonus.
- This is the hero's movement. All heroes will roll 1D6 and add the value shown to the result for their movement for the current action.
- This is how proficient a hero is at lockpicking. If there is a "+" next to the value, they gain that many more attempts at picking a lock. If there is a "-" next to the value, a player must deduct this from the attempts.
- This is the hero's Hide bonus.
- This is the hero's Evade bonus.
- This is the hero's Essence track. A hero uses Essence to cast special abilities. A hero can also burn 1 Essence to gain 1 movement on their turn. They can do this as much as they wish as long as they have Essence. If for any reason, a hero loses Essence and does not have enough, the hero loses Health points instead.
- The white circle indicates a hero's starting essence. A player will place a white plastic clip on this value. This value can never be exceeded under any circumstance for this hero's current level.
- These are the six warfare icons. Notice the values under each of the icons. These tell a player how proficient this hero is in that particular warfare type. A player will either add or subtract the value shown when making a warfare roll.
Dungeon User Interface Board
The dungeon U.I. board (dungeon user interface) is used for many different things while playing Dungeon Crusade. Let's go over each of the various things on this board.
- Minion Population Track
- Raid Difficulty
- Combat Chart
- Encounter Deck
- Treasure Chest Deck
- Celebration Day Gift Cards
- Incantation Track
- Teleport Track
- Guardian Spawn Track
- Quest Tables (levels 1, 2, and 3)
- Mining Deck Area
- Minion Movement Speed Track. (Please note: if you are someone who received the Crusader Upgrade kit, you will have a decal that will be placed here on your dungeon U.I. board.)
The 5 Races in Avalon
Undead, Human, Mythical, Beast, Demonic.
You are now one step away from being ready to start learning the gameplay of Dungeon Crusade. There is still the village board that we need to discuss a bit. But if you want to read some details on the dungeon board and monsters, you can find that on page 31.
The Village Board
The village board represents a village in Avalon the heroes must defend and where many villagers reside who have given the heroes quests to undertake. There are many buildings and services the heroes will be using throughout their perilous journey in Avalon while in the dungeon and during Celebration Day.
Let's take a look at some of the various services the Heroes can use.
The Temple - The temple may be visited at the start of the game and on any Celebration Day. There are three services the heroes may use while at the temple. Here is a brief description of each one.
- Blessing - For a donation of 200 gold, a hero may receive a blessing from the clerics of the temple. After paying, draw the top card of the blessing deck but do not reveal it. Place the blessing card next to that hero's card. When the heroes return to the dungeon, that hero may then reveal their blessing card and see what he or she has received.
- Cure all afflictions - If, on any Celebration Day a hero enters the village with an affliction or multiple afflictions, the clerics of the temple will cure them for the cost of 100 gold.
- Healing Fountain - At the start of the game, after playing the Avalon Adventure board game, or on any Celebration Day, a hero can make a 100 gold donation to the temple and drink from the fountain. Doing so will restore them to full health for their current level.
The Bazaar - During the course of the heroes' journey, they will most certainly need things to aid them along the way. The merchants at the bazaar will provide them with healing potions, elixirs, ochre juice and torches for a cost.
The Academy - Within the academy, many scholars, wizards, and grand warriors reside who can provide the heroes with new abilities, tactics, and talents. The heroes' special ability cards that are randomly selected before a game are placed here.
The Tavern - During Celebration Day, a hero may enter the tavern, rent a room and sleep. After paying a cost of 100 gold, it is considered the hero has slept and fully regained their essence for their current level.
The Blacksmith - The blacksmith provides new gear and services for the heroes. At the blacksmith shop, the heroes can purchase new gear, sell their old gear, sharpen pickaxes, have power gems crafted, and sell bundles of minerals and precious stones to the blacksmith. The five panels are for placing particular tiers of loot the blacksmith sells.
The Resurrection Altar - The resurrection altar is located in a tranquil and serene setting in the forest of the village. If a hero dies within the dungeon, their miniature is placed here and awaits resurrection.
The House of Chance - The House of Chance is a gambling hall the heroes may enter on any Celebration Day and play one of four games chosen at random in an attempt to bet gold and win big!
How to Play Dungeon Crusade
Setting Up the Game
Setting up Dungeon Crusade has two steps:
- Basic setup (is same for each scenario)
- Advanced setup (is unique in each of the scenarios)
Basic Setup
- Select 6 heroes and their level 1 hero cards. Also the level 1 Albus card.
- Clarification: The Ranger, Paladin, Warlock, Bard, Priest and Battlemage heroes are add-ons. If you just have Dungeon Crusade, then you will be playing with the six heroes that are included with the game.
- Find the matching starting weapon for each hero. This is noted on each hero card by their portrait.
- Find the three level 1 special ability cards for each hero.
- Return one random card to the game box; the returned special action is not used in this scenario.
- Find the matching level 2 and 3 cards. Now you have 6 special ability cards for each hero. Also, make sure each hero has their Counterattack special ability card.
- Place the special ability cards on the village board next to the Academy.
- If you are playing the Avalon Adventure board game before Dungeon Crusade, you can find the needed rules at the start of the rulebook.
- Each hero gains starting gold. Either: 1) 1D3x100 Gold, 2) 100 Gold, or 3) 0 Gold. Pick one option or roll 1D3 and let fate decide!
- Select the scenario from the Scenario book and place the selected dungeon board on the table. Refer to the back of the rulebook for how to set up each dungeon.
- Clarification: Castle Blackwood and The Cavern of Lost Souls are add-ons. If you just have Dungeon Crusade, then you cannot select scenarios IV, V, VI, VII or VIII.
- Place Hero miniatures on the Siege tile within the dotted white box on the dungeon board. Place Albus on any adjacent space to a hero.
- (Continued setup steps follow on the next page.)
- Place 10 Treasure chest tokens onto squares with a Treasure icon. Randomly place 8 Mining site tokens onto squares with a Mining icon. If you are playing with the traps, randomly place Trap tokens onto squares with a Trap icon.
- Draw one random Tavern Task card, return the remaining cards back to the game box; you do not need the rest of the Tavern Task cards in this scenario.
- Place the Power Gem Recipe deck next to the village board.
- Shuffle all Minion and Champion cards sorted by level to separate decks. Shuffle level 1 and 2 Guardian cards sorted by level to separate decks. Shuffle level 3 and 4 Guardian cards into one deck.
- Place the following card decks in the appropriate places.
- First, place the Trap deck, the Secret Room deck, the Loot deck and the Power Gem recipe deck near the dungeon U.I. board.
- Shuffle the Blessing card deck.
- Shuffle the Celebration card deck.
- Shuffle the Secret Room card deck.
- Shuffle the Treasure card deck.
- Remove the 8 Exhausted mining site cards from the mining card deck.
- Divide the rest of the Mining cards into 4 decks of 32 cards each.
Advanced Setup
Each scenario has many various options to adjust the difficulty. A player can freely select any difficulty setting, or mix and match different ones. A player could just select Novice difficulty on each entry or roll 1D6 on each row and play a scenario with a random difficulty on each entry.
- Find the 3 scenario's Main quest cards and follow the setup instructions on each card. Find the 3 scenario's Side quest cards and follow the setup instructions on each card. While placing these tokens within the chambers, keep them facedown and do not look at them. After setting up the Main and Side quests, there will be some leftover tokens. Do not look at these. Return them to the game box.
- Follow the selected scenario's token quantities and seed the dungeon (populate all empty chambers).
- Find the 7 Master Crate tokens and place them into a mug (or a cloth bag).
- Find all the needed Mystery Chamber, Secret Room, Level 1, 2, 3 and 4 Monster and Empty Chamber tokens. And place them into the same mug with Master Crate tokens.
- Place one random token from the mug in each empty chamber. Place monster tokens face-up. For more of a challenge, you can place monster tokens facedown.
- If you placed a Master Crate token, add one extra token with it. If the extra token is also a Master Crate token, set it aside, and draw again until the extra token is a different type of token.
- Place all the leftover Master Crate tokens in non-quest chambers that do not already have a Master Crate token.
- After the seeding process, there should be no tokens left in the mug.
- Set Terror level, Guardian Spawn and Minion Population, depending on the selected difficulty or where you prefer to make the game easier or harder. Place Red Marker tokens on the appropriate places on the Dungeon U.I. board and on the Terror Track on the Village board, where you prefer to make the game easier or harder. Set the difficulty for the Guardians per quest table.
- Place the appropriate number of Healing and Elixir potions, Ochre Juice and Torches, in the Bazaar on the Village board. Example (Scenario I with Novice difficulty): 8 Healing potions, 8 Elixir potions, 8 Ochre Juice and 10 Torches.
- Deal the appropriate number of Loot cards to the Blacksmith's shop on the Village board. Example (Scenario I with Novice difficulty): 6 random Legendary, 10 random Epic, 12 random Rare, 14 random Uncommon and 16 random Common Loot cards.
- Shuffle all the leftover Loot cards with Underworld Artifact and Junk loot cards and place the deck somewhere near the Dungeon U.I. board.
After basic and advanced setup, the heroes can visit the village for the Shopping phase before descending into the dungeon. The Heroes are free to conduct all village actions except gamble within the House of Chance. You can find these village actions on page 11 of the rulebook.
After these village actions, the game begins. Start turn one with the Upkeep phase. Please note: Level 1 minions will spawn into the dungeon on the first Monster phase.
Resurrecting a Hero
- Slide the hero's health and essence tracks to 0 and remove all afflictions.
- Place the hero's cardboard miniature in the resurrection shrine on the village board.
- Move the terror track up by 1.
- At the start of the next upkeep phase, roll 1D3. Set the hero's health and essence to the rolled value. In addition to this, roll the red D12 for health and the orange D12 for essence. The results on the dice are what health and essence have been restored to this hero. Place the resurrected hero adjacent to any hero in the dungeon.
The 5 Phases That Comprise a Turn
Upkeep Phase
- Process afflictions - New afflictions from last turn will now go into effect. Some 1st-degree afflictions can have upkeep effects.
- Test torches - For every lit torch roll 1D12. If the D12 = 1-2, place the torch to the side of the village board. Consumed torches and potions are returned to the bazaar on the next Celebration Day.
- Unchannel channelled special abilities - Refresh (turn) all channelled special abilities right side up. Channelling = once per turn abilities. Special abilities that have a symbol must be turned upside down when used.
- Assign initiative tokens - Place initiative token 1 on the hero card for who you would like to activate first in the hero phase, and following this, place initiative token 2 on the next hero and so forth.
- Rallying (share initiative with other heroes) in the Hero phase. A hero with initiative number X can rally with a hero that has initiative number X+1 or two heroes with initiative numbers X+1 and X+2.
Please note: trap, encounter or quest cards and a hero's death can also cause events that trigger at upkeep.
Quest Table and Teleport Track
If all the quests on a quest table are completed, the heroes have three turns remaining in the dungeon. After these three turns, the heroes are teleported back to the village for Celebration Day.
Encounter Phase
Draw and read the top card of the Encounter deck.
Events, interludes and challenges are returned to the game box immediately after dealing with the card.
Environment cards stay in effect until another environment is drawn, or some other effect cancels the effect.
If the Encounter deck runs out, then the minion population and the terror track goes up by 1. After this, a new 40 card Encounter deck must be prepared:
- Gather all 86 encounter cards and remove 10 interlude cards.
- Shuffle and deal out 30 cards.
- Take 9 interlude cards and shuffle them into the 30 cards.
- Place the 10th interlude card on top.
Symbols on Encounter cards:
- A hero cannot participate in an encounter if adjacent to a monster.
- A hero cannot participate in an encounter if tracked by a guardian.
Guardian Phase
Guardians per quest is the total number of guardians that can spawn during one quest table. Reset count during Celebration Days.
Example: A player may choose to have 3 Guardians spawn during each quest table.
If the scenario difficulty setting (Guardians per Quest Table) is not reached, roll 1D20.
- Spawn a new guardian if the D20 result is equal to or greater than the Guardian Spawn Track value.
- Lower the guardian spawn track value by 1. Value is locked at 11.
Example: Here we see the D20 was rolled at the start of the Guardian phase. The result is 19. The current value on the Guardian spawn track is 19. The red marker moves down by one, and a new Guardian will spawn into the dungeon!
How to spawn guardians:
- If the heroes are working towards completing quest table 1, draw the top card from the level 1 guardian deck. If they are working towards completing quest table 2, draw the top card from the level 2 guardian deck. If they are working towards completing quest table 3, draw from the bottom of the mixed level 3+4 guardian deck.
- Place the drawn card in the monster area as the last monster to activate.
- Roll 1D8. The result is the monster spawn point where you place the appropriate miniature. If the square already has a miniature, place the guardian randomly into any adjacent square (you can use the patrol route die to determine this).
Hero Phase
- Heroes take turns according to initiative order. Each hero and Albus have two actions.
- Heroes (and Albus) can perform free actions (infinite times) before, during or after their current action (even after combat, evade, enlightenment, etc.).
- Albus can have his turn anytime during the Hero Phase.
Actions are often joint actions with movement. For example, a hero may move, then the hero possibly performs an action, and finally, the hero may continue the movement. The option to rally can be found in the notes column.
Actions a Hero Can Perform on Their Turn
The table below lists the actions available to a hero, their prerequisites, and notes on how each works. Movement is normally rolled with 1D6, and a hero may move before performing an action and continue any remaining movement after the action, unless a note says otherwise.
- Use enlightenment to gain a level. Notes: Expend both actions. Rules for leveling up are explained on page 19 of the rulebook.
- Use enlightenment to gain one new special ability. Notes: Expend both actions. Level of the special ability must be equal to or less than the level of the hero. Remember to pay the Lifeforce cost.
- Pick a lock on a discovered secret room. Prerequisite: none listed beyond being adjacent to a discovered Secret Room door. Notes: Expend both actions. A hero must be adjacent to a discovered Secret Room door.
- Discover the Secret Room. Prerequisite: adjacent to a Secret Room door. Notes: One discovery action equals one discovery roll.
- Hide inside an empty chamber. Prerequisite: inside an empty chamber. Notes: If the result of 1D20 + the hero's Hide attribute is equal to or greater than the chamber's Hide value, remove the tracking tokens. Empty = free of enemies and the chamber does not have a Mystery Chamber or Secret Room token.
- Mine a mining site. Prerequisite: adjacent or on top of a Mining site. Notes: Draw 1D3 mining cards from the appropriate deck. Roll 1D12 for pickaxe degrading.
- Loot a monster that has been slain by a ranged attack in this or previous turn. Prerequisite: adjacent or on top of a tipped miniature. Notes: The ranged attack does not mean ranged warfare; it is from some type of special ability. (See page 31 for more information.)
- Open the treasure chest. Prerequisite: on top of a treasure chest. Notes: Expend both actions. Remove the treasure chest token and draw a treasure card.
- Attack adjacent monster. Prerequisite: adjacent to a minion or a guardian monster. Notes: Expend both actions. Rallying against minions is not permitted! End of turn for a hero and any rallied heroes.
- (Mandatory) Remove master token and pick and process a random double-sided Mystery Chamber token. Prerequisite: move into a chamber that has a Mystery Chamber token. Notes: Expend both actions. Rallying must be announced before token reveal. End of turn for the hero and the rallied heroes.
- (Mandatory) Flip token over, draw appropriate Champion monster card and begin chamber combat. Prerequisite: move into a chamber that has a monster token. Notes: Expend both actions. Rallying must be announced before token reveal. End of turn for the hero and the rallied heroes.
Free Actions
Free actions can be performed by a hero infinite times, before, during, or after their current action.
- Drink a potion. Place consumed potions next to the village board. A hero can drink a potion even in the Monster or Encounter phase.
- Use a special ability. Each special ability card notes: its Essence cost to cast/use, its Lifeforce cost to obtain, whether it can or cannot be used in a chamber, whether it can or cannot be used in a hallway or corridor, its level, whether it must be channelled (turned upside down) after use, and whether it can be used multiple times. See page 3 of the Scenario Book for the rules on special abilities with a radius.
- Evade out of a chamber. At the beginning of each round of combat within a chamber, a hero can try to evade out of the chamber. Successful evade: if the result of 1D20 + a hero's evade attribute & equipped items' evade values are equal to or greater than the champion monster's evade value, move the hero in front of the chamber door (if the square is occupied, then use any adjacent square). Unsuccessful evade: the hero loses health equal to the monster's level, and combat continues. If the champion monster is left alone within the chamber, see the incantation rules on page 28 of the rulebook.
- Trade with adjacent ally, Hero or Albus. Trading, equipping and inserting a power gem is not allowed while: adjacent to a monster; or inside a chamber with a Mystery Chamber or an (un)revealed monster token.
- Equip or unequip items. An equipment card that has a socket, or the reverse side of a recipe card.
- Insert a power gem into a socket of a piece of gear. When the blacksmith has received the Moonstones, Zultanites, and precious stones, he can immediately create a power gem; the cost is 100 gold coins.
- Spend 1 essence to gain 1 movement. 1 movement = 1 square.
- Light a torch. A lit torch grants +2 to base movement.
- Loot adjacent monster after slaying it. A hero can loot a monster even if the monster was killed in the Monster phase.
- Open a crate. A hero must be inside the chamber and no monster tokens within the chamber.
- Draw a Secret Room card. A hero must be inside a Secret Room chamber to draw a card. After processing the card, shuffle it back into the deck.
- Reveal a mining site. A hero must be adjacent or on top of a mining site.
Monster Phase
Spawn new minions: If the total number of the minions in the dungeon is less than the value on the Minion Population track, spawn new minions until the total number of the minions is equal to the Minion Population track value.
How to spawn minions:
- Draw the top card from the minion deck corresponding to the quest table that the heroes are working on.
- Place the drawn card in the monster area as the last monster to activate.
- Roll 1D8. The result is the monster spawn point where you will place the appropriate miniature. If the square already has a miniature, place the minion randomly into any adjacent square (you can use the patrol route die to determine this).
Minions
Vagrant minion: If a vagrant minion, at any time, is attacked or comes into line of sight (within 4 squares) of a hero, the minion immediately converts into a raiding minion.
- Roll the raid die (this depends on the scenario difficulty setting); if you rolled the maximum result, then the minion will immediately convert into a raiding minion. Place a raid token on the minion's monster card.
Roll for the minion's movement and move the minion along the current patrol route. Every time a minion is on top of a spawn point or skull pile, roll the Patrol Route die to see what patrol route the minion will follow.
Raiding minion: When a minion converts into a Raiding minion, place a Raid token upon its monster card. A raiding minion will always move toward the exit in the direction guided by the bloody arrows.
A raiding minion's objective is to reach the dungeon's exit to raid the village; thus, raising the terror level by 1. If this occurs, reshuffle the minion's monster card back into the minion deck. Also, a minion's movement point is spent when a minion enters the village, i.e. moved from the last square away from the dungeon board.
- If not yet rolled, roll for a minion's movement and move the minion towards the dungeon exit.
- Use bloody arrows as guides to determine the path a raiding minion will follow to exit the dungeon. A raiding minion does not precisely have to move across the arrow; it just shows the direction.
- Remember to move the raiding minion using the shortest possible route (that you can figure out).
- Sometimes, when a raiding minion arrives into a new quadrant, you will need to roll 1D6 to determine which bloody arrow the minion will follow.
- Hit and run tactics: If a minion along the shortest route towards the exit of the dungeon passes a hero (or adjacent square), the minion will attack. A minion can only attack one time on its turn. After the attack, if the minion has movement remaining it may continue moving. If there are many possible targets, the minion will attack a hero with a class rating highest in the minion's target priority box (break ties with the lowest health and break second ties with a die roll). The target priority box indicates a hero's class rating.
Guardians
Guardians do not move like minions. Guardians do not roll for movement. Guardians move from quadrant to quadrant up to their speed. You will roll the Patrol Route die for what path the Guardian will follow. The Guardian's movement will be listed on its card.
A non-tracking guardian:
- If a non-tracking guardian is on a spawn point or skull pile, roll the patrol route die and spend one of the guardian's movement to move the guardian along the patrol route to the next spawn point/skull pile. If a non-tracking guardian is not on a monster spawn point or skull pile, it will move to the spawn point/skull pile in the current quadrant. This expends one of its movement.
- Guardians can temporarily move on top of an occupied spawn point/skull pile and then continue moving into a new quadrant.
- Non-tracking guardians move as described above until the guardian has spent all of its movement. If a guardian ends its movement and a monster currently is upon a monster spawn point or skull pile, the guardian must be placed adjacent to the monster spawn point/skull pile. You can use the patrol route die to determine the adjacent square (at the beginning of the guardian's next activation).
- Remember to check if, at any part of the movement procedure, the guardian starts tracking a hero. A guardian can begin tracking a hero even on its last movement to a skull pile.
If a guardian is attacked or ever comes within line of sight (4 squares) of a hero, the guardian immediately starts tracking that hero. If there are multiple tracking options, select the target with the target priority box, as described in the raiding minion hit and run tactics above. You will then place matching tracking tokens on the hero card and the Guardian's card.
A tracking guardian: A guardian will track a hero until:
- The guardian or the tracked hero dies.
- Another hero comes into view of this guardian, and it is higher up on the guardian's target priority box (guardian starts to track this new hero).
- The hero successfully hides inside an empty chamber.
- The hero manages to move away from the guardian so that the guardian cannot reach the hero on its turn (guardian has run out of movement).
Clarification: When the guardian is ending its movement: move the guardian along the edge of the quadrant, check line of sight (4 squares), and if the guardian cannot see the hero, then the hero loses the tracking status. Leave the guardian on the square at the boundary as close as possible to the previously tracked hero.
A tracking guardian moves differently than a non-tracking guardian. A tracking guardian does not roll the patrol route die. A tracking guardian does not move through spawn points/skull piles because it always moves towards the tracked hero. The tracking guardian simply moves from quadrant to adjacent quadrant until the guardian reaches the hero (or it is out of movement).
When a tracking guardian reaches a quadrant with a tracked hero, place the guardian next to a hero, and proceed to combat against the hero. This may even lead to a situation where a guardian is placed inside a chamber (treat this combat still as a dungeon combat).
The dungeon is divided into 5x5 quadrants, with every quadrant consisting of 6x6 squares. A guardian monster could be in any square of the center quadrant. Spending more movement lets a tracking guardian move into a wider surrounding area, quadrant by quadrant.
If a guardian ends its movement and there is a tracked hero in the adjacent quadrant, move the guardian within this quadrant's boundary. Place the guardian in a square on the guardian's current quadrant as close as possible to the hero. Proceed to combat if the guardian is adjacent to the hero.
Celebration Day
Start of Celebration Day (heroes are teleported from dungeon to the village):
- Draw one Celebration Day Gift card, read and process the card and then shuffle it back to the deck.
- Collect reward from completed Tavern Task and then return the card to the game box. Heroes can collect rewards from a Tavern Task card on any Celebration Day, and there is no penalty for not completing a Tavern Task.
- Collect rewards from completed quests that Albus has not already collected.
- Draw 1D6+5 loot cards and restock the blacksmith's shop with the drawn cards (shuffle junk and back to the deck). Draw new loot cards if either of these cards are drawn.
- Restock bazaar with used potions and torches.
During Celebration Day, the heroes are free to conduct as much business as they like.
Level up, acquire new special abilities:
- A hero must spend 4 Lifeforce to level up (leveling up increases maximum health and essence BUT doesn't give heroes full health or essence upon leveling up).
- Restriction: a level of the hero ≤ X+1, where X is the number of green elder globes on the quest tables. Only a couple of special events can bend this restriction.
- Select a new special ability and pay the Lifeforce cost (the level of the special ability ≤ a level of the hero).
- Each special ability set must be acquired in order (1st, 2nd, and then 3rd level special ability).
- A hero can use lower-level special abilities (2nd or 3rd level abilities do not replace the less powerful ones).
Restore essence and health, receive blessings and cure all afflictions:
- 100 gold coins: fully restore a hero's essence.
- 100 gold coins: fully restore a hero's health.
- 100 gold coins: cure all afflictions.
- 200 gold coins: draw one blessing card. A hero can have only one blessing card and it can never be traded to another hero. Do not look at the blessing card; place it in the hero's playing area.
After the heroes are back in the dungeon, at the beginning of the first upkeep, reveal the blessing card. The blessing stays active until a hero discards them, or another blessing cancels it. Shuffle discarded blessing cards back to the deck.
Buy and sell items:
- 100 gold coins: one health potion.
- 100 gold coins: one elixir potion.
- 100 gold coins: one ochre juice.
- 100 gold coins: one torch.
- Heroes may buy available cards from the blacksmith's shop.
- Heroes may sell as many loot and mining cards to the blacksmith's shop as they like.
- 100 gold coins + required minerals and stones: craft power gem.
- 200 gold coins: one pickaxe.
- 100 gold coins: resharpen pickaxe.
Gamble: Randomly select one (roll 1D4) House of Chance game for this celebration day and gamble. The difficulty level that hero(es) reach while gambling is reset only at the end of the current Celebration Day. All the needed rules for the games are on pages 37-42 of the rulebook.
Clarifications:
- The Bet 100/Win 200 in Tower Attack means that a gambler spends 100 gold coins and if the dice roll is a success, the gambler gains 200 gold coins.
- The Bet 100/Win 200 in Heroes vs. Monsters means that a gambler spends 100 gold coins, and if all the monsters are killed, the gambler gains 200 gold coins.
- The Bet 200/Win 200 in Skull Jack means that a gambler spends 200 gold coins to the Bank, and if the gambler beats the Skull Jack's hand, the gambler gains 400 gold coins.
- The 500 gold coin bet is added to the 2500 gold coin winnings in The Adventures of Bravely the Knight. Place coins by the side of the Bravely the Knight game board.
After the Celebration Day (heroes are teleported from the village back to the siege tile of the dungeon):
- Create a new encounter deck: gather all 86 encounter cards, remove 10 interlude cards, shuffle and deal out 30 cards, take 9 interlude cards and shuffle them into the 30 cards, and place the 10th interlude card on top of this deck.
- Remove all minions from the dungeon and shuffle their monster cards back into the appropriate decks. At the start of the first Monster phase, populate the dungeon with new minions according to the value marked on the minion population track. The level of the minions should equal what quest table the heroes are working on.
- Reset the guardian spawn track to the value selected during the advanced setup.
- Check the top card from each of the four mining cards decks and remove "exhausted" cards and place them back in the game box. (Note: leave a newly-exhausted card face up on its mining deck; at the end of the next Celebration Day, remove this card — this mining site has now been enriched, and can be mined.)
- Remove all the red tokens from the Teleport Track.
- If the trap system is in use: remove trap tokens from the dungeon board, then place a random trap token onto each square with a trap icon.
- Place the hero standees within the white dotted square at the Siege on the dungeon board. Place the Albus standee on one square adjacent to at least one hero standee. Reveal blessing cards and start the first upkeep phase of the new set of quests.
In the following pages of the rulebook, you can find all the important mechanics and concepts that you will need while playing Dungeon Crusade.
Combat
A unique feature in Dungeon Crusade is a player can select between the two different combat systems in the game. There is the classic combat system and the newly revised combat system.
It is recommended to use the revised combat system for learning the game and playing the game thereafter. The revised combat system offers a fast-paced gameplay experience.
The classic combat system offers a more in-depth & challenging combat experience.
Whichever combat system a player selects, these systems handle combat with minions in the same way.
Combat with Minions
Let's first go over how combat is handled with minions. Consider what minions are...
Minions are the trash mobs in the game. They're the lowest level monster and creatures in Dungeon Crusade. While they are versed in 3 of the warfare types, they are not as proficient as the Champion monsters and Guardians at using all 3 warfare types in a combat situation.
However, as you know, if too many minions escape from the dungeon and raid the village, they can lose the game for you.
These are some things to keep in mind.
- Rallying heroes together to combat minions is NOT USED and CANNOT be used. It's a 1 vs. 1, as in a duel between a hero and a minion.
- A minion will randomly select only 1 of its 3 warfare types to use in combat.
- A Final Strike roll is not a warfare roll. It is known as a Final Strike roll. Consider both of these as 2 separate attacks. A player will be using the D20 for the Final Strike die. However, a player may add any buffs from the selected warfare type to the Final Strike die roll.
- A hero must select only 1 of their weapons to use in combat against a minion. A player will only be using battle token 1. Place the battle token on the selected weapon the hero will be using, combating a minion.
- Counterattack can be used against a minion in the Monster phase of a turn.
When a hero attacks a minion:
- When a hero is adjacent to a minion to launch an attack, gather the 3 warfare tokens that the minion is versed in. Quickly shuffle the 3 warfare tokens and pull one at random. This is the selected warfare type the minion has chosen for the upcoming battle.
- Place the phase 1 battle token on the weapon this hero will be attacking with. Please note: the damage a hero deals is printed on the weapon card.
- Gather the warfare dice for the selected warfare type (the D6 and D12) and the Final Strike die (D20) and roll them together.
- Process the warfare roll first: the hero scores a hit if the result of the warfare dice plus any buffs that the hero has to that warfare type meets or exceeds the warfare value printed on that minion's monster card. If the total is lower than the value printed on the minion's monster card, the minion scores a hit on the hero. The damage amount is the number next to the warfare value on the minion's monster card.
- Finally process the Final Strike die: just like with the warfare roll, if the result of the D20 plus any buffs that the hero has to that warfare type meets or exceeds the warfare value printed on that minion's monster card, the hero scores a hit. If the total is lower than the value printed on the minion's monster card, the minion scores a hit on the hero. The damage amount is the number next to the warfare value on the minion's monster card.
- Please keep in mind if the hero slays the minion on the warfare roll, even if the final strike roll was lower than the warfare value on the minion's monster card, that is canceled out, as the minion was slain on the warfare roll.
Clarification: "Plus any buffs" means all relevant warfare bonuses that come from a hero's card, activated special abilities, event cards, and equipped items. Bonuses can come even from the equipped weapon that is not used in the combat, if it provides a matching warfare bonus.
If a minion is attacking a hero in the Monster phase:
- As aforementioned, when the minion is adjacent to the target hero, quickly shuffle the 3 warfare tokens and pull one randomly. This is the selected warfare type the minion has chosen to attack the hero with. The hero has to defend. This means that the hero does not deal damage to the minion. The hero rolls only to see if damage is dealt to the hero. Remember to add any buffs similar to when a hero attacks a minion.
- Minions use "hit-and-run" tactics. See page 18 in the Crusaders' Handbook for more information on this.
- A hero can use Counterattack in the Monster phase; however, it will only be for that one randomly selected warfare type.
- Counterattack cannot be used for the Final Strike die roll. However, a hero can still possibly land a hit on the minion with the Final Strike roll. If the result of the Final Strike die plus any buffs that the hero has to that warfare type meets or exceeds the warfare value printed on that minion's monster card, the hero scores a hit. If the total is lower than the value printed on the minion's monster card, the minion scores a hit on the hero. The damage amount is the number next to the warfare value on the minion's monster card.
Counterattack: Counterattack may be activated during the monster phase when a monster is about to attack an adjacent hero. When activated, the hero may select 1 phase of combat to attack in, instead of defending in. A hero can use Counterattack at any level.
Critical Strike
Lastly, let's discuss what a Critical Strike is. A Critical Strike is after a hero slays a minion, and there is damage leftover; this damage can be applied to any other adjacent minions.
Let's look at an example of a Critical Strike, so you fully understand it.
Here we can see our Hero Sir Brennus has moved adjacent to a Skeletal Grunt and an Orc Archer. He's planning on attacking the Skeletal Grunt.
Following the procedure aforementioned for combating a minion, the Skeletal Grunt has selected Physical Warfare.
We see that Sir Brennus has Luke's Training Sword equipped, a piece of Fabled Gear to attack with. Looking at the damage output of this weapon, we can see it will do 2 damage on a successful hit.
Combat begins, and the Physical warfare dice and the Final Strike die are rolled.
Processing the warfare dice first, the result is 12! Adding the Physical warfare bonus of +3 on Sir Brennus's hero card, the +3 on Luke's Training Sword, Sir Brennus has managed to hit the Skeletal Grunt with an 18.
Looking at Physical warfare on the Skeletal Grunt's monster card, Sir Brennus only needed 10 to score a hit. The Skeletal Grunt has only 2 health; therefore, Sir Brennus has slain the Skeletal Grunt using Luke's Training Sword!
However, on the Final Strike die, he has scored a hit with a 19. Remember, a hero may add any warfare buffs to the Final Strike die. So Sir Brennus may also add the Physical warfare bonus of +3 listed on his hero card and the +3 on Luke's Training Sword. The final total is 25.
Since the Skeletal Grunt is dead, Sir Brennus has 2 damage leftover he may apply to any adjacent minion. A hero does not have to make any other roll! Consider this as "free damage" for the hero to spend.
Sir Brennus decides to spend the 2 extra damage on the Orc Archer. The Orc Archer only has 1 health, so he only needs to apply 1 damage to kill the Orc Archer. If there were any other adjacent minions to Sir Brennus, he could apply the final 1 damage to that minion.
Please note, the only rule when a hero is applying this extra damage from a Critical Strike is that it can't be divided up between minions. In other words, a hero couldn't put 1 damage on one minion, another damage on another minion, etc.
When applying extra damage to an adjacent minion, it must be spent until that minion is slain. Then, if there is any damage left, it may be applied to another adjacent minion.
Finally, after the Final Strike die has been processed or after all the damage has been spent from a Critical Strike, a Hero is permitted to make a loot and gold roll for each minion they have slain. Consult the loot and gold roll values on the minion's card. Roll 1D20. If the result is equal to or greater than the values, draw one loot card and take the gold amount shown.
Classic Combat System
We are now going to go over the classic combat system. This will primarily discuss combat with the champion and guardian monsters of the dungeon.
There are three different types of combat.
- Dungeon combat launched by a hero against a minion or a guardian monster. If a guardian has an ON DEFENSE combat ability, remember to activate it. Heroes cannot use special abilities with this icon.
- Dungeon combat launched by a minion or a guardian against the hero in the monster phase. If a guardian has an ON ATTACK combat ability, remember to activate it. Heroes cannot use special abilities with this icon.
- Chamber combat against a level 1, 2, 3, or 4 champion monster. Heroes cannot use special abilities with this icon.
The essential difference between dungeon and chamber combat is the duration of combat:
- Dungeon combat lasts only a single combat round.
- Chamber combat continues until the hero(es) are either killed or manage to kill the champion monster or succeed in evading out of the chamber.
First, activate the monster's before-combat ability and then follow the combat sequence.
Combat Sequence
- Start of a combat round.
- Activate the monster's before each round of combat ability.
- Any, or all heroes can try to evade (see the free actions chart's row "Evade from chamber").
- Collect appropriate warfare tokens and place them randomly on the combat chart, so that there is one in the middle of each of the phases. Reveal the warfare tokens.
- The following sections explain how to assign a hero to attack (or defend) in combat phases. Clarification: each phase must have exactly one attacking or one defending hero (not both).
- Assign heroes to attack.
- A single hero can use any one equipped weapon to make one attack in a combat phase (the warfare type of the weapon does not need to match the icon shown on the monster's card).
- If the hero is equipped with two weapons, the hero can make two attacks. These attacks have to take place in separate phases.
- If more heroes are rallied together, they may individually attack in as many phases as the party has equipped weapons. All rallied heroes must participate in the battle, either by attacking or defending in at least one of the phases.
- Slide the warfare token up into the combat chart's attack position, and place the related phase battle token (attack side up) on the weapon card the hero will be using in the attack.
- If a minion or guardian launched this combat in the monster phase, the only way a hero can attack is to use the Counterattack special ability. Counterattack can be used only in a single phase of combat.
- Assign heroes to defend.
- If hero(es) run out of equipped weapons to use for an attack (or for some other reason), hero(es) have to defend.
- A single hero can be a defender in multiple phases.
- Slide the warfare token down into the combat chart's defend position and place the related phase battle token (defend side up) on the defending hero's card.
- Roll the dice, with colours corresponding to the warfare tokens (D6 & D12, D6 & D12 and D6 & D12).
The six different types of warfare are: Physical, Ranged, Arcane, Mythical, Spiritual, and Chaos.
- Add bonuses to the dice results.
- Add all the relevant bonuses to the warfare rolls from the hero's character card and from all equipped items the hero has.
- Add all the bonuses, even from other equipped weapons that are used in a different phase in the current combat round. For example: "Combat phase 1 is spiritual warfare. Ashara's Scepter of Truth is used to attack in this combat phase, but the Scepter still can give its +4 arcane bonus in combat phases 2 or 3, if either of those phases is Arcane warfare."
- Clarification: these bonuses are added, regardless of whether a hero is defending or attacking.
- Some special abilities, encounter cards, etc., can add bonuses to warfare rolls.
- Keep in mind in some cases a hero may have to deduct a certain value from the dice result if the hero is not proficient in a particular warfare type. Refer to the warfare types on the hero's character card.
- Inflict damage.
- If a hero meets the target number, and the hero is attacking in the current phase, the hero inflicts damage to the monster. The inflicted damage equals the +X damage on the weapon card used in the current phase.
- Clarification: do not be distracted by how the damage value is represented "+X Damage." It just means that the weapon inflicts X points of damage.
- Some special abilities, encounter cards, etc., can alter the damage value.
- If either an attacking or defending hero rolls under the target number, the hero suffers damage from the monster.
- If a monster dies in phase X of the combat, then the combat is over, and the rest of the combat phases do not happen. Reshuffle the monster card back to the appropriate deck.
- End of a combat round.
- If this is chamber combat and the champion monster is still alive, return to step 1 (start of a combat round). If any hero uses an Underworld Artifact, it must be recharged by spending 1 Lifeforce to be used again for the next round (another option is to unequip it).
- If this is a dual monster chamber event and the first champion monster is killed, reveal the second champion card and start combat against the second champion. Please note: if a player happens to draw a second dual monster chamber card, draw another card.
- If this is dungeon combat, then the combat is over.
Once combat has ended, the turn is completed for all heroes who took place in that combat, even if they have actions left. If all heroes died, see the incantation rules on page 28.
If a monster is killed:
- Collect the Lifeforce shown on the monster's card and add it to the shared pool.
- Roll 1D20. x2 means that you can make two rolls, and they both may succeed in gaining a loot card or gold. If the D20 result is equal to or greater than the monster's treasure chest value, draw one loot card. If the same D20 result is equal to or greater than the monster's gold coin value, collect the shown gold amount.
Notes: a player will process each of the 3 phases of combat separately. Regarding chamber combat, when a hero rallies other heroes into a chamber, a different hero may be selected between each phase of combat.
Revised Combat System
We are now going to go over the revised combat system. It's essential to understand the classic combat system before learning about the revised combat system.
As discussed with the classic combat system, the revised combat system is used when a hero(es) fights the champion monsters and Guardians of the dungeon.
Much of the classic combat system is used with the revised combat system, but a few things are done differently that provide a more fast-paced, action-oriented combat experience and a shorter game.
These are a few things to keep in mind while using the revised combat system:
- Rallying up to 2 heroes is still permitted.
- The combat chart is not used with the revised combat system.
- When attacking, a single hero may attack in ALL PHASES of combat with the same weapon or select another equipped weapon.
- Because a hero can attack in all phases, "Defending" (battle tokens) are only used in combat that occurs in the Monster Phase. (Please note that a hero may sometimes have to defend as a result of a champion monster's special ability, even if they were attacking.)
Start of combat: activate the monster's "before combat" special ability.
- Start of a combat round.
- Activate the monster's before each round of combat ability.
- If this is chamber combat, any or all heroes can try to evade (see the free actions chart's row "Evade from chamber"). In the case of chamber combat, hero(es) may do one or all of the following as free actions before combat: activate a special ability, drink a potion, switch/equip gear (weapons, armor, etc.). Please note, trading with rallied heroes is not permitted within the chamber. Trading can be done outside the chamber before entering.
- Collect appropriate warfare tokens, shuffle and place them in a stack. Flip over the top warfare token in the stack.
- A hero will now place battle token 1 on the equipped weapon they will be attacking with for phase 1 of combat. (The warfare type of the weapon does not need to match the icon shown on the monster's card.) If a hero has rallied other heroes, they may decide who will attack.
- At this time, a player will roll the matching warfare dice for what warfare token was drawn.
- Add bonuses to the dice results: add all the relevant bonuses to the warfare roll from the hero's character card and all the hero's equipped items. Clarification: these bonuses are added, regardless of whether a hero is defending or attacking. Also, some special abilities, encounter cards, etc., can add bonuses to warfare rolls.
Inflict damage: please refer back to the "Inflict damage" and "End of a combat round" entries in the classic combat section, as it is the same for the revised combat system.
For phases 2 and 3, follow the same steps as phase 1; however, a player will use battle tokens 2 and 3 accordingly.
If the hero(es) is combating a champion monster within a chamber, and the monster is not slain by the end of the combat, return to the start of a combat round. If the hero(es) is combating a Guardian, the combat ends after phase 3, as this is dungeon combat.
When a Guardian Attacks a Hero
A hero must defend in all 3 phases of combat. When a Guardian is attacking a hero, place all 3 battle tokens with the defend side up on the defending hero's hero card.
Remember to activate any ON ATTACK special ability the Guardian may have.
When a Guardian launches an attack in the monster phase, the only way a hero can attack is to use the Counterattack special action. Counterattack can be used only in a single phase of combat.
A hero may decide to activate a special ability during combat.
Collect appropriate warfare tokens and place them in a stack. Flip over the top warfare token in the stack.
If a hero has activated Counterattack, they will place the appropriate battle token on the equipped weapon they will be attacking with for the selected phase of combat. Select the attack phase after the warfare token reveal. (The warfare type of the weapon does not need to match the icon shown on the monster's card.)
At this time, a player will roll the matching warfare dice for what warfare token was drawn.
When a hero is defending, they must meet or exceed the warfare value to successfully defend.
Add bonuses to the dice results: add all the relevant bonuses to the warfare rolls from the hero's character card and all the hero's equipped items. Add all the bonuses, even from other equipped weapons used in the different phases in the current combat round. Clarification: these bonuses are added, regardless of whether a hero is defending or attacking. Also, some special abilities, encounter cards, etc., can add bonuses to warfare rolls.
Inflict damage: if a hero meets the target number and the hero is Counterattacking in the current phase, the hero inflicts damage to the monster. The inflicted damage equals the +X damage on the weapon card used in the current phase. Clarification: do not be distracted by how the damage value is represented "+X Damage." It just means that the weapon inflicts X points of damage. Some special abilities, encounter cards, etc., can alter the damage value. If either an attacking or defending hero rolls under the target number, the hero suffers damage from the monster. If a monster dies in phase X of the combat, then the combat is over, and the rest of the combat phases do not happen. Reshuffle the monster card back to the appropriate deck.
End of a combat round: once combat has ended, the Guardian's turn is over.
If the Guardian was killed:
- Collect Lifeforce and add it to the shared pool.
- Roll 1D20. x2 means that you can make two rolls, and they both may succeed in gaining a loot card or gold. If the D20 result is equal to or greater than the Guardian's treasure chest value, draw one loot card. If the same D20 result is equal to or greater than the monster's gold coin value, collect the shown gold amount.
Some final words about combat (both systems): once combat has ended, the turn is complete for all heroes who took place in that combat, even if they have actions left.
When a dual monster chamber card instructs a player to draw another card, and the drawn card is another dual monster chamber card, set this card aside and draw from the deck again. Once a monster card has been drawn, reshuffle the dual monster chamber card back into the deck.
Scalable Difficulty Reference Card
New to Dungeon Crusade is the Scalable Difficulty Reference card. A player will use this card when their hero must roll the D20 for an attribute test for an event or challenge in the Encounter deck, a trap in the dungeon, or a trapped treasure chest.
When a level 1 hero encounters what was aforementioned, they can deduct 6 from the value printed on the card. A level 2 hero can deduct 3 from the value printed on the card. A level 3 hero will use the value printed on the card.
The Minion Movement Speed Track
This is a new track that is for the dungeon U.I. board. Instead of using a D6 to generate a minion's movement, a player can use the Minion Movement Speed track to randomly decide what die the minion will use. Please note: if you have the decal version, place it as shown on your dungeon U.I. board.
At the start of the Monster phase, roll 1D6 and consult the Minion Movement Speed track. The result is the die that all minions will select on their turn to generate movement. Or a player can also use this option: at the start of each minion's turn, roll 1D6 and consult the Minion Movement Speed track. The result is the die that the minion will select to generate movement for their turn.
With either option, make sure to add the minion's base movement to the result of the die rolled.
How to Accomplish a Quest and Collect Rewards
After the heroes have fulfilled the quest's objective, they will receive the Lifeforce as denoted on the quest card. All physical rewards must be collected by sending Albus to the village.
Another option for gaining these physical rewards is to wait for the next Celebration Day.
No individual Lifeforce! Collect Lifeforce and place it into a shared pool for all heroes to draw from.
Movement
Heroes and monsters may only move orthogonally through the dungeon and its corridors.
However, if a hero is adjacent to a monster, and vice versa, diagonal attacks are permitted.
Heroes and monsters can never move through walls, chambers, pillars, or any other type of structure in the dungeon. Nor are they allowed to enter into water, swamps, etc., unless there is a movement square.
While moving, heroes and monsters are permitted to pass through squares that are occupied by other characters. However, they may never end their movement on a square occupied by another character.
When a hero lights a torch, that hero gains +2 to their base movement.
Rallying Heroes
By spending one essence, a hero with an initiative number X can rally with a hero that has an initiative X+1 or two heroes who have initiatives X+1 and X+2.
A Rally action takes place before tokens (monster tokens within chambers) are revealed (before combat begins).
The rallying hero must complete actions before the rallied hero(es) activates, but the attack action is put "on hold" until the rallied hero(es) arrive.
Clarification: all rallied heroes must be within the chamber before the monster token is revealed.
In the example above, we can see that our Knight hero, Sir Brennus, has initiative token 3. For his first action, he will enter into the chamber where there is an unrevealed monster token. This monster token would not be revealed at this time.
When Sir Brennus enters into the chamber, he will spend 1 Essence to rally Ennwyn, our archer hero, who has initiative token 4, to join him in the battle. Ennwyn would then use an action to move into the chamber with Sir Brennus.
Finally, Sir Brennus rallies our wizard hero, Zeek, to join in the battle. Zeek would also use an action to move into the chamber along with Sir Brennus and Ennwyn.
At this time, the monster token would be revealed, and a player would draw from the appropriate level champion monster deck for the monster the three Heroes will be combating.
Please note, by Sir Brennus spending 1 essence, he can rally both heroes. A hero may only rally up to 2 other heroes.
Rallied heroes:
- Can use their two actions to move to the rally site.
- May use essence to make up any shortfalls in movement (1 essence = 1 movement). Can be used multiple times.
- May perform a (non-attack) action and free actions as long as they can reach the rally point.
- Must participate in combat. (For classic combat system, not revised.)
- If X+1 doesn't reach the rally point, X+2 is still permitted to move to the rally point to participate in the battle.
Attribute Tests, Resistance Tests, and Chamber Tokens
Attribute tests: Agility (xx), Strength (xx), Wisdom (xx), etc. Success if 1D20 + bonuses on hero card & on equipped items are equal to or greater than difficulty (xx); otherwise, the test fails.
Resistance tests: Physical resistance (xx), Ranged resistance (xx), etc. Success if 1D20 + bonuses on hero card & on equipped items are equal to or greater than difficulty (xx); otherwise, the test fails; continue with the outcome (usually gaining an affliction — if a hero already has a 1st degree affliction, then flip the card over for its 2nd degree affliction).
Attention: some item cards provide warfare bonuses and additional bonuses for the resistance tests.
On a fail, a player will take the appropriate affliction card.
One-sided token (= master token): these tokens have the same image on both sides. One-sided tokens are placed in the chamber rooms during setup.
Two-sided token (= randomization token): these have a different image on each side. Two-sided tokens replace one-sided tokens when prerequisites are met.
Crate token: when a hero opens a crate, return the master token to the game box and pick a random two-sided crate token. After the outcome, return the two-sided token to the place you keep them, such as a mug or bag. Take a healing potion found inside a crate from the game box (not from the bazaar).
Mystery Chamber token: when a hero(es) enters a Mystery Chamber, return the master token to the game box and pick a random two-sided mystery chamber token. After the outcome, return the two-sided token to where you keep them, such as a mug or bag. Please note: all heroes teleport to the same spawn location if the Teleport token is drawn.
Secret Room token: when a hero is adjacent to a Secret Room chamber, replace the master token with a random two-sided Secret Room token (return the master token to the game box).
Monster tokens: monster tokens are revealed just before combat. Usually, a monster token is a level 1, 2, 3 or 4 champion monster. A monster token can also be an empty chamber token. After revealing a monster token, you will draw from the appropriate champion monster deck.
Mining sites: when a hero is adjacent to (or on top of) an unrevealed token, reveal mining site.
Trap tokens: when a hero is on top of a trap token, reveal it and return the trap token to the game box. After processing the trap card, shuffle the card back to the deck. In some cases, a hero can keep moving if they have movement remaining.
Quest Tokens and Secret Rooms
Quest items: quest items are revealed after the champion monster is killed.
How to Discover a Secret Room
When a hero is adjacent to a Secret Room, draw a random two-sided Secret Room token and replace the master token.
The number in the bottom left corner is the maximum amount of attempts to discover the Secret Room. Mark attempts with red marker tokens. One discovery action yields only one discovery roll.
The number in the bottom right corner is the difficulty level. If 1D20 + wisdom is equal to or greater than the difficulty level, the hero has succeeded in discovering the Secret Room.
If the hero(es) run out of attempts, the Secret Room could not be discovered. Flip the two-sided token to the token's locked side. The Secret Room is now permanently locked.
Picking a Lock of a Chamber Door on a Secret Room
If a hero succeeds in the discovering attempt, further actions can be used to pick the Secret Room's lock. When a hero tries to lockpick a discovered Secret Room's door, draw a random lockpick token from a mug or bag.
Lockpicking is done by rolling the red, blue and green D6 together. Unlike the Discovering a Secret Room action, all lockpick rolls are made within 1 lockpick action.
The number in the bottom left is the amount of rolls a hero can make in the lockpicking action.
The hero must modify the amount with his or her lockpick attribute found on their hero card.
A hero needs to roll with each die equal to or greater than the corresponding colored number in the bottom right.
A hero does not have to succeed entirely in one roll; the hero can succeed partially in the first roll, and set aside successful dice. Then the hero can continue with the failed dice and possibly succeed in the second roll, etc. If a hero fails in lockpicking, then the Secret Room is permanently locked.
Please note that this lockpicking mechanic is used to open some treasure chests within the Encounter deck.
After the lockpicking action, return the lockpick token to the mug or bag.
If a hero successfully picks the door's lock, a hero has to spend an action to move into the Secret Room chamber to draw a Secret Room card. Drawing a Secret Room card is a free action.
Incantation Track
(If a champion monster is left alone in a chamber.) Raise the incantation track value with a value equal to the monster's level and reshuffle the monster card back to the appropriate deck.
Do not remove the monster token from the chamber. If incantation is greater than 4, then a 'Hex' is placed on the village:
- Raise the terror level & minion population by one.
- Remove one of each token in the bazaar (Healing potion, Elixir potion, Ochre Juice and Torch).
- Reset Incantation track to value 0.
Dual monster chambers: both champion monsters raise the incantation track.
Albus: the Heroes' Fetchound
Heroes cannot leave the dungeon until they complete the quests, but Albus is the heroes' link to the village. Albus can be used to retrieve items, power gems, torches and potions from the village to the heroes or carry quest items back to the village, thus gaining the physical rewards of the completed quests. When Albus leaves the dungeon through the exit, he moves directly to the village board. When Albus has conducted all business in the village, this ends his current action; if Albus has one action remaining, he can return back to the dungeon.
Albus cannot use any items; he can only carry them. Albus can never be hurt or killed (monsters, traps and creatures ignore him). He can be activated anytime during the Hero phase. Albus has two actions on his turn, and he can pick his actions from these:
- Move up to his speed.
- Use the Enlightenment to level Albus up (unlike heroes, there are no restrictions for leveling Albus up, but it still takes both actions that Albus has).
Albus can trade infinite times on his turn (trading is a free action, so it does not end his current action).
Albus is the link to the village while the heroes are within the dungeon.
Depending on the level of Albus, he has:
- A carrying capacity for potions and torches.
- A carrying capacity for gold coins.
- A carrying capacity for items (the loot cards/pickaxes).
- A speed (1D6+X) for movement.
Albus can carry an infinite amount of quest items, mining cards and power gems. A hero can carry one pickaxe.
Loot and Items
A hero can equip a loot card if the level of the hero is equal to or less than the tier of the item (T1, T2 or T3).
A hero can equip two weapons, but equipped weapons must be different weapon types. The first warfare type listed on a weapon indicates the weapon type.
A hero can equip one ring, one armour, one necklace and one charm.
A hero can carry an infinite amount of items unequipped in their backpack.
A hero can carry an infinite amount of potions, torches, mining cards, bread, gold and quest items.
Blacksmith Chart to Sell Gear
Heroes can buy item/loot cards from the blacksmith for the price printed on the card. They are free to browse the various pieces of gear in the 5 different stacks.
When a hero sells an item to the blacksmith, he pays a lot less for them. Place sold items within the blacksmith's shop (heroes can repurchase sold items).
When selling items to the blacksmith, consult the following table (Fabled gear has gold encasements):
- Starting gear (Gray) - 0 Gold
- Common (White) - 0 Gold; Fabled Common (White) - 100 Gold
- Uncommon gear (Green) - 100 Gold; Fabled Uncommon (Green) - 200 Gold
- Rare (Blue) - 100 Gold; Fabled Rare (Blue) - 200 Gold
- Epic (Purple) - 200 Gold; Fabled Epic (Purple) - 300 Gold
- Legendary (Orange) - 200 Gold; Fabled Legendary (Orange) - 400 Gold
If the heroes wish to sell some of their minerals and precious stones, the blacksmith will buy them. Consult the chart for what he will pay.
Also, the blacksmith will resharpen a pickaxe for 100 gold. You will then reset the plastic clip to the top of the pickaxe card. (Chart: Resharpen pickaxe - 100 gold; Craft Power Gem - 100 gold; Sell 6x Moonstone - 200 gold; Sell 6x Zultanite - 100 gold; Sell 6x Precious Stone - 300 gold.)
Underworld Artifacts
Rules for the Underworld Artifacts:
- The blacksmith does not buy or sell underworld artifacts.
- Charging: a hero must pay 1 Lifeforce to equip an underworld artifact. After paying the Lifeforce cost, a Fate roll must be made. Roll 1D20 and deduct the hero's level from the result. If the result is 13 or higher, the hero is killed instantly.
- After using an underworld artifact in a combat phase, it must be charged again by paying 1 Lifeforce.
- A hero may equip an underworld artifact in each hand, however, each one would need to be charged by paying 1 Lifeforce.
- An underworld artifact can be traded between heroes.
Mining and Crafting
Heroes will discover that the land of Avalon is very rich in a few different types of minerals and 6 different types of precious stones. The two minerals that can be found by mining are Moonstone and Zultanite.
The 6 precious stones found by mining are Rubystone, Iolite, Jade, Amethyst, Sunstone, and Obsidian. These stones can be melted down by the Blacksmith in the village and mixed in different combinations along with Moonstone and Zultanite to create what is known as Power Gems.
Please note: the pebbles & dirt mining cards are worthless.
Power Gems can be plugged into sockets of certain gear to boost various attributes, warfare types, and a few other things.
A player will discover there are 4 mining sites, A, B, C, and D. If a hero is adjacent to or on top of a mining site, they can spend an action to mine.
How to Mine
This can be part of a move action. (Please note: a hero must have a pickaxe to mine.)
- Roll 1D3. The result is how many mining cards to draw from the appropriate mining site.
- After drawing the mining cards, a player must check if the pickaxe has degraded. Roll 1D12. If the result is within the orange plastic clip's range, lower the clip by 1.
If the pickaxe ever becomes dull, it must be resharpened by the Blacksmith. A hero cannot mine with a dull pickaxe. Albus can take a pickaxe back to the village to have it resharpened.
- A hero can decide if they would like to use their 2nd action to mine again. Follow steps 1 & 2.
- If the card "This mining site is exhausted" is drawn, follow the directions on the card.
How to Craft a Power Gem
Once a hero has the required minerals and precious stones to create a Power Gem, they can have the Blacksmith craft it. A player is permitted to go through all the recipe cards and select which Power Gem they would like to create.
If the heroes are within the dungeon, their fetchound Albus can take the needed minerals and precious stones to the Blacksmith to have him craft the Power Gem(s). Albus can carry an unlimited amount of these. If the heroes are at Celebration Day, they can visit the Blacksmith and have it created.
Once the Power Gem is created, a player will slide it under the particular piece of gear with a socket. Notice that round sockets are only on weapons, while square sockets are only on armor. A hero can only place round Power Gems on weapons and square Power Gems on armor. Heroes are permitted to trade Power Gems with other heroes.
Once the Power Gem is inserted into the piece of gear's socket, it gains whatever benefit/buff is listed on the recipe card.
Heroes are permitted to trade Power Gems if they are adjacent. Trading is a free action and can be done in the middle of a hero's movement. A hero can move, trade with a fellow hero, then continue with their movement.
Dungeon Board Details
Here we are going to go over some essential information that a player needs to know while playing Dungeon Crusade.
Quadrants and Chambers: each dungeon board in the game is divided into 24 quadrants. Each of these quadrants has a unique name on a colored banner found on the chambers of that particular quadrant. Also, each quadrant is 6 x 6 squares. So think of the dungeon as a grid.
The small number on each chamber is the "Hide value." This represents how difficult it is for a hero to hide inside that chamber.
Champion monsters lurk within most of the chambers of the dungeon. They are often safeguarding the quest items the heroes will need to complete the quests they have been tasked with.
Monster Spawn Points and Skull Pile Nodes: within each of the quadrants, there is either a monster spawn point or a skull pile node. The minions and Guardians move from these points to another point using colored routes. This system provides the player with a "living dungeon" experience where the monsters roam the dungeon's corridors with unpredictable movement patterns.
The eight spawn points (numbered from 1 to 8) are also used to spawn new minions and Guardians into the dungeon.
Patrol Routes and Patrol Route Die: networked throughout the quadrants of the dungeon are four colored lines known as Patrol routes. The patrol route die is a D8 with symbols that match the patrol route lines.
If a minion or Guardian is on a monster spawn point or a skull pile node, the patrol route die is rolled to see what quadrant they will move to next.
Bloody Arrows: these various arrows throughout the dungeon dictate what path a raiding minion will follow to escape the dungeon.
Looting a slain monster at a distance: if a minion or Guardian is slain within a turn and is not looted, it stays in the dungeon for the current turn and the following turn. Tip the miniature on its side. This usually happens when a hero uses some type of ranged special ability.
At the end of the monster phase of the following turn, it is removed from the dungeon if it has not been looted. Reshuffle its monster card back into the appropriate deck.
Mystery Chambers: here is how to process each thing that could be within a mystery chamber.
- Reward: a player will take the gold amount indicated.
- Crate: a player will reach into the mug or bag where the Crate tokens are kept, and pull one Crate token out.
- Empty Chamber: the chamber is empty!
- Loot: draw one loot card.
- Teleport: each hero in this chamber must roll 1D8 and teleport to that monster spawn point in the dungeon.
- Monster token: a player must draw a monster card from the appropriate champion monster deck and fight this monster! Follow the same instructions that are found in the Monster section of the rulebook for fighting a champion monster.
Please note: while there are quest cards for main quests & side quests, there are no quest cards for the Kill the Guardians quest.
The Kill the Guardians quest is associated with this entry on a scenario page. A player sets how many Guardians they would like to spawn into the dungeon for each quest table. If this is your first game, it is recommended to have 1 Guardian spawn into the dungeon.
The Types of Monsters & Creatures in Dungeon Crusade
Minions: these monsters and creatures roam the corridors and hallways of the dungeon. You'll notice that there are 3 minions in a particular group. Each minion in a group will use a red, blue, and green plastic base. This corresponds to the colored gem shown in the top left corner.
You will also notice a silver and gold star on their monster cards. A silver star lets a player know this is a normal minion and has an origin story. A gold star lets a player know this is an elite minion and will have some type of a special ability.
Champions: champion monsters and creatures lurk within the chambers of the dungeon. They are usually safeguarding the quest items that heroes will need to complete their quests. Please note there are no cardboard miniatures for champion monsters. The monster tokens are in direct correlation to the various champion monster decks.
Like minions, you'll notice a silver and gold star on champion monster cards. A silver star lets a player know this is a normal champion monster and has an origin story. A gold star lets a player know this is an elite champion and will have some type of a special ability.
Guardians: the Guardians can be considered the "bosses" of the dungeon and are very tough! Like the Heroes, the Guardians can level up throughout the game and can obtain level 4. A player will use the purple plastic bases for the various Guardian cardboard miniatures.
The Tomb of Kaladar Dungeon
Of all of the stories and lore that people have spoken about across the land of Avalon, there is one that has been told for many years that is one of a quite malevolent & horrific tale.
There once lived a man by the name of Aleister Kaladar who resided in the village of Mystvale. Unbeknownst to anyone in the village, Aleister practiced in the arts of dark magic and was accused of abducting villagers to use in his wicked experiments.
Aleister was exiled from Mystvale and traveled west to an abandoned tomb which became his new home.
There, he continued to practice in dark magic, summon creatures from beyond, abduct villagers from Mystvale and build many deadly & devious traps for anyone foolish enough to enter into his tomb.
In this section, we are going to discuss a few important rules for this particular dungeon and the six environmental hazards.
Warning! It is highly recommended to become acclimated to Dungeon Crusade and the three other dungeon boards before attempting to play on this dungeon board. You have been warned, Crusader!
Let's first go over a few important rules about setting up this dungeon and a few other things.
In the northeast corner of the dungeon there is a quadrant known as the Labyrinth of Solitude. During setup, a player must always place a mystery chamber token in the single chamber found within this quadrant. Also, when moving through this chamber, it costs only 1 movement point.
Towards the central eastern part of the dungeon there is a quadrant known as the Sanctuary of Bats. During the seeding process at setup, the three chambers within this quadrant do not receive any type of tokens. This area must be free of all tokens.
Towards the southern central part of the dungeon there is a quadrant known as the Sanctuary of Souls. You'll notice that two of the four chambers do not have a banner upon them. During the seeding process at setup, the two chambers within this quadrant do not receive any type of tokens.
The Six Environmental Hazards
Throughout the Tomb of Kaladar, Aleister has created six deadly environmental hazards the heroes will have to contend with while traversing through the dungeon. When a hero lands on one of the red sigils on the floor within each of the quadrants where an environmental hazard resides, they must stop and test a particular attribute associated with that environmental hazard.
You will notice some of the hazards will have a green arrow pointing out to the floor. This is where the hero will be placed whether they succeed or fail the attribute test. Environmental Hazards do not stop a hero's movement. If a hero has movement remaining after testing an attribute, they may continue with their movement. Also, if a hero ends their movement on a red sigil, they must make an attribute test, but at the start of their next turn, they do not have to test it again before moving.
Please note: feel free to use the Scalable Difficulty Reference card when testing all of the attributes for the Environmental Hazards.
Remember that monsters are never affected by any of the traps or Environmental Hazards within the dungeon. Also, a raiding minion spends only one movement point to cross the Pit of Agony, but can never end their movement within it.
- Pit of Agony - Test Strength 13: the Pit of Agony is a 6-foot deep trench that spans approximately 40 ft and is filled with jagged spikes. A hero must grab one of the ropes to swing across to the opposite side. On a fail, the hero loses their grip, falls into the trench and lands on the spikes! Roll 1D3. The result is damage taken.
- Sanctuary of Bats - Test Hide (11): this very dark & creepy quadrant is where a flock of blood thirsty carrion bats call home. A hero must attempt to quietly creep through and hide to not alert any of the bats of their presence. On a fail, roll 1D3. The result is how many carrion bats attack the hero. Each bat does 1 damage and drains the hero of 1 essence.
- Oscillating Pendulums - Test Wisdom 12: when Aleister built this diabolical contraption, he designed the pendulums to move, swing, and rotate in a random and unpredictable manner. A hero must study the pendulums and make their move at the right time to avoid being hit by a pendulum. On a fail, roll 1D3. The result is damage taken.
- Chamber of Blades - Test Evade 13: the Chamber of Blades is another one of Aleister's devious & deadly traps. These circular jagged blades spin with great velocity and move in & out of the walls in a very erratic pattern. A hero must be quick to slip past them without getting cut by one. On a fail, roll 1D3. The result is damage taken.
- Black Rock Viper Pit - Test Agility 14: a hero needs to balance themselves to cross a pit filled with Black Rock Vipers. On a fail, they fall into the pit! Roll 1D3 to resolve how many vipers bite the hero. Each viper does 1 damage and drains the hero of 1 essence.
- Noxious Vapor Chamber - Test Willpower 12: a hero must hold their breath and not inhale the toxic fumes emitting from the statues. On a fail, roll 1D3. The result is essence lost from inhaling the toxic fumes.
If a Guardian ever spots a hero across the Pit of Agony, the Guardian crosses it to become adjacent to the hero. Also, the heroes' fetchound Albus is never affected by any of the Environmental Hazards. He simply moves through them. Albus is not permitted to cross the Pit of Agony. He must go around it.
The Solo Crusader Game Mode
A new addition to Dungeon Crusade is the Solo Crusader mode. When playing this mode, a player will select one Hero and their fetchound Albus and explore the dungeon in this 'Lone Wolf' style of play.
However, a player can also hire a mercenary from the brand new building in the village called the Mercenary Camp before delving into the dungeon!
The Solo Crusader mode turns Dungeon Crusade into something like a PC action role-playing game. Also, this mode makes the game much more faster-paced, accessible, approachable, and game time has been greatly reduced due to how briskly the game runs.
Let's go over a few things and how to set up and play the Solo Crusader mode.
First, a player should have a good understanding of the main rules for how to play Dungeon Crusade before playing this mode.
As in a regular game of Dungeon Crusade, a player will follow the rules for basic and advanced setup.
However, a player will skip the section on selecting the heroes, their special abilities, and starting gold.
There is also another change with this game mode, and that is with the minions of the dungeon. They do not roll the raid die on their turn; in saying that, the Raid Difficulty chart on the dungeon U.I. board is not used.
However, just like in a regular game, if a hero comes within four spaces of a minion, it will convert into a raiding minion, attempt to escape the dungeon, raid the village and raise the terror level by 1.
But you can consider this an option. Once you become acclimated to the Solo Crusader game mode, you can try to challenge yourself by turning the raid difficulty on. Good luck!
Setting Up the Game for the Solo Crusader Mode
Once a player goes through basic and advanced setup, it is time to prepare the game for the Solo Crusader mode.
At the start of the game, a player will select their Hero. After selecting the Hero, find their starting weapon. Then find the Albus level 1 Hero card and the Albus cardboard miniature.
You will then place all of the selected Hero's special ability cards in the Academy on the village board. Then place initiative tokens 1, 2, and 3 and 1000 gold by the selected Hero's hero card.
Difficulty table for starting gold: to add more of a challenge and randomness, a player may use the chart below to select a difficulty or roll 1D6 for the Hero's starting gold. Or, select the highest gold value for a particular difficulty for the Hero to receive (example: Novice 1200 gold, Easy 1000 gold, etc.)
- Novice: 1D12 x 100 gold
- Easy: 1D10 x 100 gold
- Normal: 1D8 x 100 gold
- Hard: 1D6 x 100 gold
- Expert: 1D4 x 100 gold
- Master: 1D3 x 100 gold
Finally, place your Hero and Albus somewhere on the village board.
Gratuity roll: when your Hero arrives in the village, the villagers are going to be quite happy to see their Savior! To show how grateful they are, they're going to give your Hero some additional gold to spend in the village.
A player will take 1D10 and roll it. You will then multiply the result by 100 gold. This is what the villagers have given your Hero to shop with before descending into the dungeon.
Difficulty table for gratuity roll: to add more of a challenge and randomness to the Gratuity Roll, a player may use the chart below to select a difficulty or roll 1D6 for what the villagers give to the Hero. Or, select the highest gold value for a particular difficulty for the Hero to receive (example: Novice 1200 gold, Easy 1000 gold, etc.)
- Novice: 1D12 x 100 gold
- Easy: 1D10 x 100 gold
- Normal: 1D8 x 100 gold
- Hard: 1D6 x 100 gold
- Expert: 1D4 x 100 gold
- Master: 1D3 x 100 gold
Mercenary Camp
Every Hero needs a little bit of help. Welcome to the Mercenary Camp. Here you can hire a Merc to go out with your Hero on their journey. Let's discuss how to populate the Mercenary Camp.
First, place the Mercenary Camp card somewhere near the village board.
Populating the Mercenary Camp: collect all of the level 1 hero cards and give them a shuffle. Randomly pull two hero cards out. These are the two mercenaries available to your Hero in the Mercenary Camp.
You will then take the two hero cards, the associated cardboard miniatures, and the starting weapon cards. Place the cardboard miniatures on the mercenary circles in the Mercenary Camp, then place the hero cards and the starting weapon cards near the Mercenary Camp board.
Then, find the level 1 special ability cards for these two mercenaries and place them in the Academy on the village board. Finally, take initiative tokens 4, 5, and 6 and place them near the Mercenary Camp.
Pro-Crusader tip: consider hiring a mercenary that is proficient in the warfare types that your Hero is lacking in. That way, they can both take on a variety of monsters and creatures they come across in the dungeon.
Hiring a mercenary: looking at the small chart on the Mercenary Camp card, we can see there is a gold amount for hiring various levels of mercenaries: a Level 2 Mercenary costs 500 gold, and a Level 3 mercenary costs 700 gold. When your Hero is starting out and working on quests for Quest Table one, only level 1 mercenaries are available.
The gold cost for a level 1 mercenary is 300 gold. If a player wishes to hire one of the two mercenaries, pay the 300 gold, take the selected mercenary's cardboard miniature and place it on the village board by the Hero and Albus.
Then, take their level 1 hero card, starting weapon, initiative tokens 4, 5, and 6, and place them in the player area by the hero card. Remember to place the white card clips on the starting health and essence levels for this Mercenary on their hero card.
Shopping Phase
At this time, a player will now shop in the village for their Hero and Mercenary. This works just as it does in a regular game of Dungeon Crusade.
When visiting the blacksmith shop for gear, a player will want to consider what warfare types their Hero and Mercenary are proficient in and what warfare types both of them lack in, and purchase gear accordingly.
Pro-Crusader tip: remember, there are 6 different warfare types in the land of Avalon, and all monsters and creatures are versed in three of the six. A player might want to consider having their Hero and Mercenary proficient in a good amount of warfare types or have them specialize in certain ones. There are many ways to build and spec out your Hero and Mercenary in the Solo Crusader mode!
Once a player is finished shopping at the various shops and services in the village, it is now time for your Hero, mercenary, and fetchound to descend into the dungeon.
Gather the three cardboard miniatures and place them within the white box on the Siege Tile of the dungeon. They are ready to explore the dungeon and complete the quests they have been tasked with.
Playing the Solo Crusader Mode
As previously mentioned, the Solo Crusader mode plays just like a regular game of Dungeon Crusade. But a few things have been modified and changed for this mode which we will now discuss.
The Solo Crusader mode uses the revised combat system.
Like in a regular game of Dungeon Crusade, one turn consists of the Upkeep phase, the Encounter phase, the Guardian phase, the Hero phase, and the Monster phase. Then it goes to the top of the next turn.
Regarding the initiative tokens, your Hero and Mercenary will always receive three of them in the Upkeep phase. A player is never permitted to give the Hero or Mercenary more or fewer initiative tokens.
And like in a regular game of Dungeon Crusade, one initiative token equals two actions. So consider it like your Hero and Mercenary each has three turns. This is one of the reasons the game is much faster-paced and runs more briskly.
A Mercenary does not need to follow your Hero everywhere he goes in the dungeon. Just like in a regular game of Dungeon Crusade, you can use your Mercenary to go anywhere in the dungeon you would like.
Also, a Hero's Mercenary can use any weapon/gear they wish to use and can carry additional gear in their backpack (items placed under their hero card). Basically, think of controlling a Mercenary as you would a hero.
In the event where EITHER your lone Hero is killed OR Hero and Mercenary are killed on the same turn, a player will follow the rules for resurrecting a hero. However, once they return to the dungeon, place resurrected miniatures within the white box on the Siege Tile.
Dismissing a Mercenary
If a hero wishes to dismiss their merc to perhaps hire another merc in the Mercenary Camp, this is permittable and is done during the Upkeep phase.
A player will take all of the gold, gear, potions, etc., that is in the Mercenary's play area and place it in the Hero's play area. Then take initiative tokens 4, 5, and 6 and place them near the Mercenary Camp.
A player will then remove the merc's hero card from the play area, the cardboard miniature from the dungeon, the special ability cards in the Academy and set it all aside. This mercenary could show up again in the Mercenary Camp on the following Celebration Day.
Hiring a Mercenary if Your Hero Is Within the Dungeon
If a player decides to hire another Mercenary from the Mercenary Camp, they must give Albus the gold amount to hire the Mercenary and send Albus to the village to drop off the gold to hire the Mercenary.
A player will follow the same procedure described in the "Hiring a Mercenary" section. Once the Mercenary has been hired, place their cardboard miniature within the white box on the Siege Tile of the dungeon.
This Mercenary will enter play upon the next Upkeep phase.
Hiring a Second and Final Mercenary
A player is permitted to hire a second and final Mercenary if they would like to do so. Follow the procedures as aforementioned for hiring a Mercenary.
However, there is a significant rule for hiring a second and final Mercenary.
As mentioned, hiring a Mercenary can only be done during the Upkeep phase. Once a player hires a second Mercenary, the initiative tokens must be split into twos. Meaning, your Hero and both mercenaries will receive two initiative tokens.
A player is never permitted to give the Hero or either of the Mercenaries more or fewer initiative tokens. Each of them receives 2 during the Upkeep phase.
Lastly, if a player dismisses one of the mercenaries, it goes back to the original rule of distributing 3 initiative tokens to the Hero and his Mercenary during the Upkeep phase.
Repopulating the Mercenary Camp on Each Celebration Day
Celebration Day is processed in the same way as in a regular game of Dungeon Crusade. However, when playing the Solo Crusader mode, a player must repopulate the Mercenary Camp with new mercenaries during Celebration Day.
Upkeep phase: when a player's Hero (and possible mercenaries) arrive in the village for Celebration Day, the first thing a player will do is clear the Mercenary Camp of any Mercenaries.
A player will remove any hero cards around the Mercenary Camp, starting weapons, any cardboard miniature(s) on the Mercenary Camp board, and all special ability cards in the Academy belonging to any Mercenary residing in the Mercenary Camp.
On the 1st Celebration Day: after the Mercenary Camp and the Academy have been cleared, a player will gather all of the level 2 hero cards and give them a shuffle. Randomly pull two hero cards out. These are the two new mercenaries available to your Hero in the Mercenary Camp.
You will then take the two hero cards, the associated cardboard miniatures, and the starting weapon cards. Place the cardboard miniatures on the mercenary circles in the Mercenary Camp, then place the hero cards and the starting weapon cards near the Mercenary Camp board.
Then, find the two new mercenaries' level 2 special ability cards and place them in the Academy on the village board.
Finally, make sure initiative tokens 4, 5, and 6 are near the Mercenary Camp. If your Hero currently has a Mercenary, skip this last step.
As you can see, the Mercenary Camp is now populated with level 2 Mercenaries. Consulting the chart on the Mercenary Camp card, the gold amount to hire a level 2 Mercenary is 500 gold.
Lastly, on the 2nd Celebration Day, a player will use this same procedure as aforementioned; however, you will use the level 3 hero cards and the level 3 special ability cards.
Leveling Up Your Mercenary
Just like with your Hero, a player can level up their Mercenary during Celebration Day by spending the 4 Lifeforce.
If a player chooses to do so, take the next-level hero card for that particular Mercenary and place the white card clips on the Mercenary's current health and essence level on the new hero card.
Next, find the current level special ability cards for this Mercenary and place them in the Academy.
Finally, to keep the Mercenary hired, a Hero must pay half the gold cost (rounding down) for what level the Mercenary is. Here is a small chart to refer to:
- Retaining a Level 2 Mercenary: 200 Gold
- Retaining a Level 3 Mercenary: 300 Gold
Obtaining Victory
Once a player's Hero (and possible mercenaries) completes all of the quests they have been tasked with, the player is victorious and has saved the village!
Playing the Avalon Adventure Board Game Before the Solo Crusader Mode
Before playing the Solo Crusader mode, a player may wish to play the Avalon Adventure board game. Use these following rules for playing the Avalon Adventure board game before playing the Solo Crusader mode.
After setting up the Avalon Adventure board game, a player will select their Hero at this time. They won't need their Hero's starting weapon for this game. Also, the Hero's fetchound, Albus, is not used during the Avalon Adventure board game.
A player will now gather all of the level 1 hero cards for the remaining Heroes. If you do not have the hero expansion pack, you will be using the 5 Heroes that came with the game.
Pro-Crusader tip: rejuvenation potions can only be found in the Avalon Adventure board game. When a hero consumes one, it restores 3 health and 3 essence.
A player will now select or randomly select 5 Heroes that will accompany their Hero on their journey throughout Avalon. The Avalon Adventure board game was designed to use 6 Heroes for optimal play. Please note that starting weapons are not needed for these Heroes either.
When journeying through the land of Avalon with these 5 Heroes, consider them as hired "henchmen" to assist your Hero on their perilous journey.
If your Hero and henchmen make it through Avalon, recover the 3 Runes of Eternity and make it back to Hope's Reach, a player will collect all gold, potions, and loot from the 5 henchmen and place it in their selected Hero's player area.
At this time, consider it as your Hero has dismissed the henchmen as the journey through Avalon is over. A player can now begin the Solo Crusader mode and import their Hero and all of the gold, potions, and loot they possess into Dungeon Crusade.
The House of Chance Games
We will now be discussing the four House of Chance games, how to set the games up, the objectives for each one, and how to play them.
Tower Attack!
Players required: 1
Objective: for a hero to ascend the tower and attempt to reach level 8 to obtain the highest payout amount of gold.
Components needed to play: Tower Attack! Board, red marker token, 1 green D12, 1 purple D12, 1 orange D12.
Please note: Tower Attack comes standard in the Crusader of the Realm edition. The other 3 games are add-ons.
How to play: Before the game begins, a player must bet 100 gold and place their hero to the left of the Tower Attack! board by level 1 where it reads Bet 100 / Win 200.
Notice the three colored circles and the values within them on level 1. The colors shown are in correlation to the D12 dice a player will roll. The values represent the results a player must meet or exceed when rolling the green, purple and orange D12's.
After the bet is made, a player will then roll the green, purple and orange D12 dice together. A player has 3 attempts to meet or exceed the values shown for that level. They may set successive rolls aside.
If a player succeeds within the 3 attempts and meets or exceeds the values shown, they have beaten that level of the tower! They are then paid the win amount shown for that level and may decide to leave the game or advance to the next level of the tower.
If a player decides to leave the game, place a red marker token on the last level they succeeded in beating. If a player wishes to continue and advance to the next level of the tower, they must bet the amount shown for the next level and place their hero on the next level of the tower.
If a player fails to meet or exceed the values shown for that level of the tower, they lose their bet, and are locked on that level. They may leave the game or attempt to beat the level again by placing another bet for that level.
In the event a player reaches level 8 of the tower and successfully beats it, place the red marker token on level 8 of the tower. No further games of Tower Attack! may be played on the current Celebration Day as the tower has been cleared of the evil skeleton army!
Heroes vs. Monsters
Players required: 1-3
Objective: a player or players takes control of three stalwart heroes who are defending the Chapel of Light from the advancing monsters that are attempting to invade the Chapel of Light. If any monsters advance into the Chapel of Light area, the heroes have lost the current challenge being attempted.
Components needed to play: Heroes vs. Monsters board, 8 Heroes vs. Monsters challenge cards, 5 Grunt tokens, 4 Skeleton tokens, 3 Wizard tokens, 2 Beast tokens, 1 Warrior hero token, 1 Archer hero token, 1 Mage hero token, some damage markers, 9 red marker tokens, 1 red D6, 1 blue D6.
How to play: begin by placing the Heroes vs. Monsters board on the table. Then, take the 4 different types of monster tokens and place each type within a stack. You will then place each stack at the top of the board under the corresponding monster types.
So for example, place the stack of grunts above the image of the grunt at the top of the board. Place the stack of skeletons above the image of the skeleton at the top of the board, etc.
Then place each of the three hero tokens anywhere within the Chapel of Light. The Chapel of Light is considered to be one big space.
From there, take the 8 cards that comprise the challenge deck and arrange it so it is in sequential order. So for example, the level 1 challenge card is on the top of the deck, followed by the level 2 challenge card, then the level 3 challenge card, etc. Place the deck on the challenge area found at the top right hand corner of the board.
Lastly, flip over the top card of the challenge deck which should be the level 1 challenge card and place it on the board where it reads "Challenge in Play." We are now ready to begin playing!
The first thing a player will do is bet the amount shown on the challenge card. We can see the bet is 100 gold. After the bet is made, consult the reverse side of the challenge card for what monsters will be attempting to invade the Chapel of Light and how to set them up.
Notice to the left of the card how the three grunts are arranged. A player will take 3 grunt tokens and place them on the board exactly as shown on the card. Use this same method for each challenge card hereafter.
Initiative Roll: after the monsters have been placed on the board, it is time to make an initiative roll to see if the heroes or monsters will go first. This is done by rolling the red and blue D6 together. The blue D6 represents the heroes, while the red D6 represents the monsters. Whoever rolls the highest gets to act first for the forthcoming round, while the losing side will activate afterwards. In the event of a tie, simply reroll the dice.
After both the heroes and monsters have activated, it goes to the start of a new round where an initiative roll is made once again.
When the heroes win the initiative roll: if the heroes win the initiative roll, the first thing a player will do is roll 1D6 and add 3 to the result. This is how many action points the heroes have generated for this round. The red marker tokens represent an action point. The heroes can have a maximum of 9 action points per round. The tokens are placed by the lower right area of the board by the heroes' special abilities for them to draw from on their turn.
Activating heroes: during the heroes' turn, a player can activate heroes any way they wish. For example, a player could choose to use all of the action points available on one certain hero, or they may wish to split the action points up and activate the warrior hero first, then the archer hero, go back to the warrior hero, then activate the mage hero. They may continue to activate heroes until all of the action points have been expended.
The action points are shared between the heroes to do various things on their turn. Here is a list of some things they can do with an action point:
- Move = 1 action point
- Normal attack = 1 action point
- Special Ability = consult the heroes' special ability book to see the cost of each special ability. This is located by the right bottom corner of the game board.
Move: when a hero spends 1 action point, they may move orthogonally or diagonally to any square adjacent to their current position. A hero may never occupy a square containing another hero or a monster. However, the Chapel of Light is an exception to this rule. Even if there is a hero or heroes within the Chapel of Light, an invading monster may move within it, thus causing the heroes to lose the game.
When a hero is moving out of the Chapel of Light, they can move to any of the adjacent squares. Once a hero moves out of the Chapel of Light, they may not re-enter.
Normal attack: when a hero is adjacent to a monster, they may spend 1 action point to launch an attack upon the monster. The combat system is very simple in Heroes vs. Monsters. On each of the monster tokens there will be a value on the left and one on the right of the token.
The value on the left is the monster's toughness. When a hero spends 1 action to attack, they roll 1D6. If the result is equal to or greater than the monster's toughness, the hero scores a hit. Depending on how much life the monster has, a player will place a damage marker on the monster's token. Grunts only have 1 health, so if a hit is scored, the grunt is removed from the board.
If the result is below the monster's toughness, the monster hits the hero for 1 damage. A player will place a damage marker by the hero's name on the book of special abilities found on the bottom right corner of the board.
The value to the right is a monster's health. If a monster ever takes damage equal to its health, the monster is slain and removed from the board.
Also, when a hero is making an attack on a monster, a player must remember to check if the monster has some type of special ability that could activate. The Wizard and the Beast have such abilities.
Special ability: if a hero plans to use a special ability, a player must consult the book of special abilities for that specific hero to find out how many action points it will cost to activate his or her special ability, and how the special ability is exactly used.
When the monsters win the initiative roll: the first thing monsters will do is begin advancing straight and towards the Chapel of Light. The monsters closest to the Chapel of Light will activate first. All monsters may move 1 space, except for grunts who have 2 movement points instead of 1.
A monster's main goal is to make it into the Chapel of Light, causing the heroes to lose the current challenge being attempted.
If a monster ever moves directly in front of a hero preventing them from moving forward, the monster will roll 1D6. Notice on the dungeon area of the board there are two placards. One reads 1-3 while the other reads 4-6. The result is in what direction the monster will move to.
For example: it is the start of the grunt's turn. If the warrior hero is blocking the path of the grunt so it cannot proceed forward, the grunt would roll 1D6. If the result was in the 1-3 range, the grunt would move up and diagonally to move on its turn.
If, instead, both the warrior hero and the archer hero are blocking the two paths of the grunt so it cannot proceed forward, the grunt would not need to roll 1D6 — it would simply move along whichever path is not blocked.
If the warrior hero, the archer hero, and the mage hero are all blocking the path of the grunt so it cannot proceed forward, the grunt would not roll 1D6 as both paths are blocked. In a case like this, the hero directly in front of the monster would take 1 damage. If the monster was a beast, the hero would take 2 damage instead of 1.
Remember also to check each monster's stat cards located at the top of the board for any special abilities they may have and use on their turn.
If a hero is knocked out: during the course of battle, it is possible that a hero can be knocked out. A hero becomes knocked out when the number of damage markers equal their maximum health. What a player must do is place the hero's token within the Chapel of Light, along with the damage markers that were upon the special ability book by the hero's name. This hero can no longer participate in the current challenge being attempted, and must remain within the Chapel of Light. If the remaining heroes manage to beat the current challenge, and attempt the next challenge card, there is a healing phase before the new challenge begins. At that time, a knocked out hero may be healed and rejoin their fellow heroes for the new challenge that will be attempted.
Summary of a round: as you can see, when the heroes are attempting to beat a challenge card, the battle could go on for a few rounds. Let's summarize what exactly happens for reference.
- The player draws the top card on the challenge deck.
- The heroes must bet the amount shown on the challenge being attempted.
- A player will consult the challenge card for what monsters are attempting to invade the Chapel of Light. They will then place the monster tokens shown on the card in that area of the dungeon board.
- After the monsters have been placed, the initiative roll will take place.
- Roll the blue and red D6 together. If the result is greater on the blue D6 than on the red D6, the heroes will get to act first. If the result is greater on the red D6 than on the blue D6, the monsters will get to act first. In the event of a tie, reroll the dice.
- At the end of a round, if the heroes failed to slay all the monsters, a new round would start with an initiative roll.
Victory & Defeat: if the heroes manage to slay all of the monsters on the dungeon board, they are victorious! Consulting the challenge card, they win the gold amount shown. They may now attempt the next challenge card. If they wish to continue, place all 3 hero tokens within the Chapel of Light. However, the damage markers that reside by their names on the book of special abilities are not removed.
If any of the advancing monsters move into the Chapel of Light, the heroes have lost this challenge along with their bet. If they choose to do so, they may attempt the same challenge again and bet the gold amount shown on the challenge card.
Healing within the Chapel of Light: when the heroes complete a challenge and are victorious, a player may decide to take on the next challenge card. If a player decides to do so, they will place all three hero tokens back into the Chapel of Light. More than likely, the heroes will have taken damage from the previous battle. However, the Chapel of Light is capable of healing some of their wounds.
For the heroes to receive healing, a player will roll the blue D6. The result is the amount of damage markers that can be removed from any of the heroes. If a hero or heroes had been knocked out in the previous challenge, it is highly recommended to heal those heroes first so they may partake in the upcoming challenge.
In the event a player beats the final challenge card, which is level 8, no further games of Heroes vs. Monsters may be played on the current Celebration Day. The heroes stand victorious as they have vanquished all of the invading monsters!
Skull Jack
Players required: 1-3
Objective: a hero needs to use their cards to get 21 or as close as possible without going over, in order to beat the evil dealer, Skull Jack.
Components needed to play: Skull Jack board, the 52 Skull Jack playing cards, 2000 gold.
How to play: Skull Jack is a simple form of the card game 21 or Blackjack. If you are familiar with this card game, then Skull Jack will be very easy to learn.
The first thing a player will do is place the Skull Jack playing board on the table. Next, they will take 2000 gold and place it on the Skull Jack board in the area that reads "Bank." It is recommended to use 2 500-coins and 10 100-coins for the denomination to place in the bank. This is the gold the heroes could possibly win.
Next, the player(s) will decide which heroes will participate in a hand of Skull Jack. Either one, two, or three heroes may play at a time. When the heroes have been decided, place their cardboard miniature on the Skull Jack board in one of the three player areas. Only one hero is permitted in a player area.
Finally, each of the heroes must bet 200 gold. Heroes cannot bet any more or less than 200 gold. Place the hero's bet on the "Place Bet" circle in their player area. The game is about to begin!
As mentioned earlier, the goal of Skull Jack is for a hero to get 21, or as close as possible, without going over. If a hero gets anything over 21, this is called a bust. They lose their bet and are out for the remainder of this hand.
Values of Cards: the cards with numerals are worth their face value, while jacks, queens and kings are worth 10. If a hero has an Ace, it can be either worth 1 or 11. The player can choose at any time what the value of the ace is.
For example, let's say a player was dealt the 4 of diamonds and the ace of spades. They declare they will make the ace an 11, giving them a total of 15. The player then decides to take a "hit," which means they would like another card from the deck. The card is dealt and it is the jack of hearts, which is worth 10. This would give them a total of 25, which is a bust. However, they can declare they would like to make the ace a 1 now, giving them a total of 15. A player may change the value of the ace as many times as they like.
How to deal the cards: after the hero or heroes have placed their 200 gold bet, the game will begin. A player will take the Skull Jack playing cards and give them a good shuffle. Starting at the center of the board where the image of Skull Jack is, deal one card facedown. Players are not permitted to look at this card. This is where Skull Jack's hand will be played, or rather, his play area.
Then, deal one card face up to each hero that is playing in their player area. So if there are three heroes playing, you will have one card face up in each of the player areas. When this is complete, deal one card face up in Skull Jack's play area. So the heroes can now see one of Skull Jack's cards in his hand.
Finally, deal another card face up to each hero in their player area. This is what is known as the hero's hand.
When a Hero takes a hit: after the hands have been dealt to the heroes, it is time to see if any of the heroes would like to take a hit. This always starts with Hero 1, then Hero 2, and finally Hero 3.
A hit is when a Hero takes an additional card to add to their hand. This is done so the Hero can get as close to 21 as possible. A Hero can take as many hits as they like, as long as they never go over 21 and bust. When a Hero feels confident with the hand they have, they will declare they would like to stand. This means no further hits are allowed and their turn is over. At this time, it would then go to the next Hero to see if they will take a hit or stand.
If a Hero ever takes a hit, and goes over 21, this is called a bust. They are out of this current hand and their 200 gold bet is placed within the bank.
Revealing Skull Jack's hand: when all of the players are finished with their turn, it is time for Skull Jack to reveal his hand to the heroes. A player will reveal the one card that is facedown in Skull Jack's play area. Here are the rules Skull Jack must follow.
- If Skull Jack's hand is 16 or lower, he must take a hit.
- If Skull Jack's hand is revealed and he has 17 or higher, he must stand. Skull Jack never takes a hit on 17+.
- Skull Jack will always use Aces as 11. In the event Skull Jack takes a hit, which would cause him to bust, Skull Jack will convert an ace to be a one to prevent from busting.
- If a hero and Skull Jack are ever tied, the bet is returned to the hero. However, if Skull Jack hits 21, Skull Jack automatically wins, even if a hero has 21.
- If Skull Jack ever busts on a hand, or a hero's hand beats Skull Jack's, the heroes win! Return their 200 gold bet back to them, and each hero receives 200 gold from the Bank.
At this time, all of the cards are collected from the board, reshuffled and ready for a new hand to be dealt. Heroes can play as many games as they like of Skull Jack as long as they are paying the 200 gold bet to participate.
At the end of Celebration Day, remove all of the currency within the bank and place it back with the stock of currency for the game.
In the event the heroes clear out the bank, no further games of Skull Jack may be played on the current Celebration Day, as the heroes have taken all of Skull Jack's gold!
The Adventures of Bravely the Knight
Players required: 1
Objective: a player must navigate Bravely through a deathtrap dungeon while attempting to clear the dungeon of all of its gold. If Bravely makes it out alive, any gold that he has collected is given to the heroes.
Components needed to play: The Adventures of Bravely the Knight game board, Bravely the Knight cardboard miniature, Bravely the Knight hero card, 1 red D6, 1 blue D6, 1D10, 14 damage markers, 1 red marker token.
How to play: place the game board on the table with the cardboard miniature of Bravely the Knight on the enter space of the dungeon. Bravely's hero card should be close to the game board.
The next thing a player will do is stock the "machine" with 2500 gold. When a player gathers the 2500 gold, it is placed by the side of the game board in a few stacks. Anytime Bravely gains gold in the game, it is drawn from these stacks. These stacks remain here for the duration of this Celebration Day. It is recommended to use 3 500-coins and 10 100-coins for the denomination to place in the machine. This is the gold that Bravely could possibly loot from the dungeon.
Bravely is now ready to venture forth into one of the most dark, devious and deadly dungeons that has ever existed!
Starting a game: to start a game, a player will need to pay 500 gold. This gold is placed with the 2500 gold that is by the side of the game board. After the 500 gold is paid, take 10 damage markers and place them on Bravely's hero card where it reads "Health." This is Bravely's health level for the game. It is a good idea to place the damage markers in a stack. Bravely is now ready to venture forth into the dungeon.
Place the cardboard miniature of Bravely on the start area of the dungeon.
Choosing a direction: a player must now decide which direction Bravely will travel. Bravely can head north or east in the dungeon. An important rule to remember is Bravely can NEVER backtrack in the dungeon. Once a direction is selected, Bravely must continue moving forward through the dungeon. The only time Bravely may travel backwards is when he lands on a Portal space. This will be discussed further along in this section.
Moving through the dungeon: after a direction has been selected, a player will spin the arrow to see how much movement Bravely has generated for this turn. Bravely must move the full value of the movement generated. Please note, sometimes the arrow will not stop directly on a particular value. The rule for this is wherever the tip of the arrow is the most, is the value a player should use.
When a player is moving Bravely, a player only counts chambers for movement. The small corridors of the dungeon are not counted as movement. Basically, a player only counts the spaces that have some type of dungeon event upon it.
Ending Bravely's movement on a dungeon event: any time Bravely ends his turn, it will be on some type of dungeon event. There are many different types of dungeon events Bravely will encounter. Some are good, while some are bad. Let's go over a few of these and explain what a player will do.
Battles: many of the chambers within the dungeon will contain a monster that Bravely must fight. Taking a look at any of the chambers that contain a monster, we can see a monster's health along with a 100 gold coin. This is the reward Bravely will receive if he manages to slay this monster.
How combat works: The Adventures of Bravely the Knight board game uses a very simple and fun combat system. A player will first gather the blue and red D6 dice. Bravely uses the blue D6 while the monster he is combating uses the red D6.
A player will then consult the monster in the chamber where Bravely will be fighting to see how much health this monster has. The health of the monster is the value on the heart. A player will then place damage markers within the chamber equal to the monster's health. After the aforementioned has been completed, combat will begin!
A player will roll the blue and red D6 together. Whoever rolls the highest result inflicts 1 damage on their enemy. In the event of a tie, both Bravely and the monster take 1 damage. When damage is inflicted, a player will remove one of the damage markers from whoever received the damage. Combat continues over a series of rounds until there is a victor.
If Bravely manages to slay the monster, Bravely receives 100 gold, and this would be the end of the current turn. A player would then spin to generate movement for Bravely for a brand new upcoming turn.
If Bravely is killed, all of the gold he has amassed is placed back into the "machine" which are the stacks of gold by the side of the board. It is then game over for Bravely! A player must remove Bravely's cardboard miniature from the game board and set it aside. All of the damage markers on Bravely's hero card are removed along with a red token marker if it was placed on the Magic Sword.
A player can always put another 500 gold into "the machine" for Bravely to start a new game.
Hazards: there are a few areas of the dungeon which are considered to be hazards. If Bravely lands on one of these spaces, it clearly states on the game board what to do to process it.
Treasure Chest: if Bravely lands on one of these chambers, he has discovered a treasure chest! Consult the chamber for how much gold is within the chest, and place the gold coins next to Bravely's hero card along with any other gold he has discovered.
Healing Potions: in a few chambers of the dungeon, Bravely can find healing potions. When Bravely ends his turn on one of these chambers, he may instantly recover the amount of health shown within the chamber.
Treasure Chamber: hidden deep within the dungeon is one of the best chambers Bravely could discover. When Bravely lands in the Treasure Chamber, a player will roll 1D10 and multiply the result by 100 for how much gold Bravely has found within the treasure chamber.
Magic Sword: if Bravely lands on this chamber, he has discovered a long lost artifact known as the Magic Sword! Place a red marker token on the Magic Sword image on his hero card. When Bravely has the Magic Sword, he may add +1 to the blue D6 when engaged in combat.
Bravely can never have more than one Magic Sword. In the event he would land on this chamber again, this is considered just a clear chamber.
Portal: if Bravely lands on a chamber containing a portal, he is instantly consumed by it! A player must then spin the spinner and move Bravely back a number of spaces equal to what value the arrow lands on. This is the only time in the game when Bravely is permitted to move backwards.
When Bravely arrives on the chamber he was sent back to, he must process whatever chamber he is in immediately. After this event is complete, it will be the start of a new turn, and Bravely must spin and continue moving forward.
Enter Space: if Bravely makes it through the dungeon and passes by the enter space, he must stop on the enter space, even if he had more movement to pass by it. At this time a player will have two options. A player must decide if Bravely will exit the dungeon now or if he will go through the dungeon again.
If a player decides they would like Bravely to exit the dungeon now, it is considered game over. A player will remove Bravely's cardboard miniature from the game board and set it aside. All of the damage markers on Bravely's hero card are removed, along with a red token marker if it was placed on the Magic Sword. Finally, whatever gold Bravely recovered from the dungeon is handed over to the heroes.
If a player wishes to play another game, they would follow the same procedure for starting a new game as we described earlier in this section. However, the gold within the machine must stay, even if it is under or higher than 2500 gold.
If a player decides they would like Bravely to venture through the dungeon again, they simply select the direction he will travel in and a new turn begins. A player does not need to pay an additional 500 gold since Bravely is already within the dungeon.
In the event Bravely clears the dungeon of all the gold within it, no further games of the Adventures of Bravely the Knight may be played on the current Celebration Day.
Game Variants, Rules Clarifications & FAQ
This section will go over some frequently asked questions about the game and some rules clarifications. This will include Dungeon Crusade, the Avalon Adventure board game, and the 4 House of Chance games.
- During Celebration Day, only 1 Celebration Day Gift card is drawn.
- When a hero rallies either 1 or 2 heroes during the Hero phase to enter into a chamber to combat a monster, ALL heroes must be within the chamber before the monster token is revealed.
- During the seeding phase in advanced setup, the tokens pulled from the bag or mug are open information. Players are permitted to look at these tokens when placing them.
- When the heroes arrive in the village after the Avalon Adventure board game, fully restore their health and essence. This was a rule change after speaking to the Dungeon Crusade community. The original way was the heroes would have to spend their gold at the temple to restore their health and sleep at the tavern to regain their essence. Feel free to play it the original way if you like.
Or, use this additional game option. Roll 1D6.
- 1-3: Cold Villagers - the villagers do not welcome the heroes, and treat them as outsiders. The heroes will have to use their gold at the temple and tavern to restore their health and essence.
- 4-6: Friendly Villagers - as the heroes reach the village, they are warmly greeted by the villagers! The villagers aid them to fully recover their health and essence.
Unknown Guardian Level: this is another game variant to try for a tougher challenge.
When setting up the Guardian monster decks, shuffle the level 1 and level 2 Guardian monster decks together. These will be used when the heroes are working on Quest table 1.
When a guardian spawns, draw from the bottom of this deck. This way, the heroes will not know if a level 1 or level 2 Guardian will be spawning.
When the heroes go to the first Celebration Day, you will then create a new Guardian monster deck for when the heroes are working on Quest table 2. Shuffle the level 2 and level 3 Guardian monster decks together. When a Guardian spawns, draw from the bottom of this deck.
Finally, when the heroes go to the second and final Celebration Day, you will then create a new Guardian monster deck for when the heroes are working on Quest table 3. Shuffle the level 3 and level 4 Guardian monster decks together. When a Guardian spawns, draw from the bottom of this deck.
Question: Can my hero attack a monster if the two weapons that they are equipped with don't match any of the three warfare types this monster is versed in?
Answer: Yes, a hero can use any weapon they wish against any warfare type. Keep in mind your hero may be at a disadvantage because they are not proficient in those three warfare types that the monster is versed in.
For example, let's say that a monster is versed in Chaos warfare (black), which is axe based weapons. A hero could declare they are going to attack with a staff which is Arcane Warfare (green). It's going to be a tough fight for this hero as they are not versed more than likely in Chaos warfare.
Lastly, always remember to add or subtract any warfare values listed on their hero card and any gear they may be equipped with.
Question: Is there any type of reward for completing the Kill the Guardians quest?
Answer: The heroes do not receive any type of reward for completing the Kill the Guardians quest.
Additional Difficulty Monster Decks and Game Variants
All editions of the game ship with Normal difficulty monsters.
However, for add-ons, there are Expert difficulty monster decks and Heroic difficulty monster decks.
Here's a few variants/mods to try out with Dungeon Crusade.
Variant 1: Random Difficulty Monsters Spawn
- So what you can do (after getting acclimated to the game) is mix ALL the monster difficulty decks together. That way, you will never know what your heroes will be facing in the dungeon and the chambers of the dungeon.
- If you draw a monster or creature that is already spawned into the dungeon, just simply draw another monster card and shuffle the other one back into the deck.
Variant 2: Monsters Difficulty Scales Upon Slaying Them
- Another variant is monsters and creatures leveling up. What you do is start the game with Normal difficulty monsters.
- As your heroes slay a certain monster, remove that Normal difficulty monster card from the game and replace it with the Expert difficulty version.
- If that Expert monster is slain, replace that monster card with the Heroic difficulty monster card.
- So you see, the monsters in the game will level up to the next harder difficulty.
Option for Starting a Game of Dungeon Crusade After Playing the Avalon Adventure Board Game:
- If a player plays the Avalon Adventure board game, they do get a shopping phase at the start of playing Dungeon Crusade before descending into the dungeon. (Please refer to page 3 in the Scenario Book for more information.)
- When the heroes are placed in the village after the Avalon Adventure board game, consider selling some loot to the blacksmith for extra gold to shop with.
How to Set Up the Ancient Ruins, Tomb of Kaladar, Castle Blackwood, and Cavern of Lost Souls Dungeons
The rulebook provides a printed diagram of each dungeon board (the Ancient Ruins, the Tomb of Kaladar, Castle Blackwood, and the Cavern of Lost Souls) marked with the exact squares for Treasure Chests, Mining Sites, and Trap Symbols. During advanced setup, place these tokens on the matching squares shown on the diagram for whichever dungeon board is in play.