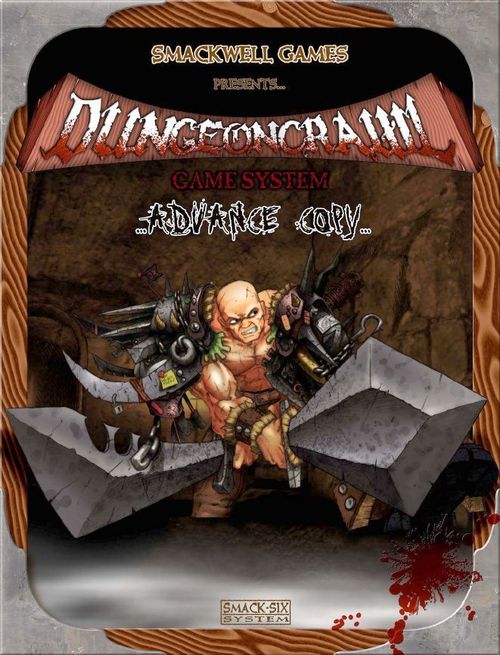
Dungeon Crawl
Dungeon Crawl Rulebook
Table of Contents
Table of Contents
Introduction
Thank you for trying out the Dungeon Crawl Solo Demo!
The purpose of this demo is to show Dungeon Crawl's basic gameplay. This is a severely chopped down version of the game; it only includes the bare minimum of rules you'll need to complete this small scenario.
The full version of Dungeon Crawl is much more expansive, including custom characters, more tiles and monsters, and much, much more. See the last page for a list of what you get with the full version!
Some Basic Rules
This section describes the rules you'll be using in the demo. Most of this stuff will be on the Play Sheet, but it doesn't hurt to read up on them.
Rolling Dice
Dungeon Crawl only uses one type of die, the 6 sided what-cave-have-you-been-living-in-if-you-haven't-seen-this-kind-of-die-before kind. However, you are rarely asked to add up the die results together. Each die is basically a Success or Failure result.
In this Demo, a 4, 5, or 6 result is counted as a success, and 1, 2, and 3 are counted as a failure.
Actions
Every Hero and Monster gets two Actions during their turn. One of them is always Move. The other one may be Attacking, Searching for Traps, drinking a Potion, among others.
Move
Every Hero and Monster can move 6 spaces each turn. Movement can only be done to adjacent spaces, not diagonally.
Attack
Every Hero and Monster can Attack. Attacking is when you use a big stick to whack the hell out of something.
Heroes add their Beef score to their Weapon's damage value when they perform an Attack. For instance, Smackalot has 3 Beef, and his Broadsword has a Damage of 1, so he rolls 4 Attack Dice when he attacks.
Monsters simply use their Beef score to Attack.
Whenever something takes damage (from an Attack, Trap, or a Spell), it rolls Defense Dice to try to block some damage. A Hero's Defense Dice are his Zip score added to his armor's Value. Here, Smackalot has 2 Zip and a Skullcap with an Armor value of 1. He rolls 3 Defend Dice to defend against damage when attacked.
See the "Example of Combat" box for a quick example of Combat. See the previous sentence for a quick example of redundancy.
Example of Combat
A literary work by Fist Breakface.
Alright so I know this guy, Henway. He went into this dungeon and as he was picking at his butt, this Orc dude came out of Nowhere, New Jersey. The Orc had a Beef of 3 and Zip 2.
Henway, being in all ways superior to this Orc, and weighing a lot more than a hen, had 4 Attack Dice and 3 Defend Dice, due to his Broadsword and Skullcap, which add 1 to his Beef and Zip, respectively. Holy Toledo, this kid's going places. But here's the action!
Orc McFadden lunges at Henway with a mean Triple Spiral John Hancock Axe Maneuver*. He rolls 3 dice (equal to his Beef, you silly person). The results: 5, 5, and 4. Three successes! That's gotta hurt! Henway rolls his defense… 4, 5, 3, 1! Two successes! His two Defense successes cancel out two of Orc's successes. Orc McFadden has caused 1 Damage to Henway!
But, my boy Henway here ain't no chump! It's Henway's turn, and he attacks with what we here know as the Maximum Montana Mincemeat Mash*! Only a reckless fool would try that! He rolls four dice… 6, 5, 1, 1! Two successes! The miserable Orc rolls his crappy 2 Defend Dice… 3, 2! No successes! The Orc is dealt a fatal blow and falls to the floor, cryin' amazacrazy!
* Note: These are not actual moves in the game, fool!
Disarm Trap
If you're playing as Chunk the Rogue, you can attempt to disarm a trap you've spotted. To disarm a trap, move Adjacent to it, and roll a die. On a success, the trap is rendered useless.
Cast a Spell
If you're playing as Fleming or Father Facepunch, you can Cast a Spell. Spell descriptions are on each Hero's Character Card.
Free Actions
Free Actions can be executed at any time at all, as many times as the Hero wants. The Free Actions in the Demo are Drink a Potion and Open a Door during Movement.
Components
On page 4 you will find the dungeon board you'll need to play on, as well as counters to use for Heroes and Monsters during the game.
On Page 5 you'll find the four Character Cards that show each Hero's stats, equipment, and any special abilities they might have. And finally, check out that last page, which has a big list of some of the crap you're missing out on for not having the full version!
This page contains, obviously, the dungeon board for the Adventure to be played out on. The following page contains the descriptions and special abilities of the four available Heroes. You can print those out too and use them for reference while playing the Demo.
On page 7 you'll find the Play Sheet, a quick reference sheet for some of the more common actions. On the bottom part of that page you'll find the Stand-Ups. You can use these to represent the Heroes and Monsters for the Adventure. Cut them along the black lines, and then fold them so the portraits are back-to-back, and the "floor" area lies flat.
Scenario: The Terrifying Tomb of Repulsive Terror!
You have travelled alone for days, after hearing of the great riches that could be had if one were to find Tormagan's Tomb. Rumors abound that his tomb was spotted almost a week ago, in a small dungeon east of Gardonia. The person who spotted it only barely escaped, and has been reduced to a babbling lunatic after experiencing the terrifying repulsiveness that the tomb had to offer.
You come upon a small, discreet stone structure with a wooden hatch. You take a quick look around to make sure no one is watching you, and open the hatch. Dust and the stench of Goblin droppings fill your nostrils, and you descend into the unknown.
Combat
All Goblins in this Adventure have the following stats:
Beef 1, Zip 2, Smarts 3, Health 1
This means that when it attacks, it rolls one die, and when it defends, it rolls two. When your Hero is attacking or defending, look for his Attack Dice and Damage Dice on the character sheet; Heroes don't just use their Beef and Zip when in combat, since they add their Beef and Zip to their Weapon Damage and Armor Value, respectively.
If you're able to Attack right away, roll your Hero's Attack Dice. Count any dice that show up as 4, 5, or 6 These are your Attack Successes. Then roll the Goblin's Zip, and count up any 4, 5, or 6. These are his Defense Successes. Subtract the Goblin's Defense Successes from your Attack Successes. If you have one or more left over, the Goblin is dead!
If you were unable to attack the Goblin or you didn't kill the Goblin this turn, the Goblin will move right towards you and Attack you with 1 Attack Die.
Keep doing this until the Goblin is dead. Once the Goblin is dead, you immediately exit Combat.
a. Entrance
Place your Hero in Room (a) on the stairs tile. Do not place anything else on the board yet.
As you descend the stairs, you smell the pungent stench of mildew emanating from the wet dungeon walls. Just as you begin thinking how cliché this dungeon already is, you hear something skittering just outside the door.
At this point the Hero begins his turn. You can stay in the room and search for Treasure or Secret Doors. Searching for Treasure or Secret Doors is an Action. Remember, each Turn you get to Move and perform one Action.
Your Hero can move 6 spaces every turn, and you can open doors as a Free Action during your Movement. If you choose to open the door on the west side of the room, go to the next section, (b).
When you search for Traps or Secret Doors, you roll a die. If you roll a success (a result of 4, 5, or 6) you will find any Traps or Secret Doors in that room. A Hero may only search for Traps and Secret doors once per room. (The Traps are obviously pretty visible on the map to begin with, but it's hard to hide traps on a solo Adventure.)
If you search for Treasure: There is none. If you search for Secret Doors: There are none.
b. Hallway
Place a Goblin where the (G) marker is in room (b).
You open the door to a dimly lit hallway. Just to the north you can see the creature you heard earlier. It seems you have alarmed it!
You have just entered Combat. During Combat you cannot search for Treasures and Secret Doors. If you have any Move points left, you should try to get next to the Goblin, and Attack it if you haven't used your Action this turn.
After Combat:
After Combat you can search the corridor for Secret Doors. You cannot search for Treasure in Corridors. That's just silly.
If you search for Secret Doors: There are none. If you search for Traps: There is a trap laid just west of the door in the corridor ahead!
If the Trap in this room is triggered by being stepped on, the Hero takes 3 Damage Dice, which he can Defend against.
c. Dining Hall
Place two Goblins in this room, on the (G) markers.
It seems you have entered some kind of dining hall. The floor and table are littered with heaps of rotting meat and what may have been other edibles some time ago. Two Goblins were scrounging for scraps amongst the debris, until you walked in.
Combat begins as soon as the Goblins are placed. If you have any Move left, you may continue to move, and Attack if you have not performed an Action yet this turn. If you happen to step on the ! square, the Hero takes 3 Damage Dice. Remember, roll your Defense Dice to block some of the damage!
After Combat:
You can search for Treasure, Traps, and Secret Doors.
If you search for Traps: If you didn't spring the Trap, you find it now. If you search for Secret Doors: There are none. If you search for Treasure: You find two Healing Potions (5) on the table! These will restore 5 of your Health points when you use them.
d. Storage Room
Place a Goblin on the (G) marker and an Orc on the (O) marker.
This room seems to be some sort of storage room. You see another Goblin in there, being looked over by a larger, meaner looking Orc!
The Orc in this room has these stats:
Beef 3, Zip 2, Smarts 4, Health 1
Combat continues until all Monsters (or you, sucker!) are dead.
If you happen to step on the ! square, the Hero takes 2 Damage Dice. Remember, roll your Defense Dice to block some of the damage!
After Combat:
You can search for Treasure, Traps, and Secret Doors.
If you search for Traps: You find a trap just before the door! If you're not a Rogue, you won't be able to disarm it! This trap causes 2 Damage Dice. Again, don't forget to roll your Defense Dice to block some damage! If you search for Secret Doors: There are none. If you search for Treasure: You find a small box with 35 Gold in it!
e. Tomb
Place a Skeleton on the (S) marker.
You walk into the resting place of Tormagan. Well, it would be his resting place if he wasn't walking around as a skeleton!
You face Tormagan's Skeleton!
Tormagan's Skeleton has the following stats:
Beef 7, Zip 2, Smarts 2, Health 2
Tormagan's Skeleton has a special power he can use once every other turn, called Repulsive Terror, which he can use as a Free Action. When he uses it, roll a die. On a success, your Hero is frightened, and his next Attack may only be made at half his Attack Dice, rounded down. This counts for Spell attacks, as well.
Don't forget that your Hero started the game with a Life Potion, which will restore him to 1 Health if he ever falls to 0 Health, effectively avoiding death. If you've already used your potion, then tough luck!
Tormagan's Skeleton falls to pieces before you, the echoes of your battle dying down to complete silence.
After Combat:
If you search for Traps: There are none. If you search for Secret Doors: There are none. If you search for Treasure: Inside of Tormagan's Tomb, you find an ornate, golden necklace.
You leave Tormagan's Tomb and head back to Gardonia, fiddling with Tormagan's necklace. When you finally make it back, you stop by the local pub and show off the necklace while telling the patrons of your heroic journey against Tormagan.
You wonder why there was a dungeon full of Green working with or defending Tormagan. Could there be a greater evil out there, attempting to resurrect old evil war champions, such as Tormagan, attempting to create an unholy army of the dead? Well duh, probably.
Heroes
Smackalot
Human Warrior. Smackalot is your typical brute; A mountain of muscle and dumb as an elbow. He likes long walks on the beach and short walks on Goblins.
Beef 3, Zip 2, Smarts 5, Health 7
| Weapon | Damage | Attack Dice |
|---|---|---|
| Broadsword | 1 | 4 |
Special
Rage Attack: Smackalot's magical Broadsword allows him to use Rage Attack twice during the Adventure. When used, Smackalot's Attack Dice succeed on a 3 or higher, instead of the regular 4 or higher, for his next Attack. Use before rolling.
Equipment: Life Potion. This can be used to bring you back up to 1 Health if you ever reach 0 Health points.
Chunk
Dwarf Rogue. Chunk is a surly little man. Grumpy, one might say. He has six brothers with very distinct traits. He lives in a place covered in snow. White snow. And he is completely original.
Beef 2, Zip 3, Smarts 5, Health 7
| Weapon | Damage | Attack Dice |
|---|---|---|
| Dagger | 0 | 2 |
| Sling | 0 | 3* |
Special
Sling: Chunk can use his Sling to attack anyone in the same room or corridor as he is, provided that his target is not standing in a space adjacent to the one he's in.
Disarm Trap: If Chunk finds a trap, he can disarm it as an Action. Roll a die. If it's a success (4+), the trap is rendered useless. On a failure, Chunk takes damage from the Trap, which he can Defend against.
Equipment: Life Potion. This can be used to bring you back up to 1 Health if you ever reach 0 Health points.
* Ranged Weapons use the Hero's Zip instead of Beef.
Fleming
Elf Sorceror. Fleming spent all of his high school years playing chess and studying, leaving him frail as an Orc's loincloth. However, he has a real big brain that helps him burn stuff real well. Hooray for magic!
Beef 1, Zip 3, Smarts 10, Health 4
| Weapon | Damage | Attack Dice |
|---|---|---|
| Dagger | 0 | 1 |
Special
Fleming has two Spells that he can use as an Action. He can cast 10 Spells during the Adventure.
Flare: Fleming can use Flare on an enemy in the same room or corridor he's in. It causes 3 Attack Dice of damage which can be defended by a Monster as normal.
Fireball: Fleming can use Fireball to cause damage to all Monsters in the room or corridor he's in. Roll 1 Attack Die. If it's a success, all Monsters in the room take 1 damage, which can be defended.
Equipment: Life Potion. This can be used to bring you back up to 1 Health if you ever reach 0 Health points.
Father Facepunch
Human Cleric. When Father Facepunch learned that, as a priest, he can go kick ass for his deity, he went out, bought a big heavy stick, and he's been crushing skulls ever since.
Beef 2, Zip 1, Smarts 7, Health 7
| Weapon | Damage | Attack Dice |
|---|---|---|
| Mace | 0 | 2 |
Special
Father Facepunch has two Spells he can use as an Action. He can cast 7 Spells per Adventure.
Heal: Facepunch can cast Heal on himself. Roll a die. The amount shown is how much Health he gains back.
Divine Hammer: As his Action, Father Facepunch can use this to attack a Monster he's Adjacent to. Divine Hammer causes 3 Attack Dice of damage, which Monsters can defend.
Equipment: Life Potion. This can be used to bring you back up to 1 Health if you ever reach 0 Health points.
Play Sheet
This Play Sheet is a quick guide to all things that can be performed during the Adventure, and all other game mechanics.
Rounds and Turns
Gameplay consists of rounds and turns. Each round, every player or Monster on the board can take their turn. When all players and Monsters have taken their turn, the round ends, and a new one begins.
A Player or Monster may Move and take an Action on his turn. Or, take an Action and then Move.
Actions
During a turn, a player or Monster performs Actions. Actions are listed below.
Attack
To Attack, a Hero rolls his Attack Dice. (Attack Dice are the sum of his Beef and Weapon Damage.) The successes are counted. When an Attack is made, the one being hit rolls Defend Dice (Zip + Armor Value). No Heroes have Armor in this Adventure, so they just use their Zip as their Defend Dice.
Monsters always use their Beef to attack and Zip to defend.
Cast a Spell
Fleming and Father Facepunch can both use Spells. They each have 2 Spells, and can cast an amount of Spells equal to their Smarts.
Disarm a Trap
Chunk can disarm traps. If he's found a trap and wants to disarm it, he must move adjacent to it and roll a die. On a success, the trap is rendered useless. On a failure, the trap goes off, causing damage to the Rogue.
Move
During a Move, all Heroes and Monsters can move 6 spaces. Once a Hero or Monster takes an Action (not a Free Action), his Move ends and he cannot keep moving.
Free Actions
Stuff you can do at any time, as many times as possible, are Free Actions. Drinking a Potion and opening doors are Free Actions.