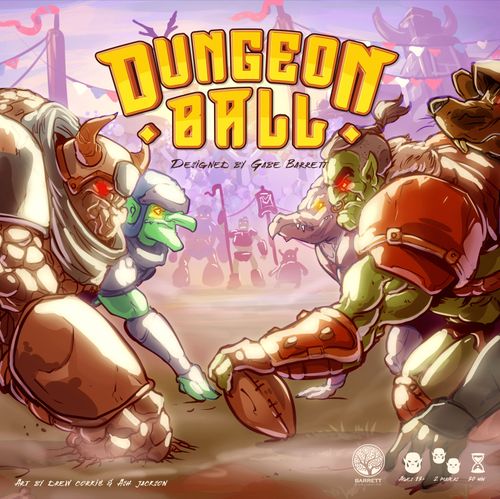
Dungeon Ball
Dungeon Ball Rulebook
Table of Contents
Table of Contents
Setup
- Place the game board within easy reach of both players. Place the scoreboard/time track and number tokens within easy reach. Place the white cube on the "20" and the black cube on the "9".
- Place the box lid with the field goal post printed inside it near the players.
- Give each player a play selection board, a pawn, and six square defense cards in their preferred color. Place the pawn on the center square of the play selection board.
- Choose a team by taking that team's five special ability cards and then place them face down in front of you.
- Flip a coin to determine who gets the ball first. The younger player chooses heads or tails before the coin is flipped. The winner of the toss decides whether to start the game on offense or defense. Give the coin to the player who starts on defense. They'll begin the second half of the game on offense.
- The player starting on defense must select which end zone (the area at the end of each side of the field) is theirs. The other end zone will belong to the player starting on offense. Your end zone will not change throughout the game. You will begin drives on the red circle icon closest to your end zone, and you will attempt to score touchdowns and field goals on the opposite end of the field.
- Place the football die (with the number 1 face-up on the die) on the red circle with the football icon in it that is closest to the offensive player's end zone.
- Give the offensive player the seven white dice, and give the defensive player the black die.
- Give each player three lightning bolt-shaped momentum tokens.
- The game is ready to begin.
On a Turn
As the offense, you have four "downs" or opportunities to score while you have the ball. A set of four downs is called a "drive." You'll select plays and roll dice in order to move down the field. But the defense will be trying to outwit you and keep you from scoring. A turn plays out in the following order:
- The defense selects a defense card from their hand of six and plays it face down in front of them.
- The offense moves the pawn on their play selection board to select a play that is directly adjacent to the square it currently occupies. You cannot stay in the same place, and you cannot move diagonally.
- The defense reveals their card. If the color matches the offensive play, the defense receives one momentum token, and the offense loses the number of dice shown on the defense's card. If the color does not match, the offense adds the shown number of dice to their roll.
- The offense now rolls the white dice. You start with five and then adjust up or down based on the outcome of step three.
- The offense may roll the dice a maximum of two times. Keep any number of dice after the first roll and reroll the rest. Time icons cannot be rerolled. Set aside all dice showing time icons.
- At this time, ability cards may be played. The defense gets to play a card first. (Ability cards are explained in depth in the Ability Cards section.)
- After ability cards are played, compare the icons on the dice with the requirements of the play you selected (Red plays need one cleat, Yellow plays need two balls, Blue plays need three balls). Move the football die to the next space on the field, matching the selected play's color, once for each time you meet the play's requirements. Example: A yellow play was selected (two ball icons needed) and the offensive player rolls 3 ball icons. The offensive player moves the football die to the next yellow space because the yellow play's requirement was met one time. Later in the game a blue play is selected (three ball icons needed) and the offensive player rolls six ball icons. In this case the offensive player moves the football die two blue spaces because the requirement was met two times.
- Reduce the time track by one for every time icon that was set aside in step 5.
- Increase the value of the football die by one to indicate the next down. If the football die was on 4 and the offense didn't score, the defense now becomes the offensive player and takes over where the football die is with it reset to one; otherwise, return to step one.
Time
When a time icon is rolled, set the die aside. You cannot reroll this die during this play. At the end of your turn, subtract one time from the time track for every time icon that was rolled.
Halftime
When time hits zero the first time, the first half is over. The player who started the game on defense now gets the ball on offense from their starting space. Place the white cube back on the 20 and the black cube back on the 9.
Final play of a half, end of game
When time runs out in a half, the offensive player may choose to run one more play per the normal rules. If time icons are rolled during this play ignore them, but they still may not be rerolled. After this play, the half is over.
If the first half has just ended, the player who started the game on defense now gets the ball on offense from their starting space. Place the white cube back on the 20 and the black cube back on the 9.
If the second half has just ended, the game is over. The player with the most points wins. (If the game is tied, refer to the Overtime rules.)
Hail Mary Passes
If there is no time left on the clock at the end of the half or the end of the game, the offensive player may run one final play. They may choose to run a play like normal or attempt a Hail Mary pass.
If they choose to attempt a Hail Mary, they roll five white dice attempting to roll five ball icons. They get one reroll and may reroll any number of dice. (Time icons may be rerolled.) No ability cards may be played. If all five dice show the ball icon after the rolls, the pass scores a touchdown and is followed by an extra point or two-point conversion attempt.
Momentum
Momentum allows you to play ability cards to be able to affect the game in various ways. You gain momentum tokens in four ways.
- You begin the game with three tokens.
- You gain one token at the beginning of every drive. (Offense and defense.)
- On defense, gain one token every time you correctly guess the color of the next offensive play.
- On offense, gain one every time you finish a roll with a lightning icon showing. Gain one per icon.
Ability Cards
Ability cards may be played at different times to affect the game. To play an ability card, you must discard the indicated number of momentum tokens found in the card's top left corner.
Cards with a star icon may only be played once during the game. Discard them after use.
Cards with a 1/2 icon may only be played once per half. After playing them in the first half, place them face down in front of you. At halftime, place them back into your hand. After playing them in the second half, discard them from the game.
If you're on offense, you may only play offensive cards. If you're on defense, you may only play defensive cards.
When to play a card
Cards with a whistle icon must be played before the offense selects a play to begin a down or right after a down is resolved.
All other cards must be played after the offense is finished rolling their dice but before the football die moves down the field. The defense gets the first opportunity to play a card and resolve it. After the defense's card is played, or after the player declines to play a card, the offense may play a card. This may continue back and forth until a player declines to play a card. A player may not play two cards in a row.
Abilities
Many cards explain their ability on the card. Offensive cards with any icons on them add those icons to your die roll.
Many Defensive cards cause the defensive player to roll the black defense die. If the icon rolled matches an icon on the card, carry out the ability.
Player Board Abilities
The two card abilities found on the play selection boards are always available to play after the offense finishes rolling their dice, assuming you're able to pay the momentum cost. Juke allows the offense to re-roll a die (except for time icons). And Big Hit gives the defense a chance to either discard one of the offense's dice or move the offense back a space or two. These abilities may only be used once per play.
Punting
On fourth down, before selecting a play, if you are unable or don't want to attempt to score a touchdown or field goal, you may elect to punt the ball. To do so, simply place the football die on your opponent's starting space with the one side up. You're now on defense, and they're now on offense.
This is a good way to avoid giving your opponent good field position.
Scoring
Whenever the football die lands on (or what would be beyond) one of the final spaces on the board (blue, red, or yellow), this is considered to be a touchdown, and the offense gains six points. The offense then either chooses to attempt an extra point or attempts a two-point conversion. After that, the defensive player becomes the offense and starts a new drive.
Field Goals
If you are able to move the football die so that it lands on or past the red circle near your opponent's end zone with the field goal post icon on it, you may attempt a field goal (explained below) instead of selecting a play. If the field goal attempt is successful, you gain three points.
Whether it is successful or not, the defensive player becomes the offensive player and begins a new drive from their starting space.
Extra Points
After scoring a touchdown, the offensive player must attempt either an extra point or a two-point conversion. An extra point is worth one point if it is successful. A two-point conversion is worth two points if it is successful. Whether it is successful or not, the defensive player becomes the offensive player and begins a new drive from their starting space.
How to Kick Field Goals and Extra Points
There are two ways to kick field goals and extra points. One is skill-based (or dexterity-based), and the other is luck-based (or dice-based). You must select the way you're going to play before the game begins. Players may select different methods.
Skill-Based
Place the box lid with the field goal post printed inside of it so that it is in front of you. Then, take the football die and toss it into the box. If the football die lands inside the green area shown on the lid, the kick is good. If it does not land inside that area, the kick is no good.
If the football die lands on one of the field goal posts (aka uprights), the die must be at least halfway inside the posts to be good.
When tossing the football die, you must release it before your hand crosses over the box.
Luck-Based
To kick a field goal, start with five white dice. Subtract one die for every red space between where the ball currently is on the field and the field goal post you're aiming for. (The most dice you can roll is four; the least is one.)
Roll the dice. As long as you roll at least one ball icon, the kick is good.
To kick an extra point, roll four white dice. As long as you roll at least one ball icon, the kick is good.
Two-Point Conversions
After scoring a touchdown, you may choose to go for two points instead of kicking the extra point. If you do this, place the football die on the football icon closest to your opponent's end zone and run a play like normal. Choose a play based on where your pawn was when you scored the touchdown. If you're able to move enough spaces to get into the end zone, you gain two points.
Whether you score or not, the defense gets the ball on their starting space, and they become the offense.
Onside Kicks
If the time track is at five or less in the second half, and the offense scores but is still losing, they may choose to do an onside kick to attempt to get the ball back.
If the offense chooses to do an onside kick, they roll five white dice attempting to roll five ball icons. They get one reroll and may reroll any number of dice. (Time icons may be rerolled.) If all five dice show the ball icon after one or two rolls, that player continues as the offensive player and starts a new drive with a new set of downs from the blue space at midfield in front of the orange doorway.
If the onside kick is unsuccessful, subtract one from the time track, and the player that was just on defense begins a new drive on offense from the blue space at midfield in front of the orange doorway.
Overtime
If both teams are tied when time runs out, you will go into overtime. For overtime, each player will receive an opportunity to play offense to try to score.
Similar to how the game started, flip a coin to determine which player gets the ball first. That player begins a new drive like normal. When their drive is over, the other player gets one drive to either tie or win.
After the second drive, if the game is still tied, the players go into a second overtime and repeat the process until there is a winner. However, the starting player alternates. The player that began the first overtime on offense will begin the second overtime on defense.
In overtime, ability cards do not refresh, and time icons on the dice do not matter. However, they still can't be re-rolled.
Solo Mode
To play the game by yourself, you'll need the deck of AI cards to simulate your opponent.
The game plays out the same as in multiplayer mode, but you'll use the AI deck any time you need to make a decision about what your opponent does. Whenever a decision for the AI must be made, simply draw the top card of the AI deck.
Setup
Follow the same setup rules above, but for your opponent, you only need the AI deck. The AI will use your play selection board when it's on offense.
There are three different teams of varying difficulty you can play against. You can add these teams' cards to the AI deck for more of a challenge, or you can choose not to for a simpler game.
- Level I: Just the AI cards
- Level II: (mimic)
- Level III: (spider)
- Level IV: (skull)
- Level V: two teams
- Level VI: three teams
To play against one of the AI teams, first randomly remove six cards from the AI deck before shuffling in the cards for that team. (It will be twelve or eighteen cards if you're on level V or VI.) Then, the game is ready to begin.
How to Play
You'll follow the same pattern of play as the multi player game.
When the AI is on offense, draw the top card of the AI deck, and use the icons in the top left corner to determine which offensive play the AI selects by taking the first valid movement (up in this case) and moving the AI's pawn to that play.
If you played a defense card that is the same color as the offensive play, then the AI does not advance on offense, and the football die increases by one.
If you did not play a defense card of the same color. Move the football die down the field the indicated number of spaces found in the bottom left corner of the AI card. If the play is blue or yellow, use the number next to the ball icon. If the play is red, use the number next to the cleat icon. (So in this case, if the AI chose a blue play, you would move the ball down the field two blue spaces.)
Whether the AI player moves down the field or not, subtract the indicated number of time (next to the stopwatch icon) from the clock.
Whenever it is fourth down, if the AI is in field goal range, it will always attempt to kick a field goal. (Unless it could score a touchdown to win the game.) To attempt a field goal (or extra point) draw the top card of the AI deck. If there is a checkmark in the top right corner, the kick is good. If there is an X, the kick is no good.
If it's fourth down, and the AI is not in field goal range, it will always punt.
When you're on offense, select your play, and then draw the top card from the AI deck. If the defensive play in the bottom right corner matches the color of the play you chose, subtract the indicated number of dice from your roll. If it does not match, add the indicated number of dice to your roll.
After drawing an AI card for any reason, place it into a discard pile. If you ever run out of AI cards, shuffle the discard pile and continue.
Ability Cards
The AI does not have ability cards.
You may play an offensive ability card after you roll the dice just like in the multiplayer game.
You may play a defensive ability card that doesn't have a whistle after a play in which you guessed the offense's play correctly. A card with a whistle may be played before or after an offensive play. Please note that defense cards that affect offensive dice have no effect.
AI Team Icons
- (double defense) - This card counts as both defense cards. If either matches the color of the play you chose, subtract the indicated number of dice.
- (-#) - Lose the indicated number of dice from your roll no matter what play you chose.
- (turnover) - The AI is now on offense from the current spot of the ball. No die roll is necessary.
All AI abilities happen before you roll the dice for a play.