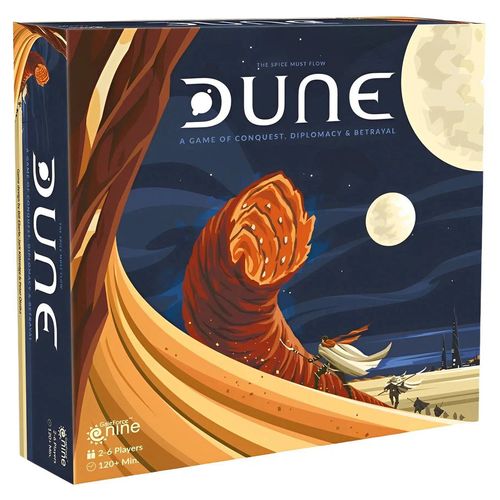
Dune
Dune Rulebook
Table of Contents
Table of Contents
Factions
You will be one of these factions:
Atreides — The Atreides, led by the youthful Paul Atreides (Muad'Dib) — rightful heir to the planet, gifted with valiant lieutenants and a strange partial awareness of the future, but beset by more powerful and treacherous opponents.
Bene Gesserit — The Bene Gesserit Sisterhood, represented by Reverend Mother Gaius Helen Mohiam — ancient and inscrutable, carefully trained in psychological control and a genius at achieving her ends through the efforts of others.
Emperor — The Emperor, his majesty the Padishah Emperor Shaddam IV — keen and efficient, yet easily lulled into complacency by his own trappings of power.
Fremen — The Fremen, represented by the planetary ecologist Liet-Kynes — commanding fierce hordes of natives, adept at life and travel on the planet, and dedicated to preventing any outside control while bringing about Dune's own natural regeneration.
Spacing Guild — The Spacing Guild, represented by steersman Edric (in league with smuggler bands) — monopolist of transport, yet addicted to ever increasing spice flows.
Harkonnen — The Harkonnens, led by the decadent Baron Vladimir Harkonnen — master of treachery and cruel deeds.
In the DUNE game, you can explore many of the possible interactions that might have taken place among these fascinating factions, each with their own drives, needs, and special advantages.
DUNE has been divided into a Basic and Advanced Game. Learn and play the Basic Game several times before venturing into the Advanced Game.
Game Components
Game Board
The game board is a map of the planet Dune showing four types of territories:
- Sand: Yellow or tan with a single border.
- Rock: Brown with double borders.
- Strongholds: Red brown with triple borders.
- Polar Sink: Mottled white with a double border.
Some territories are marked with a Spice Blow icon to show the locations of possible Spice Blows.
The map is also divided by longitude lines into eighteen sectors, which extend from the edge of the Polar Sink to the equator at the edge of the board. Sectors control the way the storm moves around the board.
There are six player circles around the map to help determine play order. The map also includes a Turn Track and the Tleilaxu Tanks for holding dead leaders and forces awaiting revival.
Rulebook, Quick Start Guide, & Quick Reference cards
The Rulebook contains the Basic Game and Advanced Game Sections as well as Strategy Hints, Q&A, and Dune Synopsis. There are 6 sequence of play quick reference cards to help you keep track of the order that everything happens in a turn.
Battle Wheels
The game includes 2 Battle Wheels, which must be assembled and joined with the center pin before you play the game.
Six Player Faction Sets
Each set is composed of 5 types of components:
- A Player Shield bearing the main character of the faction and its emblem.
- A single or double-sided Player Sheet describing the faction character's basic and advanced game advantages.
- Player Markers for each faction: Atreides (green), Bene Gesserit (Blue), Emperor (Red), Fremen (Sand), Spacing Guild (Orange), Harkonnen (Black).
- 5 large discs — each showing a leader and the leader's fighting strength.
- 20 small tokens called forces (starred forces have no significance in the Basic Game).
All components of each player set have the same color for identification.
Tokens
- 156 Spice Tokens (48 each of 1 and 2, 36 of 5, and 24 of 10)
- Destroyed Shield Wall Token
- Storm Marker
- Game Turn Counter
Advanced Game Components
- 5 Special Emperor forces: 5 of the Emperor's forces are printed with a star on them. These forces are worth twice their normal value.
- 3 Special Fremen forces: 3 of the Fremen forces are printed with a star on them. These forces are worth twice their normal value.
- Bene Gesserit forces (Fighters / Advisors): The Bene Gesserit forces are printed with two different images to differentiate between spiritual advisor forces and normal forces.
- Kwisatz Haderach Card and Counter tokens: This card and token are used by the Atreides, and add 2 points of additional strength to a leader.
- Sandworm Token: For use with the Fremen advanced game advantage.
Six Decks of Cards
- Spice Deck (21 cards): Tells where Spice Blows will create treasure troves of spice waiting to be harvested, and when the giant sandworms known as Shai-Hulud will turn up.
- Treachery Deck (33 cards): Provides weapons, defenses, tricks and tools to outmaneuver opponents and win battles.
- Traitor Deck (30 cards): With 1 card for each Leader Disc, these are leaders from other factions that you have subverted.
- Bene Gesserit Prediction Deck (16 cards): With 1 card for each of the 6 factions and 10 cards for turns 1 to 10, these predict who will win the game.
- Alliance Deck (6 cards): To remind you how your Alliance benefits you.
- Storm Deck (6 cards): For use with the Fremen advanced game advantages.
Basic Game
Object of the Game
Each faction has a set of unique economic, military, strategic, or treacherous advantages. The object of the game is to use these advantages to gain control of Dune. The winner is the First Player to occupy at least 3 strongholds with at least one of their forces during the Mentat Pause Phase.
A player may win alone or in an Alliance with other players.
Set-Up for Play
Place all spice tokens in the Spice Bank.
The Spice Deck and Treachery Deck are shuffled and placed face down next to the game board. Played cards will be piled face up next to the decks as discards and reshuffled to restock the Spice Deck and Treachery Deck as necessary.
Players now choose factions. Here are a couple of ways for players to choose their faction:
- Use the faction cards from the Prediction Deck to randomly determine what faction each player will play. Shuffle the cards and deal 1 card to each player, or
- Each player randomly draws a card from the Bene Gesserit turn prediction cards and selects a faction in the order of their drawn card, with the highest card choosing first.
Players may swap factions with each other at this point if they wish.
Players take their Player Shields and player sheets and set up their factions as follows.
- Positions. Players place their Player Marker on the player circle closest to their shield and seat at the table.
- Traitors. Remove the cards for all factions that are not in play from the Traitor Deck. Then shuffle the cards thoroughly. Each player is dealt 4 cards. Each player then secretly selects 1 card to keep. If a player draws any leaders from an opponent's faction, they can choose 1 leader to become their traitor. If they drew no opponent leaders, they can protect one of their own leaders. Either way, each player places their chosen card face down behind their shield, returning the other cards face down to the bottom of the Traitor Deck.
- Spice. Spice equal to the amount indicated on each player sheet is removed from the Spice Bank and placed behind each shield.
- Forces. Each player's forces are placed on the board as indicated by their player sheet. All forces in reserve are placed next to your shield.
- Treachery. 1 card from the Treachery Deck is dealt to each player.
- Turn Marker. Place the turn marker at 1 on the Turn Track.
Note: A faction has special advantages that may contradict the rules. A faction's particular advantages always have precedence over the rules.
Two & three player games
For a three player game, recommended factions are Atreides, Harkonnen, and Fremen. In a three player game an Alliance needs 4 strongholds to win, as in the standard Alliance rules.
For a two player game, try Atreides vs Harkonnen, or play 2 factions each (select factions normally as described above). In a two player game, the number of strongholds needed to win is increased to 4.
Four & Five player games
For 4 player, consider leaving out both the Spacing Guild and Bene Gesserit, while for 5 player games try playing with no Bene Gesserit.
Sequence of Play
DUNE is played in turns to a maximum limit of 10 turns. Each turn is composed of nine specific phases that must be completed in the exact sequence presented below.
- Storm Phase — The Storm Marker is moved around the map. The faction whose Player Marker the storm next approaches will be the First Player for this turn.
- Spice Blow and NEXUS Phase — The top card of the Spice Deck is turned over and the amount of spice shown on the card is placed in the highlighted territory. If Shai-Hulud appears during the Spice Blow Phase, a Nexus occurs and the players have the opportunity to make and break Alliances.
- CHOAM Charity Phase — Players with 0 or 1 spice may claim CHOAM Charity.
- Bidding Phase — Players bid spice to acquire Treachery Cards.
- Revival Phase — All players are allowed to reclaim forces and leaders from the Tleilaxu Tanks.
- Shipment and Movement Phase — Starting with the First Player and proceeding counterclockwise, each player in turn ships forces down to the planet or brings in forces from the southern hemisphere (Fremen) and then moves their forces on the game board.
- Battle Phase — Players must resolve battles in every territory that is occupied by forces from two or more factions.
- Spice Harvest Phase — Forces in territories that contain spice may collect the spice.
- Mentat Pause Phase — Factions either declare a winner (or winners) or take some time to evaluate their positions on the map and then move the Turn Counter to the next position on the Turn Track to begin the next turn.
Phase 1: Storm
First Storm
The first time the storm is moved, the Storm Marker is placed at a random location along the map edge using the following procedure. The two players whose player circles are nearest on either side of the Storm Start Sector will secretly dial a number from 0 to 20 on the wheels. The two numbers are simultaneously revealed, totaled and the Storm Marker moved from the Storm Start sector counterclockwise around the map for the sum total of sectors.
Storm Movement
In all subsequent Storm Phases, the two players who last used the Battle Wheels will independently dial a number from 1 to 3, simultaneously reveal their numbers, add them together, and then advance the Storm Marker from its current position counterclockwise around the map for the sum total of sectors.
Damage
Any forces in a sector of sand territory (except the Imperial Basin) over which the storm passes or stops are killed. Place these forces in the Tleilaxu Tanks. Forces that are not on a sand territory find protection from the storm. In addition any spice in a sector over which a storm passes or stops is removed to the Spice Bank.
Obstruction
Forces may not move into, out of, or through a sector in storm. Forces may not battle if either force is in storm.
First Player
The player whose Player Marker the storm next approaches is the First Player in the Bidding Phase, Shipping Phase, and Movement Phase.
Phase 2: Spice Blow and Nexus
Top Card
The top card of the Spice Deck is turned over.
First Turn
During the first turns Spice Blow Phase only, all sandworm cards turned over are ignored and set aside, then reshuffled back into the Spice Deck after this phase.
Territory
This is a Spice Blow. The amount of spice indicated on the card is taken from the Spice Bank and placed onto the territory in the sector containing the Spice Blow icon. Then this card is placed face up on the Spice Deck discard pile. (If the Spice Blow icon is currently in storm, no spice is placed that turn.)
Shai-Hulud
A Nexus will occur after the following events:
- All spice and forces in the territory shown on the card now face up in the discard pile are removed to the Spice Bank and Tleilaxu Tanks respectively. Then the Shai-Hulud card is placed face up on the Spice Deck discard pile.
- Then another card is turned over. If it is a Shai-Hulud it is immediately discarded and another card is turned over. This continues until a Territory Card appears and spice is placed as defined above. The Territory Card is placed face up on the Spice Deck discard pile.
Nexus
Revealing a Shai-Hulud card after the first turn also causes a Nexus at the end of the phase. In a Nexus, Alliances can be formed and broken. (See Alliances.)
Phase 3: CHOAM Charity
Any player with 0 or 1 spice can collect spice to bring their total to 2 by calling out "CHOAM Charity."
Phase 4: Bidding
Declaration
Before bidding starts, all players must declare how many Treachery Cards they hold. The hand limit is 4. Players with 4 cards must pass during bidding.
Dealer
One of the players deals cards from the Treachery Deck face down in a row, 1 card for each player who is allowed to bid.
Auction
The first card in the row is now auctioned off for spice.
- The bidding is started by the First Player. If that player already has 4 Treachery Cards the next player to the right who does not have 4 Treachery Cards opens the bidding.
- The player who bids first must bid 1 or more spice or pass. Bidding then proceeds to the bidder's immediate right. The next bidder may raise the bid or pass and so on around the table until a top bid is made and all other players pass. The top bidding player then pays the number of spice they bid into the Spice Bank and takes the card.
Bid Limit
Players may not bid more spice than they have.
Next Starting Bidder
In subsequent bidding during this phase, the First Player who can bid, to the right of the player who opened the bid for the previous card, begins the bidding for the next card. In this way every player who can bid gets a chance to open the bidding for a Treachery Card.
End of Bidding
Bidding for Treachery Cards continues until all cards available for bid have been auctioned off or a card is not bid on by anyone. If a card is passed on by everyone, all remaining cards are returned to the top of the Treachery Deck and the Bidding Phase is over.
Transparency
The number (not the type) of Treachery Cards each player holds must always be open to everyone during the Bidding Phase. No one is allowed to hide the number of cards that they hold. A player can never have more than 4 cards in their hand at any one time. If they have a full hand, they must pass on all cards up for bid.
Time Limit
Each player must bid within 10 seconds of the previous player or they are assumed to have passed.
Phase 5: Revival
Force Revival
All players may now revive up to 3 forces from the Tleilaxu Tanks.
- Free: A certain number of forces are revived for free as stated on the player sheet.
- By Spice: Any additional forces that may be revived must be done at a cost of 2 spice per force. All spice expended for force revival is placed in the Spice Bank.
- Limit: A player can never revive more than 3 forces per turn.
- To Reserves: Revived forces must be placed in the player's reserve.
Leader Revival
If all 5 of a player's leaders are in the Tleilaxu Tanks they may revive 1 leader per turn until all of their leaders have been revived.
- Fighting Strength: To revive a leader, a player must pay that leader's fighting strength in spice to the Spice Bank.
- Revived Leader Status: A revived leader can be played normally and is still subject to being a traitor.
- Dead Again: If a revived leader is killed again, place it face down in the Tleilaxu Tanks. This leader cannot be revived again until all of the player's other revivable leaders have been revived, killed, and sent to the Tleilaxu Tanks again.
Phase 6: Shipment and Movement
The First Player conducts their Force Shipment and then Force Movement. Play then proceeds to the right until all players have completed this phase.
Force Shipment
Shipment of Reserves. A player with off-planet reserves may make one shipment of any number of forces from their reserves to any one territory on the map.
Payment. A player must pay spice to the Spice Bank for their shipment. The cost of shipping off-planet reserves is 1 spice per force shipped into any stronghold and 2 spice per force shipped into any other territory.
Sectors. When shipping into a territory lying in several sectors, a player must make clear in which sector of the territory they choose to leave their forces.
Exceptions:
- Storm: No player may ship into a sector in storm.
- Strongholds: No player may ship into a stronghold already occupied by two other players.
- One Way: No player may ship forces from the board back to their reserves.
Force Movement
Each player may move, as a group, any number of their forces from one territory into one other territory. Forces are free to move into, out of, or through any territory occupied by any number of forces with certain restrictions and additional movement advantage mentioned below.
Ornithopters. A player who starts a force move with one or more forces in either Arrakeen, Carthag, or both has access to ornithopters and may move forces through up to three adjacent territories. The forces moved do not have to be in Arrakeen or Carthag to make the three territory move. Thus, for example, a player with one or more forces in Arrakeen would be able to move forces starting in Tuek's Sietch through Pasty Mesa and Shield Wall to the Imperial Basin, where they must stop.
One Adjacent Territory. A player without a force in either Arrakeen or Carthag at the start of their move does not have access to ornithopters and can only move their forces by foot to one adjacent territory.
One Force Move. Each player may make only one force move per turn.
Sectors. Sectors have no effect on movement. Forces can move into or through a territory ignoring all sectors. A sector's only function is to regulate the movement and coverage of the storm and spice collection.
Storm. As defined above in the Storm Phase section, no force may move into, out of, or through a sector in storm. Many territories occupy several sectors, so that a player may move into and out of a territory that is partly in the storm, so long as the group does not pass through the part covered by the storm.
- When ending a move in a territory lying in several sectors, a player must make clear in which sector of the territory they choose to leave their forces.
- The Polar Sink is never in storm.
Stronghold Blocking. Like shipment, forces cannot be moved into or through a stronghold if forces of two other players are already there.
Phase 7: Battles
Battle Determination
Wherever two or more players' forces occupy the same territory, battles must occur between those players. Battles continue until just one player's forces or no forces remain in all territories on the map with two exceptions:
- Players cannot battle one another in a territory if their forces are separated by a sector in storm. Their forces can remain in the same territory at the end of the phase.
- Players cannot battle in the Polar Sink. It is a free haven for everyone.
First Player
When resolving battles, the First Player is named the aggressor until all of their battles, if any, have been fought. The aggressor chooses the order in which they wish to fight their battles. Then the player to their immediate right becomes the aggressor and so on, until all battles are resolved.
If three or more players are in the same territory, the aggressor picks who they will battle first, second, etc. for as long as they survive.
Battle Plan
To resolve a battle, each player must secretly formulate a Battle Plan. A Battle Plan always includes the number of forces dialed on the Battle Wheel. If possible, it must include a faction's leader or cheap hero. It may include Treachery Cards at the player's discretion.
Battle Wheel. Each player picks up a Battle Wheel and secretly dials a number from zero to the number of forces they have in the disputed territory. Both players will lose the number of forces dialed on the Battle Wheel.
Leaders. One Leader Disc is selected and placed face up in the slot on the wheel. A Cheap Hero Card may be played in lieu of a Leader Disc.
- Leaders that survive battles may fight more than once in a single territory if needed, but no leader may fight in more than one territory during the same phase.
- A player must always play either a leader or a cheap hero card as part of their Battle Plan if possible.
- If it is not possible, they must announce that fact.
No Treachery. A player with no leader or cheap hero must still battle, but they cannot play any Treachery Cards as part of their Battle Plan. (This situation can occur when a player does not have a cheap hero and all their leaders are in the Tleilaxu Tanks or have fought in another territory in that phase.)
- When a player plays a cheap hero, their total is simply the number of tokens on the dial, but the option to play weapon, defense, or worthless cards is still available to them.
Treachery Cards. Players with a leader or cheap hero may play a Weapon Treachery Card, Defense Treachery Card, or both by holding them against the wheel. They may play no Treachery Cards as well.
Revealing Wheels. When both players are ready, the Battle Plans are revealed simultaneously.
Battle Resolution
Winner. The winner is the player with the higher total of number dialed on the Battle Wheel, plus their leader's fighting strength.
No Ties. In the case of a tie, the aggressor has won.
Weapons. If a player's opponent played a Weapon Treachery Card and the player did not play the proper Defense Treachery Card, the player's leader is killed and cannot count toward their total. Both leaders can be killed and neither count in the battle. When a player plays a cheap hero, their total is simply the number of forces they dial, but they can play weapons or other Treachery Cards.
Killed Leaders. Any leaders killed are immediately placed face up in the Tleilaxu Tanks. The winner immediately receives their value (including their own leader, if killed) in spice from the Spice Bank.
Surviving Leaders. Leaders who survive remain in the territory where they were used until all battles in other territories have been resolved. Then they are retrieved by their owners.
Losing. The losing player loses all the forces they had in the territory to the Tleilaxu Tanks and must discard every Treachery Card they used in their Battle Plan. Note that the loser does not lose their leader as a result of battle. Leaders are killed only by Weapon Treachery Cards.
Winning. The winning player loses only the number of forces they dialed on the Battle Wheel. These forces are placed in the Tleilaxu Tanks. The winning player may also keep or discard any of the cards they played.
Traitors
If you are in a battle and your opponent uses a leader that matches a Treachery Card you control, you may call out "Treachery!" and pause the game. The Traitor Card is revealed.
The Player Who Revealed the Traitor Card
- immediately wins the battle
- loses nothing, regardless of what was played in the Battle Plans (even if a lasgun and shield are revealed)
- places the traitorous leader in the Tleilaxu Tanks and receives the traitorous leader's fighting strength in spice from the Spice Bank.
The Player Whose Traitor Was Revealed
- loses all of their forces in the territory
- discards all of the cards they played
Two Traitors. If both leaders are traitors, each a traitor for the opponent, both players' forces in the territory, their cards played, and their leaders, are lost. Neither player gets any spice.
Phase 8: Spice Collection
Any player with forces in a sector of a territory in which there is spice may now collect that spice. This is done by taking the spice tokens you are entitled to from the territory and placing them behind your shield. The collection rate is 3 spice per force if the player occupies Carthag or Arrakeen. It is 2 spice per force if the player does not occupy Carthag or Arrakeen.
Uncollected spice remains where it is for future turns.
Phase 9: Mentat Pause Phase
If one player occupies 3 strongholds with at least one of their forces during the Mentat Pause Phase, that player wins the game.
If the required number of strongholds is 4 and the two players in an Alliance separately occupy a total of at least 4 strongholds with one or more forces at the end of a turn, that Alliance wins the game. For example, if the Atreides are in an Alliance with the Fremen, and the Fremen occupy Sietch Tabr and Carthag and the Atreides occupy Tuek's Sietch and Arrakeen during the Mentat Pause Phase, they win the game together.
If there are no winners, players mull over their positions on the board, consider their options and, when they are ready, move the turn marker to the next position on the Turn Track to begin the next turn.
Alliances (Nexus)
Once a Shai-Hulud (sandworm) card is turned over on the second or subsequent turns, at the end of the Spice Blow and NEXUS Phase, a Nexus occurs. During a Nexus, all players have a chance to make, join or break Alliances. Once players have had a chance to do so, play continues.
Forming an Alliance
Basics. No more than two players may be in an Alliance and the win condition is now 4 instead of 3 strongholds.
Discussion. Players may discuss among themselves the advantages and disadvantages of allying, and with whom.
Transparency. The members of the Alliance must be revealed to all. Alliances cannot be secret. Swap Alliance Cards as a reminder of who are in an Alliance.
Limits. Several Alliances can be formed during a Nexus, but no player can be a member of more than one Alliance. Once all players have had a chance to ally, no further Alliances can be made until the next Nexus.
Breaking An Alliance
Breaking. Any player may break an Alliance during a Nexus. Players just announce that they are breaking from an Alliance.
Joining Another. Players who break from an Alliance have an opportunity to immediately join or form a new Alliance.
How an Alliance Functions
Winning. Allied players' forces are considered the same for the purposes of victory. If together their joint forces hold 4 strongholds in the Mentat Pause Phase, they have jointly won the game.
Constraint. Allies may not enter any territory (except the Polar Sink) in which one of their allies already has a force and, thus, may never battle one another.
Note: If for any reason two factions who became allies during the last turn occupy the same territory at the beginning of the next turn, one of those factions must move out of that territory during the Shipment and Movement Phase. If the first faction to ship and move does not move out of the territory, the second faction must move out or lose those forces to the Tleilaxu Tanks.
Ally Secrecy. Allies may discuss and share strategy and information secretly at any time.
Bidding. During the Bidding Phase, allies may help each other by paying some or all of the cost of each other's Treachery Cards so that a player can bid more spice than they actually have.
Movement. During the Movement Phase, allies may pay for each other's shipments.
Shared Advantages. Allies may assist one another as specified on their player sheets.
Note, see Optional Rules for Alliances for more.
Secrecy
Players are never required to keep their cards, spice holdings, or the traitors they selected secret. They are never obligated to reveal this information either.
All spice holdings should be kept behind the Player Shield. The number of Treachery Cards held must be kept open during the Bidding Phase, but can be kept secret at all other times.
Bribery
Players who are not members of the same Alliance can make any kind of verbal deals or bribes between one another. Once made, these deals and bribes must be stated aloud and must be honored. A player cannot renege on a deal or bribe. Spice can be part of the bribe or deal.
A deal or bribe cannot involve the transfer or gift of Treachery Cards, leaders, forces, or faction advantages. This leaves secret information, future actions, and, of course, spice.
A player cannot make a deal or bribe that would contravene the rules or the player's faction powers. These are the only limitations.
Advanced Game
Introduction
The Basic Game is changed by increasing the number of Spice Blows, adding a spice advantage for holding a city or Tuek's Sietch, (the smuggler stronghold), an enhanced Karama Card, and an advanced battle system.
Increased Spice Flow
During every Collection Phase, each occupant of Carthag and Arrakeen collects 2 spice and the occupant of Tuek's Sietch collects 1 spice. To qualify for collection, a player needs to occupy the stronghold only at the time of collection. If a player occupies two of these strongholds, they collect spice for each that they occupy.
Double Spice Blow
In Phase 2: Spice Blow and NEXUS, 2 Spice Cards will be revealed instead of just one, and there will be two spice discard piles, A and B.
First reveal one Spice Card.
Territory. If it is a territory, place spice in that territory normally. Then place the card face up on discard pile A.
Shai-Hulud. If it is Shai-Hulud, a Nexus will occur after the following events:
- Any spice and forces on a Territory Card at the top of discard pile A (if any) are lost to the Spice Bank and Tleilaxu Tanks. The Shai-Hulud card is placed on the spice discard pile.
- Then another card is turned over. If it is a Shai-Hulud it is immediately discarded on pile A and another card is turned over. This continues until a Territory Card appears and spice is placed as defined above. The Territory Card is placed face up on spice discard pile A.
Nexus. Then a Nexus occurs.
Now reveal the second spice card and repeat the above procedure using discard pile B.
Advanced Combat
Spice now plays an important role in the combat procedure.
- Each force used in a battle is valued at its full strength if 1 spice is expended to support it. A force used in a battle that is not supported by 1 spice is valued at half strength.
- When creating a Battle Plan, a player must add the amount of spice they plan to expend in the battle to their Battle Wheel. If a traitor comes up, the winner does not have to expend any spice. Otherwise, spice used in the Battle Plan must go to the Spice Bank, win or lose.
When dialing a Battle Plan, one-half increments can be indicated by lining up the line between the numbers with the line under the window of the Battle Wheel.
When the battle winner takes losses, the player may do so in any manner as long as it agrees with the strength dialed and the spice expended.
For example, the Emperor player has 1 Sardaukar (worth 2 forces) and 5 ordinary forces in a territory in battle. The Emperor dialed a strength of 3 and expended 1 spice.
The Emperor player wins the battle, and they may choose to lose 1 Sardaukar force at full strength (2) and 2 ordinary forces at half strength (½ + ½), or, they may lose 1 ordinary force at full strength and 4 forces at half strength (½ + ½ + ½ + ½).
In one case, the player loses 1 Sardaukar and 2 ordinary forces. In the other case, the player loses 5 ordinary forces. Either choice fulfills the Emperor player's spice/strength requirement.
Advanced Karama Cards
When playing a Karama Card, a player may now use it to prevent one opponent from using one of their character's advantages or they may use it to implement their character's special Karama power once.
In addition to the regular Karama power, all factions except the Bene Gesserit gain unique one-time powers that can be used when the player plays a Karama Card. When playing a Karama Card, a player may use it to prevent one opponent from using one of their faction's advantages (as in the basic game), or they may now use it to implement their faction's special Karama power once, as described below. After play, the card is discarded.
- Atreides: You may use a Karama Card to look at any one player's entire Battle Plan.
- Emperor: You may use a Karama Card to revive up to three forces or one leader for free.
- Fremen: You may use a Karama Card to place your sandworm token in any sand territory that you wish. This is treated as a normal sandworm.
- Spacing Guild: You may use a Karama Card to stop one off-planet shipment of any one player.
- Harkonnen: You may use a Karama Card to take without looking any number of cards, up to the entire hand of any one player of your choice. For each card you take, you must give that player one of your cards in return.
Dune Strategy Tips
Players in DUNE must amass spice, convert it to effective weaponry, defenses, and other strategic aids, and then position themselves with enough forces to be able to suddenly move into key strongholds and defend them. The game will be won by daring, strategy, mobility, and treachery.
The storm is important, because it determines who is First Player. Being First Player is an advantage in battles (ties go to the First Player), but being last is an advantage in movement (surprise takeovers by the last player cannot be countered that turn).
The Spice Blow is important, because its location will help determine who gets new spice that turn. Sandworms are also vital, because only when they appear can the factions on the planet ally during the diplomatic Nexus.
The bidding determines who will gain fighting strength (or the threat of it) that turn. It is wise to have several cards at all times to keep your opponents guessing, but it is also wise if you have off-planet reserves to retain enough spice to ship more forces onto the board.
The Movement Phase determines battles, spice collection, and often the win. Players should always stay within striking distance of several strongholds, and may want to keep some forces mobile (the Polar Sink is ideal for this, as it connects to most territories by short routes and is not affected by sandworms or storms). Sometimes a player who moves last may go for the win if earlier players have left strongholds unprotected. Yet generally it is not wise to move for the win unless you can defend your forces against all players within range.
Battles are the key test of strength. With good weapons and defenses, and a good memory for what other players have, a player can swiftly reverse the balance of strength in the game. Strategic players will carefully watch what weapons and defenses have been played and discarded or retained, and by whom. They will also remember what leaders they can trust, and pit themselves when they can against a player who has one leader who they know is a traitor.
Since the loser must discard their cards and the winner may keep theirs as well as render up any killed leader for their value in spice, battles are the turning point of the game. However, since worthless cards can only be discarded by playing them in battle, often a player with several will send one force against a large force, sacrificing a leader to rid themselves of the cards. In such a case, the opponent may be unsure of what is going on and may spend several of their forces in an unnecessary defense.
Generally, any player with an advantage (whether it be cards, leaders, forces, or strategic advantages) is well advised to press forward and force battles.
Collection of spice is of course advantageous, especially to those who need it, but also to those who want to keep others from having it to then use for cards or shipping. But collection carries with it the risks of destruction by storm or sandworm.
Alliances will usually force an end to the game within a few turns. In larger games, it is difficult to win alone, and alliances will be necessary. It is generally wise to ally with someone who can complement your advantages. If you are strong on strategic ability but short on resources, seek an alliance with someone who has access to spice. If you are rich, look for strategy or treachery in your partner.
Faction Strategy Tips
These faction strategy tips can also be found on the back of the Player Shields.
Fremen. Your major handicap is poverty. Usually you can't purchase Treachery Cards for several turns, since the others will outbid you. You must be patient and move your forces into any vacant strongholds, avoiding battles until you are prepared. When you do battle you can afford to dial high and sacrifice your forces since they have a high revival rate and you can bring them back into play at no cost. You have the advantage of better mobility than factions without a city stronghold, and you have good fighting leaders. Your game plan will be to bide your time and wait for an accessible Spice Blow that no one else wants in order to build up your resources.
Spacing Guild. Your major handicap is your weak array of leaders and your inability to revive quickly. In addition, you usually cannot buy Treachery Cards at the beginning of the game. You are vulnerable at this point and should make your stronger moves after building up your resources. If players do not ship on at a steady rate you will have to fight for spice on the surface or collect only the isolated blows. Your major advantage is that you can ship on to Dune inexpensively and can ship from any one territory to any other. This mobility allows you to make surprise moves and is particularly useful when you are the last player in the Movement Phase. If the game is out of reach and well along, try suicide battles against the strongest players to weaken them and prevent a win until the round ends. Then the victory is yours.
Bene Gesserit. Your major handicap is your low revival rate. You must not allow large numbers of your forces to be sent to the Tleilaxu Tanks or you may find yourself without sufficient reserves to bring onto the planet. Your strengths are that you have the ability to win by correctly predicting the turn another player will win the game and then secretly working for a favorable outcome. In addition, you can be quite effective in battles by voicing your opponent and leaving them weaponless or defenseless. You can afford to bide your time while casting subtle innuendos about who you have picked to win.
Atreides. You are handicapped by the fact that you must both purchase cards and ship onto Dune, and you have no source of income other than the spice on the planet's surface. This will keep you in constant battles. Since you start from Arrakeen, you have the movement advantage of 3 from the outset, and it is wise to protect this. Your prescience allows you to avoid being devoured by the sandworms and helps you to get some slight head start on the Spice Blow. In addition, you can gain some slight advantage over those who would do battle with you by your foreknowledge of one element of their Battle Plan.
Emperor. Your major handicap is that you must ship in all of your forces at the start of the game, and often this move requires a battle before you are prepared. Even though you do not need to forage for spice on the surface of Dune often, you still are quite subject to attack since you are likely to concentrate on the cities for the mobility they give you. On the plus side, you will never need spice badly, since the bidding will keep you supplied.
Harkonnen. Your major handicap is your difficulty in obtaining spice. You are at your greatest relative strength at the beginning of the game and should capitalize on this fact by quickly buying as many Treachery Cards as you can, and then surging into battle. Since you get 2 cards for every one you bid for, you can afford to bid a little higher than most, but if you spend too lavishly at first you will not have enough spice to ship in forces or buy more cards at a later date. There is nothing so pitiful to see as a Harkonnen on CHOAM Charity. The large number of cards you may hold will increase your chances of holding worthless cards. To counteract this, you should pick your battles, both to unload cards and to flush out the traitors you control.
Faction Player Sheets
Fremen
At Start: 10 forces distributed as you like on Sietch Tabr, False Wall South, and False Wall West; and 10 forces in reserves (on the far side of Dune). Start with 3 spice.
Free Revival: 3 forces (you cannot buy additional revivals).
Advantages — You are native to Dune and know its ways.
- Shipment: During shipment, you may bring any or all of your reserves for free onto the Great Flat or onto any one territory within two territories of the Great Flat (subject to storm and occupancy rules).
- Movement: During movement you may move your forces two territories instead of one.
- Shai-Hulud: If Shai-Hulud appears in a territory where you have forces, they are not devoured. Upon conclusion of the Nexus, you may ride the sandworm and move some or all of the forces in the territory to any territory subject to storm and occupancy rules. Any forces in that territory are not devoured. If Shai-Hulud appears again and you still have forces in the original territory, you may do this again.
- Fremen Special Victory Condition: If no faction has won by the end of the last turn and if you (or no one) occupies Sietch Tabr and Habbanya Sietch and neither Harkonnen, Atreides nor Emperor occupies Tuek's Sietch, your plans to alter Dune have succeeded and you and any allies win the game.
Alliance: You may decide to protect (or not protect) your allies from being devoured by sandworms and, at your discretion, may also allow them to revive 3 forces for free during revival. In addition, your allies win with you if you win with the Fremen Special Victory Condition.
Advanced Game Advantages
- Storm Rule: Move the Storm Marker normally using the Battle Wheels on the first turn of the game. Subsequent storm movement is determined by you using your Storm Cards. You randomly select a card from the Storm Deck, secretly look at it, and place it face down on the margin of the game board. In the next Storm Phase the number on that Storm Card is revealed; the storm is moved counterclockwise that number of sectors and your Storm Card is returned to the Storm Card Deck. You then shuffle the Storm Deck, randomly select a Storm Card and look at it for the next turns storm movement, and place it face down on the margin of the game board.
- Sandworms: During a Spice Blow, all additional sandworms that appear after the first sandworm can be placed by you in any sand territory you wish. Any forces there, except yours, are devoured.
- Storm Losses: If your forces are caught in a storm, only half of them there are killed (any fractions are rounded up). You may also bring your reserves into a storm at half loss.
- Fedaykin: Your three starred forces, Fedaykin, have a special fighting capability. They are worth two normal forces in battle and in taking losses. They are each treated as one force in revival. Only one Fedaykin force can be revived per turn.
- Battles: Your forces do not require spice to count at their full strength.
Atreides
At Start: 10 forces in Arrakeen and 10 in reserves (off-planet). Start with 10 spice. Place the Treachery Deck and the Spice Deck near your player position. You manage these decks.
Free Revival: 2 forces.
Advantages — You have limited prescience.
- Bidding: During the bidding round, you may look at each Treachery Card as it comes up for purchase before any faction bids on it. You, and only you, may keep written records about cards.
- Movement: At the start of the Movement Phase, before anyone moves, you may look at the top card of the Spice Deck.
- Battle: During the Battle Phase, you may force your opponent to reveal your choice of one of the four elements they will use in their Battle Plan against you: the leader, the weapon, the defense, or the number dialed. If you choose to ask about a weapon or defense and your opponent tells you that they are not playing that element during this battle, you may not then ask to see a different element.
Alliance: You may assist your allies by forcing their opponent to show them one element of their Battle Plan.
Advanced Game Advantage
- Kwisatz Haderach: The Kwisatz Haderach card starts out inactive and may not be used. Use the Kwisatz Haderach card and counter token to secretly keep track of force losses. Once you have lost 7 or more forces in a battle or battles, the Kwisatz Haderach card becomes active for the rest of the game and may be used as follows:
- It cannot be used alone in battle, but may add its +2 strength to leaders or cheap heroes in one territory per turn. If the leader or cheap hero is killed, the Kwisatz Haderach has no effect in the battle.
- A leader accompanied by Kwisatz Haderach cannot turn traitor.
- The Kwisatz Haderach can only be killed if blown up by a lasgun/shield explosion. If killed, the Kwisatz Haderach must be revived like any other leader.
- Alive or dead, the Kwisatz Haderach has no effect on the rule governing revival of Atreides leaders.
Harkonnen
At Start: 10 forces in Carthag and 10 forces in reserve (off-planet). Start with 10 spice.
Free Revival: 2 forces.
Advantages — You excel in treachery.
- Traitors: At the start of the game when you draw 4 Traitor Cards, you keep them all including your own, and any leader cards of other factions can be revealed in a battle as a traitor.
- Treachery: You may hold up to 8 Treachery Cards. When you have 8 cards you must pass during bidding. At the beginning of the game you are dealt 2 cards instead of 1, and every time you buy a card you get an extra card for free from the Treachery Deck (unless you are at 7 cards, because you can never have more than 8 total Treachery Cards in hand).
Alliance: Traitor Cards that you hold may be used against your ally's opponent if you so choose.
Advanced Game Advantage
- Captured Leaders: Every time you win a battle, you can either randomly select 1 leader from the loser (including the leader used in the battle, if not killed, but excluding all leaders already used elsewhere that turn) and place the Leader Disc face down into the Tleilaxu Tanks to gain 2 spice from the Spice Bank; or you can keep the leader and use it once in a battle, after which, if it wasn't killed during that battle, you must return that leader to its faction. When all of your own leaders have been killed, you must return all captured leaders immediately to their factions. Killed captured leaders are put in the Tleilaxu Tanks from which their factions can revive them (subject to the revival rules). A captured leader used in battle may be claimed as a traitor.
Bene Gesserit
At Start: 1 force in Polar Sink and 19 forces in reserves (off-planet). Start with 5 spice.
Free Revival: 1 force.
Advantages — You are adept in the ways of mind control.
- Prediction: After step 1 (Positions) in the Setup Phase, you secretly predict when one other faction will win, placing a turn number card and a faction card from your prediction cards face down behind your Player Shield. Place the unused prediction cards face down back in the box. If the faction you predicted wins (alone or as an ally, even your ally) in the turn you predicted, reveal your prediction and win alone. You also can win normally. You can't predict that the Spacing Guild or Fremen will win with their special victory conditions.
- Spiritual Advisors: Whenever any other faction ships forces onto Dune from off-planet, you may ship 1 force for free from your reserves into the Polar Sink. You may also ship normally, of course.
- Voice: You may Voice your opponent to do as you wish with respect to one of the cards they play in their Battle Plan. For instance, to play or not play a specific weapon (poison weapon, projectile weapon or lasgun) or defense (snooper or shield), a worthless card, or a cheap hero. If your opponent can't comply with your command, they may do as they wish.
Alliance: In an Alliance you may Voice an ally's opponent.
Advanced Game Advantages — Your forces have two sides, the spiritual, striped side (advisor) and the battle side with no stripes (fighter). Fighters are normal forces.
- Start of Game: After the Fremen placement (if that faction is in the game), you start with one peaceful advisor in any territory of your choice. If you are alone in the territory, flip the advisor to a fighter.
- Charity: You always receive CHOAM charity of 2 spice regardless of how many spice you already have.
- Karama: You may use any worthless card as if it is a Karama Card.
- Advisors: Whenever any other faction ships forces to Dune from off-planet, you may ship for free one advisor from your reserves into that same territory (instead of the Polar Sink). Advisors in this territory cannot flip to fighters during this turn unless no other forces exist in the territory. Advisors coexist peacefully with other faction forces in the same territory. Advisors have no effect on the play of the other factions whatsoever and cannot collect spice, be involved in combat, prevent another faction's control of a stronghold, prevent another faction from challenging a stronghold (second force), use ornithopters, or play Family Atomics. Advisors are still susceptible to storms, sandworms, lasgun/shield explosions, and atomics.
- Fighters: When you ship forces into an unoccupied territory, you must ship as fighters. If you move advisors into an unoccupied territory, you must flip them to fighters. If you move advisors into an occupied territory, they may remain as advisors or flip to fighters.
- Intrusion: When another faction ships or moves into a territory where you have fighters, you may flip them to advisors.
- Battle: On each turn after the Spice Blow and NEXUS Phase and before any shipment occurs, in all territories in which you have advisors and wish to battle, announce you are doing so, and flip all of those advisors to fighters.
Spacing Guild
At Start: 5 forces in Tuek's Sietch and 15 forces in reserve (off-planet). Start with 5 spice.
Free Revival: 1 force.
Advantages — You control all shipment onto and off Dune.
- Payment for Shipment: When other factions ship forces onto Dune from their off-planet reserves, they pay the spice to you instead of to the Spice Bank.
- Three Types of Shipment: You are capable of making one of three types of shipments each turn:
- You may ship normally from off-planet reserves to Dune;
- You may ship any number of forces from any one territory to any other territory on the board;
- You may ship any number of forces from any one territory back to your reserves.
- Half Price: You pay only half the normal fee when shipping your forces, and pay 1 spice for every 2 of your forces shipped back to reserves.
- Spacing Guild Special Victory Condition: If no faction has been able to win the game by the end of play, you have prevented control of Dune and automatically win the game.
Alliance: Allies may ship from their off-planet reserves onto Dune or cross-ship from one territory to another with forces that are already on Dune at the Spacing Guild half-price rate. Your allies win with you if you win with the Spacing Guild Special Victory Condition.
Advanced Game Advantage
- Ship and Move When You Wish: You may take your shipment and move action out of turn. This would allow you to go first or last or in between other players' turns, however you wish. The rest of the factions must make their shipments and moves in the proper sequence. You do not have to reveal when you intend to make your shipment and move until the moment you wish to take it.
Emperor
At Start: 20 forces in reserves (off-planet). Start with 10 spice.
Free Revival: 1 force.
Advantage — You have access to great wealth.
- Bidding: Whenever any other faction pays spice for a Treachery Card, they pay it to you instead of the Spice Bank. You may not discount the price of Treachery Cards; the full price must be paid.
Alliance: You may share your great wealth with your allies as well as paying spice (directly to the bank) for the revival of up to 3 extra of their forces (for a possible total of 6 during each Revival Phase) from the Tleilaxu Tanks.
Advanced Game Advantage
- Sardaukar: Your five starred forces, elite Sardaukar, have a special fighting capability. They are worth two normal forces in battle and in taking losses against all opponents except Fremen. Your starred forces are worth just one force against Fremen. They are treated as one force in revival. Only one Sardaukar force can be revived per turn.
Questions and Answers
Treachery Cards
Does the Family Atomics card have an immediate effect if blown when the Storm Marker is over Arrakeen, Imperial Basin, or Carthag? Answer: When the Family Atomics card is used, the sector that the storm currently occupies is never affected. All appropriate sectors into which it moves will be affected.
Can the Family Atomics card be used if the Shield Wall or if the adjacent territory from which the explosion is being initiated is in storm? Answer: Yes, in both cases.
Does the lasgun/shield explosion destroy the spice in the territory as well as the forces? Answer: Yes. Please note also that all forces in the territory are lost, including those of players who were not involved in the battle.
If a Karama Card is played to prevent the Atreides player from looking at Treachery Cards, does it affect just one card or all cards up for bid? Answer: All cards up for bid.
Can a Tleilaxu Ghola card allow a leader to fight in the same phase in which they were killed? Answer: Yes, a leader revived by this card during a Battle Phase can be used in this Battle Phase.
Is the Tleilaxu Ghola 5 force revival free? Answer: Yes.
In the advanced game, can a Karama Card be used to stop a player from using an advanced advantage? Answer: Yes.
In the advanced game, does the Karama sandworm called by the Fremen signal a Nexus? Answer: No. A Nexus is signaled only by a Shai-Hulud sandworm card.
Revival
Are revived leaders still subject to turning traitor? Answer: Yes. Once a leader is a traitor they are always a traitor for the entire game even if revived.
In the advanced game, can players revive leaders if other leaders have been captured by the Harkonnens? Answer: Yes. A player can begin to revive their leaders if they don't have any of their own leaders available to play in battle (this includes Harkonnen, too).
Movement
When the Fremen bring reinforcements, must they include the Great Flat when counting the two territory range from the Great Flat? Answer: No. Never include the Great Flat when counting the two territory range.
In the 2017 World Boardgaming Championship tournament rules shipping into Arrakeen or Carthag and then using ornithopters was banned. Some people think the original rules were not clear about this point. Why do you allow this in these rules? Answer: We (the designers) have always allowed a player to ship forces into Arrakeen or Carthag and then use ornithopters. Our logic is that with the various military cultures in the Dune universe, raids prescribed by Kanly (or by opportunity for the Fremen) were common. An invasion is a similar case in the book. A fighting force can be shipped into Carthag or Arrakeen, steal ornithopters and use them to move other forces through three territories anywhere on the board.
Can a player's forces, that have moved into different sectors of the same territory at different times, move or ship as a single group? Answer: Yes.
Does a sandworm move count as the one group move allowed to the Fremen each turn? Answer: No. In fact, the sandworm move is made in the Spice Blow Phase, after the Nexus, and not in the Movement Phase.
Do sectors affect movement? Answer: No. See response to movement question 1 (above). Sectors function to regulate the movement and effect of storms and the placement and collection of spice. They do not affect movement.
If a storm is over Arrakeen or Carthag does it affect the three territory (ornithopter) move? Answer: No, except of course, into, out of, or through the storm.
If the storm separates two factions with forces in Pasty Mesa, they cannot battle and remain for the next turn (battle rules). On the next storm round, a sandworm card is drawn and a Nexus occurs. Can those two players ally? The Alliance section says allies cannot battle each other. If they can ally, how do they resolve the problem? Is one forced to use the Movement Phase to exit the territory? Answer: Yes. If the First Player who ships and moves does not move forces out of that territory which the two allied factions occupy, the second player must . . . or lose those forces to the Tleilaxu Tanks.
Battle
Can a player substitute a cheap hero for a weapon or defense card in order to get rid of it or must they only play it in the place of a leader? Answer: No, a player cannot substitute a cheap hero for a weapon or defense card. It may only be played as a substitute for a leader.
May the same weapon or defense card be played in more than one battle, if victorious? More than one battle in the same phase, if victorious? Answer: Yes to both questions.
Can a player's forces that have moved into different sectors of the same territory at different times battle as a group? Answer: They must fight as a single group (if storm permits).
What happens if truthtrance, Bene Gesserit Voice and Atreides Prescience or some combination thereof, are being used in the same battle? Answer: The Bene Gesserit Voice must always be used before the Atreides Prescience. Truthtrance can be played at any time in this interaction. Please note that a player has the ability to alter components of their Battle Plan, that are not affected after being Voiced, Prescienced (sic) or Truthtranced.
Can a player voluntarily refuse to reveal a traitor if played against them in battle? Answer: Yes. If your traitor appears in battle against you, you need not reveal that that leader is your traitor.
Miscellaneous
Do allies pay the Spacing Guild for all of their shipments? Answer: Yes.
What is the exact rate for the Spacing Guild shipment back to their reserves — 1 spice per 2 forces, or half of that? Answer: 1 spice per 2 forces.
What happens if at the end of the last turn, no one has won and the Spacing Guild are not in play? Answer: The Fremen wins. If they are not in play, the player occupying the most strongholds wins. If several qualify, all who qualify win.
In the advanced game, when reshuffling the Spice Deck, must you reshuffle the entire deck? Answer: Yes.
In the advanced game, does the Fremen get the sandworm advantage bonus if a second sandworm appears in a Spice Phase? Answer: Yes.
How does the Spacing Guild pay for an odd force shipment? Answer: All fractional costs are rounded up. So a 5 force shipment costs the Spacing Guild 3 spice; a 1 force shipment costs them 1 spice; etc.
Optional Rules for Alliances
| Alliance Restriction | Possible Side Effect | Comment |
|---|---|---|
| Default Alliance Game: 2 Player Alliance limit, 4 Strongholds to win | a longer game | Players look for synergy with one other player and try to win together but must try to hold on to the strongholds they have. |
| 2 Player Alliance limit, 3 Strongholds to win | a shorter game | Players look for synergy with one other player and try to win together by holding or capturing 3 strongholds. |
| 3 Player Alliance limit, 4 Strongholds to win | a longer short game | May devolve into 3 strongest against 3 weakest, etc. but supposedly weaker players may be able to reverse the stronger players' fortunes and tip the balance. |
| 3 Player Alliance limit, 3 Strongholds to win | probably the shortest game | May devolve into 3 strongest against 3 weakest, but supposedly weaker players may pull off a surprise win by winning key battles. |
| Any number of players in Alliances, 3 Strongholds to win | a more exotic game | The original Dune rules Alliance game; adversity creates ingenuity. |