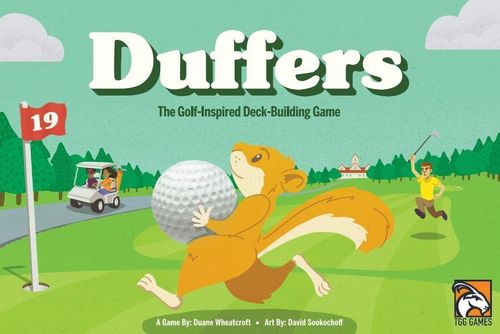
Duffers
Duffers Rulebook
Table of Contents
Table of Contents
Included in the Box
- 18 Hole Cards (6 Par 3s, 9 Par 4s, 3 Par 5s)
- 40 Starter Cards
- 28 Chip Shot Club Cards
- 12 Whiff Duff Cards
- 89 Pro Shop Cards
- 51 Club Cards
- 26 Equipment Cards
- 12 Crew Cards
- 36 Stack Cards
- 12 Vintage Driver Club Cards
- 12 Broken Tee Equipment Cards
- 12 3-Putt Club Cards
- 25 Luck Cards
- 12 Duff Cards (Hook x 4, Slice x 4, Toed x 4)
- 4 Caddie Mats
- 36 Player Chits
- 4 Reference Cards
- 1 Score Pad
Object of the Game
Just like traditional golf, the Player with the lowest score at the end of the game wins.
Anatomy of a Card
Details Area. The essentials of a card are here: what it's called, what it is, how much it costs.
- Card Name
- Card Type. Every card has a type that describes its general role in the game. Certain cards can interact with or be affected by cards of a specific type. The 5 card types are: Club | Luck | Duff | Equipment | Crew
- Cost to Purchase. How much you need in Credits to gain this card from the Pro Shop or Stacks.
- Icon for Special Status. These graphics help identify a card at a glance as satisfying a Condition or that it can be (or needs to be) used in a particular way.
Action Area. The bottom half of the card contains all the details about what the card can do.
- Values when Played for Yardage. Add the Yards with other cards to see if you have enough to complete a Hole. If you do, add all the Strokes together to get your total. Don't forget to write it down on the score pad.
- Value when Played for Credits. Add these Credits along with those on other cards to buy more Clubs, Equipment, and Crew from the Pro Shop or The Stacks. What's the "or" for? It is to remind you that you can either play a card for its Yardage values or its Credit value, but not both.
- Description. This space details the additional abilities that are triggered when the card is played, or it better explains the Condition(s) the card satisfies.
Setting Up
Getting the Bags Ready
- Deal each Player 7 Chip Shot Cards and 3 Whiff Cards. Like a real golf bag, this is where all the Clubs, Equipment, and other surprises you gain will go.
- Designate a score keeper to track each Player's Strokes as they complete Holes.
Prepping Your Caddie
Each Player chooses a Caddie to carry your deck and help organize your Player Tokens along the Player Token Track, removing the left-most token when you finish a Hole to mark its completion (example below).
Your Caddie also has special abilities:
Caddie Card. Keep a Club or Equipment Card around to use later! You may place a card from your hand on this Caddie Card space face-up instead of playing it for Yardage or Credits. On subsequent turns, you may play this card as though it were in your hand. When played, discard it as you would any other card.
Token Track Actions. Completing Holes unlocks the following actions for all Players once the corresponding letter is revealed on any Caddie:
- A. A Player may Trash up to 1 Chip Shot for twice its Credit value on their turn.
- B. When Purchasing a card, a Player may place it on their Caddie Card (if empty) instead of their discard pile.
- C. A Player may place up to 2 cards on their Caddie Card space on their turn.
(Figure: Player 2's token track before first tee off. Player 2's Token Track after completing 3 Holes.)
Making the Stacks
Consider this your practice area. Clubs and Equipment are cheap here, but they can only take you so far.
Place the following face up:
- 12 Vintage Driver Cards (Club | Iron)
- 12 Broken Tee Cards (Equipment)
- 12 3-Putt Cards (Club | Putter)
- Face up cards in the Stacks can be bought and gained on your turn. They play like Pro Shop Cards, but are not considered to be from the Pro Shop.
And shuffle the following decks separately and place each face down:
- 25 Luck Cards (Will it be BAD LUCK or a LUCKY BREAK?)
- 12 Duff Cards (4 Slices, 4 Hooks, 4 Toed)
Building the Course
There are 9 Beginner Holes and 9 Advanced Holes that you can mix and match for a new game experience every time you play. Players can create the course by:
- Choosing to play a Standard Course (6 Holes) or Full Course (9 Holes), and selecting the appropriate number of Holes from the 18 Hole cards included.
- FYI: Duffers gameplay takes an average 10 to 15 minutes per Hole.
No matter how you set up the course, you should have at least one par 3 Hole. When teaching the game to new players, consider playing a short course with these 3 Holes: B-1: Beginner's Luck, B-3: Cake Walk, B-5: The Meadows. With fewer Holes, new Players can learn the mechanics and build up stamina for the full course experience.
Anatomy of a Hole
- Hole Name
- Hole Identifier
- Hole Yardage. The minimum distance Players need to complete the Hole.
- Hole Par. The average number of Strokes it takes to finish the Hole.
- Conditions. Players must satisfy or overcome additional rules to complete the Hole. For example, Leap Frog needs a card that counts as a Putt and a Club Card that hits between 90 and 130 Yards.
- Completion Markers. A Player adds one of their Player Tokens to this space to let everyone know they crushed it.
(Example: 9-Hole Course Set Up. The layout shows the Pro Shop and Pro Shop Deck and Trash Pile, nine numbered Hole positions with a Display on each side, and the Stacks row beneath them with the Luck, 3-Putts, Broken Tees, Vintage Drivers and Duffs decks.)
Opening the Pro Shop
Before setting up shop, go through the deck and find all cards with a star symbol next to its name. For each Player, set aside 3 of these cards, either at random or you can choose (2 Players = 6 cards, 3 Players = 9 cards, etc.). These are your Early Bird Cards and will be the first you can purchase from the Pro Shop, but first we need to add reward cards to each of the Holes.
- Shuffle the remaining Clubs, Equipment, and Crew Cards together.
- Place a number of Pro Shop cards face down in the center of each Hole equal to the number of Players minus one (e.g. if there are 4 Players, each Hole gets 3 Pro Shop cards).
- When a Player finishes a Hole, they gain one of these reward cards, then return any remaining cards back on the Hole. If there are no reward cards on a Hole, well, you should have finished it faster.
Next, stock the Display.
- Add the Early Bird Cards to the top of the shuffled Pro Shop deck and place the top 5 cards face up next to the Hole cards. This is the Display.
- During a Player's turn, cards in the Display can be purchased and gained (purchased cards go immediately to Player's discard pile). Replenish the Display up to 5 cards only at the end of a Player's turn.
A few special rules for the Pro Shop.
- Sleep in. The Early Birds are meant to help newer Players build and manage their own decks faster. If you're a seasoned Duffer or just want to throw caution to the wind, you can choose not to set aside any starred cards and start with a completely random Pro Shop deck.
- Cycle the Shop. If 3 turns pass where no Player purchases or gains a card from the Display, the group can agree to Trash the 5 Display cards (remove from the game) and replace them with 5 new cards from the top of the Pro Shop deck.
Let's Play!
Beginning the Game
- Each Player shuffles their Bag deck and draws 5 cards.
- The oldest Player goes first (it usually takes them longer to do math).
Playing Your Turn
On each of their own turns, Players may make purchases from the Display and attempt to complete a Hole. The order of these two actions does not matter, but when playing a card from your hand, Players must decide immediately whether it is being used for Yardage or Credits. Some cards will also have additional effects that Players must follow when they choose how the card is played (for example, certain card effects only happen when cards are played for Yardage).
Playing Cards for Credits:
- Play cards from your hand and add up the Credits you wish to use for purchasing and follow any instructions on those cards if present and relevant.
- Spend your Credits for the To Buy value (number at the top right of the card) from either the Stacks or Pro Shop Display.
- Gain the card(s) you purchased and move the cards played to make the purchase(s) to your discard pile unless otherwise directed by a card or effect.
Playing Cards for Yardage:
- Play Club and Equipment Cards for their Yardage value.
- If the card has an additional action, you must follow that action right away (learn more about actions on page 3, Anatomy of a Card). Woods and Irons with additional actions are easy to spot: just look for the Duff and Luck symbols on their faces. (The Duff symbol means "Gain a Duff Card"; the Luck symbol means "Reveal a Luck Card.")
- Add up the Yards on the cards you are playing for Yardage, including any Luck Card(s) with a Yardage value (+/-).
- You must play any Duff Cards in hand (not gained that turn). This may negatively impact Yardage totals and/or add to the Player's number of Strokes.
- Determine if your total equals or exceeds a Hole's Yardage and otherwise satisfies the Conditions set out by a Hole Card you have not completed.
IMPORTANT: To successfully complete a Hole, cards played for Yardage can add up to or exceed the total distance of the Hole by no more than 50 Yards.
- To complete a Hole, you must also play at least one card that counts as a Putt. There are a number of these cards that satisfy this Condition, including: Club | Putter Cards and specific Club | Iron Cards (The Miracles). Look for the Putt symbol on the card.
- If you meet the Conditions of the Hole (Distance, Putt Card, etc.), add up the number of Strokes on the cards played for Yardage and enter that total on the Score Pad.
- Next, if there are any reward cards left on the Hole, look at them, gain one, and put any remaining back on the Hole face down.
- BULLSEYE BONUS: Anytime you successfully complete a Hole by playing the exact Yardage, you may Trash any card you own (from your hand, your deck, or your discard pile). If you choose a card from your deck, shuffle it afterwards.
Hole Completion Checklist
- Play cards for Yardage.
- Play all Duff Cards in hand.
- Add up Yardage and determine a Hole you can finish (less than 50 Yards over).
- Play a card that Counts as Putt.
- Make sure any other Conditions are met.
- Add up Strokes on the cards played.
A Note About Yardage and Credits. When completing a Hole, the cards used for Yardage cannot be split to also be used for Credits if you have an overage of yards and vice versa. In other words, you either use a card for Yardage or Credits, but never both.
Ending Your Turn
- Place all the cards you played, and any remaining cards from your hand, into your discard pile, then draw 5 new cards.
- Do not reshuffle your discard pile until you must draw, discard, or reveal a card from your deck and cannot because there are no cards available. When you are unable to meet any of those three tasks, shuffle your discard pile immediately. It becomes your new deck.
- If the Pro Shop has fewer than 5 cards face-up, replenish The Display cards from the top of the Pro Shop deck.
Finishing a Hole the Hard Way
Player 2 has the following Club Cards in hand: 275 + 30 + 30 = 335 yards.
Plus a Duff Card: 1 + 1 + 1 + 2 = 5 strokes.
When this particular Big Head Driver is played for Yardage, Player 2 must reveal the top Luck Card, and it's BAD LUCK!
(Duffs have to be played.) –40 x 2 = –80 yards.
The math works out to be: 335 yards – 80 yards = 255 yards.
That's enough to complete "Cake Walk" with a double bogie, or two over par (5 Strokes), because 255 is less than 50 over the Hole's listed Yardage. Not bad for getting that Goose Egg.
Plus, Player 2 has a Putter, meeting the Condition of this Hole (and every Hole, really), so "Cake Walk" is done and Player 2 adds her marker!
Finishing the Round
Completing the Round
The game ends when one of two conditions is met:
- When a Player completes their final Hole. If this happens, all other Players have one last turn to act. They can play their hand to complete a Hole or make purchases from the Pro Shop and play all legal cards in the regular fashion.
- IMPORTANT: Players get an automatic DOUBLE PAR (2x the number in the Par box) for any unfinished Holes, and cannot claim any remaining reward cards.
- When the Pro Shop deck is unable to replenish to five cards. The game ends immediately and there are no additional turns or purchases possible.
- Again, any Holes not completed get an automatic DOUBLE PAR. Players cannot claim the reward cards from unfinished Hole(s).
Determining the Winner
Add up the Strokes for all Holes for each Player, then add any permanent or end-of-game modifiers for the game (e.g. Golf Tee Equipment Cards will subtract Strokes from your final total). Then do the last bit of math. The Duffers Master (winner) for the game is the Player with the lowest overall score. You can let them have bragging rights or reset, reshuffle, repeat.
Duffers vs. Traditional Golf
How do the two games differ? (Besides one's played with cards, usually inside.)
- Players can finish the Holes in any order. They don't even have to start with #1!
- Players don't need exact Yardage to complete a Hole. They can be up to 50 Yards over unless otherwise stated in the Conditions.
- You get a bonus card every time you finish a Hole, as long as you're not the last Player to do so.
- No rain delays. However, we don't recommend getting the cards wet.
- No green fees.
- You can be as loud as you want on a Duffers course. Trash talking is even encouraged.
Duffers Glossary
Bag (or Player's deck). The cards a Player acquires during the game to complete Holes, either purchased from the Pro Shop Display or The Stacks, or Duff Cards gained through played cards, BAD LUCK!, or opponent mischief. Players start their deck with 7 Chip Cards and 3 Whiff Cards.
BAD LUCK! In golf, not all luck is good. BAD LUCK! can affect one Player or the whole group. If no specific Player is indicated on the card, the BAD LUCK! strikes the Player who revealed the Luck Card.
Club. The essential card type that will make up the majority of a Player's deck. They can be broken down into three subcategories: Wood | Iron | Putter
Conditions. Additional requirements to complete a Hole. For example, some may restrict the type of Club Cards you can play. Conditions appear at the bottom of the Hole Cards.
Credit Value. The amount a card is worth when Played for Credit, found on the bottom left corner. It is generally half the "TO BUY" purchase value.
Crew. When you play a Crew Card, it remains on the table, usually in front of you, for the duration of the game and its effect is continuous.
Deck-Building Game. Players acquire cards from a communal set of cards to build their own decks to complete objectives set out by the game. In the case of Duffers, you buy cards from the Pro Shop or the Stacks and, using those cards, attempt to complete a course you created.
Discard. To place a card from your hand into your Discard Pile without playing it for Yardage or Credit, or any other special ability on the card.
Discard Pile. All played and unplayed cards go into a Player's discard pile. Cards gained through purchase or other means also go here unless otherwise stated.
Display, The. The set of 5 cards placed face up from the Pro Shop for purchase is called The Display. At the end of a Player's turn, replace any purchased cards up to 5.
Draw. Taking a card from the top of your deck and adding it to your hand. At the end of your turn, all played and unplayed cards go to the Discard Pile and 5 new cards are drawn.
Duff. A card with a negative effect that must be played when a Player is attempting to complete a Hole. Certain cards, when played for Yardage, will require you to gain a Duff Card. There are four standard types of Duffs: Whiff | Hook | Slice | Toed
Equipment. Golfers carry a number of specialty tools to play at their best. Equipment Cards offer a number of beneficial effects and abilities that can improve a Player's chances of completing a Hole or purchasing the perfect addition to their deck.
Gain. To place a newly acquired card in your Discard Pile. All purchased cards are "gained" unless otherwise stated on the card or if another card affects where it is placed.
LUCKY BREAK! Sometimes the ball does bounce in your favor. LUCKY BREAK! cards are part of the Luck Stack and, when revealed by specific triggers, Players get the benefits immediately (if able).
Permanent. A card not discarded when played, but remains in front of the Player for the duration of the game. Its effect is continuous. Crew Cards are examples of a Permanent card.
Stroke. Golf is scored in Strokes. The Player at the end of the game with the lowest number of Strokes wins. All Club Cards have a Stroke value, as do specific Duff Cards (i.e. a Whiff Card adds a Stroke without adding Yardage).
Trash. To remove a card from the game. Some cards allow you to Trash unwanted cards, others force you to Trash a card from your hand. In both cases, the Player chooses the card.
Yards / Yardage. The distance a ball must go, as a value on a card played for Yardage, or the length of a Hole.
A Few Different Ways to Play
Try one or more of these alternate rules to speed up or simplify your next round of Duffers. They're especially handy when introducing new Players to the game.
Rapid Round. Like real golf, Duffers takes time to play. If you want to get in a quick round, build the course with fewer Holes. This is particularly helpful with new Players. Try 3 Holes to start.
Scratch Golf. You're too good to start with the basics. Shuffle the Pro Shop Club Cards and deal each Player 3 random clubs. They each pick 2 and add them to their starting deck, returning the extra to the Pro Shop to be shuffled. Players then Trash 2 Chip Shots from their starting deck.
For the Love of the Game. We're going old school and removing all equipment and crew from the game. That's right, all clubs, all the time. Also, do not place Reward Cards on the Holes during set up. It's the game in its purest form, and that means no freebies!
Pro Shop Pre-Sales. Before beginning the game, each Player has 200 Credits to spend in the Pro Shop. The last player in the order gets to make purchases first, then the 2nd last, etc. (e.g. in a foursome, it would be Player 4, Player 3, Player 2, Player 1). Players may Trash a Chip Shot for its Credit value to cycle the cards in the Display. They can do this only once during the Pre-Sale and only when it's their turn.
Solo Mode!
Let's be honest, playing with others messes with your mojo. We totally understand and made this additional ruleset just for you. Objective: Players have three rounds to get the lowest score possible while completing their Solo course (a round is a single run-through of a Player's Solo deck).
Solo Set Up
Choose 9 Holes. You may either select specific Holes or choose randomly. Shuffle the Holes and place face down. This is the Course Stack. Flip over the top 3 Hole cards and place them side by side. The face-up Holes can be completed in any order.
Next, open The Pro Shop. In Solo Play, the Pro Shop is made up of only Pro Shop Equipment Cards (no Crew) and there is no Display or Early Bird set up. Remove the following Equipment: Fancy Club Covers, Club Head Covers, 21' Ball Retriever, 15' Ball Retriever, Supreme Bag, Basic Bag, then shuffle and place to the left of the face-down Hole cards. And no Caddie. It's just you vs. the course!
Remove the following cards from the Luck Stack, then shuffle and place to the right of the face-down Hole cards: Recalled, Reckless Redo, Pin Dropped, Lost a Penny, Find a Penny, Cleansing Cloudburst.
Shuffle the Duff Stack, which should include the following Duff Cards: Toe (x4), Whiff (x4), Hook (x4), Slice (x4). Place it next to the Luck Stack.
(Layout: Pro Shop, Course Stack, Luck Stack, Duff Stack, Solo Deck, Play Pile.)
Solo Play
Building Your Solo Bag. For Solo Play, a Player's Solo deck is made up of all Pro Shop Club Cards (no Vintage Drivers, 3-Putts, or Broken Tees). Add 8 Chip Shot Club Cards to your Solo deck, shuffle it, and place it face down on the table close to you.
Creating a Hand. Unlike multi-player Duffers, which requires you to complete a Hole in a single turn, Solo Play allows you to build your "Hand" over time on each individual Hole until its Yardage and Conditions are met. Turns in Solo Play last as long as a Hole is face up and incomplete.
Teeing Off. To begin, draw 3 cards from the top of your Solo Deck. Turn them over and place them in a Play Pile in front of you. You may play only the top card in the pile on any of the face-up Holes, placing it on the right side if it's the first card played on that Hole (and as long as it does not contradict the Conditions of that Hole). If you do so, you may play the next card in the pile on any of the three Holes, continuing to play the top revealed card in the pile until either you choose to not play the revealed card or there are no cards remaining in the pile.
In either case, draw 3 new cards from your Solo Deck and repeat.
Hint: if you've ever played Solitaire, you know how this goes.
Overall, cards from the Play Pile can be played on any one of the revealed Holes in any order, but can only be done so in a descending order of Yardage values. Meaning, if a 2 Iron Club Card (+195 Yards) is the most recent card played on Staggering Monk (Par 5, 565 Yards), you cannot play a 3 Wood Club Card (+230 Yards) on the hole next, but you could play a Fairway Wood Club Card (+190), getting you to 385 Yards and that much closer to finishing the Hole.
Just like the multi-player version, a Player must follow the requirements on the Club Cards, but only when played on a Hole.
Duff Cards. If a Club Card says to Gain a Duff Card, draw one from the Duff Stack and play it immediately on the Hole's "Hand" that required you to draw it. Duff Cards that change the distance on a Club Card (i.e. Toed It) reduce the "Hand's" overall distance, but do not change the intrinsic Yardage value of the Club Card it applies to, so the descending order is not affected.
Luck Cards. If a Club Card says to Reveal a Luck Card, that card is added to the Hole's "Hand" and the instructions on the card are then followed. Yardage gains or losses are added immediately. If Players gain a Duff Card, it is added to the same "Hand". If a Player gains an Equipment card, it is placed on the top of the Play Pile and can be used immediately.
Equipment Cards. The role of Equipment is much more specialized in Solo Play. An Equipment Card that has a Yardage value can be played for that Yardage. If it is, add that Yardage to a Hole's "Hand" and follow any other instructions on the card. Equipment Cards that have a Special ability can be played from the top of the Play Pile and stay in the Solo Deck.
Special Abilities.
- Draw: Draw the number of cards specified on the Equipment Card. You may play the card(s) on any valid Hole or place the card(s) on your Play Pile and draw three new cards.
- Discard: There is no Discard Pile in Solo Play. When required to discard a card, choose a card from a Hole's "Hand" and add it face-down to the bottom of your Solo Deck. You can choose to discard a Duff Card from a Hole. Just remember, that Duff Card will eventually be revealed again and you will have to play it. Again. Luck Cards cannot be removed in this way. Luck is ephemeral and you cannot manipulate it, no matter how hard you try.
- Trash: You may Trash a card from any Hole's "Hand", removing it from play. There is no Discard Pile, so no cards can be Trashed from it.
Solo Hole Completion
Once the Yardage and Conditions of a Hole are met in the "Hand", a Player completes it by playing a card that Counts as a Putter as the last card played on that Hole. Once completed, the Hole and the Hole's "Hand" are set aside until the end of the game. The Player replaces the completed Hole with one from the face-down Course Stack, turning it over and setting it beside the other revealed Holes. The Player also gains the top card of the Pro Shop, placing it face up on their Play Pile.
(Figure: It looks something like this.)
Solo Finish
The game ends when either a) the Player completes all Holes, or b) the Player completes three rounds of playing through their Solo Deck. Any uncompleted Holes are immediately counted as DOUBLE PAR. The Player adds up all their Strokes from the completed and uncompleted Holes to determine their final score. Add up the Pars on each of the Holes in your Solo Course to see how you did. Were you over Par? Under? Either way, congratulations!
A note about Tees. If a Tee is not played to complete a Hole, it cannot be used to reduce a Player's score at the end of the game.
What About Credits and the Crew?
For Solo Play, Credits are unnecessary since your "Bag" is already filled with all the Clubs you could possibly want. As for the Crew, they earned a well-deserved vacation (ok, they demanded the time off), but they have complete faith that you can overcome any challenge or vengeful squirrel you come across. Except the Coach... she wants you to drop and give her 20 before you start playing!
Solo Example: Broken Lighthouse
Player 1 (like there's another) is building a "Hand" for Broken Lighthouse. She starts it by playing a Big Head Driver (+275), requiring her to reveal a Luck Card. She gets BAD LUCK! Sprinkler Dread and adds it to the "Hand".
Next she plays a 5 Iron (+175), a legal move since 175 < 275 and follows the descending Yardage rule, but also requiring her to gain a Duff Card and play it immediately with this hand. Player 1 got lucky, because a Hook Card does not subtract Yardage on Broken Lighthouse because of the Hole's Condition. Phew! Finally Player 1 gets a Regulation Putt in her Play Pile and completes the Hole!
275 – 50 + 175 = 400 Yards
1 + 1 + 2 = 4 Strokes