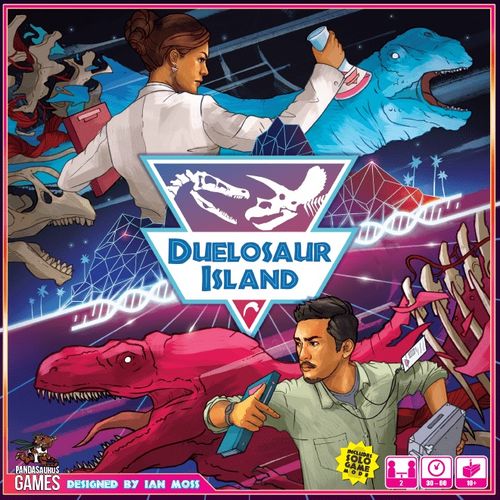
Duelosaur Island
Duelosaur Island Rulebook
Table of Contents
Table of Contents
Game Components
- 1 Main Board
- 1 Draft Board
- 2 Company Boards
- 44 Park Cards
- 6 Starter Park Cards
- 22 Specialist Cards
- 6 AI Cards (Solo Mode)
- 8 DNA dice
- 1 Dice Bag
- 15 Plot Twist Tokens
- 4 Lawsuit Tokens
- 2 50+ Visitor Tokens
- 1 PR Marker
- 20 Player Cubes (10 in 2 colors)
- 27 Coins (20 x $1, 7 x $5)
(there may be more than the listed number of components)
Icon Reference
- Food Attraction / visitors
- Merch Attraction / excitement
- Ride Attraction / basic DNA
- Park cards / advanced DNA
- Threat / security
- Discard Effect / coins
Game Setup
Main Game Setup
-
Place the main board in the center of the play area, then place the draft board beside the main board.
-
Put all DNA dice into the dice bag, then give it to a randomly determined first player.
-
Shuffle the 44 park cards into a face-down deck, and place the deck in its slot on the draft board. Flip the top 3 cards of the deck face up and place them in the slots next to the deck. Leave room for a discard pile.
-
Shuffle the specialist cards into a face-down deck and place the deck next to the draft board. Leave room for a discard pile.
-
Shuffle the plot twist tokens face down, then select 4 at random. Place these tokens in the 4 leftmost token spaces on the draft board. (The far right space should not have a token on it.) Return all leftover plot twist tokens to the box.
Variant: Select 8 plot twist tokens at random. Starting with the first player, each player selects 1 plot twist to be in play and discards another. Do this twice. This is for more strategic play as well as more variety in your plot twists.
-
On the main board, place the PR marker on the starting space (darker red) of the PR track.
-
Place the coins and various modifier tokens off to the side as the supply.
-
Choose your desired game length: short (25 visitors), medium (35 visitors), or long (45 visitors). The game length determines the visitor threshold that will trigger the end of the game. There are icons on the visitor track as a reminder.
Individual Player Setup
- Take a company board and 10 player cubes in your color. On your company board, place 6 cubes on the "0" spaces of your DNA tracks, 1 cube on the "1" space of your threat indicator, and 1 cube on the "1" space of your security indicator. Your remaining 2 cubes go on the main board: on the "1" space of the excitement track and on the "5" space of the visitor track.
- Take the 3 starter park cards that are marked with your company logo. From these cards, choose 1 card as your starting dinosaur and 1 card as your starting attraction.
- Tuck your chosen starting dinosaur under the top of your company board so that only the dinosaur portion is showing, and tuck your chosen starting attraction under the bottom of your company board so that only the attraction portion is showing.
- Keep the remaining starter park card in your hand.
How to Play
The game is played over a number of rounds until the end of the game is triggered when a player reaches a given visitor threshold (determined by your chosen game length). Each round is split into 4 phases:
- Phase 1: Income
- Phase 2: Draft
- Phase 3: Build
- Phase 4: Visitors
Phase 1: Income
In this phase, players will gain coins and draw park cards.
Gaining Coins
Each player gains a base income of 3 coins. Each player also gains +1 coin for each food icon on the attractions in their park. Finally, each player gains +2 coins for every income space they have reached or passed on the excitement track.
Drawing Park Cards
In turn order, each player draws 1 park card. Each player draws +1 park card for each merch icon on the attractions in their park. For each card you draw, you may choose a park card from the face-up row or the top of the deck. If you take a park card from the face-up row, immediately refill the row with the top card of the deck. If you have to refill the row and cannot because the deck is empty, shuffle the discard pile to form a new park deck.
Note: Before drawing your cards, you may spend 1 coin to discard all 3 cards from the face-up row, then refill the row. Each player may do this once per round.
Phase 2: Draft
In this phase, the first player will draw and place DNA dice and specialist cards on the draft board. Then, the players will take turns drafting these items.
Park Card Anatomy
- Dinosaur Name
- DNA Cost
- Dinosaur Type
- Excitement
- Threat Icons
- Visitors
- Attraction Name
- Coin Cost
- Attraction Type
- Visitors
- Set Icon
Specialist Card Anatomy
- Specialist Name
- Threat Icons
- Phase
- Ability Text
- Discard Effect
- Set Icon
Preparing the Draft
The first player draws 3 cards from the specialist deck, then chooses 2 to place face up in the card slots at the bottom of the draft board. The third specialist card is discarded without effect (i.e., the player does not gain the discard effect).
The first player draws 5 dice at random from the dice bag, and rolls them. Then, they place the 5 dice in the top row of dice slots of the draft board, 1 die per slot. Each die is being paired with the plot twist token below that die slot, so the first player must make careful decisions when placing the dice.
Example A (Draft Preparation): Claire has drawn 5 random dice and rolled them, with these results. She now must carefully decide which dice to pair with which plot twists. After some consideration, she settles on these pairings.
Plot Twist Tokens
- DNA Multipliers (x2, x3): These tokens multiply the number of DNA you would normally gain from drafting the die from this dice slot.
- DNA Multipliers + Bonus: These tokens multiply the number of DNA you would normally gain from drafting the die from this dice slot. In addition, they provide a one-time bonus. (The bonus is NOT multiplied.)
- Bonuses: These tokens provide a one-time bonus like coins, cards, or even visitors!
- DNA: These tokens give you DNA. They are "wild," which means you choose any DNA of the appropriate rarity (basic or advanced).
- Choice: These tokens give you a choice. When you draft the die from this dice slot, you decide which of the 2 rewards you want. If there is a multiplier on the plot twist token, you can multiply the DNA of that die or gain the standard number and receive the other reward.
Executing the Draft
Starting with the second player, the players will each choose an available DNA die or specialist card. This will continue until each player has drafted 3 items total.
Drafting DNA Dice
If you draft a DNA die, move it down to the bottom row to show that it is no longer available, and then gain the items shown on the die and the associated plot twist token. When you gain DNA, mark that on your company board by adjusting your cube in the corresponding DNA track. If you draft the die showing the security symbol, immediately increase your security level by 1 for free.
Example B (Drafting DNA Dice): Owen is the second player, so he gets first choice of the available items. He chooses the die showing 1 "wild" advanced DNA, moving it down to the bottom row. Because the die is paired with a plot twist showing an x2 multiplier, Owen gains 2 advanced DNA of his choice. He chooses 1 green and 1 yellow DNA.
Drafting Specialists
If you draft a specialist card, take the card and place it to the right of your company board. You can have a maximum of 3 specialists at a time. If you already have 3 specialists, you may discard a specialist to make room for the new specialist. Each specialist also has a discard effect. When you draft a specialist card, you may discard it immediately, instead of adding it to your company, to activate its discard effect. If you discard a previous specialist to make room for a new one, you do NOT activate the discard effect.
Example C (Drafting Specialists): Claire already has 3 specialists, but she wants to draft the Junior Scientist specialist to prevent Owen from getting it. She would rather keep the 3 specialists she has, so she discards the Junior Scientist immediately for its discard effect, gaining 1 park card.
Undrafted Item
After both players have drafted 3 items, there will be 1 leftover DNA die or specialist card. Move that item to the threat area of the draft board. At the end of the round, when calculating threat level, both players must add the threat icons (if any) from this undrafted item to their current threat level.
Phase 3: Build
In this phase, both players will take their actions simultaneously. Each player may take any number of actions (including the same action multiple times), in any order. The phase ends when neither player wishes to take any further actions.
Create a Dinosaur
To create a dinosaur, choose a park card from your hand and spend the required DNA. Then tuck the card under the top edge of your company board so that only the dinosaur portion is showing. You immediately increase your excitement level (on the main board) and your threat level (on your company board) as shown on the card.
Build an Attraction
To build an attraction, choose a park card from your hand and spend the required coins. Then tuck the card under the bottom edge of your company board so that only the attraction portion is showing. There are 3 different types of attractions: Food, Merchandise, and Rides.
- Food: For every food icon in your park, you will gain +1 coin during the Income Phase.
- Merch: For every merch icon in your park, you will draw +1 card during the Income Phase.
- Rides: When you build a ride attraction, you immediately gain the bonus listed in the space currently occupied by the PR marker on the PR track. If you build a ride attraction with 2 ride attraction icons, gain that bonus twice.
Mix DNA
To mix DNA, you must discard a park card from your hand. Then, you may either convert any 2 basic DNA into any 1 advanced DNA, or convert any 1 advanced DNA into any 2 basic DNA. Adjust the DNA tracks on your company board accordingly.
Sell DNA
To sell DNA, you must give up DNA. Choose any 2 basic DNA or any 1 advanced DNA to give up, adjusting the DNA tracks on your company board accordingly. Then gain 1 coin.
Increase Security
To increase security, you must spend coins. Security costs are indicated by the price chart next to the security indicator on your company board. When increasing security, you always pay the cost for the new level, not your current level. (Past level 10, all increases cost 4 coins.)
Example D (Build Phase): During the Build Phase, Owen first spends 5 coins to build the Safari Ride attraction. Since that is a ride attraction, Owen then immediately gains the bonus from the PR marker space (1 advanced DNA). He then spends the required DNA to create Stegosaurus, which increases his excitement and threat levels by 1. Owen would like to increase security to account for the added threat, but he is 1 coin short. So he sells 2 basic DNA for 1 coin, then spends 3 coins to increase his security level by 1.
Phase 4: Visitors
In this phase, there are 3 steps that must be carried out in order.
- Compare Threat vs. Security
- Gain Visitors
- Choose PR Bonuses
1. Compare Threat vs. Security
Each player compares their threat level against their security level. When determining threat level, don't forget to add the threat icons from the item (die or card) that was undrafted during the Draft Phase.
If your security level is equal to or higher than your threat level, nothing happens. But if your security level is lower than your threat level, dinosaurs break out and eat visitors! The number of visitors eaten is twice the difference between your security and threat levels. You then move your player cube back on the visitor track accordingly.
If you would go below 1 on the visitor track, you remain at 1 but must take a lawsuit token instead. At game end, you will lose 5 visitors for each lawsuit token!
Example E (Threat vs. Security): Claire's base threat level is 4. The undrafted item this round (DNA die) has 2 threat icons. So Claire's total threat level this round is 6, but she only has a security level of 5. Since her security isn't high enough, dinosaurs break out and eat 2 visitors! Claire moves back 2 spaces on the visitor track.
2. Gain Visitors
Each player gains a number of visitors equal to their current excitement level, advancing their player cube on the visitor track accordingly. The more visitors you have, the closer you are to victory!
3. Choose PR Bonuses
First, determine which player is lower on the excitement track. The player with the lower excitement level will choose a PR bonus first. They may choose to take the items from any space on the PR track to the left of the PR marker.
The other player then chooses a PR bonus. However, their options are more limited. They may only choose to take the items from any space on the PR track to the left of the space chosen by their opponent. This means that if the player with lower excitement level chooses the PR bonus at the far left end of the PR track, their opponent does not get any PR bonus at all.
If the players are tied on the excitement track, the player with fewer cards in their park will choose first. If there is still a tie, the first player for the current round will choose first.
Example F (Choosing PR Bonuses): It's time to choose PR bonuses in the fourth round. Owen has 6 excitement and Claire has 7, so Owen will choose first. There are plenty of options for Owen, and he chooses the bonus that gives him 2 basic DNA and 1 coin. This leaves Claire with 3 options, and she chooses the bonus that gives her 1 basic DNA and 1 park card.
Round End
At the end of the round, check to see if either player has reached or passed the visitor threshold that triggers the end of the game. If so, proceed immediately to END OF THE GAME. If not, carry out the following steps to prepare for the next round.
- Each player must discard down to their hand limit (3 cards).
- Remove all items from the draft board, discarding any specialist card that remains and returning the DNA dice to the dice bag.
- On the PR track, move the PR marker 1 space to the right. (If the marker is already at the end of the track, do not move it.)
- Switch turn order. The current first player hands the dice bag to their opponent, who will be the first player in the following round.
End of the Game
At the end of a round, if a player has reached or passed the visitor threshold determined by the game length (short game = 25 visitors; medium game = 35 visitors; long game = 45 visitors), the game ends immediately.
Variant: Once a player has reached or passed the visitor threshold required to trigger the end of the game, play 1 more round. This variant is for players who feel that the end of the game can sneak up on you (like a clever girl).
Players will then gain additional visitors during the final scoring, in 5 different categories.
Dinosaurs
Gain visitors from the dinosaurs in your park. The number of visitors that a dinosaur provides is listed in the lower left.
Attractions
Gain visitors from the attractions in your park. The number of visitors that an attraction provides is listed in the lower right. (Tip: Only attractions with a $5 cost provide visitors.)
Attraction Sets
Gain bonus visitors for having complete attraction sets in your park. Each set of 3 different attraction icons (ride, food, merchandise) is worth 4 bonus visitors. You can have multiple sets.
Specialists
Some specialists will also provide visitors.
Lawsuits
Lose 5 visitors for every lawsuit token you were forced to take during the game.
Example G (Final Scoring): Claire had 33 visitors when the end of the game was triggered. She gains 17 visitors from dinosaurs, 2 visitors from attractions, 8 visitors from attraction sets, and 4 visitors from her Chef specialist. However, she also loses 5 visitors because she has 1 lawsuit token. Claire's final total is 59 visitors.
Once the final scoring has been completed, whoever has more visitors is the winner! Their company can now face off against the theme park giants in Dinosaur Island. In the case of a tie, the player with more dinosaurs in their park wins. If still tied, build your own real-life dinosaur park and play with real stakes! (Or just play again to settle the score.)
Solo Mode
A new revolution is sweeping the corporate world: AI CEOs. Artificial intelligences as corporate heads are all the rage these days, and now they are trying to take your job too. In this mode you will test your mettle against their metal, trying to come out on top while they are cutting all the corners and taking away your precious resources.
Changes to Setup
Set up for a 2-player game, with the following additions and changes.
- Remove the following specialist cards from the game: HR Manager, Insider, Programmer.
- Select an AI card based on your desired game length and difficulty. Each AI card lists its game length, and the difficulty is indicated by the number of threat icons.
- Place your opponent's player cubes on the excitement and visitor tracks as normal, but do not place any player cubes on your opponent's company board.
- Perform the setup steps listed on your selected AI card.
- Select 4 plot twist tokens at random. However, some AI cards have specific requirements for which plot twists are in play. Discard and redraw as necessary until the AI card requirements are met.
Changes to Gameplay
Phase 1: Income
The AI always gains income first. The AI card will indicate a priority order for choosing which cards the AI will draw (with a default of drawing from the top of the deck if no suitable match can be found). The AI card will also specify whether the AI gains coins. After the AI gains their income, you gain your income as normal.
Example H (AI Income): Sima-Saurus draws 1 card during the Income Phase. To choose which card, you must look at the cards already in her hand and draw a card for her from the face-up row that is of a different dino type than what she has in hand (or from the top of the deck, if none available). Sima-Saurus also gains 3 coins, plus additional coins for passing income spaces on the excitement track.
Phase 2: Draft
To prepare the items for the draft, draw the top 2 cards from the specialist deck, as normal. However, instead of drawing all 5 DNA dice and then rolling them, draw 1 DNA at a time, roll it, and place it on the leftmost dice slot, until all 5 slots are filled.
Unless otherwise specified, the AI drafts the first item. Refer to the specific AI card to determine which die or specialist the AI will choose. Then you choose an item, and the draft continues in this way until both you and the AI have each drafted 3 items.
When determining whether the AI will draft a specialist card, look at what the AI would gain from that specialist's discard effect. The AI always discards specialists immediately upon drafting them to activate the discard effect.
Example I (AI Draft Priority): Herb E. Vore's priority order for drafting items is advanced DNA > total DNA > coins > visitors > highest threat. So initially, he will choose the die or card that provides the most advanced DNA. Once advanced DNA is not available, Herb E. Vore will go for most basic DNA, then most coins, and so on.
Phase 3: Build
Each AI card specifies what actions they will take in this phase. Unlike you, the AI never spends coins or DNA when building attractions and creating dinosaurs. Certain AI cards will alternate taking different actions from round to round. (You can track this with a cube on the AI card, so that you don't have to simply remember.)
Example J (AI Card Play): In the Build Phase, Dino-Mike always plays 2 cards. First, he plays a dinosaur from hand, always choosing the dinosaur with the most visitors. Dino-Mike then plays an attraction from hand. The card he chooses is whichever card will help him complete an attraction set. If there are multiple cards that would do this, the attraction with the most visitors breaks the tie. If there is still a tie, then you choose which tied card is played.
Phase 4: Visitors
In this phase, you must compare your threat level against your security level, and lose visitors equal to 2x the difference. Don't forget to add any threat icons from the undrafted item! The AI does not compare threat vs. security, but does sometimes lose items equal to the threat icons from the undrafted item.
Then both you and the AI gain visitors equal to your excitement level, as normal. Then you must choose PR bonuses. Unless otherwise specified, the AI always chooses their PR bonus first. They will follow the priority order listed on their card when choosing their bonus. (If there are multiple equal options, the AI selects the rightmost of those options.)
Some AIs will also lose items or visitors based on the threat icons present on the undrafted item, leftover from the Draft Phase. (If this is the case, it will be listed on the AI card.) However, an AI is never forced to take a lawsuit token.
Example K (AI Bonus Priority): When choosing a PR bonus, DNAIDAN will choose the available bonus that offers the most total DNA (if multiple spaces offer the most, DNAIDAN will choose the space with more advanced DNA). During this phase, DNAIDAN also loses visitors equal to the number of threat icons on the undrafted item.
Round End
At the end of the round, you must discard down to your hand limit (3 cards). The AI has no hand limit, and so does not have to discard down. Clear the draft board of all dice and cards, then advance the PR marker 1 space to the right.
End of the Game
At the end of a round, if either you or the AI has reached the visitor threshold determined during setup, the game ends immediately.
You score according to the 5 normal categories. Each AI card has directions on which categories they gain additional visitors for during this final scoring.
Example L (AI Final Scoring): During final scoring, Sara Tops scores for the normal categories. But she also gains +1 visitor for every 2 coins she has at game end (rounded down). So if she ends the game with 7 coins, she will gain +3 visitors.
Gameplay Reference
Phase 1: Income
- Gain 3 coins, +1 coin per food icon, +2 coins per income space reached.
- Draw 1 park card, +1 card per merch icon.
Phase 2: Draft
- First player draws and places DNA dice and specialists.
- Second player drafts an item of their choice.
- Alternate drafting items, until each player has drafted 3 items.
- Undrafted item adds temporary threat.
Phase 3: Build
- Create dinosaurs.
- Build attractions.
- Mix DNA.
- Sell DNA.
- Increase security.
Phase 4: Visitors
- Compare threat vs. security.
- Gain visitors based on current excitement level.
- Choose PR bonuses.
Round End
- Discard down to hand limit.
- Clear the draft board.
- PR marker moves forward.
- Turn order changes.
Final Scoring
- Dinosaurs → gain printed visitors
- Attractions → gain printed visitors
- Attraction Sets → gain 4 visitors per set of 3 attraction icons
- Specialists → gain visitor bonuses
- Lawsuits → lose 5 visitors per lawsuit token