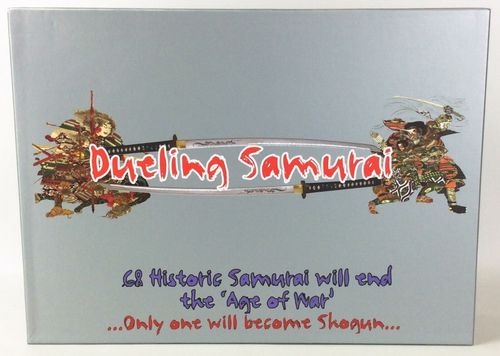
Dueling Samurai
Dueling Samurai Rulebook
Table of Contents
Table of Contents
- Goal of the Game
- Points System
- Warlord Strategies
- Cultural Centres
- Destroy or Capture a Castle
- Time to Play
- Game Set-up
- First Round Special Rules
- Game Play
- Actions
- Attacking and Combat
- God Cards
- Farmer Settlements (Peasants/Farmers/Refugees/Tents)
- Promoting a New Warlord
- Bonus Cards
- Attack Cards
- Defense Cards
- Peace Cards
- Tournament Cards
- Rule Disputes and Other Rule Details
- Historic Samurai (Warlords)
Goal of the Game
In Dueling Samurai, you take control of a ruling clan, give it a strong base to work from and plot, using strategy and the resources at hand, to do just what Tokugawa did: smash all enemy castles and 'win the game', ultimately unifying all of Japan to become Shogun: the ultimate samurai lord and retainer of all of Japan.
When only 1 castle remains, the game is won. If the winning clan is based in Iyo, then this creates the 'Iyo Jidai' or Iyo Period of peace and unity in Japan.
Or, end the game in a predetermined number of rounds (or decide on the last round at the beginning of a round). Minimum 5 rounds of play recommended, playing until 1590, but less is fine too. In this case a points system is used to determine the winner.
Points System
Points System to determine a winner:
Honour Points (+):
- Capture/Destroy Enemy castles: 10 points each.
- Slay Warlords: 2 points each. 1st: Place slain Warlord's chit onto the Warlord Card of the victorious samurai Warlord. Then: If this victorious Warlord is later slain, any Warlords chits on his card go on the 'Honor' box on the Points Card.
- Behead a Warlord (Critical Strike): 1 point. Place a head token onto the 'Heads' box on the Points Card.
- Commit Seppuku: 1 honour point (assassination attempts blocked with Seppuku do not count). Place 1 clan token into the 'Honour' box on the Points Card.
- Promote Warlords: 2 points for each Warlord remaining on the board at the end of the game.
- Take territories: 1 point for each territory held at the end of the game.
- Have the most kills: The surviving Warlord who has the most kills will get 3 points.
- Slay Daimyo: 1 point each. Place one of the enemy's clan tokens onto the 'Honor' box of the Points Card.
- Cultural Centres: Owners of these territories get 1 point for each owned at the end of the game.
ADVANCED RULES
Dishonour (-):
- Dishonorable Retreat: 1 point. Place a clan token in the 'Dishonor' box of the Points card.
- Disruption of Peace: 1 point.
- Breaking Diplomacy: 1 point.
- Small Pox Demons: 1 points.
In all cases of Dishonor, place a clan token in the 'Dishonor' box of the Points card.
Warlord Strategies
- Take and hold regions (same coloured areas of the map), prevent other players from holding regions.
- You must be beside a territory to attack. So, keep the enemy off your doorstep and defend borders to regions and keep the enemy from advancing on your castle!
- Go for the kill. Strike like a katana blow to the heart of a clan when you see the chance. Taking an enemy castle has benefits: you'll get two extra cards and extra samurai (explained later). Destroy all enemy castles and win!
- (ADVANCED PLAY) Cultural Centres may, or may not, influence what you do in the initial set-up of your forces and during game play.
Cultural Centres
Special rules for Cultural Centres (Advanced Play):
- When samurai go to a centre, they may play an attack card before converting to the daimyo of that territory.
- Cultural Centre rules do not apply if the Cultural Centre is in a castle territory. Tournaments may still be held in castle territory, but the other special rules do not apply.
Destroy or Capture a Castle
When all samurai in a castle territory are destroyed a player may keep and occupy the castle, or burn it to the ground (remove it off the board).
In either case the victor gets to look at all opponent cards and take one. The victor also gets to take one card from one of the decks on the board.
In the region of the castle, half of the loser's armies desert and the other half convert (including Warlords) to the victor.
Elsewhere on the board the loser takes 4 Clan Tokens off of each territory (leaving at most one Clan Token).
Time to Play
(Times are approximate and may vary. Time does not include set-up and having to read rules etc.)
| Number of Rounds | 2 players | 3 players | 4 players |
|---|---|---|---|
| 3 | 30 minutes to 1 hour | 45 minutes to 1.25 hours | About 1 hour |
| 4 | 1 to 2 hours | 1 to 2 hours | 1.25 to 2 hours |
| 5 | 1 to 2.5 hours | 1.5 to 3 hours | 1.5 to 3 hours |
| 6 | 1 to 3 hours | 1.5 to 3 hours | 1.5 to 3 hours |
| Until endgame | 1 to 3 hours | 1.5 to 4 hours | 2 to 4+ hours |
As skill level increases, games tend to become quicker.
Game Options:
- In three player games only three regions can be used on either end of the board to make for fantastic and fast game dynamics.
- In four player games players may choose to use only half of the map, including Kinki (green region).
Game Set-up
Game Cards: There are two main decks of cards:
- Playing Cards
- Samurai Warlords Cards (Warlord Cards)
Separate Playing Cards and place them on the board as follows. All Playing Cards have the same backing for gaming purposes. It's an inconvenience, but well worth it.
God Card Deck:
- 1 of each 7 types of god cards (Flooding, Typhoon, Tsunami, Earthquake, Full Moon, Volcano, Asian Invasion).
- Place this deck on the tsunami (on the game board).
Defense card deck:
- Defense cards
- Peace cards
- Tournaments
- 4 spy cards
- Place this deck on the image labelled 'Peace.'
Attack card deck:
- Attack cards
- 4 spy cards
- The rest of the god cards
- Place this deck on the image labelled 'War'.
Bonus Card deck:
- All bonus cards.
- Place these cards on the image labelled 'Land.'
Separate the Samurai Warlords Cards into two decks:
- The 'Gold Deck' of characters for promoting new Warlords (20 cards). These do NOT have territory names written on them.
- The remainder (with territory names written on them). This will be referred to as the 'Samurai Warlords Deck.'
Game Board set-up:
-
Determine 'Centres of Culture' on the map. Do this by drawing one card at a time from the Samurai Warlord's Deck (Advanced play only).
In this order, place the Swordsmiths, Tea Ceremony, Poetry, Emperor and Calligraphy chits on the territories selected randomly. The significance of these centres of culture will be explained later.
Place the drawn cards onto the bottom of the Samurai Warlords Deck and do not re-shuffle.
-
Deal out all of the Samurai Warlords Cards to players. Players place a Clan Token (1000 samurai) on each territory they get dealt. The territory name is written on the Warlord Card and is colour coded to match region colours for ease of set-up.
-
Choose your castle territory in secret. This will be your base and placement is extremely important. Once you decide on your castle territory, take the Warlord Card with that territory name on it out of your hand and place it face down on the table. Place your castle on the card to tell players you have decided.
-
Once ALL players have decided on their castle territory, all players reveal their castle territory selection and place their castle onto their selected castle territory. Change seats at table to make sure you sit close to your castle.
Now, lay out your Warlord Cards in front of you. It's best to put colours together and also put cards close to their corresponding region.
Also, place a Clan Token on the Warlord Card who resides in your castle territory. This designates him as the main Daimyo (main Warlord) of your mission to become Shogun. The rest of the territorial Daimyo samurai on the map represent your allied clans and these samurai act as your Warlords for conducting war.
If your main Daimyo is slain you must designate an heir, by placing a Clan Token on another Warlord card.
Note: Slain Daimyo result in a bonus point. Place the opponents' Clan Token from the Warlord Card onto your Points Card, as well as the Samurai Chit of the slain Warlord.
-
Roll a D12 to see who goes first. If highest dice tie then all players get to roll again.
Player 1 goes first and the turn order goes clockwise for the rest of the game.
First Round Special Rules
The first round has special rules to keep the game as fair as possible:
- You cannot attack castles in the first round of play. You MAY use attack cards on castle, other than Ninja.
- The last person to go in the first round gets an extra game card of their choice, between attack and defense, at the start of their turn.
- 'Clusters of three' samurai bonuses do not apply in Round One (you'll learn about this below).
- If the first player to go owns a region at the start of the game by luck, they do not receive the start of turn region bonus.
Game Play
Each player makes 2 actions starting from player 1 and rotating clockwise (and doesn't change). This represents 5 years.
At the end of 5 years: each player takes 2 Playing Cards and 2 bonus cards.
Each player again makes 2 actions in turn, after which 1 round is complete and 1 decade has passed.
At the end of a decade:
- Each player takes 2 Playing Cards and 2 bonus cards.
- Players may fortify by moving as many Clan Tokens and Warlords around connected territories as they wish. Clan Tokens may be transferred between Warlords.
- Each player collects 5000 samurai (5 Clan Tokens) and allocates them to any Warlord(s) that you want.
- Collect armies for regions owned. Each region name has two numbers written on them. Shikoku – Blue: 4,1). Ex: 4 armies (4 Clan Tokens) are collected for owning Shikoku at the beginning of your turn. These 4 armies must be placed in Shikoku.
- "Clusters of Three": Collect 3000 samurai (3 Clan Tokens) for every three territories owned. These game pieces must be placed within any of the three territories used to get them. The three territories do not have to be connected. DO NOT count territories in regions (colored regions) that you own!
Other things happen at the end of a decade:
End of Round Summary (some of these items are advanced rules items):
- Add farmer settlements to peasant controlled territories.
- Take away 1000 samurai from Smallpox infected territories.
- Players move 1000 samurai to Yoshiwara (if it's in play), Keepers of History, Emperor, Swordsmiths and Tea Ceremony Cultural Centres.
- Have Dojo and Sumo tournaments if they are in play.
- Remove red tokens from all riflemen, archers and cannons.
- Move mercenaries.
Actions
You may make up to 2 actions per turn. Actions are either Attack or Movement or Bribes. Players do not have to use all four actions.
Movement Actions
As an action you may move samurai from one territory to a connected territory (as in you own all the territories you would like to move through, for as far as you want). Clan tokens and Warlords may be collected along the way. Only direct routes from start to finish are allowed, with no side-tracking to collect extra Warlords or Clan Tokens.
Bribery Actions
As an action you may attempt to bribe a Warlord in an adjacent territory. To do this you must roll 11 or 12. If successful the Warlord immediately switches sides and goes to the territory from which the bribe occurred. In this case, replace the entire stack of Clan Tokens under control of this Warlord with your own.
Attack Actions
As part of the one act of attacking the territory, you may attack as many times until there is a conclusion to the battle, or you retreat dishonourably. Failed attacks count as one action.
You may attack up to 4 territories in your turn (failed attacks count). As part of an Attack Action, the player may attack the territory as many times as they want to.
See next section on rules for attacking and defending.
End Your Turn
Collect your end of turn armies. Each region name has two numbers written on them. Shikoku – Blue: 4,1. Ex: 1 army is collected for owning Shikoku at the end of your turn. This one army must be placed in Shikoku.
Attacking and Combat
Rules for attacking
- You must be beside a territory to attack it, or territories must be connected with an arrow over water.
- You may make a multi-pronged attack on a territory (from multiple territories) and converge armies upon victory.
- If you conquer a territory you may leave it abandoned by placing a farmer settlement (peasants or farmers – more on these later).
- You may, or may not, leave a Clan Token or samurai Warlords behind you in the territory you attacked from. If you leave none, the territory is abandoned and a farmer settlement is placed there.
- If attacking from a territory with no samurai Warlord leading the forces, roll a D6 instead of a D12.
Combat
When samurai meet in combat, the game dynamic zooms in on the two characters, who engage in a duel. In the background would be an epic melee struggle between the two (or more) rival clans. The Clan Tokens represent a samurai Warlord's thousands of samurai under their command, and they are also the Warlord's health points. So, in effect, both the melee and the duel occur at the same time with the focus on the duel.
- Each player rolls a D12.
- The attacker always has +1 for attacking.
- Check samurai character cards for modifiers to the roll (Advanced Play Only).
- The difference between the dice is the loss of HP or Clan Tokens from that samurai.
IMPORTANT: The number of samurai slain in any given battle can only be 3x the number of Clan Tokens in the battle. For example, if a player wins a duel with only 1 Clan Token left, they can only cause a maximum of 3 damage to the enemy. If a player wins a duel with only 2 Clan Tokens left they can only cause a maximum of 6 damage to the enemy. However, at any time decapitations (Critical Strike) may occur, regardless of the number of Clan Tokens on the winning side (decapitation rules outlined later).
A samurai Warlord is slain when their HP goes to zero (no Clan Tokens left). In this case, the Samurai Chit gets placed on the character card of the samurai Warlord who slayed them.
Also, if the slain Warlord had slain any other Warlords, the Samurai Chit(s) on their character card get put onto the Points Card (on the 'Heads') for the player who owns the slain Warlord.
This occurs for two reasons:
- Each player gets points for every Warlord they slay.
- The surviving Warlord with the most kills wins extra points. So, when a Warlord dies, they are no longer in the running for this bonus, and the cards can be put away to clear the table space. Thus, the chits go on the player's Points Card.
Decapitations (Parental Guidance is advised)
If you are playing with kids, please call this 'getting 'em real good' or Critical Strike!
Decapitating a rival was a focal point of combat and the glory and reward of victory. We simply couldn't ignore this cultural aspect of samurai warfare.
In Warlord, if in a duel a player rolls 12 and the other player rolls 3 or lower it results in an automatic decapitation and slaying. In this case the winner gets to put a "Decap Chit" into the 'head basket' on their Points Card. If "Decap Chits" run out, then use your opponent's Clan Tokens.
Some samurai Warlords have modifiers to their decapitation rules, so pay attention to the characteristics of your samurai.
Due to the horrific victory, half of the loser's armies will convert to the winner and the other half are taken off the board (desertion).
Claiming territory
If a territory is defeated the attacker may occupy it with at least 1000 samurai by moving a Clan Token in it. This occupying force may or may not be accompanied by a samurai Warlord.
If you do not want to occupy a defeated territory place a farmer settlement in it showing that peasants rule there now (farmers explained later).
Attack may come from multiple territories at once, meaning you can conjoin armies upon a conquered territory from a multi-pronged attack.
Dishonourable retreat
After the outcome of a roll, the attacker may retreat to end the battle. In this case place a Clan Token from the Warlord's army and put it in the Dishonour area of the Points Card.
In the case that a territory is attacked that does not have a samurai Warlord in it, the defender rolls a D6 instead of a D12.
Special Rolls during duels
All rules apply to natural dice (non-modified outcomes).
- Rolling 1 as the attacker: Allows another player to assassinate you and end your turn immediately.
- Both players roll 1: The battle immediately ends. The two samurai have a game of 'go' and the attacker goes home. Place a 'Go Chit' on the territory for game history. This territory becomes the gaming and gambling district in the game and combat cannot occur in this territory from hence forth. All players may move through this territory as part of a Movement Action.
- A player may attack this territory and will add 1 enemy Clan Token into their honour pool on the Points Card.
- All players send 1000 samurai to this territory at the end of a round.
- If double ones is rolled again the 'Go Chit' is moved to the territory to make a new gaming and gambling district.
- Duel dice tie (after modifiers): A god card event occurs.
In the case a player is rolling more than 1D12 (for example when using archers), the highest value is the result applied to the above roll rules. However, BOTH dice count towards the rolling a '1' rule for assassination chances.
God Cards
If a God Card Event is triggered, turn over a God Card from the God Card Deck (it should be on the tsunami on the game board).
Turn over the next Bonus Card. There are two territories written on it. The calamity strikes the territory closest to the battle that triggered the battle.
Hand Held God Cards
Since there are 7 God Cards in the Attack Card Deck, a player may hold one in their hand. The player can play it at any time by combining it with a Bonus Card to direct the attack at that territory.
OR
A player may do a random God Card attack by turning over the next Bonus Card and rolling a D6 to locate the calamity.
Full Moon God Cards may not be directed with Bonus Cards held in-hand.
If a God Card takes out all samurai in a territory, place a farmer settlement to show that farmers have taken over.
Volcanos
You will notice that volcanos straddle territories (or do so via arrows over water (Awaji)). The damage is spread out evenly in this case between the two or three territories (round up).
Farmer Settlements (Peasants/Farmers/Refugees/Tents)
Peasants (also referred to as farmers or refugees) are placed on territories that have all samurai armies destroyed by Attack Cards, or God Cards, or if territories are abandoned during conquest or if territories are defeated but not wanted.
Peasants multiply at the end of each round (by adding one paper tent to the territory controlled by peasants).
Samurai must fight to regain peasant controlled territories. Regular rules apply for combat, with peasants rolling 1D6 and winning on all 6's (even if the opponent rolls higher). If the opponent rolled higher than a 6, they lose only 1 Clan Token.
Promoting a New Warlord
Any samurai Warlord that gets its 11th Clan Token may promote a soldier to Warlord status. The 11th token must come as a bonus from outside of the board. Thus, you cannot promote a new Warlord by simply making a troop movement.
Randomly choose a new Warlord Card from the 'gold deck.' Place the Warlord Chit for the character in the territory where the promotion occurred. Give the new Warlord the 11th Clan Token. Any Clan Tokens being added to or moved into the territory containing the new Warlord may receive the Clan Tokens, in order to bolster their forces. End of turn fortification moves allows a player to adjust the number of forces under any samurai Warlord.
Warlords only duel in pairs. Each player can choose who to send into the duel should they have more than 1 Warlord. The defender cannot retreat. The attacker may retreat, but will receive a dishonour point.
Bonus Cards
These can be played at any time. Ambush requires that the enemy make an advance at you to attack.
There are 4 types: Archers, Horseback Samurai, Dueling Samurai and Ambush.
These cards can be cashed in for additional samurai. The Cash-in value starts at 6 and goes up by 2's until 24.
Players may only cash-in during their own turn, and may only do so once per turn. Cash-in by using any three Bonus Cards.
The Territory Cards may also be used individually:
Dueling Samurai: Use one of these at any time by placing 4000 samurai (4 Clan Tokens) in any territory. This represents increasing samurai forces by promoting peasants. (There do not have to be paper tents on the board to play this card.)
When the Bonus Card cash-in is above 12, the Dueling Warlord Card can be used in combination with any Attack Card. In doing so a player may roll an addition dice for the attack.
In defense, the Dueling Samurai Card may be used to cash in for more Samurai, but, if three are played it is worth 12 clan tokens (since it's not your turn you can't do a Bonus Card army cash-in, but may utilize them individually when it is not your turn).
Archer Cards: Use to better your odds in battle. Place an Archer Chit on the board and a small D6 showing six. During a duel with archers present, the player may roll 2D12 and use the highest result for one duel per 10 years.
Place a small red token by the Archer token when they have been used. Take this small red token off the board at the start of each decade. When the warlord that the archers are assigned to is slain, they are taken off the board.
Both offense and defense may use archers at the same time. Both players will roll 2D12 and use the highest result.
Ambush: If an enemy makes a movement at you to attack you may use the Ambush Card.
- Commit 1 Clan Token for the ambush and roll 1D12.
- Commit 2 Clan Tokens for the ambush and roll 2D12 and take the highest result.
- Rolling just one '1' results in a failed attack and the Clan Tokens are removed from the board.
Horses Cards: Deploy troops at any time from one territory to another (as far as you are connected). You must declare your path of travel. You may pass enemy territory only with permission.
Ambush! As you pass through foreign land, the owner may attack you once as an ambush on your convey. This is a 1D6 attack.
Beware! Demons may destroy an entire Horses Card troop deployment. Floods, tsunami, typhoon, earthquakes, and volcanos may also!
God Cards and troop deployment: If a calamity strikes a territory that the troop deployment goes through, all samurai perish.
All Movement Actions Rules Apply.
When a Bonus Card is used it is discarded. When no Bonus Cards are left in the deck, shuffle the discard pile and re-use these.
Attack Cards
- Attack Cards can be used anytime and it does not have to be your turn to use one.
- You must be bordering a territory to attack it with an Attack Card.
- The Ninja Card is the only exception. It must be your turn to use the Ninja Card and you don't have to be neighbouring the castle territory to attack it.
Although Attack Cards can be used anytime it is bad manners and illegal to use them when a player is counting and placing their start of turn armies.
When attack cards take out all samurai in a region, place a Farmer Settlement in the territory to signify the rule of peasants in that land.
USING ATTACK CARDS IN DEFENSE: When a player declares an attack on a territory, the defender has the option to play attack cards and/or make a troop deployment before the first attack dice are rolled. Otherwise, the order of cards played determines the order that they are played out.
List of Attack Cards
In all cases if attack cards destroy all enemy samurai, a Farmer Settlement is placed in the territory.
Assassin: Assassination can be played when the attacking dice roll a 1. This move ends the attacking player's turn immediately. The player may NOT cash in for armies with Bonus Cards.
They may do actions other than movement actions for 1 decade.
Seppuku blocks the assassin card.
Advanced rules: Place the assassin chit in the enemy castle. On your next turn(s) roll 10+ to slay any Warlord in that territory or neighbouring territories.
When the owner of this territory has their turn they must roll 6+ on D12 to detect the assassin. If detected the assassin chit is taken off the board.
Cannons: As a 2D6 attack they can be used to:
- Defend a castle against an attack.
- Shoot at a ship passing by.
- Be shot from a ship at a seaside territory.
Otherwise Cannons may be used as a 1D6 attack card and cannot be combined with Ninja.
If one of the dice rolls '1', this is a failed attack on that dice only. This dice must be re-rolled against the person using the Cannons Card, as this is a gun powder accident. Rolling two 1's results in a double fail and both dice are rolled against the player using the cannons card.
Advanced rules: Cannons stay in play and may be used once per decade until '1' is rolled or the Warlord that the cannons are assigned to is destroyed. They may be moved with an army as long as there is at least 5 clan tokens. Use small red tokens to keep track of the 1 use per decade rule.
Religious Conversion: Religious Conversion played a huge role in the outcome of the 'Age of War.' Christianity, Buddhism, Confuciusm, Bushido and Shinto played their part in the carving of history, as it will in your game.
Conversion is a 1D6 attack. The result is the number of samurai who convert. Keep the opposing coloured playing pieces as game history – it is fun to attack a player with their own samurai!
Samurai Warlords whose HP is less than the roll are converted and switch sides.
Bushido blocks Conversion.
Rolling a '1' on a conversion attack is 'failed conversion' due to an inept priesthood. In this case the opposing player rolls and the result are the number of samurai who convert to their side.
Advanced rules: The conversion chit should be placed on the game board. Conversion can then be played once per decade, until a '1' is rolled or the territory is taken over. Use the small red tokens to keep track of conversion use.
Ninja: The style of combat which employed ninja was not fully developed until the end of the 'age of war.' Battlefield honour through duels and full out combat became a secondary notion if one could attack through stealth, deception and cunning.
Roll D12 on attack, despite not having a Warlord with this force. It must be your turn to play this card. You do not have to be adjoining the castle territory to use it.
Place the Ninja Chit in the castle territory with the 5 Clan Tokens.
Scouts block Ninja, where the samurai infiltration team all convert.
The Ninja Card can be used to cancel diplomacy, where the attack immediately cancels the Diplomacy Card. Diplomacy by decree of the emperor cannot be cancelled.
A Ninja attack may attempt to bribe a Warlord in the castle that is not the main Daimyo. This counts as a regular Bribery Action.
Ninja may be combined with other attack cards but not cannons, or battering ram.
Advanced Rules: If they take over the castle, keep them as a fighting force, requiring no Warlord to roll D12. You may add clan tokens to this fighting force with bonus cards.
Ninja may then move through one territory unnoticed to attack a territory two territories away as a single action.
Riflemen: Teppo, arquebus, or rifles were used primarily as sniping weapons and not in large scale combat until later in the 17th century. Thus, their limited use in this game.
Rifles are a 1D6 attack, where a roll of '1' is a failed attack, due to a gunpowder accident. In this case, roll against yourself.
When employed place a Riflemen Chit on the territory. Each decade you may shoot the rifles once, until you roll a '1,' or until the Warlord who is in control of the rifles is slain. Place a small red token on the riflemen when used. Take this token off at the end of a decade.
The Riflemen Chit may move with an army's movements.
Revolt: The Ikko-Ikki, or armed peasants movement had a large impact on history in the 16th century, more so than any other time in the era of samurai.
Incite revolt in any adjoining territory at any time. When invited to a tournament, ceremony, festival or yoshiwara, you may also incite revolt (as a final act before converting).
Thus, revolt ends peace from the moment it is played. A player may wait until their turn to end peace with revolt in this case.
The tournament and peace cards block revolt.
Revolt incited at tournaments occurs after the conclusion of the tournament.
Rolling a '1' is failed revolt – in this case, roll against yourself (unless revolt was incited and you do not border the territory.)
Breaking a Peace Card with the Revolt Card causes a Dishonour Point. Place a Clan Token for the act in your Dishonour Points section of the Points Card.
Advanced Rules: After the revolt occurs, place a Revolt Chit in the territory. At the start of the turn of the person who owns this territory, the player must spend an action to remove the revolt. This can be done by rolling 6+ on D12. If the attempt is failed the number rolled on the D12 is the number of Clan Tokens removed from the territory due to the ongoing revolt.
Smallpox Demons: Smallpox was a disease that came and went, along with drought, famine and other acts of the angry gods overlooking the blood flood from the 'Age of War.'
At times though, with complete dishonour and secrecy, biological warfare took place amongst the most cunning and evil daimyo.
This is a 1D6 attack. Rolling a '1' is a failed attack, where the samurai infect their own territory instead. In this case, the attacker rolls against themselves.
Chinese Medicine blocks Smallpox.
Territories attacked with smallpox become infected and remain so until the end of the game (or until healed with Chinese Medicine). This territory will lose 1000 samurai at the end of the round.
Using Smallpox Demons results in 0.5 Dishonour Point being added to the Points Card of the player who uses them.
Mercenaries: Ronin, pirates and bandits are hired mercenaries whose primary function is to dissolve diplomacy (but incurs a Dishonour Point if Diplomacy is broken).
Any of these cards cancel the Diplomacy Card. They can even be played by the player who originally played diplomacy, resulting in one of the strongest combinations in the game.
These are a 1D6 attack, where rolling a 1 is a failed attack. In this case the mercs double cross and attack the person that hires them.
Mercenaries can also be bribed with the Oban Gold Card, where the mercs double cross the player who originally hired them.
Pirates may only be used from a seaside territory against another seaside territory, but the two territories have to be adjoining. Pirates may also attack ships that pass by.
Advanced Rules: When mercenaries are utilized, place a Mercenary Chit onto the board in the territory that was attacked. If the attack succeeds and all samurai are destroyed from the mercs the winner may move in to take the territory and the mercs move with them.
The player who owns the territory that has the mercenaries may roll 8+ on D12 to direct them to attack again. In a fail 1 Clan Token is removed from the board.
If attacking a territory that has merc in it – the defender has +1 modifier to duels.
Mercenaries will move at the end of each round, according to the rules outlined below.
Battering Rams: The 'Kikko Sha' or battering ram was used to deal the death blow to enemy castle gates.
Advanced rules: To use it you must have at least 5000 samurai. It cannot be combined with the Ninja Card. It can only be used to attack a castle.
This is a 1D12 attack. Rolling a '1' or '2' is a failed attack, where the samurai have a battering ram accident. In this case, roll against yourself.
Advanced rules: Place the Battering Ram Chit on the table when used. If the attack succeeds (against the castle) keep the battering rams for later use! You must have at least 5 Clan Tokens to move the battering ram on conquest to another castle.
Navy: May be used to transport samurai from one territory to another.
The path of the boat must be clearly declared so that other players may shoot cannons, or play Typhoon, Tsunami, or Demons. Typhoon and Tsunami sink the ship, as do Demons, resulting in all samurai lost.
The Navy can be parked offshore and used again in the next decade of play. The boat may only be used once per round (10 years on the round counter). After the first use via the Navy Card, it costs 1 Action to utilize the Navy again, since it will be a movement. If Navy is then used to attack a territory, this will also count as an Attack Action.
If Navy is parked and the territory is attacked and conquered, the Navy ownership goes to the victor. If the Navy had not been used in the round yet, the victor may utilize it (costing 1 Action), since it is a Movement Action.
Note: The original use of the Navy Card does not burn an Action Point.
Should peace be declared when samurai are on a beach mid-attack, they remain there until peace is over, unless an action is used to move them.
Smallpox, used against beached samurai, results in half the damage being split between the offensive and defensive forces.
Please use the Navy Card as a boat for the armies.
Tactical Navy retreat: Armies aboard this ship are not subject to conversion and desertion rules for when castles are taken over.
Typhoon and tsunami targeting the territory the boat is anchored in, or regions on either side for 3 territories (making a total of 7 regions), will sink the ship. Demons and Pirates may attack anchored ships.
Spy Cards: 4 go into the Attack Deck and 4 go into the Defense Deck.
Spy cards block spy cards, where the spy becomes a double agent and the spying is reversed. This is the reason all cards have the same backing – and it's well worth it!
Advanced Rules: When spying occurs: Place a Spy Chit in the enemy castle. In the next round you may utilize the spy again, but must pass a stealth test. If the test succeeds you may blindly choose and keep one of card from your enemy.
Spy Stealth Tests (D12):
| Test | 1st | 2nd | 3rd | 4th | 5th | 6th | 7th |
|---|---|---|---|---|---|---|---|
| Must Roll | 6+ | 7+ | 8+ | 9+ | 10+ | 11+ | 12 |
When a test is failed the Spy is discovered and slain.
In the extremely rare case a spy lasts until 1620 they automatically become an assassin. Choose any samurai Warlord in the castle territory or adjacent territories to slay. Also the master spy will take two cards blindly and keep them. The spy will then retire onto the Points Card and count as 2 points.
Use the small D6 to keep track of your spy count.
Moving Ronin, Pirates, Bandits and Demons
At the end of each round, any Mercenaries or Demons on the board will move according to the following rules. Roll a D12:
- 1 to 3 is North.
- 4 to 6 is East.
- 7-9 is South.
- 10-12 is West.
All Ronin, Pirates, Bandits and Demons will move in the same direction. If there is nowhere to move to (the direction is the ocean) the character will not move. If there is a disagreement as to which territory the character should move, a D12 can be rolled to determine the direction, using evens and odds. Pirates must stay on the coast and ignore movement that would send them inland.
Defense Cards
The defense card Deck has Defense Cards, Peace Cards and Tournament Cards.
Dueling Samurai Bonus Cards may be played in combination with Defence Cards to increase the number of dice rolled (once the Bonus cash-in is greater than 12).
Chinese Medicine: Chinese medicine blocks Smallpox. The Smallpox infects the attacker instead. Roll 1D6 against the attacking territory. The result is the number of Clan Tokens taken off the territory. If all samurai are wiped out, the damage spreads to neighbouring or closest territories by the choice of the attacker (who used the smallpox card). Chinese Medicine can be used to heal an infected territory.
Advanced Rules: When played, place a Chinese Medicine Chit on the territory it was played. This chit can move with armies and will prevent any future Smallpox attacks and provide +1 in all duels for the Warlord that this chit is associated with.
Bushido: Bushido blocks religious conversion. The way of the samurai overcomes the religious zealots!
Roll 1D6 against the attacking territory. The result is the number of samurai that convert to your side.
DO NOT switch the game pieces for ones of your own colour – this is game history and you can end up attacking a player with their own samurai!
If all samurai are converted in a territory, samurai will convert from adjacent then closest territories by the choice of the attacker (who used the conversion card), until the amount rolled on the D6 have converted.
Advanced rules: When played, place the Bushido Chit into the territory. This chit can be moved around with armies and will cause +1 to all duels for the warlord that this chit is associated with.
Scouts: Scouts block Snipers and Ninja and may destroy Riflemen.
- Blocking Ninja: the attacking force immediately converts and becomes part of the defending player's army.
- Blocking Sniper Cannons: Roll 1D6 against the attacker. The result is the damage caused to the army via ambush!
- Blocking Rifles: Roll 6+ on D12 to successfully ambush and destroy riflemen. This can happen against the Riflemen Card or already deployed riflemen.
When played, place the Scouts Chit on the game board where it is played. This chit can be moved around with armies and can prevent future snipers attacks. The chit will remain in play until the territory is destroyed.
Gold: Oban Gold can be used to bribe Warlords or to bribe Ronin, pirates and bandits.
Block Pirates, Ronin and Bandits: Pay them off and they double cross. Roll 1d6 against the attacker. Damage spreads if there are not enough samurai in the territory, as explained on earlier cards (above). In this case the gold chit is not put onto the table. A Warlord holding gold from a bribe may use the gold to pay off the mercenaries.
Bribe a Warlord with Oban Gold: Any samurai Warlord may be bribed at any time (except the main Daimyo). Roll 1D12 and get 9 or higher and the Warlord switches sides. (He will be placed in a territory of your choice that is adjoining or the next closest territory of your choice).
Advanced Rules: The gold remains with the bribed Warlord (using the Gold Chit). If this Warlord is slain the gold goes to the victor, who may use it to bribe a Warlord. In this case, since they are not using a card, an action is required to make the bribe occur.
(During your turn you may attempt to bribe a Warlord in an adjacent territory by using a Bribery Action. In this case, without gold, you must roll 11 or 12 to bribe the Warlord.)
Other Notes: Your main Daimyo cannot be bribed.
Note: the original use of the Oban Gold card for bribery does not require an Action. Any additional uses of the same gold for future bribing requires a Bribe Action to be used.
Seppuku: Block assassination, or gain 2 honour points.
Block Assassination: If a player tries to assassinate you, block it with seppuku. The plot is foiled and to save face, the attacker must remove 100 samurai from their castle territory. If no samurai remain, a Farmer Settlement is placed in the castle territory.
Gain 2 honour points: If you are getting horribly smashed in the game, you may commit seppuku and gain 2 points to the score at the end of the game. It must be played on one of your own Warlords, and can happen mid-duel. The Warlord counts as one slain for you, for points in the game at the end. So, 1 Seppuku Card played against yourself is worth 4 points at the end of the game. In this case put the Seppuku Card aside for the end of the game score tallies.
Furious Defence: Furious defense can only be played when your castle is getting attacked. Roll 1d6 against the attacker and this number of samurai are destroyed in the fury.
Rolling a 1 is 'failed fury'. Roll again against yourself. This number of samurai are destroyed in the 'failed fury.'
Dueling Samurai may be played together with Furious Defense if the samurai cash-in is greater than 12.
Demons: Demons destroy an entire ship or horseback samurai troop deployment. You do not have to be neighbouring the territory to play this card.
Advanced rules: When played, place a demons chit on the board. It will stay in this territory until the end of the game. The owner of this territory will get -1 to highest dice in combat due to the presence of demons.
Demons move at the end of each round, according to the movement rules outlined earlier for Demons and Mercenaries. When appearing due to an attack on Navy, the Demons beach into the territory of their choice on the path of the boat.
Diplomacy: Hostages, Marriage, Emperor – The Diplomacy cards…
Force 1 full round of peace between you and another clan. You block an attacker from attacking you for the rest of their current turn. Then on your turn you cannot attack them.
Peasants can be attacked during diplomacy.
Either player can use Ronin, Pirates or Bandits to cancel the diplomacy. Even if the mercenary attack is reversed by gold, the diplomacy is over.
Rolling a '1' or a failed Ronin, Pirates or Bandits attack, does not end diplomacy.
No other attack cards can be used during diplomacy.
Smallpox and Religious Conversion attack cards can be played during Diplomacy, and they do not end diplomacy.
Peace Cards
How you wage peace will play as much or even more than how you wage war!
Absolute Peace (the Peace Pipe): Force one full round of peace amongst all players. The person it is played against is the first to lose their chance at attacking, and the first person to get to attack again.
If played against yourself (during your own turn), you cannot attack for one full round, so the next person that will be able to attack is the person to go after you.
Any attack card can be used, but they do not end the peace.
Nothing can block this card, and it is the strongest in the game. However, Religious Conversion and Smallpox may be played during Absolute Peace.
Only other players can attack peasants during Absolute Peace (the player who uses the Absolute Peace Card is the only one that cannot attack peasants on their turn).
This card DOES block revolt, if revolt is played first. However, Revolt does NOT end Absolute Peace.
Place the peace chit in a territory when this card is played for game history.
Ceremony: Religious Ceremony can be played to block revolt, OR on its own to cause one full round of peace in the territory its played in PLUS all territories adjoining that territory.
The Revolt Card can be played to end the regional peace. Also, Religious Conversion and Smallpox can be played in these territories during the peace.
Place the peace chit in a territory when this card is played for game history.
Festival: Festival blocks an attack for one round, in one territory only. This can be any territory on the board, including capital territories.
Revolt ends the festival and ends the peace once it is played. Religious Conversion and Smallpox may be played on festival territories. Festival also blocks Revolt, by easing the populace with the festival.
Place the peace chit in a territory when this card is played for game history.
Yoshiwara (The Willow World): The original brothel district of Edo, the Yoshiwara had a strong influence on opposing daimyo. Tokugawa used luxuries to weaken his enemy and the Yoshiwara played a crucial role in this process.
The original red light district of Edo is considered to have played a key role in Tokugawa's overall strategy of softening his enemies into submission. Use it in Dueling Samurai to your advantage!
Yoshiwara blocks Revolt. Revolt cannot be played against Yoshiwara.
Only Smallpox can be played against it, which ends the Yoshiwara. (Which results in a total of 1.5 dishonour points!)
If the Yoshiwara blocks the only route to a castle, it can be attacked.
At the end of each round starting after the round that Yoshiwara is played in, players must send 1000 samurai to the Yoshiwara. These samurai convert. Only Smallpox can be played as an attack on that territory, before the samurai convert.
Tournament Cards
Dojo: The Dojo Card can be played anytime, except during a duel.
Although it was forbidden for samurai to duel for money, tournaments were held all the time, even to the death.
If any one player rolls a 12 and any other player rolls 2 or 1, their Warlord is slain. If a player does not have a Warlord, they are allowed to promote a 1 HP Warlord and send them to the tournament. This Warlord may go anywhere after the tournament, if he survives.
Once the Dojo is in play, a tournament occurs at the end of each round, starting with the next round after the original Dojo Event.
Sumo: Oda Nobunaga popularized this traditional sport as part of his warlord demeanour.
The Sumo Card can be played anytime (except during a duel). In order to fulfil the 300 samurai quota for the sumo tournament a player can pull samurai from various places on the board. Territories can be abandoned to do this, leaving behind farmers, or paper tents.
Upon winning, the samurai who convert are to remain in their original colour. Also, the winning player must bring new samurai back to the territories they came from, in proper proportions.
Once Sumo is in play, a tournament occurs at the end of each round, starting with the next round after the original Sumo Event.
When a card pile is used up, collect the cards, shuffle and replace them on the board.
Rule Disputes and Other Rule Details
Rule dispute: Chill! Have fun and enjoy losing. Dueling Samurai will twist you up, so remember to enjoy the 'game story' of each game. You'll win next time! Try to find a common ground for disputes. Feel free to visit our FAQ for rules on our homepage: www.BigForestCreativityLab.com
The order that cards are played, or events occurring, must be followed.
Etiquette
- Let players start their turn before Attacking with cards.
- Freshly picked up cards cannot be used to prevent a start of turn cash in.
- Once played on the table, or verbally declared, an Attack Card may not be taken back. This is especially true if it is revealed that the opposing player has the corresponding defense card.
- If a regular attack is declared, the attacker must attack at least once (especially if the defender responds somehow to being attacked with an Attack Card).
Time Saving Tips
- Allow 'end of turn army movements/collection of armies' and the next player's 'start of turn army collection' to overlap, in order to save time.
- The player to start their turn must verify the previous player is done fortifying and placing their end of turn armies, before they attack anywhere. This is especially true when playing at pro levels.
- Forgetting to do something is called 'Failed Leadership'; players cannot go back and use an unused action.
At pro levels
Forgetting to collect cards is 'Failed Leadership.' If the next player has started making Actions for their turn, uncollected end of turn cards are unavailable. (Thus, even at pro levels, players may collect cards during the start of turn bonus army placement of the next player. And, it is a rule that a player may not start attacking until the previous player's end of turn fortification is complete.)
Players should remind one another to collect end of turn cards and not enforce failed leadership in non-pro situations.
Cheating
Players caught cheating must undergo a seppuku. Other players must mutually decide which of the cheater's Warlord commits seppuku.
If game pieces get used up
If Clan Tokens are used up players must battle to free up resources. Thus, there is an army size limit for each player.
NOTE: All conversions (where samurai switch sides) must keep the original clan token colour on the board! So, players may be controlling enemy samurai Clan Tokens that had converted.
If Warlord Cards are used up, there are no other samurai that can enter the game and again, time slows down until there is a victor with the remaining samurai on the board.
Historic Samurai (Warlords)
The following is a short list of some of the historic samurai who are in this game. We encourage gamers to check out the internet for all the 68 characters in this game to draw parallels between history and how characters play in Dueling Samurai.
Ashikaga Yoshiaki (1537 – 1597)
The 15th and last Ashigaka shogun, Yoshiaki fails to keep his families hold on the warring states of Japan. Defeated by Oda in 1568, Yoshiaki utilized the Ikko-Ikki and farmers to remain relevant in the forging of a unified Japan.
This Daimyo is special in that he may control peasants, or paper tents.
Rules for doing so: In territories that have more than one paper tent, the extra paper tent may be used to attack a neighbouring territory. Also, once per turn, Ashikaga may force a single paper tent to make an attack. Should they win, the paper tent multiplies into two paper tents. Upon victory, this paper tent may continue to attack adjoining territories until defeated.
Oda Nobunaga (1534 – 1582)
Oda defeated the Ashikaga Shogunate in 1573, and popularized sumo. He was eventually betrayed by his 'loyal' retainer, Akechi Mitsuhide. Oda historically had a terrible time fighting against the Ikko-Ikko and farmer warriors.
Takeda Shingen (1521 – 1573)
A dominant figure in the pre-final stages of the 'Age of War,' Shingen could have easily 'won the game' if it wasn't for the snipers that took him out. His rivalry against Uesuig Kenshin is legendary, as is his fear invoking conquering of vast portions of Chubu.
Uesugi Kenshin (1530 – 1578)
Kenshin's rivalry with Shingen dominated this daimyo's career, as did a Buddhism inspired unification of Kanto. Armed with a Katana against Shingen who only had a battle fan, Kenshin was unable to destroy his enemy. He died most likely of deep organ illness, whereupon Oda noted, "Now the land is mine!"
Mori Motonari (1497 – 1571)
Rulers of much of Chugoku, the Mori Clan could have easily 'won the game' if it were not for the cards given and how they were played. Motonari and his heirs were powerful negotiators and patrons of the arts. Thus, a player who owns Motonari that plays the Festival Card will force 200 samurai from each player to go to the festival (instead of just 100).
Hojo Ujiyasu (1515 – 1571)
The Hojo Clan ruled over much of Chugoku and Kanto and were one of the most predominant clans entering the final stages of the 'Age of War.' Known for stealth tactics, Ujiyasu fought on two fronts against both Takeda Shingen and Uesugi Kenshin, and held his own throughout.
Akechi Mitsuhide (1528 – 1582)
Mitsuhide's short lived glory came from betraying his master, Nobunaga. In 1582, his attack on Oda in Kyoto led to Oda's seppuku. Mitsuhide enjoyed power for a mere thirteen days, whereupon Toyotomi Hideyoshi took revenge, alongside Tokugawa.
Toyotomi Hideyoshi (starts the game as Kinoshita of Owari Province) (1536 – 1598)
Loyal to the Warlord Nobunaga, Hideyoshi took the reins of power and further unified Japan, eventually to its entirety. Vultures circling after his death quickly plunged Japan into civil war, mostly due to an overambitious Tokugawa. Toyotomi crucified 19 Christians in what is known as the most modern case of on-the-cross execution.
Chosokabe Motochika (1539 – 1599)
Ruler of Shikoku, Chosokabe was an old school daimyo, who also could have taken Japan. Even losing eventually to Toyotomi, he still held control over Tosa. Known to be extremely fierce in battles, he eventually was slain fighting for Toyotomi in Kyushu.
Tokugawa Ieyasu (who starts the game as Matsudaira of Mikawa Province) (1543 – 1616)
It is said that, "Oda grew the rice, Toyotomi pounded it, and Tokugawa ate it." With a combination of holding the critical cards, best strategy and timing, Tokugawa wins the game in real history and becomes Shogun. Brilliant siege tactician, Tokugawa was almost an unstoppable commander of samurai war, espionage and guerrilla ninja strategies.
Ishida Mitsunari (1559 – 1600)
The victim of last-minute betrayal at Sekigahara, the leader of the Toyotomi Clan dynasty is defeated. Fleeing the battle field, he was eventually caught by villagers in Kyoto and beheaded.
Honjo Shigenaga (1540 – 1614)
Although an Uesugi Kenshin retainer, Shigenaga was notoriously stubborn and often refused orders. Wielding the famous Honjo Masamune blade, no samurai dare do anything about his disobedience.
Honda Tadakatsu (1548 – 1610)
Despite being in over 100 battles, this untouchable warrior never received a single wound in battle. Honda was one of Tokugawa's most capable Warlords.
Sanada Masayuki (1547 – 1611)
Known as one of the greatest military strategists of the late 'Age of War.' Known to work well with mercenaries, he served under the Takeda clan and then under Toyotomi. Masayuki is famous for being one of the only Warlords to withstand a Tokugawa siege.
Nabeshima Naoshige (1537 – 1619)
Naoshige distinguished himself as a master slayer by personally doing away with 100's of men in battle. A 'survivor' he saved his Hizen domain from siege after siege, Naoshige was known for making the right decisions at lightning speed.
Shimazu Yoshihiro (1535 – 1619)
Contributing greatly to the unification of Kyushu, Yoshihiro is well known for smashing the ito Clan. Unfortunately, he betrays Tokugawa at Sekigahara and switches to the losing side of the battle. A genius fighting retreat gained the respect of Tokugawa, however, and this samurai kept his power even after Sekigahara.
Wakisaka Yasuharu (1554 – 1626)
Lord of the gateway island of Awaji, Yasuhara fought under a number of warlords over the 'Age of War.' He was prized for his skill as a naval commander. This Warlord followed Kobayakawa's betrayal at Sekigahara and also switched sides, leading to the Tokugawa victory.
Katou Kiyomasa (1561 – 1611)
Kiyomasa was one of the three main Warlords in the 7 year war against Korea. A genius architect of castles and fortification, a feared Christian Warlord, Kiyomasa spent his free time hunting tigers in Korea.
Date Masamune (1567 – 1636)
A late comer in 'the game,' Masamune survived smallpox as a child, losing one eye. He led his first battle at the age of 14 and was ruthless, reckless, but known for not defending castles well. Masamune controlled much of Tohoku, he reluctantly served Toyotomi, and then later Tokugawa.
A note on the list of Samurai used in this game
Of course, there are dozens of samurai who could have, should have and want to be in this game. However, due to economic reasons we had to choose just 68. You can contact us and let us know which famous Warlord you would like to see as part of an expansion pack planned for Dueling Samurai.
Also, due to the random nature of picking Warlords, alliances that did not exist, can occur in this game. We hope historians see the fun in this and don't get too worked up if things don't play out exactly as history made it. We consider true renditions of history to be the best and most unforgettable games, so we wanted to keep that chance occurrence as a sort-of rare happening. Warlord Card characters are based on history to facilitate the possibility of history being played out in Dueling Samurai.
A note regarding the map used for this game
Historic geographers will note some discrepancies on the game board, territories missing and mysterious volcanos. In Warlord the board is designed to be both historically accurate to the period of the late 1500's. For gaming purposes, some smaller states are not present. Also, Regions of Chugoku went back and forth between Kinkii and Chugoku, and it was decided for gaming purposes to have them in Chugoku. Two volcanos are fictitious and are present for gaming purposes (can you spot them?). Also, Honma Usosan is a fictional character.