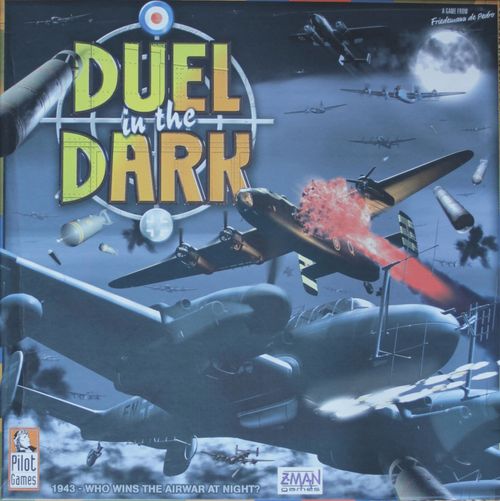
Duel in the Dark
Duel in the Dark Rulebook
Table of Contents
Table of Contents
- The Opponents
- Object of the Game
- The Components
- The Course of the Game
- Game Preparation
- The Six Phases of the Game
- The 1st phase: Positioning the German fighter squadrons
- The 2nd phase: Determining the weather
- The 3rd phase: Planning the British attack
- The 4th phase: Setting up the German defense resources
- The 5th phase: Positioning the British bomber fleet and the Mosquito
- The 6th phase: Executing the attack and defense
- The Function and Use of the Game Materials
- Advanced Rules
- The Solo Mission
- Example of Play
- The 1st phase: Positioning the German fighter squadrons
- The 2nd phase: Determining the weather
- The 3rd phase: Planning the British attack
- The 4th phase: Setting up the German defense resources
- The 5th phase: Positioning the British bomber fleet and the Mosquito (Mossie)
- The 6th phase: Executing the attack and defense
The Opponents
"Duel in the Dark" is a strategic game for two people, one representing Britain and the other representing Germany.
Object of the Game
Each player tries to gain as many victory points as possible. As the head of the British Bomber Command, you succeed by leaving the German side in the dark for as long as possible, by secretly and cleverly choosing a route to your destination target city, hoping to achieve a maximum amount of destruction with a minimum number of your own losses. As the General of the German air force (Luftwaffe), on the other hand, you have to foresee your opponent's intentions as early as possible, through the tactical deployment of your defense resources and strategic movement of your fighters, to minimize the effect of the British attacks.
The Components
The game pieces include:
- 1 28-page instruction booklet
- 1 game board
- 2 Victory Point reference cards
- 6 aircraft holders
- 4 fighter squadrons (cardboard)
- 1 bomber fleet (cardboard)
- 1 Mosquito (cardboard)
- 4 fuel indicators
- 32 compass cards
- 1 summer card
- 12 weather cards
- 21 plastic holders for weather elements
- 21 cloud and thunderstorm elements
- 4 fog hexes
- 16 flak tiles
- 16 searchlight tiles
- 8 radar tiles
- 6 fire department tiles
- 8 smoke screen tiles
- 6 balloon barrier tiles
- 12 civil bunker tiles
- 8 fuel truck tiles
- 8 target / bomb markers
- 1 yellow full moon marker (wood)
- 1 blue new moon marker (wood)
- 1 orange summer marker (wood)
- 1 red victory point marker (wood)
The Course of the Game
The battles take place at night. Before the game begins, the two players need to agree on how many nights the game will consist of. There are 6 phases that occur each night. During the night, there will be at least one British attack on a German city and the German defense of the city. The six phases are:
- Positioning the German fighter squadrons
- Determining the weather
- Planning the British attack
- Setting up the German defense resources
- Positioning the British bomber fleet and the Mosquito
- Executing the attack and defense
Phases 1-5 are the setup phases for each player. In the sixth phase, the duel takes place. For that, the British side has command of a bomber fleet and the Mosquito, whereas the German side strikes back with 4 fighter squadrons and 40 ground defense resources. In this phase, the opponents alternate moving their pieces in turn—each "turn" consisting of moving different game pieces.
Game Preparation
Choosing sides
Agree upon the number of nights the game should last (for instance, two nights); each night could take about 30 to 60 minutes. Then choose sides: if you cannot decide, the one who is sitting closest to the quickest exit from the room plays the German side.
Distributing the game materials
The victory point marker stands at "0" on the VP track.
The German side gets:
- 4 fuel indicators
- 4 fighter playing pieces
- 40 ground resources
- 1 Germany VP summary card
The British side gets:
- 1 bomber playing piece
- 1 Mosquito playing piece
- 32 compass cards to program the course
- 6 target/bomb markers
- 1 British VP summary card
Victory conditions
The player with the most VPs after completing the agreed upon number of nights wins.
Note: When playing multiple nights, you don't reset the VPs to zero. You keep the marker where it was from the previous night.
An alternate way to play is to choose two nights, with the same weather conditions, and switching sides to see who is the better tactician.
The Six Phases of the Game
In the first five phases of the night, you prepare for the duel that takes places in the 6th phase.
The 1st phase: Positioning the German fighter squadrons
During this phase the German fighter squadrons are positioned on any four German airports, only one fighter squadron per airport. If you want to position 2 or more fighters in the same airport you will have to place one or more fuel trucks on that hex.
The 2nd phase: Determining the weather
The British player draws a weather card and distributes the weather elements on the game board as indicated on the card. (See "The weather", page 13.)
The 3rd phase: Planning the British attack
The British player secretly chooses a British airport to take off from, a target city, and a British airport to land in. The color of the city coat of arms on the game board indicates whether it is an easy (green), moderate (yellow), or difficult (red) target. (See "Coat of arms" illustration, page 11, and "The compass cards," page 11.)
Programming the course with the compass cards
The British player takes the compass cards and programs the bomber's attack run secretly: the German player should not see this programmed course. He has to do this with no more than 14 compass cards. When done, place the compass cards back on the pile of unused compass cards.
The 4th phase: Setting up the German defense resources
The German player positions his 40 defense resources. How many he places on one hex is his decision. Now that the British player sees the setup of the German ground defense, a change of the programmed course is not possible. (In the 4th phase of the following night, the German player can redeploy all defense resources any way he chooses, except for civil bunkers.)
The 5th phase: Positioning the British bomber fleet and the Mosquito
The British player positions his playing pieces on the airports that he has secretly selected in the 3rd phase. The Mosquito and the bomber cannot start on the same airport.
The 6th phase: Executing the attack and defense
Order of turns:
- The British Mosquito
- The German fighter squadrons
- The British bomber fleet
- The British Mosquito
- The German fighter squadrons
- The British bomber fleet etc.
In this phase, the players move in turn until every airplane lands (i.e. the night is over when every plane lands).
Fight scenarios
Victory points are gained only when there is combat, and combat occurs only if the opponents meet in a hex in the following way:
- If a German fighter squadron moves onto the hex of a Mosquito, the Mosquito will attack.
- If the bomber fleet flies into a hex with flak or fighter squadrons, the German player will attack.
- The bomber fleet attacks the target city as soon as it has reached its hex.
When one country gets VPs the marker is moved in their direction; if a country loses VPs the marker is moved in the opponent's direction. Example: The VP marker is at Britain's "6" space. Britain loses 2 VPs for flying the bomber through a thunderstorm: move the VP marker 2 spaces toward Germany's side ending up on Britain's "4" space.
The Function and Use of the Game Materials
The game board
The game board depicts a view of a map from eastern Britain to Berlin and from Denmark to the Alps. It contains 4 British airports, 19 German airports, 11 German cities, a victory point track, and a wind-direction indicator with moon phases and a summer sign.
The game board is divided into 43 numbered hexagons; each hexagon is a potential operational area and will be referred to herein as "hex". No aircraft can leave the board.
The city coat of arms and its meaning
Each city shows a coat of arms indicating the degree of difficulty of reaching it in an attack. There are green "easy" targets, yellow targets of "moderate" difficulty, and red "difficult" targets. The more difficult a target is, the more victory points the British player gets for the attack.
- Red = difficult target
- Yellow = moderate target
- Green = easy target
The 6 playing pieces
Each piece represents many aircraft. For this reason, no playing piece is removed from the game board after being shot down.
The aircraft can be in three different positions: before the start of the game and after each landing, aircraft take their basic positions on the ground - lower the piece all the way to the bottom of its rod. For the flight positions, you can fly at low altitude (aircraft is in the middle of the rod) or high altitude (aircraft is at top of its rod).
The British bomber fleet (1 bomber playing piece)
In the fifth phase, the British bomber playing piece is positioned on the game board, and in the sixth phase, it flies in the direction indicated on the compass cards. On the bomber fleet's turn, it moves ahead one hex; its range and direction are determined by its preprogrammed course. The bomber fleet can not attack cities that are flown over on the way to the target and back.
The British bomber fleet, on its 1st move, can climb either to low altitude (middle of rod) or high altitude (top of rod): once this decision is made, it cannot be changed again during the night. If the bomber fleet attacks the targeted city from a low altitude Britain receives an extra 4 victory points. However, the chance is taken that the German flak would get +2 victory points in addition to the 1 victory point per hit.
The compass cards
In the third phase the British player programs the heading of the bomber fleet by means of the compass cards. Each of the compass cards indicates a prospective flight direction; you may fly from one hex to a neighboring hex, with a maximum of 14 moves per night.
To do so, secretly decide on a British airport to start from, a target city, and a British airport to land in. For each move, you put one compass card after another with the desired flight plan on a pile, without letting the German player watch you do this. From one move to another, you may maintain the direction or change the course of each move one bearing left or right (for example, from East to Northeast or from East to Southeast but not from East to Southwest). Only when you are over the target city can you choose the direction for the next move freely, without the above restrictions. The last card you put on the pile shows the move to the British airport you will land in.
After that, you turn the pile over so that the first move lies on top face down. Put the pile on top of the remaining compass cards so that your opponent cannot figure out what the distance of the attack is.
In the sixth phase, the programmed course is flown. To do this, you turn over the top card from the pile and execute the indicated move with your bomber playing piece on the game board. Repeat this for each subsequent card in the pile.
Note: In summer, both players can earn extra VP from the eighth compass card on. In this case, the British player puts the summer card on the seventh compass card of his programmed course as a reminder.
The Mosquito (1 Mosquito playing piece)
The Mosquito supports the bomber fleet in attacking the Germans. It ignores wind direction and can fly one or two hexes per move in any direction, its range unlimited. The Mosquito may also circle, remaining in the same hex. In addition, it cannot be attacked by German flak. The Mosquito can fly at any altitude (low or high) when it first moves and it can change altitudes from move to move. If flying low, it will suffer -1 VP when dueling fighters.
The Mosquito has these effects in the game:
- If a German fighter squadron moves onto the hex of a Mosquito, the Mosquito will attack, and get 1 VP for every fighter squadron, up to a maximum of two fighter squadrons (i.e. if 3 or more squadrons enter the Mosquito's hex, Britain will only score VPs for the first two).
- The Mosquito blocks German airports - i.e. the fighter cannot take off. A fighter squadron that takes off if the Mosquito is present, gives the British player one victory point.
- The British player has 6 markers available, printed double-sided: one side represents target markers and the other represents bomb markers. These can be used by the Mosquito in any combination. Once the markers are used, they are unavailable until the next night.
- Over the target city the Mosquito can drop one or more target markers, giving Britain 1 extra victory point per marker dropped when the bomber strikes.
- The Mosquito must fly low to drop one or more bombs to destroy an airport underneath it. Any German fighters landing or taking off from a bombed airport gives Britain 1 VP per bomb used to destroy the airport.
- The Mosquito must also fly low to destroy ground defense resources: simply place one or more bomb markers on the ground defense resources in the hex under the Mosquito and those resources are out of action for the rest of the night. Civil bunkers cannot be destroyed. If the Mosquito destroys a balloon barrier, the German player receives no VP for that balloon barrier.
The four German fighter squadrons (4 fighter playing pieces)
For each German fighter squadron, one game piece operates on the game board.
In phase 1 of the game, the fighter squadrons are positioned on any German airport (only one per airport, unless fuel trucks are used); in phase 6 they can take off for the first time. In each German turn, you may perform one move for each fighter squadron. These squadrons may fly from their present hex to any adjacent hex. Their range depends on your overall fuel stock, since with each move the fuel supply indicated on the special fuel cards decreases.
The fuel cards
Each German fighter squadron has a fuel card on which the fuel usage is adjusted after each move by decreasing the reserve by 1, 2 or 3 lines. In this way, you always have an overview of the remaining range of your squadrons. The fuel usage is 2 lines on the fuel dial per hex flown independent of the altitude.
In a headwind (i.e. going in the direct opposite direction of the wind) the fuel usage increases to 3 lines per move.
In a tailwind (i.e. going in the same direction of the wind) a squadron uses 1 line on the fuel dial, or you can fly 2 hexes with the use of 2 lines.
If a squadron neither lands nor flies onward, it "circles" in the same hex using up 1 line. If the fuel indicator is on zero after a move, the squadron must land on the same hex on its next turn. If a fighter squadron doesn't reach an airport in time, it must ditch.
Altitude and Fuel Usage
When a fighter squadron takes off, it can fly into the neighboring hex at low altitude (but not at high altitude). If the squadron stays in the start hex it can use 2 fuel lines to fly at high altitude. Otherwise the squadrons are allowed to raise or lower their altitude after each move, one step at a time. Changing altitude costs nothing.
When a squadron flies lower than the bomber fleet, the German player gets a penalty of -1 VP per squadron for the combat.
Ditching over Germany
The British player gets 2 victory points for each emergency landing from a fighter squadron, and the responsible squadron cannot start again on this night.
Ditching over Britain or at sea
The British player gets 4 victory points and the responsible squadron is lost. The fighter playing piece is removed for the remainder of the game.
NOTE: You may voluntarily land your fighter even if you have fuel in order to fill up and take off next turn (if nothing is restricting the take off).
The German ground defense resources
Before the game starts the German player receives 40 defense resources and places them on the game board in phase 3.
The hexes with the numbers 1, 2, 3, 8, 9, 10, 16, 17, and 23 are not allowed to be used. There is no limit to the amount of resources one can place in a hex and some resources have cumulative effects. However, each resource is used only if the bomber fleet reaches their hex. (Fire departments are an exception.)
For each night of the game, you may regroup all resources except for civil bunkers. To do so, you rearrange some or all resources in phase 4 of the following night.
There are two types of ground defense resources, basic (framed in red) and advanced (framed in gray).
The basic defense resources include: Flak, Searchlights, and Radar.
When you want to plunge deeper into the strategy offered in this board game, it is quite easy to simply turn over the red defense resources to the gray side and the advanced defense resources which are: Smoke screen, Fuel truck, Fire department, and Balloon barrier.
Note: You can mix basic and advanced resources in a game.
Flak
Each time the bomber fleet runs into flak, the German player gains 1 victory point.
Searchlight
The searchlights illuminate or blind the bombers.
If the searchlight is in the same hex with flak, the Germans get one hit extra on the bomber (+1 VP). Multiple searchlights give a cumulative bonus, so 2 searchlights will give a +2 VP bonus to each flak.
If there are any fighter squadrons in the same hex as a searchlight, the Germans receive a +1 VP bonus per searchlight. Over the target city, the British player loses one victory point per searchlight.
Radar
The radar helps the fighters to discover bombers. If one or more fighter squadrons are in a hex with radar, each fighter squadron gets one additional hit (+1 VP) on the bomber fleet.
Smoke screen
If a smoke screen obscures the target city, the bomber fleet loses 1 victory point for every smoke screen. For every smoke screen in a hex, the Mosquito must drop an extra bomb marker in order to hit a target. For example, if there are two smoke screens in a hex, the Mosquito must drop 3 bomb markers to take out an airfield or a ground defense resource in that hex.
Civil bunker
Civil bunkers protect the population. The bomber fleet loses 2 victory points for every civil bunker in the target city.
Balloon barrier
Mosquitos can blockade airports; this is prevented by balloon barriers. And the Germans can defend their ground defense resources against a possible Mosquito bomb attack. To do this, the German player must place one or more of the balloon barriers he has onto a hex. If the Mosquito executes a bombing attack (dropping one or more bomb markers at a single time) onto this hex, the Germans will receive one VP per balloon barrier present (the ground defense resource will still be destroyed). If the Mosquito targets a balloon barrier, Germany receives no VP from that balloon barrier.
Fire department
Fire departments are only allowed to be positioned in the cities. If there is a fire department in the target city, Britain gets 1 victory point less.
The fire departments that are up to two hexes away from the target city can be called into the respective city immediately after the attack. In this case, you need two fire departments to neutralize one British hit.
Fuel truck
Fuel trucks are placed on the German airports for the fighter squadrons. Two squadrons can start and land on an airport where a fuel truck is stationed. For every additional fuel truck you can land another fighter squadron.
The weather
Each weather card depicts a specific weather scenario for the entire game board. Before the game starts, the cards are shuffled and placed face down as a pile beside the game board. In phase 2, the British player draws a weather card, flips it over, and distributes the weather elements on the game board accordingly. He places clouds, thunderstorms and fog, and sets the wind direction. He sets the moon marker, and possibly also the summer marker, on the hexes indicated on the game board.
The effect of the weather elements
Clouds
Influence on the German side: If the opponents meet in an overcast hex, each fighter squadron detects one less bomber. (1 VP per hit instead of 2).
Influence on the British side:
- If the target city lies under clouds, the British player subtracts 5 victory points from the city's value.
- The Mosquito suffers a -1 VP penalty against fighters.
Thunderstorm
Influence on the German side:
- In a thunderstorm, each fighter squadron hits 2 bombers less.
- Starting or landing in a thunderstorm - The British player gets 1 victory point when a German fighter starts or lands in a thunderstorm.
Influence on the British side:
- If the target city is covered by thunderclouds, the British player subtracts 7 victory points from the city's value.
- If the bomber fleet flies through a thunderstorm, the British player loses 2 victory points.
- The Mosquito suffers a -2 VP penalty against fighters.
Fog
Influence on the German side:
- Starting in fog: The British player gets 1 victory point.
- Landing in fog: The British player gets 1 victory point.
Influence on the British side:
- Starting in fog: Normally the bomber fleet will not start off in bad weather, since the British player knows the weather when he is plotting his course. It is technically possible, however, to take off in fog; in this case, the British player accepts losing one bomber and Germany gets 1 victory point. Fog has no effect on Mosquitos.
- Landing in fog: Britain loses 2 bombers, and therefore Germany gains 2 victory points.
- Attack in fog: The British player subtracts 3 victory points from the target city's value because the bomber fleet achieves 3 fewer hits.
Full moon
Influence on the German side: During a full moon, the German player discovers 1 additional bomber per fighter squadron. He gets an extra victory point per hit.
New moon
During a new moon, the British player achieves 3 fewer hits on the target city; therefore he gets 3 victory points subtracted.
Wind influence
Influence on the German side: (See "The fuel cards," above.)
Summer
In summer, each time the bomber fleet flies into a hex with a fighter squadron, the German player hits 1 additional bomber from the eighth compass card on, i.e. gets +1 VP per squadron. (See "The compass cards," above.) After the 8th move the Mosquito gets 1 victory point extra regardless of how many fighter squadrons are in the same hex.
When the weather change card is revealed, you draw a "new weather card" to determine the new direction of the wind (in this illustration, one step clockwise). All other weather elements (including fog) will be moved 2 hexes in this new wind direction.
If weather elements should leave the game board they will be placed back on the opposite side of the board.
Advanced Rules
For the advanced rules: 16 medals, 6 change of wind direction cards, 2 change of weather cards, 1 MW-50-Marker.
1. More Power for the Mosquito
The Mosquito has now 8 instead of 6 bomb/target markers. However, the bomber will lose 2 VP in an attack against the target city.
2. Weather changes during the game
On the weather cards you can see written "weather change before move 5 and 10" (see illustration) which means a change in the weather will occur before move 5 and 10. In the pile of programmed compass cards you need to insert a Change of Weather card before the indicated move (in this case, before move 5 and 10).
2a. Program changes to the bomber fleet
To be able to react to possible weather changes which may have hidden the target city under clouds, the bomber is allowed to change targets and attack another city. When the weather changes, (i.e. the weather change card is drawn) the British player may reprogram his course before the bomber's next move (following the same rules for programming) by taking the compass cards and plotting out a new course using a number of cards equal to the difference of 14 and the number of moves already resolved (so if the weather change took place on move 4, (right before move 5), the British player would have 10 compass cards to plot his new course). If it is not possible to reach an alternate target with the remaining cards, you must attack the original target.
2b. Program changes after hitting the target
You are now able to change your flight home at any time after hitting the target. So you have the chance to fly a less dangerous course, because you see where the ground defense is heavy. Same restrictions apply for programming a course. You can use compass cards equal to the difference between 14 and the moves already resolved for this new flight path home. (see The 3rd phase, above.)
3. Medals
It is possible to earn medals during the game so that they can be used during any night. You cannot use medals on the same turn you received them. The medals will be removed from the game after being used. There is no maximum number of medals you can win a night. And you can carry medals from one night to the next.
German: Every time the bomber fleet flies in the same hex as 3 or 4 fighter squadrons the German side gets 1 or 2 medals.
British: Every time the bomber encounters no German fighters the British side gets two medals, except on the first and the last move.
Using the Medals
German:
- After the German fighters have moved into a hex they can place one or more medals there. Should combat occur between the bomber and one or more squadrons in a hex containing medals, the German player gets 1 VP more per medal. Remove those medals after the next German move whether combat occurs or not.
- You may "spend" a medal to reduce the fuel use of a squadron by one line. Usable once per night.
- With one medal you could repair a destroyed airport or ground defense resource.
British:
- After the bomber has moved, the British player can - after this move - put any Radar, Flak, or Searchlight out of action for the night for each medal spent. The resource must be under the bomber at the time.
- The Mosquito can use medals as bombs or target markers. It can only use medals in this way on the same move it drops bomb/target markers. The number of medals used cannot exceed the number of bomb/target markers dropped.
- During an attack from a German fighter, the British player can spend medals to reduce the VPs gained by the Germans by one for each medal spent. Exception: Britain cannot do this in a hex with German medals.
4. Corpse cloth
If the bomber flies over the clouds, and there are 2 or more searchlights in the same hex, the effects of the searchlights are doubled, because they illuminate the clouds, and the bombers are visible like before a canvas.
5. Flak disturb fighters
For every flak more than one in a hex, the German fighters get one VP less. For example: 3 Flak = 2 VP less. Figure out the VP gain without flak first, then subtract this flak penalty.
6. Special Fuel
If the Germans use this marker they are allowed to fit an extra tank with special fuel to one of their 3 Messerschmitt-Squadrons at the beginning of the night. This enables the squadron to fly a distance of two hexes once a night to help, for example, overtake the bomber fleet. You expend fuel normally to pay for this extra move (4 lines to move two hexes, 2 lines in a tailwind, 6 lines in a headwind, etc.) After usage flip the marker to indicate it is empty.
The Solo Mission
"Duel in the Dark" can be played solo. You play the German side and the British side is controlled by the compass cards.
1. Preparations
Sort out the compass cards into two piles. One is for the outbound flight of the bomber to the destination and contains only the NE, E and SE cards. The other pile is for the return flight and contains the cards for NW, W, and SW. Shuffle both piles separately.
The weather will be decided by drawing a weather card from the weather card pile. This card also shows the starting positions of the British aircraft ("B" for bomber and "M" for Mosquito) and whether the bomber attacks the first or second city it reaches (coat of arms with "1" or "2").
2. Positioning of the German fighters and ground defense
Squadrons and the ground defense resources are placed as in the normal game.
3. Positioning of the bomber, Mosquito and weather elements
The Mosquito will always be positioned in the hex east of the bomber. On the return flight, it will fly on the west side of the bomber.
Germany starts the solo game by moving its squadrons.
Then take a compass card from the outbound flight pile: the bomber moves in this direction. If the compass card calls for a prohibited change of direction (a change of direction of two or more compass bearings) just lay it on the side and take a new card.
The Mosquito playing piece is always flying on the eastern side of the bomber (outbound flight) and on the western side on the return flight, irrespective of the flight direction of the bomber. If a Mosquito flies over an airport hex then it will release a bomb to destroy the airport.
When the bomber is over the target city, every unused marker is counted as a target marker.
4. Executing the attack and defense
Same as in the two player game.
5. Battle
Same as in the two player game.
6. Target city
If the bomber fleet encounters a city hex it can attack, but only if it is the first or second city it has reached as indicated on the weather card.
7. Return flight of the bomber fleet
If the bomber fleet has reached their target your next move is drawn from the return flight pile of compass cards.
Note: The Advanced Rules can not be used during the Solo Mission.
Example of Play
The 1st phase: Positioning the German fighter squadrons
During this phase the German fighter squadrons are positioned on any four German airports, only one fighter squadron per airport (unless a fuel truck will be used).
The 2nd phase: Determining the weather
The British player draws a weather card and distributes the weather elements on the game board as indicated on the card. (See "The effect of the weather elements," page 13.)
The 3rd phase: Planning the British attack
As shown in the illustration, the player has decided on 6 moves for the bomber fleet out of a possible 14 (the red shadow indicates the flight to the target and the green shadow shows the return flight home). In this example, the compass cards are shown openly, one beside another, in order to illustrate how the British player has planned his course before he places these cards on top of the compass card deck. During this planning, his German opponent should not learn anything about the course of the aircraft.
The 4th phase: Setting up the German defense resources
The German player positions his 40 defense resources. How many he places on one hex is his decision. Now that the British player sees the structure of the German ground defense, a change of the programmed course is not possible.
The 5th phase: Positioning the British bomber fleet and the Mosquito (Mossie)
The British player must position the playing piece of his bomber at the airport he selected in phase 3 when he programmed the course to the target city. The playing piece for the Mosquito could be placed on any British airport not containing the bomber. This was the last phase for planning and positioning. Now let the combat begin.
The 6th phase: Executing the attack and defense
Turn 1: The Mossie can move up to two hexes in any direction. In the illustrated example the Mossie flies into the hexagon marked "17". This is a lurk position to see what the German night fighters will do in the next step.
Turn 2: The German fighters leave their airports and try to intercept the British bomber. As shown in the illustration to the right, two German fighters fly into the same hex as the Mossie. The British player earns 3 victory points (one point for each squadron entering the hex of the Mossie and one extra point because of the full moon - look at your reference sheets for VP determination). Move the VP marker toward Britain's side marked "3". Finally, adjust the fuel spent by the fighters: notice that the Dornier can move two hexes from its take off position due to flying in a tailwind. This fighter is also flying at high altitude, while the others are at low altitude.
Hint: Keep checking your fuel gauges. If your squadrons run out of fuel and you can't reach a friendly airport for refueling, they are lost for the rest of the night.
Turn 3: The British player draws the first compass card from the card pile and moves the bomber in the direction indicated on the card. The example shows that the bomber flies Northeast, at high altitude, into the hex of a lurking night fighter squadron. This gives Germany 3 VP - two for the fighter itself and one extra point for the full moon. Adjust the VP marker back to "0".
Turn 4: The Mossie goes next. It flies into the hex that the bomber will fly in, in order to protect it.
Hint: Since the Mossie can move in any direction and up to two hexes, you can use it as a decoy, to fool the fighters into thinking the bomber is going in a different direction.
Turn 5: The German fighters decide to follow the Mossie, thinking that is where the bomber will fly. Three fighters enter the Mossie's hex at high altitude, giving Britain 3 VP (2 for the fighters and 1 for the full moon). Adjust the VP marker accordingly. Also, adjust the fuel gauges. The Dornier has to spend 3 lines of fuel for flying in a headwind.
Remember: the Mossie can only attack 2 squadrons max.
Turn 6: The British player draws the next compass card and moves the bomber East into the hex with the Mossie and the three fighters. It's summer, no clouds in the sky, and the full moon is rising, so the bomber fleet is very easy to see. For this reason the Germans earn many victory points. In fact they gain 9 VP (2 VP for each squadron +1 VP per squadron for the full moon). The marker is moved onto space "6" on the German side.
Turn 7: The Mossie flies one hex in low altitude, directly over Emden, the target city they chose in Phase 3. Once over the city, the Mossie releases a bomb to take out the airport and 2 further bombs to destroy the searchlight and the radar. Since the area was protected by a balloon barrier, Germany earns another VP (they are now at 7). After the bombing, the Mossie releases three target markers.
Hint: Target markers give Britain some extra points because they illuminate the target area and help the bombers achieve a better hit rate.
Turn 8: The German fighters rush to protect the target area, giving Britain 2 VPs due to the Mossie's low altitude attack (2 VPs for the fighters but -1 for flying low and +1 for the full moon). Move the VP marker onto the "5" space on the German's side. The yellow night fighter squadron decides to land in order to refuel: it can take off it's next move.
Hint: The night is not over. Take a look at the fuel gauges of the other squadrons.
Turn 9: The bomber is one hex before the German coastline and the Mossie already illuminated the target. It's no surprise that with the next compass card drawing, the direction points to the city of Emden. The British player moves the bomber to the target city and the calculation of victory points commences.
Germany receives 10 VP for hits against the bomber (2 VP per squadron +1 VP per squadron for the full moon, +1 VP for the flak).
Britain receives 18 VP for hitting Emden, (13 VP for Emden itself, +3 VP for full moon, +3 VP for the target markers, but must subtract the following victory points from this total: -1 VP for the two Fire departments that can travel 2 hexes once a night to reach this hex.)
So, Britain gains 18 VP for bombing the target city which compared to Germany's 10 VP puts the VP marker on Britain's "3" space.
Turn 10: It's the Mossie's turn. The bomber has done a good job. Now it is time to head home.
Hint: After the attack the bomber could fly in any direction. The Mossie could protect this return flight or try to divert the night fighters.
Turn 11: The yellow fighter is airborne again and heads in the hex he thinks the bomber will fly to. Once again there is an air duel between Mosquito and a Messerschmitt (Britain gains 2 VP). At the same time the green and the red fighters must prepare to land as their fuel stock is too low. The red fighter lands in Emden's airhex (giving Britain a VP for landing in a bombed airport), while the green one moves Southwest and lands. The marker is moved onto space "6" on the British side.
Turn 12: According to the next drawn compass card, the bomber must fly into a hex of a night fighter squadron (Germany gains 3 VP: the VP marker should be on the "3" space on Britain's side).
Hint: Interested in weather changing? Take a look at the advanced rules, page 14.
Turn 13: The German player knows the next move of the bomber, because it's on the edge of the board and cannot change direction more than 1 bearing (see "Compass Cards," above). The Mossie flies to protect the route the bomber must take.
Turn 14: Only one German fighter could reach the possible route of the bomber at this time (the blue fighter must find an airport to land on or it would have to ditch). The yellow fighter flies into the Mossie's hex: Mossie earns 2 VPs. The fuel truck at Emden allows two squadrons to use the airport, so the blue fighter will be able to share the airport with the red fighter. But Britain earns 1 VP for the squadron landing in a bombed airport. The green fighter takes off from its hex, allowing the yellow fighter to land there later this night. But it lands in the next hex over.
Reminder: The Dornier is not required to land this turn - it reached 0 fuel in this turn and would be required to land next turn. Choosing to land now is optional.
Turn 15: As expected, the next compass card moves the bomber West, into the hex of a fighter. Germany gains 3 VP in the last attack of the night. The rest of the bomber's course will take it to its landing position.
Turn 16: The last move for the Mossie brings it to the prepared home base where it safely lands.
Turn 17: The last German fighter in the air must return home immediately: no one has the desire to take a bath in the British channel or crash land so close to home.
Turn 18: The bomber lands safely at its home base. A long night is over and the surviving crew members already plan their next attack run.
Turn 19: As the sun rises, the last night fighter reaches an airport. Britain wins with 3 VP.