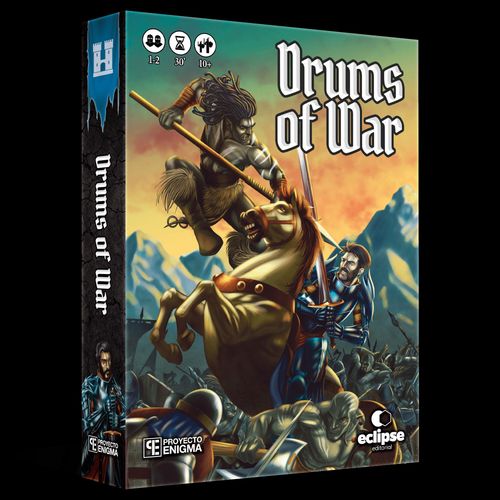
Drums of War
Drums of War Rulebook
Table of Contents
Table of Contents
Introduction
Drums of War is a fast-paced tactical game, in which each player manages an asymmetrical deck of cards, commanded by a Hero who represents the player.
Set in a fantasy world, both armies fight each other on the battlefield. During their turn, players deploy their units, equipment and tactics cards to face the enemy army, depleting their deck for each action they take.
Drums of War: Enclave contains a Solo game mode, explained in the other rulebook you'll find in the box, as well as a Campaign Mode, included at the end of this booklet.
Goal of the Game
In Drums of War you must defeat your opponent's Hero, inflicting damage to match their Health value, before you run out of cards to replenish your hand.
Components
1 board and 2 rulebooks:
- 1 board (42 x 29.7 cm).
- 1 Rulebook.
- 1 Solo mode rulebook.
100 cards in total, distributed as follows:
- 50 Human Army cards: 4 Hero cards, 36 Unit cards, 4 Tactics cards, 6 Equipment cards.
- 50 Orc Army cards: 4 Hero cards, 36 Unit cards, 4 Tactics cards, 6 Equipment cards.
21 tokens, distributed as follows:
- 1 First Player token.
- 10 Wound tokens.
- 10 Ability Activation tokens.
Tokens
There are 3 types of tokens:
- First Player token: each side shows the icon of an army. It is used to determine the starting player.
- Wound tokens: place them on Hero and Unit cards to mark the damage suffered.
- Ability tokens: the front side indicates that the ability has been activated, and the back side includes the most common Attack and Defense bonuses for easier combat resolution.
Cards
These values are used to indicate the attributes of the cards, and may vary depending on the card type (Unit card, Equipment/Tactics card, Hero card):
- Image
- Name
- Ability
- Ability Cost
- Range
- Deployment Cost
- Starting Cards Removal
- Attack
- Defense
- Health
- Card Type
- Army
- Recruitment Cost
Types of Cards
Unit Cards
Unit cards are labeled with an icon (11) for Infantry, Cavalry, Monsters or War Machines, as well as a text (3) that describes their unique abilities in battle. They also have a range value (5).
Equipment and Tactics Cards
Equipment cards are marked with a backpack icon (11), and Tactics cards are marked with a flag icon (11).
A Unit cannot be equipped or affected by two cards of the same name. The effect of these cards only applies to your own army, unless the card specifies otherwise.
Heroes cannot be equipped with Equipment cards nor are they affected by Tactics cards, unless stated on the card itself or in the Hero's ability.
Hero Cards
Heroes are the leaders of the army. They are marked with a Hero icon (11), and can only lead the army of their faction (12).
There are 3 ranks of Heroes according to the color under their icon: Gold, Silver and Bronze, which is relevant if you choose to play a campaign (see Skirmishes, Duels and Campaigns).
They do not actively participate in battle unless they are directly attacked by enemy Units or have abilities that allow them to do so.
Removing Cards from your Starting Deck
Before you start the battle, Heroes may see their troops weakened due to various reasons: illnesses, accidents, desertion, etc.
The number that appears at the top of your attribute bar (7) is the number of cards you must remove from your Army deck before starting the game.
If there is an eye icon under this value, you can select which cards to remove. On the contrary, if there is a clover icon, remove the cards at random.
E.g.: before starting the game, Thugg must remove 10 cards from his Army deck and, without showing them, place them on the pile of removed cards.
Hero Abilities
Each Hero has a unique ability. It is usually a passive ability with no cost, which gives the Hero a certain advantage during the game.
There are Heroes whose ability has a cost (4) shown next to their name. This ability can only be used once per round, in any phase of the round. Activating your ability does not count as an action. To use it, you must pay its cost, just like you would to play a Unit, Equipment or Tactics card (see Deploying Cards).
A note about abilities: In case of conflict between the resolution of two abilities, such as two abilities that cancel the opponent's ability and which are played at the same time, the player who currently holds the First Player token has priority.
Battle Setup
Players set up the battlefield as follows:
- Place the board in the center.
- Each player picks an Army deck, at their choice or at random.
- Each player picks a Hero, at their choice or at random. Set aside any unselected heroes.
NOTE: it is possible to use the Hero cards of other armies in other game modes.
Set up the battlefield:
- Hero card: place your chosen Hero at the indicated position, as shown in the image.
- Pile of removed cards: this pile will go to the left of your Hero, face down, and in a horizontal position to differentiate it from the other decks. If your Hero card instructs you to do so, remove the corresponding number of cards from your Army deck before the start of the battle and place them here, as described in the Hero Cards section.
- Army deck: shuffle your Army deck and place it face down to the right of your Hero.
- Discard pile: the discard pile is formed during the game, face up next to the Army deck.
- Tokens: place the tokens within reach of both players.
- Front line: each player has a limited 5-slot play area to deploy their Units during the battle.
Start of the Battle
To determine who starts the game, toss the First Player token into the air (as if you were flipping a coin). Give the First Player token to the player whose Army icon and color is on the top side of the token.
Each player draws 5 cards from their Army deck to their hand.
Game Round
The game round is composed of three phases: Deployment, Combat and Replenishment.
Each of these phases is resolved by both players before they move on to the next phase together. That is, both players play the Deployment Phase, then the Combat Phase, and finally the Replenishment Phase. Once the three phases have been played, flip the First Player token over and the army that appears on the visible side of the token starts a new round, whose player keeps the token for the duration of the round.
The game proceeds in successive rounds until one of the Heroes suffers as many wounds as indicated by their card's Health value, or one of the players cannot draw cards from their Army deck, in which case they are defeated.
1 - Deployment Phase
Each player, starting with the player with the First Player token, performs an action by deploying a single card anywhere they wish on their front line (slots numbered from 1 to 5).
Players take turns to deploy cards: first, the starting player can deploy a card. Then, the other player can deploy a card. Next, the first player has the option to deploy again, and so on until both players pass and the phase ends.
A player who passes in this phase cannot deploy any more cards until the next round. In this phase, each player can perform one of three actions:
Deploy a Unit card
To deploy a Unit card, you have to pay its deployment cost, indicated at the top of the attribute bar (6). This cost is paid by removing from the game the necessary cards from your hand, which are placed on the pile of removed cards.
E.g.: to deploy a Halberdier card with deployment cost 2, the player removes 2 cards from her hand and places them on the pile of removed cards. Then, she places the Halberdier on a slot of her choosing in her front line.
Units with a lightning icon next to the deployment cost (such as the Human Knight or the Orc Lancer), lower this cost by 1 if their Hero has any Wound tokens.
Deploy an Equipment or Tactics card
To deploy an Equipment or Tactics card, you must first pay its deployment cost. Unless otherwise indicated in its text, place the card partially underneath a Unit and apply its effects to it.
There are 2 types of deployment costs for Equipment and Tactics cards:
- If the card only shows an icon, pay the deployment cost with cards from your hand and place them on the pile of removed cards.
- When the deployment cost also has an arrow icon, remove the indicated number of cards from the top of your Army deck, instead of your hand. These cards are also placed on the pile of removed cards.
E.g.: the player deploys a Triangular Shield card, cost 1 (with arrow). For this, she takes the first card from her Army deck and places it on the pile of removed cards without looking at it. She then places the Equipment card underneath her Halberdier unit.
NOTE: whenever players have to draw, discard or remove cards from a deck, they always do it from the top, unless otherwise specified.
Pass
You can choose to pass instead of deploying cards. Once you announce that you pass, you cannot deploy any more cards that round, although your opponent can continue to do so. You can still use your Hero's ability, which you may activate in this phase or in the following phases. When both players pass, the phase ends and the Combat Phase begins.
2 - Combat Phase
Combat is simultaneous for all units of both armies: each Unit attacks and defends at the same time. In this phase, you must take into account the Range of each Unit, as well as its Attack, Defense and Health values.
Range
Each Unit card has a range value. The more icons it has, the further away it can attack on the battlefield. There are three icons:
- 1 icon: This range is limited to the Unit with which it is engaged.
- 2 icons: This range reaches both the engaged Unit and the enemies adjacent to it.
- 3 icons: This range allows attacking both the engaged Unit and all other slots of the battlefield.
In either case, in addition to the Units within range, if the attacker is not engaged with an enemy, they can attack the enemy Hero.
Attack and Defense
Each Unit can only attack and defend once against one enemy during its turn; this is unless the text of a Unit card, an Equipment or Tactics card, or a Hero's activated ability specifies otherwise.
The Unit's Attack is compared to the enemy Unit's Defense, and vice versa. An attack is considered a success if the Attack value equals or exceeds the enemy's Defense value.
If this happens, the defending Unit receives a Hit, and a Wound token is placed on its card.
In case the attacking Unit does not overcome the Defense value of the enemy, i.e. its Attack is lower, the defending Unit manages to block the attack and remains in its slot of the battlefield's front line.
Once the Combat Phase is over, any Hits that were not prevented with abilities, Equipment or Tactics cards, are then converted into Wounds.
A successful attack inflicts a single Wound to the defending Unit or Hero, regardless of the difference between Attack and Defense.
E.g.: in this battle a Soldier of the Human army is facing a Lancer of the Orc army. By comparing their Attack and Defense values, the Orc Lancer's Attack overcomes the Defense of the Human Soldier (2 vs 1) and therefore lands a Hit, placing a Wound token on the latter. However, the Human Soldier cannot match the Orc Lancer's Defense with his Attack (1 vs 2) so he does not land a Hit. The Human Soldier is destroyed and its card is placed face up on the Human player's discard pile.
Both units can be destroyed as a result of comparing their Attack and Defense values, in which case each of them will go to their respective discard piles.
If a Unit has an Equipment or Tactics card underneath it when it is destroyed, both cards will go to the discard pile unless the card specifies otherwise.
The Heroes and some of the Units have a higher health value listed on their card, so they can withstand several Wounds before they are destroyed. Likewise, there are also Units, Equipment and Tactics cards that cause more than one Hit or Wound, in which case it is indicated in the card's text.
A distinction is made between Hit and Wound since some abilities are applied on one and not on the other. Hits are associated with a successful attack against the opponent's defense, while Wounds are the consequence of a successful Hit.
E.g.: Rincemer, a Human Hero, has the ability to cancel 1 Hit that has just been inflicted, but he cannot discard Wound tokens in subsequent turns with this ability.
Units with a lightning icon next to their Attack value (such as the Orc Furor), must always attack, either a unit within range or the enemy Hero.
Units with a lightning icon next to their Defense value (such as the Human Brotherhood and the Orc Rider), cancel the ability of an enemy Unit card within range on the battlefield, at the choice of the player who controls it. You must make this choice before resolving the battle and, once the target is chosen, you cannot change it. If the Unit continues fighting in subsequent turns, you can choose a new target.
Although in a real battle the fights happen at the same time, a priority system has been established in Drums of War to make it easier for you to resolve this phase:
Combat Sequence
First, the player with the First Player token announces the actions performed by all their units. Then, the opposing player announces their actions.
Engaged Units: a Unit must fight against the Unit it is engaged with. A unit is considered engaged when it is facing an enemy Unit, regardless of its range. Bring the engaged cards closer together to represent this.
Example 1: the Human player has the First Player token, so she will be the first to decide against whom her units fight. The Human Soldier unit and the Orc Lancer unit are engaged and must fight against each other. The Human Halberdier and Orc Furor units are also engaged in battle.
Non-Engaged Units: all other units that are not engaged may perform one of these four actions, at the choice of the player controlling them:
-
2.1. Supporting the attack of an engaged Unit: the supporting Unit must be within range of the enemy to be jointly attacked. When a Unit supports a battle, both attacking Units add their Attack values against the defending Unit. The defending Unit can only attack one of these enemy Units, the engaging Unit or the supporting Unit, at their choice.
Example 2.1: the human Halberdier and the Orc Furor are engaged, so they are forced to fight. The human player decides to have her Archer support this battle. The Orc Furor may attack either of them, at his choice.
-
2.2. Attacking a Unit within range: a Unit can attack an enemy Unit if it is within range. The defending Unit can choose to attack its attacker in turn, regardless of its range. Tilt the card slightly towards the target to represent it.
Example 2.2: the Human player decides to attack the Crossbow Orc with her Knight.
-
2.3. Attacking the enemy Hero: one or more Units can attack the enemy Hero, if they are not engaged with enemy Units. In case of attacking with more than one Unit, add all of their values in a single attack, just as if they were supporting an attack. The Hero can only attack one of the enemy Units. Partially invade the enemy front line with your card, or cards, to represent it.
Example 2.3: once the Human player has announced all her attacks, it is the turn of the Orc player, who decides to attack the Human Hero with his Crossbow Orc.
-
2.4. Hold position: the Unit does not attack any targets and remains on the battlefield awaiting further instructions. The card does not move.
Combat Resolution
Once all Unit actions on the battlefield have been declared, all battles are resolved at once. All activated abilities remain active until the end of this phase. Once the battle is resolved, return all cards to their initial position, and discard or remove any cards needed, as well as the corresponding tokens.
Following the previous example, let's move on to its resolution:
- Example 1: the Human Soldier gains +1 in Defense as there is a Halberdier unit on the battlefield, however, it is not enough to resist the Orc Lancer's Hit and he is destroyed.
- Example 2.1: thanks to the support provided in battle by the Archer and her ability (+1 Attack against non-engaged Units), they manage to add a total Attack of 4, enough to destroy the Orc Furor. The Furor decides to attack the Halberdier, since it can only attack one Unit, and destroys it; it also activates its ability and recovers 2 cards from the pile of removed cards to the discard pile.
- Example 2.2: the Human Knight was deployed this turn, so it gains a +1 bonus to his Attack. Since he does not have enough Attack power to damage the enemy Hero, he decides to attack the Crossbow Orc, who will be destroyed at the end of the phase.
- Example 2.3: the Orc player could have attacked the human Knight by using his Crossbow Orc after the Knight announced its attack, but he prefers to focus on the goal of the game and attack Joanna causing her a Wound. After this, he is destroyed. Both Joanna and the human Knight would have destroyed him.
After resolving the battle, the Human player still has the Archer and Knight units on the battlefield for her next round. The Orc player has only the Lancer unit left, although he has caused a Wound to the enemy Hero and he will have the First Player token next round.
3 - Replenishment Phase
If you wish, you may remove the cards left in your hand and place them on the pile of removed cards.
In any other case, the players replenish their hand from the cards in their Army decks, until they have 5 cards again. In case your Army deck runs out, shuffle your discard pile and create a new Army deck.
Cards from the pile of removed cards may NOT be used to create a new Army deck under any circumstances.
Flip the First Player token over and pass it to the other player.
End of the Game
You win the game if you manage to defeat the enemy Hero by inflicting as many Wounds as indicated by the Health attribute of their card.
However, if you cannot replenish your cards at the end of the round, you will be defeated.
If both players run out of cards during the same round, the player whose Hero has suffered more Wounds loses.
In case of a tie, the player whose Hero has the highest Health value on their card loses. If both Heroes have the same Health value, the game ends in a draw.
Skirmishes, Duels and Campaigns
There are 3 different modes in which you can play Drums of War:
- Skirmish: you play a single battle as described in these rules, in which you win, lose or draw as indicated in the End of the Game section.
- Duel: 2 battles are played, one with each army. For the first battle, the players choose one of the Heroes at random from among those available. For the second battle, the players also choose a Hero at random, previously separating those who have already fought in the first battle. The player who wins both battles wins. In case both players win a battle, the player who won with the Heroes of a lower rank wins (Bronze wins over Silver and Gold, and Silver wins over Gold).
- Campaign: 3 battles are played consecutively with the same army and with a Hero of the same army and a different rank (color) each time: Gold, Silver and Bronze. You cannot repeat any rank during a campaign.
When the campaign starts and before the first battle, the First Player token is tossed into the air to determine which player reveals first their chosen Hero and their rank. The opposing player then chooses their own.
In the second battle it will be the other player who will reveal their Hero first, with the first player then choosing from their two remaining Heroes. The third battle will be played with the remaining Heroes and rank.
In this third mode, each victory can give a certain number of points, depending on:
- If your Hero defeats a Hero of the same rank, you get 1 point.
- If your Hero defeats a Hero that is one rank stronger (Bronze to Silver, or Silver to Gold), you get 2 points.
- If your Hero defeats a Hero that is two ranks stronger (Bronze to Gold), you get 3 points.
- In case of a tie, nobody gets points.
Example: after tossing the First Player token in the air, the Human player chooses his Hero first. He chooses Aiden (Silver) first, his Orc counterpart decides to play Borrunm (Bronze) to gain an advantage if she wins this battle. In the second battle, it will be the Orc player who selects her hero first, choosing between Krangg (Silver) or Thugg (Gold). She chooses to fight with Thugg (Gold). Likewise, the Human player will select between his Bronze and Gold heroes, and decides to fight with Jayme (Gold). For the third battle, the Human player can choose between Joanna or Rincemer (Bronze), while the Orc player will have to fight with Krangg (Silver).
After the end of all 3 battles, each player's total score is tallied and the player with the highest score wins.
Armies
Humans
They saw the light in a world in conflict. They were created as a weapon of war by an ancient magical race when facing annihilation at the hands of their enemies. After years of fighting against the dwarfs, they betrayed and condemned their creators by signing a peace. From that moment on, they dedicated themselves to explore and expand throughout the wide world.
They are now the most numerous race on the continent, grouped around castles, large walled cities and villages. They do not have a common leader, but great lords rule the regions and let the workers cultivate the land in exchange for a tithe. In return, the lords provide protection with their armies.
Trade routes are protected by soldiers of the Brotherhood. Devotees dedicated to a military life in the service of humanity. They have their own Griffin stables in their impregnable fortresses.
The Human armies use group combat tactics, with the aim of holding a solid defensive line so that their more specialized Units can gain an advantage with their steel against certain types of enemies.
Orc creatures
They arose from the machinations and enraptures of the Spider Queen, who used dark magic mixed with crystals mined from the earth itself to create and control them, with the intention of destroying all life in the world.
With these green-skinned creatures under her spell, she began a campaign of destruction across the continent, which would not cease until death claimed the Spider Queen.
Orcs are also one of the most numerous races on the continent. They gather in small groups, in colonies or clans, generally led by a brutal chieftain or a powerful druid. In all of them, the law of the strongest prevails.
The Goblin race was enslaved by the Orcs, as they are considered a weak race and inferior to them. They do slave labor and in war they are sent to the front line so that they take most of the casualties while the rest of the Orcs approach the enemy intact.
Orcs paint their bodies to look even more fearsome in battle. The most powerful are the Furors, larger and stouter creatures than the rest of their kind, and equipped with the finest weapons and armor. They stand out from the rest of their species for their battle prowess and thirst for combat.
The Orc armies use brute force to finish off their enemies in combat, by means of frontal combat tactics.
Game Summary
- Battle setup: set up the board, choose an Army deck and select a Hero. If your Hero card indicates so, remove the corresponding number of cards from your Army deck.
- Start of the battle: toss the First Player token. Each player draws 5 cards from their Army deck.
- Game Round: consists of 3 phases.
- Deployment Phase: perform one of these 3 actions: Deploy a Unit card. Deploy an Equipment or Tactics card. Pass.
- Combat Phase: the player with the First Player token announces their Units' actions first. Engaged Units: the Unit must fight. Non-engaged Units: the Unit can do one of these 4 actions: Support the attack of an engaged Unit; Attack a Unit within range; Attack the Hero; Hold position.
- Replenishment Phase: replenish your hand until you have 5 cards.
Iconography
Attack, Defense, Health, Infantry, Cavalry, Monster, War Machine, Equipment card, Tactics card, Hero card.
Drums of War: Enclave - Solo Mode Rulebook
To play a solo battle, you will control one army following the standard game rules, while the other army is controlled by an Artificial Intelligence (hereinafter AI) with the additional rules described in this rulebook.
Battle Setup
The AI selects a Hero at random from those available. If it must remove cards at the beginning, it always does so randomly, regardless of whether its Hero icon is an eye or a clover.
The AI does not draw a hand of cards, instead they are placed face down on each of the front line slots of the AI's battlefield.
Supply Deck
During the game, a new deck will be formed for the AI, which is called the Supply deck. This deck is placed under the AI Hero and will increase or decrease during the game.
During the Replenishment phase, the cards that cannot be placed on the AI front line become part of this deck (this will be explained in detail later on).
Start of the Battle and Game Turn
Start the game by tossing the First Player token into the air, as usual.
Deployment Phase
Follow the flowchart below to perform this phase with the AI:
- Are there any unrevealed* cards on the battlefield?
- Yes: Are there any player non-engaged Units on the battlefield?
- Yes: Reveal* the card facing a player's card on the battlefield, giving priority to the one with the highest deployment cost if there are several options. Pay its cost.
- No: Reveal* the card closest to the engaged card. If there are several options, choose which one to reveal. Pay its cost.
- No: Are there cards in the Supply deck?
- Yes: Activate the AI Hero's ability when possible if it has not been already activated this turn.
- No: The AI passes and ends its phase.
- Yes: Are there any player non-engaged Units on the battlefield?
*Reveal: This is the action of flipping an AI card over on the front line of the battlefield so that it is face up.
To pay the cost of the revealed card follow these steps:
- If the revealed card is a Unit card:
- Pay its cost with the remaining unrevealed cards on the front line, prioritizing the farthest ones first. If there are several options, choose which card to reveal.
- If there are not enough cards to pay that cost, use cards from the Supply deck to cover the remaining cost.
- If there are still not enough cards in the Supply deck to pay the cost, remove the necessary cards from the Army deck to the pile of removed cards. If you have to do the latter, remove an additional card as a penalty.
- If the revealed card is an Equipment or Tactics card:
- If it has a cost, pay that cost from the Army deck. That is, remove from the Army deck the number of cards indicated by its cost to the pile of removed cards. This is done regardless of the cost type of the Equipment or Tactics card.
- Next, draw a card from the Army deck:
- If it is an Equipment or Tactics card, discard it and draw an additional card until you draw a Unit.
- If you draw a Unit card, place it on top of the previously revealed Equipment or Tactics card and pay its cost following the previous step.
Example: you start a battle with Aiden in command of the Human army, to fight against Krangg, who will be controlled by the AI. You remove 3 random cards for the AI from its Army deck before the start of the game. After tossing the First Player token into the air, you start the battle. You deploy a Human Soldier on the 3rd slot of your front line. Following the flowchart for the AI, you reveal slot 3, an Orc Lancer (cost 2). You remove the farthest cards, corresponding to slots 1 and 5.
Next, you deploy a Human Knight on the 5th slot, removing the rest of the cards from your hand. You reveal the card closest to the Knight for the AI, the equipment card Clan Cry in slot 4. Since it has no cost, you don't remove cards from the Army deck. After this, you draw a card for the AI from its deck to place on the Equipment card, getting an Orc Rider (cost 2). To pay its cost, you remove the card from slot 2 and a card from the Supply deck, since there are no more unrevealed cards in the AI front line.
Deployment Phase Notes: If a card is revealed and cannot be fully paid for with cards from any deck (Supply deck, Army deck or discard pile), remove it to the pile of removed cards and the AI ends this phase.
Combat Phase
Follow these priority rules with the AI:
- Engaged Units: engaged Units must fight.
- Non-engaged Units: non-engaged Units follow this priority order:
- Support: if its range allows it, the Unit supports a battle as long as it provides the necessary value to damage or destroy the player's Unit. If the engaged Unit can finish off the player's Unit by itself, or if both Units together cannot defeat the player's Unit, the AI does not support the combat and moves on to the next point.
- Attack by range: if its range allows it, the Unit attacks an enemy Unit on the battlefield, but only if it can damage or destroy it. Otherwise, it passes to the next point.
- Attack the Hero: the Unit will only attack the enemy Hero if it can inflict a Wound on them. Otherwise, it passes to the next point.
- Hold position: if there is no other valid option, it holds the position.
Following the previous example: the Human Soldier and the Orc Lancer are engaged and must fight, the Soldier receives a wound and will be destroyed at the end of this phase.
You decide that the Human Knight will hold his position because, even though he has activated his ability, he will not be able to inflict a Wound on Krangg.
Following the rules of combat priority, the Orc Rider must make a ranged attack against the Human Knight, who fights back by attacking. Both Units receive a Wound and are destroyed, but the Orc Rider card is placed on top of the Army deck. After resolving the battle, the Orc Lancer stays on the front line.
Combat Phase Notes:
- If an AI Unit must choose between several potential targets, it will first select the player Unit with the highest deployment cost. In case of finding several targets with the same cost, it will select the one with the highest attack. If the tie persists, choose the one you like.
- The lightning icons on Unit cards (Deployment, Attack and Defense) are applied as usual. The lightning icon in Defense is used on the engaged Unit, follow the previously described step in any other case.
Replenishment Phase
Draw 5 cards from the AI Army deck, without looking at them, and place them face down on the empty slots of the AI front line on the battlefield.
If there are any unplaced cards left after filling these slots, place the remaining cards on top of the Supply deck.
Following the example above: the player draws 5 cards from the AI deck. He uses 4 of them to fill the gaps in the front line of the battlefield. The remaining card is placed on the AI Supply deck.
End of the Game
The game ends as usual. The AI loses the game if it runs out of cards in its Army deck and in its discard deck. The Supply deck is not taken into account.
AI Hero Abilities
To pay the cost of an AI-controlled Hero's ability, use only the Supply deck. It can only be activated in the Deployment Phase, and it cannot be activated if the full cost cannot be paid.
Due to the high number and diversity of abilities that exist among Heroes, a general order of priority has been established to select the target of the ability when activated:
- HEROES: the ability targets the Hero themselves.
- If the ability grants the Hero a benefit, it is used on themselves.
- If the ability has several cumulative options and the Hero can benefit from them, it also activates them (like Borrunm, for instance).
- If the ability is targeted at both the Hero and the Units, it only applies if it makes a beneficial difference on the battlefield. That is, the positive effects outweigh any negative effects for the Hero themselves (e.g. Jayme).
- UNITS: the ability targets the Units.
- It is targeted at the Unit that can use it to damage or destroy an enemy target.
- It is targeted at the Unit that can use it to protect itself from an enemy Hit.
- It is targeted at the most powerful Unit, i.e. the Unit with the highest deployment cost.
- If there are several Units with the same deployment cost, it is directed at the Unit with the highest Attack value on its card. Failing that, the Unit with the highest Defense. If the tie persists, you decide.
- REST OF CARDS: the ability targets Equipment or Tactics cards.
- It is applied on the card with the highest deployment cost.
- In case there are several options, you decide.
Behavior of some cards in solo mode
The following procedure describes how several cards behave when they are controlled by the AI:
- Catapult: when distributing its attack by targeting several enemy Units, it first targets the player's most powerful Unit to damage or destroy it, i.e. the opposing Unit with the highest deployment cost.
- Griffin: always attacks the Hero if it can land a Hit, otherwise it follows the standard AI combat priority.
- March Order: if the Unit is not engaged, it moves to another slot in the front line to engage a player Unit that it can damage or destroy. If it is engaged or the above conditions are not met, it does not move.
- Onslaught: directly attacks the player Hero if it can land a Hit, otherwise it follows the standard AI combat priority.
Solo Summary and Charts
- Setup: select the Hero at random. If applicable, always remove cards randomly from the starting deck and place 5 cards on the AI front line.
- Deployment: follow the flowchart (see Deployment Phase above).
- To pay its cost:
- Units: Front line cards, then cards from the Supply, then cards from the Army deck to the pile of removed cards; in this case, remove 1 additional card as a penalty.
- Equipment or Tactics: Pay its cost from the Army deck, then draw another card from the Deck. If it is an Equipment or Tactics, remove it. If it is a Unit, see Units.
- Combat: follow the priority order. Engaged: Battle. Non-engaged: Support, then Attack by Range, then Attack the Hero, then Hold Position.
- Replenishment: place up to 5 cards back on the AI front line of the battlefield filling the gaps. Any cards left are placed on the Supply deck.