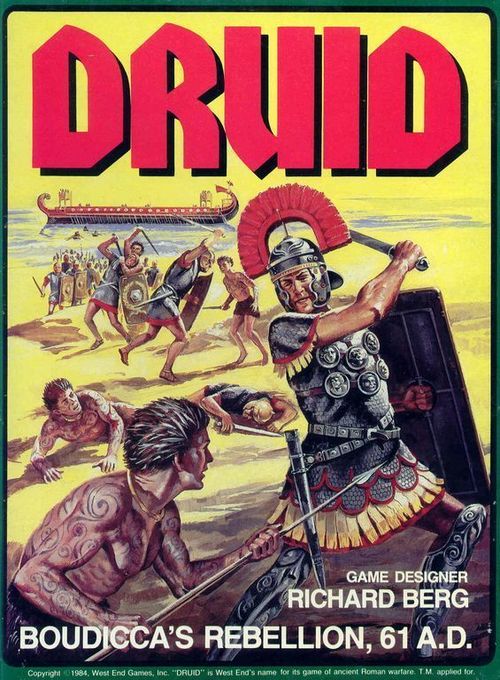
Druid: Boudicca's Rebellion, 61 A.D.
Druid: Boudicca's Rebellion, 61 A.D. Rulebook
Table of Contents
Table of Contents
1. Introduction
Druid is a two player game recreating the revolt of the ancient Britons against their Roman overlords in 61 A.D. One player, who takes the part of the Britons, attempts to eliminate the Roman military presence while spreading revolt. His Roman opponent must try to crush the revolt in the time allotted while taking as few casualties as possible.
1.1 Historical Background
Britain's introduction to the Roman Empire was Caesar's invasion of 57 B.C. Rome made no serious attempt to conquer the island in the succeeding century. In 43 A.D. the Emperor Claudius, leading a force of four legions supported by elephants, landed in Britain and quickly subdued the tribes of the southeast. To celebrate his triumph, Claudius was declared a god, and a magnificent temple was erected in his honor at the new settlement of Camulodunum (modern Colchester). Roman military posts were established throughout the new province, especially on the frontier. There strong, independent tribes such as the Silures and Brigantes held sway, owing allegiance only to the powerful Druid priesthood. Elsewhere, the Roman influence spread. A flourishing trade developed with the rest of the Empire, centered on the burgeoning port of Londinium, which soon became the largest and wealthiest city in the province.
In 61 A.D. the Roman governor, Gaius Suetonius Paulinus, set off for the island of Mona, off the Welsh coast, to subjugate the Druids once and for all. The Druids represented a source of divine authority to most Britons, and were always a threat to the political supremacy of Rome. Furthermore, their practice of human sacrifice disgusted the Romans. (What the Britons thought of gladiatorial combat remains unrecorded.) Paulinus made short work of the Druids and marched back to what he expected would be a triumphant welcome.
Meanwhile, on the opposite side of the British isles, Prasutagus, king of the Iceni, died. He had directed that his vast wealth be divided between his two daughters and the Emperor Nero in the hope that the independence of his people would be preserved through this action. This was not to be. Roman tax collectors claimed the entire Iceni kingdom for the Empire. When Prasutagus' widow Boudicca (Boadicea) objected, she was whipped and her daughters were raped. Goaded to fury, she raised the standard of revolt. Thousands of Britons, oppressed by high taxes and Roman cruelty, flocked to her. First they advanced on Camulodunum, center of the hated imperial presence in Britain. In a few days the town was stormed, its population was massacred, and its temple was leveled. Part of the Ninth Legion, summoned to quell the revolt, was repulsed and suffered heavy losses.
When word of the revolt reached Paulinus, he hastened to Londinium with only his personal bodyguard to organize the defense. Once there he realized that the sprawling town, of some 20,000 people, could not be held and, as the historian Tacitus put it, "sacrificed the town to save the province." The full force of the Britons' wrath fell upon the hapless city. Londinium was reduced to ashes and its citizens slaughtered, many of them sacrificed to the Druid war gods. Boudicca's army then leveled Verulamium, capital of the Catuvellauni, whose people were suspected of pro-Roman sympathies.
By this time Paulinus had marshalled a force consisting of the Fourteenth and Twentieth legions and set off to do battle with Boudicca. Tacitus, on whose account we rely for most of our knowledge of the revolt, neglects to tell us the site or even the date of the climactic battle. Somewhere, most likely along the road from Verulamium to Venonae, Paulinus and about 8,000 legionaries met a Briton force perhaps ten times their strength. As so often happens in the history of warfare, barbarian courage and ferocity proved no match for organization and discipline. The Britons were utterly defeated. Boudicca disappeared from history, probably taking poison. As for Paulinus, his repression, which Tacitus described as "making a desert and calling it peace," proved so extreme that he was eventually recalled lest he destroy a source of Rome's tax revenues. Under a milder regime Britain soon became a thoroughly Romanized province.
1.2 How These Rules Should Be Read
The rules to Druid, as with other wargames, are fairly complex, particularly when compared to more well known games (Monopoly, for example). These rules have been kept as short as possible, though content and thoroughness of the rules are the primary concern. The rules are written within a special and highly organized system:
- Each separate topic is presented as an individual rules section, numbered consecutively from 1. Further divisions within the rules are made by specific cases, each of which explains an aspect of the major topic.
- The organization of these rules can be compared to an outline for a thesis. The sections describe topics, primary cases describe subtopics, and secondary cases are a further division of the more complex subtopics. Primary cases are numbered decimally (e.g., 6.3, Civilians), secondary cases are numbered centimally (e.g., 6.31). Separate thoughts within a case are so indicated.
- The rules sections are presented in roughly the order a player will be likely to encounter the particular topics when playing the game.
- Several of the rules are labeled as optional. These rules add historical detail or features of particular interest to the designer at a slight cost in playability of the game. An optional rule is used only with the consent of both players.
- The rules make use of a certain jargon ("gamespeak") with terms that may not be familiar to the players, particularly those new to this sort of game. If confusion arises, the players should consult the glossary (3).
- We have attempted to present the rules in a manner that is both clear and thorough. Where a particular rule seems unclear to the players, they may either write to the publisher for a clarification (see below) or implement an acceptable compromise. After all, while Druid is designed to be a recreation of 1st Century operational warfare, it is still intended to be an enjoyable game, and not an exercise in constitutional law. Players are encouraged to make whatever mutually acceptable modifications they feel will improve the game.
1.3 Questions?
If the players are unsure of the meaning of one or more rules, they may request a ruling from the publisher. All questions must be phrased to be answered by a simple sentence, or a few words or numbers. Questions must be accompanied by a stamped, self-addressed envelope, or they will not be answered. Please restrict yourself to no more than twenty-five questions, and understand that queries about design intent or game theory will not be answered.
2. Component Description
Each copy of Druid should contain:
- One rules booklet with chart sheet
- One 200 die-cut countersheet
- One 22" by 34" mapsheet
- One counter tray
- Two 6-sided dice
- One box
If any of the above components are missing or damaged, write to the publisher for replacement. Note: The publisher will not replace counters with slightly off-center printing. Only if individual counters are illegible will the countersheet be replaced.
2.1 The Map
The 22" by 34" game map portrays the area of Britain in which the campaign took place. It includes all terrain significant to that campaign. It also displays the Terrain Key, the Legion Holding Boxes, the Legion Supply Tracks, the Briton Horde Boxes, the Hidden Briton boxes, and the Turn Record Track.
An hexagonal grid is superimposed over the terrain features in order to regularize movement and clarify the position of the playing pieces. Each hexagon (or hex) on the map has its own four-digit identity number (e.g., 1511).
To make the map lie flat, back-fold against the creases. Small pieces of masking tape may be used at the corners of the map to hold it taut and in place.
2.2 The Playing Pieces
The 200 die-cut playing pieces represent Roman legionary units (colored blue), Roman auxiliary units (colored pale blue), Briton tribal units (colored red), and the leaders for each side. These playing pieces are referred to as units throughout the rules. Additionally, there are playing pieces representing bridges, sacked towns, and so on.
Combat unit: Each combat unit shows a Designation, a Combat Strength, a Movement Allowance and a Type. Designation refers to the tribe or legion (if any) to which the unit belongs. Combat Strength is the strength of the unit when engaged in combat with other units (see 8, Combat). Movement Allowance is the number of Movement Points (see 6) that the unit may expend in one turn. Type refers to the type of troops within the unit.
Leader unit: Each leader shows an Operations Rating, a Battle Rating and a Movement Allowance. The Battle Rating gives the player a favorable modification to the die-roll when the leader is present in battle (see 8.7). The Operations Rating of the highest rated leader on one side is added to that side's Operations Points (see 5.2). Movement Allowance is the number of Movement Points (see 6) that the unit may expend in one turn.
Operations Chits are Roman (blue) and Briton (red). Unit types are: Roman Infantry, Roman Cavalry, Briton Infantry, Briton Cavalry and Civilian (each has its own symbol on the counter).
2.3 Game Scale
Each turn represents two days. Each hex represents roughly 5 miles across. Each Roman Strength Point represents 100 men. Briton Strength Points vary wildly.
3. Glossary
The number in parentheses immediately following each definition refers the player to the rule in which terms are fully elaborated upon.
- Activation is the expenditure of an Operations Point (q.v.) to allow a Roman legion to move and attack (12.1).
- Forced March is movement for the second time in a turn by a Roman unit (6.4).
- Fortified Hex (or Fort) is a large, permanent (usually stone) defensive work built to withstand prolonged siege (9.3).
- Garrisons are Roman units which must be kept in specified hexes to prevent Briton tribal revolts (12.2).
- Interception is movement in the other player's phase (q.v.) to attack his units (7).
- The Legion is the basic fighting unit of the Roman army consisting of ten cohorts (including an elite cohort) and some attached cavalry (10).
- Movement Points make up a unit's Movement Allowance (2.2). All terrain costs are measured in Movement Points (6.7).
- Odds is the ratio between the attacking and defending forces; this is always expressed with "1" as the lowest common denominator (8.13).
- An Operations Point is an abstract measure of each side's ability to wage the campaign (5).
- Overrun is the elimination of a vastly inferior force during the movement of the superior force (8.4).
- A Phase is the basic division of a turn (4).
4. The Sequence of Play
Druid is played in a series of turns, which are broken up into phases. Phases are organized into a sequence of play, which is the strict order in which all actions must be undertaken. The Operations Phase is further divided into segments. The number of segments within an Operations Phase may vary from turn to turn (see 5.3).
The first segment within an Operations Phase is always a Briton Segment.
The game can never exceed 20 turns in length (see 16).
Sequence Outline
A. Operations Capability Phase: Each player randomly picks an operations chit, with the Roman player picking first. Each player adds the Operations Rating of his highest rated active leader to the number on the chit, keeping the chit and the total secret until the end of the turn (see 5.2).
B. Roman Supply Phase: The Roman player notes which of his legions is not in an unsacked Roman town or military post, adjusting the Supply Track of each legion so noted. If a legion has no supply left on its track, the Roman player indicates that that legion is out of supply (see 11.2).
C. Civilian Movement Phase: The Roman player may move his civilians if they are eligible to do so (see 6.3).
D. Druid Invocation Phase: The Briton player may, by expending an Operations Point, use the Berserk Unit Table (13.7) or, if he has not done so on the previous turn, the Druid Invocation Table (13.6).
E. The Operations Phase: Players alternate segments (see 5.3), until both players pass in consecutive segments, at which time the Operations Phase is completed.
- Briton Segment
- a. The Briton player moves units by expending Operations Points. If a Briton stack enters a Roman-occupied hex, combat occurs immediately.
- b. The Briton player sacks towns, destroys bridges, etc., expending Operations Points to do so.
- or c. The Briton player may pass and do none of the actions.
- Roman Segment: The Roman segment is identical to the Briton segment except that, prior to moving, the Roman player may use Operations Points to try to activate his legions.
The only actions which may be undertaken by the other player during a segment are interception (7) and combat, if his units are attacked.
F. Tribal Revolt Phase: The Briton player may attempt to have inactive tribes revolt, if Boudicca or a Druid is in that tribe's capital and the Briton expends an Operations Point. Consult the Tribal Revolt Table (12.7). On even-numbered turns, the optional Spontaneous Revolt Table (12.8) is consulted.
G. Turn Conclusion Phase: Both players reveal their Operations Chits for the turn to each other. Advance the Turn marker one space on the Turn Record Track. Remove all Moved markers.
5. Operations
The number of actions a player can undertake with his units is limited by the number of Operations Points he has for that turn. Most actions such as movement, tribal revolts, sacking towns, etc. cost points. The points are received via an operations chit, picked at the start of the turn, to which is added the Operations Rating of the player's best active leader, giving a sum total of Operations Points.
Operations Points cannot be saved from turn to turn. Those that have not been used by the end of a turn are lost.
5.1 Operations Chits
There are 10 operations chits provided in the game.
5.11 The red side of the chit is the Briton side, and the blue side of the chit is the Roman side. The player consults the appropriate side of the chit he has drawn to discover his base Operations Points for the turn.
5.12 All operations chits are placed in an opaque cup at the beginning of the turn. In the Operations Capability Phase of each turn, each player picks one chit, with the Roman player picking first.
Players do not look at their operations chit until they have removed the chits from the cup.
5.13 At the end of the turn the players return their chits to the cup, after showing their chit to each other for verification purposes.
5.2 Determining Operations Points
To determine the number of Operations Points a player has for a turn, the player adds the number on his side of the operations chit he has picked to the Operations Rating of any one leader on the map. Thus if the Briton player gets a "4" chit and Boudicca is in play, he has a total of 6 (4 + 2 = 6) points available for that turn.
5.21 The Briton player receives 2 extra Operations Points on the first turn and 1 extra point on the second turn. This simulates the advantage gained when the Romans were surprised by the Briton attack.
5.22 Suetonius Paulinus is not in play until he enters the map as a reinforcement (see 12.51).
5.3 Use of Operations Points
Certain actions in the game cost Operations Points; in order to perform these actions, the player must have available and must expend the appropriate number of points. See the Operations Points Cost Chart (5.4).
5.31 The Briton player always has the first segment in the Operations Phase. He may do as little or as much as he likes, depending on how many points he wishes to expend. When the Briton player does not want to or cannot expend any more points, it becomes the Roman segment. The Roman player expends points as desired, after which it again becomes the Briton segment. The players alternate segments until each passes in consecutive segments.
5.32 A player passes if he chooses not to expend Operations Points in his segment.
A player must pass if he has no Operations Point left when it becomes his segment.
5.33 There is no minimum number of points spent in an Operations Phase. The maximum number of points is limited by the total points available to the player.
5.34 When the players pass in two consecutive segments, the Operations Phase is over. Any Operations Points remaining to the players are lost.
5.35 Most points will be spent to move units. It costs 1 point to move one stack of units. The point applies to all units in any one hex that start the Operations Phase in that hex. Each unit in that hex can move separately, or the stack can move together.
5.36 A stack cannot pick up other units during movement or combine movement with units from another stack.
5.37 Only 1 Operations Point may be expended and one stack moved at any one time, meaning that all units in a stack must finish movement before another stack begins movement. (The chief effect of this rule is to limit attacks to one stack at a time, as combat is part of movement.)
5.38 Movement of civilian units (during the Civilian Phase) and leaders does not cost Operations Points.
5.4 Operations Point Cost Chart
| Action | Cost (Operations Points) |
|---|---|
| Move one stack (see 5.35) | 1 |
| Combat | 0 |
| Attempt interception | 1 |
| Sack town or post | 1 |
| Destroy bridge | 1 |
Roman player only:
| Action | Cost |
|---|---|
| Attempt legion activation | 1 |
| Construct bridge | 1 |
| Add 1 to legion activation die-roll | 1 |
Briton player only: Use Druid Invocation Table; use Berserk Unit Table; use Tribal Revolt Table; activate new Druid priest; call tribal units together. (The cost column for these Briton-only actions was lost in the scan; the rules text, 12.33, 13.42, 13.44, 13.45 and 13.47, states 1 Operations Point for each.)
Supply replenishment costs 1 Operations Point per legion (11.16).
6. Movement
6.1 Basic Principles
6.11 Units are moved one stack (or part of a stack) at a time, regardless of the number of units in that stack (see also 5.35 through 5.37).
6.12 No player is required to move his units, but in order to move a given stack he must expend Operations Points. Place a Moved marker on a stack after it moves.
6.13 Units may be moved in any direction or combination of directions, limited only by their Movement Allowances, the terrain, and other applicable rules. Units that begin in a stack may move in different directions.
6.14 Moving units trace a path of contiguous hexes, expending Movement Points for each hex entered and for each river hexside crossed. The cost to enter a hex or cross a river is listed on the Terrain Effects Chart (6.7).
A unit's Movement Points may not be saved from turn to turn nor lent to other units.
6.15 A stack of units may not enter a hex occupied by enemy units unless it is going to attack those units.
Briton units in revolt may not enter a Roman military post or fortified town unless they are going to attack (or sack) that town or post, even if the town or post is not Roman-occupied (see 9.1 and 9.3).
6.16 Once a stack of units has moved within a given Operations Phase, it may not move again. However:
- A unit may intercept enemy units after regular movement (see 7).
- Roman units may perform a second movement known as forced march (see 6.4).
6.17 A unit may move a minimum of one hex during a segment or phase, regardless of terrain cost, by spending an Operations Point.
However, a unit may never enter or cross prohibited terrain.
6.18 No unit may cross an unbridged river hexside into a hex occupied by enemy units. A unit can cross an unbridged river hexside into a military post, town, etc. hex unoccupied by enemy units.
6.19 There are no zones of control in Druid. (If you don't know what these are, they can't hurt you.)
6.2 Stacking
Stacking refers to the number of units a player may place in a given hex. The only limits to the number of units that can stack in a hex are in the following four cases.
6.21 Briton tribes in revolt may not stack together unless Boudicca or a Druid is present in the hex.
Similarly, units of different Roman-allied Briton tribes may not stack together in a hex unless Paulinus is present in the hex.
6.22 Units of different Roman legions may not stack together unless Paulinus is present in the hex.
6.23 Roman-allied tribal units may not stack with Roman units, unless Paulinus is present in the hex, and at least one intact legion is also in that hex.
6.24 No more than 10 Roman auxiliary units may be present in a hex with an intact legion or at least 5 cohorts of that legion.
6.25 The stacking limitations apply at the end of a stack's movement and during combat.
Enemy units have no effect upon stacking limits.
6.26 If the death of a leader leaves a stack containing several legions, tribes, etc., in violation of the stacking rule, the owning player is obliged to spend an Operations Point to correct the infraction as soon as legally possible.
6.3 Civilians (Civitates)
Civilian counters represent Romans and those Britons whom the tribes perceived as friendly to the Romans.
6.31 Civilian units may move only during the Civilian Movement Phase. Standard movement rules apply, except as below.
6.32 Any civilian unit that begins its phase in a hex adjacent to that of a Briton unit in revolt may move that phase.
6.33 Any civilian unit within 6 Briton Movement Points of (but not in a hex adjacent to) a Briton unit in revolt may move on a die-roll of 1 through 4.
6.34 Any civilian unit outside this 6 Movement Point radius may move only on a die-roll of 1 or 2.
6.35 Civilian units have no Combat Strength, stack freely with Roman units (but may not move with them), and are eliminated if attacked while not stacked with Roman military units by Briton units in revolt. If a Briton stack attacks a stack composed of Roman military and civilian units, and all Roman military units are eliminated, the civilian units are also eliminated.
6.36 An attack against only civilian units is considered an overrun at 10-1 odds (see 8.42).
6.37 The Briton player can elect not to eliminate civilian units even though his units have fulfilled the conditions for doing so.
6.4 Roman Forced March
6.41 The Roman player (only) may force march his legions. Auxiliaries may not force march, unless stacked with a legion.
6.42 To force march a stack (i.e., legion or legion plus auxiliaries), the Roman player moves that stack a second time within an Operations Phase, expending a second Operations Point. Place a Forced March counter on top of such a stack as soon as it starts to move.
6.43 The second, forced march movement may be performed either immediately after the first, normal movement, or in any later Roman segment during the same Operations Phase.
6.44 Force marching units must use road hexes. They may not enter any other type of hex.
6.45 Roman units that have been in combat during or before their first move may not force march.
Force marching units may attack.
6.46 If a Roman unit that is or has force marched during a given Operations Phase is attacked, the Briton player adds 1 to his combat die-roll for the first round of combat (only). (The rationale for this rule is that Romans built camps when they stopped marching at the end of the day; units that are force marching have no time to take these defensive precautions.) If the force marching units attack, there is no modifier.
6.47 The Forced March counter is removed at the end of the turn.
6.48 Cavalry units that are force marching move at the infantry movement rate (i.e., 8 hexes along a road).
6.5 Movement in Viroconium
6.51 Viroconium (hex 4501) is Roman-occupied at the beginning of the game, fortified, and the capital of the Cornovii. If no Roman units occupy Viroconium, Cornovii units may enter or move through that hex freely.
6.52 If the Cornovii are in revolt and no Roman units occupy Viroconium, any Briton unit in revolt may enter or move through the town.
6.6 Hidden Deployment and Movement (Optional)
This optional rule requires a bit of honesty and some minor bookkeeping, but greatly adds to the flavor and historicity of the game. It also helps the Briton player.
6.61 Only Briton units may use hidden deployment and movement.
6.62 Any Briton unit in a forest or wooded hills hex may use hidden movement, as long as it stays in forest or wooded hills hexes. Any time such a unit moves into a hex which is not forest or wooded hills, it must be placed back on the map.
For convenience, all references to "forest" in rule 6.6 imply "and wooded hills."
6.63 If a Briton stack enters a forest hex and decides to use hidden movement, place a numbered Hidden Briton marker anywhere in that forest until the stack leaves. The Briton player must keep track, on paper, of where the stack is each turn. The Briton units are placed in the Hidden Briton box corresponding to the number on the counter.
If another stack later hides in the same forest, its counters are put in the same box, though its movement must be plotted separately.
6.64 Movement costs for hidden movement are greater than those for normal movement (see 6.7).
6.65 Use of hidden movement does not affect a stack's ability to intercept.
6.66 If a Roman stack moves into a forest hex in which a Briton unit is hidden, the Briton player must inform the Roman player (which is where honesty is required). This is, as always, an automatic combat. However, the Roman player subtracts 2 from his combat die-roll for the first round (only).
6.67 Briton stacks may remain hidden indefinitely as long as they remain in forest hexes.
6.7 Terrain Effects Chart
Movement Point costs to enter a hex or cross a hexside. Note on this transcription: the chart's columns were garbled in the available scan. Entries shown as "?" could not be read reliably and are not guessed.
| Terrain | Roman Inf | Roman Cav | Tribal Inf | Tribal Cav | Leader | Civilian |
|---|---|---|---|---|---|---|
| Clear | 2 | 2 | 1 | ? | ? | ? |
| Road* | 1 | 1 | 1 | 1 | 1 | 1 |
| Hills | ? | 2 | 1 | 2 | 1 | 2 |
| Forest | 3 | 4 |
* Road rate is used only when the unit is moving along continuous road hexes. ** Rate is used only if the town, etc., is friendly or sacked. Numbers in parentheses: the second number is the cost to Briton units using hidden movement (see 6.6). P: Prohibited. Inf: Infantry. Cav: Cavalry. Sea includes sea hexsides (e.g., 2424/2524 and 3104/3205).
(Errata, West End Games, June 1984: the terms "military posts" and "Roman military camps" mean the same thing on this chart.)
7. Interception
Interception allows the non-moving player (i.e., the player whose segment it isn't) to react to enemy movement during the enemy player's segment of the Operations Phase by "intercepting" and attacking his moving units. The ability of a stack of units to intercept and attack an enemy stack while it is moving depends on its location as well as whether it includes cavalry. Interception is always a voluntary action, and it is only undertaken by the player who is not moving.
7.1 Interception Range
7.11 Any stack of units containing at least one combat unit can intercept an enemy stack. Its ability to do so is expressed in terms of a range of hexes, measured from the original hex of the intercepting units to the current hex of the moving units. The hex containing the intercepting unit is not counted towards the interception range.
7.12 A stack's interception range does not extend through any hex or hexside through which it could not move (including enemy-occupied hexes, fortified towns, unbridged river hexsides, etc.).
7.13 The interception range of Roman units extends into or through no more than 1 forest or wooded hills hex. This restriction does not apply to Briton units, whether enemy to or allied with Rome.
7.14 The maximum interception range is 3 hexes.
7.2 Mechanics of Interception
Whenever a stack enters the interception range of enemy units, it has a chance of being intercepted. The non-moving player, should he wish to intercept with his eligible units, announces his intention to do so and expends 1 Operations Point. The moving player halts his stack and the intercepting player notes the range, location of intercepting units, and presence or absence of cavalry in his intercepting stack, as noted on the Interception Range Table. He then rolls one die (unless interception automatically succeeds). If the die-roll falls within the listed range, interception succeeds. If not, it fails; the intercepting units remain in their original hex and the moving units continue to move.
7.21 If interception is successful, the intercepting player immediately moves the intercepting stack to the hex of the moving units for immediate combat.
7.22 The intercepting player need not move all units from the original hex of the intercepting stack.
7.23 A successful interception requires the intercepting player to move a minimum of 1 combat unit to the moving stack's hex.
If the cavalry portion of the Interception Range Table is used, one intercepting unit must be a cavalry unit.
7.3 Interception Restrictions
7.31 There is no cost in Movement Points to intercept.
7.32 Successful interception immediately precipitates combat. This combat is resolved in normal fashion.
7.33 Successful interception of a stack of moving units prevents further movement of those units during that segment, regardless of the outcome of combat.
7.34 No more than one stack of units at a time may attempt to intercept a given enemy stack. Thus, one stack cannot aid another in intercepting an enemy stack.
7.35 A given stack of units may attempt only one interception in an enemy segment of the Operations Phase.
Whether or not such interception fails, the owning player may not try to intercept again with that stack until the enemy player's next Operations Segment.
7.36 A stack which begins the segment within interception range of enemy units and:
- does not move may not be intercepted;
- moves into a hex further away from the enemy stack may not be intercepted; but
- moves into a hex equidistant from or closer to the enemy stack may be intercepted.
7.37 Briton units using hidden movement in forest or wooded hills hexes may, of course, intercept. This makes Roman marches through forests quite interesting.
7.38 Leader units moving alone may not be intercepted. Civilian units may be intercepted during the Civilian Movement Phase.
7.39 Retreating units may not be intercepted during the segment in which they retreat.
Units which retreat cannot attempt interception until the following turn. Place a Moved marker on units which retreat.
(Errata, West End Games, June 1984: 7.12 delete "unbridged river hexsides". 7.13 This restriction applies also to auxiliaries.)
7.4 Interception Table
Die-roll needed for the interception to succeed ("1-4" means a roll of 1 through 4; Auto = interception automatically succeeds; No = interception is not possible at that range). Rows give the range in hexes; columns give the type of hex the intercepting units are in. Note on this transcription: the table was garbled in the available scan; the entries below are as read, and the Roman no-cavalry rows in particular may be misaligned (for example the "1-5" in the Roman no-cavalry, range 1, forest column may actually read 1-4).
Roman, cavalry present
| Range | Military Post, Fortified Town | Forest, Wooded Hills | Other |
|---|---|---|---|
| 1 | Auto | Auto | Auto |
| 2 | 1-4 | 1-4 | 1-2 |
| 3 | 1-2 | 1 | No |
Roman, no cavalry
| Range | Military Post, Fortified Town | Forest, Wooded Hills | Other |
|---|---|---|---|
| 1 | 1-4 | 1-5 | 1-2 |
| 2 | 1 | 1-2 | No |
| 3 | No | No | No |
Briton, cavalry present
| Range | Town | Forest, Wooded Hills | Other |
|---|---|---|---|
| 1 | Auto | Auto | Auto |
| 2 | 1-3 | 1-5 | 1-2 |
| 3 | 1 | 1-2 | No |
Briton, no cavalry
| Range | Town | Forest, Wooded Hills | Other |
|---|---|---|---|
| 1 | 1-3 | 1-5 | 1 |
| 2 | No | 1-2 | No |
| 3 | No | No | No |
Cavalry Present: At least one cavalry unit is stacked with the units attempting interception. Auto(matic): Interception automatically succeeds. No: Interception is not possible at this range.
8. Combat
Combat occurs the instant one stack of units enters a hex occupied by enemy units. The resulting battle is resolved immediately; no further movement or interception may take place until that combat is resolved.
Combat is either a major battle or skirmish (i.e., minor battle), depending on the size of the forces involved.
One side may withdraw as the battle proceeds, or both sides may fight until one is completely victorious. (Many ancient battles were fought to the total annihilation or dispersion of the enemy.)
To a certain extent, combat is of the odds/ratio variety (e.g., 2-1, 4-1), although the Combat Results Table does not directly reflect these odds. Rather, the Table simply shows losses inflicted; the player with the odds in his favor rolls more times than his opponent.
8.1 How Combat Occurs
A battle occurs whenever one stack of units enters a hex occupied by an enemy stack, whether as a result of movement or interception. The battle is resolved immediately, and no further action may take place until that battle is finished.
8.11 Once battle has been joined, each player totals the Strength Points in his stack.
Units may not be withheld from battle.
8.12 A player may not examine the contents of an enemy stack until he commits units to battle against it.
8.13 The players determine the odds by comparing Strength Point totals. Thus, 42-20 would be 2-1, etc. After simplifying the odds, players determine if the combat is a major battle or a skirmish.
Fractions are always rounded to favor the defender, who is the player who did not initiate combat or interception. Thus if 19 Strength Points attack 10, the odds are 1-1. If 10 points attack 11, the odds are 1-2.
8.14 If both sides contain 10 or more Strength Points, the battle is considered a major battle.
If one side has less than 10 points and the other has 10 or more, it is a major battle unless the odds are 1-1 or 1-2 (in which case the battle is a skirmish).
8.15 If both sides have less than 10 Strength Points, the battle is a skirmish. Thus, 15-9 is a skirmish; 16-5 is a major battle; 8-15 is a skirmish; 19-11 is a major battle; 8-7 is a skirmish.
8.16 A battle's status as a major battle or skirmish does not change. The reduction of either or both side's Strength Point totals has no effect on this status.
8.17 A battle consists of rounds with no set limit. The players engage in one round, subtract losses, recompute the odds (after each round), and then continue to the next round, unless the weaker side withdraws.
A battle rages until one side is totally eliminated or the weaker side withdraws.
8.18 Combat die-rolls for a round are considered simultaneous; that is, each player rolls his combat die-rolls for a round before any combat losses are removed.
8.2 Resolution of Combat
To resolve each round of combat the players first compute the odds and then roll a die one or more times.
8.21 The player with the greater force rolls the die as many times as his ratio of superiority; the other player rolls the die once. (Odds are always reduced to a factor of "1": 2-1, 6-1, 4-1, etc.) Thus, if the odds are 3-1, the player with the greater force rolls the die three times, while the other player rolls only once.
8.22 Combat die-rolls can be affected by factors such as terrain and leaders. All these factors are listed on the Combat Adjustments Chart (8.7).
All relevant die-roll adjustments are cumulative.
8.23 The results on the Combat Results Table are in steps. Most units have two steps: full strength and half strength. A one step loss reduces a full strength unit to half strength and eliminates a half strength unit.
Units with only 1 Strength Point have only 1 step and are, of course, eliminated by a step loss.
8.24 The owning player may choose to take losses from any unit in a stack unless the combat result indicates "High." In this case, the player must take a step loss from the unit with the most Strength Points.
8.25 A "disrupted" result means that 1 enemy unit is disrupted. Disruption has no effect upon the odds, but the player must subtract 1 from each of his die-rolls for each disrupted unit in his stack.
8.26 Additional disruption results must be applied to undisrupted units. If every unit in a stack is disrupted, further results of "disrupted" have no effect.
8.27 If a disrupted unit is eliminated to satisfy a step loss result, the disruption goes away.
8.28 At the conclusion of a battle, all disrupted units return to normal. There is no other effect.
8.29 At the end of each round of battle, players take losses and then recompute their total Strength Points. Unless the weaker side withdraws, the player recomputes the odds for the next round and rolls again, using the new odds ratio.
8.3 Exceptions and Example
8.31 If the odds are 1-1 but one side has at least 50% more Strength Points than the other (say, 18-10), then the player with the greater force rolls twice on the first round of battle (only).
8.32 Each Roman legion contains an elite cohort with 8 Strength Points. If this cohort suffers a step loss, it is flipped to its 6 Strength Point side. If it suffers a second step loss it is replaced by a 4 Strength Point cohort, which may in turn be flipped to its 2 Strength Point side. Thus, elite cohort units may suffer up to 4 step losses, rather than be limited to 2 as most other units are.
8.33 Elite cohort units need not be selected by the Roman player when applying a "High" combat result if another cohort unit is present.
An elite cohort unit is affected by a "High" result only if no other cohort units are present in its stack.
8.34 Example
Boudicca and all Briganti units attack Paulinus and an intact legion in a town. The odds are 72-45, which are reduced to 1-1, with the Briton player rolling two dice during the first round.
The Briton player rolls a "2" which, with Boudicca's +1 bonus and the town's -1 penalty, remains a 2 and inflicts a disruption. The second Briton die-roll is "5", -1 for the town, which is reduced to 4 and eliminates a high step; that is, 1 from a cohort. (Notice that Boudicca's battle rating affects only one die-roll in the round.)
The Roman player rolls a "3" which, with Paulinus' +2 and intact legion's +1, becomes 6, causing two step losses, one of which must be a high step. The Briton player reduces one Briganti cavalry unit for a loss of 2 Strength Points, and one Briganti infantry unit for a loss of 8 points. The odds are now 62-43, which still reduces to 1-1.
In the second round, both players roll a 5. (Notice that the Briton player loses his second die-roll.) For the Briton, the roll remains a 5 and destroys two steps. For the Roman, the roll becomes a 7 (+2 for Paulinus, +1 for the intact legion, and -1 for the disruption) which destroys two steps, one of which must be the high step. The Roman player removes the legionary cavalry (which is a one step unit), which was assigned the disruption in the last round, and reduces another cohort. The Briton player removes his previously reduced units.
The odds are now 52-40, which is still 1-1, and the Roman player has regained his net +3 die-roll modifier. Both players roll a 6. The Roman player reduces two cohorts (4 Strength Points) and the Briton player, suffering from a die-roll modified to 9, loses a second cavalry unit (two steps) and a second infantry unit (two high steps) for a total loss of 20 Strength Points.
The odds are now 32-36, reduced to 1-2. At this point, the Briton player decides to withdraw. Since the Roman player has sacrificed his cavalry unit, there is no pursuit.
Note: Since the Briton steps usually have more Strength Points than the Roman steps, a Briton force will usually take casualties at a faster rate. This simulates combat between disciplined soldiery and an armed mob.
8.4 Overrun
8.41 If a stack of units attacks an enemy stack at odds of at least 7-1 but less than 10-1, the defending stack is automatically eliminated, and the attacking units may not move further during that segment.
8.42 If a stack is attacked at 10-1 or greater odds, the defender is automatically eliminated.
If the overrunning stack has any Movement Points remaining after 2 Movement Points have been subtracted for the overrun itself, it may continue moving.
8.43 If a stack attacks at odds of 1-5 or worse, the stack is automatically eliminated without casualties to the defending units.
However, the defending units may not move in the current segment.
8.44 Roman units in military posts may only be overrun at odds of 10-1 or greater.
The overrunning units may move no further during that segment.
The Roman player rolls one die on the Major Battle column of the Combat Results Table, applies all relevant modifiers, and then eliminates his stack.
8.45 A fortified hex may never be overrun and its occupying units must be attacked normally regardless of the odds.
8.5 Withdrawal and Pursuit
8.51 Withdrawal of a stack may not occur until after the first round of battle.
8.52 Only the player with fewer Strength Points may withdraw his units.
If both sides have exactly the same number of points, neither may withdraw.
8.53 Withdrawal is a voluntary action. Once announced, it must be immediately undertaken.
8.54 Withdrawing Roman units move their full Movement Allowance towards the nearest friendly military post or fortified hex.
Such units may stop movement once they have entered such a hex even if they have used less than their full allowance.
8.55 Withdrawing Briton units move their full allowance towards their capital, each unit moving towards its tribal capital.
If the tribal capital is enemy-controlled, the units move towards the nearest friendly capital or post.
8.56 Withdrawing units may not move or attempt interception for the rest of the turn.
Place a Moved marker on units which have withdrawn. Previous withdrawal from battle does not prevent withdrawal from succeeding battles.
8.57 Withdrawing units may be "pursued" by the victor, if the victorious units have greater cavalry strength than the withdrawing units. The pursuing units do not actually move; the pursuit is resolved as an additional round of battle.
For every 2 Strength Points of cavalry that the victorious stack has above that of the withdrawing stack (round down), the victor rolls one die on the skirmish column of the Combat Results Table.
No adjustments are made to a pursuit die-roll. Thus, if the victor has 7 cavalry Strength Points and the withdrawing units 2, the difference is 5, and the victor rolls twice on the skirmish column.
8.58 Losses resulting from pursuit combat are chosen by the pursuing player.
8.6 Combat Results Table
| Die | Major Battle | Skirmish |
|---|---|---|
| 1 or less | 0 | 0 |
| 2 | Dis | 0 |
| 3 | 1 | Dis |
| 4 | 1H | 1 |
| 5 | 2 | 1 |
| 6 | 2H | 1H |
| 7 | 2H | 2 |
| 8 | 3H | 2H |
| 9 or more | 4H |
A number is the number of step losses inflicted upon the enemy stack. Dis: disrupt one unit in the enemy stack. H: the step losses must include a "high" step, that is, from the unit with the most Strength Points (see 8.24 and 8.33). (The legend beneath this table was partly cut off in the scan; the H meaning is taken from rules 8.24, 8.33 and the example in 8.34, in which a "2H" result is "two step losses, one of which must be a high step".)
8.7 Combat Adjustments Chart
- a) -1 for each attacking disrupted unit
- b) -1 if attacking units attack units in unsacked towns
- c) +1 if Briton units attack units in a Roman unsacked post
- d) -2 for first round if Roman units battle with hidden Briton units (supersedes (e) or (f))
- e) -1 if Roman units attack Briton units in forest or wooded hills hex (not cumulative with (d))
- f) +1 if Briton units attack Roman units in forest or wooded hills hex (not cumulative with (d))
- g) +1 if Briton units are berserk
- h) +1 if intact Roman legion attacks
- i) +1 for first round if Briton units attack Roman units which have forced marched
- j) +2 for first round for units which intercept
- k) + leader's battle rating to 1 die-roll per round (or, if battle rating is 2, +1 to two die-rolls)
- l) Roman units attacked in a fortified hex have their combat strengths doubled
- m) Units attacked across a bridge have their combat strengths doubled
Combat adjustments are cumulative, unless otherwise noted. (Thus, units in a fortified hex which are attacked across a bridge have their combat strength quadrupled.)
9. Military Posts and Towns
There are two types of urban locations on the map: towns and (Roman) military posts. Some towns are tribal capitals, and are indicated as such.
The military posts of Lindum (hex 5118) and Glevum (hex 3405), and the capital of the Cornovii, Viroconium (hex 4501), are fortified.
9.1 Military Posts
9.11 All military posts are considered Roman, unless occupied by Briton units or sacked (and destroyed).
9.12 Military posts have no intrinsic defensive value, although they do benefit Roman units in such hexes.
9.13 Roman and Roman-allied units may freely enter and pass through military post hexes.
9.14 Briton units in revolt which enter a military post hex must expend an additional Operations Point to sack (and destroy) the military post. Place an appropriate marker on the hex to indicate the sack. Of course, Briton units may always enter a military post hex to attack a Roman stack there.
(Errata, West End Games, June 1984: 9.14 If combat does not take place and the Roman units withdraw, the post must be sacked. A post may be entered even if the player does not have sufficient Operations Points to sack, but it must be sacked on the next turn.)
9.2 Towns and Capitals
9.21 Towns and capitals provide a defensive benefit to units in such a hex.
9.22 Units of either side may freely enter and exit an unoccupied town or capital hex.
9.23 Towns may be sacked by a stack which ends its movement in that hex; the owning player expends an Operations Point to do so. Place a marker indicating destruction. Sack of a town may be performed in the same segment that the sacking units enter, in a subsequent segment, or even in a subsequent turn, provided the units remain in place.
9.24 (The opening of this case is missing from the scan; it concerns Camulodunum (hex 3031) and Londinium (hex 2523). The Numerical Information Summary, 15.3, states: "Minimum of 8 Strength Points are required to sack Londinium or Camulodunum.") The sack of either town also requires a full turn. This means that a Briton unit must enter the hex during a first turn, remain in the hex until the end of a second turn (not segment), and only then is the town sacked.
9.3 Fortified Hexes
9.31 At the start of the game, all three fortified hexes are Roman. These hexes remain Roman unless occupied solely by Briton units. When Briton units leave a fortified hex, it reverts to Roman control.
9.32 Any Roman or pro-Roman Briton units in a fortified hex have their Combat Strength doubled.
9.33 Briton units in revolt may not enter an unoccupied fortified hex, except Viroconium, without attacking it.
9.34 An unoccupied fortified hex has 3 Strength Points, each point being a step.
A battle against an unoccupied fort is always considered a major battle.
9.35 If a fortified hex is occupied, and the occupying units are destroyed, the fort would still retain its 3 steps. These would have to be eliminated before the fort could be destroyed.
9.36 Once a fortified hex is reduced to 0 Strength Points (i.e., 3 step losses are taken), it may be sacked (see 9.23).
If the hex is not sacked, and the Briton units leave, the fortified hex reverts to its 3 step status.
9.37 The intrinsic defensive value of a fortified hex (3 Strength Points and steps) applies only when it is unoccupied and attacked by Britons. It is not added to any occupying Roman or Roman-allied units.
9.4 Viroconium
Because of its dual status as a Roman fort and the Cornovii capital, Viroconium (hex 4501) is something of an anomaly.
9.41 If the Cornovii tribe is neutral or pro-Roman, Viroconium functions as any other fortified hex.
9.42 If the Cornovii tribe is in revolt, and Roman units occupy Viroconium, it functions as any other fortified hex.
9.43 If the Cornovii tribe is in revolt and Viroconium is not occupied by Roman units, place an Inactive marker on the hex. If Viroconium is occupied by Roman units, the fort becomes active for as long as Roman units remain in the hex. If Roman units leave the hex or are eliminated, the fort again becomes inactive.
9.44 The inactive fort may be destroyed as described in case 9.34.
If the fort is destroyed, replace the Inactive marker with a Disrupted marker.
Fort destruction is permanent.
9.45 If Briton units in revolt are attacked in Viroconium, they may use the defensive bonus for a town, but they may not use the fort.
Conversely, the Romans may sack Viroconium and still use its fortifications. If they leave, the fort becomes inactive.
9.46 No Victory Points are awarded for destroying this fort and Viroconium is not necessarily considered sacked by the Britons.
Of course, Viroconium may be sacked by units which are enemies of the Cornovii.
9.47 See 6.5 for the rules for movement in Viroconium.
10. The Roman Legion
There were four legions active in Britannia at the time of the revolt: the II, IX, XIV and XX. (The printed sentence is garbled in the scan; the legion numbers are those given in the deployment and activation rules.)
10.1 Legion Composition
Each legion (at full strength) consists of ten cohorts and one cavalry unit. Nine cohorts have a full strength of "4", one has a strength of "8", and the cavalry has a strength of "1". The total Strength Points of a full-strength legion is thus "45".
(Transcriber's note: the cavalry strength figure is partly illegible in the scan; "1" is consistent with the stated total of 45 = 9 x 4 + 8 + 1.)
10.2 Intact Legions
If all units from a given legion are in the same hex, the legion is represented by the corresponding legion counter. The units are placed in the appropriate Legion Holding Box.
10.21 A legion represented by a legion counter is treated as a stack containing the units in its Holding Box. The counter is a convenience; stacks eleven high are, to put it mildly, awkward to move.
10.22 A legion that has all of its cohorts in the same hex is considered "intact"; if any of its cohorts are elsewhere on the map, the legion is not intact.
If a legion's cavalry unit is eliminated or elsewhere, the legion can still be intact if the ten cohorts stack together.
10.23 The XX Legion starts the game not intact.
10.24 If the strength of a legion falls below 20 points or 10 cohorts, the legion can not be intact.
If all of such a legion's units are in the same hex, it may still be represented by the legion counter.
10.25 If a Roman legion is attacked or attacks while intact, the Roman player receives a die-roll benefit while in battle (see 8.7).
This benefit applies as long as at least one intact legion is present in the hex of battle.
11. Supply
Supply applies only to Roman legions. Briton units and Roman auxiliaries ignore the supply rules.
Roman legions need supplies to operate at full effectiveness. These supplies come from Roman-controlled military posts and towns.
11.1 Supply and Its Sources
A legion can operate without stopping for supplies for 7 turns.
11.11 Each legion which starts the game on the game-map has 7 turns of supply. Indicate this by placing the supply marker for that legion in the "7" box of that legion's supply track.
The supply status of reinforcing legions is given in 12.53.
11.12 If a legion is not intact, all units within the legion are considered to be at the supply level of the unit with the least supply. Thus, the six cohorts of the XX Legion, which start the game at Viroconium, may be considered to have a supply level of no higher than "4" when the rest of the legion arrives (see 12.53).
11.13 A legion uses 1 point of supply every turn, unless it spends the Supply Phase of that turn in a Roman post or town. In those cases, it uses no Supply Points.
11.14 Legions can increase their supply level by starting a turn in a Roman post or town.
Sacked posts or towns cannot be used to increase supply.
11.15 For the supply level of a split legion to be raised, the legion must come together; supply levels of split legions cannot be raised.
(Errata, West End Games, June 1984: A "split legion" is one that has units in at least two different hexes.)
11.16 During the Supply Phase, the Roman player spends 1 Operations Point for each legion he wishes to replenish. This raises the supply level of one legion by 3 Supply Points. Adjust the appropriate supply track accordingly.
11.17 Legions which have a supply level reduced to "0" are out of supply.
11.2 Out of Supply
11.21 Roman legions in a friendly post or town hex which has not been sacked suffer no ill effects from being out of supply as long as they are in such a hex during the Supply Phase.
11.22 Otherwise, legions which are out of supply suffer the following effects:
- All Movement Allowances are halved;
- No forced marching is allowed;
- If there are any out of supply legions in a battle, the Roman player subtracts 1 from all die-rolls; and
- At the end of each turn that a legion is out of supply (i.e., its supply level is at "0" and at least one unit is not in a friendly, unsacked post or town), the Roman player rolls one die. On a 1 to 3, that legion loses a step; on a 4 to 6, there is no effect.
12. Reinforcements
Aside from the units that start the game on the map, the players have other units available to them through a variety of means. The Roman player must activate reinforcements (and legions on the map) to bring them into play, while the Briton player receives his reinforcements through tribal revolts against Roman authority.
There is no replacement of units. Once a unit is eliminated it may never be returned to play.
12.1 Legion Activation
12.11 The four Roman legions and all off-map combat units start the game inactive. These units cannot do anything until activated.
Inactive markers should be placed on the Roman units until they become activated.
The on-map auxiliary units are active at the start of the game.
12.12 In order to attempt to activate inactive units, the Roman player must spend 1 Operations Point for each legion or group of off-map auxiliaries (see 12.53) that he wishes to attempt to activate. This point must be spent even if the activation is automatic or fails.
Only one attempt may be made to activate a particular unit in a given turn, though attempts may be made for all inactive units.
Once activated, a unit may be moved immediately upon the expenditure of an additional Operations Point.
12.13 On turn 1, there are two full legions plus part of a third on the map. A full legion, part of another, infantry and cavalry auxiliaries are off-map. Each of these must be activated in accordance with the Activation Table (12.6).
The Roman player is advised to heed the garrison restrictions (see 12.2).
12.14 To attempt activation of a legion or off-map auxiliaries, the Roman player expends an Operations Point any time during one of his segments of the Operations Phase.
Activation is either by die-roll, automatic or impossible (see 12.6).
12.15 The Roman player must place one legion (any one) in reserve. The In Reserve marker is placed in the appropriate Legion Holding Box.
The reserve legion must be designated by the end of the first turn.
The reserve legion may not attempt activation until turn 10.
12.16 Any inactive legion that is attacked, including the reserve legion, is instantly activated for the rest of the game.
There is no combat benefit for attacking an inactive legion.
12.17 An active legion can never become inactive again.
12.18 The Roman player may expend an Operations Point to add 1 to his die-roll to activate a legion. Only 1 point may be so expended per turn.
12.2 Roman Garrisons
The Roman player should maintain a garrison at certain hexes to forestall automatic revolts by Briton tribes.
12.21 If, at any point, there are less than 20 Strength Points of Roman units in Lindum (hex 5118), the Briganti tribe automatically revolts and enters the game on the side of the Britons during the next Tribal Revolt Phase.
12.22 The Roman player should maintain a garrison for Glevum (hex 3405) and Viroconium (hex 4501). If, at any point, there are less than 20 Strength Points of Roman units in both towns put together, or there are no Roman units in one of these two towns, the Silures tribe automatically revolts and enters the game on the side of the Britons during the next Tribal Revolt Phase.
12.23 A garrison may be composed of legionary plus auxiliary units. However, if auxiliaries are used, only half (measured in Strength Points, not units) of the garrison force is allowed to be auxiliary units.
The limit on auxiliary Strength Points is applied to the combined Glevum/Viroconium garrison.
12.24 If either the Silures or the Briganti become activated, that Roman garrison may be withdrawn without penalty.
12.3 Tribal Revolts
12.31 The Briton player starts the game with only four tribes active on the map: Iceni, Trinovantes, Coritani and Catuvellauni.
The remainder of the tribes are inactive and are not placed on the game-map.
12.32 The Briton player may attempt to rally inactive tribes to his cause by inciting them to revolt. He attempts this during the Tribal Revolt Phase.
If the tribe does revolt, all its units are placed in the tribal capital.
If the tribal capital is sacked or enemy-occupied, the tribal units may be placed anywhere within 3 hexes of that capital.
12.33 Boudicca or a Druid must be present in the capital (see 16.4) of a tribe which the Briton player wishes to incite to revolt.
Further, 1 Operations Point must be expended for each revolt attempt. Roll one die and consult the Tribal Revolt Table (12.7).
12.34 If the tribe does not revolt but instead becomes pro-Roman, place the units of that tribe in the capital and immediately resolve any combat. If only a Druid or Boudicca is present, simply move the Briton leader up to his or her full Movement Allowance. (This is a free move.)
12.35 Pro-Roman tribes are indicated by placing a pro-Roman marker in the tribe's capital.
Pro-Roman tribal units are treated as auxiliaries except:
- they may not force march; and
- they may not be used as part of a garrison.
12.36 If the capital of an inactive tribe is sacked, that tribe joins the enemy of the sacking player during the next Tribal Revolt Phase.
The sacking player receives full Victory Points for the capital.
Once a sack has been announced, it cannot be rescinded. In other words, the sacking player cannot claim he did not know the tribe was inactive, that he did not mean to sack the place, etc. (Nothing came between the ancient soldier and his twin pleasures, rape and pillage.)
12.37 If Roman units kill Boudicca or a Druid in the capital of an inactive tribe, that tribe revolts during the next Tribal Revolt Phase.
12.38 If Viroconium is Roman-occupied, the Briton player may attempt to activate the Cornovii by placing a leader in Deva (hex 5503) or Pennocrucium (hex 4407).
12.4 Spontaneous Briton Revolt (Optional)
Although spontaneous revolts add considerably to the excitement of the game, the rule is obviously pro-Briton. To counteract the latter effect, the Roman player is excused from the requirement to maintain a legion in reserve once at least two tribes have gone into spontaneous revolt.
12.41 On any even-numbered turn, the Briton player may attempt to have one tribe go into spontaneous revolt.
12.42 Boudicca or at least one Druid must still be in play for a spontaneous revolt to be attempted.
There must be at least two tribes currently in revolt.
12.43 There is no Operations Point cost for spontaneous revolt.
12.44 Spontaneous revolt is rolled for after the Briton player has rolled for the normal leader-inspired revolt.
12.45 The Briton player rolls on the Spontaneous Revolt Table. The first roll determines which pair of tribes is eligible for this revolt. A roll of 3 through 6 on the second roll means that there is no revolt. A 1 or 2 on the second roll means that the indicated tribe goes into spontaneous revolt. (For instance, two rolls of "1" would rouse the Briganti.)
12.46 If a tribe which spontaneously revolts is already in play, the result has no effect.
12.5 Off-Map Roman Units
Certain Roman units start the game off map in Wales.
12.51 Suetonius Paulinus automatically enters the map on hex 5701 on turn 2, during any Roman segment of the Operations Phase.
12.52 All other off-map Roman units must be activated to enter play.
If activated, these units enter hex 5701, treating that hex as clear (not road).
12.53 The following units are activated as part of the indicated groups for an expenditure of 1 Operations Point per group:
- I. XIV Legion (see 12.6). Supply Status: 4
- II. 4 cohorts of the XX Legion (see 12.6). Supply Status: 4
- III. Five 2-12 auxiliary cavalry; two 1-12 auxiliary cavalry
- IV. One 4-8 auxiliary infantry; four 2-8 auxiliary infantry; two 1-8 auxiliary infantry
(The unit notation "2-12" and "2-8" is Combat Strength then Movement Allowance.)
12.54 If hex 5701 is occupied by Briton units, the entering Roman units must immediately give combat.
12.55 Units that are activated may enter any time during the Operations Phase.
12.6 Activation Table
Die-roll needed to activate ("5-6" means a roll of 5 or 6), by turn. Note: the scan's row labels for the first two legions were garbled ("W Legion" and "K Legion"); they are given here in the order the legions are listed in the rules (II, then IX).
| Unit | Turn 1 | 2 | 3 | 4 | 5 | 6+ |
|---|---|---|---|---|---|---|
| II Legion | 2-6 | Auto | Auto | Auto | Auto | Auto |
| IX Legion | 5-6 | 4-6 | 3-6 | 2-6 | Auto | Auto |
| XIV Legion | No | 6 | 5-6 | 5-6 | 5-6 | 4-6 |
| XX Legion (on-map) | Auto | Auto |
* Off-map units. On-map auxiliary units begin activated. ** No Operations cost. Auto(matic): Group of units automatically activates. No: Group of units cannot activate that turn.
12.7 Tribal Revolt Table
| Die | Result |
|---|---|
| 1 | Tribe revolts, joins Britons, and goes on rampage. For next two turns, increase Movement Allowance of all units in tribe by 2, and add 1 to all combat die-rolls for units in tribe |
| 2-4 | Tribe revolts, joins Britons |
| 5 | Revolt fails, nothing happens |
| 6 | Tribe activates and joins Romans as Roman-allied tribe |
12.8 Spontaneous Revolt Table (Optional)
| First Die-Roll | Second Die-Roll 1 | Second Die-Roll 2 | Second Die-Roll 3-6 |
|---|---|---|---|
| 1 | Briganti | Parisi | None |
| 2 | Cornovii | Dobunni | None |
| 3 | Silures | Durotriges | None |
| 4 | Belgae | Atrebates | None |
| 5 | Regni | Cantii | None |
| 6 | None | None | None |
13. Leaders
The Briton leaders are Boudicca and the four Druids. Suetonius Paulinus is the only Roman leader.
A leader's Battle Rating is added to the first die-roll in a round of a battle in which the leader is present. The Operations Rating of the highest rated leader on a side is added to the number on the operations chit drawn for that side. Leaders are also used to stir up revolts, increase stacking limits, and so on.
13.1 Restrictions on Leaders
13.11 A leader may never enter an enemy-occupied hex unless accompanied by friendly combat units.
13.12 A leader unit has no combat strength.
13.13 A lone leader may be killed if an enemy cavalry unit enters his hex. The attacking player rolls a die. On a roll of 1 to 3, the leader is killed; on 4 to 6, the leader escapes.
13.14 A leader always escapes when an enemy stack composed exclusively of infantry units enters his hex.
13.15 An escaping leader is immediately moved up to 5 hexes in any direction by the owning player.
13.16 If a leader is in combat and his entire stack is eliminated, he is killed. Otherwise he is killed only as specified below.
13.2 Suetonius Paulinus
13.21 The Roman player may not use Paulinus' Operations Rating until he enters the map. (He enters during the Roman Operations Phase of the second turn, so his rating cannot be added to the Roman operations chit until that phase.)
13.22 Two or more legions may not stack in the same hex unless Paulinus is present.
13.23 Pro-Roman tribal units may not be stacked in the same hex as Roman units or as units of a different tribe unless Paulinus is present.
13.24 At the end of a battle involving Paulinus, the Roman player rolls two dice. Paulinus is killed on a roll of 12.
13.3 Boudicca
Boudicca is the only Briton leader with a Battle Rating. She may be used to stir up revolts (see 12.33).
13.31 Units of more than one tribe may not be stacked in one hex unless Boudicca or a Druid is present (see 6.21).
13.32 At the end of a battle involving Boudicca, the Briton player rolls two dice. Boudicca is killed on a roll of 2 or 12.
13.4 Druids
The Briton player begins the game with two Druid priests. A Druid may stir up revolts (see 12.33), allow units of different tribes to stack together (see 6.21), invoke the gods, gather units together, or rouse tribal units to a berserk frenzy (see below).
13.41 At the end of a battle involving a Druid, the Briton player rolls two dice. The Druid is killed on a roll of 10, 11 or 12.
13.42 Unlike other leaders, killed Druids may be replaced. There are two Druids in reserve on the island of Mona. Beginning with turn 10, the Briton player may replace Druids killed in combat with the Druids of Mona.
A Druid is activated at a cost of 1 Operations Point during the Tribal Revolt Phase and moves during the following turn.
A Druid must spend 5 Movement Points to move from Mona to any hex on the adjacent coastline. He may then move normally henceforth.
13.43 There may never be more than two Druids in play at any one time, and there may never be more than four which have been in play throughout the game.
13.44 If the Briton player has at least one Druid in play he may use a Druid to invoke the gods once during the Druid Invocation Phase. The Briton player expends 1 Operations Point, rolls the die, and applies the result from the Druid Invocation Table (see 13.6) immediately.
This table may not be used in consecutive turns.
13.45 During the Druid Invocation Phase, the Briton player may also make use of the Berserk Unit Table (see 13.7). At the cost of 1 Operations Point each, any Druid stacked with Briton units may attempt to raise those units to a fever pitch. Roll one die and consult the table. Apply the results immediately.
13.46 One or both Druids may use the Berserk Unit Table, and it may be used in the same turn as the Druid Invocation Table.
If the Druid Invocation Table is used, one Druid is considered to be invoking the gods, and thus cannot use the Berserk Unit Table.
13.47 At any time during a Briton Segment, the Briton player may use a Druid to gather units together. At a cost of 1 Operations Point, all Briton units within 3 Movement Points of any one Druid may be moved into the hex of that Druid.
Units which have been gathered together by a Druid may make no normal movement in that turn.
13.5 Briton Hordes
Each Briton leader has a Horde Box printed on the map. If a leader is commanding a large stack of units, these units may be placed in his or her Horde Box. The leader's counter is then used to represent the stack. The Horde Box has been provided as a convenience.
13.6 Druid Invocation Table
(The die-roll column of this table was lost in the scan; the results are listed in the order printed, which corresponds to die-rolls 1 through 6.)
| Die | Result |
|---|---|
| 1 | Add 2 to Briton Operations Points |
| 2 | Bad weather invoked. All Movement Point costs increased by 1. River hexsides may not be crossed (except at bridges). No forced march permitted |
| 3 | The Curse of the Druids strikes Paulinus! Paulinus may not use his battle or operations ratings |
| 4 | Briton player may, at no cost in Operations Points, roll on the Berserk Unit Table for each Druid stacked with units |
| 5 | Druids scare units. All tribes in revolt have their Movement Allowances halved |
| 6 | Bad augury. Briton player may not attack |
All effects are for the current turn only.
13.7 Berserk Unit Table
Results in the order printed (the die-roll column is not legible in the scan; the table is rolled with one die, 1 to 6):
- Increase Movement Allowance for all units in hex by 2, and add 1 to combat die-rolls for those units
- Increase Movement Allowance for all units in hex by 2
- Add 1 to combat die-rolls for units in hex
- Nothing happens
- Druids frighten troops. Reduce Movement Allowance of all units in hex by 1, and subtract 1 from combat die-rolls for those units
(Only five results are legible for the six die-rolls; the assignment of die-rolls to results could not be confirmed.) All effects are for the current turn only.
14. Bridges
14.1 Bridge Construction
The Roman player (only) may construct bridges across unbridged river hexsides.
14.11 Only an intact legion (see 10.2) can construct a bridge.
14.12 The intact legion must be in a hex adjacent to the river hexside across which the bridge is to be built.
There can be no Briton units within 2 hexes of the constructing legion when bridge construction is announced.
14.13 The Roman player must announce where and with which units he intends to build a bridge before the first Briton segment of the Operations Phase.
14.14 The Roman player must expend 1 Operations Point for each bridge construction attempt he announces.
14.15 If the legion moves, intercepts, force marches, or is involved in combat, the bridge is not built.
14.16 The Operations Point spent for a bridge construction attempt is not recovered if, for any reason, the bridge is not built.
14.2 Bridge Destruction
Bridges, including those printed on the map, may be destroyed by units of either side.
14.21 A bridge may be destroyed during the Operations Phase by a combat unit in a hex adjacent to a bridged river hexside.
No enemy combat unit may be within 2 hexes of the unit destroying a bridge at the time bridge destruction is announced.
14.22 A player must spend 1 Operations Point when he announces the destruction of a bridge.
14.23 A unit which destroys a bridge may not move, force march or intercept for the rest of that turn.
Conversely, a unit may not destroy a bridge in any turn in which it has force marched, engaged in combat, or attempted interception. It can, however, move to the bridge before destroying.
14.24 Place a Destroyed Bridge marker on the hexside of the bridge when the Operations Point is spent.
For convenience, the players may wish to just remove the Bridge marker when a previously constructed bridge is destroyed.
15. Initial Deployment
The following units are placed on the map at the start of the game by the owning player. References to "tribe" or "legion" direct the player to set up all units in that tribe or legion (see 10.1 and 16.4).
15.1 Briton Deployment
Units below are in revolt.
| Hex | Units |
|---|---|
| 2821 | The Catuvellauni Tribe |
| 3525 | The Trinovantes Tribe |
| 4116 | The Coritani Tribe |
| 4432 | The Iceni Tribe; First Druid Priest |
Place Boudicca and the Second Druid Priest, each with a tribe other than the Iceni.
15.2 Roman Deployment
| Hex | Units |
|---|---|
| 2416 | One Civilian |
| 2523 | Two Civilians |
| 3031 | One 2-12 Auxiliary Cavalry; One 2-8 Auxiliary Infantry; One Civilian |
| 3108 | One 1-12 Auxiliary Cavalry; One 1-8 Auxiliary Infantry; One Civilian |
| 3405 | II Legion; One 2-12 Auxiliary Cavalry; Two 2-8 Auxiliary Infantry |
| 4501 | Six non-elite cohorts and the cavalry of XX Legion; One 2-12 Auxiliary Cavalry; One 2-8 Auxiliary Infantry |
| 5118 | IX Legion; One 4-12 Auxiliary Cavalry; Two 2-12 Auxiliary Cavalry; Two 1-12 Auxiliary Cavalry; Three 2-8 Auxiliary Infantry; One 1-8 Auxiliary Infantry |
The following units are to be placed in any military post not already occupied by combat units. No more than two of these units may be placed in a post.
Five 1-12 Auxiliary Cavalry; One 2-12 Auxiliary Cavalry; Two 2-8 Auxiliary Infantry; Three 1-8 Auxiliary Infantry.
15.3 Numerical Information Summary
For handy reference, those numbers which have not already been extracted from the rules and presented in one of the other charts and tables are presented below.
- 5.21. Additional Briton Operations Points. First turn: 2. Second turn: 1.
- 6.17. Minimum unit movement: 1 hex per segment or phase.
- 6.24. A maximum of 10 auxiliary units may stack in a hex which contains at least 5 cohorts of a legion.
- 6.32-34. Civilian unit die-rolls. Adjacent to enemy Briton unit: automatic. Within 6 Movement Points of enemy Briton unit: 1-4. Outside 6 Movement Point radius of enemy Briton units: 1-2.
- 7.13. Roman interception range may not extend or pass through more than 1 forest or wooded hills hex.
- 7.14. Maximum interception range: 3 hexes.
- 7.35. A unit may attempt 1 interception per segment.
- 8.13-14. Battle is a major battle if both sides have 10 or more Strength Points, or one side has 10 or more Strength Points and the other side has less than 10, unless odds are 1-1 or 1-2. Battle is a skirmish if both sides have less than 10 Strength Points, or one side has 10 or more, the other has less than 10, and odds are 1-1 or 1-2.
- 8.16. Fractions in odds ratios are always rounded down in favor of the defender.
- 8.31. If odds are 1-1 and one side has at least 50% more Strength Points than the other, the former rolls twice during the first round of battle.
- 8.32. The elite cohort unit in each legion has 4 steps.
- 8.41. Minimum overrun odds: 7-1.
- 8.42. Cost to overrun at 10-1 odds and continue movement: 2 additional Movement Points.
- 8.43. Attacking units are automatically eliminated at odds of 1-5 or less.
- 8.44. Minimum overrun odds against military post: 10-1.
- 8.57. One pursuit die-roll for each 2 cavalry Strength Point superiority the victor has over the withdrawing units.
- 9.24. Minimum of 8 Strength Points are required to sack Londinium or Camulodunum.
16. Victory
At the end of turn 20, both players total up their Victory Points as listed below. The player who has the most points is the winner. In the improbable event that the players have an equal number of points, the game is a draw.
16.1 Briton Victory Points
| Award | Event |
|---|---|
| 6 | Sack of Camulodunum or Londinium |
| 1 | Sack of a military post |
| 3 | Sack of any other Roman town or pro-Roman tribal capital |
| 15 | Eliminate all units in a legion |
| 8 | Reduce a legion's total Strength Points to 22 or less |
| 5 | Kill Suetonius Paulinus |
| 1 | Eliminate a civilian unit |
| 1 | Eliminate 7 Strength Points worth of auxiliary units |
| 1 | Eliminate 5 Strength Points worth of pro-Roman tribal units |
(Errata, West End Games, June 1984: 16.1 The Briton player receives 12 Victory Points if he sacks both Camulodunum and Londinium. He receives 1 Victory Point for every 7 Strength Points worth of auxiliary units, and 1 Victory Point for every 5 Strength Points worth of pro-Roman tribal units, that he eliminates.)
(Transcriber's note: the award column of this table was partly garbled in the scan; the awards are listed as read, aligned with the events in the printed order.)
16.2 Roman Victory Points
| Award | Event |
|---|---|
| ? | Sack of Venta Icenorum |
| ? | Sack of any other capital of an enemy tribe |
| ? | Kill Boudicca |
| ? | Kill a Druid |
| ? | Each civilian unit which remains in its town for the entire game |
| ? | Each civilian unit which moved from its town but is in its unsacked town at the end of the game |
| ? | Occupation of an unsacked capital of an enemy tribe at the end of the game |
| ? | Each tribe reduced to half or less of its original Strength Point total (see 16.4) |
(The award column of this table could not be read reliably in the scan: only the numbers 1, 2 and 1 survive, and they cannot be matched to events, so no values are given here rather than guessing.)
The Roman player receives 1 Victory Point per unit if all units in a tribe (see 16.4) are eliminated.
16.3 Automatic Victory
If a player meets his conditions for automatic victory, the game immediately ends, and that player is the winner regardless of the Victory Point totals.
16.31 The Roman player achieves an automatic victory at the end of any turn in which every tribal capital is pro-Roman, sacked, or occupied by at least 4 Strength Points of legionary or auxiliary units.
16.32 The Briton player achieves an automatic victory at the end of any turn in which at least 10 tribes are in revolt and no tribes are neutral.
Tribes which have been completely eliminated do not count towards the 10 tribe requirement.
16.4 Tribal Summary
| Tribe | Full Strength | Half Strength | Counters | Capital |
|---|---|---|---|---|
| Atrebates | 18 | 9 | 3 | Calleva (2416) |
| Belgae | 16 | 8 | 2 | Venta Belgarum (1914) |
| Briganti | 72 | 36 | 6 | Isurium (6412) |
| Cantii | 12 | 6 | 2 | Durovernum (1931) |
| Catuvellauni | 28 | 14 | 4 | Verulamium (2821) |
Designer's Notes
(The designer's opinions occasionally coincide with those of West End Games.)
The question that must be on your fevered lips is where did I light upon this topic for a game?
Good question. I was tinkering with a variety of operational systems to create something of the "fog of war" — opposing players could not simply react to their opponent's moves but would have to anticipate, guess and take chances. Having a rough idea for the basic mechanics I needed a subject to which to apply them. I had just read something about Boudicca (Lord knows where, as it is not exactly one of today's burning historical issues), and her revolt against the Romans seemed an excellent fit for the experimental system. All of this took place back in 1981, when I designed the original version of the game (which is not so very different from what you have before you today). However, at that time there was no one interested in the subject, so they never looked at the game itself, which I felt was kind of tragic. I did discuss the system with Bruce Shelley at SPI, who was then designing American Civil War and was stuck for a Sequence of Play. He took the Druid system, modified it and used it in ACW (no help, as the game turned out to be such a patchwork of bad ideas and isolated development that it almost defies description).
Druid is simple as wargames go, and players should remember that it is, mostly, a game (as opposed to a strict simulation). Much care was taken to see that game play stayed within the parameters of history, but since the Romans literally ran Boudicca off the court, some adjustments had to be made.
The revolving Operations Phase tended to equalize the game, and so successful was this in terms of playtester reaction that I am positive you will see variations of it pop up — often (especially in my games). This mechanic allows players to control their own destiny without being sure of what the other player is going to do.
The movement system we've all seen before, but I chose it because it places a premium on concentration, an important concept given the limited communications of the day. Armies coming from three different directions simply did not arrive at the same time at the same place in those days (no matter what you saw in Spartacus).
Interception, a virtual sine qua non for this era of games, I gleaned from my old The Conquerors game. Together with the optional Briton hidden movement rule, interception not only aids the Britons but adds a lot of excitement to play. One of the prime theories of game design is that you always increase the enjoyment in a game when you give the players decisions to make that are based solely on their knowledge (or lack thereof) of the situation, rather than on the roll of a die.
The combat system evolved from a desire to recreate the feel of an ancient battle, with its possibilities for total annihilation, etc., without putting the players through a melange of tactical strictures (as I did in The Conquerors many moons ago). I'm sure what I came up with is not overly original — I've seen the reductio ad absurdum type of Combat Results Table before, but it seemed to fit wonderfully here, creating a certain amount of tension to the one or two major battles that do occur without a tremendous amount of time expended. The problem in designing a combat system for this type of game is that you want to keep the play flowing and the game moving while, at the same time, not having the outcome of the few battles that do occur depend upon a single die-roll.
The rest of the game is, in the main, in the usual style of chrome that I opt for. My basic intent is to allow the players to feel and react as if they were in that era, susceptible to the forces and feelings of that time and place. (Which is why I appreciate a game like Kingmaker so much.) Granted, much of the Druid tables is a lot of hooey (the Druid priests were generally a harmless lot, except when it came to burning people alive), but what would a game on this subject be — or any game by me, for that matter — without some form of random events table?
That brings us to the title. Why Druid? Would you have bought a game called Boudicca's Revenge? Think about that.
Town Gazetteer
Hex, ancient name, and (where the rulebook gives one) modern name. Note: the scan's columns were misaligned; modern names are matched to their ancient names.
| Hex | Ancient Name | Modern Name |
|---|---|---|
| 2504 | Aquae Sulis | Bath |
| 3616 | Bannaventa | |
| 5027 | Branodunum | Brancaster |
| 2416 | Calleva | Silchester |
| 3525 | Camboritum | |
| 3031 | Camulodunum | Colchester |
| 4719 | Causennae | Ancaster |
| 3106 | Corinium | Cirencester |
| 5503 |
(The hex for Durnovaria is printed 1404 here and 1401 in the Tribal Summary (16.4) in the scan; both are shown as read.)