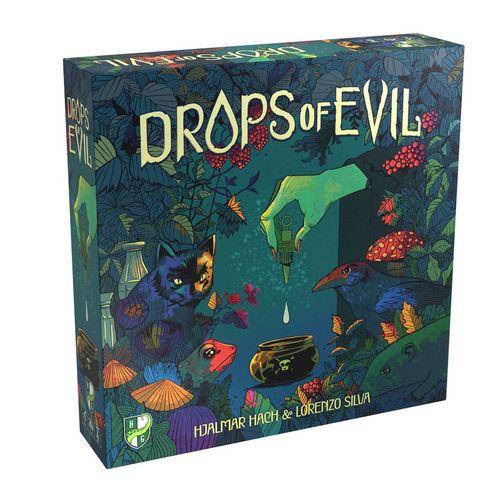
Drops of Evil
Drops of Evil Rulebook
Table of Contents
Table of Contents
Components
- 2 double-sided Forest boards (1 large, 1 small)
- 18 Assistant tiles
- 8 Recipe tiles
- 4 Recipe Ingredient tokens
- 1 score pad
- 1 cloth bag
Player components (in 4 colors)
- 4 Alchilab boards
- 4 Score markers
- 4 Turn Order markers
- 24 Toxicity tokens
20 Action pawns
- 4 Crows, 4 Cats, 4 Toads, 4 Snakes, 4 Coin Pouches
96 Bonus tokens
- 56 Extra Resources
- 40 Scrolls
Resource tokens
- 30 Owl Claws
- 26 Bat Wings
- 22 Salamander Eyes
- 18 Scorpion Tails
- 18 Mushrooms
- 14 Spiders
- 14 Rats
- 58 Worms
Setup
- Place one of the Forest boards in the center of the table, using the board and side that match the number of players:
- 4 players: large Forest board, 4-player side
- 3 players: large Forest board, 3-player side
- 2 players: small Forest board, either side
The two sides of the small Forest board offer different setups for 2-player games. Choose which side to use before setting up the game: side A (regular) or side B (variant).
- Before starting the game, remove some Resource tokens from the pool according to the number of players:
| Players | Owl Claw | Bat Wing | Salamander Eye | Scorpion Tail | Mushroom | Rat | Spider |
|---|---|---|---|---|---|---|---|
| 2 | 14 | 12 | 10 | 8 | 8 | 6 | 6 |
| 3 | 7 | 6 | 5 | 4 | 4 | 3 | 3 |
| 4 | Don't remove any tokens |
Put the removed tokens back into the box—you won't need them for this game.
Fill the bag with all the remaining Owl Claw, Bat Wing, Salamander Eye, Scorpion Tail, Spider, Mushroom, and Rat tokens. Mix the contents thoroughly, then fill each Gathering space on the Forest board with 1 Resource drawn randomly from the bag.
Finally, place the bag next to the Forest board.
- Shuffle the Assistant tiles and reveal:
- 5 Assistant tiles in a 4- or 3-player game
- 4 Assistant tiles in a 2-player game
Place the revealed Assistant tiles on the Assistant spaces of the Forest board.
- Shuffle the Recipe tiles and reveal 2 of them. Place them on the Recipe spaces of the Forest board. Then, shuffle the Recipe Ingredient tokens and place one of them on each revealed Recipe tile. (You can return the unused Recipe tiles and tokens to the box—you won't need them for this game.)
Place all the Worm tokens next to the Forest board to form a general supply.
The Forest board is marked with Gathering spaces, Forest Areas (the light green Clearing and the dark green Underbrush), a Score Track, a Turn Order Track, spaces for the Recipe tiles, and spaces for the Assistant tiles, next to the general supply.
- Each player chooses a color from those available and takes all the player components of that color:
- 1 Alchilab board
- 5 Action pawns
- 1 Score marker
- 1 Turn Order marker
- 6 Toxicity tokens
- 14 Extra Resource tokens
- 10 Scroll tokens
Place your Action pawns on the matching spaces in the upper-right area of your Alchilab.
Place your Toxicity tokens on the spaces showing the matching icons on the Toxicity Track along the top edge of your Alchilab. These are the starting Poison Point values for the corresponding Resources (see End of the Game, page 10).
- Take each player's Turn Order marker and randomly place one in each space of the Turn Order Track on the Forest board, from left to right. This determines the initial turn order.
Also, place your Score markers on the starting space (with a skull icon) of the Score Track that runs around the Forest board.
- The first player sets up their Bonus tokens on their Alchilab as follows:
- Shuffle the Extra Resources and place 1 randomly on each of the round spaces to the left of their Distiller and at the bottom of their Brewer.
- Shuffle the Distiller Scrolls (those with a mushroom icon on the back), randomly discard 1, then randomly place the remaining Scrolls on the corresponding spaces of their Distiller.
- Shuffle the Brewer Scrolls (those with a vial icon on the back), randomly discard 1, then randomly place the remaining Scrolls on the corresponding spaces of their Brewer.
Once the first player has completed this procedure, all the other players must then copy the exact placement of every token on their own boards, so all Alchilabs have the same starting configuration; then, return all unused Scrolls back to the box—you won't need them for this game.
Game Overview
The game is played over three rounds. Each round is divided into four phases: Placement, Gathering, Brewing, and Income.
During the Placement Phase, players take turns placing one of their Action pawns on the Forest board to indicate which Resources they want to collect or to hire an Assistant for the current round.
Once all players have placed all their Action pawns, the game proceeds to the Gathering Phase, when players collect Resources from the Forest board. Action pawns that collect Resources from fewer spaces are resolved first, possibly stealing Resources from slower pieces that can collect from a greater number of spaces.
Then, during the Brewing Phase, the players place the Resources they have collected into their Alchilab.
Finally, during the Income Phase, players gain points for their revealed Income icons, then the Forest is replenished and prepared for the next round.
At the end of the third round, the player with the most Poison Points wins the game!
Placement Phase
In this phase, the players will take turns in the order shown on the Turn Order track. During your turn, you must place one of your five Action pawns on any empty space of the Forest board. You can place your Action pawns in any order you choose. Continue taking turns in this way until all players have placed all five of their Action pawns.
Placing Action Pawns
There are two types of Action pawns:
- Familiars, which gather Resources from the Forest
- Coin Pouches, which are used to activate Assistants
Each Action pawn can only be placed on a specific type of space, and they can never be placed in a space already occupied by another Action pawn.
Crows
Crows can only be placed on Gathering spaces in the clearing of the Forest board—the light green spaces with a solid border. They cannot be placed on spaces in the underbrush—the spaces with a dashed border outside of the clearing. Crows collect all Resources from a single Gathering space and are resolved first.
Cats
Cats can only be placed on double-arrow spaces. They collect Resources from the 2 Gathering spaces indicated by the arrows and are resolved second.
Toads
Toads can only be placed on four-arrow spaces. They collect Resources from the 4 Gathering spaces indicated by the arrows and are resolved third.
Snakes
Snakes can only be placed on down-arrow spaces. They collect from the entire column of Gathering spaces indicated by the arrow, but they are the last Familiars to be resolved.
Coin Pouches
Coin Pouches can only be placed on Assistants, to secure their services. Assistants have a variety of effects that can be used during specific phases of the round; for more details, see Assistants.
Update Turn Order
Once all players have placed their Action pawns, before proceeding to the Gathering Phase, you must update the Turn Order Track. The new turn order is determined by the position of each player's Snake on the Forest board.
The player whose Snake is farthest to the left becomes the first player for the next round, the player whose Snake is second farthest to the left becomes the second player, and so on. Rearrange the Turn Order markers accordingly.
Note: This step is still performed during the final round, as turn order is used as the tiebreaker.
Gathering Phase
The players now retrieve their Familiars from the Forest board and collect Resources. Each step in this phase can be resolved simultaneously by all players, but the Familiars must all be retrieved in order from fastest to slowest:
- All players retrieve their Crows, then
- All players retrieve their Cats, then
- All players retrieve their Toads, then
- All players retrieve their Snakes
When you retrieve your Familiar, you also take all of the Resources contained in the Gathering spaces that Familiar can collect from.
Since some Familiars are faster than others, it is possible that a Gathering space will be empty before your Familiar has a chance to collect the Resources they would normally get. If this happens, you instead collect exactly 1 Worm from the supply, regardless of the number of Resources there were in that Gathering space. As a reminder, each Gathering space has a Worm icon on it. If your Familiar collects from more than one empty space, collect 1 Worm for each of those empty spaces.
After retrieving your Familiar, place it on the matching space in the upper-right corner of your Alchilab. Place the Resources it collected next to your Alchilab to create your pool of available Resources: they will be used later, during the Brewing Phase.
Brewing Phase
The players now place all the Resources they collected into their Alchilab. This phase is performed simultaneously by all players.
You may place your Resources in any order you choose, but you must place all of them before the end of this phase (if possible).
Resource Types
Resources are divided into three categories, which determine where they are placed in your Alchilab:
- Ingredients are always placed in your Brewer.
- Mushrooms are always placed in your Distiller.
- Rats are placed in your Free Rats space in the Rats Area.
Your Alchilab is divided into the Rats Area, the Toxicity Track, the Action Pawns area, the Distiller, and the Brewer.
Placing Ingredients
You must place your Ingredients in the Vials of your Brewer. You may place any Ingredient in any available space, but there are a few restrictions: Each space can only have 1 Ingredient token; each Vial can contain only 1 type of Ingredient in all of its spaces (with the exception of Spiders, see below); and you cannot move Ingredients you placed in previous rounds. You must place all of your Ingredients if possible. Only in the rare case that you have no legal space where you can place an Ingredient, you must discard it at the end of the Brewing Phase.
At the end of the game, each completely full Vial will score you Poison Points equal to the Toxicity of the Ingredient type it contains (for more details, see page 10).
Spiders
Spiders are wildcards that count as any type of Ingredient. Spiders are the only Ingredient that can share a Vial with another type of Ingredient.
Spider-Only Vials
You are not allowed to create Spider-only Vials. There always has to be at least one non-Spider Ingredient in each Vial, to determine how many Poison Points that Vial is worth (see page 10).
Completing Columns
The spaces in your Brewer are arranged in columns that can include parts of multiple Vials. Whenever you fill every space in a column, you immediately gain all of the Bonus tokens below that column, regardless of whether the Vials those spaces belong to are complete or not. For more details, see Bonus Tokens, page 8.
When you take a Bonus token, it may reveal one or more Income icons (see Income Phase, page 9). To know in advance how many Income icons will be revealed when you complete a specific column, look at the flames at its base: their number corresponds to the number of Income icons that will be revealed.
Placing Mushrooms
Mushrooms must be placed in the Vials of your Distiller, always starting with the lowest available Vial and going up.
When you completely fill a Vial, you immediately gain one of the Bonus tokens adjacent to that Vial or any Vial below it (for more details, see Bonus Tokens, to the right).
The topmost Vial can be filled multiple times. For each pair of Mushroom tokens you place in your top Vial, you immediately gain any one available Bonus tokens from your Distiller. After you complete your first pair here, stack any additional Mushroom tokens on top of them.
When you take a Bonus token from your Distiller, you will reveal one Income icon (see Income Phase, page 9).
Note: After you have unlocked all the Bonus tokens from your Distiller, gaining additional Mushrooms gives no advantage.
Placing Rats
Rats must be placed in the Free Rats space in the top-left corner of your Alchilab. Each Rat in this area will make you lose 1 point during each Income Phase. However, they can be captured by using Cheese. For each Cheese icon you use, move 1 Rat from your Free Rats space to your Captured Rats space.
There is no limit to how many Rat tokens you can stack in your Free Rats and Captured Rats spaces.
Note: Cheese cannot be collected from Gathering spaces. It can only be gained through Extra Resource tokens or Assistant abilities.
Bonus Tokens
There are two types of Bonus tokens:
- Extra Resources
- Scrolls
Extra Resources
When you gain an Extra Resource, it is immediately added to your pool of available Resources. You may use it at any time during the current round. Depending on the type of Resource shown, they are used in different ways:
- Worms — You may spend this token to gain 1 Worm from the general supply for each Worm icon shown on the token. If you don't spend this token, you must discard it at the end of the round.
- Any other Ingredient — You may place the Extra Resource token itself directly into your Brewer as if it was a regular Ingredient token.
- Mushrooms — You may place the Extra Resource token itself directly into your Distiller as if it was a regular Mushroom token.
- Cheese — You may spend these tokens to move 1 Rat to your Captured Rats space for each Cheese icon shown on the token. Cheese tokens must be discarded at the end of the round, even if no Cheese icons were used or they were used only partially.
Any unused Extra Resources must be discarded at the end of the Brewing Phase.
Scrolls
Scrolls increase the Poison Point values of specific Resources (see End of the Game, page 10). When you gain a Scroll, move the matching Toxicity marker forward on your Toxicity Track one space for each complete icon shown on the Scroll. Keep all Scrolls you gain next to your Alchilab.
Double Bonus for Combining Scrolls
If you gain a second Scroll showing the same Resource, the two Scrolls are combined, granting an additional bonus (i.e., the second Scroll makes the matching Toxicity marker move forward two spaces instead of one).
Note: In some games, one or even both Scrolls for a specific Ingredient may be unavailable, depending on which Scrolls were discarded.
Moving Resources
All Resources have a small triangle on one side of the token. When placing them, keep the side with the triangle facing up. At the end of the Brewing Phase, flip them to the side without the triangle. This makes it easy to change your mind when placing your Resources for the current round without accidentally moving any placed in previous rounds.
If you unlock a Bonus token, flip the Resources that contributed to unlocking it to the side without the triangle. From that moment on, those Resources can no longer be moved. This rule helps avoid any mistakes when moving Resources for the current round.
Income Phase
In this phase, you gain 1 Poison Point for each Income icon you have revealed on your Alchilab. However, you lose 1 Poison Point for each Rat you have in your Free Rats space.
Move your Score marker on the Score Track accordingly (you can't go below 0 points).
End of the Round
In this phase, you will do a little "clean up" and prepare for the next round:
All players retrieve their Coin Pouches from the Forest board.
Add 1 random Resource from the bag to each Gathering space on the Forest board, including those that still contain Resources that were not collected in the previous round(s). Note: You can skip this step at the end of the third and final round.
Then, start a new round.
End of the Game
The game ends at the end of the third round. It is now time to calculate your final score!
Mark the Poison Points you gained on the Score Track on the score pad, then, calculate the points you score from the Vials you completed, the Rats you captured, and the Recipes you followed, as described below.
Completed Vials
A Vial is completed if every space in that Vial has an Ingredient token in it. For each completed Vial in your Alchilab, you score points equal to the current Toxicity value for the type of Ingredient it contains, as shown on your Toxicity Track.
Incomplete Vials score no points.
Captured Rats
Each Rat in your Captured Rats space is worth points equal to their current Toxicity value, as shown on your Toxicity Track.
Recipes
There are two Recipes in each game. Each Recipe is paired with a Recipe Ingredient token, which indicates the type of Ingredient required for that Recipe.
It also shows a specific Ingredient pattern that must be formed in your Brewer using that Ingredient, and a value in Poison Points. You gain that many points once for each time that pattern of matching Ingredients appears in your Brewer.
Note that a single Ingredient token may be counted only once for the same Recipe. This also applies to Spiders, although each Spider may be counted once for each Recipe (see below).
You can find a detailed list of all Recipes on page 15.
Recipes and Spiders
Spiders may be used as wildcards for the completion of Recipes, regardless of which type of Resource is in the Vial where the Spiders are placed.
The same Spider could be counted as three different Ingredients: one for completing its Vial and for each of the two Recipes.
In the image above, only the two sets of Bat Wing tokens highlighted in yellow count toward the Recipe. Although a third pattern meeting the Recipe's requirements can be traced (marked in red), each token may be counted only once for the same Recipe, and all the tokens in this hypothetical third pattern would violate this requirement.
Note that the Spider to the top right counts both as a Salamander Eye for its Vial and as a Bat Wing for the Recipe, since Spiders are wildcards.
The player with the most Poison Points wins!
In case of a tie, the tied player who comes first in turn order wins.
Tips & Tricks
Placement
Timing is everything. Choosing the right Action pawn at the right moment can make all the difference in getting the most out of your Familiars.
- Whenever possible, deny your opponents valuable Resources while collecting them yourself. Every Resource you steal is one less they can use, and mastering this balance is the key to success.
- Not all spaces in the Forest are equally valuable. Look carefully: some Gathering spaces can only be claimed by a Snake or a Toad, making those Resources guaranteed. Keep this in mind when placing your Action pawns.
- Pay attention to the Action pawns your opponents have already placed. For example, if all the Crows have already been placed, no one can steal Resources from a Cat you place later.
- Turn order is a subtle but important aspect of Drops of Evil. Playing first gives you access to the best spaces, but leaves you with less control over which Resources you'll get. Playing later lets you react to your opponents and better predict which Resources your Familiars will ultimately bring home, but gives you fewer options to choose from.
Brewing
You have complete freedom when placing Ingredients into your Brewer, but not all placements are equally effective. Keep the following in mind:
- Unlocking Bonus tokens by completing columns is essential, so try to arrange your Ingredients to unlock the bonuses that best suit your strategy. Unlocking columns early also allows you to gain more points during the Income Phase.
- Use your Spiders wisely. Place them in valuable Vials and use their flexibility to maximize the points you score from Recipes.
- Avoid leaving too many Vials incomplete toward the end of the game, as you may find yourself needing more specific Ingredients than you can realistically obtain to complete all of them.
- Unlocking both Scrolls of the same type is especially rewarding, as it grants an additional step on the Toxicity Track for that Ingredient. Plan ahead and prioritize the pairs that best fit your strategy early on.
Assistants
Assistants offer a variety of abilities that can be activated during specific phases of the round, as indicated in the detailed description of each Assistant (see below). Assistants can be activated at any moment during the appropriate phase (Placement, Brewing, or Income).
For Assistants that are activated during the Placement Phase, you may activate them immediately after you hire them or at any other moment during one of your later Placement turns, before or after you place your Action pawn. For these effects, it is important to keep turn order in mind: as a reminder, they are marked with the hourglass icon in the top-left corner.
When you activate the Assistant you have hired, lay your Coin Pouch pawn flat, to indicate that you have used their special ability.
Before the Brewing Phase ends, you may choose not to activate the Assistant's ability and instead gain either 1 Worm or 1 Cheese (as indicated by the icons shown here, which are also shown next to the Assistant spaces on the Forest board). Lay your Coin Pouch pawn flat as a reminder.
Claimed Gathering Spaces
Some Assistants refer to "claimed spaces". A Gathering space is "claimed" by the Familiar that would be the first to collect Resources from it during the Gathering Phase.
1. Apothecary
Brewing Phase
Take 1 Rat from your Alchilab and place it into a Vial of your Brewer as if it were a Spider. The Rat may be taken from either your Free Rats or Captured Rats spaces.
2. Swindler
Brewing Phase
Swap two Bonus tokens on your Alchilab. The swapped tokens may be of different types, and they may be swapped between the Brewer and the Distiller. If you do this, you also gain 1 Worm from the general supply.
3. Hutkeeper
Brewing Phase
Double the Poison Points you gain from Income icons in your Distiller during this Income Phase.
4. Raven Master
Placement Phase
When you place your Crow, you may place it on a double-arrow space as if it were a Cat. If you do, during the Gathering Phase, it must also be retrieved as if it were a Cat.
5. Worm Herder
Brewing Phase
Gain 2 Worms from the general supply.
6. Pathfinder
Placement Phase
You may place your Crow on a Gathering space in the underbrush (spaces with a dashed border). If you do this, you also gain 1 Worm from the general supply.
7. Ash Sweeper
Brewing Phase
Choose one incomplete column of your Brewer that is missing no more than two Ingredients. Immediately gain all the Bonus tokens below that column, as if the column was complete.
8. Cat Lady
Placement Phase
When you place your Cat, you may place it on a four-arrow space as if it were a Toad. If you do, during the Gathering Phase, it must also be retrieved as if it were a Toad.
9. Grim Merchant
Brewing Phase
Special: At the start of each round, draw 1 Resource from the bag and place it on this tile (even if other Resources are already there). If you draw a Rat, return it to the bag and draw again. In the unlikely case that the bag contains only Rats, the Grim Merchant remains empty and provides no benefit. When you activate this tile, take all the Resources it holds and add them to your pool of available Resources.
10. Trickster
Brewing Phase
Place a Spider from your pool of available Resources across two spaces in the same Vial in your Brewer. Both spaces separately count as occupied by a Spider.
11. Butcher
Brewing Phase
Place 1 Rat or 1 Worm from your pool of available Resources or from your Rats Area in your Distiller as if it were a Mushroom.
12. Rat Catcher
Brewing Phase
Move all your Rats from your Free Rats space to your Captured Rats space.
13. Scavenger
Brewing Phase
Choose 1 Gathering space on the Forest board (either in the clearing or the underbrush) that still contains one or more Resources at the end of the Gathering Phase. Take all the Resources from that space and add them to your pool of available Resources.
14. Sage
Placement Phase
Take back one of your Familiars from the Forest board. You may not take back your Coin Pouch. Note: This means that you will have six Placement turns during this round (instead of the regular five).
15. Snake Charmer
Placement Phase
Choose one Gathering space in the column where you placed your Snake that is not also claimed by an opponent's Familiar. Take all the Resources from that space and add them to your pool of available Resources.
16. Beast Tamer
Placement Phase
Choose one Gathering space that is not claimed by an opponent's Familiar. Move all the Resources from that space to any orthogonally adjacent Gathering space. It does not matter if the destination space is claimed or unclaimed.
17. Surgeon
Income Phase
During the Income Phase, gain 1 Poison Point for each Rat in your Captured Rats space.
18. Poacher
Placement Phase
Take all the Rats from the four Gathering spaces surrounding your Toad (those indicated by the arrows), even if those spaces are claimed by an opponent's Familiar, and place them directly into your Captured Rats space.
Recipes Reference
This is a list of the effects of each Recipe. For the purposes of these examples, always consider Owl Claws to be the Resource associated with each Recipe.
1. Toxic Layers
You gain 4 Poison Points for each group of 4 horizontally adjacent Ingredients of the required type in the same row.
In this example, 2 groups of 4 horizontally adjacent Ingredients, for a total of 8 Poison Points.
2. Wicked Sediment
You gain 2 Poison Points for each group of 3 vertically adjacent Ingredients of the required type that includes the bottom space of a column.
In this example, 4 groups of 3 vertically adjacent Ingredients at the bottom of their columns, for a total of 8 Poison Points.
3. Oozing Mass
You gain 1 Poison Point for every 2 Ingredients in your largest group of orthogonally adjacent Ingredients of the required type.
In this example, a group of 14 adjacent Ingredients, for a total of 7 Poison Points.
4. Spreading Blight
You gain 1 Poison Point for each column of your Brewer that contains at least 1 Ingredient of the required type.
In this example, 9 columns containing at least 1 Ingredient of the required type, for a total of 9 Poison Points.
5. Tainted Patina
You gain 1 Poison Point for each set of 2 Ingredients of the required type placed on the edge spaces of your Brewer. These Ingredients do not need to be adjacent to each other.
In this example, 15 Ingredients of the required type on the edge spaces, for a total of 7 Poison Points.
6. Cursed Clumps
You gain 3 Poison Points for each group of 4 Ingredients of the required type arranged in a 2×2 square.
In this example, 3 groups of 4 Ingredients arranged in a 2×2 square, for a total of 9 Poison Points.
7. Corrupted Bonds
You gain 2 Poison Points for each set of 2 Ingredients of the required type placed on opposite sides of a connection between two different Vials.
In this example, 7 pairs of Ingredients placed on opposite sides of a connection between two Vials, for a total of 14 Poison Points.
8. Winding Venom
You gain 1 Poison Point for each set of 2 Ingredients of the required type placed in L-shaped Vials. These Ingredients do not need to be in the same Vial.
In this example, 16 Ingredients of the required type placed in L-shaped Vials, for a total of 8 Poison Points.