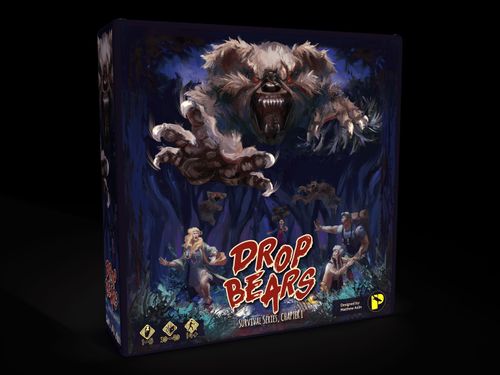
Drop Bears: Survival Series, Chapter 1
Drop Bears: Survival Series, Chapter 1 Rulebook
Table of Contents
Table of Contents
- Components
- Setup
- Surviving the Game
- Survival Guide
- Basics
- Camper Cards
- Drop Bears
- Location Tiles
- Utility Cards
- Game Concepts and Terms
- Game Structure
- Camper's Turn
- Camper Actions
- Free Actions
- Panic!
- Unconsciousness
- Death
- Spawn a Camper
- Drop Bear Priorities
- Drop Bear Movement
- Drop Bear Attack
- The Sun Rises
- Solo Mode
- Icon Index
Components
- 5 Drop Bear miniatures
- 10 Camper character tokens
- 10 Camper profile cards
- 8 tracking clips (4 red and 4 blue)
- 5 Drop Bear profile cards
- 1 Location Tile storage tree
- 40 Location Tiles
- 2 campfire tokens
- 48 Utility cards
- 1 Survival Expert token
- 4 six-sided dice
- 25 Expiry tokens
- 21 Survival Point tokens
- 4 Attack dice
- 1 Dusk Till Dawn board
- 1 Dusk Till Dawn token
- 1 Death Toll token
- 4 Unconscious cards
- 2 Companion tokens
- 5 Sequence tokens
- 2 Companion profile and action cards
Setup
Set up the play area:
- A. Give the Survival Expert token to the player who last went camping. They will be the first player in the player phase.
- B. Place the Base Camp Tile in the centre of the table. Shuffle the remaining Location Tiles face down and form a Location stack within the storage tree.
- C. Flip the Dusk Till Dawn board to the correct side for the player count (e.g., for two players, "2" should be shown), placing it just above the play area. Make sure you have enough space for the Location Tiles to expand.
- D. Place the Dusk Till Dawn token on its start space (dusk).
- E. Place the Death Toll token on 0.
- F. Shuffle all the Camper Profile cards and deal each player a single card. Each player then takes the corresponding Camper token. Place the Campers' tokens on the Base Camp Tile.
- G. Give each Camper two tracking clips, a red one for their Wounds track and a blue one for the Heart Rate track. Place these clips on the 0 value of both tracks on your Camper Profile card.
- H. Shuffle the Utility deck and place it to one side. Each Camper is dealt 4 Utility cards.
- I. Shuffle the Drop Bear Profile deck and place it to one side of the Dusk Till Dawn board. Draw the top card and place it face up below the deck and place the matching miniature onto the Base Camp. First Game: Use the Drop Bear Mongrel.
- J. A Drop Bear! - RUN!!!!
Solo Mode: details and rules on pages 26-29.
Surviving the Game
Surviving the game: To win the game you simply have to do two things: don't get eaten by Drop Bears, and collect a relative number of Survival Points in accordance with the player number listed on the Dusk Till Dawn board by the time the sun rises and the game ends.
Not surviving the game: You lose the game if the number of dead Campers exceeds the player count.
Additionally, if the sun rises and you have not collected the number of Survival Points required for your player count, you may have survived the Drop Bears but not the Australian bush. Sadly, you will not persevere long enough to be rescued.
Survival Guide
Survival Points: Not only are these a key factor in winning the game, but they are also a vital resource to improve your chances of surviving this nightmare. Don't be afraid to use them!
Find Endeavour Locations: Campers should look for places that give them a higher chance of survival. Some old buildings provide the opportunity to Endeavour and, with a little hard work, earn important rewards for the group.
Collect Gear: Gear can make the difference between a scratch and a festering wound. Whenever possible, gather Utility cards. You find these in backpacks, or when doing a Search in the scrub, or if you Endeavour for them. These cards will expand your options. Additional Actions, wound healing and many special capabilities are available to those with the proper gear.
Avoid the Drop Bears: It sounds obvious, granted, but don't go near the Drop Bears. Be aware of their target priority. Avoid grouping up, especially during the Late Stage of the night.
Basics
The Dusk Till Dawn board is the central source of information for you. It shows you how much time is left until the sun rises and the horror is over. It also keeps track of your win and loss conditions.
Dusk Till Dawn track: Each turn the Dusk Till Dawn marker will advance one step until it reaches the last slot "Dawn". When the sun rises, the game is over and you review the win conditions.
The track is divided into two different stages of the night. The Early Stage (grey) and the Late Stage (red). Each stage is made up of 8 alternating phases, first the Campers, then the Drop Bears. In total, the game runs for 16 phases. The Drop Bears get the last phase on the Dawn position.
- Early Stage - Phases 1-8: Drop Bears will be calmer and let the Campers have a chance of survival.
- Late Stage - Phases 9-16: Drop Bears are fiercely stalking after the Campers and use their special attack abilities.
Death Toll: This is one of your losing conditions. In a game of Drop Bears, only so many Campers may die before you lose the game, as indicated by the Death Toll.
Gain Survival Points: At the beginning of this phase, every Camper receives 1 or 2 Survival Points.
Spawn: Drop Bear: This symbol indicates that another Drop Bear spawns. There can never be more Drop Bears in the game than Campers. Ignore it when you have reached the maximum count.
Survival Point requirement: This section shows how many Survival Points you need at the end of the night to win the game. In Solo mode it's 5 points; in a two-player game it's 8 in total, and so on.
Camper Cards
Camper cards: Each Camper in the game is an ordinary person of no great importance, except for their special ability. The Camper Profile card shows who you are and what makes your character unique - so make sure to use it wisely!
Tracking clips:
- Wounds track (red clip): This is the Wounds track. For every wound you suffer, advance your Camper's Wounds tracking clip one step upwards towards the skull symbol. If your Camper suffers 6 wounds, they have died.
- Heart Rate track (blue clip): This is the Heart Rate track and indicates the emotional stability of your Camper. If your Camper reaches the red zone on this track (4, 5 or 6), then you (after completing your current Action) immediately Panic! If you reach the skull symbol on the Heart Rate track, your Camper succumbs to their shock and falls unconscious.
Unique Ability: Located below the Camper's title is their Unique Ability. This Ability always costs 2 Survival Points and can be used at any time during a Camper's turn. Unless otherwise specified, the Ability always targets you.
At the bottom of the Camper's Profile card is a reminder you can spend a Survival Point to re-roll a D6 or an Attack die affecting this character.
Drop Bears
These fluffy bears inhabit the Australian bush. All they want is to give your Campers a tender hug... with blood-soaked claws and monstrous teeth! Run you fools!
Drop Bears are the Campers' main enemy in the game. Their Profile card will give you an idea of how strong they are and what they will do if they catch your Campers. Each Drop Bear prioritises different targets, uses a varying number of Attack dice and acts uniquely when dropping from trees. For them, it makes a big difference which part of the night it is. So should it to you...
Drop Bears worry mostly about their hunger. For them, wandering Campers are a welcome snack. They don't discriminate - whoever is closest to them gets eaten. Only when dropping from trees, or when there is more than one Camper close, do their target priorities come into play. They apply in descending order and decide who a Bear will go for, whenever he is in doubt.
If no Camper is close or meets the priorities, the Drop Bear returns to the trees. For now.
Attack dice: If a Drop Bear finishes its movement or drops on the same Tile as your Camper, it attacks. You roll the number of dice indicated on the Drop Bear Profile card. Each Drop Bear has an effect triggered by particular icons; see each Drop Bear's Profile for the details.
Attack ability: Each Drop Bear has a late-stage game special Attack Ability. Listed adjacent to the Attack dice, the ability is often triggered only by particular dice results.
Location Tiles
The thick Australian scrub is a task to navigate even in the light of day. At night, the Campers have to uncover their surroundings step by step by drawing and placing map Tiles. They may discover overgrown and abandoned Locations, landmarks or even spine-chillingly morbid remains. And perhaps a way out of the horror.
The Map: The active area of interconnected Location Tiles is collectively referred to as the Map. During the game, you will draw and place many hexagonal Location Tiles from the Location stack. In the rulebook, these will also be referred to as "Location" or "Tile".
Depending on the direction the Campers stumble through the night, you place new Locations. Make sure there is plenty of space on your table. If a new Tile is needed, draw the top Tile from the stack. Place them adjacent to your Camper's current Location in any direction you choose. Detailed rules on placement can be found in "Player Turn".
Each Tile has the following features:
- Name: The identifying title of the Tile.
- Directional Guides: These go from 1-6 on every Tile. They are used in the setup of the game and as guides when your Camper panics. Refer to Game Concepts for details - Pages 13-15.
- If the Location stack runs out of Tiles, no more map Locations can be placed.
Location Icon Index
- SEARCH ICON: If you perform a Search Action here, draw and add the topmost card of the Utility card deck to your inventory. Before drawing a card, the Camper may discard a card if their inventory is full.
- BACKPACKS: Immediately draw and add a card of the Utility deck to your inventory. Place an Expiry token on the Backpack icon. You may pick up Backpacks while running.
- HEART RATE: Increase your Camper's Heart Rate by +1 for each Heart Rate icon on a Location. You are only affected by each Location's Heart Rate icon(s) once per turn.
- ENDEAVOUR: These represent various opportunities for Campers to better their chance of survival. But they have to work for it. Each Endeavour Tile has a set of values. These values are indicators of the dice roll required to succeed. Details are in the Player Turn section on page 18.
- DICE VALUE (REQUIREMENT): Every Endeavour Location comes with Dice Value icons. If you use the Endeavour Action here, your dice roll result must be the same or exceed the indicated value of these icons. If you succeed, cover them with an Expiry token. Details in the Player Turn section.
- DANGEROUS TERRAIN: These mark hazardous areas of the Australian bush. Be mindful when in a hurry. Your Camper suffers a wound for every icon on the Tile if you are performing a Run Action or are in Panic! Refer to Game Concepts for more details.
- HOSTILE ENVIRONMENT: This is even more dangerous - deadly creatures are hunting. If your Camper steps onto this Tile, roll an Attack die for each Hostile Environment icon on the Location. Apply the results to your Camper. See the Drop Bear Attack section for the effects of any rolled icons.
- EXPIRY TOKENS: You can place them on map Tiles. They indicate a resource that is no longer available. Example: You found a backpack and drew a Utility card. After the Backpack is collected it is covered with an Expiry token and is no longer available.
Utility Cards
In the Australian bush, useful things go missing all the time. Hikers lose their knives, misplace their flashlight... Things lost by others will become essential lifelines for the Campers.
Utility cards, also sometimes referred to as items, can be obtained with the Search Action, from abandoned backpacks, Endeavour Tiles, and by using Campers' special abilities.
When gained, Utility cards are placed face-up in front of you until played. In game terms, these cards are in the Camper's inventory. You can play them at any time, as long as they don't interrupt an ongoing Action.
Each Utility card has an immediate effect written on it which is applied when the card is played. Any card showing the discard icon must be discarded to the Utility discard pile after the card is played.
- You may use Utility cards at any time during your turn.
- You may only use Utility cards in your own inventory.
- You may use any number of Utility cards in a single turn.
- You may hold up to a maximum of 5 Utility cards at any time. When holding your maximum allowance of cards you can't draw another card.
- You may trade Utility cards with another Camper at your Location - see Trade in the Free Actions section on page 18.
- If the Utility deck runs out, shuffle all discarded Utility cards and form a new draw deck.
Types of Utility cards:
- Food: Will give your Camper the power to take extra or special Actions.
- Medicine: These heal your Camper or reduce their Heart Rate.
- Gear: Handy stuff that offers special abilities.
- Exploration: Allows your Camper to scout the Environment around them more carefully.
- Combination: Some Utility cards must be combined before you can use their ability.
Game Concepts and Terms
Survival Expert: This is the player that takes the first turn in the player phase and holds the Survival Expert token. This role is transferred clockwise to the next Camper at the end of the player phase.
Survival Points: These are your win condition. You need to possess enough at the end of the game, but you also can use them for abilities. Survival Points are awarded to anyone still alive at the start of phases 1, 5, 9 and 13 (as marked on the Dusk Till Dawn board). Early in the night it's a single point; closer to dawn it's two points. They are also available in specific Locations or from Utility cards.
Survival Points can be utilised in two manners:
- Cost 2: Use your Camper's Unique Ability.
- Cost 1: Re-roll a single die (either D6 or an Attack die) that targets or affects your Camper. A die may not be re-rolled more than once.
Spent Survival Points no longer count towards the required end of game total. When your Camper dies, all their Survival Points are lost (see Death, page 20).
Wounds: Above all else is the instinct to survive and tonight you must do whatever you can do to prevail. Run, hide, even sacrifice those near to you if you must, make each drop of blood count, because dawn nears and with it comes salvation.
If the Drop Bears attack you, or you stumble carelessly into the bush, you sustain wounds. When your Camper is wounded seven times without medical attention, they die. This is displayed on the Wounds track. Remember to use the Heal Action as often as possible; this Action will be essential to avoiding death.
When your Camper is injured, advance the indicated tracking clip on that Camper's Wounds track one position upwards for each wound suffered. If the tracker reaches the top of the track your Camper dies. (See Death, page 20.)
Printed figure note: the Wounds paragraph above (page 13) says a Camper dies after seven wounds, while the Camper Cards section (page 8) and the Death section (page 20) say 6 wounds. Both figures are transcribed as printed; the rulebook does not reconcile them.
Unique Ability: Each Camper possesses a Unique Ability. These abilities cost 2 Survival Points. They count as Free Actions (see Free Actions, page 18). These abilities can be used at any time during that Camper's activation.
Heart Rate: Representing your Camper's state of mind, their ability to make quick and safe decisions can become compromised, so stay focused because if you begin to panic... the Drop Bears can sense your fear. Venturing into the bush is often terrifying. As the night progresses a Camper will be faced with various horrors represented by this icon. Advance the appropriate tracking clip one position upwards for each Heart Rate icon encountered.
Panic!: If the Heart Rate of your Camper surpasses a certain threshold, they Panic! When that happens, they run heedlessly into the wilds in a direction determined by the roll of a die.
Unconsciousness: Your Camper is out cold, blacked out but still breathing. They will need intervention to help them out of the bush tonight. Even awake, they will be of little use to the group right now, but you should feel bad for leaving them.
If a Camper's Heart Rate reaches its maximum value, the Camper has become unconscious and is out of the game and will count as a death for the "Death Toll" if not revived by another Camper before Dawn. In the meantime, you will be able to spawn another Camper. If too many of your Campers die, you lose the game.
Death Toll: The Death Toll marks the maximum number of Campers that can die over the course of the game. The calculation is very simple: as soon as one more Camper dies than the number of players participating, the game is lost. The Death Toll is tracked via the Dusk Till Dawn board.
The token starts on the skull symbol and is moved one step forward when a Camper dies. The small dots represent the number of players. If the token leaves the square with the same number of dots as the number of players, the game is lost immediately.
Dangerous Terrain: This icon represents a vast array of naturally occurring Terrain types that are hazardous to an unwary Camper. If your Camper moves onto a Tile while resolving Panic! or during a Run Action, they suffer a wound for each Dangerous Terrain icon on it.
Hostile Environment: These Locations are home to all sorts of hostile things that crawl, creep, slither and sting. When a Camper enters a Location Tile, you have to roll an Attack die for every Hostile Environment icon at the Location and apply the results to your Camper. See the Drop Bear Attack section for the effects of any rolled icons.
Death: If your Camper suffers from too many wounds, they die. This is indicated by the Skull symbol on your Camper's Profile card. One dead Camper may not be game over; you get to spawn another Camper (page 21). If too many of your Campers die, you lose the game.
Game Structure
The game is played in 16 alternating phases, first the Campers' phase, then the Drop Bears' phase.
Campers' phase:
- Advance the Dusk Till Dawn token one step closer to Dawn.
- Check if you are rewarded for your struggles with Survival Points. All Campers receive the indicated number of Survival Point tokens.
- Each player, starting with the Survival Expert and going clockwise, takes their turn one at a time.
- Pass the Survival Expert token clockwise to the next player.
Drop Bears' phase:
- Move the Dusk Till Dawn token one step closer to dawn. Note that you still perform a Drop Bear phase when the token reaches the dawn space.
- If the token has reached a Drop Bear spawn point and there are fewer Drop Bears than the number of players, then spawn a new Drop Bear. Randomly draw a new Profile card, place it below any Drop Bear profile cards already in play and place the corresponding beast's miniature on the card.
- One by one, activate each Drop Bear in the order in which they were spawned. Each activated Drop Bear will Move and Attack, if possible. See Drop Bear Movement (page 22) and Drop Bear Attack (page 23) for details.
- If, after an action, your Camper's Heart Rate is 4 or greater, your Camper must follow the procedure for Panic! (page 19).
Camper's Turn
On their turn, your Camper receives and must spend 2 Action Points. The following actions cost 1 Action Point: Scout, Run, Rest, Search or Endeavour. The Heal Action costs 2 Action Points. You may also take any number of free Actions.
- You cannot use the same Action twice during your turn unless a Unique Ability allows it or a Utility card says you may repeat an Action or take an additional Action.
- While sharing a Location with a Drop Bear, a Camper may only choose Actions that would cause them to leave the occupied Location.
- Campers may take Action Points in any order of their choosing.
- Campers must spend at least 2 Actions before ending their turn.
Camper Actions
Scout
When you choose to Scout, your Camper may move to an adjacent Tile OR you draw and connect a new Tile to your Camper's current Location and move to it. Choose how you align the new Tile. You MUST move your Camper to the new Location. You CAN'T ever move them onto a Tile that's occupied by a Drop Bear.
Connecting Tiles: When expanding the Map, ensure that each new Tile is connected to an existing Location Tile. Connect at least one side to an already positioned Tile on the board. Make sure that no two Locations overlap.
When drawing multiple Tiles, a Camper must draw and place each Tile one at a time.
Run
When in a hurry, you can run. This allows you to advance two Location Tiles, effectively allowing you to take two consecutive Scout actions. Running increases your Heart Rate by one and triggers Dangerous Terrain, which causes as many wounds as there are Dangerous Terrain icons on the Tiles you step on. As before: if you draw new Tiles you MUST move onto them and can't go onto a Tile with a Drop Bear.
Rest
If your Camper is too exhausted or shaken, you can use Rest. This reduces their Heart Rate by 1, or by 2 if there is a Campfire icon on their Location. A Camper may never use a Rest Action when sharing a Location with a Drop Bear.
Search
If there is a Search icon on your current Location, you may perform a Search Action. Draw a card from the Utility deck and add it to your inventory. You may not draw any Utility cards if you have a full (5) inventory.
Endeavour
If you are lucky, you'll find special Locations in the Bush. Here you can Endeavour for Survival Points that help your Campers... well... to survive.
If you find such a place and choose to take an Endeavour Action, roll a single D6. If the result exceeds or equals one of the indicated values, your Camper's efforts are successful. Other results have no effect. Place an Expiry token on one of the values (the Dice Value icons on the Tile) for each successful roll on this Tile. When you cover the last value, EACH Camper on this Location receives the indicated number of Survival Points and/or cards. Each Endeavour Location may only be completed once per game.
Heal
Healing is a tedious process and cannot be rushed. The Heal Action will cost 2 Action Points and reduces your Camper's Wounds by 1. You can't reduce Wounds to below 0.
Free Actions
Your Camper may take the following Actions without using any Action Points. There is no limit to how often you can use these during your turn. All of these may never interrupt any other Action such as Run, Scout etc. Free Actions cannot be taken during or after a Camper Panics!
- Utility Cards: You may use any number of Utility cards during your turn. The use of a Utility card cannot interrupt an Action in progress. You may only play a Utility card outside of your Camper's turn when the card specifies that you may do so. You may not draw any Utility cards if you have a full (5) inventory.
- Unique Ability (see each Camper's Profile card): Your Camper has an ability listed on their Profile card. This may only be used during your Camper's turn. Follow the instructions on your Camper's Profile card. The Survival Point cost of this ability must be paid each time you want to use a Camper's Unique Ability.
- Trade: When your Camper shares a Location Tile with one or more other Campers, you may trade any number of cards from your inventory with any number of cards from another player's inventory.
Panic!
Spiders, creatures, fast pace - there are a lot of things that elevate your Heart Rate. But keep an eye on your Camper's pulse. When it enters the red zone, they will panic, and running heedlessly through the bush is really not advisable.
If your Camper's Heart Rate ever reaches a total of 4 or more, they are forced to Panic! and will run into the bush.
Moving into a Location Tile occupied by a Drop Bear will cause the Drop Bear to attack the panicking Camper (see Drop Bear Attack, page 23).
This movement will trigger both Dangerous Terrain & Hostile Environment.
Panic! Procedure:
- Complete your Camper's current Action (see Action resolution, page 17).
- Roll a D6; the result determines where the Camper will go. Move your Camper to the connecting Location Tile indicated by the number.
- The Camper will move two Location Tiles straight in the indicated direction. If no Tile is in the targeted space, draw the appropriate number of Location Tiles and then move your Camper onto it.
- Complete the movement and apply any effects displayed on the Tile, like Heart Rate, Dangerous Terrain & Hostile Environment.
- Reduce your Camper's Heart Rate to 3.
- Immediately end your Camper's turn. Your Camper cannot perform any further Actions, nor can they use special abilities or Utility cards.
Unconsciousness
If your Heart Rate tracker ever reaches 6, then you have fallen unconscious and will need to be rescued before you get eaten.
- The unconscious Camper's token is placed face-up on its current Location Tile.
- Return the Camper's token and trackers to the supply.
- Place the Camper's Profile card next to the Dusk Till Dawn board. Place a Condition: Unconscious card on the Profile card and place all cards in the Camper's inventory next to their Profile card, so it is clear they belong with that Camper.
- Unconscious Campers are not active and cannot participate in actions.
- Spawn a new Camper under your control (see Spawn a Camper, page 21).
Wake up! (Endeavour: 3+): A Camper may use an Endeavour Action requiring a single 3+ result to wake up an unconscious Camper. If they are successful, they gain a Survival Point. The awoken Camper's token is removed from the map to the supply. Camper(s) at the same Location may collect the unconscious Camper's items. Any uncollected items are discarded.
Drop Bear targeting: Drop Bears will not target an unconscious Camper. They prefer their prey lively. If a Drop Bear enters a Location containing an unconscious Camper, remove the unconscious Camper's token from the map. Campers removed in this manner are counted as having died.
End of game: Each unconscious Camper remaining on the map when the Dusk Till Dawn tracker reaches dawn will be counted as dead.
Death
Wounded to death: If your Camper suffers from 6 or more Wounds, they succumb to their injuries and die immediately.
In case of death:
- Lay the dead Camper's character token down on the Location Tile they are currently occupying.
- Discard all Survival Points and inventory/Utility cards.
- Check the Death Toll on the Dusk Till Dawn board. If it has exceeded the number of players, you lose the game.
- Discard the Camper's Profile card.
- If the game hasn't been lost: spawn a new Camper under your control.
Spawn a Camper
As one Camper tragically falls victim to the Drop Bears, many more fight for their lives in a desperate bid of escape. Now it's time to shift the focus and see if another brave Camper can make it out alive.
- Draw your new Camper's Profile card and take the corresponding Camper token.
- Attach both a Wounds (red) and a Heart Rate (blue) clip to the new Camper's Profile card, setting both values to 0.
- Draw 4 Utility cards and add them to your new Camper's inventory.
- Place the Camper's token on either the Base Camp Location Tile or any Location containing a campfire token.
- Randomly determine their starting Location. Roll a D6, move in the indicated direction, placing a Location Tile if required.
- This movement will trigger Dangerous Terrain & Hostile Environments.
- Your new Camper will activate normally during your next turn.
If necessary, a Camper is spawned immediately after any Camper's death.
Drop Bear Priorities
When moving a Drop Bear, the rules will sometimes tell you that you need to use the Drop Bear's Priorities to determine which Camper is the Drop Bear's target. To do this, look at the Drop Bear's Profile card; their top Priority is shown with its icon. Use that Priority to determine the target from within the pool of eligible Campers.
If more than one of the eligible Campers meets the top Priority's criteria, then use the next Priority below that as a tie-breaker between them. If that fails to select a single Camper, then use the last Priority as a final tie-breaker to select the Drop Bear's target.
Drop Bear Movement
Drop Bears move differently depending on whether they are on the map or lurking up in the trees (represented by the miniature being on its Profile card). Use the appropriate set of rules below based on where the Drop Bear miniature is located to conduct its movement.
Drop Bear on the map: Firstly, if the Drop Bear already shares a Location Tile with a Camper (ignore any Unconscious Campers), then it doesn't move; proceed to Drop Bear Attack.
Otherwise, determine how far the Drop Bear can move. In the Early Stage (grey area on the Dusk Till Dawn board) Drop Bears have a movement of one. In the Late Stage (red area on the Dusk Till Dawn board) their movement increases to two.
Any Camper not already sharing a Location Tile with a Drop Bear and within the activated Drop Bear's range of movement is now an eligible target (i.e. within one or two Tiles of the Drop Bear, depending on the stage of the night). If there are no such Campers within range, the Drop Bear returns to the trees, hungry and disgruntled - place the miniature on its Profile card and end its activation.
Drop Bears crawling back to the trees might seem like a breather, but be warned: they come back, and the longer the night drags on, the more lethal they become.
If there is only one eligible Camper in range, then move the Drop Bear miniature onto that Camper's Location Tile.
If there is more than one eligible Camper in range, use the Drop Bear Priorities to determine which of them is selected and move the Drop Bear miniature onto the lucky winner's Location Tile.
Drop Bear on its Profile card: Dropping is what gives these creatures their name. It's scary, so better keep an eye on the canopy at all times. If a Drop Bear catches you off guard, you will get its claws... unless you can distract it somehow...
Moving swiftly through the trees, the Drop Bear can move anywhere on the Map to drop down onto its prey. All Campers on the Map, except unconscious Campers and Campers already sharing a Location with a Drop Bear, are therefore eligible for being its target. Use the Drop Bear's Priorities to determine its target from the pool of eligible Campers and place the Drop Bear miniature onto the target's Location Tile.
If there is no possible target, leave the Drop Bear on its Profile card.
Drop Bear Attack
Chance to flee: Drop Bears are very dangerous and hungry. But they are animals driven by hunger. This may give the Campers an edge if they are willing to make a sacrifice and act quickly. In case of an attack, Campers have the chance to distract them. But that comes at a price. Throwing your food in the monster's way might be a good idea. Or maybe you could trip another Camper...?
Each Drop Bear has an Escape Cost listed on their Profile card between their target priority and their special attack ability. If your Camper can pay the exact cost when an attack is imminent, they can distract the Drop Bear and escape. To outsmart a Drop Bear, your Camper must have the necessary resources and be prepared to pay the full resource costs of fleeing. Skimping won't work - if they don't meet the expectations of this fearsome marsupial, then there's no escape from its bloodlust!
If an Escape is successful, shift your Camper to an adjacent Location Tile of your choice. This counts as a Scout Action when triggering any Tile icons.
- You may not attempt to Escape if attacked during a Panic movement.
- Draw and place a new Tile if moving into an empty slot of the map whilst fleeing.
- If, after all flee movements have been resolved, there are no Campers remaining on the Drop Bear's Location Tile, then return the Drop Bear to the bush, placing the Drop Bear on its Profile card.
Attack ability: Each Drop Bear has a distinct attack ability that makes them unique - bad news for the Campers. On each Drop Bear Profile card, adjacent to the Attack die icon, is a unique attack ability. The ability is only active in the Late Stage of the night and some abilities are only triggered when certain symbols are rolled.
Attack dice results:
- Blank: No effect.
- Heart Rate: Increase your Camper's Heart Rate by 1.
- Wound: Your Camper suffers a single wound.
- Critical Wound: Your Camper suffers two wounds.
Attack: The Drop Bear makes a single attack, the results of which are applied to ALL Campers on its Location.
The Survival Expert rolls the indicated number of Attack dice on the attacking Drop Bear's Profile card. Sum up the number of wounds and Heart Rate increases shown on the dice (see Attack Dice Results above) and, if appropriate, apply the Drop Bear's special ability to determine the total effect of the Attack. Each Camper on the Drop Bear's Location has the total result of the Drop Bear's attack inflicted on them. E.g., if 3 wounds are rolled, each Camper on the Drop Bear's Location receives 3 wounds.
At this time, any Campers at this Location may spend Survival Points to re-roll any of the dice. Each die may only be re-rolled a single time.
The Sun Rises
After a terrifying night of danger and horrific monsters, the sun finally rises. Some of the Campers have survived, but will they be rescued? Your Campers survived the night? But Drop Bears are not about hiding. Only if your Campers have learned to master the trickery and pitfalls of the Australian bush can they be saved.
Each unconscious Camper remaining on the map is counted as dead. This is calculated before the end of the game. Adjust the Death Toll accordingly. It's time to check the win conditions:
- Has your Death Toll exceeded the number of players?
- Has your group gathered together the required number of Survival Points as indicated on the Dusk Till Dawn board?
If you meet the above criteria, congratulations! You survived the night and won against the Drop Bears... this time.
Solo Mode
What were you thinking wandering off into the Australian bush all by yourself? There are Drop Bears around, didn't you hear? Well, here you are anyways. And you brought company. Now you're responsible for not only your own survival but also for your Companions. Good luck, you will need it.
If you don't have any mates to play with (because they all got eaten) or wish to experience Drop Bears alone, there are two alternatives. You can control two or more Campers using the standard game rules already covered in this rulebook, or alternatively, bring along a somewhat helpful but fragile Companion and attempt the Solo Mode described here.
Companion: Your Companion is either the wayward puppy Bluey or a forsaken child that got lost in the bush. Both have some skills but quickly panic and need to be protected from the evil monsters. Both Companions have their own Action card. When it's their turn, you choose what Actions they will perform and mark them with Sequence tokens. The symbols represent the Actions for Scout, Run, Rest, Search, Endeavour, Trade and Heal (as shown in the Actions sections, page 16). For the most part, Companions play the same way as Campers. Use the normal rules as if they were a Camper, with the exceptions listed in the following sections.
Setup: The setup is identical to a multiplayer game with a few additions and differences. Go through the usual setup but:
- Deal your Camper 4 Utility cards.
- Choose a Companion and take their Profile card, Action card and corresponding token. Place the Sequence tokens (numbered 1-5) next to the Action card.
- Set the Companion's Wounds and Heart Rate on 0.
- Roll for both your and the Companion's starting Locations.
Unique abilities: Companions have three abilities, one on their Profile card and two on their Action card. Their abilities work like the Camper's unique abilities, but the costs can vary depending on the choices you make for them. Companions cannot spend Survival Points to re-roll dice. The Companion's unique abilities must be programmed in the same way as their Actions are, using the A, B & C on the Action card. Pay the appropriate cost for the Ability when it triggers.
Programming the Companion: A Companion may mimic a Camper's actions in an effort to emulate independence; providing a semi-autonomous support character. At the beginning of each Companion turn, take the Sequence tokens (numbered 1-5) and place them so that the Companion is spending two Action Points and performing as many free Actions as desired. This becomes the sequence of the Actions the Companion will take in their turn. If the Companion wishes to use one or more Unique Abilities in their turn, then add them to the sequence.
Campers' phase: A Companion will receive Survival Points and gains the Survival Expert token, just like a Camper in the multiplayer game. Beware that when you are the Survival Expert the Companion is more likely to be targeted by Drop Bears.
Companion turn: A Companion performs each Action marked with a Sequence token in sequence order, completing each Action before moving onto the next. Any Actions requiring a choice of direction or target are chosen by the player during that Action's execution. Once the sequence for the Companion is set, it cannot be modified. At the end of a Companion's turn, clear away all the Sequence tokens ready for the next turn. Each Companion has Unique Abilities that will greatly assist in keeping the Companion and yourself alive during this solo adventure. The Companion must spend the required number of their Survival Points to perform each selected Ability.
Companion Utility cards: A Companion does not carry any Utility cards. Any Utility cards collected by the Companion are added to and played from the Camper's inventory.
End of turn: After both you and the Companion have finished your respective turns, continue with the Drop Bear phase as usual (see page 15).
Game end: You proceed with the game as in the multiplayer mode until you reach dawn. If you survived until then, check your remaining Survival Points to determine if your Camper and Companion get rescued from the Australian bush.
How to survive Solo Mode (win the game):
- When the sun rises you have collected 5 Survival Points.
- Your Companion must survive until dawn.
How to not survive Solo Mode (lose the game):
- The maximum Death Toll for this mode is 1, so you lose if more than one Camper gets slaughtered by Drop Bears.
- Your Companion dies.
Icon Index
- Backpack: When moving onto this Location, immediately draw a Utility card and add it to your inventory. Place an Expiry token on the Backpack icon.
- Combination: This Utility card must be combined before you can use its ability.
- Search: You may perform a Search Action at this Location. If you do so, draw a single card from the Utility deck.
- Campfire: You can spawn Campers here. Rest Actions on these Locations lower your Heart Rate by two.
- Endeavour: You may perform an Endeavour Action at this Location. If you do so, roll a D6 and if it is equal to or exceeds an Endeavour requirement, cover that requirement with an Expiry token.
- Endeavour requirement: If you use the Endeavour Action here, your dice roll result must be the same or exceed the indicated value of these icons.
- Dangerous Terrain: When you are running or panicking and enter this Tile, your Camper will suffer a wound for each Dangerous Terrain icon.
- Hostile Environment: When a Camper enters this Location Tile, roll an Attack die for every Hostile Environment icon on the Location and apply the results to your Camper.
- Reprieve: When moving onto this Location, a Camper may immediately reduce their current Heart Rate by two. If used, place an Expiry token over the Reprieve icon.
- Expiry token: Placed on an icon to indicate that it is no longer available.
Drop Bear Profile cards (their priorities, Escape Costs, Attack dice counts and attack abilities) are separate printed components and are not reproduced in this text.