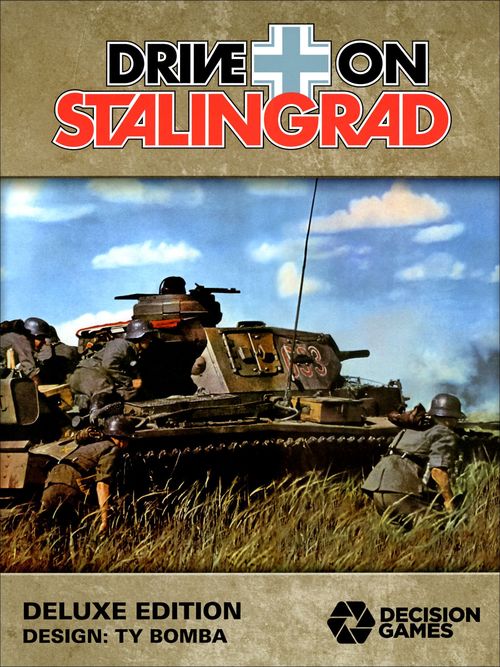
Drive on Stalingrad (Second Edition)
Drive on Stalingrad (Second Edition) Rulebook
Table of Contents
Table of Contents
- 1.0 Introduction & Designer’s Notes
- 2.0 Game Components
- 3.0 Set Up, Scenarios & Hex Control
- 4.0 How to Win
- 4.1 In General—Operation Blue
- 4.2 VP Hexes—Operation Blue
- 4.3 Soviet Losses VP—Operation Blue
- 4.4 Starting VP—Operation Blue
- 4.5 Winning Operation Blue
- 4.6 Soviet Sudden Death Victory—Operation Blue
- 4.7 In General—Operation Uranus
- 4.8 German Losses Victory—Operation Uranus
- 4.9 City Seizure Victory—Operation Uranus
- 4.10 German Victory—Operation Uranus
- 5.0 The Turn Sequence
- 6.0 Stacking
- 7.0 Supply
- 7.1 General
- 7.2 German Supply States
- 7.3 German Regular Supply
- 7.4 South Map German Supply
- 7.5 German Coastal Supply
- 7.6 German Aerial Supply
- 7.7 Soviet Supply States
- 7.8 Soviet North Map Supply
- 7.9 Soviet North Map Automatic Supply Area
- 7.10 Soviet South Map Supply
- 7.11 Astrakhan
- 7.12 Tracing Supply Lines
- 8.0 Reinforcements & Withdrawals
- 8.1 General
- 8.2 Operation Blue German-Side Reinforcement Entry
- 8.3 Soviet North Map Operation Blue Reinforcements
- 8.4 Soviet Reserve Armies in Operation Blue
- 8.5 Soviet South Map Operation Blue Reinforcements
- 8.6 Germans Across the Don in Operation Blue
- 8.7 German Operation Blue Withdrawal Requirement
- 8.8 Operation Uranus German-Side Reinforcement Entry
- 8.9 Manstein in Operation Uranus
- 8.10 Soviet Reinforcements in Operation Uranus
- 9.0 Movement & Mobile Assaults
- 10.0 Operation Uranus Freeze
- 11.0 Prepared Assault
- 11.1 General
- 11.2 Multiple Defenders in One Hex
- 11.3 Multi-Hex Attacks
- 11.4 Indivisibility of Units
- 11.5 Attack Sequencing
- 11.6 Stacks in Prepared Assaults
- 11.7 Fog o’ War
- 11.8 Combat Procedures
- 11.9 Poor Odds Attacks
- 11.10 Odds Limits & Lines on the CRT
- 11.11 Combat Modifiers
- 11.12 Minimum Combat Factors
- 12.0 Charts & Tables & Scenario Set Ups
- 13.0 Historical Commentary:
1.0 Introduction & Designer’s Notes
1.1 General
Drive on Stalingrad (DoS for short) is a two-player, low-to- intermediate complexity, strategic-level simulation of Fall Blau (Operation Blue), the German attempt to conquer the Stalingrad and Caucasus areas of the southwest Soviet Union in 1942. The German player is on the offensive, attempting to win the game by seizing key areas on map. The Soviet player is primarily on the defensive in the first scenario, but he is also given the chance to run a full-blown counter-offensive in the second scenario, “Operation Uranus.” Game play of the main scenario encompasses the period that began with the Germans’ launching of “Operation Blue,” their offensive toward Stalingrad and the Caucasus on 28 June 1942. That scenario ends on 15 September, after 11 weekly game turns. The second scenario starts on 19 November 1942, with the launching of the Soviet “Operation Uranus” counter- offensive, and continues for six weekly turns to the end of December, when historically the German attempt to free their encircled 6th Army at Stalingrad ground to a halt.
1.2 Game Scales
Each hexagon on the map represents approximately 16 miles (26 kilometers) from side to opposite side. The units of maneuver for both sides are primarily divisions along with what were actually similarly sized Soviet tank and mechanized “corps.” Air power is represented abstractly. Each full game turn represents one week.
1.3 Halving
The general rule concerning the halving of numbers in the game is whenever any such division takes place all remainders are rounded down. Thus, for example, “half” of three is one and “half” of two is one, while “half” of one is zero. One exception: if only a single unit’s combat factor is being halved, half of one is one. That is, no single unit’s combat factor is ever reduced below one for any reason. If there were two or more units in the same battle and both were to be halved, then all the involved units’ combat factors are first added together so only one division and rounding is made.
1.4 North
The compass roses printed on the maps show their relationship to magnetic north. In the rules, whenever a compass direction is referenced, it should be understood the north side of the joined maps is comprised of the hexes N1044 to N1311, inclusive. The east side of the joined maps is comprised of the hexes N1311 to S2811, inclusive. The south side is S2143 to S2811, inclusive, and the west is S2143 to N1044. The corner hexes are therefore each part of two map sides.
1.5 German & German-Side Units
If a rule is said to apply to “all German-side units” or “all units of the German side,” it includes German nationality and Axis-satellite units (Italians, Hungarians and Romanians). If a rule is said to apply only to “Axis-satellite units,” it applies only to the Hungarian, Italian and Romanian units in the game. If a rule is said to apply only to “German units,” it applies to all German Nationality units and the single Slovakian (Slvk) unit.
1.6 Designer’s Notes
To use current Hollywood jargon, this updated edition represents a “complete re-imagining” of the original Drive on Stalingrad game. I asked Christopher Cummins to allow me to take that approach because, unlike some of the other old-SPI titles currently being revised in a more minimalist way (since that’s all they really need), I consider original DoS to have been pretty near a complete failure. Back in my salad days I played a lot of the original version of DoS, despite the many problems with it. The topic itself was so promising—the hinge period of World War II in Europe—you couldn’t help but want to like the game. That was true even though signs of trouble showed up as soon as you took the box out of the shipping carton. First, the cover illustration was taken from 1941’s Operation Barbarossa, not 1942’s Operation Blue. That’s a small point, but it proved an omen of other, bigger incongruities to come. Second, at SPI they couldn’t seem to decide on the exact title of the game. Was it: “Drive on Stalingrad: Road to Ruin,” or “Road to Ruin: The German 1942 Summer Offensive,” or “Drive on Stalingrad/Road to Ruin: The German 1942 Summer Offensive”? Again, that’s a small thing, but it turned out to bespeak a similar lack of clarity of design vision throughout the whole game. There were no marsh hexes, though they were replaced by a made up, incredibly large, zone of “light forest” paralleling most of the rivers out to a range of one hex, about 8.5 miles. There are trees along many southwest Russian rivers, but they’re a phenomenon to be measured in yards, not miles. Soviet air power was exaggerated, while well over half of what should’ve been the initial Red Army ground order of battle was simply omitted. The zone of control rules allowed such things as, for example, one Soviet rifle division stopping all movement past it along a front of about three hexes (25 miles) for a week at a time. The “Hitler Directives” rule didn’t work for its intended purpose (game balance), succeeding only in causing the German player to spend a great deal of time figuring ways to get around it. DoS was supposed to have been playable in “one long sitting,” which it was in a way, but only if you could keep sitting for about 20 hours straight. Most noticeably, no game ever came close to paralleling the historic action. That occurred, first, because hardly any match was ever played to the end. Typically, the German player would go through what was for him the fun part of the game, usually the first 10 or so turns, then look at his opponent and say something like: “We can see where this is going, can’t we? Why don’t we pack this up and play something that’ll be fun for both of us?” We used to call this “Battle
of the Bulge Syndrome” in my gaming circle, naming it after the first title we’d owned where we noticed it came into use. Second, the game failed to model the whole campaign because the historic event had been based on Hitler’s increasing denial of reality concerning the capabilities of both his enemy and his allies. That is, no matter how the Directives rule went in any given game, there was never a time, come November, that a German player would have 20 or so German divisions concentrated within three hexes of Stalingrad, with the flanks out to a depth of 20 or more hexes held by nothing but Axis satellite units. There is no rule that can be used to recreate that kind of strategic ignorance in today’s gamers. The time period encompassed by the original one-scenario game was in fact not really a unitary campaign; it was two distinct campaigns. The first, the German summer offensive, petered out historically, as well as in most playings of the original edition of the game, around the middle of September, after which all the action came down to two or three hexes at Stalingrad and another handful of hexes along the road to Grozny in the far south. Historically, and often in the original game, that was followed by what might best be called an intercalary period of near complete inactivity almost as long as the first phase, followed by some kind of Soviet counterattack. At one of the Origins conventions shortly after the original DoS was released (79 or 80), I remember hearing its designer Brad Hessel explain how he thought the truck-supply rules clearly demonstrated the “impossibility” of conducting major offensive operations using that kind of shoestring logistics. Exactly—those supply rules demonstrated the impossibility, not the difficulty—the impossibility—of conducting army My main sources for this redesign were as follows: Hayward, Joel S.A. Stopped at Stalingrad: The Luftwaffe and Hitler’s Kansas, 1998. ISBN: 0-7006-0876-1. Rotundo, Louis, ed. Battle For Stalingrad: The 1943 Soviet General 035974-4. Sharp, Charles O. The Soviet Order of Battle, World War II: An Organizational vols. West Chester, OH: The Nafzigger Collection, 1995. No ISBN Simonitch, Mark. Campaign to Stalingrad: Southern Russia, 1942. Petaluma, Ziemke, Earl F. and Magna E. Bauer. Moscow to Stalingrad: Decision 294-6.
group size offensive operations on shoe string logistics. Even gamers who enjoy working with those kinds of mechanics were frustrated when pitted against competent Soviet play, because no matter how well they learned to manipulate truck chains there simply wasn’t enough supply to maintain German offensive momentum. It wasn’t that the truck supply rules were historically inaccurate— they weren’t—but they were competitively futile and frustrating. The way to escape that isn’t to undue or disregard history, but to better craft the game so as to avoid the necessity of simulating history’s dreary parts. In that way I end the new Operation Blue scenario on 15 September. It was then the summer campaign really ended historically, for it was after that the German logistics failed. They’d planned a summer campaign and had the resources to run a summer campaign, not a summer-into-autumn campaign. It was the changing weather within the theater of operations, as much as the increasing length of their supply lines across it, which changed the nature of the operation after that date. If the German hasn’t won by the middle of September, he’s not going to do it after that either, no matter how much time the turn record track might otherwise seem to allow him to try to do it. In that way and others I’ve worked to overcome the first edition’s shortcomings and frustrations. Those who feel somehow let down by my approach are invited to purchase a copy of the second edition as released in Japan, which takes the minimal revision path and is available through Desert Fox Games. I eagerly invite comparison between the two efforts. This is the general introduction to the redesign approach I adopted for this project. Specific changes are discussed at those places below in the rules text where they occur in various “Design Notes.” Defeat in the East, 1942-1943. Lawrence, KS: University Press of Staff Study. Exeter, England: Pergamon-Brassey’s, 1989. ISBN: 0-08- History of the Major Combat Units of the Soviet Army. 10 given. CA: Rhino Game Co., 1992. A simulation wargame. in the East. New York: Military Heritage Press, 1988. ISBN: 0-88029-
2.0 Game Components
2.1 General
The components to a complete game of DoS include these rules, two different map sheets (one “north” and one “south”) and 420 die-cut counters, also referred to as “units” and “unit counters.” A die and storage bags round out the box. Be sure to send in the game response card as this enters you on the mailing list for further updates from Decision Games. If there is any problem with your game please contact customer service at: Decision Games, PO Box 21598, Bakersfield, CA 93390.
2.2 The Game Maps
The game map illustrates the militarily significant terrain found in the southwest portion of the Soviet Union in 1942-43 when viewed at these time and space scales. A hexagonal (“hex”) grid is printed over the map to regulate the placement and movement of units across it, much like in Chess and Checkers. A unit is considered to be in only one hex at any one time. Each hex contains natural or manmade terrain or water features that can affect the movement of units and combat between units. The various terrains and water features on the map have had their exact, real-world configurations altered slightly in order to make them coincide with the hex-grid, but the relationships among the terrains and water bodies from hex to hex are accurate to the degree necessary to present players with the same space and time dilemmas faced by their historic counterparts in the real campaign. Note also every hex on the maps has a unique, four-digit identification number printed within it. They’re provided to help find exact locations more quickly and to allow for the recording of unit positions if a match has to be taken down before it can be completed. To distinguish between north map and south map hex references, the letter “N” will be prefixed to the former and “S” to the latter. For example, the city of Rostov is in hex N3635; the town of Mackhach-Kala is in hex S2812.
2.3 Assembling the Maps
Before playing a match of DoS , you should first prepare the maps by counter-folding them along their seams. Notice the southern-most hexes on the north map duplicate and therefore overlap the terrain in the northern-most hexes of the south map. When the two maps are joined for play, consider the common hex row to be part of the north map (but also see 7.12, 8.3 and 8.10). After aligning and overlapping the two maps’ edges, temporarily fasten them together, either with small pieces of masking tape at the corners and outer edges, or with larger strips of transparent, removable plastic tape across the entire overlapping boundary. Removable plastic tape is available from most art supply stores.
2.4 Counters
There are 420 unit counters in the game, most of which represent combat formations. Others are provided as informational markers and memory aids. After reading these rules at least once, carefully punch out the counters. Trimming off the “dog ears” from their corners with a fingernail clipper will facilitate easier handling and stacking during play and enhances their appearance.
2.5 Sample Combat Unit
Each combat unit counter displays several pieces of information: nationality (and therefore the “side” each unit is on), specific historical identification, unit type and size, combat and step strengths, movement allowance, and reinforcement or other special status.
2.6 Nationality
A unit’s nationality and sometimes, it’s “mobility category” (see
below, 2.9), are shown by its color scheme.
The German Side
German mechanized units: white on black
German non-mechanized units: black on gray
Hungarian units: black on yellow
Italian units: black on leaf-green
Romanian units: black on light-blue
The Soviet Side
Regular Red Army units: white on red
Red Army “specialist” units: black on red
2.7 Historical Identification
All units are given their specific identification by numbers and/or
abbreviations of their historic designations or names to the right of
their unit-type boxes. The abbreviations are as follows:
B—Blackshirt
C—Celere (Italian cavalry division)
Co—Cosseria (Italian infantry division)
Cu—Cunense (Italian infantry division)
G—Guards
J—Julia (Italian infantry division)
GD—Gross Deutschland
H - Hungarian
I—Italian
K - Kuban
Lw - Luftwaffe (German air force ground troops)
N—NKVD (Soviet security forces)
NG—Naval Garrison (Soviet Black Sea coast forces)
P—Pasubio (Italian infantry division)
R—Ravenna (Italian infantry division)
R—Romanian
S- Security (on German units)
S—Sforzesca (on an Italian unit)
Slvk—Slovakian
T—Torino (Italian infantry division)
Tr—Tridentina (Italian mountain infantry division)
V—Vicenza (Italian infantry division)
Wkng—Wiking (Viking)
2.8 Units Sizes
Units’ historical organizational sizes are shown by the following symbols: XXX—corps; XX—division. A bracket atop a size symbol means that unit was not necessarily listed in its army’s records as being of that size, but was in fact a formation approximating the size shown.
2.9 Unit Types
All ground units in the game belong to two basic mobility
categories: mechanized (“Mech”) or non-mechanized (“Non-
Mech”). Mechanized units are those whose primary means of
moving across the battlefield is by wheeled and/or tracked
vehicles. Non-mechanized units are those whose primary
means of locomotion is provided by legs, human and animal.
This distinction is important, primarily among German units,
for movement and combat considerations.
Mechanized/Motorized Unit Types
Panzer/Tank
Motorized Infantry
Mechanized Infantry
Motorized Anti-Aircraft Artillery (FLAK)
Soviet Heavy Cannon Division
Truck-Towed Artillery
Soviet (Tank) Destroyer Divisions
Non-Mechanized Unit Types
Infantry
Mountain Infantry
Naval Infantry
Fortified Areas
Horse Cavalry
2.10 Combat Factors
Attack and defense factors are the measures of a unit’s ability to conduct those types of combat operations. Their uses are explained in sections 9.0 and 12.0. On most German units, since the numbers would be the same, the two factors have been combined into a unitary “combat factor,” which is the same on offense and defense.
2.11 Movement Factor
This number is a measure of a unit’s ability to move across the hex grid printed over the map. Units pay varied movement costs to enter different hexes, depending on the terrain in each, along the hex sides around them, and the moving unit’s type (see section 9.0).
2.12 Step Strength
All ground units in the game have one or two “strength steps,” or simply “steps.” That’s an arbitrary term used to express the ability of a unit to absorb a certain amount of combat losses before ceasing to be an effective formation (a measure of its “robustness” in current US Army jargon). Those units with combat factors on only one side of their counter are “one-step” units; those with combat factors on both sides of a single counter are “two-step” units. When units of these sizes are eliminated in play it doesn’t mean every individual within them has been killed. It means enough casualties and equipment losses have been suffered to render them useless for further operations during the period encompassed by the scenario being played. If a two-step unit suffers a one-step loss, it’s flipped over so its reduced side (the one with the lower combat factors) shows. If a one- step unit, or a two-stepper that’s already been “reduced,” suffers a step loss, it’s removed from the map (“eliminated”) and placed into the “dead pile.” For more details, see section 11.0.
2.13 German-Side Reinforcement & Starting Units
Units of the German side that enter play after the game has begun, rather than starting play already set up on the map, are called “reinforcements.” Reinforcements of the German side can be distinguished from the starting units of that side by the fact they (the reinforcement units) have only a one- or two- digit number printed in their upper-left corners, which refer to their game turns of entry into play. Units of the German side with “Ur” in their upper-left corners, some along with a number and some without, only appear in the Operation Uranus scenario. Some German mechanized-class divisions have two counters included in the mix, one is for use in the Operation Blue scenario, the other (“Ur”) is for use in the Operation Uranus scenario. This is purely for convenience when sorting these key units. German side units already in play at the start of the Operation Blue scenario (“starting units”) have an army I.D. number printed in their upper-left corners, which correspond to their initial placement areas on the map. For example, the German 3rd Panzer Division begins play of the Operation Blue scenario set up in within the 6th Army placement area (“6A”). See section 3.0 and 12.1 for details. All two-step units that start play set up on the map do so at their full, two-step strength in both scenarios. All two-step units that enter the map as reinforcements after play has begun also do so at their full, two-step strength.
2.14 Soviet Untried & Specialist Units
Note the many white-on-red Soviet divisions and corps in the game each contain only one strength step despite the fact they have printing on both sides of their counters. Their reverse sides show only a capital letter “U” (for “Untried”), a unit-type box and a movement factor. All such Soviet units begin the game with their untried side showing and neither player knowing exactly what’s on the reverse sides. They are not flipped over, thus revealing their exact combat strengths, until the first time they enter combat attacking or defending. Untried units are never flipped back to their untried side once revealed. The black on red Soviet “specialist” units are one strength step units; however, they don’t have an untried side. Their combat and movement capabilities are known from the start.
2.15 Axis Satellite & Luftwaffe Field Division Question Mark (?) Combat Factors
All Hungarian, Italian, Romanian, and Luftwaffe Field Divisions in the game have question marks (?) in place of what would otherwise be a regular, numeric defense factor. The Romanian and Hungarian panzer divisions also have a question mark in place of their attack factors. Whenever any of these units go into combat, the German player rolls a die to determine the actual numeric strength of
their question-marked combat factor for that battle (1-6). The two tank units are rolled for on both attack and defense; the others have attack factors of just one and therefore are only rolled for on the defense. When they’re out of supply, roll the die as described above, and then halve it according to the strictures of 1.3.
2.16 Other Counters
The uses of the following counters are explained at appropriate
points throughout the rest of the rules:
• German Operation Blue Victory Point marker (see
4.1-4.6)
• Game Turn indicator (see section 5.0)
• German Aerial Supply marker (see 7.6)
• Soviet/German Supply Network markers (see section
7.0)
• Soviet/German Ground Support Aircraft markers (see
11.25)
• Soviet “Reserve Not Activated” markers (see 8.4)
Design Note. So you “Old Hands” know better what to expect as you continue
reading: all Soviet and Axis satellite units are only one-step units; there are no
ZOCs and no replacements; no unit has more than two steps; no unit of either
side makes more than one appearance per scenario, and once eliminated a unit
is out of play for the rest of the game.
3.0 Set Up, Scenarios & Hex Control
3.1 General
Players should first decide which side each will control and which of the two scenarios they’ll play. After that they should take their chosen side’s units and sort them onto and around the map according to the instructions given below for the scenario they’ve decided to play, Operation Blue or Operation Uranus.
3.2 Operation Blue Set Up & Starting Strictures
The details of both sides’ set up for the Operation Blue scenario are given on that scenario set up sheet, 12.1. The German player turn is first in every game turn of this scenario (see section 5.0.) After all the units of both sides are deployed as described on 12.1, place both sides’ reinforcement units in the appropriate boxes on the Operation Blue Turn Record & Reinforcement Track (TRRT, 12.2). All Soviet units other than “specialists” are drawn randomly by that player and neither player should know their specific combat factors until the first time each enters combat. German side Operation Blue reinforcements are identified by the one- or two-digit number (or asterisk) in their upper-left corners, which correspond to their earliest possible game turn of entry into play (see section 8.0 for details). Place the German victory point marker at zero (0) points.
During Game Turn 1 of Operation Blue the German player must use the prepared assault/move and mobile assault sequence (see 5.3). Further, only units of that side’s 2nd Army and 4th Panzer Army (2A & 4PA) may fight and move during that turn. On Game Turn 2nd the units of the 2 Hungarian Army (2H) and German 6th Army (6A) may also begin to move and fight (or fight and move). Units of 1st Panzer Army (1PA) may join in on Game Turn 3. And all armies of the German side become active at the start of Game Turn 4. Prior to their release for active operations, German side units may move within their respective army areas (only); they may not attack in any way. The army restrictions given above—all of them—are immediately lifted if any Soviet unit moves or attacks across any hex of the scenario start line prior to the stated release times. Any unit of the German side entering play as a reinforcement during the first four game turns is considered to belong to the army in which its specific entry hex is located. Such units are liable to the same initial movement and combat strictures as those given for their owning army. After the start of Game Turn 4, which army each German unit belongs to is no longer significant. Note, though, that nationality distinctions will remain important for stacking purposes; see section 6.0. Soviet units belonging to the Red armies set up in the front line hexes of the “Operation Blue” scenario (see the first paragraph of rule 12.1) are also frozen in place at the start of play. That is, no unit of any starting Soviet front line army may attack or move prior to the game turn of activation of the army of the German side that’s opposite it. If a Soviet front line army is opposite more than one army of the German side, that Soviet army activates during the same game turn as the first of its activating German counterparts. A still-frozen Soviet front line army is also considered activated, and is thereby free to fight and move normally, starting the same game turn any unit of the German side moves into any hex on the Soviet side of the scenario start line that is within eight or fewer hexes of any component unit of the still- frozen front line Soviet army under consideration. Similarly, a still-frozen Soviet front line army is also activated the same game turn any unit of the German side attacks any of its component units from any direction. Newly arriving Soviet reinforcement units, and other Soviet units not initially frozen by the strictures of the two paragraphs above, are generally free to fight and move from the first turn of the game or the first turn of their entry into play. If, however, such Soviet units once enter any hex containing one or more component units of a still-frozen front line Soviet army, the new arrivals are then similarly deactivated (can not fight or move farther) in the first such hex they enter, and they remain that way until their new host army is activated by one of the methods described above.
3.3 Operation Uranus Set Up & Starting Strictures
The details of both sides’ set up for the Operation Uranus scenario are given on the separate scenario set up
sheet, 12.3. Note that this scenario is set up and played only on the north map. The weather during the first game turn of the Operation Uranus scenario is always automatically “Normal” (see section 10.0); no weather die roll is made. The Soviet player turn is first in every game turn of this scenario (see section 5.0.) After all the units of both sides are deployed as described on 12.3, place both sides’ reinforcement units in the appropriate boxes on the Operation Uranus Turn Record & Reinforcement Track (TRRT, 12.4). All Soviet units other than “specialists” are drawn randomly by that player and neither player should know their specific combat factors until the first time each enters combat. German side Operation Uranus reinforcements are identified by “Ur” and a one- or two-digit number in their upper-left corners, which correspond to their earliest possible game turn of entry into play (see section 8.0 for details). The German victory point marker is not used in this scenario. During Game Turn 1 of Operation Uranus, all movement factors of both sides’ units are halved. Further, the German player may not make any attacks (MA or PA) during his first player turn. Design Note. It may seem unfair or unrealistic to make all regular Soviet units start out in their untried states in the Operation Uranus scenario, given the fact many of them would undoubtedly have gained combat experience in the Operation Blue or intercalary time periods of the campaign. I wanted to maintain that approach, though, because the untried unit rule is a major underpinning of the entire game system. So my historical rationale is that, during the early period of the campaign, the Soviet untried units only gained experience in combat while conducting a strategic and operational defense. In the Operation Uranus scenario, crucial emphasis is placed on the ability of the Soviet units to conduct major offensive operations at all levels. In that sense, then, they can easily be judged to again be “untried.” It may also seem strange to have all German units set up at their full two-step strength in this scenario. It takes two steps, however, to simulate the robustness these units demonstrated during this period despite the fact many of them had already suffered heavy losses. Looked at another way, if I’d gone with the one-long-campaign-game approach to this redesign, I would have had to have included third- and fourth-step substitute counters for almost all the German units. Through the magic of scenario-based design, though, what would otherwise be an encumbering necessity is avoided. Last here, as you’ll see when you read over 12.3, the Operation Uranus set up sheet, I’ve allowed both players as much flexibility as realistically possible when making their dispositions. That’s because the Soviets only knew in general what they were punching into here. A little set up flexibility goes a long way toward recreating that. It also adds a pleasant element of variability to what could otherwise become a scenario centered almost solely on some Soviet “perfect attack plan.” (Though I suppose it might become centered on some German “perfect defense plan” now.)
3.4 Hex Control
In this game the idea of “hex control”—which side “owns” which hexes at any given instant—is important for certain victory point hexes (see section 4.0) as well as towns and cities (see section 7.0). At the start of play of both scenarios, the German player controls all hexes generally to the west of the start line, while the Soviet player controls all those hexes within and generally to the east of the start line. The control status of a hex switches from one side to the other whenever a ground unit from the other side enters it. Control switching is immediate and may occur and reoccur in the same hexes any number of times during play.
4.0 How to Win
4.1 In General—Operation Blue
In the Operation Blue scenario, the German player is generally on the offensive striving to win the game by driving east and south as fast as possible into the Soviet controlled portion of the maps, to seize key victory hexes If he manages to do that at a tempo significantly faster than occurred historically, he will be judged the winner of the game. The Soviet player wins by preventing his opponent from doing that. Only the German player gains or loses victory points (VP); the Soviet player doesn’t keep track of any VP total of his own.
4.2 VP Hexes—Operation Blue
Each VP hex is worth one VP. That is, each time the German player gains control of a VP hex, his VP total is increased by one. Control of the same VP hex can be traded back and forth between the two sides any number of times during play. Each time a VP hex’s control status switches, increase or decrease the German VP total by one. Note that the supply status of VP hexes is irrelevant when considering their VP status in this scenario. Note also there are no functional differences among VP hexes that have their number-values printed in red ink and those with number-values shown in blue ink.
4.3 Soviet Losses VP—Operation Blue
Each time a Soviet unit of any type is destroyed while out of supply (“OOS,” see section 7.0), the German player should take that unit and place it in a separate dead pile away from the general Soviet dead pile. When (if) the German player manages to accumulate 20 units in his OOS Soviet dead pile, he is immediately awarded one VP. That award may be gained any number of times, but only for increments of 20 Soviet units eliminated out of supply. For instance, if the German eliminated 39 Soviet units while they were out of supply during the course of a game, he receives only one VP for having done so.
Soviet units still on the map but in the OOS state at the very
end of Game Turn 11 are considered to have been
“eliminated” for purposes of this rule.
4.4 Starting VP—Operation Blue
At the start of the Operation Blue scenario, the German player has zero (0) VP. Use the VP counter provided on the Operation Blue Victory Point Track (12.5) to maintain a constant record of German VP.
4.5 Winning Operation Blue
Make any and all adjustments to the German VP total as soon as they occur throughout every player-turn and game-turn. At any time the German VP for controlling victory point hexes and/or generating out of supply Soviet unit eliminations reaches six or more, play stops and that player is declared to have won If the German VP total hasn’t reached six or more by the end of Game Turn 11, play stops and the Soviet player is declared the winner.
4.6 Soviet Sudden Death Victory—Operation Blue
Any time during play of the Operation Blue scenario that a Soviet unit enters Kursk (N1143), Stalino (N3140), Lozovaya (N3143) or Kharkhov (N2044), play stops and that player is declared the winner (for just having completely overturned the logistical underpinning of the entire German campaign).
4.7 In General—Operation Uranus
In this scenario the Soviet player is striving to win by seizing one or more of the key German supply points on the north map and/or by destroying a significant number of German units while they are out of supply or on aerial supply. No victory point marker is used in this scenario.
4.8 German Losses Victory—Operation Uranus
Each time a German (never Axis satellite) unit of any type is destroyed while out of supply or while drawing aerial supply (see section 7.6), the Soviet player should take that unit and place it in a separate dead pile away from the general German dead pile. When (if) the Soviet player manages to accumulate 20 or more units in his OOS German dead pile, play stops and he is immediately declared to have one the game. Note that any German unit out of supply or drawing aerial supply at the end of Game Turn 6 is considered to have been eliminated out of supply for purposes of judging victory.
4.9 City Seizure Victory—Operation Uranus
Play stops, and the Soviet player is declared to have won the game, the instant any of his ground units enters Kharkhov (N2044), Stalino (N3140) or Rostov (N3635). On the other hand, play stops, with the German player being declared the victor this time, if a Soviet player turn ends with two or more town and/or city hexes “east of the Don” (see 8.6 for the definition of that area) in overland-supplied German control.
Design Note. The idea behind the last rule above is not to try to prompt German players into some strange, ahistoric offensive; it’s to prevent the Soviet player simply abandoning the northern two-thirds of the map in order to concentrate everything around Stalingrad or in a drive on Rostov, etc. Leaving Stalingrad out of the Uranus scenario’s victory conditions is to reflect the fact it’s pretty much the only way we could make a game out of the situation. That is, if we required the German player to also hold onto Stalingrad in order to win the scenario (Hitlerian victory conditions), it would be virtually impossible for that side to ever win at all. So German players who win the game, but do so without also holding on to Stalingrad, should realize they’d probably be ordered shot by Hitler for having “won” in that way.
4.10 German Victory—Operation Uranus
The German player wins the Operation Uranus scenario by preventing the Soviet player from fulfilling any of his victory conditions through the end of Game Turn 6 (and also see 4.9 above). Design Note. No draws are possible in either scenario.
5.0 The Turn Sequence
5.1 General
Each game turn of DoS is divided into two player turns of sequenced steps called “phases.” Every action taken by a player must be carried out in the appropriate phase as described below. Once a player has finished a particular phase he may not go back to perform some forgotten action or redo a poorly executed one unless his opponent graciously permits it.
5.2 Operation Blue Turn Sequence Outline
The turn sequence for this scenario is given below in outline.
Note the German player turn is the first during each game turn
of Operation Blue.
I. German Player Turn
A. German Movement/Mobile Assault Phase or Prepared
Assault Phase
B. German Prepared Assault Phase or Movement/Mobile
Assault Phase
II. Soviet Player Turn
A. Soviet Prepared Assault Phase
B. Soviet Movement Phase
III. Weather Determination for the Next Game Turn
5.3 Operation Uranus Turn Sequence Outline
The turn sequence for this scenario is given below in outline. Note
the Soviet player turn is the first during each game turn of Operation
Uranus.
I. Soviet Player Turn
A. Soviet Movement Phase or Prepared Assault Phase
B. Soviet Prepared Assault Phase or Movement Phase
II. German Player Turn
A. German Movement/Mobile Assault Phase or Prepared Assault
Phase
B. German Prepared Assault Phase or Movement/Mobile Assault
Phase
III. Weather Determination for the Next Game Turn
Design Note. Only the German player gets to launch mobile
assaults (MAs)—a form of combat conducted while moving—
during play of either scenario. The Soviet player never MAs.
See 9.23.
5.4 Move or Fight, Fight or Move
At the start of every one of his player turns, the player who is up must declare in what order he will carry out his movement phase and his prepared assault (PA) phase that player turn. That is, he may choose to have his units move and mobile assault (MA) first and make prepared assaults second, or PA first and move/MA second. The decision is generally always up to each player, but note the following critical exceptions: 1) the Soviet phase sequence is always prepared assault/move when playing Operation Blue; 2) the German phase sequence must be his prepared assault phase followed his movement and MA phase during Game Turn 1 of Operation Blue; and 3) the Soviet phase sequence must be prepared assault/move during Game Turn 1 of the Operation Uranus scenario. No matter what phase order you choose (or is imposed on you by the restrictions above), all your units are allowed to participate to the limit of their normal capabilities in both phases. Moving (and possibly mobile assaulting), or making a prepared assault doesn’t preclude a unit performing both tasks each turn; only the order of execution is variable.
5.5 Further Declaration Strictures & Exceptions
Each player only makes one phase order declaration per player turn, at the start of his own player turns, which is then applied to all his units throughout that player turn. You may not choose one phase order for some of your units and the other phase order for others. During any one of his player turns of the Operation Blue scenario, the German player may choose to have two prepared assault phases and no movement phase. On that turn he therefore has no reinforcement entry. Note also that choosing the PA/PA sequence does not earn him the one column-rightward shift for his PAs that a normal PA/Move sequence would earn him (see 5.6).
During any one of his player turns of the Operation Blue scenario, the Soviet player may choose to have two movement phases and no prepared assault phase (move/move). Neither player is required to make use of these special, one- time phase sequences, but each is available once per game in Operation Blue as described above.
5.6 Phase Sequence Combat Odds Shifter Effects
In both scenarios, whenever the German player chooses the PA phase/move and MA phase sequence, all his prepared assaults that turn gain a one column rightward (1R) odds shift in addition to any other applicable odds shifters. In the Operation Uranus scenario, whenever the Soviet player chooses the movement phase/PA sequence, all his attacks that turn suffer a one column leftward (1L) odds shift in addition to any other applicable shifters.
6.0 Stacking
6.1 General
“Stacking” is the word used to describe the piling of more than one unit into a single hex at the same time. The general rule is each side may stack up to eight units per hex. Note that step strength, unit type, etc., have no bearing on defining “a unit” for stacking purposes. In general, each unit in the game is considered one unit for stacking purposes. Exceptions, further details, and other strictures are given below.
6.2 Stacking & Movement
Stacking rules are in effect at all times throughout the game turn. Players should therefore pay particular attention to the order they move their units in crowded areas of the board; otherwise moves made carelessly early in the phase may block your ability to move units later in the phase. There are no limits, however, on the number of units that may enter and pass through a given hex over the course of a phase, player turn or game turn as long as the stacking limits are met on a hex-by- hex, instant-by-instant basis. If any hex containing stacked units of either side is found to be “over stacked” (exceed the stacking limits given below) at the start or end of any phase, the opposing player is immediately allowed to remove to the dead pile his choice of the minimum number of involved enemy units necessary to bring the violating stacks back into limits. Design Note. The idea in the paragraph above is that most stacking violations should be noted and stopped before they’re allowed to go on, during each phase as the game progresses. If, however, some violation is not seen until a phase ends, or is discovered when a phase has just begun, the transgressing player then suffers the penalty of elimination rather than just chastisement.
6.3 German & Axis-Satellite Stacking Restrictions
German and Axis-satellite units may generally not stack with any units other than those of their own specific nationality. That is, in general, Hungarian units may only stack with other Hungarian units; Italian units may only stack with other Italian units; Romanian units may only stack with other Romanian units, and German units may only stack with other German units. Thus, with just two exceptions, there may never be units of more than one nationality of the German side in any hex at any one time. The first important exception is that units of the German side that are out of supply or that are drawing aerial supply (see section 7.0) may stack together up to the general stacking limit (eight units per hex) without regard to nationality. That’s not eight units per nationality per hex, but eight units, total, per hex. The second exception is that Axis satellite panzer (tank) units may always stack with German mechanized units without regard to nationality; however, this still doesn’t allow Axis satellite tank units to stack with each other or to make MAs. For instance, the Romanian panzer division could stack with a force of German mechanized units, but it couldn’t stack with Hungarian panzer division even if there were also German mechanized units in the same hex. And, again, the overall eight unit per hex limit must still be observed. If a multi-national stack of out of supply or aerially supplied German-side units suddenly comes back into regular overland supply, that player is given until the end of his current turn’s movement phase to again sort out his stack by nationality, or until the end of his next movement phase if the supply change occurs at a time other than during one of his movement phases. Also see 11.39.
6.4 Soviet Artillery Stacking
Soviet artillery and heavy cannon divisions don’t count toward that side’s normal per hex stacking limit. That is, the Soviet player may have up to three artillery units in a hex along with up to eight of his non-artillery units. Design Note. The artillery and non-artillery stacking combination described above will, in maximally stacked hexes, recreate the 2.5:1 ratio of non-artillery to artillery units that the Soviet general staff considered optimum during this period of the war.
6.5 Free Stacking Units
None of the units and counters listed in rule 2.16 have any stacking values of their own. Each and all may be added to any stack in accordance with the particular rules given for their uses.
7.0 Supply
7.1 General
Units of both sides need supply to operate at their full, printed movement and combat potentials. There are no counters representing the actual materiel consumed; instead, that process is represented by
“supply line tracing” to “intermediate supply source hexes” and finally to “ultimate supply source hexes.”
7.2 German Supply States
There are four supply states for units of the German side, and each ground unit of that side always exists in one of them: 1) regular overland supply, which is also called “regular supply;” 2) coastal supply; 3) aerial supply and 4) out of supply, which is also referred to as being “OOS” and “unsupplied.”
7.3 German Regular Supply
A unit of the German side is in regular overland supply if it can trace a path no longer than seven contiguous hexes, unblocked by enemy ground units, from its location hex to an appropriate intermediate supply source hex, and from that intermediate supply source hex, in supply line lengths to other intermediate supply point hexes (each also no longer than seven hexes), back to an ultimate supply source hex. German ultimate supply source hexes are the two towns and one city located along the north map’s west edge (Kursk in N1143, Kharkhov in N2044 and Lozovaya in N3044), as well as the Taman peninsula ultimate supply source hex in S1343 once that hex becomes activated (see below, 7.4). German intermediate supply source hexes are any cities or towns that have been made part of that side’s supply network. At the start of both scenarios all cities and towns on the north map west of the appropriate scenario start line are considered to be part of the German supply network. Units of the German side within seven hexes of an ultimate supply source hex need not trace their supply line through any intermediate supply source hexes; they may trace directly to the ultimate supply source hex. Units of the German side with regular supply have their full, printed movement and combat factors available for use. Only German mechanized units with regular overland supply may make mobile assaults.
7.4 South Map German Supply
The city of Rostov (hex S3710) was at first the major supply junction for all German operations to the south of there. Accordingly, until such time as the Taman peninsula supply source hex is activated, all German-side units on the south map must trace their supply line through that city; otherwise they are OOS even if they have what appears to be a supply line running elsewhere than through Rostov. Exception: units drawing coastal or aerial supply are excused from this stricture; see below. The Taman peninsula supply source hex (S1343) becomes an active part of the German supply network the instant any unit of that side first enters that hex. That activation also triggers the arrival of two special reinforcement units (see 8.2). If the Taman ultimate supply source hex is deactivated by again coming under Soviet control, the rule above about Rostov and south map German supply again comes into effect.
7.5 German Coastal Supply
All units of the German side located in coastal hexes of the Sea of Azov or Black Sea hexes are thereby considered to be in supply for defensive purposes only; their movement and attack factors are halved as if OOS. German mechanized units drawing coastal supply may not make mobile assaults.
7.6 German Aerial Supply
The German aerial supply marker can provide such supply to any German-side units in its hex of placement and in the six surrounding hexes. Units receiving aerial supply are in supply only for defensive purposes; they are considered OOS for attack and movement. German mechanized units drawing aerial supply may not make mobile assaults. The aerial supply marker may be committed to aid OOS units anywhere on the board, but it may not move with the units beneath it. The marker may be committed to the board any time during the game turn and it’s supply effects are immediate, but it may never be committed to more than one hex per game turn.
7.7 Soviet Supply States
There are two supply states for Soviet units, and each ground unit of that side always exists in one of them: 1) regular overland supply; and 2) out of supply.
7.8 Soviet North Map Supply
A Soviet unit is in regular overland supply on the north map if it can trace a supply path no longer than seven contiguous hexes, unblocked by enemy ground units, from its location hex to an appropriate north map intermediate supply source hex, and from that intermediate supply source hex, in supply line lengths also no longer than seven hexes each to other intermediate supply source hexes, back to an ultimate north map supply source hex. Soviet ultimate supply source hexes on the north map are all the towns and cities located along both banks of the Volga River as well as Astrakhan in N4211. Soviet north map intermediate supply source hexes are any cities or towns on the north map that have been made part of that side’s north map supply network. At the start of both scenarios, all cities and towns on the north map east of the appropriate scenario start line are considered to be part of the Soviet supply network. Units of the Soviet side within seven hexes of an ultimate supply source hex need not trace their supply line through any intermediate supply source hexes; they may trace directly to the ultimate supply source hex. Soviet units with regular supply have their full, printed movement and combat factors available for use. In the Operation Uranus scenario (only), the north map edge hexes from 1038 to 1016, inclusive, are also considered to be Soviet ultimate supply source hexes.
7.9 Soviet North Map Automatic Supply Area
Soviet units in hexes east of the Volga River on the north map are always fully supplied and need not trace any kind of supply line to maintain that status while there. For all purposes the Volga River is considered to end at the point where the hexes N4111, N4211 and N4212 come together.
7.10 Soviet South Map Supply
Soviet south map supply works the same way as north map supply, but with different ultimate source hexes. That is, the Soviet ultimate supply sources on the south map are the two towns on its south edge (Ordzhonikidze in S2822 and Makhach-Kala in S2812), along with the three Black Sea port towns (Norossisk in S1643, Tuapse in S2039 and Sochi in S2336), and Astrakhan (in N4211).
7.11 Astrakhan
Astrakhan (N4211) is simultaneously a north and a south map Soviet ultimate supply source hex when playing the Operation Blue scenario, but it is only a south map reinforcement entry point (see 8.3 and 8.10).
7.12 Tracing Supply Lines
An overland (or regular) supply line (or path) consists of an uninterrupted chain of hexes, no longer than seven hexes, traced from the unit or stack in question back to a valid supply source. Such paths may enter and cross all kinds of playable terrain. In addition, Soviet units may trace their supply lines across all-lake (including reservoir) hexes in all kinds of weather. German-side units may only trace their supply lines across such hexes during freeze weather (see section 10.0) in the Operation Uranus scenario. Neither side may trace supply lines across blocked mountain hex sides. Supply lines may not enter hexes occupied by enemy ground units, nor may they cross all-sea hexes except as described in 7.5 and 7.10. German-side units may not trace their supply lines into or through intact Don-Volga defense line hexes (see 11.23), nor across Volga River hex sides (see 9.17). When a unit’s supply line reaches its first intermediate supply source hex, it doesn’t automatically mean it’s thereby in supply. That initial hook up into the supply network must in turn be connected, via more supply lines (each no longer than seven hexes) from that first intermediate supply source hex to another intermediate supply source hex, etc., until an ultimate supply source hex is reached. Of course, units of the either side within seven hexes of an appropriate ultimate supply source hex need not trace their supply line through any intermediate supply source hexes; they may trace directly to the ultimate supply source hex. When counting seven hexes, don’t count the hex of the unit or intermediate supply point from which you’re starting, but do count the hex of the intermediate or ultimate supply point to
which you’re counting. For example, Rostov, in N3635, is “within seven hexes of” (or is “seven hexes away from”) Tsimlyanskiy in N3529. A German unit tracing to that latter place could then from there connect its supply line to Rostov. (A supply line need not have more than one intermediate supply source hex; it all just depends on the overall distance from a tracing unit to its ultimate supply source.)
7.13 North Map/South Map Restrictions
The supply lines of both sides’ units are further restricted in that units on the north map may only trace their supply lines into and through north map hexes to north map supply sources. Similarly, Soviet units on the south map may only trace their supply lines into and through south map hexes to south map ultimate supply source hexes. Units of the German side on the south map may trace to north map supply source hexes, but only if that supply line goes through Rostov (N3635). The fact the Taman peninsula ultimate supply source hex is brought into the supply network of the German side does not require all south map units of that side to use it for that purpose; the Rostov option is always available.
7.14 Gaining & Losing Supply Source Hexes
For both sides, a supply source hex, intermediate or ultimate, loses its supply providing capacity while it’s enemy controlled. That capacity is regained, though, when the supply source hex is brought back into the friendly supply network. That loss/gain process may potentially go any number of times for each such hex throughout both scenarios (but see 4.6 and 4.9). Each player has the ability to add one intermediate supply source hex to his supply network at the very start of each of his player turns in both scenarios. To qualify to be added to your supply network, a town or city hex must be in friendly control and there is a path of contiguous hexes, free of enemy units, no longer than seven hexes and not running through prohibited terrain or across prohibited hex sides, to an appropriate ultimate supply source hex or to another intermediate supply source hex that in turn connects with the same kind of supply path to an ultimate supply source hex or to another such intermediate supply source hex, etc. The “chaining” of intermediate supply sources may potentially be infinite, as long as each length of that supply chain meets all the requirements for functionality (taking into account north/south map restrictions, terrain, enemy units, etc.). To mark a town or city’s addition to your supply net, mark it with a supply marker of your side’s color. Again remember, however, neither player may place more than one such marker per player turn, no matter how many potential new supply network additions there are at those times. That’s one marker, total, per player turn, not one marker on the north map and one on the south map. A given town or city hex need not be added to a supply network during the turn immediately after the one in which it was first brought under friendly control. Within the one per turn limit, an otherwise eligible intermediate supply source hex may be added to your supply network at the start of any of your player turns after its capture.
7.15 Effects of Being OOS
Units are never reduced in step-strength or eliminated or simply for being OOS; units may exist indefinitely in the OOS or any other supply state. OOS units have their movement and combat factors halved. OOS German mechanized units may not make mobile assaults.
7.16 When to Check Supply
Check the supply status of each of your units or stacks at the start of its movement and again at the start of each individual battle (mobile assault and prepared assault, see 9.23 and section 11.0) in which you have forces involved on offense or defense. Units found to be OOS at the start of their movement have their movement factors halved for that phase. Units found to be OOS at the start of any prepared assault in which they’re participating, either on offense or defense, have their corresponding combat factor halved. Soviet units defending against a German mobile assault and that are found to be OOS at the instant of that assault have their defense factor halved. German mechanized units may not make mobile assaults unless they are in regular overland supply in the “launch hex” of that mobile assault. The “launch hex” of a mobile assault is the last hex occupied by those attackers prior to their entry into the defenders’ hex.
7.17 Deliberate OOS
In the Operation Blue scenario, it’s permitted for both players
to deliberately move their units into hexes wherein they will or
may become OOS.
In the Operation Uranus scenario, the German player is again
allowed to move his units into hexes wherein they will or may
become OOS. The Soviet player, however, is forbidden to
move any of his units into hexes wherein they would be OOS
in this scenario. Soviet units found to be OOS at the start of
one of their side’s movement phases may only move that phase
if at the end of it they are back in regular supply or, if still
OOS, at least one hex closer to a functioning source of supply
than they were at the start of their move.
Design Note. Forbidding the Soviet player to voluntarily
move into hexes without supply is to reflect the
relatively conservative approach taken by Moscow
during the first weeks after they launched Operation
Uranus.
7.18 Appropriate Supply Sources
The supply source hexes in the game only work for the units of the proper side as described in the rules above. If, for example, the Germans captured a Soviet ultimate supply source hex, it wouldn’t become an ultimate supply source for them, though they might plug it into their side’s network as an intermediate supply source hex. For both players in both scenarios, all the town and city hexes on their own side of that scenario’s start line are part of their
own side’s supply net at the beginning of play. If the enemy player sends forces across the start line of the scenario being played, and there captures one or more intermediate or ultimate supply points on your side of that line, and you then recapture one, some or all of them, those hexes instantly come back into your supply net. It isn’t necessary in such cases to use up a turn or a supply marker; recaptured supply points on your side of the scenario start line instantly and automatically come back into logistical operation for you when recaptured by your forces (any number of times per game).
8.0 Reinforcements & Withdrawals
8.1 General
Reinforcements are new units that enter the game after play has begun. Those appearing on the German side in the Operation Blue scenario are identifiable by the one- or two-digit numbers printed in their upper-left corners, while those appearing in the Operation Uranus scenario have “Ur” and a number appearing in their upper- left corners, both of which correspond to the number of the earliest possible game turn of their entry into play on the map in each scenario. Either player may choose to delay some or all of his reinforcements’ arrivals, but neither player has the ability to accelerate those arrivals. Delayed reinforcements of both sides are simply held off the map by the owning players until a friendly movement phase begins during which he chooses to enter them. Both side’s reinforcement units may be entered any time during the receiving side’s movement phase during a game turn; however, no single placement hex may receive more than one full stack’s worth (see section 6.0) of units per movement phase. German reinforcement units are always entered into play at their full step-strength and they have their full movement and capabilities available to them from their instant of placement. With but two exceptions in Operation Uranus (see 8.8), if reinforcements are entered into play via hexes other than their own side’s board edge ultimate supply source hexes, the selected town or city hexes may only be intermediate supply points (see section 7.0) for the receiving side. Arriving reinforcements of both sides immediately have their normal movement and combat abilities available to them, with but one exception (see below, second paragraph 8.2).
8.2 Operation Blue German-Side Reinforcement Entry
The German player’s regular reinforcements may enter play via friendly controlled and functioning ultimate and/or intermediate supply source hexes on the north board using regular movement. Their hex of entry counts against each entering unit’s movement allowance for that phase. Arriving reinforcement units may be entered at any times throughout the German movement phase. Only two units of the German side—the German 46th Infantry Division and the Romanian 3R Mountain Infantry Division, both marked with an asterisk (*) in their upper-left corners—may enter via the south map. They do so via the Taman peninsula ultimate supply
source hex (S1343) the instant that hex is made part of the German supply network. Note, though, unlike north map reinforcements these two units are not allowed to move or attack during their game turn of entry via the Taman hex. (They defend normally.) The Taman hex is the only method of entry for these two units.
8.3 Soviet North Map Operation Blue Reinforcements
Soviet north map reinforcements in Operation Blue (all those units designated in the game turn boxes on that scenario’s TR&RT, 12.2) may enter play via any of their side’s friendly controlled ultimate and/or intermediate supply source hexes on that map sheet, excluding only Astrakhan (N2812). Their hex of placement counts against each entering unit’s movement allowances for that phase. Arriving reinforcement units may be entered through one or several supply hexes at any times throughout each Soviet movement phase. Note that for reinforcement arrival purposes, Astrakhan is considered only a south map entry point in Operation Blue (see 7.11 and 8.10).
8.4 Soviet Reserve Armies in Operation Blue
Within his Operation Blue north map set up forces the Soviet player will find four groups of forces that begin play designated as “Reserve Armies.” They are: 5th Reserve Army in N2125; 6th Reserve Army in N1827; 7th Reserve Army in N3022 and 8th Reserve Army in N1516. The units making up those armies (see 12.1) are frozen in place, not allowed to move or attack, until such time as a Soviet player turn begins wherein at least one unit of the German side is within eight hexes or less of their location hex. This is judged on an army by army and turn by turn basis; enemy proximity to one army only frees that one army, not all the Reserve Armies; though it certainly is possible for more than one Reserve Army to be freed per turn due to multiple enemy advances. When counting the distance between the nearest enemy unit and a frozen Reserve Army, count from the enemy unit to the Reserve Army location hex. Don’t count the hex in which the enemy unit is located; do count the Reserve Army location hex. For example, an enemy unit in hex N3229 would be within eight hexes of 7th Reserve Army’s location hex at N3022. In addition to the method above, the Soviet player may also try to free Reserve Armies by petitioning Moscow to have each one’s status changed. This supplemental petitioning process begins at the start of the Soviet player turn in Game Turn 2. At that time that player rolls a die for each still-frozen Reserve Army. On a result of one (1), the just rolled for army is freed. Any other result means that Reserve Army remains in place until the enemy approaches within eight hexes or another appeal to Moscow succeeds in freeing it on a subsequent turn. Make one die roll per frozen Reserve Army per Soviet player turn beginning on Game Turn 2.
Design Note. A “Reserve Not Activated” marker is provided in the counter mix to keep atop every such army as a memory aid until each is freed.
8.5 Soviet South Map Operation Blue Reinforcements
During play of the Operation Blue scenario, the Soviet player may introduce a total of 10 rifle division reinforcements via friendly controlled south map intermediate and/or ultimate supply source hexes, but at a rate of no more than two rifle divisions per game turn. Such south map reinforcements are not taken from the north map totals given on the scenario’s TR&RT, but instead are drawn separately (and still also randomly, see 2.14) from the general pool of uncommitted units of that type. Further, no south map Soviet reinforcement may begin entering on that map until a Soviet player turn begins with the German side controlling Rostov (N3635). Within the above strictures, Soviet south map reinforcements use the same entry procedures there, have their combat and movement factors instantly available, etc., as their counterparts arriving via the north map. Design Note. The rules above govern the number and type of units the Soviet player may enter as reinforcements via the south map in Operation Blue; they do not govern the number of units he may move overland from the north map to the south or vice versa.
8.6 Germans Across the Don in Operation Blue
If one or more units of the German side move or attack to the east side of the line formed by the Voronezh/Don Rivers and the Don- Volga fortifications, the Soviet player moves forward one block on the TR&RT all his remaining north map reinforcements at the start of his next player turn. (South map reinforcement rules continue normally.) For example, German-side units in the following hexes would trigger the Soviet reinforcement acceleration: N1033, N2526 and N2720. But German-side units in N1034, N1133, N1234 and/or N1334 would not trigger it. The TR&RT one-block forward-move is a one time event, no matter how many turns the German may remain (and/or be attacking) to the east of the trigger line. Further, though, at the first German-side violation of the line, all Soviet Reserve Armies that are still frozen at that time are permanently released into play.
8.7 German Operation Blue Withdrawal Requirement
At the very start of his player turn on Game Turn 6 of the Operation Blue scenario (only), the German player must permanently remove from play any two German panzer divisions, any one German infantry division, and the Gross Deutschland motorized infantry division. The selected units are simply picked up from the map and set aside for the rest of the game. The German player may choose any overland supplied panzer and infantry divisions anywhere on the map, at either full or reduced strength, for the withdrawal. If the Gross Deutschland (GD) unit is
unavailable for withdrawal, either because it’s in the dead pile or is OOS or drawing coastal or aerial supply, the German must substitute any two other available German motorized infantry divisions for it. The non-mechanized infantry division chosen for withdrawal must have a combat factor of at least seven (7) printed on either side of its counter.
8.8 Operation Uranus German-Side Reinforcement Entry
German-side reinforcements in the north-map-only Operation Uranus scenario enter just as described in the first paragraph of 8.2 with but one exception. That is, the 23rd Panzer Division, arriving as reinforcement on “Ur3,” enters the board by moving onto it via any north-map south-edge hex from N4227 through N4243, inclusive.
8.9 Manstein in Operation Uranus
The German player receives the Field Marshal von Manstein marker in the Operation Uranus scenario. This marker has no combat, stacking or step values of its own and is usually kept off to the side of the map. Once per German player turn, though, Manstein may be used to aid any one German attack, MA or PA. His effect is to give such an aided attack a two column rightward (2R) odds shift, in addition to all other normally applicable odds shifters and combat modifiers. The aided attack may be any place on the map, but it must have at least one overland supplied German panzer division in it for it to qualify to receive the personal attention of the field marshal. Manstein may never be eliminated, nor may he be used to aid any kind of German-side defense. Design Note. The Manstein marker represents not only the personal attention of that field marshal being focused on a given attack, but also the commitment of arriving heavy tank battalions and other such reinforcements too small to be represented by their own counters in the game.
8.10 Soviet Reinforcements in Operation Uranus
Soviet reinforcements in the north map only Operation Uranus scenario (all those units designated within the game turn boxes of that scenario’s TR&RT, 12.4) may enter play via any of their side’s friendly controlled ultimate and/or intermediate supply source hexes on that map sheet, including Astrakhan (N2812). Their hex of placement counts against each entering unit’s movement allowances for that phase. Arriving reinforcement units may be entered through one or several supply hexes at any times throughout each Soviet movement phase. Note that for reinforcement arrival purposes, Astrakhan is considered a north map entry point in Operation Uranus (see 7.11 and 8.3).
Additionally, at the start of any game turn(s) in this scenario, if either or both hexes of Stalingrad are empty of all German-side ground units, the Soviet player may immediately place five untried rifle divisions in each such hex (for a total of 10, possible, throughout the game). Such units may not move or attack during their game turn of placement; they defend normally from the start. Design Note. The special Soviet Stalingrad reinforcements represent the remnants of 62nd Army, climbing out of their last toeholds in the city along the Volga River, reorganizing, and taking part in the rest of the campaign.
8.11 Enemy Interdiction of Reinforcements
In both scenarios, if an enemy unit is adjacent to a town or city hex that’s part of your supply network (see section 7.0), that hex’s supply-providing capacity remains unaltered, but no reinforcements may enter play through the hex until the adjacent enemy unit(s) is/are removed.
9.0 Movement & Mobile Assaults
9.1 General
Every ground combat unit in the game has a “movement factor” printed in its bottom-right corner. That factor is the number of “movement points” (also called “movement factors,” and “MFs” and “MPs”) available to the unit to use to move across the hex grid during its side’s movement phase each player turn couplet. Units move from hex to adjacent hex—no “skipping” of hexes is allowed—paying varied costs to do so depending on the type of unit moving and the terrain in and along the hexes being entered. The movement of each player’s ground units takes place only during his own player turn’s movement phase; no enemy movement takes place during your own operations segment. (Exception: see 11.33, retreat-after-combat.)
9.2 Limits
MPs may not be accumulated from turn to turn or phase to phase, nor may they be loaned or given from one unit to another. A player may potentially move all, some or none of his units in each of his movement phases throughout the game. Units that move are not required to expend all their MPs before stopping. The movement of each unit or stack must be completed before that of another is begun. A player may only change the position of an already moved unit or stack if his opponent agrees to allow it.
9.3 Minimum Movement Ability
Each ground combat unit is generally guaranteed the ability to move at least one hex during a friendly movement phase by expending all its MF to do so. But this guarantee doesn’t allow units to enter hexes or cross hex sides that are otherwise impassable to them, nor does it guarantee German mechanized units the ability to launch a mobile assault.
9.4 Enemy Units
Ground combat units may normally never enter hexes containing enemy ground combat units, but see 9.23.
9.5 Stack Movement
To move together as a stack, units must begin their side’s movement phase already stacked together in the same hex. Units are not, however, required to move together simply because they started a movement phase in the same hex; such units might be moved together, individually, or in smaller sub- stacks.
9.6 Splitting Stacks
When moving a stack you may halt it temporarily to allow a unit or sub-stack to split off and move away on a separate course. The units left behind in the original (or “parent”) stack may then resume their own movement, even splitting off other units if desired. But once you begin moving an entirely different parent stack or an individual unit that began in a different hex than the currently moving parent stack, you may no longer resume the movement of the earlier stack without your opponent’s permission.
9.7 Different MFs in Stacks
If units with different movement factors are traveling together in a stack, the stack must use the movement factor of the slowest unit within it. Of course, as the slower units exhaust their MFs, you may drop them off and continue with the faster ones.
9.8 Terrain & Movement
All terrain features on the map are classified into two broad categories: natural and manmade. Both of those categories are further divided into several different types (see below). There is never more than one type of natural terrain in any one hex, but one or more types of manmade terrain may exist in one hex along with the natural stuff.
9.9 Natural Terrain
There are various types of natural terrain and hydrographic features on the map: clear, forest, hills, mountains, marsh, desert steppe, blocked mountain hex sides, non-Volga river hex sides, Volga river hex sides and all-lake/reservoir/sea hex sides (including the “Manych Deep” reservoir). The effects these various features have on the movement of ground units are described below and are also summarized on the Terrain Effects Chart (or “TEC,” see 12.6) for quick reference during play.
9.10 Clear
Clear terrain is the “base” terrain of the game; it’s devoid of any natural features that would enhance defense or slow
movement at this level of operations. Each clear hex costs all ground units one MP to enter. All city hexes are considered to have a base of clear terrain, but that’s not necessarily true for towns.
9.11 Forest
Forest hexes represent areas where the primary ground cover is trees. Each forest hex costs mechanized units two MP to enter, while non- mechanized units pay one MP.
9.12 Hills
Hills are areas dominated by broken or rough terrain. All mechanized units pay four MP per hex entered; mountain infantry pay one MP, while all other non-mechanized units pay two MP.
9.13 Mountain Hexes & Blocked Mountain Hex Sides
Mountain hexes cost mountain infantry two MP to enter, while other non-mechanized units must pay four MP per hex. Mechanized units may not move into or through mountain hexes, and no units of either side or any kind may move across blocked mountain hex sides.
9.14 Marsh
Marsh hexes cost non-mechanized units two MP per hex entered. Mechanized units may not move into marsh hexes except when the Operation Uranus freeze has occurred (see 10.6).
9.15 Desert Steppe
Desert steppe hexes cost all units one MP each to enter.
9.16 River Hex Sides
Rivers run between hexes, along hex sides, rather than existing in- hex. Every river hex side, other than those belonging to the Volga River, may be crossed by all non-mechanized units of both sides by paying one extra MP for the crossing, and by mechanized units of both sides by paying two extra MP for the crossing. “Extra” means in addition to whatever movement cost is involved for the hex being moved into. No unit of the German side may ever move, attack or trace supply across any hex of the Volga River in either scenario. Soviet units may always move across such hex sides without having to pay any extra costs in both scenarios.
9.17 Volga River Defined
The Volga River is an entirely north map feature. It begins along the boundary between hexes N1311 and N1312 and ends at the juncture point of hexes N4111, N4211 and N4212.
9.18 Soviet Black Sea Movement in Operation Blue
When playing the Operation Blue scenario, the Soviet player may move one, two or three non-mechanized units by sea, from friendly
controlled port town to friendly controlled port town, during each of his movement phases. The exact number of units he may so move each turn is governed by the number of port towns under his control: one port town controlled means one unit may move by sea, two controlled means two units, etc. To move by sea a Soviet unit must be an arriving south map reinforcement or, if already in play on the map, must start the movement phase already located in a port town. An arriving reinforcement may move to a port, paying normal MP costs to land in the port town hex, then move on from there according to regular movement strictures. A unit that begins a Soviet movement phase already in a port town may move from there to any other port town, land by paying appropriate hex entry costs, then move on from there according to normal movement strictures. (Landing Soviet units aren’t forced to move out of the port; they may stay where they land if that’s desired by that player.) Sea movement may not be used by the Soviet player to withdraw units from the map, nor does this rule given that player any kind of amphibious invasion capability against German controlled ports. At the start of any game turn of the Operation Blue scenario, the German player may announce he’s using both his aircraft ground support counters to block Soviet sea movement. The effect is just that: there is no Soviet sea movement allowed that turn. Of course, there will also be no further air counter participation on the German side that game turn.
9.19 All-Lake/Reservoir/Sea Hexes & Hex Sides
All-lake/reservoir/sea hexes and hex sides may only be entered or crossed according to the rule above. Design Note. All the terrain costs and strictures given above describe movement during normal weather. For the effect of freezing weather on these costs, see section 10.0. Also note the Sea of Azov is not the Black Sea, nor is there is German sea movement of any kind.
9.20 Manmade Terrain & Movement
Manmade terrain exists in four types: cities, towns, the Don- Volga defense line fortifications and the Stalingrad O-Ring defense line. Manmade terrains have no effects by themselves on movement. The movement cost for entering hexes is determined by the natural terrain in them.
9.21 Cumulative Costs
The total movement cost for entering any hex is always the sum of all the applicable terrain and water costs involved. For example, a mechanized unit crossing a non-Volga river hex side into a hill hex would pay a total of six MP to do so. That is, four MP to enter the hill hex and two “extra” MP to cross the river hex side.
9.22 No Off Map Movement
No unit once in play on the map may be moved, advanced- or retreated-after-combat off it, except as described in 8.7. Design Note. If this is your first time reading these rules, it’s probably best for you to skip over for now the following section (9.23 to 9.31) and resume reading at 10.0. Then return to this section after you’ve finished reading the sections 10.0 and 11.0.
9.23 German Mobile Assaults
All German mechanized units may conduct a special form of attack during that side’s movement phases in both scenarios. This is called “mobile assault” (or simply “MA”). All types of German mechanized units may potentially participate in MAs, but for FLAK and/or motorized infantry to be able to do so, at least one panzer division must be involved in the same MA. Motorized infantry and/or FLAK, alone or in combination with each other, but without at least one panzer division, may not make MAs.
9.24 MA Procedure
To conduct an MA, an eligible moving German mechanized unit or stack enters the enemy occupied hex chosen to be attacked, paying double the normal movement costs to do so. No German mechanized unit or stack may conduct more than one MA per German movement phase, but any given defender hex may potentially be mobile assaulted any number of times during any one German movement phase, as long as each new MA is conducted by fresh units and the German player observes stacking limits in the launch hex(es). The stacking limits for the two sides’ involved units within the assaulted hex itself are mutually exclusive. Design Note. An MA’s “launch hex” is the last hex occupied by the assaulting German force just prior to entering the defender’s hex.
9.25 MA General Limits
No MA may ever be launched into forest, hill, mountain, marsh, city or Don-Volga defense line hexes; nor may MAs ever be launched across any kind of all-water hex side. When the freeze (see 10.6) occurs in Operation Uranus, though, MAs may then be launched across non-Volga River hex sides. Likewise, the Operation Uranus freeze also means marsh hexes are considered to be clear terrain and may therefore serve as locations for MAs. The guaranteed ability of units to move at least one hex per friendly movement phase by expending all their MPs to do so (see 9.3), doesn’t work to guarantee German mechanized units the ability to launch an MA; the assaulting unit or stack must have sufficient MP available to pay for the MA or it may not be made. The concentric assault odds shift bonus (see 11.28) is never available for MAs.
9.26 MA & Supply State
The supply state of both sides’ involved units in an MA is determined at the instant of battle and at the location of battle. That
is, no German mechanized unit or stack may conduct an MA if it can be seen to be without regular overland supply in the launch hex for that MA.
9.27 MA Defender Bonus & Luftwaffe Ground Support.
Soviet defenders against MAs normally receive a two column leftward odds shift (2L) in addition to other applicable shifters (see section 11.0). If, however, at the very start of any of his player turns in the Operation Blue scenario, the German declares he is “using his Luftwaffe formations to form Schwerpunkte with the panzers,” (Gen. von Richtoffen’s phrase) that otherwise normal MA defense bonus is nullified for all MAs that player turn, but the two German air units are likewise no longer available for any other function throughout any such game turn.
9.28 MA Stack Eligibility
To be able to MA together during a given movement phase, German mechanized units must begin that phase already stacked together.
9.29 Unfavorable Combat Result
If the German MA achieves any result that fails to entirely clear the defender hex of all enemy units, the involved German force suffers whatever losses are dictated by that result and the survivors are placed back in their MA’s launch hex, where they must remain for the rest of the phase. Such units could potentially PA in the following German PA phase provided the sequence chosen for that turn was move and MA/prepared assault.
9.30 Favorable Combat Result
If a German MA completely clears the defender hex of Soviet units, the assaulting German units may continue their movement from that hex with the MP remaining to them. They may not, however, launch another MA that same phase (though they might yet PA if the sequence chosen that turn was move and MA/prepared assault). Note there is never any automatic advance-after-combat in victorious MAs as there is in victorious PAs (see 11.38); all post-MA movement is governed by the MP left to the moving units.
9.31 MA & Phase Sequence
The ability of German mechanized units to MA is not effected by the phase sequence chosen by that player. In PA/move and MA sequences, otherwise eligible units might participate in a PA, then during the following movement phase also launch an MA. The same is true when the move and MA/PA sequence is chosen: units that launched an MA during the movement phase might also participate in combat during the PA phase later that same German player turn.
Design Note. Within the limits and exceptions given above, MAs are generally resolved the same way as PAs (see section 11.0).
9.32 Flooding the Manych
At the very start of any Operation Blue game turn wherein he still controls hex N4127 or N4227, the Soviet player may announce he’s flooding the Manych River. This is a one-time per game event, the effect of which is to make the entire course of the Manych River, from those two hexes to N3733/N3633, inclusive, impassable for movement and combat for that one game turn. Even after the flooding, the Manych Deep still remains a lake/reservoir.
10.0 Operation Uranus Freeze
10.1 General
At this scale of simulation, weather makes itself felt in play, only during the Operation Uranus scenario, by affecting ground conditions. At the start of the Operation Uranus scenario, the weather is considered “normal” That is, the ground is generally dry and the normal movement and combat rules (which have all been written with fair weather in mind) pertain. At the end of each game turn the Soviet player rolls a die to determine the weather and therefore the ground condition that will pertain throughout the next game turn. Design Note. The weather is always “normal” in Operation Blue.
10.2 Operation Uranus Freeze
At the end of Game Turn 1 in the Operation Uranus scenario, and the end of every game turn thereafter until it occurs, the Soviet player rolls a die to see if an overall winter freeze has occurred. The die roll range needed to trigger the freeze increases each turn, and that range is note on the Operation Uranus TR&RT (12.4). For example, a freeze will occur for Game Turn 2 on a roll of just one (1), or for Game Turn 3 on a roll of one or two (1-2), etc. Once a freeze is begun it automatically lasts for the rest of the game. The effect of the freeze is to nullify all non-Volga river hex side effects for both movement and combat. Lakes, reservoirs and seas are unaffected. Further, all marsh hexes are treated as clear terrain for all purposes for the rest of the game. When the freeze occurs that means the German player could run mobile assaults into what would otherwise be marsh hexes and across what would otherwise be non-Volga river hex sides.
11.0 Prepared Assault
11.1 General
Prepared Assault (PA) combat takes place between adjacent opposing units during the prepared assault phase in every player-turn. Attacking is always voluntary; the mere fact of opposing units’ adjacency doesn’t necessitate combat. The player whose player turn it is, is considered the “attacker,” and the other player is considered the “defender,” no matter the overall situation across the map.
11.2 Multiple Defenders in One Hex
If there are two or more enemy units in a hex being attacked by your units (MA or PA), you may only attack that stack as if it were one large, combined defending unit.
11.3 Multi-Hex Attacks
An enemy occupied hex may be prepared assaulted in one battle by as many of your units as you can bring to bear from one, some or all of the surrounding hexes, but no more than one hex may ever be the object of any one PA, which is also true for MAs. For example, a unit in S2123 may not attack, either PA or MA, into both S2122 and S2223 during the same phase. See 11.6 below for more details.
11.4 Indivisibility of Units
No single attacking unit may have its attack factor divided and applied to more than one battle. Likewise, no defending unit may have part of its defense factor attacked by one or a few attackers while another part is attacked by others. No attacking unit may attack more than once per prepared assault phase, and no defending unit may be attacked more than once per prepared assault phase. (That last isn’t true for MAs; see 9.23.)
11.5 Attack Sequencing
There is no artificial limit on the number of PAs each player may resolve during his prepared assault phase, which is also true for MAs during the German player’s movement phases. The attacker need not declare all his attacks before hand, and he may resolve them in any order he wishes, as long as the resolution of one is completed before that of the next is begun.
11.6 Stacks in Prepared Assaults
It’s not necessary for all the units you have stacked in a given hex to participate in the same PA. Some of the units in a stack might attack into one defender hex while others attacked into some others or simply didn’t attack at all. No defending unit, though, may ever refuse combat.
11.7 Fog o’ War
Neither player may ever look beneath the top unit of enemy stacks until the time comes in the combat resolution process for odds computation. Once such an examination has been made, the attacker may no longer call off that attack. Neither player may examine the other’s stacked reinforcement units on the Turn Record Tracks. The German VP total in Operation Blue is always known to both players.
11.8 Combat Procedures
Normally the attacking player should strive to have several times more attack factors involved in a battle than the defender has defense factors. Such battles are called “high odds” attacks. To resolve such fights, the attacking player begins by
calculating his “odds.” Do that by adding together the attack factors of all the attacking units involved in the battle; then add up the defense factors of the enemy units defending in the battle. Divide the defender-total into the attacker-total and round down any remainder. Fore example, if 26 attack factors attack 7 defense factors, the situation yields an odds ratio of 3:1 (“three to one”). That is, 27÷7=3.71, which rounds down to 3. To turn that “3” into a ratio, you must set a “1” next to it on the right. Thus “3” becomes “3:1,” which corresponds to a column-heading on the Combat Results Table (CRT, see 14.7). And don’t forget to take both sides’ immediate supply situation into account; see section 7.0.
11.9 Poor Odds Attacks
Battles in which the attacking force has fewer combat factors than the defender are called “poor odds attacks.” Procedures in such situations are modified from what’s described above in that here you divide the defender’s total by the attacker’s, round up all remainders, and set the “1” on the left side of that result. For example, if a force with 5 attack factors is attacking a force with 11 defense factors, it’s a poor odds attack. In that case, divide 11 by 5 (11÷5=2.2), and round up (2.2 becomes 3); then set a “1” on the left of that “3,” yielding odds of 1:3 (“one to three”).
11.10 Odds Limits & Lines on the CRT
Note the column headings on the CRT range from 1:3 to 6:1. Final odds greater than 6:1 are resolved without a die roll; their results are always “DE.” Odds less than 1:3 are also resolved without a die roll; their results are always “AL1.”
11.11 Combat Modifiers
The odds obtained in the calculations described above may be modified (“shifted”) by the terrain in the defender’s hex and around its perimeter, as well as other factors described below. All applicable combat modifiers are cumulative in their effect. That is, in every battle all applicable modifiers are determined and their effects taken into account before the “final odds” are determined and the die is rolled to get a combat result.
11.12 Minimum Combat Factors
No lone unit or stack in the game with a printed combat factor greater than zero ever has that combat factor reduced below “1” for any reason(s). Whenever stacked or multi-unit or multi-hex situations arise in which combat factor reductions are to be made, total all the units’ factors subject to a common reduction, then make just one grand reduction, rounding down any remainder (but also see 1.3). Units with printed attack factors of zero are never allowed to attack, nor may they “ride along” with other units that happen to be attacking from their hex. They may not participate in attacks in any way.
11.13 Clear Terrain
Units defending in clear terrain hexes that are devoid of other terrain features derive no benefit to their defense against PAs because of that
terrain. The same is not necessarily true, though, when defending against MAs in clear terrain, see 9.23.
11.14 Forest
Units defending against PAs in forest hexes during enemy player turns in which they prepared assault/move and MA sequence is chosen receive no terrain benefit from the trees; however, when the sequence is move and MA/PA, defenders in forest hexes receive a one-column leftward (1L) odds shift. MAs may never be launched against defenders in forest hexes.
11.15 Hills
Units defending in hill hexes against PAs always receive a one- column leftward (1L) odds shift. For example, a 3:1 attack would become a 2:1 attack. MAs may never be launched against defenders in hill hexes.
11.16 Mountains & Blocked Mountain Hex Sides
Units defending in mountain hexes against PAs always receive a two-column leftward (1L) odds shift. For example, a 3:1 attack would become a 1:1 attack. MAs may never be launched against defenders in mountain hexes. No kind of attack may ever be launched across blocked mountain hex sides.
11.17 Marsh
Both sides’ mechanized units are prohibited from attacking into marsh hexes in any way. Remember, though, that when playing the Operation Uranus scenario and the freeze occurs (see 10.6) marsh is thereafter considered clear terrain for all purposes. When non-mechanized units PA against defenders in unfrozen marsh terrain, they gain a one column rightward (1R) odds shift for doing so, due to lack of cover for the defenders.
11.18 Desert Steppe
When units attack (MA or PA) defenders located in desert steppe terrain, they gain a one column rightward (1R) odds shift for doing so, due to lack of cover for the defenders.
11.19 River Hex Sides
Every non-artillery unit PA attacking across a river hex side has its attack factor halved. Soviet artillery units on the attack are always unaffected by rivers. No MAs may be launched across unfrozen non-Volga River hex sides. No German-side attack of any kind may ever be launched across Volga River hex sides. During the freeze in Operation Uranus, units no longer suffer any combat effected when making a PA or MA across rivers, but the frozen Volga is still off limits to all German attacks and moves.
11.20 Lakes, The Manych Deep & All-Sea Hex Sides
It’s normally impossible for units of either side to attack across these hex sides in any way; however, Soviet artillery units may do so in support of other attacking units coming in through other hex sides. So, for example, say you had a German unit in hex S1126. Soviet artillery in hex S1125 could “fire” to support other Soviet (non- artillery) units also coming in against the German from hex S1226 and/or S1227, etc.
11.21 Towns
Towns themselves never generate any kind of combat odds shifter or modifier in this game, but other terrain in town hexes does continue to make itself felt as usual for all combat purposes.
11.22 Cities
Units defending against a PA in a city hex never suffer the concentric attack bonus, no matter what the positions of the attackers around the hex. In addition, units defending in city hexes gain a two-column leftward (2L) odds shift bonus for doing so. Further, both AS and DR combat results are converted to AL1 when achieved against defenders in cities with regular overland or aerial supply. Finally, MAs may never be launched into cities, and German and Axis satellite panzer divisions are halved when making PAs into city hexes.
11.23 Don-Volga Defense Line Fortifications
These fortifications are printed directly on the map and are considered already in place at the start of play of both scenarios. Soviet units receive a two-column leftward (2L) odds shift when defending in these hexes against enemy PAs. German units may never MA into this defense line. Units of the German side may not trace their supply lines into or through intact Don-Volga defense line fortifications, but whenever an German-side unit occupies one of these fortification hexes those fortifications are considered destroyed for the rest of the game.
11.24 Stalingrad O-Ring Defense Line
In Operation Blue, whenever all the attacking units involved in a German-side MA or PA are launching their attack across an intact hex side of this fortification ring, the Soviet defenders gain a one- column-leftward (1L) odds shift in addition to any other applicable modifiers. As soon as any German-side unit(s) occupies any hex within the O-Ring perimeter, however, the entire fortification structure ceases to exist for all purposes. The O-Ring is already destroyed at the start of the Operation Uranus Scenario. Design Note. The O-Ring was hastily constructed under the supervision of Stalingrad’s civilian authorities as the Germans first approached. Its positions were therefore poorly placed, and the whole thing quickly ceased to be of any value once the Germans got inside it.
11.25 Ground Support Aircraft
The German player has two ground support aircraft counters available for use during Operation Blue, and the Soviet player has one such counter available for his use during Operation Uranus. There is never any game turn during which both sides have them available simultaneously. Either player may commit an aircraft counter to support any one PA battle, either offensive or defensive, anywhere on either map. The German player may use them both to support a whole player turn’s worth of MAs, see 9.23, or he may commit both of them to support any one PA, either offensive or defensive. Neither side’s planes have any stacking or combat values of their own, nor may they be given up to satisfy combat step losses. They effect of each aircraft counter is to generate a one column odds shift in favor of the owning side. Each plane counter may be used once per game turn, when available, as described in the paragraphs above.
11.26 Soviet Artillery & Heavy Cannon Units
Soviet artillery and heavy cannon units have the following special rules pertaining to them. (Also see 6.4, 11.19 and 11.20.) No Soviet artillery or heavy cannon unit may ever attack without there being at least one or more Soviet non-artillery or cannon units participating in the same PA from the same hex. Further, there may never be more artillery or heavy cannon combat factors involved in any Soviet attack or defense than there are non-artillery/heavy cannon combat factors in the same hex. Any surplus of artillery or heavy cannon factors is simply ignored. Soviet artillery and heavy cannon units are only available to that side in the Operation Uranus scenario. None of these units are “ranged;” within the strictures given here, they PA only from hex to adjacent hex. When using the move/PA phase sequence, no artillery or heavy cannon unit that expends more than half its movement allowance may attack during that same Soviet player turn’s prepared assault phase. When using the PA/move sequence, any Soviet artillery or heavy cannon unit that attacks during the PA phase loses half its movement allowance during the subsequent movement phase for having done so. OOS artillery and heavy cannon units may not PA at all. Artillery and Heavy Cannon units never advance-after-combat.
11.27 German 9th FLAK Division
This German mechanized unit functions in all ways like a normal (non-panzer division) mechanized-class unit of that side as long as it’s stacked with at least one other German-side unit of either mobility class. If, however, it’s ever caught alone in a hex and is attacked by the Soviet player while in that state, its defense factor is reduced to one. Similarly, if it ever PAs without at least one other German-side unit participating in the
same attack from the same hex, its attack factor is then reduced to just one. Design Note. Though there were other German FLAK divisions in this theater of operations, only the 9th is included in the order of battle. That’s because it was the only fully motorized FLAK division, and its commander was an astute tactician who saw to it his men trained to participate in ground actions.
11.28 Concentric Prepared Assault
If a Soviet unit or stack is defending against a German PA from opposite hexes, or by units from three hexes with one hex between each and the next, or by units from more than three hexes, that German PA gains a two column rightward (2R) odds shift. This bonus is also available to PA attacking Axis-satellite and Soviet units, but when they gain it they only achieve a one-column rightward (1R) odds shift. If a mixed German/Axis satellite force gains concentric positioning for a PA, the bonus is likewise only 1R. This bonus is never available to units PA attacking into any city hex. In the accompanying diagram, the defending unit in the center is being concentrically assaulted.
11.29 Final Combat Resolution
After all applicable modifiers have been applied and final CRT odds column determined, the attacker rolls a die and consults that table (12.7) to get a “combat result.” For example, a roll of “5” at odds of 6:1 yields a combat result of “DE.” Apply all applicable modifiers before going to the CRT to find each battle’s final odds column. For example, if you’re attacking at 20:1 (twenty to one) and there are modifiers operating that give a 2L shift, you’re then actually attacking at 18:1. That means you’d resolve that battle without a die roll, obtaining an automatic “DE” result in accordance with the note printed beneath the CRT. You don’t convert the original 20:1 to a 7:1, the highest odds column on the CRT, and then shift 2L; you apply all modifiers first, then go to the CRT to find your column.
11.30 Combat Results In General
In each battle, the defender must always completely absorb his combat result before the attacker absorbs his. There is never any carry over of a combat result from one battle into any other battle.
11.31 AS—Attack Stalled
When this result is achieved in a PA, nothing happens: both sides remain in place an neither side suffers any losses. When this result is achieved in an MA, the Soviet defenders remain in place and the German attackers are placed back into their launch hex, from where they may not move that same phase.
11.32 AL1-Attack Lose One Step
When this result is achieved in a PA, the attacking player must remove any one strength step (total) from among his involved units.
Both sides otherwise remain in place and the defender suffers no losses. In a PA, the attacker is always completely free to absorb his step loss from among any of his involved units. When a German MA gets this result, however, the step loss must come from an involved panzer division.
11.33 DR—Defender Retreat After Combat
In PAs or MAs, the defeated defending unit or stack must retreat into any adjacent hex empty of enemy units. Empty but intact Soviet Don-Volga fortifications hexes may not be retreated into by German or Axis satellite units If there is more than one eligible hex available, the owning player must retreat his units in the direction that takes them closer to their nearest source of supply. If more than one route fulfills that requirement, it’s his choice.
11.34 Retreat After Combat Movement
Retreat-after-combat doesn’t use up MP, and it has nothing to do with the costs involved with movement phase movement. Retreating units, however, must still observe normal movement prohibitions. For example, units retreating after combat may not retreat across all-sea hex sides. Stacking limits must be observed in retreat movement. If the only retreat path open would result in over-stacking in that hex, the defending units must all stand their ground and instead take a DE result (see below, 11.36). A retreating stack may only be broken up to allow its component units to retreat individually or in sub-stacks into different hexes if stacking restrictions both require it and allow for it.
11.35 No Retreat Into Battle
If defending units from one battle, MA or PA, retreat into a hex containing other friendly units, and that hex comes under attack that same phase, the units that retreated into the new hex in no way contribute to their new location’s defense. Further, if the original defenders in the new hex receive any combat result other than AS or AL1, the just-retreated-in units are automatically eliminated, and their elimination doesn’t serve to satisfy any of the current combat’s defender result.
11.36 DE -Defender Eliminated
When this result is achieved in a PA or MA, the defender must first eliminate (remove to the dead pile) all his involved one- step units. Immediately after that he must reduce all his involved two-step units (if any) to one-step strength. The attacker suffers no losses, and in a PA may make an advance- after-combat into the defender hex if the DE result has left it completely empty of enemy units.
11.37 EX -Exchange
When this result is achieved in a PA or MA, the defender must first eliminate (remove to the dead pile) all his involved one-step units. Immediately after that he must reduce all his involved two-step units (if any) to one-step strength. That done, the attacker must then remove the number of steps from among his involved attackers equal to the number of steps just lost by the defender. In a PA, if the EX result has left the defender hex vacant of enemy units, the victorious attacker may advance-after-combat with his surviving attacking units.
11.38 PA Advance-After-Combat
Whenever the defender’s hex is left vacant of defenders, either by step loss and/or retreat, the victorious PA attacking units may advance-after-combat into that hex. Stacking limitations must be observed. Such advances aren’t part of normal movement, and they don’t cost any MPs, but advancing units must still observe normal terrain prohibitions. Advancing-after-combat is an option; it is never mandatory. The decision to advance must be made immediately after the battle is resolved and before that of another is begun. It’s not necessary for an advancing attackers to stack-full the newly won hex; the victorious player may send just one or a few units. There is never any defender advance-after-combat; victorious defenders simply hold their place. Soviet artillery and heavy cannon units never advance-after-combat.
11.39 German-Side Multi-National PAs
It is permitted for German units to PA together with any one nationality of Axis satellite units, but no more than one nationality of Axis satellites may ever be involved in any one German-side PA. If a mixed German/Axis for PAs with concentric assault, the bonus is only 1R. For purposes of MAs, remember only German mechanized units may launch them, but also remember the Slovakian motorized infantry division is considered fully German for all rules purposes.
11.40 Operation Uranus German Garrisons
During play of Operation Uranus, all cities and towns under German control other than Chir Station (3124) and Stalingrad (3021/3121) are considered to have intrinsic defensive garrisons, each worth one defense factor, when entirely empty of all German side units. No counters are included to represent these garrisons, and their presence is ignored if such places are defended by one or more German-side units.
12.0 Charts & Tables & Scenario Set Ups
12.1 Set Up Instructions for Operation Blue Scenario
The Soviet player sets up first according to the instructions below. For example, “40A=RDx7,” means he randomly selects (see 2.14) seven rifle divisions to make up 40th Army (40A) and then places
them all within the five Operation Blue front line hexes marked
as such on the north map (N1141, N1242, N1342, N1442 &
N1542).
How many units he places in each 40A front line hex is up to
him, except that each front line hex must have at least one
Soviet unit in it when the set up is completed and normal
stacking rules must be observed. Front line units may only be
placed within the front line, never in front of or behind it.
Abbreviations
A = Army
CC = Cavalry Corps
DD = (Tank) Destroyer Division
NG = Naval Garrison
RA = Reserve Army
RD = Rifle Division
TC = Tank Corps
Soviet Front Line Set Up Specifics From North
to South
13A=RDx5
40A=RDx7
21A=RDx6
28A=RDx7
38A=CCx1+RDx9
9A=RDx8
12A=RDx4
37A=RDx6
18A=RDx4
56A=RDx6
Soviet Rear Area Set Up Specifics For The
North Map
TC = one each in N1938, N1639 & N1334
DD = one each, for a total of two, in any two towns and/or
cities on the north map behind the Soviet front line.
RD = RDx1 in 3635 (Rostov)
8RA=RDx7 in N1516
6RA=CCx1+RDx6 in N1827
5RA=RDx6 in N2125
7RA=RDx7 in N3022
24A=RDx2 in N2832
51A=CCx1+RDx5+TCx1 in N4135
Soviet Set Up Specifics for South Map
NG = one each in S1643, S2039, S2336
44A=RDx8 in S1343
46A=RDx3 in S2535
47A=RDx3 inS1938
German & Axis Satellite Set Up Specifics
All German and Axis satellite unit set ups for this scenario take place
on the north map. Down the west side of the north map there are six
German and Axis Satellite Army abbreviations:
2A = (German) 2nd Army;
4PA = (German) 4th Panzer Army;
2H = 2nd Hungarian Army;
6A = (German) 6th Army;
1PA = (German) 1st Panzer Army;
17A = (German) 17th Army,
St = in Stalino (N3140), and
K = in Kharkhov (N2044).
The abbreviations correspond to those printed in the upper-left
corners of the German and Axis satellite units that start this scenario
on the map. For example, German 3rd Panzer Division has “6A” in its
upper-left corner. That means it can be set up anywhere in the “6A”
area marked on the map.
The German must observe normal stacking limits within each army
set up area, but has no restrictions or strictures beyond that. He may
set up his units adjacent to Soviet units. The German divisions
marked “St,” may only set up in the city of Stalino. All German units
start at their full step strength.
Units of the German-side with an “A” printed in their upper-left
corners are Operation Blue starting units set up by that player,
decided on a unit-by-unit and hex-by-hex basis, in any friendly
controlled hexes to the west of the scenario start line. Once such
units are set up, for purposes of rule 3.2 they are considered to
become part of the army corresponding to the areas in which their set
up hexes are located. No more than one may be set up in any given
hex.
12.2 Operation Blue Turn Record & Reinforcement Track
Located on mapsheet
12.3 Operation Uranus Set Up Instructions
This scenario is set up and played entirely on the north map; put the
south map away. Also remember, unlike in the Operation Blue
scenario, the Soviet player turn is the first one in each game turn
here. Further, the Soviet player gets to choose his phase sequence
here, just like the German player, with but two exceptions: 1) the
Soviet player still doesn’t get to make MAs; and 2) on Game Turn 1
the Soviet player must still use the prepared assault/move phase
sequence. And finally, remember, during Game Turn 1 the
movement allowances of both sides’ units are halved and the German
player may not make any kind of attacks.
Abbreviations Used
CD—Cavalry Division
FA-Fortified Area (the 0-6-2 black-on-red Soviet units)
FD—FLAK Division
H—Hungarian
HCD—Heavy Cannon Division
ID—Infantry Division
It—Italian
J-Jaeger
MC-Mechanized Corps
MID—Motorized Infantry Division
PD—Panzer Division
Ro—Romanian
S – Security
German/Axis Set Up Instructions
In Specific Hexes
Set up each of the following units (all are German unless
otherwise noted) in the specific hexes listed.
1 Ro PD & 22 PD - 2927
105 HID - 2044
213S ID - 1143
294 ID - 3140
403S ID - 3635
Vicenza It ID - 2935
44, 376 & 384 ID - 2923
4th Romanian Army
Set up the following Romanian units, no more than one per
hex, in any hexes within four hexes or less of 3720 that are also
adjacent to one or more Soviet Operation Uranus scenario start
line hexes. When counting hexes from 3720, don’t count that
hex itself. For example, 4018 is four hexes away from 3720.
5 Ro CD
8 Ro CD
1 Ro ID
2 Ro ID
4 Ro ID
18 Ro ID
20 Ro ID
The “German Stalingrad Group of Forces”
Set up the following 18 units, all German, within the eight
hexes: 2920, 2921, 2922, 3021, 3022, 3121, 3122 and 3222.
Normal staking limits must be observed, and at least three units
must begin in each Stalingrad city hex.
- 3 MID
- 79 ID
- 9 FD
- 94 ID
- 14 PD
- 100J ID
- 16 PD
- 113 ID
- 24 PD
- 295 ID
- 29 MID
- 297 ID
- 60 MID
- 305 ID
- 71 ID
- 371 ID
- 76 ID
- 389 ID 3rd Romanian Army
Set up the following 10 Romanian units in these six hexes: 2527, 2627, 2726, 2826, 2825 and 2824. Normal stacking rules apply, and there must be at least one unit in each of the listed hexes.
- 1 CD
- 9 ID
- 5 ID
- 11 ID
- 6 ID
- 13 ID
- 7 CD
- 14 ID
- 7 ID
- 15 ID Italian 8th Army Set up all Italian units in the counter mix, other than the Vicenza ID, plus the German 62 ID and 298 ID, in these six hexes: 2528, 2529, 2430, 2330, 2231 and 2232. Normal stacking rules apply, and there must be at least one unit in each of the listed hexes. Hungarian 2nd Army Set up all Hungarian units in the counter mix, other than the 105 HID, plus the German 168 ID and 336 ID, in these eight hexes: 2132, 2033, 1932, 1833, 1733, 1734, 1635 and 1534. Normal stacking rules apply, and there must be at least one unit in each of the listed hexes. German 2nd Army Set up the following 14 units, all German, in these eight hexes: 1435, 1334, 1235, 1236, 1237, 1238, 1138 and 1039. Normal stacking rules apply, and there must be at least one unit in each of the listed hexes.
- 27 PD
- 299 ID
- 45 ID
- 323 ID
- 57 ID
- 340 ID
- 68 ID
- 377 ID
- 75 ID
- 383 ID
- 82 ID
- 385 ID
- 88 ID
- 387 ID Soviet Player Set Up Instructions After the German player has completed his set up, the Soviet player sets up his own side’s starting units. He first randomly selects the following units: ADx3; CCx3; FAx7; HCDx1; MCx2, RDx92 and TCx5. He then sets them up, observing normal stacking limits, anywhere in or generally east of the Operation Uranus start line on the north map. Aside from observing stacking limits, he has two other restrictions:
- no more than two mechanized-class units may begin in the area south of the Volga River (N3221, N3220, N3219, N3320, etc.); and
- the HCD must begin in hex N3120 (other units may also begin there, but the HCD must do so).
12.4 Operation Uranus Turn Record & Reinforcement Track
Located on mapsheet
12.5 German Victory Point Track
Located on mapsheet
12.6 Terrain Effects Chart
Located on mapsheet
12.7 Combat Results Table
Located on mapsheet
13.0 Historical Commentary:
“Drive on Stalingrad” in its Strategic Context When the Germans invaded the Soviet Union in June 1941, they did so along a front of approximately 1,200 miles using some 150 German and Axis-satellite divisions. The broad strategy behind the massive undertaking — the single largest offensive land campaign ever waged — was nothing less than the leveling of the USSR “to its roots in one blow” (as described in the authorization order penned by Hitler). When the invaders failed to fulfill that goal, they were left to fight a contest that became increasingly attritional. For instance, on 30 March 1942, the 16 panzer divisions then in the east could field a total of only 140 operational tanks among them, a number smaller than the officially authorized strength for just one such unit. In addition to tank losses, another 100,000 motor vehicles (trucks, automobiles, motorcycles, etc.) were also lost, with little prospect of their replacement any time soon. In terms of manpower, the German replacement system had managed over the winter to send just one man east for every four being lost there. Naturally, then, the German strategy for their 1942 campaign in Russia had to be carefully chosen. The resources needed to repeat anything like the previous year’s performance were simply lacking. Hitler’s choice of strategy in the east that year, then, seemingly had to be selected from among the following four options. First, there was the idea put forward by Gen. Friedrich Fromm, then head of the German army’s replacement apparatus, to remain entirely on the strategic defensive in the east for the whole year. Such a change would have at once freed some resources to be used in the Mediterranean, while also bringing the east front armies back to full strength and mobility by 1 January 1943. Second, a series of limited, sequential offensives could be launched to 1) capture Sevastopol and the rest of the Crimean peninsula; 2) advance Army Group South’s right flank to Rostov; 3) pinch off and annihilate the Soviets’ Toropets salient that jutted westward some 50 miles between the main fronts of Army Group North and Army Group Center; and 4) capture Leningrad, thereby achieving a direct overland link with the Finns. Third, a new effort to capture Moscow could be launched from Army Group Center alone. The hope here would be the loss by
the Soviets of their central communications hub for the entire European portion of the Soviet Union, coupled with the psychological blow inherent in being forced to move their seat of government, would together be enough to send fatal shock waves through the remaining portions of their state, economy and armed forces. Though most observers at the time, including many on the intelligence and command staffs of both sides, expected the Moscow option to be the one selected, Hitler rejected it almost out of hand. And he rejected it for the same reasons he also set aside the other three options. That is, none of them could be depended on to be fully decisive that year. (Numbers one and two of the sequential offensives plan were carried out, but only as preparation for the main show.) The German dictator believed he had to reach a final decision in the east in 1942 for two reasons. First, the Anglo-Allies were slowly but surely beginning to gather themselves for strategic offensive operations, and they couldn’t be depended on to take more than another year before launching themselves back onto the continent. Second, Hitler was being inundated with reports from the various economic departments of the Reich government, all universally pessimistic about the possibility of continuing the war if some large new source of oil wasn’t gained in the year ahead. In fact, the consensus view on the oil question held that all German mobile operations on land, in the seas and in the skies, would completely grind to a halt sometime during the second half of 1943 if a new oil source wasn’t secured. The German armed forces had actually finished the campaigns of 1940 with a slight surplus of POL (petroleum, oil and lubricant) supplies. That feat had been possible because of the new stocks added when Norway, France and the Benelux were overrun. As it turned out, though, no matter how fast the panzer spearheads thrust into the USSR’s western areas in 1941, the feat could not be repeated. That was because the Soviet fuels captured tended to be of such low octane ratings they were useless for German engines until put through and expensive and time-consuming redistillation process. The POL situation deteriorated still further once Italy came fully into the war. During peacetime that nation’s main oil sources had been from wells within Allied territory. With Mussolini’s declaration of war those sources were cut off. Thus the Germans had to begin diverting significant portions of their own precious stocks simply to maintain the already rickety Italian Empire. Hitler had studied strategy, including Clausewitz, who emphasized the primary aim in war was always and everywhere to be the destruction of the enemy’s armed forces, only after which would follow the seizure of economic and political objectives. Once he even scolded Heinz Guderian, the blitzkrieg’s panzer general inventor: “There’s no need for you to try to teach me [strategy]! I’ve studied Clausewitz and Moltke, and read all the Schlieffen papers! I’m more in the picture than you are!” He therefore knew he was putting the operational cart before the strategic horse when he picked the Caucasus oil regions as the target for 1942. His mistaken faith that the Soviets were already near complete exhaustion, however, along with his dread certainty he had no other viable options given the Reich’s POL situation, compelled the decision. He told the assembled officers at the Army High
Command: “If I don’t get the oil of Maikop and Grozny, then I must end the war.” Recognizing a need, however, did not automatically provide the means to satisfy it. The distance between Taganrog — the small port town near the northeast corner of the Sea of Azov, and one of the jump off points for the new German offensive — and Baku, the heart of the Soviet trans-Caucasus oil region, is a little greater than the 700 miles separating downtown Warsaw from Kremlin Square in Moscow. Despite that daunting geographic fact, in 1942 the Germans would launch their effort along a front of only 450 miles, while at its peak the push would involve only 68 German and 25 satellite divisions. And even that force could only be gathered by denying almost all personnel and equipment replacements to the other two army groups, thereby further diminishing overall German combat capabilities along the rest of the front. Maikop and Grozny, the two oil centers on the European side of the Caucasus, together yielded only 10 percent of total Soviet oil production. Baku, then, more distant across the mountains, had to be the final goal; for it alone produced some 80 percent of all Soviet oil, about 24 million tons per year. An even more daunting problem, and one Hitler apparently was never made aware of, centered on how to actually get the Caucasus oil from the region to the German industrial heartland once the new conquest had been achieved. That is, in March 1941, the German War Economy and Armaments Board sent a report to the Army High Command pointing out it would at most be possible to send overland — via pipeline, truck and rail — some 10,000 tons of oil per month from the Soviet fields to Germany. The Danube barge fleet, as well as the overall traffic potential of that river, were already entirely taken up moving supplies from Romania’s Ploesti oil complex. The only really viable route for significantly large quantities of oil to get to Germany would be via the Black and Aegean Seas to Mediterranean ports. The document concluded: “The opening of those sea routes and the security of the tankers in the Black Sea is the prerequisite for the use of Russian supply sources in sufficient quantity to support the further continuation of the war.” Thus, after seizing the oil fields themselves, the German armed forces would still also have to annihilate all Soviet naval and air presence in, under and above the Black Sea, and likewise remove Anglo-Allied air and naval intervention capabilities in the Aegean and Eastern Mediterranean Seas. The bad news apparently never got to Hitler, however, since the evidence
indicates that particular report didn’t get beyond the in-basket of Gen. Wilhelm Keitel, the Führer’s chief administrative lackey at the Army High Command. Of course, the Germans never got far enough to be able to tap any important quantity of oil from the main Soviet fields. Hitler also ordered the critical Baku complex not be bombed during the two months German bombers could reach it, since he still hoped he’d soon be drawing resources from it and therefore didn’t want to acquire a wrecked facility. Thus the campaign that ultimately cost the Axis five entire armies didn’t even seriously disrupt Soviet oil acquisition, let alone bring in new POL supplies for Berlin’s war effort. Given everything, then, the only strategic question remaining was why the German war machine did indeed not grind to a halt in 1943, as had been universally predicted by their economic planners the year before. Three factors intervened to give the Germans more time on that score. First, Italy capitulated and changed sides, thereby ending the German requirement to supply Mussolini’s armed forces and allowing those quantities of oil to be funneled back to the Wehrmacht. Second, the German synthetic fuels program continued to expand through 1943, thereby providing more of the needed POL. And third, it seems many of the reports given to Hitler were based on falsified data. That is, careful postwar examination of surviving records, comparing them with POL quantities actually used in production and on the battlefield, indicates supply officers and factory managers, from the bottom of the command and management chain to near its very top, almost universally under-reported the amount of essential POL they had on hand. They did so, in fact, by an average of about 50 percent. Such a conspiracy of lies may at first seem unlikely in a police state as suffocating of individual initiative and as punishing of infraction as Nazi Germany. In a planned economy in which oil is the critical resource, however, it’s understandable how everyone able to do so in any way would find it hard to resist building up, and then maintaining and concealing, a local, hidden, unreported supply that was kept as large as possible. Hitler seems never to have suspected, believing it was Armament Minister Albert Speer’s organizational and technocratic genius that kept the gears greased and the panzers’ fuel tanks topped off. Thus the Stalingrad campaign was ultimately little more than a laughable, useless dream played out within the context of a larger nightmare. Map Clarification: In both scenarios, for all purposes, the western hex of Voronezh (N1334), as well as Rostov (N3635), are indeed TOWN hexes, just as shown on the map. Ignore the word “city” in the reference to Rostov in rule 7.4; that place is a town.