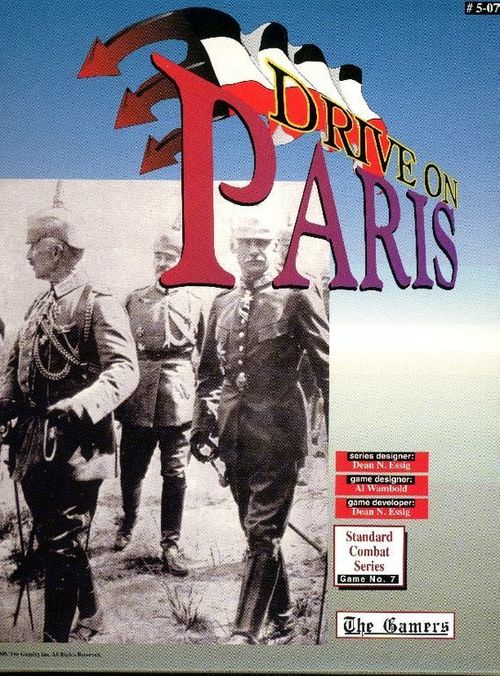
Drive on Paris
Drive on Paris Rulebook
Table of Contents
Table of Contents
Parts Manifest
A Complete Copy of Drive on Paris Includes:
- 1x Box
- 1x Standard Combat Series Rulebook (v1.6)
- 1x Game Specific Rulebook
- 2x Dice (one red, one white)
- 1x 22"x 34" Map
- 1x 280-counter countersheet
- 1x 140-counter countersheet
- 1x Registration Card
- Assorted Advertising Flyers
If you are missing something, contact the publisher. If you have something extra, Merry Christmas.
Replacement Counters
You have three replacement counters on Sheet 2 for units on Sheet 1. The German 2 GdR Inf Division is shown on Sheet 1 as belonging to the X Corps, and the 23 Res Inf Div and 24 Res Inf Div as belonging to XII Corps. All of these should belong to the Reserve Corps of the same number (10 Res and 12 Res Corps respectively). The counters on Sheet 2 correct this. Throw the counters from Sheet 1 away and use only the ones from Sheet 2.
General Information
Scale
Each turn is 1/2 week, each hex is 10 kilometers. Units represent divisions and brigades.
Belgian Place Names
Numerous cities have more than one name listed. In these cases, the name in parenthesis is the name of the city in either French or Flemish (as appropriate), the other being the primary name used in Belgium. If there are two names in parenthesis for a city, the second is the English name for the city.
Counter Ownership
The Allied player controls the British (Tan), French (Blue), and Belgium (Pale Blue) armies. The German player controls the German (Field Grey) armies.
Within each nationality color, there are a number of separate symbol colors showing additional detail:
- British with Brown symbol: Indian
- French with Red symbol: Colonial
- German with White symbol: Guard
- German with Blue symbol: Bavarian
- German with Red symbol: Württemberger
- German with Yellow symbol: Saxon
The color band on the counters show army organization. This has no effect on play, and is for your information only.
Unit Symbols
Unit symbol types found on the counters: Infantry, Static, Cavalry, Assault Infantry, Mtn Infantry, Naval Infantry, Fortress.
Stacking
Up to four units can stack in any hex. All units count as one for stacking, except Fortresses, HQs, Siege Guns, Trains, Taxis/Buses, Armored Cars, and game markers do not count for stacking.
Sequence of Play
German Player Turn
- Movement
- ...Reinforcements and Reconstitution
- ...Reserve Marker Placement
- ...Movement and/or Overrun Combats
- Combat
- ...Siege Gun Combat
- ...Regular Combat
- ...Breakthrough Combat
- Exploitation
- ...Movement and/or Overrun Combats
- Supply
- ...Supply Trace and Attrition
Allied Player Turn
Repeat the above for the Allied player.
Multiple Terrain Types in a Hex
If a hex has more than one basic terrain within it (City and Woods, for example), they are cumulative for defense. Note that Foothills and Mountains are already inclusive with Woods, so never add the effects of Woods to that of Foothills or Mountains. For movement, pick the single terrain type with the highest MP cost.
1.0 General Special Rules
1.1 Exploit Capable Units & Reserves
1.1a Units marked with a Yellow Tag under their unit values, and any unit placed into reserve can move fully during the Exploitation Phase (given other requirements of Exploit Capability). White tagged units get this ability for a limited period, see 3.1.
1.1b All other units, not so marked, but otherwise eligible for Exploit Movement, can move 1/2 MA during the Exploitation Phase. EXCEPTION: Siege Guns and HQs are never allowed to do this.
1.1c Only Yellow-tagged units are capable of full advance after combat. White tagged units get this ability for a limited period, see 3.1.
1.1d Before any unit moves in the regular Movement Phase, the player can place Reserve Markers on any units in the command radius of an HQ provided the units are not in an EZOC. The countermix is no limit to the number of reserve markers available. Units in Reserve defend normally but cannot move or attack until the next friendly Exploitation Phase—units released from reserve can move 2x their printed MA in the Exploitation Phase.
1.2 Trains
1.2a Both players receive Trains during the game. Trains have no combat value or ZOC. A train can never exist in an EZOC and if forced to do so they are destroyed (along with any units loaded aboard the train). No unit can negate an EZOC for train movement purposes. Trains cannot be replaced or captured.
1.2b Trains can move their full MA in both the regular Movement and Exploitation Phases and the train can carry units in the Exploitation Phase which could not normally move during then. Such movement must be along contiguous friendly railroad hexes. A train can carry up to four steps. Trains cannot transport Siege Guns, Arm Cars, or Taxis/Buses.
1.2c It costs the train 10 MPs to load or unload. Show loading by placing the Train marker on top of the units loaded. A unit cannot move in the phase in which it uses a Train to move (to include loading or unloading). Units cannot be in Reserve while moved by Train. Units being transported by train have no effect on stacking and have no combat strength.
1.2d Rail hexes are controlled by the player who last moved an infantry division into the hex. (See also 2.7) Use railhead markers to show the boundaries of friendly held railroads. At-start railheads are either at each player's national borders, or at the most advanced extent of friendly troops. In any case, railroad hexes function like roads for the movement of normal units.
1.2e When a train arrives as a reinforcement at the same time as regular reinforcements, those reinforcements can enter play loaded on the trains so as to avoid the loading MP cost. Units which happen to be in the hex where the train arrives, but do not arrive that turn, cannot take advantage of this rule.
1.3 Headquarters
1.3a HQs have no combat value or ZOC. Their function is to rebuild units which have taken losses and provide command & control for reserve placement. Enemy units can freely enter a hex containing only an enemy HQ (in which case, the HQ is automatically destroyed).
1.3b Each HQ has a command radius printed on the counter (bottom, far left). Count this path from the HQ to the unit's hex. HQs can only command units of the same nationality. Count hexes, not MPs. Terrain has no effect on this trace path (provided the terrain is not prohibited) and the path cannot enter an unnegated EZOC hex.
1.3c Each HQ (not in an EZOC) can use its Replacement Rating (bottom center value) to allow units to reconstitute in its hex. Units so placed must move out of the hex to re-establish normal stacking by the end of the phase (they are not penalized until the phase ends).
1.4 Reconstitution
During this campaign units were not permanently destroyed. They would become ineffective for a time, receive replacements, be reorganized, and then be sent into combat again. Only if units were cut off and isolated before being destroyed could a decisive victory be achieved in combat.
1.4a Whenever a combat unit is removed from play, roll to place it on the Turn Record Track according to these rules. Roll one die in all cases, but use the multipliers below. If the time of return is after the game ends, remove the unit from play. Forts, Trains, HQs, Taxis, Arm Cars, and Siege Guns cannot be reconstituted and are lost permanently when destroyed. Place the unit the number of turns in the future equal to the multiplied die roll, e.g. on turn 4 a unit is destroyed with a x2 multiplier. The roll of 3 gives six turns and the unit will return to play on turn 10.
1.4b HQs cannot rebuild any units belonging to any other country. In other words, a French HQ can only rebuild French units.
1.4c Units in command radius when lost: Die x2.
1.4d Units unable to trace command radius (range too great OR EZOCs, prohibited terrain blocks, or a unit forced into a Neutral Country's hex): Die x3.
1.4e When the turn arrives with a unit or units on the Turn Record Track, they arrive at any HQ of the same nationality of the unit (provided the HQ is not in an EZOC (friendly units do not negate) and the HQ is in supply trace at that moment). A given HQ can bring in any number of returning units in a turn, limited only by its Replacement Rating (center bottom of the counter). Units always return at reduced strength (Exception: 1-step units return with their "full" strength of 1-step).
1.4f A reduced unit can be refitted to full strength if the unit begins a Friendly Movement Phase in the same hex as an appropriate HQ. At the cost of one of its Replacement Rating points, the HQ can flip one reduced unit to full strength. Units so flipped can exit the HQ's hex in the same phase (refitting does not cost MPs from either the HQ or the unit). An HQ can refit any number of units limited only by its Replacement Rating and stacking. No unit can ever reconstitute from the dead and refit to full strength in the same turn.
1.4g If there isn't enough refit capability to bring on units available for reconstitution, slide the units back one turn until they can be reconstituted. A player is never forced to reconstitute any unit and can always pick and choose which units he wants to reconstitute.
1.5 Fortresses
1.5a Fortresses cannot move or attack. They do exert a ZOC and defend with the value in the center of the counter.
1.5b Fortresses are only affected by "Fortress Reduced" combat results from the Combat Results Table. In those cases, reduce the fortress by one step, other combat results do not affect forts. Some fortresses have more than 2 steps and have two counters to show their step reductions. See also the effect of Siege Guns on Fortresses using the Siege Gun Table (3.3).
1.5c Fortresses are always in trace supply, but units stacked with them must trace normally.
1.5d Fortress defense strengths are never modified by terrain effects. A hex containing a Fortress and regular units could enjoy a column shift as a group however, the hex's terrain would only modify the regular units' strength.
1.6 Trenches
At the beginning of the war, all participants (especially the French) held a disdain of trenches and the defensive mind-set they represented. Extensive trench lines made their first appearance in mid-September when the Germans dug in along the Aisne River.
1.6a Neither side can build trenches until turn 11. On turn 11 and after, the Germans can build trenches. The Allies can only build trenches after the Germans complete at least one. Turn 11 contains a trench symbol on the map's Turn Record Track as a reminder of this important turn. The only effect of a trench hex (one marked with a completed trench marker) is that units in the hex can ignore combat retreat results.
1.6b Trenches can be built by any infantry unit. EZOCs have no effect on the ability to build trenches. Units in Reserve cannot build trenches. During the Supply Phase, place a trench marker (construction side up) on any desired unit. The countermix does not limit the ability to build trenches, but the arrow trench markers can be used to mark the ends of lines of trenches. While under a trench construction marker, units cannot move or attack, if such units are forced to retreat, remove the marker. Flip the marker over to its completed side in the next Supply Phase. Remove trenches in hexes taken by the enemy or left unoccupied at the end of a turn.
1.6c Trenches cannot be built in Major Cities, Marsh, Foot Hills, or Mountains.
1.7 Breakthrough Combat
When attacking units receive a breakthrough result from the combat result, conduct their advance after combat normally and mark all participating units with a Breakthrough Marker. After all regular combats in the Combat Phase, any units marked with Breakthrough Markers can attack again. Such stacks can combine to attack a single hex in the normal manner, but no unmarked unit can participate. Remove the markers when the attack is announced. Remove any Breakthrough markers remaining on the map when the player decides he will do no more attacks. A breakthrough combat does not generate additional breakthrough results.
1.8 Lines of Supply
1.8a A unit is in supply only if it can trace a supply path of 10 MPs or less to a Supply Source or 10 MPs or less to a friendly railroad (as per 1.2d) of any length attached to a Supply Source.
1.8b Belgium Supply Sources. Antwerp. If Antwerp is captured by the Germans, Belgium units can trace to any Allied controlled port.
1.8c British and French Supply Sources. Any Allied controlled port or any west or south map-edge railroad hex.
1.8d German Supply Sources. Any northern or eastern map-edge railroad hex in Germany.
1.9 Effects of Being Out of Supply
Do not mark units found to be out of supply. Instead, simply eliminate 25% (round normally) of all the steps in the hex found to be Out of Supply (owning player's choice of unit). HQs which are out of supply are never destroyed due to the above, but while out of supply they cannot refit or rebuild any units.
1.10 Neutral Countries & Luxembourg
No unit can enter any hex of Switzerland or The Netherlands. No command radius or supply trace can be traced into any hex of either country. See also 3.5.
German units can enter Luxembourg any turn the player desires, but the French cannot enter Luxembourg until the Germans have done so.
1.11 Cavalry Screens
If an enemy attack is declared against a hex containing only Cavalry units and the attacking force does not contain any cavalry, the defending unit can retreat one hex (which cannot be into an EZOC) to refuse the combat. Friendly units do not negate EZOCs for this purpose. Terrain has no effect (with the exception of Prohibited terrain which still is prohibited).
When a cavalry unit does this screening retreat, the enemy units involved can advance into the vacated hex.
1.12 Mobilization Points
Each player places his Mobilization Point counters before play begins. These represent the Mobilization Centers of each side's inflexible mobilization plans. Each player has a number of such points to place on the map (10 for the French, 8 for the Germans) and these are organized in order (A for the French or 1 for the Germans is the most important, to J for the French and 8 for the Germans as the least important). These markers apply to only the French and Germans, British reinforcements arrive at any Allied-held channel port and Belgium units always arrive in Antwerp. On occasion, a unit may be given a precise location where it must arrive, if so, that location supersedes these rules.
Mobilization Points can be placed in any Railroad hex within the pre-war boundaries of the owning country.
Once placed, a Mobilization Point cannot be moved. Mobilization Points cannot be reconstituted, have no ZOC, no combat value, and do not count for stacking. They are instantly destroyed when an enemy unit enters their hex. Should the enemy take a Mobilization Point, it is destroyed and any future reinforcements slated for that point arrive 5 turns later in Paris or Strassburg (as appropriate).
There are three levels of freedom allowed: Historical, French Doctrine Line constrained (FDL), and Free. Use the FDL one for normal games. For the historical version, follow the hexes below, for the free version allow the Mob Points to be set up anywhere in the player's country.
The FDL is the same as the free version for the Germans, but the French are restricted in which Mob Points can set up on either side of the FDL line (see 2.8). Mob Points C, D, H, I, and J must set up west of the line; A, B, E, F, and G must set up east of the line.
The French Player places his Mobilization Points before the German player and before either player sets up his units.
These are the historical Mob Point positions:
French: A: 46.10, B: 38.14, C: 14.05, D: 30.19, E: 49.06, F: 55.01, G: 41.01, H: 27.13, I: 15.26, J: 2.10
German: 1: 38.33, 2: 45.26, 3: 44.33, 4: 47.21, 5: 51.17, 6: 59.13, 7: 63.19, 8: 44.15
Note: The "importance" of each mobilization point was rated simply by the number of units arriving there in the campaign scenario. No effort was made to evaluate when or what in this determination. If timing is critical to your mobilization plan, be sure to check the reinforcement schedule for your scenario to determine any other factors you might deem of importance.
2.0 Allied Special Rules
2.1 Allied Cooperation
2.1a French and British units cannot stack together or combine their strengths in an attack. Exception: British units can stack with and use French trains and fortresses.
2.1b Belgian units cannot stack with either French or British units or combine their strength with either for an attack until turn 15. On turn 15 and beyond, Belgian units can freely stack and attack with both British and French units. Turn 15 is marked on the Turn Record Track with the Belgian flag as a reminder.
2.2 Belgian Operations
The Belgian Army had no plan to coordinate action with the French or British at the start of the campaign. Their intent was to delay the Germans but to keep their army intact while withdrawing to their "National Redoubt" in Antwerp. King Albert wished to form an initial defensive line along the Meuse but was overruled by his Chief of Staff who was afraid of being cut off from Antwerp. Instead, the Belgians formed their line on the Gete River.
2.2a If the Belgian Army HQ is not in a hex of Belgium, flip it to its 0-rated replacement side. The HQ remains in this status as long as it is not in a hex of Belgium.
2.2b Until turn 5, no Belgian unit can exit Belgium (if forced to do so they reconsolidate at the one die x3 rate). On turns 1 through 3, no French or British unit can enter Belgium (as shown on the map).
2.2c Armored Cars. The Belgian Armored Car unit has no normal attack combat strength. Instead, it gives a die roll modifier to any attack it is involved with. The unit has no ZOC, but is a normal unit for defense, movement and has one step. The Arm Car unit cannot be reconstituted.
2.3 Plan XVII
Numerous VP hexes exist in Alsace-Lorraine marked with "Plan XVII" and a French flag. If the French player (even momentarily) holds any of these hexes from turns 1 through 8, the French player retains these VPs for the rest of the game. The German player gets no VPs for these hexes nor does the French player lose the points garnered if he later loses the hex. No hex generates more than one issue of VPs.
2.4 French Taxis and Buses
Twice during the campaign the ad hoc use of motor transport by the French had a small but not insignificant effect on operations. The first instance was the famous "Taxicab Army of Paris" that moved the French 7th Infantry Division up to the German right flank during the Battle of the Marne. The second instance was when a fleet of buses transported the BEF's II Corps from the Abbeville RR station up to the front during the Race to the Sea.
2.4a There is one French Taxis/Buses unit representing both the Paris Taxis and the later buses. The Taxis/Buses unit has no combat value or ZOC.
2.4b The Taxis/Buses unit can move up to 2 steps like trains do. They can move into any hex allowing normal movement—they are not constrained to RRs like the Trains. All other rules applying to trains also apply to the Taxis/Buses, except that loading/unloading them costs 2 MPs.
2.4c They can be used twice (flip the counter to show the first usage has been used). On the second use, remove the counter from play. The unit arrives in play as a reinforcement twice and has exactly two uses each time. Should the counter remain in play when the second arrival happens, remove the existing counter and bring it in as a reinforcement at full value (the leftover use (or uses) of the original unit is (are) lost).
2.5 Lille—The Open City
At the urging of its citizens, Lille was declared an Open City. Joffre was displeased by this decision which meant he could not defend the city properly. As an option, players can ignore this rule.
Any Allied units defending in Lille (15.26) have their defense strength halved and get no benefit from the major city terrain. Once the Germans take the city, it becomes a normal major city hex for the rest of the game.
2.6 Foch
Foch is treated as any other HQ, except for the following. Foch has no replacement points of his own. He applies his 1 rating as a modifier to the replacement rate of all French HQs to which Foch can trace a command radius. Foch has this ability both as AD-Foch and as C-n-C (i.e. both sides of the counter).
2.7 French Railway Restrictions
The French, while they planned an advance into Alsace-Lorraine, did not apply the kind of logistical staff planning to their effort that the Germans did in the Schlieffen Plan (which itself was underdeveloped logistically).
The French cannot use railroads in Luxembourg, Alsace, Lorraine, or Germany-proper. They can control such hexes so as to deny them to the Germans, but cannot use such railroads for their own trains or supply trace. They can use those in Belgium (when French units are allowed to enter Belgium).
2.8 French Doctrine Line Restrictions
Historically, the French National doctrine revolved around their attacks into Alsace-Lorraine. As such, they were doctrinally inhibited from shifting forces to deal with the German right-wing advance.
2.8a The French Doctrine Line (FDL) is marked on the map following the boundary between the armies committed to the French offensive and those free to deal with the German advance.
2.8b French units to the east of the line must stay east of the line. French units west of the line must always stay west of the line. French trains and taxis can cross the line freely, but their cargo must follow the normal rule. Reinforcements must stay on the side of the line they enter on. French units can be reconstituted west of the line regardless of where they were destroyed, given that the HQ doing the rebuilding is west of the line.
2.8c French units can attack German units across the line, but cannot advance after combat into such hexes. They cannot, however, overrun hexes on the wrong side of the line.
2.8d The FDL has no effect on British or Belgian units.
2.8e The moment a German unit crosses south of the French Panic Line (just north of Paris), the FDL ceases to exist.
2.8f The FDL does not affect supply trace or reconstitution trace functions.
Design Note: Players will initially rebel against this rule (well, at least the Allied player will...). It's effects are important and the player must learn to live with them. Do not concentrate your attention on how much you'd like to shift forces west, but can't because of "that dumb rule..." Instead, use everything you have in a no-holds-barred offensive into Alsace-Lorraine. Additionally, make use to the few HQs you get west of the line to rebuild units there (this results in a slow shift of units from east to west).
3.0 German Special Rules
3.1 Forced Marches
German infantry with the White Box around their unit values can operate as Exploit Capable units until turn 8. After that turn, these units revert to normal non-exploit capable infantry.
All other German infantry can execute Exploit Capable movement (they are not considered exploit-capable for advance after combat purposes) using either Reserve or the following die roll. Roll one die per stack of German infantry not in an EZOC during the Exploitation Phase. On a 5 or 6, the stack can move fully during that Exploit Phase. On any other roll that stack moves at 1/2 as per 1.1b if otherwise qualified.
Turns 1 through 8 are colored grey on the Turn Record Track as a reminder of these rules.
3.2 Emmich's Assault Force
Emmich's force was a special combined arms group based around infantry brigades drawn from several corps. These units have the "arrow" assault symbol as well as the identify "EM" on the right side of the counter. These troops were to take advantage of special infiltration techniques to take the Belgian fortifications by surprise.
3.2a Assault units ignore all EZOC MP costs.
3.2b Assault units are x2 in the attack against any hex containing a fortress unit. These units also affect the die roll on the Siege Gun Table for siege gun fires upon fortresses. Assault units, if any involved in a combat (attacker or defender) are the first to take step losses (an exception to the usual rule requiring the strongest units to take the first loss).
3.2c Assault units shift any combat against a non-fortress hex one column right on the combat table (or one column left if defending).
3.2d These units cannot be reconstituted or refitted (all step losses are permanent).
3.3 Siege Guns
Just in case Emmich failed to take out key Belgian fortresses (as he did), the Germans brought in a siege train of super-heavy artillery. It was composed of a 30.5 cm Skoda howitzer and 42 cm Krupp howitzer (Big Betha). Since the fortresses were only designed to stand bombardment by 21 cm guns, the German siege train had little difficulty in reducing them.
3.3a Siege guns have no attack or defense strength and no ZOC. They cannot move into an EZOC unless another German unit exists in that hex. The siege guns can only use their MA along railroad hexes. If they are ever in an EZOC without another German combat unit (not the other siege gun...), they are automatically destroyed. If forced to retreat off the railroad, they are also destroyed.
3.3b Each siege gun can attack one fortress during the Combat Phase using the Siege Gun Table. Each gun can attack one fortress hex if it is adjacent to the fortress and both guns can attack the same hex in one turn (separately) if desired. Cross index the gun type with the fortress defense strength and roll one die on the table. If the roll is equal to or greater than the number listed, reduce the fortress by one step. Siege guns have no effect on normal enemy combat units that happen to be in the fortress hex and resolve any siege gun attacks on the hex before any normal attacks against that hex (a fortress hex can be subject to both kinds of attacks in a single Combat Phase).
3.4 Transfers to the Eastern Front
When the Russians launched a major offensive against the 8th Army in East Prussia a month earlier than the Germans thought possible, the Supreme Command panicked and sent two corps of infantry and a cavalry division from the west to help. Ludendorff, Chief of Staff of the 8th Army, didn't feel the troops were needed and in fact they arrived too late to take part in the subsequent Battle of Tannenburg.
On Turn 6, remove from play four 6-8-6 infantry divisions (2 steps each) and one 3-4-8 cavalry division (also 2 step) from the map. All units must be in play, full strength, and not in an EZOC. These units never return to the game. If the player chooses to ignore this transfer (all of it) or cannot or does not execute it entirely, give the French player 5 VPs.
3.5 Violating the Dutch and Strengthening the Right... (optional)
Historically, the Germans revised Schlieffen's plan to keep from forcing the Dutch into the war (this necessitated a longer march for the right wing armies as well as more heavily congested roads). Also, the Germans were unable to fill out the Order of Battle wish-list Schlieffen proposed in the original plan. While this "watering-down" of the plan has been over-emphasized, the combination of these two features is easy to show in the game. The Dutch army was well respected by the Germans and any "extra" troops provided would have had to be dedicated to cornering the Dutch off the north map edge. This option allows the player to do both, which (in practical terms) means that the Germans can use the few hexes of The Netherlands on the map. (The extra troops are off fighting the Dutch, out of the player's reach.)
3.5a The Germans can freely enter any hex of The Netherlands. Allied Troops cannot enter these hexes.
3.5b The Germans give the Allies 5 VPs for this option.
4.0 Basic Scenario Rules
4.0a First the French player, then the German, sets up his Mobilization Point markers before any units are set up.
4.0b The German Player Turn is always first.
4.0c The Allied Player always sets up first.
4.0d A unit placement with the notation "(r)" means the unit sets up reduced.
4.0e Some units are scheduled to arrive in a specific HQ hex. If that HQ has been destroyed or is out of supply at the moment a unit is slated to arrive there, the reinforcement is lost and never arrives.
4.0f If no port exists for British units to arrive, the British units arrive at 1.11 instead.
4.0g Set up lines are always inclusive of the line itself, unless stated explicitly otherwise.
5.0 Scenarios
5.1 Introductory Scenario: Drive on Paris
This short scenario serves as an introduction to the SCS and this game. It dispenses with a lot of the special rules allowing you to become familiar with the combat and replacement systems.
General Information: First Turn: 6. Last Turn: 8. Game Length: 3 turns. Map Area: All hexes south of xx.30 and west of 30.xx. The French Doctrine and Panic Lines do not apply to this scenario.
British Set Up: 19.21: 3/II (r), 4/III, 1/Cav; 20.20: 5/II, 2/Cav; 22.21: 1/I, 2/I (r); with any of the above: BEF HQ (4-1-8).
French Set Up: 3.25: FM Bde; 4.27: Calais Fort (strength 4); 9.30: Dunkerque Fort (strength 4); 10.22: 81 Ter, 82 Ter (r); 13.05: Paris-SW Fort (strength 8); 13.06: Paris-NW Fort (strength 8); 13.22: 61 Res/GpEb, 62 Res/GpEb; 14.04: Paris-S Fort (strength 8); 14.06: Paris-N Fort (strength 16); 15.05: Paris-SE Fort (strength 8); 15.06: Paris-NE Fort (strength 16); 16.05: Paris-E Fort (strength 10); w/i 1 16.21: 84 Ter; 17.20: 1/1 Cav (r), 3/1 Cav (r), 5/1 Cav (r); 23.22: 53 Res/4 Res, 69 Res/4 Res; 23.24: Maubeuge Fort (strength 16); 25.22: 35/XVIII (r), 36/XVIII; 26.22: 5 Army HQ (Lanrezac side), 5/III (r), 6/III (r), 38 Alg; 27.19: 4 Cav Div; 27.22: 19/X (r), 20/X (r), 37 Alg; 28.19: 17/IX; 28.22: 1/I (r), 2/I; 29.19: 9 Cav Div; 29.22: 51 Res/4 Res; 30.19: 52 Res Inf Div.
German Set Up: 17.26: 2/2 Cav (r); 18.24: 4/2 Cav, 9/2 Cav; 19.25: 3/II, 4/II; 20.24: 7/IV (r), 8/IV (r); 20.25: 7 Res/4 Res, 22 Res/4 Res; 21.24: 5/III (r), 6/III; 22.24: 1 Army HQ, 17/IX (r), 18/IX; 24.22: 10 Ldw Bde, 11 Ldw Bde; 24.23: 13/VII, 14/VII; 24.24: 13 Res/7 Res, 14 Res/7 Res; 24.25: PrGd/1 Cav, 5/1 Cav; 25.24: 19/X (r), 20/X; 25.25: 2 GdR/10 Res (r), 19 Res/10 Res; 26.24: 2 Army HQ, 1 Gd/Gd, 2 Gd/Gd; 27.24: 23 Res/12 Res; 28.24: 23/XII, 32/XII (r); 29.24: 24/XIX, 40/XIX; 29.28: 27 Ldw Bde; 30.25: 3 Army HQ, 24 Res/12 Res, 47 Ldw Bde; 30.28: 25 Ldw Bde, 29 Ldw Bde, Krupp, Skoda.
Special Rules: 1) Normal supply rules apply, with the following: Allied Supply Source: Paris; German Supply Source: Brussels. 2) Allied units cannot enter Brussels.
Victory: The Germans win if it has twice as many divisions south of xx.15 (exclusive) as the Allies do north of xx.15 (inclusive). These divisions need not be full strength or supplied. Do not count any divisions available for rebuilding. If the Germans do not have twice the Allied number, the Allies win.
5.1 Reinforcements — Allied:
- Turn 6, with BEF HQ: British: 19 Inf Bde.
- Turn 7: 10.11: 6 Army HQ, 14/VII, 63 Res/1 Res; 14.05: 55 Res/3 Res, 56 Res/3 Res; 19.01: 45 Alg Div, Mor Bde, 6/2 Cav; 27.13: 42 Gros Div, 1 Mor Div; w/i 2 30.13: AD-Foch HQ, 21/XI (r), 22/XI (r), 60 Res Div.
- Turn 8: British: Upgrade BEF HQ to 4-2-8; 19.01: 8/IV; 30.02: 10/2 Cav; Flip Lanrezac to d'Esperey side.
- If the Germans have occupied a needed entry hex, the reinforcements enter at 14.05 (Paris).
5.1 Reinforcements — German: There are no German reinforcements, only reconstitution.
5.2 La Revanche (The Revenge)
For 43 years, the French had longed for "la Revanche": the day when they could reclaim the provinces of Alsace and Lorraine that Germany annexed in 1871. On August 14th, they launched a full scale offensive against the German armies holding the lost provinces.
General Information: First Turn: 3. Last Turn: 8. Game Length: 6 turns. Map Area: All hexes south of xx.20 and east of 43.xx.
French Set Up: 43.10: Toul Fort (strength 18), 68 Res/2 Res, 73 Res/Toul; 44.09: 59 Res/2 Res; 46.10: 2 Army HQ, 17/IX, 18/IX, 70 Res/2 Res; 46.11: 11/XX, 39/XX, 2 Col Bde; 47.11: 29/XV, 30/XV; 48.10: 31/XVI, 32/XVI; 49.06: Epinal Fort (strength 18), 1 Army HQ, 71 Res/Epinal; 49.12: 2/2 Cav; 50.06: Epinal NE Fort (strength 14); 50.10: 15/VIII, 16/VIII; 50.11: 10/2 Cav; 51.09: 25/XIII, 26/XIII; 51.10: 6/2 Cav; 53.06: 27/XIV; 53.07: 28/XIV; 53.11: 13/XXI; 54.04: 41/VII; 54.08: 43/XXI; 55.01: Belfort Fort (strength 20), Army of Alsace HQ, Chas Bde, 57 Res/Belfort; 56.01: 14/VII; 58.02: 8 Cav.
German Set Up: 43.18: Thionville Fort (strength 8); 44.14: Metz-S (strength 4); 44.15: Metz Fort (strength 12); 44.16: Metz-N Fort (strength 12); 45.15: Metz-SE Fort (strength 8), 7/3 Cav, 8/3 Cav; 45.16: Metz-NE Fort (strength 8); 47.15: 5 Bav/III, 6 Bav/III; 49.15: 3 Bav/II Bav, 4 Bav/II Bav; 49.16: 6 Army HQ; 50.13: Bav/3 Cav; 50.14: 31/XXI, 42/XXI; 52.13: 1 Bav/I Bav, 2 Bav/I Bav; 55.12: 28/XIV; 56.10: 30/XV; 58.07: 39/XV; 59.04: 29/XIV; 59.07: N.Breisach Fort (strength 4); 59.13: Straasburg Fort (strength 30), 7 Army HQ, 26 Res/14 Res, 28 Res/14 Res, 30 Res/Strassburg, 55 Ers Bde.
5.2 Reinforcements — Allied:
- Turn 4: 49.03: 58 Res/1 Res; 52.01: 63 Res/1 Res; 55.01: 66 Res/1 Res, 44 Alp.
- Turn 5: 43.07: 64 Res, 74 Res; Remove: 17/IX.
- Turn 6: Remove: Army of Alsace HQ, 14/VII, 63 Res/1 Res, 6/2 Cav.
- Turn 7: Remove: 29/XV, 30/XV, 13/XXI, 43/XXI, 10/2 Cav.
- Turn 8: Remove: 18/IX, 2/2 Cav.
5.2 Reinforcements — German:
- Turn 4: 44.15: 33 Res/Metz; 51.17: 1 Bav Res/1 BavR, 5 Bav Res/1 BavR; 59.13: B.Ers, 6 B.Ldw, 19 Ers, 60 Ldw Bde; 63.19: Gd Ers.
- Turn 5: 49.17: 4 Ers, 8 Ers, 10 Ers, 5 B.Ldw Bde; Remove: 33 Res/Metz.
- Turn 6: Remove: 8/3 Cav.
- Remove from play any units called on to be removed, regardless of their status at the time.
Victory: At the end of the scenario both players receive 1 VP for each enemy division destroyed (count those which have not been reconstituted by the end of the scenario). In addition, award the listed points for each of the following locations: 5 Points: Nancy, Saarbourg. 2 Points: Boulay, Chateau Salins, Colmar, Luneville, Molsheim, Morhange, Mulhouse, St. Avold, St. Die. 1 Point: 54.04, 55.04, 46.10, 46.11, 47.11.
Subtract the lower amount from the greater (between the two sides) and award the level of victory below to the player with the higher total.
| Differential | Victory Level |
|---|---|
| 6 or more | Major Victory |
| 3 to 5 | Minor Victory |
| 0 to 2 | Draw |
5.3 Home Before the Leaves Fall
Opening with Joffre ordering the ill-fated offensive into the Ardennes, this scenario covers the time period in which the Schlieffen Plan was to have brought France to her knees. Instead, the Germans were defeated by a revitalized foe in the Battle of the Marne and had to retreat to the Aisne River.
General Information: First Turn: 5. Last Turn: 12. Game Length: 8 turns. Map Area: All west of 44.xx. The French Doctrine and Panic Lines apply to this scenario.
Belgian Set Up: 23.33: Ant-4 Fort (strength 6); 23.34: Ant-5 Fort (strength 6); 23.35: Ant-6 Fort (strength 4); 24.33: Ant-3 Fort (strength 8); 24.34: Antwerp Fort (strength 14); w/i 1 24.34: Bel Army HQ, 1/Bel (r), 2/Bel, 3/Bel, 5/Bel, 15/5 Bde, 6/Bel, 1 Cav/Bel (r); 25.34: Ant-2 Fort (strength 8); 25.35: Ant-1 Fort (strength 12); 29.28: Namur Fort (strength 12), 4/Bel. Turn 9 Reconstitution (on Turn Record Track): 8/3 Bde.
British Set Up: 12.24: 4/III; w/i 1 19.24: BEF HQ (4-1-8 side), 1/I, 2/I, 3/II, 5/II, 1/Cav, 2/Cav.
French Set Up: 1.11: FM Bde; 4.27: Calais Fort (strength 4); 9.30: Dunkerque Fort (strength 4); 10.16: 61 Res/GpEb, 62 Res/GpEb; 11.26: 81 Ter; 13.05: Paris-SW (strength 8); 13.06: Paris-NW (strength 8); 14.04: Paris-S (strength 8); 14.06: Paris-N (strength 16); 15.05: Paris-SE (strength 8); 15.06: Paris-NE (strength 16); 15.23: 82 Ter; 15.26: 88 Ter; 16.05: Paris-E Fort (strength 10); 18.21: 84 Ter; 23.24: Maubeuge Fort (strength 16); 24.23: 53 Res/4 Res, 69 Res/4 Res; 24.25: 1/1 Cav, 3/1 Cav, 5/1 Cav (r); 25.25: 35/XVIII, 36/XVIII; 27.22: 5 Army HQ (Lanrezac side); 27.26: 5/III, 6/III; 28.22: 37 Alg, 38 Alg; 28.26: 19/X, 20/X; 29.24: 51 Res/4 Res; 30.20: 52 Res, 60 Res; 30.25: 1/I, 2/I; 32.21: 4 Cav; 33.20: 21/XI, 22/XI; 33.21: 9 Cav; 34.19: 33/XVII, 34/XVII; 35.18: 4 Army HQ; 35.19: 2 Col, 3 Col/Col, 5 Col Bde/Col; 36.18: 23/XII, 24/XII; 37.18: 3/II, 4/II; 38.14: Verdun Fort (strength 20), 3 Army HQ (Ruffey side), Army of Lorraine HQ, 65 Res, 72 Res, 75 Res; 38.17: 7/IV, 8/IV; 39.15: Ver-NE (strength 18); 39.16: 54 Res/3 Res, 67 Res; 39.18: 9/V, 10/V; 40.14: 55 Res/3 Res, 56 Res/3 Res; 40.17: 12/VI, 40/VI, 42 Gros; 42.14: 7 Cav; 43.10: Toul Fort (strength 18); 44.10: 17/IX, 1x Train; 30.27: 22/XI, 38/XI; 30.28: 1 GdR/GdR, 3 GdR/GdR, Krupp, Skoda; 30.29: PrGd/1 Cav, 5/1 Cav; 31.26: 23/XII, 32/XII; 32.25: 24/XIX, 40/XIX; 33.24: 15/VIII, 16/VIII; 34.26: 3 Army HQ, 23 Res/12 Res, 24 Res/12 Res; w/i 1 34.30: 10 Ldw, 11 Ldw, 25 Ldw, 27 Ldw, 29 Ldw Bde; 35.23: 21/XVIII, 25/XVIII; 36.20: 11/VI, 12/VI; 36.21: 21 Res/18 Res, 25 Res/18 Res; 37.20: 3/4 Cav; 37.24: 4 Army HQ, 15 Res/8 Res, 16 Res/8 Res; 37.27: 47 Ldw Bde; 38.19: 9/V, 10/V; 39.20: 26/XIII, 27/XIII; 41.20: 11 Res/6 Res, 12 Res/6 Res; 42.17: 6/4 Cav; 42.18: 33/XVI, 34/XVI; 42.19: 9 Res/5 Res, 10 Res/5 Res; 43.18: Thionville Fort (strength 8); 43.21: 5 Army HQ; 44.14: Metz-S Fort (strength 4); 44.15: Metz Fort (strength 12), 33 Res/Metz; 44.16: Metz-N Fort (strength 12). Railheads: 28.31, 30.27, 30.28, 43.15.
German Set Up: 23.29: 7/IV, 8/IV; 23.31: 2/2 Cav; 24.29: 5/III, 6/III; 25.29: 17/IX (r), 18/IX; 25.32: 3/II (r), 4/II; 26.28: 13/VII, 14/VII; 27.28: 4/2 Cav, 9/2 Cav; 27.29: 19/X, 20/X; 27.33: 5 Res/3 Res, 6 Res/3 Res; 28.28: 1 Gd/Gd, 2 Gd/Gd; 28.29: 2 GdR/10 Res, 19 Res/10 Res; 28.31: 1 Army HQ, 7 Res/4 Res, 22 Res/4 Res; 29.31: 2 Army HQ, 13 Res/7 Res, 14 Res/7 Res.
5.3 Reinforcements — Allied:
- Turn 6, with BEF HQ: British: 19 Bde. French: 19.01: 1 Mor; 44.10: 6/2 Cav, 1x Train.
- Turn 7, French: 19.01: 45 Alg, Mor Bde, 1x Train; 44.03: 14/VII, 63 Res/1 Res; 44.10: 10/2 Cav; 4 Army HQ: AD-Foch HQ; Flip Lorraine HQ to 6 Army HQ; Flip 3 Army HQ (Ruffey) to 3 Army HQ (Sarrail).
- Turn 8, British: Flip BEF HQ to 4-2-8 side. French: 44.03: 13/XXI, 43/XXI; 44.10: 18/IX, 29/XV, 30/XV, 2/2 Cav; Flip 5 Army HQ (Lanrezac) to 5 Army HQ (d'Esperey).
- Turn 9, Belgian: 24.34: Arm Car. French: 14.05: Paris Taxis; Replace Ad-Foch with 9 Army HQ.
- Turn 11, British: 1.11: 6/III. French: 1.11: 1x Train; 19.01: 2 Mor, Spahi Bde, 1x Train; 44.08: 25/XIII, 26/XIII.
5.3 Reinforcements — German:
- Turn 5: 44.33: AD-Bes HQ, Mar Div, 2 Ers, 33 Ldw, 34 Ldw, 37 Ldw, 38 Ldw Bde, 2x Trains; 44.15: 2 Ldw, 43 Ldw, 45 Ldw Bde; 44.22: 49 Ldw Bde.
- Turn 6: Apply rule 3.4 withdrawals.
- Turn 10: 44.15: Army Det C HQ, 5 Bav/III Bav, 6 Bav/III Bav, Bav Ers, GdErs, 10 Ers; 44.26: 4 Ers, 1x Train; 44.33: 17 Res/9 Res, 18 Res/9 Res, 1x Train.
- Turn 11: 44.15: 7 Army HQ, 30/XV, 39/XV, 7/3 Cav, 1x Train.
- Turn 12: 44.15: 6 Army HQ, 1 Bav/I Bav, 2 Bav/I Bav, 3 Bav/II Bav, 4 Bav/II Bav.
5.4 From the Marne to the Sea
The victorious German Army pursued the Allies across the Marne only to find themselves flanked by the French. The German retreat to the Aisne initiated the "Race to the Sea" as both sides attempted to outflank the other all the way to the English Channel.
General Information: First Turn: 9. Last Turn: 20. Game Length: 12 turns. Map Area: All west of 44.xx. FDL and French Panic Line do not apply (panic has already been triggered).
Belgian Set Up: 23.33: Ant-4 Fort (strength 6); 23.34: Ant-5 Fort (strength 6); 23.35: Ant-6 Fort (strength 4); 24.33: Ant-3 Fort (strength 8), 2/Bel; 24.34: Antwerp Fort (strength 14); w/i 1 24.34: Bel Army HQ, 1/Bel, 3/Bel, 6/Bel, 1 Cav/Bel; 25.34: Ant-2 Fort (strength 8), 5/Bel, 15/5 Bde/Bel; 25.35: Ant-1 Fort (strength 12). Turn Record Track (for reconstitution): Turn 11: 8/3 Bde/Bel; Turn 16: 4/Bel.
British Set Up: 17.03: BEF HQ (4-2-8 side); 18.06: 4/III, 19 Bde; 19.06: 3/II, 5/II; 20.05: 1/I, 2/I; 21.05: 1/Cav. Turn Record Track (for reconstitution): Turn 9: 2/Cav.
French Set Up: 2.10: 81 Ter, 82 Ter, 84 Ter (r), 88 Ter (r); 4.27: Calais Fort (strength 4); 9.30: Dunkerque Fort (strength 4); 10.06: 62 Res/GpEb; 10.11: FM Bde; 12.04: 4 Cav, 5/1 Cav (r), 6/2 Cav; 13.05: Paris-SW Fort (strength 8); 13.06: Paris-NW Fort (strength 8), 8/IV; 13.08: 61 Res/GpEb; 14.04: Paris-S Fort (strength 8); 14.06: Paris-N Fort (strength 16); 14.07: 45 Alg, Mor Bde; 15.05: Paris-SE Fort (strength 8); 15.06: Paris-NE Fort (strength 16); 15.07: 6 Army HQ; 16.05: Paris-E Fort (strength 10); 16.08: 14/VII, 63 Res/1 Res; 17.08: 55 Res/3 Res, 56 Res/3 Res; 18.01: 7/IV; 22.05: 1/1 Cav (r), 3/1 Cav (r), 10/2 Cav; 23.06: 37 Alg, 35/XVIII, 36/XVIII; 23.24: Maubeuge Fort (strength 8); 24.06: 38 Alg, 5/III, 6/III; 25.06: 51 Res/4 Res (r), 53 Res/4 Res (r), 69 Res/4 Res (r); 25.07: 1/I, 2/I; 26.04: 5 Army HQ (d'Esperey side); 26.07: 19/X, 20/X; 27.08: 42 Gros, 1 Mor; 28.08: 17/IX, 21/XI, 52 Res; 29.06: AD-Foch HQ; 29.08: 22/XI, 60 Res; 30.02: 18/IX; 30.08: 9 Cav; 31.09: 33/XVII, 34/XVII; 32.08: 23/XII, 24/XII; 33.09: 2 Col/Col, 3 Col/Col, 5 Col Bde/Col; 34.04: 4 Army HQ; 34.09: 3/II; 35.10: 4/II; 36.06: 13/XXI, 43/XXI; 36.10: 9/V; 37.11: 10/V; 37.12: 12/VI; 37.13: 40/VI; 37.14: 72 Res; 38.14: Verdun Fort (strength 20); 39.09: 3 Army HQ (Sarrail); w/i 2 39.11: 54 Res/3 Res (r), 65 Res (r), 67 Res (r), 75 Res (r); 39.15: Ver-NE Fort (strength 18); 40.08: 29/XV, 30/XV; 40.12: 7 Cav; 42.11: 2/2 Cav; 43.07: 1x Train; 43.10: Toul Fort (strength 18); 30.10: 3 Army HQ, 24/XIX, 40/XIX; 31.11: 15/VIII, 16/VIII; 32.10: 21/XVIII, 15 Res/8 Res, 16 Res/8 Res; 32.12: 4 Army HQ, 3/4 Cav, 6/4 Cav, 49 Ldw Bde; 33.11: 25/XVIII, 21 Res/18 Res, 25 Res/18 Res; 34.11: 11/VI, 12/VI; 35.15: 5 Army HQ, 11 Res/6 Res, 12 Res/6 Res; 35.12: 26/XIII, 27/XIII; 35.13: 33/XVI, 34/XVI; 36.15: 9 Res/5 Res; 37.16: 10 Res/5 Res; 40.15: 9/V; 41.14: 10/V.
German Set Up: 18.09: 7 Res/4 Res, 22 Res/4 Res; 19.08: 2/2 Cav, 9/2 Cav; 20.07: 3/II, 4/II; 21.07: 7/IV, 8/IV; 21.11: 1 Army HQ, 4/2 Cav (r); 22.07: 5/III, 6/III; 22.23: 14 Res/7 Res; 23.08: 17/IX, 18/IX; 23.09: PrGd/1 Cav, 5/1 Cav; 24.09: 13/VII, 14/VII; 24.24: 13 Res/7 Res, Krupp, Skoda; w/i 2 24.30: AD-Bes HQ, Mar Div, 2 Ers Bde, 33 Ldw Bde, 34 Ldw Bde, 37 Ldw Bde, 38 Ldw Bde, 2x Trains; 25.10: 2 GdR/10 Res, 19 Res/10 Res; 25.32: 5 Res/3 Res; 26.10: 19/X, 20/X; 26.32: 6 Res/3 Res; 27.10: 2 Army HQ, 1 Gd/Gd, 2 Gd/Gd; 27.13: 23 Res/12 Res, 24 Res/12 Res, 47 Ldw Bde; 28.10: 23/XII, 32/XII; 43.18: Thionville Fort (strength 8); 44.14: Metz-S Fort (strength 4); 44.15: Metz Fort (strength 12); w/i 1 44.15: 33 Res, 2 Ldw, 43 Ldw Bde, 45 Ldw Bde; 44.16: Metz-N Fort (strength 12). In any town or city west of 29.xx, in any German controlled RR Hex: 10 Ldw Bde, 11 Ldw Bde, 25 Ldw Bde, 27 Ldw Bde, 29 Ldw Bde. German Railheads: 13.14, 13.17, 13.18, 13.23, 14.26, 15.27, 16.11, 17.10, 19.08, 22.23, 22.25, 22.30, 24.08, 24.24, 25.32, 26.32, 29.10, 30.10, 35.13, 36.15, 43.13.
Victory: If the Allies have cut the German rail connection to the Marne at the end of the game, they win. The line is cut if the Allies have units occupying a hex blocking the line's connect north.
5.4 Reinforcements — Allied:
- Turn 9, Belgian: 24.34: Arm Car. French: 14.05: Taxis/Buses (first time); Convert AD-Foch HQ to 9 Army HQ.
- Turn 11, British: 1.11: 6/III. French: 1.11: 1x Train; 19.01: 2 Mor, Spahi Bde, 1x Train; 44.08: 25/XIII, 26/XIII.
- Turn 13, French: 44.10: 2 Army HQ, 27/XIV, 28/XIV, 11/XX, 39/XX.
- Turn 15, British: 9.30: 1/Nav, 2/Nav; 14.33: RM/Nav. French: 44.08: 70 Res/2 Res, 77 Res, 8 Cav; with 2 Army HQ: 10 Army HQ.
- Turn 16, French: with 6 Army HQ: 137 Bde/Klein, 138 Bde/Klein; Convert 9 Army HQ to CnC Foch HQ.
- Turn 17, British: 14.33: 7/IV, 3/Cav. French: 9.30 or 14.05: 87 Ter, 89 Ter; any hex of Paris: Taxis/Buses (second time); 44.03: 58 Res/1 Res.
- Turn 18, Belgian: with Belgian Army HQ: 2 Cav.
- Turn 20, British: 19.01: 3 La/Ind. French: At Bel HQ: AD-Bel HQ (back side of Alsace HQ).
5.4 Reinforcements — German:
- Turn 10: 44.15: Army Det C HQ, 5 Bav/III Bav, 6 Bav/III Bav, B.Ers, GdErs, 10 Ers; 44.26: 4 Ers, 1x Train; 44.33: 17 Res/9 Res, 18 Res/9 Res, 1x Train.
- Turn 11: 44.15: 7 Army HQ, 30/XV, 39/XV, 7/3 Cav, 1x Train.
- Turn 12: 44.15: 6 Army HQ, 1 Bav/I Bav, 2 Bav/I Bav, 3 Bav/II Bav, 4 Bav/II Bav.
- Turn 13: 44.15: 31/XXI, 42/XXI, 26 Res/14 Res, 28 Res/14 Res.
- Turn 15: 44.15: 1 BavR/I BavR, 5 BavR/I BavR, Bav/3 Cav.
- Turn 16: 44.15: 28/XIV, 29/XIV.
- Turn 18: 44.33: 43 Res/22 Res, 44 Res/22 Res, 45 Res/23 Res, 46 Res/23 Res, 51 Res/26 Res, 52 Res/26 Res, 53 Res/27 Res, 54 Res/27 Res.
5.5 In Flanders' Fields
This was the last German attempt to break the Allied line in 1914. Newly raised and poorly trained Reserve Corps were thrown into the attempt to take the Channel ports. In holding the Ypres salient, the BEF brought the German offensive to a bloody end, but also lost much of the remaining pre-war regular army personnel.
This scenario is an intro to the effect of a solid trenchline on play. It is useful in practicing how to break a trenchline, but is not recommended for normal play as it is very static, but then again, simulating trench warfare should be.
General Information: First Turn: 20. Last Turn: 25. Game Length: 6 turns. Map Area: North of xx.20 and west of 20.xx (inclusive).
Belgian Set Up: 10.30: Bel Army HQ, 3/Bel (r), 6/Bel (r), 2 Cav/Bel, Arm Car; 11.29: 5/Bel (r); 11.30: 4/Bel (r), 1 Cav/Bel (r); 11.31: 1/Bel (r), 2/Bel (r).
British Set Up: 11.27: BEF HQ (4-2-8 side); 13.25: 3/II, 5/II; 13.26: 4/III, 6/III, 19 Bde; 13.27: 1/Cav, 2/Cav, 3/Cav; 13.28: 1/I, 2/I, 7/IV.
French Set Up: 3.25: 42 Gros; 4.27: Calais Fort (strength 4); 9.30: Dunkerque Fort (strength 4), 81 Ter; 10.22: 10 Army HQ; 10.26: CnC Foch HQ; 11.28: 4 Cav, 5/1 Cav, 6/2 Cav; 12.28: 17/IX, 18/IX, 7 Cav; 12.29: 87 Ter, 89 Ter, FM Bde; 13.20: 21/XI, 22/XI; 13.21: 8 Cav; 13.22: 19/X, 20/X; 13.23: 1 Mor, 70 Res/2 Res, 77 Res; 13.24: 13/XXI, 43/XXI.
German Set Up: 12.30: 43 Res/22 Res, 44 Res/22 Res; 12.31: 5 Res/3 Res, 6 Res/3 Res, Mar; 13.29: 51 Res/26 Res, 52 Res/26 Res; 13.30: 45 Res/23 Res, 46 Res/23 Res; 14.20: 26 Res/14 Res, 28 Res/14 Res; 14.21: 1 Gd/Gd, 2 Gd/Gd; 14.22: 7/IV, 8/IV; 14.23: 1 BavR/1 BavR, 5 BavR/1 BavR; 14.24: 28/XIV, 29/XIV; 14.25: 13/VII, 14/VII; 14.26: 24/XIX, 40/XIX; 14.28: 53 Res/27 Res, 54 Res/27 Res; 15.23: 6 Army HQ; 15.27: 26/XIII, 27/XIII; w/i 1 15.28: 2/2 Cav, 4/2 Cav, PrGd/1 Cav, 5/1 Cav, 3/4 Cav, 6/4 Cav; w/i 1 16.30: 4 Army HQ, 4 Ers, 2 Ers Bde, 37 Ldw Bde, 38 Ldw Bde.
Special Rules: 1) All units setting up in an EZOC are entrenched. 2) The German supply source is any east edge RR hex.
Victory: Allied Major Victory: Capture Lille. Allied Minor Victory: Capture more of the German trench hexes than you lose of your own. German Minor Victory: Capture more of the Allied trench hexes than you lose of your own. German Major Victory: Capture Calais. Draw: Any result other than the above.
5.5 Reinforcements — Allied:
- Turn 20, British: 5.20: 3 La/Ind. French: at Bel HQ: AD-Bel HQ (back of Alsace HQ); w/i 3 8.20 along south edge: 31/XXI, 9 Cav.
- Turn 22, British: 5.20: 7 Me/Ind, Sec Cav Bde/Ind. French: w/i 3 8.20 along south edge: 32/XVI, 38 Alg.
- Turn 24, French: w/i 3 8.20 along south edge: 11/XX, 39/XX.
- Turn 25, French: w/i 3 8.20 along south edge: 26/XIII, 44 Alp, Mor Bde.
5.5 Reinforcements — German:
- Turn 22: 17.20: 3 Bav/II Bav, 4 Bav/II Bav, 25/XVIII; 20.20: 30/XV, 39/XV.
- Turn 23: 20.20: 6 BavR.
- Turn 24: 17.20: 3/II, 4/II.
5.6 Drive on Paris (Full Campaign)
This scenario covers the entire mobile campaign to the end of the first battle of Ypres. By that time, both the French and German pre-war campaign plans had failed and the trenches established.
General Information: First Turn: 1. Last Turn: 25. Game Length: 25 turns. Map Area: All.
Belgian Set Up: 19.32: 1 Inf Div; 22.25: 5 Inf Div; 23.33: Ant-4 Fort (strength 6); 23.34: Ant-5 Fort (strength 6); 23.35: Ant-6 Fort (strength 4); 24.30: Belgian HQ (Albert), 6 Inf Div, 1 Cav Div; 24.33: Ant-3 Fort (strength 8); 24.34: Antwerp Fort (strength 14), 2 Inf Div; 25.34: Ant-2 Fort (strength 8); 25.35: Ant-1 Fort (strength 12); 29.28: Namur Fort (strength 12), 4 Inf Div; 32.28: 8/3 Inf Bde; 34.30: Liege Fort (strength 14), 15/5 Inf Bde, 3 Inf Div.
French Set Up: 4.27: Calais Fort (strength 4); 9.30: Dunkerque Fort (strength 4); 13.05: Paris-SW Fort (strength 8); 13.06: Paris-NW Fort (strength 8); 14.04: Paris-S Fort (strength 8); 14.06: Paris-N Fort (strength 16); 15.05: Paris-SE Fort (strength 8); 15.06: Paris-NE Fort (strength 16); 16.05: Paris-E Fort (strength 10); 23.24: Maubeuge Fort (strength 16); 28.16: 5 Army HQ (Lanrezac side); 30.10: 4 Army HQ; 31.20: 5/1 Cav; 32.19: 1/1 Cav; 33.20: 3/1 Cav; 35.18: 3/II; 36.17: 4/II; 38.10: 9 Cav Div; 38.14: 3 Army HQ (Ruffey side), Verdun Fort (strength 20); 39.15: Ver-NE Fort (strength 18); 39.18: 4 Cav Div; 41.12: 9/V; 41.16: 40/VI; 42.11: 7 Cav Div; 42.13: 12/VI; 43.10: Toul Fort (strength 18); 46.10: 2 Army HQ, 11/XX, 39/XX; 48.07: 15/VIII; 49.06: 1 Army HQ, Epinal Fort (strength 18); 49.11: 2/2 Cav, 10/2 Cav; 50.06: Ep-NE Fort (strength 14); 51.10: 6/2 Cav; 52.09: 13/XXI; 53.05: 41/VII; 53.07: 43/XXI; 55.01: Belfort Fort (strength 20), 14/VII, 8 Cav Div.
German Set Up: 38.32: 2/2 Cav, 4/2 Cav; 38.33: 27+34 Assault KG (EM); 39.30: 9/2 Cav, 38+43 Assault KG (EM); 39.32: 11+14 Assault KG (EM); 43.18: Thionville Fort (strength 8); 44.14: Metz-S Fort (strength 4); 44.15: 33/XVI, 34/XVI, Metz Fort (strength 12); 44.16: Metz-N Fort (strength 12); 45.15: Metz-SE Fort (strength 8); 45.16: Metz-NE Fort (strength 8); w/i 1 45.15: 7/3 Cav, 8/3 Cav; 45.20: 26/XIII, 27/XIII; 47.15: 6 Bav/III Bav; 49.15: 4 Bav/II Bav; 49.16: 6 Army HQ; 50.14: Bav/3 Cav; 51.19: 5 Army HQ; 52.13: 2 Bav/I Bav; 59.07: N.Breisach Fort (strength 4); 59.13: 7 Army HQ, 30/XV, 39/XV, Strassburg Fort (strength 30); 62.07: 29/XIV; 63.19: 28/XIV.
Victory: If either player wins a Massive Victory, apply that result. Otherwise compute the VPs below.
Allied Massive Victory: If at the end of any turn from Turn 8 or beyond there are no German units in France.
German Massive Victory: If the Germans capture Paris (hex 14.05 is the only one that counts).
Total the map VPs owned by both players (a player owns a VP hex (and the points) if his troops occupy or were the last to move through the hex). Add to the Allied player's total the number of French Plan XVII points acquired at any time in the game. Subtract the German total from the Allied and compare to the below:
| Differential | Victory Level |
|---|---|
| +20 or more | Allied Major Victory |
| +10 to +19 | Allied Minor Victory |
| -9 to +9 | Draw |
| -10 to -19 | German Minor Victory |
| -20 or less | German Major Victory |
Shift victory one level in favor of the Allies if the Germans have constructed trenches.
5.6 Reinforcements — Allied (by turn and Mobilization Point):
- Turn 2: Mob Point A: 10/V; 17/IX, 18/IX; 29/XV, 30/XV; 35/XVIII, 36/XVIII; 2 Col Bde. Mob Point B: 23/XII, 24/XII; 2 Col Inf Div, 3 Col Inf Div, 5 Col Inf Bde (Col Corps); 7/IV, 8/IV; 21/XI, 22/XI; 42 Gros Inf Div. Mob Point C: 61 Res Inf Div, 62 Res Inf Div (GpEb Corps). Mob Point D: 1/I, 2/I; 5/III, 6/III; 19/X, 20/X. Mob Point E: 16/VIII; 25/XIII, 26/XIII; 27/XIV, 28/XIV; 31/XVI, 32/XVI. Mob Point F: Alsace Army HQ (Pau). Mob Point H: 69 Res/4 Res, 51 Res/4 Res, 53 Res/4 Res; 67 Res Inf Div; 33/XVII, 34/XVII.
- Turn 3: British: BEF HQ (1 repl point side); 1/I, 2/I; 3/II, 5/II; 1/Cav, 2/Cav. Mob Point A: 59 Res/2 Res, 68 Res/2 Res, 70 Res/2 Res; 73 Res Fortress Div (Toul). Mob Point B: 72 Res Fortress Div (Verdun); 54 Res/3 Res, 55 Res/3 Res, 56 Res/3 Res. Mob Point D: 52 Res Inf Div; 60 Res Inf Div. Mob Point E: 71 Res Fortress Div (Epinal). Mob Point F: 57 Res Fortress Div (Belfort); Chas Mtn Inf Bde.
- Turn 4: British: 4/III. Mob Point F: 58 Res/1 Res, 63 Res/1 Res, 66 Res/1 Res; 44 Alp Mtn Inf Div. Mob Point G: 37 Alg Inf Div; 38 Alg Inf Div; 65 Res Inf Div; 75 Res Inf Div; 2x Trains.
- Turn 5: Mob Point B: Lorraine Army HQ (back side of 6 Army HQ (Maunoury)). Mob Point G: 64 Res Inf Div; 74 Res Inf Div. Mob Point I: 81 Ter Div; 82 Ter Div; 84 Ter Div; 88 Ter Div. Mob Point J: FM Marine Bde.
- Turn 6: British: with BEF HQ: 19 Inf Bde. Mob Point C: 1 Mor Inf Div; Remove: Alsace HQ, Lorraine HQ.
- Turn 7: Mob Point C: 45 Alg Inf Div; Mor Bde; 2x Train; AD-Foch HQ (back side of Foch 9 Army HQ); 6 Army HQ (back side of Lorraine HQ); Flip 3 Army HQ (Ruffey) to 3 Army HQ (Sarrail).
- Turn 8: British: Flip BEF HQ to 2-rated repl side; Flip 5 Army HQ (Lanrezac) to 5 Army HQ (d'Esperey).
- Turn 9: Belgian: Arm Car. Any hex of Paris: Taxis/Buses (first time); Flip AD-Foch HQ to 9 Army HQ (Foch).
- Turn 11: British: 6/III. Mob Point C: 2 Mor Inf Div; Spahi Cav Bde; 1x Train.
- Turn 12: Mob Point F: 77 Res Inf Div.
- Turn 15: British: 1 Naval Inf Bde; 2 Naval Inf Bde; RM Marine Bde. Mob Point C: 10 Army HQ.
- Turn 16: Mob Point C: 137 Inf Bde, 138 Inf Bde (Klein); Convert 9 Army HQ (Foch) to CnC HQ (Foch).
- Turn 17: British: 7/IV; 3/Cav. Mob Point C: 87 Ter Div; 89 Ter Div. Any hex of Paris: Taxis/Buses (second time).
- Turn 18: Belgian: At Bel HQ or Antwerp: 2 Cav Div.
- Turn 20: British: 3 La Inf Div (Ind Corps). French: At Bel HQ: AD-Bel HQ (back side of Alsace HQ).
- Turn 22: British: 7 Me/Ind, Sec Cav/Ind.
5.6 Reinforcements — German (by turn and Mobilization Point):
- Turn 2: Mob Point 1: 1 Army HQ; 2 Army HQ; 13/VII, 14/VII; 17/IX, 18/IX; 19/X, 20/X; PrGd/1 Cav, 5/1 Cav; Skoda Siege Gun. Mob Point 2: 3 Army HQ; 22/XI, 38/XI; 23/XII, 32/XII; 24/XIX, 40/XIX; 15/VIII, 16/VIII; 21/XVIII, 25/XVIII. Mob Point 5: 5 Bav/III Bav; 3 Bav/II Bav; 31/XXI, 42/XXI; 3/4 Cav, 6/4 Cav; 1 Bav/I Bav.
- Turn 3: Mob Point 1: 3/II, 4/II; 5/III, 6/III; 7/IV, 8/IV; 5 Res/3 Res, 6 Res/3 Res; 7 Res/4 Res, 22 Res/4 Res; 1 Gd/Gd, 2 Gd/Gd; 1 GdR/GdR, 3 GdR/GdR; 13 Res/7 Res, 14 Res/7 Res; 2 GdR/10 Res, 19 Res/10 Res; Krupp Siege Gun. Mob Point 2: 23 Res/12 Res, 24 Res/12 Res; 15 Res/8 Res, 16 Res/8 Res; 9/V, 10/V. Mob Point 4: 4 Army HQ; 21 Res/18 Res, 25 Res/18 Res; 11/VI, 12/VI. Mob Point 6: 26 Res/14 Res, 28 Res/14 Res; 30 Res Fortress Div (Strassburg); 55 Ers Bde.
- Turn 4: Mob Point 1: 10 Ldw Bde, 11 Ldw Bde, 25 Ldw Bde, 27 Ldw Bde, 29 Ldw Bde; 2x Train. Mob Point 2: 47 Ldw Bde. Mob Point 4: 9 Res/5 Res, 10 Res/5 Res; 11 Res/6 Res, 12 Res/6 Res. Mob Point 5: 1 BavR/1 BavR, 5 BavR/I BavR. Mob Point 6: B.Ers Div, 6 B.Ldw Div, 19 Ers Div, 60 Ldw Bde, 5 B.Ldw Bde. Mob Point 7: 4 Ers Div, 8 Ers Div, 10 Ers Div, Gd Ers Div. Mob Point 8: 33 Res Fortress Div (Metz).
- Turn 5: Mob Point 3: Bes HQ; Mar Marine Div; 2 Ers Bde, 33 Ldw Bde, 34 Ldw Bde, 37 Ldw Bde, 38 Ldw Bde; 2x Trains. Mob Point 4: 49 Ldw Bde. Mob Point 8: 2 Ldw Div, 43 Ldw Bde, 45 Ldw Bde.
- Turn 6: Transfers to the Eastern Front (see 3.4).
- Turn 8: Mob Point 3: 2x Trains.
- Turn 10: Mob Point 3: 17 Res/9 Res, 18 Res/9 Res. Mob Point 8: C HQ. Mob Point 6: A HQ, B HQ.
- Turn 18: Mob Point 3: 43 Res/22 Res, 44 Res/22 Res; 45 Res/23 Res, 46 Res/23 Res; 51 Res/26 Res, 52 Res/26 Res; 53 Res/27 Res, 54 Res/27 Res.
- Turn 22: Mob Point 7: 47 Res/24 Res, 48 Res/24 Res; 6 BavR Inf Div.
5.7 Alsace-Lorraine Expansion for Scenarios 5.3 & 5.4
Both scenarios 5.3 and 5.4 can be expanded with the following additional troops so that the entire campaign can be picked up from those later start points. Use all the regular campaign rules, entire map area, reinforcements and victory evaluation as per 5.6. Note that the French only get the Plan XVII VPs they get during these scenarios from where they start (no awards automatically from "earlier" actions).
For 5.3 add... French: 43.01: 64 Res, 74 Res, 1x Train; w/i 1 44.12: 73 Res; 46.10: 2 Army HQ, 18/XI; w/i 1 46.13: 59 Res/2 Res, 68 Res/2 Res, 70 Res/2 Res; 49.06: Epinal Fort (strength 18), 1 Army HQ; 49.14: 11/XX, 39/XX, 2 Col Bde; 50.06: Ep-NE Fort (strength 14); 50.13: 29/XV (r), 30/XV; w/i 1 51.13: 2/2 Cav, 6/2 Cav, 10/2 Cav; 51.14: 31/XVI (r), 32/XVI; 52.13: 15/VIII (r), 16/VIII (r); 53.13: 25/XIII, 26/XIII; 54.02: 58 Res/1 Res, 63 Res/1 Res; 54.08: 71 Res; w/i 1 54.11: 13/XXI, 43/XXI; 55.01: Belfort Fort (strength 20), Alsace HQ, 57 Res; w/i 1 55.09: 27/XIV, 28/XIV; 56.06: Chas Bde; 58.02: 44 Alp, 66 Res/1 Res; 58.03: 14/VII (r), 41/VII; 58.04: 8 Cav.
For 5.3 add... German: 45.15: Metz-SE (strength 8); 45.16: Metz-NE (strength 8); 46.15: 8/3 Cav; 47.15: 6 Bav/III Bav; 48.14: 4 Bav/II Bav, 5 Bav/III Bav; 49.15: 3 Bav/II Bav; 49.17: 4 Ers, 8 Ers, 10 Ers; 50.14: 31/XXI, 42/XXI, Bav/3 Cav; 50.15: 6 Army HQ, 7/3 Cav; 50.17: 5 Bav Ldw Bde; 52.15: 1 BavR/1 BavR, 5 BavR/1 BavR; 53.15: 1 Bav/I Bav (r), 2 Bav/I Bav; 54.13: 28/XIV, 29/XIV; 55.13: 30/XV, 39/XV; 56.10: 30 Res; 56.11: 26 Res/14 Res; 56.12: 28 Res/14 Res; 57.10: Bav Ers, 6 Bav Ldw; 57.11: 19 Ers; 58.07: 60 Ldw Bde; 58.09: 55 Ers Bde; 58.16: Gd Ers; 59.07: N.Breissch Fort (strength 4); 59.13: Strassburg Fort (strength 30), 7 Army HQ.
For 5.4 add... French: 44.12: 73 Res; 46.10: 2 Army HQ; 46.11: 59 Res/2 Res, 68 Res/2 Res; 47.11: 64 Res, 70 Res/2 Res; 48.08: 15/VIII (r), 16/VIII (r); 48.09: 74 Res (r); 48.10: 11/XX (r), 39/XX, 2 Col Bde; 49.06: Epinal Fort (strength 18), 1 Army HQ, 71 Res (r); 49.10: 31/XVI, 32/XVI; 50.06: Ep-NE Fort (strength 14); 50.09: 25/XIII, 26/XIII; 51.09: 27/XIV; 52.08: 28/XIV; 53.08: 41/VII; 55.01: Belfort Fort (strength 20); 55.03: 58 Res/1 Res; 55.05: 44 Alp; 55.07: Chas Bde; 56.01: 57 Res, 66 Res/1 Res, 8 Cav.
For 5.4 add... German: 45.14: Bav/3 Cav, 7/3 Cav; 45.15: Metz-SE Fort (strength 8); 45.16: Metz-NE Fort (strength 8); 46.23: 2x Trains; 47.13: 4 Ers, 8 Ers, 10 Ers; 48.12: 5 Bav/III Bav, 6 Bav/III Bav; 48.13: 6 Army HQ, 5 Bav Ldw Bde; 49.12: 1 BavR/1 BavR, 5 BavR/1 BavR; 49.15: Gd Ers (r); 50.11: 3 Bav/II Bav, 4 Bav/II Bav; 51.11: 31/XXI, 42/XXI; 52.10: 1 Bav/I Bav, 2 Bav/I Bav; 52.11: 7 Army HQ; 52.13: 30/XV (r), 39/XV (r), Bav Ers; 53.10: 28/XIV, 29/XIV; 54.09: 26 Res/14 Res, 28 Res/14 Res; 55.08: 30 Res; 55.09: 19 Ers; 56.07: 6 Bav Ldw; 57.06: 60 Ldw Bde; 58.03: 55 Ers Bde; 59.07: N.Breisach Fort (strength 4); 59.13: Straasburg Fort (strength 30).
Designer's Notes
Despite the common conception of World War I as a long grueling contest between heavily entrenched armies engaged in fruitless slaughter, the opening campaign was designed to keep that degeneration from happening and was not fought in that manner. In the fall of 1914, both sides believed they were about to fight a short war of maneuver reminiscent of the 1870-71 war. The French were also looking forward to a much more favorable outcome. The failure of this initial campaign, on both sides, led to the stalemate lasting until the United States entered the war. My intent was to design a game that captured the feel of this mobile campaign while challenging players to find solutions resulting in victory that would keep their men out of the trenches.
The Map
The map was based on a 1:265,000 scale map of France, Belgium, and adjoining areas my great-grandfather brought back from France in 1919. That map depicts the transportation network as it was in 1914 and is very detailed in the classification of roads and railroads. Only the major railroads and a very few minor ones are on the game map. The more minor ones only being added because of the terrain they traversed. The location of the woods and other features were derived from a set of 1:100,000 Army Mapping Service maps printed for use in WW2 as well as Michelin's tour guides of Great War battlefields and maps published in the 1920's.
The Forces
The orders of battle come from a variety of sources of which the most helpful were the memoirs of France's Marshal Foch and Germany's Prince Wilhelm, the official British history by Edmonds, and some Soviet Military Academy studies from the 1930's. Combat strength's were derived by assigning numerical values for each infantryman, cavalry trooper, machine gun, and field gun in the unit and then dividing the result so that the weakest unit would have a strength of 1. Slight adjustments were then made to reflect troop quality and cavalry doctrine. For example, the French Cavalry were not well trained or equipped to fight dismounted. The British, Belgian, and German cavalry, on the other hand, were well-equipped with machine guns and trained to fight dismounted. These variations are brought out in the defense values of these units.
Developer's Notes
This game was a blast to work on. After being scared for life by the difficult development and playtest efforts involved in Crusader and Gazala, I found Drive on Paris to be a joy. Not only was the submitted game in overall good shape (excellent OOB, map, scenarios, and special rules), but after just a little clean-up trimming (generally by eliminating a few elaborate restriction rules and streamlining the original reconstitution system) the game played wonderfully. I was greatly impressed with Al's fine work.
During testing, it became apparent that the French were far too able to shift units to face the German right wing. Looking back at the original game, I found that some of the restrictions I had eliminated were designed to fight this flow of Frenchmen. Those rules required this or that army to stay in certain positions until this or that turn (which is why I axed them). This led to the creation of the FDL rules. The FDL was designed so as to allow the player to "ooze" rebuilt units across the boundary. Further testing found that the French Panic Line was also needed as a governor to allow all bets to be off if the Germans get too close to Paris. All of this worked very well.
Originally, the game required unit rebuilds to be fed through an army HQ track system on an off-map player's aid card. I replaced this with the much more flexible system you see here with the ability of players to choose which HQ is doing the rebuild at the moment the unit comes back. This is more freedom than Al's system was designed to allow, but testing found the actual difference to be slight and players enjoyed that little bit of extra freedom.
Al's submission contained some rather extensive rules concerning the operations of the Emmich assault KG. These involved rules regarding the groups assault into Liege, rules allowing the unit to be inside the hex with the Belgian units, and rules allowing them to attack from within the hex. It was all very involved and created quite a few exceptions to series rules in order to allow the fight of this three counter group to capture one hex in the first few turns of the game. I decided this was just too much for what it was trying to do. I turned the units into regular German army units with a limited amount of special abilities. While the extra detail Al was after was lost, I think the gain in playability far more than compensates for it.
Some rules still apply to the game even though playtesting showed them to be of limited utility. The train counters are an example of this. While I once used trains to help some Landwher brigades to follow the German advance more quickly, their value in general is pretty small. More power to you if you can get more value out of them.
The freedom to violate Holland was a last minute addition (about the time I realized the pain involved in marching the Germans around that little finger of land). Checking with van Creveld's Supplying War, I decided that adding this neutral violation together with the "reinforce the right" idea would end up a wash, except that the little finger of land can be traversed.
Some material I would have wanted to add never made it out of testing. One idea I would have liked to add was the logistical unbalance and fatigue of the German Right wing by the time they approached Paris. These guys were at the end of their endurance by that point. Most of the ways I looked at dealing with this ended up being much more trouble than it was worth. The idea that came the closest was to not allow German HQs an ability (or to reduce their ability) to rebuild units forward in that wing. Defining where this would apply became a nightmare. Watching players gyrate to avoid the rules I came up with just proved to me I was barking up the wrong tree. I decided to let the issue stand, though I would have rather had a workable solution instead. At any rate, you'll find that it really doesn't make that much of a difference.
In the end, I must say I had more fun playing this little game than most any other game, from any company including my own, than I've played in the last few years. Every game provided a relaxed an enjoyable gaming experience. Both sides in every game always had numerous opportunities for attack and defense, for slugfests and mobile warfare. I hope you enjoy it as much as I did developing it.
Player's Notes
The Belgians and British
The first force the Allied player has to delay the German advance is the Belgian army. It cannot stop that advance, but must do a skillful delaying fight in Belgium to stall it as much as possible. The use of this little army must be agile. Don't wait too long in any one defensive position (or you'll be unable to get out), but don't be afraid to launch small spoiling attacks. At the same time, there are points where you can really sidetrack the German juggernaut—Liege comes to mind—and these are places where it might be useful to fight to the death. Once the German spearhead advances into France, the Belgian army can do some interesting work harassing the German right flank and in protecting the Canal ports.
While it is small and the effect on the final campaign will be marginal, don't cheat yourself of the fun of running this neat little army during those early turns of the campaign by giving their operations little attention because they seem "forlorn!"
The French
The first thing the French player must accept is the fact that there is only so much he can do west of the FDL. Feed reconstituted units there as best you can and fight the best defensive action you can there, but always keep in mind that you will win or lose the game based on how your offensive in Alsace-Lorraine does (unless you lose Paris, that is). Stall the Germans in the west using the Belgians, British, and whatever French units you get there, but don't let your inability to shift large forces there disrupt your real job of attacking in the east.
Once in the proper frame of mind, you must apply maximum pressure on the Germans just east of Metz. Attack on the east side of the Vosage Mountains as well, but that should be a minimal effort compared to the Metz area. Your goals are two-fold: 1) Tie up as many Germans as possible in this area (so they aren't part of the German offensive in the west) and 2) Capture and hold as much of the VPs the are has to offer as you can. Should the Germans drop their own offensive by rediverting resources to this area above the minimums needed, you'll have gone a long way toward stopping their major effort. If they don't reallocate (or better yet, try to ignore your efforts...), take as much of this area as your limited supply lengths will allow. The area can become a meat grinder that neither player can afford to ignore or it can be a scene of some serious French gains. Play it with all the force, energy and effort you can generate. While the French can lose the game in the west, the French win their game here.
The Germans
The first thing you, as the Germans, must deal with is the fact that you are not nearly as strong and the French are stronger than you might have thought. Your spearhead in the north and west is fragile and you must keep your HQs busy refitting as fast and efficiently as you can to keep it in the fight. At the same time, you must move as fast as possible through Belgium into northern France. This advance is one of skill, not brute force. If you get seriously hung up, fail to secure your extending lines of communications, or allow your strength to fritter away, you will be in trouble. The fact that the French can't directly shift their strength so as to be in front of you should not convince you that you have a cake walk ahead of you.
While your right is screaming for all of your energy, under no circumstances should you strip your left wing to support it. If the French player is worth his salt, he will dismember any second-rate defense screen left once all the "good units" are stripped away. Regardless of what your Right accomplishes, the French gains in this area will cause you to lose the game. But the German effort in the center and left must amount to more than a breakwater to keep the French assaults at bay, it must also endeavor to attack where possible to inflict additional losses on those same French. The defense must be active and not static. Whatever you do, don't try to ignore this front and "hope it will go away."
Historical vs. Free Mobilization Set Up
I prefer to play the game with the FDL Mob Point set up version. This allows the player some control over where the forces mobilize, but keeps the French from redirecting excessive numbers of their troops west of the FDL. Early testing showed that if the French were allowed to do this, frequently the German right wing would have a hard time even getting out of Belgium. The result was a dull draw as the Germans, halted early on, did not have very many VPs and the French, heavily deployed to the west, could not make gains in Alsace-Lorraine. Allowing players freedom within the original FDL limits made for enough flexibility to try new things, but kept the balance inherent in the original situation. I think that is the best way.
Abbreviations
AD: Army Detachment. Alg: Algerian. Alp: Alpine. Ant: Antwerp. Arm: Armored. Bav: Bavarian. Bde: Brigade. BEF: British Expeditionary Force. Bel: Belgian. Bes: Beseler. Cav: Cavalry. Chas: Chasseurs. Col: Colonial. CnC: Commander-n-Chief. Div: Division. EM: Emmich's Assault Group. Ers: Ersatz. FDL: French Doctrine Line. FM: Fusiliers Marine. Fort: Fortress. Gd: Guard. GpEb: Group Ebener. Gros: General Grossetti. Ind: Indian Army Corps. Inf: Infantry. KG: Kampfgruppe. Klein: Klein's Provisional Brigade. La: Lahorne. Ldw: Landwehr. Mar: Marine. Me: Meerut. Mob: Mobilization. Mor: Moroccan. N: North. Nav: Naval. NE: Northeast. NW: Northwest. Pr: Prussian. R: Reserve. Res: Reserve. RM: Royal Marines. rr, RR: Railroad. S: South. SE: Southeast. Sec: Secunderabad. SW: Southwest. Ter: Territorial. Ver: Verdun.
Counter Manifest & Order of Battle
Belgian Forces
Bel Army HQ (Albert); Bel Arm Car; 1 Inf Div; 2 Inf Div; 3 Inf Div; 4 Inf Div; 5 Inf Div; 6 Inf Div; 8/3 Inf Bde; 15/5 Inf Bde; 1 Cav Div; 2 Cav Div; Antwerp Fort (strength 14); Ant-1 Fort (strength 12); Ant-2 Fort (strength 8); Ant-3 Fort (strength 8); Ant-4 Fort (strength 6); Ant-5 Fort (strength 6); Ant-6 Fort (strength 4); Liege Fort (strength 14); Namur Fort (strength 12).
British Forces
BEF HQ (French); 1/I Inf Div; 2/I Inf Div; 3/II Inf Div; 4/III Inf Div; 5/II Inf Div; 6/III Inf Div; 7/IV Inf Div; 19 Inf Bde; RM/Nav Naval Inf Bde; 1/Nav Naval Inf Bde; 2/Nav Naval Inf Bde; 1/Cav Cav Div; 2/Cav Cav Div; 3/Cav Cav Div; 3 La/Ind Inf Div; 7 Me/Ind Inf Div; Sec/Ind Cav Bde.
French Forces
1 Army HQ (Dubail); 2 Army HQ (de Castelnau); 3 Army HQ (Sarrail); 4 Army HQ (de Langle); 5 Army HQ (d'Esperey); 6 Army HQ (Maunoury); Alsace Army HQ (Pau); 9 Army HQ (Foch); CnC HQ (Foch); 10 Army HQ (de Maud'Huy); Taxis/Buses; 5x Trains; 1/I Inf Div; 2/I Inf Div; 3/II Inf Div; 4/II Inf Div; 5/III Inf Div; 6/III Inf Div; 7/IV Inf Div; 8/IV Inf Div; 9/V Inf Div; 10/V Inf Div; 11/XX Inf Div; 12/VI Inf Div; 13/XXI Inf Div; 14/VII Inf Div; 15/VIII Inf Div; 16/VIII Inf Div; 17/IX Inf Div; 18/IX Inf Div; 19/X Inf Div; 20/X Inf Div; 21/XI Inf Div; 22/XI Inf Div; 23/XII Inf Div; 24/XII Inf Div; 25/XIII Inf Div; 26/XIII Inf Div; 27/XIV Inf Div; 28/XIV Inf Div; 29/XV Inf Div; 30/XV Inf Div; 31/XVI Inf Div; 32/XVI Inf Div; 33/XVII Inf Div; 34/XVII Inf Div; 35/XVIII Inf Div; 36/XVIII Inf Div; 39/XX Inf Div; 40/VI Inf Div; 41/VII Inf Div; 43/XXI Inf Div; 44 Alp Mtn Inf Div; 51 Res/4 Res Inf Div; 52 Res Inf Div; 53 Res/4 Res Inf Div; 54 Res/3 Res Inf Div; 55 Res/3 Res Inf Div; 56 Res/3 Res Inf Div; 57 Res/Belfort Fortress Inf Div; 58 Res/1 Res Inf Div; 59 Res/2 Res Inf Div; 60 Res Inf Div; 61 Res/GpEb Inf Div; 62 Res/GpEb Inf Div; 63 Res/1 Res Inf Div; 64 Res Inf Div; 65 Res Inf Div; 66 Res/1 Res Inf Div; 67 Res Inf Div; 68 Res/2 Res Inf Div; 69 Res/4 Res Inf Div; 70 Res/2 Res Inf Div; 71 Res/Epinal Fortress Inf Div; 72 Res/Verdun Fortress Inf Div; 73 Res/Toul Fortress Inf Div; 74 Res Inf Div; 75 Res Inf Div; 77 Res Inf Div; 81 Ter Static Div; 82 Ter Static Div; 84 Ter Static Div; 87 Ter Static Div; 88 Ter Static Div; 89 Ter Static Div; 137/Klein Inf Bde; 138/Klein Inf Bde; Chas Mtn Inf Bde; FM Naval Inf Bde; 1/1 Cav Cav Div; 2/2 Cav Cav Div; 3/1 Cav Cav Div; 4 Cav Div; 5/1 Cav Cav Div; 6/2 Cav Cav Div; 7 Cav Div; 8 Cav Div; 9 Cav Div; 10/2 Cav Cav Div; 37 Alg Inf Div; 38 Alg Inf Div; 42 Gros Inf Div; 45 Alg Inf Div; 2 Col/Col Inf Div; 3 Col/Col Inf Div; 1 Mor Inf Div; 2 Mor Inf Div; 2 Col Inf Bde; 5 Col/Col Inf Bde; Mor Inf Bde; Spahi Cav Bde; Belfort Fort (strength 20 / strength 5); Calais Fort (strength 4); Dunkerque Fort (strength 4); Epinal Fort (strength 18 / strength 4); Ep-NE Fort (strength 14); Maubeuge Fort (strength 16 / strength 4); Paris-N Fort (strength 16 / strength 4); Paris-E Fort (strength 10); Paris-NE Fort (strength 4); Paris-NW Fort (strength 8); Paris-SW Fort (strength 8); Paris-S Fort (strength 8); Paris-SE Fort (strength 8); Toul Fort (strength 18 / strength 4); Verdun Fort (strength 20 / strength 5); Ver-NE Fort (strength 18 / strength 4).
German Forces
1 Army HQ (Kluck); 2 Army HQ (Bülow); 3 Army HQ (Hausen); 4 Army HQ (Royalty) (Albrecht); 5 Army HQ (Royalty) (F. Wilhelm); 6 Army HQ (Royalty) (Rupprecht); 7 Army HQ (Heerington); Bes HQ (Beseler); A HQ (Falkenhausen); B HQ (Gaede); C HQ (Strantz); Krupp Siege Gun; Skoda Siege Gun; 6x Trains; 3/II Inf Div; 4/II Inf Div; 5/III Inf Div; 6/III Inf Div; 7/IV Inf Div; 8/IV Inf Div; 9/V Inf Div; 10/V Inf Div; 11/VI Inf Div; 12/VI Inf Div; 13/VII Inf Div; 14/VII Inf Div; 15/VIII Inf Div; 16/VIII Inf Div; 17/IX Inf Div; 18/IX Inf Div; 19/X Inf Div; 20/X Inf Div; 21/XVIII Inf Div; 22/XI Inf Div; 25/XVIII Inf Div; 28/XIV Inf Div; 29/XIV Inf Div; 30/XV Inf Div; 31/XXI Inf Div; 33/XVI Inf Div; 34/XVI Inf Div; 38/XI Inf Div; 39/XV Inf Div; 42/XXI Inf Div; 5 Res/3 Res Inf Div; 6 Res/3 Res Inf Div; 7 Res/4 Res Inf Div; 9 Res/5 Res Inf Div; 10 Res/5 Res Inf Div; 11 Res/6 Res Inf Div; 12 Res/6 Res Inf Div; 13 Res/7 Res Inf Div; 14 Res/7 Res Inf Div; 15 Res/8 Res Inf Div; 16 Res/8 Res Inf Div; 17 Res/9 Res Inf Div; 18 Res/9 Res Inf Div; 19 Res/10 Res Inf Div; 21 Res/18 Res Inf Div; 22 Res/4 Res Inf Div; 25 Res/18 Res Inf Div; 28 Res/14 Res Inf Div; 30 Res/Straasburg Fortress Inf Div; 33 Res/Metz Fortress Inf Div; 43 Res/22 Res Inf Div; 44 Res/22 Res Inf Div; 45 Res/23 Res Inf Div; 46 Res/23 Res Inf Div; 47 Res/24 Res Inf Div; 48 Res/24 Res Inf Div; 51 Res/26 Res Inf Div; 52 Res/26 Res Inf Div; 53 Res/27 Res Inf Div; 54 Res/27 Res Inf Div; Mar Naval Inf Bde; 4 Ers Static Div; 8 Ers Static Div; 10 Ers Static Div; 19 Ers Static Div; 2 Ers Static Bde; 55 Ers Static Bde; 2 Ldw Static Div; 10 Ldw Static Bde; 11 Ldw Static Bde; 25 Ldw Static Bde; 27 Ldw Static Bde; 29 Ldw Static Bde; 33 Ldw Static Bde; 34 Ldw Static Bde; 37 Ldw Static Bde; 38 Ldw Static Bde; 43 Ldw Static Bde; 49 Ldw Static Bde; 60 Ldw Static Bde; 11+14/EM Assault KG; 27+34/EM Assault KG; 38+43/EM Assault KG; 2/2 Cav Cavalry Div; 3/4 Cav Cavalry Div; 5/1 Cav Cavalry Div; 6/4 Cav Cavalry Div; 7/3 Cav Cavalry Div; 8/3 Cav Cavalry Div; 9/2 Cav Cavalry Div; 1 Gd/Gd Inf Div; 2 Gd/Gd Inf Div; 1 GdR/GdR Inf Div; 2 GdR/10 Res Inf Div; 3 GdR/GdR Inf Div; GdErs Static Div; PrGd/1 Cav Cavalry Div; 1 Bav/I Bav Inf Div; 2 Bav/I Bav Inf Div; 3 Bav/II Bav Inf Div; 4 Bav/II Bav Inf Div; 5 Bav/III Bav Inf Div; 6 Bav/III Bav Inf Div; 1 BavR/I BavR Inf Div; 5 BavR/I BavR Inf Div; 6 BavR Inf Div; B.Ers Static Div; 6 B.Ldw Static Div; 5 B.Ldw Static Div; Bav/3 Cav Cavalry Div; 23/XII Inf Div; 24/XIX Inf Div; 32/XII Inf Div; 40/XIX Inf Div; 23 Res/12 Res Inf Div; 24 Res/12 Res Inf Div; 45 Ldw Static Bde; 47 Ldw Static Bde; 26/XIII Inf Div; 27/XIII Inf Div; 26 Res/14 Res Inf Div; Metz Fort (strength 12); Metz-N Fort (strength 12); Metz-NE Fort (strength 8); Metz-SE Fort (strength 8); Metz-S Fort (strength 4); N.Breisach Fort (strength 4); Strassburg Fort (strength 30 / strength 10); Thionville Fort (strength 8).
Combat Results Table
Cross-index the attacker's odds (1:4 through 6:1) with the die roll (2-12). "A" results apply to the attacker (steps lost), "D" results apply to the defender (steps lost, "r" = retreat hexes). A star (✭) marks a Breakthrough Result; a sunburst (❂) marks Fortress Reduced by one step.
| Roll | 1:4 | 1:3 | 1:2 | 1:1 | 2:1 | 3:1 | 4:1 | 5:1 | 6:1 |
|---|---|---|---|---|---|---|---|---|---|
| 2 | A5 / – | A4 / – | A4 / – | A4 / – | A3 / – | A3 / D1 | A2 / D1 | A2 / D1 | A2 / D2 |
| 3 | A4 / – | A4 / – | A3 / – | A3 / – | A3 / – | A2 / D1 | A2 / D1 | A2 / D2 | A1✭ / D2r1 |
| 4 | A4 / – | A3 / – | A3 / – | A3 / – | A2 / – | A2 / D1 | A1 / D2 | A1✭ / D2r1 | A1✭ / D2r2 |
| 5 | A3 / – | A3 / – | A3 / – | A2 / – | A2 / D1 | A1 / D2 | A1✭ / D2r1 | A1✭ / D2r1 | A1✭ / D3r2❂ |
| 6 | A3 / – | A3 / – | A2 / – | A2 / D1 | A1 / D1 | A1✭ / D2r1 | A1✭ / D2r1 | A1✭ / D3r2❂ | A1✭ / D3r2❂ |
| 7 | A3 / – | A3 / – | A2 / D1 | A2 / D1 | A1 / D1r1 | A1✭ / D2r1 | A1✭ / D3r2❂ | A1✭ / D3r2❂ | A✭ / D3r2❂ |
| 8 | A3 / – | A2 / – | A2 / D1 | A1 / D1r1 | A1✭ / D2r1 | A1✭ / D2r1 | A1✭ / D3r2❂ | A✭ / D3r2❂ | A✭ / D4r2❂ |
| 9 | A2 / – | A2 / D1 | A2 / D1r1 | A1✭ / D2r1 | A1✭ / D3r1 | A✭ / D3r2❂ | A✭ / D3r2❂ | A✭ / D3r2❂ | A✭ / D4r2❂ |
| 10 | A2 / D1 | A2 / D1r1 | A1✭ / D2r1 | A1✭ / D2r1 | A✭ / D3r2❂ | A✭ / D3r2❂ | A✭ / D3r2❂ | A✭ / D4r2❂ | A✭ / D5r2❂ |
| 11 | A2 / D1r1 | A1✭ / D2r1 | A1✭ / D2r1❂ | A✭ / D3r2❂ | A✭ / D3r2❂ | A✭ / D4r2❂ | A✭ / D4r2❂ | A✭ / D5r3❂ | A✭ / D5r3❂ |
| 12 | A1✭ / D2r1❂ |
Shift one column in favor of the Germans if one or more Assault units are present in the combat.
Siege Gun Table
| Gun Type | Fortress Defense 6 or less | 7-15 | 16-18 | 20 or more |
|---|---|---|---|---|
| Skoda | 3+ | 4+ | 5+ | 6+ |
| Krupp | 2+ | 3+ | 4+ | 5+ |
Roll # above or more on one die and Fortress is reduced one step.
Modifier: +1 to die if one or more Assault KG(s) adjacent to the Fortress.