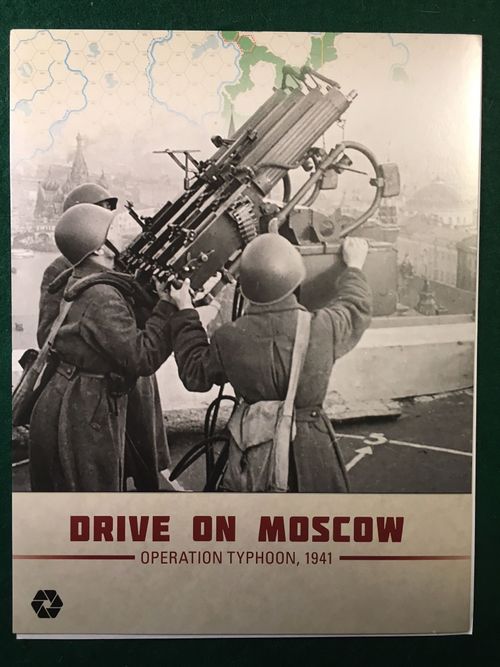
Drive on Moscow: Operation Typhoon, 1941
Drive on Moscow: Operation Typhoon, 1941 Rulebook
Table of Contents
Table of Contents
- 1.0 Introduction
- 2.0 Game Components
- 3.0 Set Up & Hex Control
- 4.0 How to Win
- 5.0 The Turn Sequence
- 6.0 Stacking
- 7.0 German Zones of Control
- 8.0 Supply
- 9.0 Reinforcements, Replacements, Withdrawals & Conversions
- 10.0 Movement & Mobile Assaults
- 11.0 Combat Phase Prepared Assaults
- 12.0 German November Offensive
- 13.0 Developers' Notes
- Terrain Key
1.0 Introduction
Drive on Moscow (DoM for short) is a two-player, low-to-intermediate complexity, strategic-level simulation of the final German attempt to capture the capital city of the Soviet Union late in 1941. The German player is generally on the offensive, attempting to win the game by isolating or capturing the city of Moscow, or by seizing all the other key cities on map. The Soviet player is primarily on the defensive, but the situation sometimes also requires that he prosecute counterattacks.
Game play encompasses the period that began with the Germans launching their offensive on 1 October 1941, and ends on 7 December of the same year. By that time, it had become clear the invaders had shot their bolt without achieving their objective. Play may end sooner than the historic termination time if either player concedes defeat prior to the official end of a game.
1.1 Game Scale
Each hexagon on the map represents 7.5 miles (12 kilometers) from side to opposite side. The units of maneuver for both sides are primarily divisions, along with some brigades and one super-elite regiment. The effects of the general air superiority enjoyed by the Germans throughout much of the campaign are built into the game's movement and combat rules. Each game turn represents a week.
2.0 Game Components
The components to a complete game of DoM include these rules, the map sheet and 352 die-cut counters, which are also referred to as "units" and "unit counters." Players must provide themselves a standard six-sided die to resolve combat and other probabilistic game events.
2.1 Game Map
The game maps illustrate the militarily significant terrain found around the city of Moscow late in 1941 when viewed at these time and space scales. A hexagonal ("hex") grid is printed over the maps to regulate the placement and movement of units across it, much like in Chess and Checkers. A unit can be in only one hex at any one time.
Each hex contains natural and/or manmade terrain and/or water features that can affect the movement of units and combat between units. The various terrains and water features on the map have had their exact real-world configurations altered slightly to make them coincide with the hex-grid, but the relationships among the terrains and water bodies from hex to hex are accurate to the degree necessary to present players with the same space/time dilemmas faced by their historic counterparts during the real campaign.
Note: Every hex on the map has a unique four-digit identification number printed within it. They're provided to help find exact locations more quickly and to allow for the recording of unit positions if a match should be taken down before it can be completed.
2.2 Seating
The German player should sit along the joined maps' west edge, with the Soviet player opposite on the east. See 3.0 for more detail on assembling the two map sheets into a single playing surface.
2.3 Counters
There are 352 unit-counters in the game, most of which represent combat formations. Others are provided as informational markers and memory aids. After reading through the rules at least once, carefully punch out the counters. Trimming off the "dog ears" from their corners with a fingernail clipper will facilitate easier handling and stacking during play and enhances their appearance.
2.4 Sample Combat Unit
Each combat unit-counter displays several pieces of information: nationality (and therefore its "side"), specific historic identification, unit type and size, combat and step strengths, and reinforcement or other special status. (The sample counter diagram labels: unit size, unit type, unit identification, attack factor, defense factor.)
2.5 Nationality
A unit's nationality and its "mobility category" (2.8), is shown by its color scheme.
German Side
- Mechanized Units: Black background
- Non-Mechanized Units: Gray background
Soviet Side
- Guards Mechanized Units: Dark brown background
- Guards Non-Mechanized Units: Orange background
- Regular Mechanized Units: Red background
- Regular Non-Mechanized Units: Light brown background
2.6 Historical Identification
All units are given, to the right of their unit-type boxes, their specific identification using numbers or abbreviations of their historic designations. Those abbreviations are as follows.
- G: Guards
- GD: Gross Deutschland
- KG: Kampfgruppe
- L: Lehr
- M: Moscow
2.7 Unit Sizes
Historical organizational sizes are shown by the following symbols:
- Division: XX
- Brigade: X
- Regiment: III
- Kampfgruppe: KG (battlegroup of a burned out German mechanized-class division).
2.8 Unit Types
All ground units in the game belong to two basic mobility categories: mechanized ("mech") or non-mechanized ("non-mech"). Mechanized units are those whose primary means of moving across the battlefield is by wheeled or tracked vehicles or horses. Non-mechanized units are those whose primary means of locomotion is provided by human legs. That distinction is important for movement and combat considerations. In the list of unit types below, if the explanation for a symbol contains a slash (/), the term in front of the slash is used to describe German units of that type and the term to the right of the slash is used to describe Soviet units of that type.
Mechanized Unit Types
- Panzer Grenadier/Motorized Rifle
- Panzer/Tank
- Cavalry
Non-Mechanized Unit Types
- Infantry/Rifle
2.9 Combat Factors
Attack and defense factors, together called "combat factors," are the measures of each unit's ability to conduct offensive and defensive combat operations. Their specific uses are explained in sections 10.0 and 11.0.
2.10 Movement Factors (MF)
MF are the measure of a unit's ability to travel across the hex grid printed over the map. Units pay one MF to enter a hex, while crossing a river hexside costs an extra MF. Note that in this game, unlike in many others, units' movement factors are not printed on the counters. They're presented that way because movement factors vary greatly from turn to turn depending on the ground condition.
All movement factors, based on mobility category (2.8) are given on the Turn Record Track (printed on the map sheet) in a two-number format following the abbreviation "MF." The first number is the movement factor that game turn for both sides' mechanized-class units; the second number is the movement factor that game turn for both sides' non-mechanized units.
Example: On Game Turn 1 all mechanized-class units of both sides have movement factors of "10," while all non-mechanized units of both sides have movement factors of "6."
Note: On the Soviet side, Guards and non-Guards units of the same mobility class have the same MF.
2.11 Step Strength
All ground units in the game have one or two "strength steps," or simply "steps." That's an arbitrary term used to express the ability of a unit to absorb a certain amount of combat losses before ceasing to be an effective formation (a measure of its "robustness" in current US Army jargon). Those units with combat factors on only one side of their counter are "one-step" units; those with combat factors on both sides of their counter are "two-step" units. All two-step units that start play set up on the map do so at their full step strength. All two-step units that enter the map as reinforcements after play has begun do so at their full strength.
If a two-step unit suffers a one-step loss, it is flipped over so its reduced side (the one with the lower combat factors and reduced indicator) shows. If a one-step unit, or a two-stepper that's already been reduced, suffers a step loss, it is removed from the map (eliminated) and placed into the dead pile (10.0).
2.12 German KG Units
There are 10 German KG units in the counter-mix. They are printed on both sides, in panzer division KG format on one side (factors of 2-1), and panzer grenadier division format on their other side (factors of 1-2). Those counters in effect work to allow the German player to create a third strength step for some of his units (11.30).
2.13 Soviet Untried Units
All Soviet non-guard units in the game lack numbers on their reverse sides. Soviet units with only their background color and unit-type icon on their reverse sides are set-up (or entered as reinforcements) with that numberless side showing upward. Thus, neither player will at first know exactly what is on the front. The hidden side of a unit shows only their mobility class and type. Such units are said to be "untried," and are not flipped over to reveal their exact combat strengths until the first time they enter battle as either the attacker or defender. Once revealed, untried units are permanently converted to "veteran" status, and are never again flipped back to their untried side.
2.14 Other Counters
The uses of the following counters are explained at appropriate points throughout the rest of the rules.
Ground Combat Support Aircraft Markers (11.19)
Note: Only one aircraft marker is back printed with a Soviet aircraft
Game Turn Indicator (5.0)
3.0 Set Up & Hex Control
Players should first join the two maps together to form one playing surface. Overlay the north edge of the south map atop the south edge of the north map. Use masking tape or removable tape to lightly join the two map sheets for play. That done, the players should decide which side each will control. Each player should take his own side's units and sort them onto and around the map according to the instructions below.
3.1 Reinforcement & Starting Units
Units that enter play after the game has begun, rather than starting play already set up on the map, are called "reinforcements." Soviet reinforcement units are described in the boxes of the Turn Record Track using the following abbreviations.
- CD: Cavalry Division
- GCD: Guard Cavalry Division
- GRD: Guard Rifle Division
- GTB: Guard Tank Brigade
- MRB: Motorized Rifle Brigade
- MRD: Motorized Rifle Division
- RB: Rifle Brigade
- RD: Rifle Division
- TB: Tank Brigade
Example: During Game Turn 1, the Soviet player will receive seven rifle divisions, two rifle brigades, two cavalry divisions and a tank brigade as reinforcements, all of them non-Guards and entering play in their untried state.
Note: If you examine all five Soviet motorized rifle divisions in the counter-mix, you'll find one of them, when flipped to its veteran side, is a tank division. Since there was only one of them in action here historically, to preserve the overall working of the untried unit system, we simply mixed in that one tank division with the motorized rifle divisions.
At the start of play, all non-guard Soviet reinforcement units should be sorted by type into neat piles off to the side of the Turn Record Track, with their untried sides showing. Neither player should know their combat strengths during this process. For details on the set up and entry of Guards units, see 3.2, 3.3 & 3.4. For details on reinforcement entry, see 9.1 & 9.4.
3.2 Soviet Reserve Front Set Up
When his reinforcements have been sorted as described, the Soviet player selects the following units:
- MRD x 1
- RD x 4
- RB x 4
- Guards Rifle Divisions (GRD) x 6
Note: All non-guard units are picked randomly and set up with their untried side up, neither player should know their actual strength.
These units are set up in any hexes east of the Forward Zone/Reserve Front boundary line printed on the map. No Reserve Front unit may be stacked with any other unit; they must be set up one per hex.
Note: All Soviet Guards units of all types have two strength steps, and they are set up with their full, two-step, combat strengths upward and known to both players.
3.3 Soviet Forward Zone Set Up
After his Reserve Front units have been deployed, the Soviet player should take the following numbers of non-guard units, all untried and selected randomly by type, and set them up in the area between the initial front-line boundary and the Reserve Front boundary lines:
- CD x9
- MRB x8
- MRD x4
- RB x17
- RD x78
- TB x9.
Soviet Forward Zone units may be set up within normal stacking limits (6.0), but every hex of the front line must have at least one rifle division set up in it. Beyond that stricture, the Soviet player is free to set up his Forward Zone units anywhere inside that area of the map.
Designer's Note: Both Soviet front boundaries permanently lose all significance as soon as set up is completed and play begins (exception: 4.4).
3.4 Remaining Soviet Guards Units
As the final step of his set up, the Soviet player should place the eight undeployed guard units into an opaque large-mouth container, such as a coffee mug.
- GCD x2
- GRD x2
- GTB x4
For details on how they come out of that container see 9.4.
3.5 Once In, Once Out
The Soviet counter-mix has been structured so each unit of that side makes only one entry or exit from play. That is, no unit of the Soviet side will enter or exit play more than once per game. Whenever a Soviet unit is eliminated, one or the other player should put it back into whatever they're using as storage containers for the game's components.
3.6 German-Side Set Up
Once the Soviet player has completed his set up, the German player should start and complete the set-up of his side's units. Set aside, within easy reach, all the KG and ground combat support aircraft counters. All other German units begin set up anywhere west of the initial front line printed on the map; they may be set up adjacent to Soviet units. Normal stacking restrictions must be observed.
3.7 Hex Control
In this game, the idea of "hex control" (which side owns which hex at any given instant) is important for victory reckoning purposes (4.0). At the start of play, the German player controls all hexes west of the initial front line, while the Soviet player controls all hexes east of that line. The control status of a hex switches from one side to the other whenever a ground unit from the other side enters it. Control switching is immediate and may occur and reoccur in the same hexes any number of times during play. Don't confuse the idea of "hex control," presented above, with the idea of "zones of control" (7.0).
4.0 How to Win
The German player is generally on the offensive, trying to win the game by driving as fast as possible into the Soviet controlled portion of the map, there to capture Moscow and/or other key cities. If by early December he has managed to go significantly farther than occurred historically, he will be judged the winner of the game. The Soviet player generally wins by preventing his opponent from doing so; though an 'offensive solution' is also available to the Red Army commander. No drawn games are possible.
4.1 German Sudden Death Victory Via Moscow Entry
Play stops, and the German player is declared to have won the game, the instant either hex of Moscow comes under his side's control. That doesn't necessarily mean the Soviet Union would thereby be fully defeated in the war. Victory in the game is awarded to the German player under this circumstance simply because, he succeeded in entering the city, he has thereby so out-performed both his opponent and his historic counterparts that he deserves to win in the competitive-comparative sense.
4.2 German Sudden Death Victory Via Isolating Moscow
Play stops, and the German player is declared to have won the game, the instant a supply line can no longer be traced from both hexes of Moscow to any one or more of the Soviet supply source hexes on the north or east map edges. Both hexes may use the same or different tracing to complete a supply line (8.0). This tracing has nothing to do with the fact the Moscow hexes themselves are supply sources for Soviet units inside them (8.2). Make the victory-check trace as if the Moscow hexes were themselves units needing supply from a board edge.
Important: Both Moscow hexes must be cut off at the same time for this victory condition to apply.
Note: This accomplishment wouldn't necessarily mean the Soviet Union would thereby be fully defeated in the war. Victory in the game is awarded to the German player under this circumstance simply because, by isolating the city, he has thereby so out-performed both his opponent and his historic counterparts that he deserves to win in the competitive sense.
4.3 German Victory by Other Means
The German player is declared to have won the game if, at the end of Game Turn 9 (Dec I), he controls all five non-Moscow city hexes on the map: Kalinin, Kursk, Orel, Smolensk and Tula. The supply states of those hexes are not relevant. This rule works to prevent the Soviet player from unrealistically 'hedge-hogging' all his units into the northeast corner of the map.
4.4 Soviet Sudden Death Victory
Play stops, and the Soviet player is declared the winner, the instant any town or city lying to the west of the initial front line comes under his side's control. The supply state of the controlled hex is not relevant. This type of victory is awarded to the Soviet player because it means he's penetrated far enough into the German rear area to significantly disrupt his opponent's logistics and communications. The Soviet player is also awarded a sudden death victory if, for any reason, the German player fails to meet his withdrawal requirements (9.3).
4.5 Regular Soviet Victory
The Soviet player is declared to have won if, at the end of Game Turn 9 (Dec I), the German player hasn't fulfilled any of that side's victory conditions.
5.0 The Turn Sequence
Each game turn of DoM is divided into two player turns of sequenced steps called "phases." Every action taken by a player must be carried out in the appropriate sequence of phases described below. Once a player has finished a phase he may not go back to perform some forgotten action or redo a poorly executed one unless his opponent graciously permits it.
5.1 Turn Sequence Outline
The turn sequence is given below in outline. The German player turn is the first player turn during each game turn.
I: German Player Turn
- A: German Replacement & Withdrawal Phase.
- B: German Movement or Combat Phase, or;
- C: German Combat or Movement Phase
II: Soviet Player Turn
- A: Soviet Reinforcement Phase
- B: Soviet Movement or Combat Phase, or;
- C: Soviet Combat or Movement Phase
- D: Soviet Guards Conversion Phase
- E: Soviet Terminal Supply Phase
5.2 Move or Fight; Fight or Move
At the start of every one of your player turns, you must declare in what order you will carry out your movement and combat phases that turn. That is, you may choose to have your units move (and, if you're the German player, mobile assault) first and then make prepared assaults, or you may choose to fight first and move (and mobile assault) second. The decision is always up to each player. No matter what phase order you choose, all your units can participate to the limit of their normal capabilities in both phases. Moving, and possibly mobile assaulting, or making a prepared assault in the combat phase, doesn't preclude a unit performing both operations each turn; only the order of execution is variable.
- Each player makes only one phase order declaration per player turn, at the start of each of his own player turns, which is then applied to all his units throughout that player turn.
- You may not choose one phase order for some of your units and the other phase order for others.
- Whenever the German player chooses the fight/move sequence, all his prepared assaults that turn gain a one column rightward (1R) odds shift in addition to any other applicable odds shifts (see the second paragraph of rule 12.3).
5.3 Game Turn 1 Special Rules
No matter which phase sequence he chooses, during Game Turn 1 all the German player's MA and PA gain a one-column rightward odds shift. That reflects the tactical momentum achieved by the Germans when they first began their offensive, and is applied in addition to all other applicable combat odds shifters (10.0 & 11.0). If he chooses the fight/move sequence, his PA does not gain a two-column rightward shift that turn; that bonus remains just one column.
Important: Guderian Effect; During Game Turn 1's German Movement Phase, all mechanized-class units of that side that set up on the south map, and that spend the entire game turn moving and/or attacking only on the south map, have their movement factor for that turn increased to 14.
5.4 Tracking Game Turns
At the start of play put the Game Turn Marker into the Game Turn 1 box on the Turn Record Track. To keep track of 'game time,' move it forward one box on the track after each game turn.
6.0 Stacking
"Stacking" is the word used to describe the piling of more than one friendly unit into a single hex at the same time. The general rule is each side may stack up to five units per hex. Step and combat strengths have no bearing on defining a "unit" for stacking purposes. Each unit in the game is considered one unit for stacking purposes.
6.1 Stacking & Movement
Stacking rules are in effect throughout the game turn. Players should therefore pay attention to the order they move their units in crowded areas of the map; otherwise, moves made carelessly early in a phase may block your ability to move units later that phase.
- There are no limits on the number of units that may enter and attack through a given hex over the course of a phase, player turn or game turn, if stacking limits are always met on a hex-by-hex and instant-by-instant basis.
- If a hex containing stacked units of either side is found to be "over stacked" (exceed the stacking limits given above) at the start or end of any phase, the opposing player is immediately allowed to remove to the dead pile his choice of the minimum number of involved enemy units, necessary to bring the violating stack(s) back into limits. The idea here is stacking violations should be noted and stopped before they're allowed to go on, during each phase as the game progresses. If, however, some stacking violation is not seen until a phase ends, or is discovered when a phase is just beginning, the transgressing player then suffers the penalty of unit elimination rather than just chastisement.
6.2 Free Stacking Units
Ground combat support aircraft units (2.14) have no stacking value of their own. They may be added to any stack in accordance with the rules given for their use (11.19).
7.0 German Zones of Control
Every German ground unit in the game exerts a "zone of control" (ZOC) into the six hexes surrounding its location hex. There is no qualitative difference between a hex containing ZOC exerted there by one unit or by several.
Important: Soviet units do not exert ZOC.
7.1 Limits
ZOC do not extend across reservoir hex sides. They do extend into and out of all other hexes and across all other hex sides. They are exerted equally by units in both supply states and all step strengths.
7.2 ZOC Effect on Movement
All moving Soviet ground units must stop their movement for that movement phase in the first hex they enter containing a German zone of control (GZOC).
- Soviet units beginning their side's Movement Phase already in a hex containing a GZOC may move out of that hex provided the first hex they enter contains no GZOC. Soviet units may then enter another GZOC after moving into that first GZOC-free hex, but they would then be forced to halt their movement for that phase.
- Soviet units are never allowed to move from one GZOC directly into another GZOC.
- The above strictures are applied only to Soviet units during Soviet Movement Phases and during both sides' Combat Phases (11.26).
- The fact that a German unit or stack is projecting a ZOC as it moves next to, and possibly past, a Soviet unit or stack in no way stops or slows German movement. German ZOC only inhibit Soviet activities.
7.3 GZOC & Supply
In general, Soviet supply lines may not be traced, into or through, hexes containing GZOC. German ground units exert ZOC normally no matter their supply state.
Exception: 8.4
7.4 No Negating GZOC
In general, the presence of a Soviet ground unit in a hex containing a GZOC does not negate that GZOC for any purpose.
Exception: GZOC do not block Soviet advances-after-combat (11.31).
7.5 GZOC & Hex Control
The mere projection of one or more GZOC into a hex is not, by itself, enough to cause the control status of that hex to switch to the German side (3.7). A German ground unit must enter a Soviet controlled hex for such a control status switch to take place there.
8.0 Supply
Units of both sides need supply to operate at their full potential. There are no counters representing the actual materiel consumed; instead, the process of supply consumption is represented by "supply line tracing" to "supply source" hexes.
8.1 Supply States
There are two supply states for the units of both sides, and each ground unit always exists in one of them. Each unit is always either "supplied" (also referred to as being "in supply"), or "unsupplied" (also referred to as being "out of supply" or OOS).
8.2 In Supply
A unit is in supply if it can trace a supply path of contiguous hexes of any length, unblocked by enemy ground units or GZOC, from its location to an appropriate supply source hex.
- The German supply source hexes are all those hexes along the west map edge.
- Soviet supply sources are the six hexes marked with a supply symbol along the assembled maps' north and east edges.
- Soviet units stacked in city hexes are considered supplied while they remain in those hexes, provided only that city hex was never yet been under German control.
Important: This rule does not allow Soviet units outside cities to trace supply to them as if they were map-edge supply source hexes. Only Soviet units located in city hexes may use this kind of supply.
- Units in supply have their full movement and combat capabilities available for use.
- On the German side, only supplied mechanized-class units may make mobile assaults (10.14).
8.3 Tracing Supply Lines
A supply line consists of an uninterrupted chain of hexes traced from the unit or stack in question back to a valid supply source. Supply lines may enter and cross all kinds of terrain, water barriers and hexes except for the following:
- Only Soviet supply lines may be traced across reservoir hexsides.
- Units may NOT trace supply lines into or through enemy controlled city hexes, even if those city hexes are empty of actual enemy units.
- Neither side's supply lines may enter hexes occupied by enemy units.
- Soviet supply lines may be traced from, but not through or into, GZOC hexes.
Important: The presence of one or more Soviet units in a hex otherwise containing a GZOC negates that GZOC for purposes of tracing Soviet supply lines into, out of, and through such hexes.
8.4 Gaining & Losing Supply Source Hexes
Map-edge supply source hexes lose their supply providing capacity while enemy controlled. That capacity is regained, the instant the supply source hex is brought back under friendly control. That loss/gain process may potentially go on any number of times for each hex throughout the game.
Exception: A Soviet city hex, once it becomes German controlled, may never again provide supply to Soviet units that may later reenter it.
8.5 German OOS Effects
German units are never reduced in step-strength or eliminated for being OOS; however, their attack and movement factors are reduced to zero. OOS German units continue to have their normal defense factors available to them.
Check the supply status of each German unit or stack at the start of its movement and again at the start of each individual battle (both mobile assault and prepared assault) in which it is involved on offense.
- German units found to be OOS at the start of their move have their movement factors reduced to zero.
- German units found to be OOS at the start of any attack in which they would otherwise be participating have their attack factor reduced to zero.
Note: The wording of those last two sentences allows for the possibility of German units OOS at the start of a movement or combat phase to have a supply line opened to them by the action of other German units, and thereby allowing the resupplied German units to participate normally in the activities of that same phase.
- German mechanized-class units may not make mobile assaults unless they are in supply in the "launch hex" of that mobile assault. The "launch hex" of a mobile assault is the last hex occupied by those attackers prior to their entry into the defenders' hex (10.17).
8.6 Soviet OOS Effects
Soviet units found to be OOS during any game turn's Soviet Terminal Supply Check Phase (5.1), are eliminated and removed to the dead pile at that time (no matter if one-step or two-step units). During all other portions of the game turn, Soviet OOS units operate with all their movement and combat capabilities fully intact and available for normal use no matter what their supply state.
8.7 Deliberate OOS
It's permitted for both players to deliberately move their units into hexes wherein they will or may become OOS.
8.8 Appropriate Supply Sources
The supply source hexes in the game work only for the units of the proper side as described in the rules above. If, for example, the Germans captured a Soviet supply source hex, it wouldn't become a supply source for them.
9.0 Reinforcements, Replacements, Withdrawals & Conversions
Reinforcements are new units that enter the game after play has begun. Reinforcement units always enter play in supply and with their full movement and combat capabilities immediately available for normal use. Normal stacking restrictions must be observed when entering reinforcements. Soviet reinforcements are placed on the map during step A (5.1).
9.1 Soviet Reinforcements
The Soviet player may not delay the arrival of any of his reinforcements. Any reinforcements not entered for any reason during the turns indicated on the Turn Record Track are permanently eliminated from play. The Soviet player may enter his non-guard reinforcements, decided by him on a unit by unit, turn by turn, and hex by hex basis as follows:
- Via any of his side's map edge supply source hexes that are under his control at that time.
- They may also be placed in any town or city hexes that are at that moment under his side's control, have no German units in any hexes immediately adjacent to them, and have never yet, even just temporarily, been under German control. To be used as a Soviet reinforcement entry hex during any given game turn, a town or city hex must have been in supply to a map edge supply source hex at the very start of that Soviet player turn.
All Soviet non-guard reinforcements enter play in their untried state and are drawn randomly by that player from among the pool of all units of their type, with the exact number of each type to be entered shown in the boxes of the Turn Record Track. No type-substitutions may ever be made.
9.2 Replacements
The only German replacements in the game are entered with that side's November offensive (12.0). There are no Soviet replacements.
9.3 German Withdrawals
The German player is required to withdraw units from the map during the game. The German player may not decline to make any withdrawal; to do so would forfeit the game to the Soviet player (4.4). To be eligible for withdrawal, a selected unit need only be in supply. Simply pick up units to be withdrawn and set them permanently aside; they will not come back into play during the game. The German player must withdraw the following units:
- Game Turns 5, 6 and 7: Each turn, withdraw one 4-8/2-4 infantry division (total of three).
- Game Turn 7: German cavalry division.
Withdrawn divisions may be in their reduced or full-step strength when withdrawn. If a 4-8/2-4 infantry division is not available for withdrawal at a time one is to be made, a 3-7/1-3 division, full strength or reduced, may be substituted for it. If the cavalry division isn't available to be withdrawn when called for, any other mechanized-class division, reduced or full strength, may be substituted for it. (KG may not be substituted.)
9.4 Soviet Guards Conversions
On Game Turns 1 through 8, during step II.D of each of those Soviet player turns, a new Soviet Guards unit may enter play via "conversion." Guards units are all two-steppers, and enter play via the conversion of non-guard units already in play on the map. When the appropriate phase arrives, the Soviet player may enter a guard unit into play on the map by first removing a non-guard unit of the matching type, and then substituting in place the new guard arrival. The new guard units have their normal movement and combat capabilities available for regular use starting that game turn.
- Non-guard units selected for conversion may be either in their untried or veteran states. The Soviet player may view the veteran side of the selected untried unit; however, he may not change his mind about that conversion once he's viewed the unit's combat factors. The German player does not have any right to view the veteran sides of such converted untried units.
- The removed non-guard unit must be in supply via a map edge Soviet supply source hex at the time of the conversion.
- It must be of the exact same type as the guard unit into which it's being converted. (It need not share the same historic I.D. number.)
- Non-guard units removed to carry out guard conversions are not eligible for reentry into play on later turns.
- Guard units may never receive step-replenishment, nor may they be reclaimed from the dead pile in any way once there.
- Guard conversions may never be delayed. If they cannot be carried out during the game turns indicated, judged on a unit by unit and turn by basis, the unentered guard unit is eliminated.
- To determine which guard unit is to enter play each turn, the Soviet player should, without looking, reach into the container holding the general pool of guard units (3.4). He should select one randomly, and then immediately use the conversion process described above to bring it into play. All guard units enter play at their full two-step strength.
Designer's Note: The Soviet player will more fully come to understand the criticality of guard units to his army's overall performance once he's read rule 11.29.
10.0 Movement & Mobile Assaults
Every ground unit in the game has a "movement factor" awarded to it every game turn, based on its mobility class (2.8) and listed on the Turn Record Track. That factor is the number of "movement points" (also called "movement factors" and "MF" and "MP") available to the unit to use to move across the hex grid during its side's Movement Phase in each player turn. Units move from hex to adjacent hex (no "skipping" of hexes is allowed) paying one MP per hex to do so. The movement of each player's ground units takes place only during his own player turn's Movement Phase; no enemy movement takes place during your own player turn.
Exception: 11.26 (Retreat After Combat).
10.1 Limits
MP may not be accumulated from turn to turn or phase to phase, nor may they be loaned or given from one unit to another. A player may potentially move all, some, or none of his units in each of his Movement phases throughout the game. Units that move are not required to expend all their MP before stopping. The movement of each unit or stack must be completed before that of another is begun. A player may change the position of an already moved unit or stack only if his opponent agrees to allow it.
10.2 No Minimum Movement Ability
No unit is guaranteed the ability to move during a friendly Movement phase. To enter a hex (or cross a river hexside), a unit must have sufficient MP remaining to it to pay for the costs involved in that move. OOS German units may not be moved at all while in that state (8.5).
10.3 Enemy Units
Your side's ground units may normally never enter hexes containing enemy ground units,
Exception: See 10.14 for an important exception.
10.4 Stack Movement
To move together as a stack, units must begin their side's Movement Phase already stacked together in the same hex. Units are not, however, required to move together simply because they started a Movement Phase in the same hex; such units might be moved together, individually, or in smaller sub-stacks.
10.5 Splitting Stacks
When moving a stack, you may halt it temporarily to allow a unit or sub-stack to split off and move away on a separate course. The units left in the original (or "parent") stack may then resume their own movement, even splitting off other units if desired. Once you begin moving an entirely different parent stack, or an individual unit that began in a different hex than the currently moving parent stack, you may no longer resume the movement of the previous stack without your opponent's permission.
10.6 Different MF in Stacks
If units with different movement factors are traveling together in a stack, the stack must use the movement factor of the slowest unit within it. Of course, as the slower units exhaust their MF, you may drop them off and continue moving with the faster ones.
10.7 Terrain & Movement
All terrain features on the map are classified into two broad categories, natural and manmade. Both of those categories are further divided into different types (see below). There is never more than one type of natural terrain in any one hex, but one or more types of manmade terrain may exist in one hex along with the natural stuff.
10.8 Natural Terrain & Hydrography
There are five types of natural terrain and hydrographic features on the map: clear, forest, marsh, river hexsides and reservoir hexsides. The effects those various features have on the movement of ground units are described below and are also summarized on the Terrain Effects Chart (TEC) for quick reference during play.
Clear Terrain: Is the "base" terrain of the game; it's devoid of any natural features that would enhance defense or slow movement at this level of operations. Each clear hex costs all ground units one MP to enter. For a hex to be considered clear, it must be entirely devoid of all other natural terrains. All city hexes and town hexes are considered to have a base of clear terrain.
Forest Hexes: Represent areas of tree cover or broken terrain. Each forest hex costs units one MP to enter. If a hex contains any amount of forest terrain, that entire hex is considered fully forested for all movement and combat purposes.
Marsh hexes: May not be entered by mechanized units other than cavalry. Non-mechanized units and cavalry units pay one MP per marsh hex entered. Both sides' cavalry units are considered mechanized-class units for all purposes except for this one characteristic. If a hex contains any amount of marsh terrain, that entire hex is considered fully marsh for all movement and combat purposes.
10.9 River Hexsides
Rivers run between hexes, along hexsides, rather than existing in-hex. Every river hexside may be crossed by all units of both sides by paying one extra MP for the crossing. "Extra" means in addition to the movement cost for the hex being moved into.
10.10 Reservoir Hexsides
No movement or combat is allowed across reservoir hexsides for either side, but see 8.3 for a Soviet logistical exception.
10.11 Manmade Terrain & Movement
Manmade terrain exists in three types: cities, towns and Soviet fortifications. The movement cost for entering hexes is determined by the natural terrain in them and any hydrographic features along their hex sides. Each hex is identified by only one type of natural terrain; manmade terrain, however, may exist in hexes along with natural terrain.
10.12 Cumulative Costs
The total movement cost for entering any hex is always the sum of the terrain and any river-crossing costs involved. For example, a unit entering a clear hex by crossing a river hexside into it would pay a total of two MP to do so. That is, one MP to enter the new hex and an "extra" MP to cross the river hexside.
10.13 Off Map Movement
Units, once in play on the map, may never voluntarily move, advance- or retreat off the map.
Exception: German withdrawals (9.3).
Design Note: If this is your first time reading these rules, it's probably best for you to skip over for now rules 10.14 through 10.23, and resume reading at the start of section 11.0. Return to this place after you've finished reading section 11.0.
10.14 German Mobile Assaults
All German mechanized-class units, including cavalry, may conduct a special form of attack during their side's Movement Phases called "mobile assault" (MA). All types of German mechanized-class units may potentially participate in MA, but for panzer grenadier or cavalry units to be able to do so at least one panzer division or panzer KG must be involved in the same MA. Panzer grenadiers or cavalry alone, or in combination with each other but without at least one panzer unit also participating, may not make MA. Within normal stacking limits, one panzer unit enables any number of panzer grenadier or cavalry units to participate in the same MA with it.
10.15 MA Procedure
To conduct an MA, an eligible German mechanized unit or stack enters the Soviet occupied hex chosen to be attacked, paying two additional MP to do so. A given German mechanized unit or stack may not conduct more than one MA per German Movement Phase, but any given Soviet occupied hex may potentially be mobile assaulted any number of times during the same German Movement Phase, if each new MA is conducted by new units with sufficient MF to pay for each new effort. The German player must observe stacking limits at all times in MA launch hexes. An MA "launch hex" is the last hex occupied by the assaulting German force just prior to entering the defender's hex. The stacking limits for the two sides' involved units within the assaulted hex itself are mutually exclusive.
10.16 MA General Limits
MA may be launched into any kind of hexes other than marsh terrain. Clear terrain hexes that contain cites [sic] or towns or fortifications may be the targets of MA. MA may never be launched across reservoir hexsides. MA may be launched across river hexsides, but they suffer a one column leftward shift for it (in addition to any in-hex odds shifter).
10.17 MA & Supply
The supply state of otherwise eligible German units in an MA is determined at the instant of battle and at the location of battle. That is, no German mechanized-class unit or stack may take part in an MA if it is OOS in the launch hex for that MA at the instant the MA is begun.
10.18 MA Stack Eligibility
To be able to MA together during a given Movement phase, German mechanized-class units must have begun that phase already stacked together.
10.19 Unfavorable Combat Result
If an MA achieves any result that fails to entirely clear the attacked hex of Soviet units, the involved German force suffers whatever losses are dictated by that result (if any), and the survivors are placed back in their launch hex, where they must remain for the rest of the phase. Such stalled units could still potentially attack (PA) in the following German Combat Phase, provided the sequence chosen for that turn had been move/fight.
10.20 Favorable Combat Result
If an MA completely clears the target hex of Soviet units, the assaulting German units may continue their movement from that hex with the MF remaining to them. They may not, however, launch another MA that same phase, though they might yet PA if the sequence chosen that turn was move/fight. Note there is never any automatic advance-after-combat in victorious MA as there is with victorious PA (11.31). All post-MA movement is governed by the MF left to the moving units.
10.21 MA & Phase Sequence
The ability of German mechanized-class units to MA is not effected by the phase sequence chosen by that player. With the fight/move sequence, otherwise eligible units might participate in a Combat Phase prepared assault and then, during the following Movement Phase, also launch an MA. The same is true when the move/fight sequence is chosen; units that launched an MA during the Movement Phase might also participate in a prepared assault during the Combat Phase later that same German player turn.
10.22 Retreating-After-Combat & Subsequent MA
If defending Soviet units in one MA retreat-after-combat into a hex that's either empty or already contains other Soviet units, and that new location hex comes under subsequent MA attack that same German Movement Phase, the Soviet units that retreated into the new hex do contribute to their new location's defense against the MA being waged there, just as if they had been in the new hex from the start of that Movement Phase. That process may go on any number of times each Movement Phase for any given Soviet unit(s) in any number of hexes.
- When conducting a mobile assault, the GZOC of the mobile-assaulting force doesn't work to prevent the retreat of the Soviet unit/stack being mobile assaulted. That is, mobile-assaulting does NOT turn the "DR" combat result into a "Death Ray" result. Mobile-assaulted Soviet units can retreat out from under the GZOC of the force assaulting them. Of course, though, any GZOC from German forces positioned in hexes nearby the mobile-assaulted hex remain in force and do work to block retreats.
- When determining the direction of a Soviet retreat from an MA, precedence must be given to the hex directly opposite the hexside through which the mobile-assaulting German force entered the defended hex. If that hex is blocked for any reason, the Soviet player must then give precedence to retreating via either of the hexsides adjacent to that blocked hexside (his choice), and so on around the perimeter of the defended hex until the hexside from which the Germans launched their MA is reached. Soviet units retreating from an MA may never retreat into the hex from which that MA was launched against them
10.23 Summary
Within the limits and exceptions given above, MA are generally resolved the same way as PA (11.0).
Note: Unlike many other games using MA-type rules, here there are no inherent combat penalties or odds shifts involved simply because an attack is an MA.
11.0 Combat Phase Prepared Assaults
Prepared Assault (PA) combat takes place between adjacent opposing units during the Combat Phase in every player-turn. Attacking is always voluntary for both players; the mere fact of enemy units' adjacency doesn't necessitate your units launching PA or MA against them. Within the strictures of sections 10.0 and 11.0, both players are free to attack or not, as each chooses, during each of their own player turns' Combat Phases throughout the game. The player whose player turn it is, is considered the "attacker," and the other player is considered the "defender," no matter the overall situation across the map.
11.1 Multiple Defenders in One Hex
If there are two or more enemy units in a hex being attacked by your units (MA or PA), you may only attack that stack as if it were one combined defending unit.
11.2 Multi-Hex Attacks
An enemy occupied hex may be prepared assaulted in one battle by as many of your units as you can bring to bear from one, some, or all the surrounding hexes, but no more than one hex may ever be the object of any one PA, which is also true for MA (10.14).
11.3 Indivisibility of Units
No single attacking unit may have its attack factor divided and applied to more than one battle. Likewise, no defending unit may have part of its defense factor attacked by one or a few attackers while another part is attacked by others. No attacking unit may attack more than once per Combat Phase, and no defending unit may be attacked more than once per Combat Phase.
Exception: 10.22
11.4 Attack Sequencing
There is no artificial limit on the number of PA each player may resolve during his Combat Phases, which is also true for MA during the German player's Movement Phases. The attacker need not declare all his attacks beforehand, and he may resolve them in any order he wishes if the resolution of one is completed before that of the next is begun.
11.5 Stacks in Prepared Assaults
It's not necessary for all the units you have stacked in a hex to participate in the same PA. Some of the units in a stack might attack into one hex while others attacked into another or simply didn't attack at all. Note, though, each attack made into a different defended hex would have to be resolved as a separate battle. No defending unit may ever refuse combat.
11.6 Fog of War
Neither player may ever look beneath the top unit of enemy stacks until the time comes in the combat resolution process for odds computation. Once such an examination has been made, the attacker may no longer call off that attack. Neither may the German player examine his opponent's reinforcement units piled off to the side of the Turn Record Track.
11.7 Combat Procedure
Normally the attacking player should strive to have several times more attack factors involved in a battle than the defender has defense factors. Such battles are called "high odds" attacks. To resolve such fights, the attacking player begins by calculating his "odds." Do that by adding together the attack factors of all the attacking units involved in the battle; then add up the defense factors of the enemy units defending in the battle. Divide the defender-total into the attacker-total and round down any remainder.
Example: If 26 attack factors attack 7 defense factors, the situation yields an odds ratio of 3:1 ("three to one"). That is, 27÷7=3.71, which rounds down to 3. To turn that "3" into a ratio, you set a "1" next to it on the right. Thus "3" becomes "3:1," which corresponds to a column-heading on the Combat Results Table (CRT). [The printed example says 26 attack factors but computes 27÷7.]
11.8 Poor Odds Attacks
Battles in which the attacking force has fewer combat factors than the defender are called "poor odds attacks." Procedures in such situations are modified from what's described above in that here you divide the defender's total by the attacker's, round up all remainders, and set the "1" on the left side of that result.
Example: If a force with 5 attack factors is attacking a force with 11 defense factors, it's a poor odds attack. In that case, divide 11 by 5 (11÷5=2.2), and round up (2.2 becomes 3); then set a "1" on the left of that "3," yielding odds of 1:3 ("one to three").
11.9 Odds Limits
The column headings on the CRT range from 1:3 to 5:1. Final odds greater than 5:1 are resolved without a die roll; their results are always "DE." Final odds less than 1:3 are also resolved without a die roll; their results are always "AL1." When determining combat odds, always apply all applicable odds shifters to obtain a final odds ratio prior to referring to the CRT.
11.10 Combat Modifiers
The odds obtained in the calculations described above may be modified ("shifted") by the terrain in the defender's hex and any river around its sides, as well as other factors described below. All applicable combat modifiers are cumulative in their effect. That is, in every battle all applicable modifiers are determined and their effects considered before the "final odds" are determined and the die is rolled to get a combat result.
11.11 Clear Terrain
Units defending in clear hexes devoid of all other terrain features derive no benefit to their defense because of that terrain.
11.12 Forest
Soviet units defending in forest hexes against German MA receive a one column leftward odds shift (1L). There are no combat odds shifts due to the presence of forest terrain for either side's units when defending there against Combat Phase prepared assaults.
11.13 Marsh
Mechanized-class units other than cavalry may never move or attack into marsh hexes in any way. The German cavalry division may not MA into any marsh hex because it would, of necessity, lack the panzer unit needed to lead such an effort. When cavalry and/or non-mechanized units PA against defenders in marsh hexes, neither side gains or suffers any column shift because of that terrain.
11.14 River Hexsides
If all attacking units in an MA or PA are coming across a river hexside, the defending side in that combat benefits from a one column leftward odds shift.
11.15 Reservoir Hexsides
Units of both sides may not conduct a MA or PA across reservoir hex sides.
11.16 Towns
Towns themselves never generate any kind of combat odds shifter or modifier in this game, but fortifications in town hexes do make themselves felt as usual for all combat purposes (11.18).
11.17 Cities
Soviet units defending against an MA or PA in a city hex never suffer the concentric attack bonus (11.20), no matter what the positions of the attackers around the defended city hex.
- All units of both sides defending in city hexes gain a two-column leftward (2L) odds shift.
- Whenever Soviet units attack into city hexes, both AS and DR combat results must be converted to AL1.
- In German PA into cities, DR combat results must be converted into either AS or "Bloodbath" results. The German player is generally free to choose which result to convert to (11.28).
- German panzer units must use their defense factors as their attack factor when attacking into cities, both MA and PA.
- Neither player may retreat-after-combat (11.26) any of his units into or through a hex containing an enemy controlled city, even if that hex is empty of actual enemy units at the time, nor may either player trace his supply lines into or through such hexes.
11.18 Soviet Fortifications
All fortifications on the map belong to the Soviet side; there are no German fortifications.
- All fortifications are always considered to be intact and operative.
- If a fortification hex is taken control of by the German side only to be retaken later by the Soviet side, the fortifications in that hex again generate their combat bonus for any Soviet units defending in them.
- When Soviet units defend in a fortification hex, the combat effect of those fortifications is to shift the odds one column leftward, in addition to any other applicable odds shifters, in both MA and PA.
- There are never any fortification odds shift for German units that may be defending in such hexes.
- When German panzer units attack into a Soviet fortification hex, they must use their defense factor as their attack factor.
11.19 Ground Combat Support Aircraft
At various times both players are awarded ground support aircraft counters. On the Turn Record Track, two numbers are listed after the word "Air." The number to the left of the slash is the number of German combat aircraft units available that turn; the number to the right is the number of Soviet combat aircraft units available that turn.
Note: Both players never have aircraft available during the same game turns; it's always just one or the other.
- Aircraft may not be in any way accumulated or saved from game turn to game turn. The single Soviet aircraft unit is back printed on one of the two German aircraft units.
- The player with aircraft available may commit them to support any one or two battles, either offensively or defensively, MA or PA, anywhere on the map. Aircraft counters have no stacking or combat value of their own, nor may they be given up satisfying combat result requirements. They are, in effect, indestructible in game terms.
- The effect of an aircraft counter is to generate a one column shift in favor of the owning side.
- Each aircraft counter awarded to a player may be used once per game turn, up until the time of its removal at the start of the subsequent game turn.
- More than one aircraft counter may be committed to the same MA or PA.
- The player with aircraft must announce the commitment of the counter(s) prior to the revealing of the exact compositions of any involved stacks and/or untried Soviet units, and before any odds calculations have begun for the battle being resolved.
- German aircraft don't exert GZOC. Their inclusion in a battle in no way negates or inhibits the GZOC of the involved German ground units.
11.20 Concentric Prepared Assault
If a unit or stack is defending against a PA originating from two directly opposite hexes, or by units attacking from three hexes with one hex between each hex and the next, or by units attacking from more than three hexes, that PA gains a one column rightward (1R) odds shift. That bonus is available to both Soviet and German units making PA, but it's never available to German units making MA. Similarly, it's never available to units attacking into a city hex.
11.21 Final Combat Resolution
After all applicable odds shifters have been applied, and the final odds column determined, the attacker rolls a die and consults the CRT to get a "combat result." For example, a roll of "5" at odds of 1:1 yields a combat result of "AS" on the CRT. Apply all applicable modifiers before going to the CRT to find each battle's final odds column.
Example: If you're attacking at 20:1 (twenty to one) and there are modifiers operating that give a 2L shift, you're then actually attacking at 18:1. That means you'd resolve that battle without a die roll, obtaining an automatic "DE" result in accordance with the note printed beneath the CRT. You don't convert the original 20:1 to a 5:1, the highest odds column shown on the CRT, and then shift 2L; you apply all modifiers first, then go to the CRT to find your column.
11.22 Combat Results in General
In each battle, the defender must always completely apply his combat result before the attacker applies his. There is never any carry over of a combat result from one battle to another or from one phase or turn to another.
11.23 AS: Attack Stalled
Both sides remain in place and neither side suffers any losses. When this result is achieved in a MA, the Soviet defenders remain in place and the German attackers are put back into their launch hex, from where they may not move again in that same phase.
11.24 AL1: Attacker Lose One Step
The attacking player must remove any one strength step (total) from among his involved units. Both sides otherwise remain in place and the defender suffers no loss. When this result is achieved in an MA, the German force suffers its one step loss; the Soviet defenders remain in place, and the surviving German attackers (if any) are put back into their launch hex, from where they may not move again that same phase. The attacker is always completely free to absorb his step loss from among any of his involved units.
11.25 DR: Defender Retreat-After-Combat
In PA or MA, the defeated defending unit or stack must be retreated into an adjacent hex empty of enemy units. Neither player may retreat his units into hexes containing enemy controlled cities, even if that city is empty of actual enemy units at the time of the retreat. If there is more than one eligible hex available to receive a retreating stack or unit, the owning player must retreat his units in the direction that takes them closer to their nearest source of supply. If more than one route fulfills that requirement, it's his choice.
11.26 Retreat-After-Combat Movement
Retreat-after-combat doesn't use movement points, and it has nothing to do with the costs involved with Movement Phase movement. Retreating units, however, must still observe normal movement prohibitions.
Example: No unit may ever retreat across a reservoir hexside.
Stacking limits must also be observed during retreats. If the only retreat path open would result in over-stacking in that hex, the defending units must all stand their ground and instead take a DE result (11.29). A retreating stack may only be broken up to allow its component units to retreat individually or in sub-stacks into different hexes if stacking restrictions require it. Retreating is always an all-or-nothing proposition; either the whole defending force retreats or the whole defending force stays and instead suffers a DE result, based on the strictures given above. Soviet units may not retreat into hexes containing GZOC (7.0).
11.27 Retreating-After-Combat into Subsequent PA
If defending units in one PA retreat-after-combat into a hex containing other friendly units, and that hex comes under attack that same Combat Phase, the units that retreated into the new hex in no way contribute to their new location's defense against the attack being waged there. If the original defenders in the new hex receive any combat result other than AS or AL1, the newly retreated-in units are automatically and fully eliminated, and their elimination doesn't serve to satisfy any of the current PA's defender result. (That's different than the process described for mobile assaults in 10.22.)
11.28 DR Conversions
Whenever the German player attacks into a city, MA or PA, and gets a DR result, he must convert it to an "AS" or "Bloodbath" result.
- In a bloodbath (a result not otherwise on the CRT), all involved Soviet defenders suffer a DE result (11.29), then the German player must eliminate from among his involved units the number of steps equal to the number of steps just lost by the Soviet player. (That's steps, not combat factors.)
- If choosing a bloodbath would leave the German player without at least one surviving step among his involved force, he must choose AS; otherwise, he's free to choose either conversion result.
- Whenever the Soviet player attacks into a city and gets a DR result, it's automatically converted into an AL1.
- When German units are defending in a hex other than a city, and they receive a combat result of DR from a Soviet attack, the German player may choose to execute that DR retreat result normally or he may decide to convert it into a "Defender Lose 1" result (a result not otherwise on the CRT). To do that he eliminates any one step from among any one of his involved units, thereby allowing all to hold their place. He may not choose to convert a DR to a Defender Lose 1, however, if in doing so he would thereby be eliminating his entire involved force.
11.29 DE: Defender Eliminated
When this result is achieved in a PA or MA, the defender must first eliminate all his involved one-step units. Immediately after that he must reduce all his involved two-step units (if any) to one-step strength. The attacker suffers no losses. In a PA, the attacker may make an advance-after-combat into the defender hex if the DE result has left it empty of enemy units.
11.30 German Panzer & Panzer Grenadier KG
Whenever a panzer or panzer grenadier division (not brigade or regiment) that's been reduced to one-step strength is then eliminated for any reason, immediately replace that unit-counter in the same hex with a KG counter of its same type: 2-1s for panzer divisions and 1-2s for panzer grenadier divisions.
The two types of KG are reverse-printed on each other; that doesn't make them two-step units. Each KG is a one-step unit that enters play with a permanent configuration and type. When/if the KG counters run out, the process stops; entered and eliminated KG may not be entered into play a second time. (There are only some many stalwarts per army group.) Beyond that, once entered into play, each KG immediately begins operating normally as a unit of its type and mobility class.
11.31 PA Advance-After-Combat
At the end of every PA (not MA), whenever the defender's hex is left vacant of defending units, either due to elimination or retreat, the victorious attacking units may advance-after-combat into that hex. Stacking limitations must be observed. Such advances aren't part of normal movement, and they don't cost any MP, but advancing units must still observe normal terrain prohibitions. GZOC don't serve to block the ability of victorious Soviet attackers to advance-after-combat.
Advancing-after-combat is an option; it's never mandatory (exception 12.1). The decision to advance must be made immediately after the battle is resolved and before that of another is begun. It's not necessary for advancing attackers to stack-full the newly won hex; the victorious player may send just one or a few units (exception; 12.1). There is never any defender advance-after-combat; victorious defenders simply hold their place.
12.0 German November Offensive
The German player may openly declare a "November Offensive" at the very start of Game Turn 4, 5, 6 or 7 (Oct IV, Nov I, Nov II, or Nov III). He is not required to declare any such offensive, and he may never declare more than one per game. There is an unavoidable one game turn delay between the declaration and execution of a November offensive.
12.1 Game Turn of Declaration
During the German player turn that immediately follows the German declaration of a November offensive, the following is in effect:
- No German attacks, MA or PA, may take place.
- All German mechanized-class units have their MF reduced by two.
- All German non-mechanized units have their MF reduced by one.
Example: If the German decided to make his November offensive declaration at the start of Game Turn 5 (Nov I), his supplied mechanized-class units would have MF of one that turn, while his supplied non-mechanized units would have MF of two. That's a "2" and a "1," respectively, subtracted from the MF that would otherwise be awarded for the two classes of units on the Turn Record Track that turn.
During the Soviet player turn of the game turn of the German offensive's declaration, Stalin reacts to the lull (and the obvious new offensive it portends) by ordering the Soviet player to launch spoiling attacks.
- To determine the exact magnitude of the required Soviet attacks, the Soviet player must roll a die at the start of his player turn that game turn and multiply that result by three. That will yield a number between three and 18, which represents the minimum number of units he must launch into PA that turn against German units.
- Beyond the requirement to attack with a certain number of units, the Soviet player is free to resolve his Stalin-mandated spoiling attacks normally.
Exception: When it is possible to do so, the Soviet player must advance-after-combat as many of his victorious units as possible into vacated German-defended hexes.
Note: Every Soviet unit, no matter its organizational size or step strength, counts as "one unit" for purposes of satisfying Stalin's order.
If, by some unusual set of circumstances, the Soviet player is unable to attack with the minimum number of units mandated by Stalin, no matter how he moves his units or sequences his phases, then whatever turns out to be the maximum number he can engage is considered sufficient to satisfy the great leader (even if that number is zero). In relation to choosing his phase sequence, if one sequence allows him to meet Stalin's minimum-attack-size demand and the other doesn't, the Soviet player must choose the sequence that best allows him to comply with those orders.
12.2 Game Turn of Execution
The German November offensive is launched and executed during that side's player turn in the game turn following its declaration.
Example: If the German player declared his offensive at the start of Game Turn 6, it would be run during Game Turn 7.
During the game turn of execution:
- All German mechanized-class MF are increased by two.
- All German non-mechanized MF are increased by one.
Example: In the example cited above, during a November Offensive executed during Game Turn 7 (Nov III), German supplied mechanized-class units would have MF of eight, and German supplied non-mechanized units would have MF five.
- All German PA launched that turn receive a one-column rightward shift. Those shifts are in addition to all other normal odds shifters.
Exception: If the German chooses the fight/move sequence, his PA the turn of the November offensive only gains a one column rightward shift, not a cumulative two.
- The German player's normal ground combat support aircraft allocation is also increased by one beyond what's shown on the Turn Record Track for that turn.
- The German player also receives three steps of mechanized-class replacements and three steps of non-mechanized class replacements. Each of the three mechanized replacement steps may be used to replenish a reduced panzer or panzer grenadier division to its full two-step strength. Each of the three non-mechanized replacement steps may be used to replenish a reduced infantry division back to its full two-step strength. Divisions of both categories must be in supply to receive a replacement. No KG may be replenished back into divisional form, nor may the L Brigade or GD Regiment receive replacements. The replacement steps may not be accumulated for use in later turns, nor may any step be used to replenish a unit from outside its own mobility class. Units that receive replacements may operate normally that turn and thereafter.
12.3 No November Offensive
If the German player hasn't declared a November Offensive by the start of Game Turn 7 (Nov III), he thereby permanently forfeits the ability to do so. In that case, play continues uninterrupted except for the following effects:
- For the remainder of the game, due to increasing German logistical and replacement shortfalls, all German MA and PA suffer a one-column leftward shift.
- All Soviet attacks gain a one-column rightward shift bonus. (All those shifts are in addition to the continued application of all other normally applicable shifters.)
13.0 Developers' Notes
by Ty Bomba
This game was originally designed over half a decade ago by my good friend and comrade-in-arms, Joseph Miranda, using his well-liked Balkans '41 system, which was published way back in the 20th. Since then, however, the component structure of S&T has evolved considerably. What 'fit' then, in terms of word-counts and page-counts, isn't a 'fit' now. That was why the decision was taken to redesign DoM to use the similarly well-liked system from Drive on Stalingrad.
Concerning the air-system of DoM: this is an area of disagreement between JM and myself. That is, my belief is, the air system of Balkans '41 is historically inaccurate in that it allows players too many clear-cut and well-developed options for that stage of the war. It presents a system that allows players, particularly the German, to regularly gain operationally significant results with tactical airpower. My belief is, that kind of thing — operationally significant results as an outcome of the application of tactical airpower — was only achieved three times during WWII: Poland in 1939, Southeast Asia in 1942-45, and northwest Europe in 1944-45. Further, those operational successes were, I think, due to unique circumstances that prevailed in each of those cases.
In 1939 the Germans got such powerful results because the Poles, for political reasons, didn't begin their armed forces' mobilization until war was already upon them. Since that mobilization was inescapably tied to a handful of important and easily identifiable rail-junction cities, the Germans, by returning again and again to hit those places, could achieve the operational disruption of much of the mobilizing Polish army. They were in fact able to delay all of, and completely overturn parts of, that process.
In Southeast Asia, the overall topographic situation across that vast region at the start of the Pacific War could be summarized as an immense, under-developed, agricultural and semi-wilderness tied together by a few major, easily recognizable, transport arteries and large ports. That meant, despite the vast size of the overall theater of operations, tactical air forces of both sides could achieve operationally significant results by concentrating their efforts against its few transport arteries and nodal points.
In northwest Europe in 1944-45, the Allies got such good results, first, because they simply had such immense aerial resources to bring to bear against the Germans. Second, aerial technologies and doctrines had by then been improved to the point nighttime and bad-weather operations were no longer entirely ruled out.
In terms of what was lacking for tactical airpower early in the war in Europe — to dependably expand tactical airpower into operational airpower — what was needed was: nighttime and all-weather attack capability, air transport and supply doctrine, and corresponding amounts of equipment designed specifically for those kinds of operations.
The primary source that's most affected my understanding this aspect of World War II's air war is the transcribed, book-length debriefing of Luftwaffe Gen. A.D. "Fritz" Morzik, head of that air force's transport arm during the war. His memoir of that aspect of the struggle runs to 417 pages, and was published by the USAF in 1968 through Arno Press, under the title: German Air Force Airlift Operations. (Interestingly, in World War I, Morzik flew as a combat pilot in the "Pasha" squadron Germany sent to the Middle East theater.)
Morzik points out in his book that, contrary to popular wisdom, German air-transport and air-supply doctrine didn't simply arrive, full-blown, on 1 September 1939. At the start of the war the only troops the Germans believed would need that kind of thing were the relatively small numbers of paratroops, and perhaps the single army division of light "air landing" troops. No one was imagining large numbers of regular German ground force troops would need to be supplied by air as they fought to survive behind the enemy front in large pockets. A further important upshot of that failure of imagination was the fact the only air-droppable supply canisters on hand were, again, small and light affairs intended only for use with paratroopers. German Paratroop doctrine, in turn, called for them to be quickly linked up with advancing ground forces — and hence their rapid reintegration into the regular supply net.
Thus, when "air supply" was used during the portion of the war fought prior to the pocket-formation battles, which started taking place for the first time early in 1942, it was used to speed the forward movement of some critical type of commodity (for instance, gasoline being moved in "Gerry Cans") along existing overland supply routes. It was not conducted as a logistical operation independent of the on-the-ground German supply system.
The need for large air-droppable supply canisters became apparent, at places like Kholm and Demyansk, only in 1942. The tube-like containers used by the paratrooper "sticks" were then found to be inadequate. Not only were they too small to hold the kinds and quantities of supplies needed by trapped German conventional units, they were also too light to hold together against the stresses inherent in being air-dropped when crammed full of those other types of commodities. Thus, Morzik had to pretty much start from scratch, overseeing the speedy design and initial production of a whole new set of supply canisters. (The fact he was able to do that in a matter of weeks, rather than months or even years, is remarkable.)
In pockets, large enough to contain airfields there was also a problem in that the Germans trapped on the ground there, no matter how bad the tactical situation might become around the airfields, would inevitably report via radio that it was OK for the transports to come in and land. From those men's perspectives, of course, they were managing to survive in the terrible conditions of a pocket; so, they certainly weren't going to let some flyboys get by with abandoning a supply mission because of a 'little enemy gunfire' over an airfield.
Morzik solved that problem by quickly instituting Luftwaffe logistics command liaison teams, who were air dropped (or landed on the airfield) into such pockets as soon as they were formed. Those teams were independent of the chain of command of the pocketed troops, reporting directly to Morzik; and they had the yes/no say-so on whether conditions allowed for landing Luftwaffe transports.
Morzik's changes and reforms worked so well that during 1944-45 it wasn't unusual for pocketed German troops to get better supply via the Luftwaffe than their comrades outside the pockets got through regular German Army logistical channels.
In the realm of operational combat results, as I mentioned above, the great weakness of most World War II tactical air forces was their almost universal and complete lack nighttime and bad-weather attack capability. The common north European weather feature of daytime low-cloud cover could often overturn one side's tactical air dominance above a fighting front. And it never took long for ground commanders on the losing side of the tactical airpower contest to realize it was time to put their units, in so far as operational maneuver was concerned, on the 'night shift.'
For all those reasons, then, I've come to view the original air system from Balkans '41 as what amounts to an 'alternative history' view of that component of the early-war fighting in Europe. I think it could be easily adapted to the widening powers and uses for tactical airpower for campaigns that began in 1942 and after, but it allows for a way-too-sophisticated use of airpower in campaigns prior to that time.
The traditional Soviet winter counteroffensive scenarios are also missing from DoM. The simple reason for that is, the map scale is wrong for that to be an interesting option. That is, at this map scale, the farthest penetration into the Germans' position, after three-and-a-half months of Soviet hammering (14 game turns), was nine hexes. In contrast, the Germans go about three times that distance in nine game turns.
My experience with that kind of thing was set in place decades ago when first playing the original AH Battle of the Bulge game. That is, both players would sit down to it while swearing they were both ready to fight it out to the bitter end. Of course, come 23 or 24 December, and it became clear the Germans weren't going to jump the Meuse, etc., that player would sigh and say something like: "Say, I believe we can see where this is going. Why don't we put it away and get something else out to play that we can both enjoy?"
We used to call that kind of thing the "Bulge Syndrome." I sought to avoid it here. The idea in DoM is to make it be as accessible as possible in terms of a big game. That means one scenario — which works to focus everyone's play, most quickly generate AARs and strategy articles, etc., while also controlling playing time and overall rules length.
Players' Notes
The key to the game for the German player is to plot a strategy — and, just as important, make your initial operational deployments — in such a way that your forces' ever-deteriorating mobility can still get the job done. Above all, that means deploying your forces so you can drive on Moscow and all the other cities on the map at the same time. More than one playtest game was lost when, during the final turns, the German commander realized he was only one city away (usually Kursk) from a victory based on rule 4.4. The thing is, it doesn't matter how under-defended a Soviet city is if you can't get anything there to attack it in time. If you just kind of 'mob up' your combat power in the center of the front, figuring you'll send out expeditionary forces toward the flanks as circumstances evolve — which seemed to be the dominant approach among first-time German commanders — against competent Soviet play you will lose every time.
When it comes time to make the "November Offensive" decision, study the map. Essentially, if you decide for that offensive, you'll be giving up one turn of normal operations to get a doubled-up turn of operations. Whether that trade-off is worthwhile will depend entirely on the distance you still must go to reach your objectives.
The key to winning for the Soviet player is found in that side's Guards formations. Don't attempt to use them to create massed, counterattacking "Guards Army" — this isn't yet that phase of the war. Spread out the Guards into the key locales, while also establishing a main reserve of them in Moscow.
Terrain Key
The map's terrain key shows: clear, forest, marsh, towns, cities, starting frontline boundary hexside, Soviet supply sources, reservoir hexsides, Soviet fortifications and river hexsides.