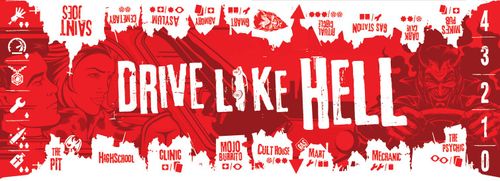
Drive Like Hell
Drive Like Hell Rulebook
Table of Contents
Table of Contents
Object of the Game
To win the game you must reach the Saint Joes location without The Devil reaching you, having your vehicle receive four points of damage or having a Fiend reach your location.
Components
- 18 identical cards (two sided)
Card Sides: One side of the card is referred to as the 'Drive' card. The other side is referred to as the 'Hell' card. See diagram below.
Setup
(See diagram next page.)
- Take 10 cards to form the Chase Deck. Set TWO of these cards so that the word 'Hell' is faceup and the remaining EIGHT cards, so the word 'Drive' is face up. Shuffle these cards.
- Place the remaining 8 cards as shown in the diagram. This includes:
- Set two cards in the center of the play area to create the Locations game board so that they spell 'Drive Like Hell'.
- Setting your starting Gas resource to '3'.
- Setting your starting Mojo object as the Necklace.
- Setting your car's Damage tracker to 4.
- Set your Vehicle card at the Highschool.
- Set the Devil card at The Pit.
Setup Diagram: Note that areas have been highlighted to show which part of a card is important in its current use. For example 'Your Vehicle' is represented by the car image at the top of the card. You will not use any other part of that card during gameplay. When tracking resources like Gas, Mojo and Damage, you will only use the numbers/icons as shown in the diagram below.
Gameplay
- Each turn:
- Mojo Phase
- Decide if you want to Focus Your Mojo on a different object. If you do, you may move the tracking card up or down 1 space (if possible).
- You may use the current object's ability of the Artifact immediately (if applicable) or wait for it to trigger in some cases. Use this effect once per turn.
- Note: The Necklace's effect may only be once per game.
- Note: Some Objects have a cost when they are used. An arrow with a number will instruct you how to shift the Mojo tracker after using the object. For example, when using the Relic you should shift the tracking card down 2 spaces (back to the Necklace).
- Chase Phase
- Draw 3 cards from the bottom of the Chase Deck.
- Place the cards to form a row from left to right.
- Depending on the result resolve as follows:
- 'Drive' cards: For each 'Drive' card you spend you may either:
- Move your Vehicle ahead one location (if you have Gas available). If you do so, reduce your Gas by 1.
- For every two 'Drive' cards you may increase your Gas by 1.
- If you have an unused 'Drive' card remaining, you must always move ahead at least 1 Location if possible.
- 'Hell' cards: For each 'Hell' card you should move The Devil ahead 2 locations. If this would cause the Devil card to pass your location or end at your location you lose the game and your soul!
- Additionally:
- If you draw 1 'Hell' card:
- Take 1 Damage to your vehicle.
- Flip a Chase card in you just drew, in your discard or deck from the 'Drive' side to the 'Hell' side. If you cannot, you lose.
- If you draw 1 'Hell' card:
- Additionally:
- 'Drive' cards: For each 'Drive' card you spend you may either:
- Mojo Phase
Movement Diagram: In the example below your car moves 3 locations (wrapping around the board).
Fiend Diagram: In the example below a Fiend has been added to Saint Joes. If a game effect would cause a Fiend to be added later, instead just move the current Fiend towards you.
A Note About Shuffling
For the sake of uncertainty and fun, try not to look at the cards in the Chase deck as you are shuffling them. It's ok to look at the top card of the deck after shuffling. This little bit of information is gleaned from your lover's feverish words as you race along the dark night roads.
Icon Definitions
- Foretell (Eyeball): Look at the bottom card of the Chase deck for each Foretell icon you receive this turn.
- Damage (Burst): Your vehicle takes damage (tracked as shown in the diagram) from the dark forces pursuing you.
- Curse (Pentagram): Things are heating up! For each of these icons flip a 'Drive' card from your Chase deck to a 'Hell' card then shuffle the deck. If you cannot do this, you lose the game.
- Gas (Gas Can): Increase your vehicle's gas supply by one.
- Repair (Wrench): Repair 1 damage to your vehicle per Wrench icon.
- Keepsake (Necklace): The first time you would lose the game as a result of the Devil reaching your location, ignore that effect and move ahead 1 location. Useable once per game.
- Medical Kit (Cross Box): Restore 1 cards in your discard pile from 'Hell' card to 'Drive' card.
- Relic (Hand): Restore 1 cards in your Chase deck from 'Hell' cards to 'Drive' cards. Reshuffle the discard pile into the Chase Deck.
- Speed (Speedometer): You may move +1 location this turn.
- Holy Water (Bottle): Ignore the effect of a location that you move onto this turn.
- Silver Bullet (Bullet): Discard a Fiend at a location that you move into this turn.
- Shuffle (2 cards): Shuffle cards in your discard back into your deck.
Losing the Game
You lose the game if a Fiend or The Devil reach your location or your car takes too much damage (reaching zero). If you cannot flip a card to the 'Hell' side when required to do so you also lose.
Winning the Game
If you end your turn at the Saint Joes location you win!