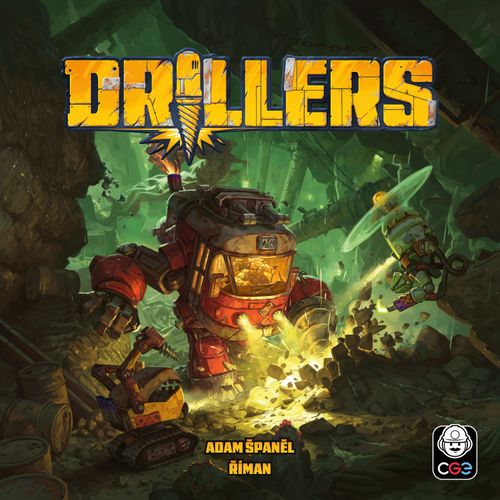
Drillers
Drillers Rulebook
Table of Contents
Table of Contents
- Game Overview
- Components
- Setup
- Dashboard
- 1. Operations
- Cards
- 2. Surfacing
- 3. Upkeep
- Delving Deeper in the Mines
- End of the Game — The Mine Collapses!
- Solo Mode
- Setup
- Overview
- Action Turn
- How to Read the Bot's Action Board
- 1. The Bot Uses Every Drilling They Have Available
- 2. The Bot Collects the Most Valuable Available Mineral
- 3. Finally, If the Bot's Action Has a Move Icon, the Bot Moves
- Reset Turn
- Milestones (Solo)
- Floor Cards (Solo)
- End of the Game and Scoring (Solo)
- FAQ
- List of Icons
Game Overview
As a professional driller, your goals are to:
- Build an awesome mech, buying new cards for your rig and repairing the damage your mech sustains.
- Collect valuable minerals. Every mineral you have on your dashboard at the end of the game will be worth points.
- Expand the mine, drilling mine tiles to access new floors and discover new minerals. Each mine tile you drill is worth points.
DRILLERS is played in a series of turns, starting with the first player and continuing clockwise. When it's your turn, follow these phases:
- Operations — Play cards and perform effects, like moving your mech between floors, collecting minerals, and drilling mine tiles. Effects cost fuel, a resource you'll have to carefully manage.
- Surfacing — If you end your Operations on the surface, you'll get to sell minerals, buy upgrades, make a repair, and fill your fuel tank to the max.
- Upkeep — Discard the cards you played, spend fuel to keep extra cards in your hand, then draw 3 new cards.
Players continue taking turns until one of them triggers the end of the game. After the other players take a final turn, all players will calculate the victory points they earned in hopes of being crowned the ultimate Driller of Legend.
Components
- 1 main board (7 floors: surface, mine entrance, 5 underground floors)
- 1 2-piece shop board
- 66 cards: 14 damage, 12 drilling, 12 movement, 12 utility, 16 advanced
- 4 milestone tokens
- 29 corridor mine tiles (5 / 6 / 7 / 6 / 5, one stack per floor)
- 4 barrier mine tiles
- 43 credit tokens (25 × 1, 12 × 5, 6 × 20)
- 12 floor cards: 3 starting, 9 deep
- 105 minerals: 13 silver, 21 gold, 27 sapphire, 23 emerald, 21 ruby
- 1 proper mech fitting (tray)
For each player, in their color:
- 1 mech miniature
- 8 starting cards
- 1 dashboard (assembled using 3 stickers)
- 1 fuel cap tile
- 1 storage cap tile
- 3 gauge indicators
- 3 drone tokens
- 1 shop refresh tile
- 1 assembled card stand
Setup
Ready the Mines
- Unfold the main board and place it in the middle of the table. Note that the board consists of 7 floors: the surface, the mine entrance (floor 1), and 5 underground floors of the mine.
- Most floors start with minerals on them. Place minerals on each floor to match the minerals printed there. Note: floor 4 will also start the game with two advanced cards — see step 9.
- Place the remaining minerals in a pile next to the mine.
- Shuffle the 3 starting floor cards and place 1 face up next to the starting indicator on floor 2.
- Shuffle the 9 deep floor cards and deal one face down on each floor with a deep indicator. Put any unused floor cards back in the box.
- Find the 4 barrier tiles. Place one on each of the 4 lowest floors of the mine, so that the floor indicator in the upper left corner matches the number on the floor.
- Flip all the corridor tiles face up, so the minerals printed on the tiles are visible. Sort them into 5 stacks according to the floor indicators in the upper left corner. Randomize the order of each stack and place them in the marked area on the left side of each floor.
Settle the Surface
- Place both pieces of the shop board above the mine.
- Sort the cards according to the icon in the top left corner:
- Mech icon: leave these to the side for now. These will be the cards in each player's starting deck.
- Damage icon: place the DAMAGE cards in a stack to the left of the shop board.
- Drilling / movement / utility / advanced icons: sort the remaining cards into separate decks by icon. Shuffle each deck, and place them face down on the corresponding spaces of the shop board. Each of these decks represents a different shop.
- Reveal 2 cards from each deck, placing them below the shop board to form 4 columns. Additionally, place 2 cards from the advanced shop face down underneath the deep floor card on floor 4, without looking at them.
- Place each milestone token next to the shop board.
- Place all credits in a pile next to the shop board.
Start Your Mech
- Each player should select a mech. Place your chosen mech miniature on the top floor of the board (the surface).
- Assemble each player's starting deck. Give each player their card stand, one DAMAGE card, and the 8 starting cards in their color. Each player sets the TORSO card aside. Shuffle your remaining cards to form a deck, and place it face up into your card stand. Finally, place the TORSO card on top of your deck. Note that in DRILLERS, you (and only you) can always see the top card of your deck!
- Give each player a dashboard.
- A: Place a fuel cap blocking the "11" and "12" spaces of your fuel tank.
- B: Place a gauge indicator on the "10" space of your fuel tank.
- C: Place gauge indicators at the beginning of your movement gauge and drilling gauge.
- D: Place 3 drone tokens into the drone slots at the bottom of your dashboard. Flip 1 face up, and leave the other 2 face down.
- E: Place a storage cap blocking the third space of your storage area, leaving 2 empty storage spaces to the left.
- Give each player a shop refresh tile. Place it beside your dashboard.
- Distribute starting resources. Randomly select a first player. Based on your player count, gain credits and draw cards from your deck according to your play order:
| 2 players | 3 players | 4 players | |
|---|---|---|---|
| 1st player | 2 credits, 3 cards | 2 credits, 3 cards | 2 credits, 3 cards |
| 2nd player | 4 credits, 4 cards | 3 credits, 4 cards | 5 credits, 3 cards |
| 3rd player | — | 5 credits, 4 cards | 4 credits, 4 cards |
| 4th player | — | — | 7 credits, 4 cards |
Dashboard
Your dashboard keeps track of these things:
- Fuel Tank — Track the fuel you spend or gain here.
- Drilling and Movement Gauges — Used to track unused movement and drilling.
- Progress Track — Filled with mine tiles from left to right. Triggers the end of the game when full.
- Milestones — Earn bonuses by covering these lines.
- Overflow Zone — Minerals in the Overflow Zone shorten your progress track.
- Drones — Active drones can be used during Operations to sell 1 mineral or buy 1 card.
- Default Functions — the icons printed at the bottom of your dashboard.
- Storage — Place collected minerals here, to the left of the storage cap.
- Market — Minerals you collect are sold here.
1. Operations
During Operations, you may freely alternate between moving, drilling, playing cards, using your mech's default functions, and using drones. You may perform these effects in any order, as many times as you want to (and can afford to!). Your Operations phase ends when you no longer want to perform any of these effects.
Moving and Drilling
During Operations, you'll generate drilling and movement by spending fuel and playing cards. These allow you to perform your mech's most important functions: MOVING and DRILLING.
Moving
Spend 1 movement to move your mech up or down 1 floor. You may only move your mech onto open floors (any floors without barrier tiles are considered open).
Example: Yellow plays cards that give her a total of 3 movement. She spends them to move up 3 floors, ending on the surface.
Drilling
Drilling can be spent in 3 different ways:
Collect Minerals. If your mech is on a floor with a mineral, you may spend 1 drilling to collect it. Place collected minerals in your mech's storage. If your storage is full, you cannot collect more minerals.
Example: Yellow spends 1 drilling to collect the mineral from their floor, placing it in their storage.
Excavate Corridors. Most floors have a stack of corridor tiles, with a cost in drilling listed above them. If you are on a floor with corridor tiles, you may spend drilling equal to the listed cost to excavate one: add the minerals shown on the top corridor tile to its floor and place the tile face up in your progress track.
Example: Yellow spends 2 drilling to excavate a corridor. They add the minerals shown on the tile to their floor and place the tile in their progress track.
Remove Barriers. If your mech is on a floor directly above a barrier tile, you may spend drilling equal to the number shown on the barrier tile to remove it. Place the barrier tile in your progress track and reveal the floor card below it. Resolve any on-reveal effects on the card, then move your mech to the newly open floor. Do not pay movement for this move — you drilled down so far that you found a new floor!
Example: Yellow spends 4 drilling to remove a barrier. They place the barrier tile in their progress track and reveal the floor card under it. Finally, they must move to the newly open floor (without spending movement).
Using the Gauges
On your turn, you may freely spend movement and drilling you have gained. You can move and drill in any order, but you don't have to spend them right away — the corresponding gauges on your dashboard help you keep track of any movement and drilling you haven't spent yet.
Cards
During Operations, you'll play cards to generate movement, drilling, and a wide variety of other effects.
Whenever you play a card, it goes to an area in front of your dashboard called your play area. You'll move all of the cards in your play area to a personal discard pile during Upkeep.
Each turn, you'll have a hand of cards. With each card, you'll choose to either:
- Spend fuel to play its main effect. Fuel is spent from the fuel tank on your dashboard. You can track any movement or drilling you generate on the corresponding gauges of your dashboard. Some cards have instant effects and/or unique effects. Both are considered part of a card's main effect, and can be resolved in any order.
- Gain fuel. Instead of its main effect, every card can be played to gain fuel. To do so, play the card into your play area and increase your fuel by the listed amount. You can never gain fuel past your fuel cap.
- Save it for the next turn. You don't have to play all of your cards every turn! Sometimes it's best to hold onto a card for your next turn. You're allowed to hold 1 card for free between turns, and can spend 1 fuel for each additional card you'd like to save during your Upkeep.
Card Anatomy
- Card type — the icon in the top left corner.
- Purchase cost — the credit cost shown in the top right corner.
- Amount of fuel gained if played for fuel.
- Cost of main effect — the fuel cost to play the card for its main effect.
- Instant effects — resolved immediately, as part of playing a card for its main effect.
- Generated movement and drilling.
- Unique effects — resolved when playing a card for its main effect. These are resolved immediately, unless accompanied by:
- an infinity icon: you can perform this effect any number of times this turn.
- a "1x" icon: this effect can be performed once, at any time during your Operations phase.
The main effect of some cards costs solid fuel. To play these cards for their main effect, you must move any 1 mineral from your storage to your overflow zone. This mineral is not sold, and you gain no credits for it — but it will still be worth points at the end of the game.
Default Functions
In addition to playing cards, you may always perform your mech's default functions during Operations. While not as fuel-efficient as cards, default functions are very important. They will often let you get that little extra action or fuel you need to take great turns!
- Spend 3 fuel to generate a movement.
- Spend 4 fuel to generate a drilling.
- Once per turn, you may take 1 damage to gain 3 fuel. When you take a damage, place a DAMAGE card from the stack in your discard pile.
- Exhaust a mine tile. The mine tiles you collect can be exhausted for a variety of effects. To exhaust a mine tile, resolve the effect listed at the bottom of the tile, then flip it face down. Exhausted mine tiles are worth fewer points at the end of the game.
Note: You may also exhaust mine tiles during the Surfacing phase. Usually, you'll do this in order to pay costs, both in credits and drilling.
Operations example: Red spends 4 drilling to play GRABBER for its main effect, using the 2 drilling to excavate a corridor on her floor. Using a default function, she pays another 4 drilling to collect the mineral placed there when she excavated the corridor. Now, she wants to move back to the surface: she plays SPIDER LEG to gain 2 movement. She then plays VINTAGE DRILL for its 3 fuel, spending the fuel to gain a movement with a default function. Using these 3 movement, she returns to the surface.
Drones
Drillers love these little fellers. Their brains be only nuts and bolts, but they all smart enough to do lots on their lonesome. Really makes a driller think.
Drones are tokens on your dashboard. They let you perform effects that you can normally only perform during the Surfacing phase. You may use any of your face-up drones during Operations. When you want to use a drone, flip it face down and either:
- Sell 1 mineral, or
- Buy 1 card.
The procedure for both selling minerals and buying cards is explained in the Surfacing section below.
Refresh icon: This effect refreshes one of your drones. When you gain it, flip one of your face-down drones face up.
2. Surfacing
O'er the past few moons, I hear a little camp has sprung up on the surface around the hole, sellin' would-be drillers all manner of shiny new toys to dig deeper and faster than the competition.
During the Surfacing phase, you visit the shops in the surface camp. You conduct this phase only if you end your Operations on the surface (the top floor of the board). Otherwise, skip to Upkeep.
While surfacing, you can perform each of these effects in any order: sell minerals, repair, discard cards, upgrade your rig, refuel, and buy new cards. With the exception of repair, you may perform each of these effects as many times as you like.
Sell Minerals
Sell all the minerals in your storage. To sell a mineral, move it to its column in the market table. Always fill the columns from the bottom. Gain credits equal to the amount shown on the space you covered.
Overflow: If the mineral's column is full, you sell it for a lower price. Place the mineral in the rightmost empty space of the overflow zone. The amount you get is shown above the mineral's column. All minerals (even unsold minerals) are worth points at the end of the game.
Example: The emerald is the first this player has sold. The market says it sells for 8 credits. The gold column is full. This gold will go to overflow and sell for 0. It will still be worth 3 points at the end of the game. (Too bad it wasn't sapphire — those sell for 4 when they go to overflow.)
Repair
For the cost of 5 credits you may repair one card. You may only repair once each time you surface.
When you repair, choose any card from your hand, play area, discard pile, or the top card of your deck and remove it. If you repair a DAMAGE card, place it on top of the damage stack. Otherwise, remove the repaired card from the game.
Additionally, if you repair a card in your hand, draw a card to replace it.
Warning! Many of the cards in your starting deck are worth negative points at the end of the game. Repair these cards if you can!
Discard Cards
You may discard any number of cards still in your hand, gaining 2 credits for each card you discard. Remember that you'll still have to pay fuel for cards left in your hand during Upkeep.
Upgrade Your Rig
Your mech's fuel cap and storage cap can both be upgraded. To upgrade your mech's storage, pay 3 credits and move your storage cap 1 space to the right.
To upgrade your mech's maximum fuel, pay the cost listed on the space immediately to the right of your fuel cap. Move your fuel cap to this space.
Buy New Cards from the Shops
There's 4 shops doin' business in camp: SPINERAMA sells drills, PONY EXPRESS sells propulsion, and BOTS 4 LESS sells a bit o' everything. There's also that shifty suit sellin' old corp tech…but you'll need the bottomless energy of them weird blue batteries to run 'em.
To purchase a new card, pay the cost in the upper right corner in credits (and batteries, if required).
Usually, you'll place the newly purchased card on top of your deck. If you buy a permanent card, put it beside your dashboard.
Cards that you buy are not replaced immediately, but will be refilled during Upkeep.
Advanced Technology. Some cards in the shop use advanced technology, as indicated by the battery icon in their cost. To purchase one of these cards, you must spend a battery in addition to paying the required credits. Batteries are spent by exhausting a mine tile with a battery icon.
Permanent Cards. Permanent cards are oriented horizontally, and are never added to your deck. When you purchase a permanent card, place it beside your dashboard, outside your play area. You can use a permanent card's effect once during each of your Operations phases.
Shop Refresh Tile
Once per game, you can use your shop refresh tile to replace the cards currently available in one of the shops with new ones. If you would like to perform a shop refresh, follow these steps:
- Flip your shop refresh tile face down (so it shows 0).
- Choose one of the shops to refresh. Take all of the cards currently available in that shop, shuffle them, and place them on the bottom of that shop's deck.
- Refill the shop, drawing 2 new cards and placing them face up.
Note: When the advanced shop is refreshed after it has expanded, draw 4 cards instead.
You can refresh a shop at any time during the Surfacing phase, even after you've already bought a card from that shop.
Refuel
Completely refill your fuel tank, moving your fuel indicator to your fuel cap.
When you've done everything you want to do on the surface, you can move on to your Upkeep.
3. Upkeep
At the end of your turn, regardless of whether you surfaced or not, you'll perform your Upkeep. Follow these steps in order:
- Pay fuel to keep unplayed cards. You may keep one unplayed card in your hand for free. Pay 1 fuel for each additional unplayed card you would like to keep.
- Clear your play area. Move every card in your play area to your discard pile and reset your drilling and movement gauges to 0. Note: Permanent cards never go to your discard pile! Keep them separate from your play area.
- Draw 3 cards from your personal deck. Note that you always draw 3 cards, regardless of how many cards you saved. If, at any point, there are no cards left in your deck, immediately shuffle your discard pile and place it face up in your card stand.
- If you bought any cards, either with drones or during the Surfacing phase, refill each shop from its respective deck.
Delving Deeper in the Mines
As you excavate the deeper floors of the mine and fill your progress track, you'll encounter new surprises: floor cards, milestones, and the shop expansion.
Floor Cards
Most floors of the mine start with a floor card. When you open a new floor, reveal the card that's there and place it to the right of the floor.
Floor cards have 4 different kinds of mandatory effects:
- On reveal: These effects happen once, immediately when the floor card is revealed.
- When excavating a corridor: Resolve this effect after you excavate a corridor on this floor.
- When collecting a mineral: Resolve this effect whenever you collect a mineral from this floor.
- End of Operations effect: Resolve this effect if your mech is on this floor when you end your Operations phase.
Once revealed, floor cards remain active for the rest of the game.
Milestones
On each player's progress track, there are 3 milestone lines.
The first player to cover a milestone line earns a milestone: They take the corresponding milestone token, and place it above their progress track. It'll be worth points at the end of the game.
Each other player immediately gains the credits or draws the cards shown on the milestone token.
In addition to the 3 milestones earned via the progress track, there is a final milestone awarded to the player that triggers the end of the game.
Advanced Shop Expansion
As soon as a player opens floor 4 of the mine, the advanced shop expands. Add the 2 cards placed underneath the floor card during setup to the shop.
The advanced shop now contains 4 cards for the rest of the game. If a player refreshes the advanced shop, they'll discard all 4 cards and reveal 4 new ones.
End of the Game — The Mine Collapses!
A player triggers the end of the game when they complete their progress track. This happens when the tiles in their progress track meet the cubes in their overflow zone. A player with no cubes in their overflow zone triggers the end of the game when the tiles in their progress track reach the end of their dashboard.
The player who triggers the end of the game takes the final milestone token, which is worth 18 points. All other players draw a card, as indicated by the milestone token.
The mine has become unstable from so much drilling: after the player who took the milestone finishes their turn, every other player takes one final turn before the mine collapses. Then, the game ends — the player who triggered the end of the game doesn't take another turn. If your mech is still in the mine at the end of your final turn, you'll lose points based on its depth. Try to get out if you can!
Example: After excavating a corridor, the mine tiles in Yellow's progress track have passed the cubes in their overflow zone. The end of the game has been triggered! This will be Yellow's final turn of the game.
Scoring
At the end of the game, each player scores points for:
- Every collected mine tile. Count only the points listed in the top-right corner of each tile.
- Every mineral in your market, overflow zone, and storage. Each mineral is worth a fixed amount of points according to its type.
- Every 5 credits you have remaining at the end of the game is worth 1 point.
- Every collected milestone, as well as any unused shop refresh tile, scores points according to its printed value.
Each player loses points for:
- The final position of their mech. The lower your mech is in the mines, the more points you lose, as indicated on each floor.
- Every card in their deck that is marked with negative points in its upper right corner.
The player with the most points wins the game! If there is a tie, the tied player with the most remaining credits is the winner. If players are still tied, the tied player with the most remaining fuel is the winner.
Solo Mode
In the solo game, the human ingenuity of your driller faces off against the seemingly limitless power of the soulless corporate bot. Try to defeat them over 4 levels of increasing difficulty to prove the superiority of your fleshy brain!
Setup
Follow all the normal steps of setup, but instead of distributing starting resources, prepare the bot:
- On the back of the dashboards, you will find 4 boards for the bot, one for each difficulty level. Choose a difficulty that you would like to play against. The more stars in the bottom right corner, the more challenging the bot.
- Each difficulty is tied to a different color of bot. Take the miniature matching the difficulty you chose and place it on the surface.
- Assemble a starting deck for the bot as you would for a player (including a DAMAGE card). Don't give them a card stand and don't have them begin with the TORSO as their top card. Just shuffle their starting deck and place it face down. The bot will never buy new cards, nor will they ever reshuffle their deck.
Overview
You, the human player, begin the game with 2 credits and 3 cards. The bot will never draw cards or gain credits. You will take the first turn.
Turns will alternate between the player and the bot. You'll take your turns exactly as you would in a multiplayer game.
When the bot's turn begins, check their position:
- If they're on the surface, they will take an action turn.
- If they're in the mine, they will take a reset turn.
Action Turn
If the bot starts their turn on the surface, turn over the top card of their deck. Ignore everything on the flipped card other than the fuel cost of its main effect. On the bot's action board, find the row matching the fuel cost of the flipped card's main effect and the leftmost column with any empty mineral slots. The intersection of the two determines:
- How many drilling the bot will use this turn.
- Whether the bot will move up or down this turn.
How to Read the Bot's Action Board
The fuel cost of the flipped card's main effect determines which row to use. When determining the bot's action, always use the leftmost column that still has empty mineral slots. (If the mineral track is completely full, use the rightmost column.)
Example: The bot flips a card with a cost of 4, and has not yet filled any mineral slots this game. That means the bot will take the action in the top row, first column.
As the bot collects minerals, place them in this mineral track, filling it from left to right. Each slot on the bot's mineral track fits either 2 silver/gold, or 1 of any other mineral.
Whenever the bot has an odd quantity of total silver and gold, place the odd mineral in this buffer slot. When the bot collects another silver or gold, combine it with the mineral in the buffer slot to fill the next slot in the mineral track.
The bot has a progress track, just like you. They'll place collected mine tiles in this track, and earn milestones if they progress faster than you.
Once the bot fills their mineral track, all future minerals they collect are placed in their overflow zone.
Stars indicate the difficulty of the bot you're facing.
The bot uses drilling according to a list of priorities, shown top to bottom on the action board as: next barrier tile, excavate matching corridor, collect matching mineral. Ignoring the position of their mech, the bot will take the highest priority action that they have enough drilling to afford on any open floor.
After determining which action the bot will take, resolve each icon in that action from left to right.
1. The Bot Uses Every Drilling They Have Available
Moving down the list of priorities, the bot will take the first action that:
- Is available for them to take. For example, if there are no ruby minerals on open floors, the bot will not take a ruby mineral, and will keep moving down the list of priorities.
- They have enough drills to afford. For example, if the next barrier tile costs 4 drilling to drill, but the bot only has 3 drilling available, they will keep moving down the list of priorities.
The bot repeats this procedure as long as they still have drills remaining. This may result in the bot drilling a mine tile and collecting multiple minerals on the same turn.
Note: If the bot ever has to take a silver mineral, but there are none on the open floors, they take a silver mineral directly from the supply.
Example: The bot has 3 drilling to use this turn. They cannot afford to remove the next barrier, which would require 4 drilling. There is no sapphire or better available on open floors, so they excavate a corridor, spending 2 drilling. They have 1 drilling remaining, which they use to collect the sapphire that was added to the floor during the corridor excavation.
2. The Bot Collects the Most Valuable Available Mineral
After using all of their drills, the bot collects the most valuable mineral from any open floor. This works exactly like collecting minerals from the bot's priority list.
3. Finally, If the Bot's Action Has a Move Icon, the Bot Moves
To resolve a move, move the bot's mech to the best floor: the open floor with the most ruby minerals. If multiple floors are tied for the most (including 0), compare the tied floors by checking which of them has the most emerald minerals. Keep checking the mineral of the next highest victory point value until you break the tie.
If floors remain tied across all mineral types, the mech moves to the bottommost tied floor.
The bot aims to collect some of these minerals when it takes a reset turn.
Example: There are no ruby minerals on open floors. The bot looks for the open floor with the most emerald minerals. There's also no open floor with emerald minerals, so they move to the floor with the most sapphire minerals instead.
Reset Turn
If the bot starts their turn underground, they will take a reset turn. Unlike an action turn, the bot doesn't flip a card from their deck during a reset turn. Instead, follow these steps:
-
The bot collects the 2 most valuable minerals on their floor. If there are fewer than 2 minerals on the bot's current floor, they take a silver mineral from the supply for each mineral they could not collect.
-
Move the bot's mech to the surface and refresh the shop. Based on the minerals the bot collected this turn, refresh the shop:
- For each gold or silver collected, discard the card with the lowest credit cost.
- For each sapphire, emerald, or ruby collected, discard the card with the highest credit cost. Ignore battery costs.
If there is a tie for lowest or highest credit cost, discard all cards of that cost in the shop.
After discarding cards, refill the shop.
Example: The bot collects the sapphire and gold minerals on their floor. Then, they move to the surface, discarding the highest cost and the lowest cost card.
Milestones (Solo)
If the bot earns a milestone before you, they receive the token and the corresponding milestone bonus. You gain credits or draw cards as normal. If you earn a milestone, the bot collects a silver mineral from the supply instead of gaining credits or drawing cards.
Floor Cards (Solo)
The bot reveals floor cards in the same way that players do. However, the bot is unaffected by all text on floor cards, and ignores their effects during their turns.
Exception: When the JACKPOT floor card is revealed, add just 1 emerald mineral. Only the player can collect it.
End of the Game and Scoring (Solo)
The end of the solo game can be triggered in 2 different ways:
- The player or the bot completes their progress track, or
- The bot draws the last card in their deck.
Just like the multiplayer game, the player or bot who triggered the end of the game finishes their turn. Then the other player takes one final turn.
At the end of the game, the bot only scores points for their collected minerals, mine tiles, and milestones. They do not lose any points for being underground or for the cards in their deck.
Score points for yourself in the same way you would in the multiplayer game. If you score higher than the bot, you've won!
FAQ
- Do I shuffle my deck when my draw pile is empty, or when I need to draw another card? As soon as your deck is empty, shuffle your discard pile and place it face up in your card stand, creating a new deck.
- Can I use the ability of a permanent card in the same turn I buy it with a drone? Yes.
- Can I use default functions while resolving a card's main effect? No. Default functions can only be used before or after playing a card.
- Can I discard minerals from my storage in order to collect new ones? No. Drillers never leave a valuable mineral behind!
- What happens if I run out of…
- Corridor tiles: If there are no corridor tiles remaining on a floor, you can no longer excavate corridors on that floor.
- Damage cards: If you need to take damage and there are none remaining, your mech becomes so damaged that you lose a mineral. Take the top mineral from the rightmost non-empty column in your market and return it to the supply.
- Shop cards: If a particular shop runs out of cards, it no longer refills. There will now be fewer cards available to buy from the shops for the rest of the game.
- Credits or minerals: Credits and minerals are not meant to be limited. If you run out, use a suitable replacement.
- Are LAVA CAVE and SULFUR CAVE effects mandatory? Yes. All floor card effects are mandatory.
- Can I use leftover movement or drilling, or play cards for effects after surfacing? No, all extra movement and drills are lost, and you can only play cards during Operations.
- Can I use the shop refresh tile when buying a card with a drone? No. You may only use the shop refresh tile during the Surfacing phase.
- Can I still excavate mine tiles even if my progress track is completely full? Yes. Place these mine tiles to the right of your dashboard.
- What if my overflow zone is full? Can I still sell minerals? Yes, you can continue to sell minerals, but they no longer shorten your progress track. You will still receive points and credits for them as if you were adding them to your overflow zone.
- How do CLEANING BREAK, MINING DRONE, REFUELLING DRONE and SUPERHOT FURNACE work? Whenever you play one of these cards for its main effect, upgrade your storage or fuel tank one step without paying any credits. If the section has been fully upgraded already, skip the effect.
- How does CURRENT-CREDIT MINER work? Pick 1 non-empty column of your market. Take the topmost mineral from that column and move it to the overflow zone (without gaining any credits).
List of Icons
General
- Minerals: silver, gold, sapphire, emerald, ruby. "Any mineral" covers all five types.
- Solid Fuel. Move any 1 mineral from your storage to your overflow zone without gaining any credits.
- Gain X credits.
- X points.
- Gain fuel (X). Move your fuel marker X steps right. You can never go over your fuel cap.
- Refill your fuel tank to the maximum, moving the fuel marker to your fuel cap.
- Spend fuel (X). Move your fuel marker X steps left. If you don't have enough fuel, you can't do the effect.
- Move. You may move your mech to an adjacent floor.
- Drill. You may collect 1 mineral from your floor, or use multiple drilling to excavate mine tiles.
- Cost of excavating a corridor tile (drilling amount, shown above the corridor stack).
- Cost of removing a barrier (drilling amount, shown on the barrier tile).
- Draw a card from your deck.
- Take 1 DAMAGE card and place it in your discard pile. If the damage stack is empty, remove the most valuable mineral from your market table.
- Repair. You may remove 1 card from your play area, discard pile, hand, or top of your deck. (If it is a DAMAGE card, return it to the Damage pile.) If you choose a card in your hand, draw a card.
- Battery. Use it to buy Advanced cards (in addition to paying any credits).
- Infinity icon. This turn, you may evaluate this effect any number of times.
- "1x" icon. You may evaluate this effect once at any point during your Operations.
- Shuffle your discard pile to form a new deck as soon as your deck is empty.
Dashboard
- Storage — where you place collected minerals.
- Market — where minerals are sold.
- Overflow zone — where minerals go once their market column is full, or when moved there by a solid-fuel cost.
- Milestones are tokens you gain if you are the first one to cross a milestone line on your progress track.
Drones
- Refresh a drone, turning it to its active side (skip if all drones are face up).
- Exhaust a drone.
- Sell one mineral from your storage to your market (or overflow zone).
- Buy one card and place it on top of your deck.
Surfacing Phase
- Discard a card to gain 2 credits.
- Buy cards from the shops.
- Card types: drilling, utility, movement, advanced, damage.
- Refresh a shop. Place all cards from one shop at the bottom of its deck and then fill the shop with new cards.
- Upgrade your maximum fuel / maximum storage.
The Mine
- Starting floor card and Deep floor card — the two kinds of floor cards, marked by their indicator icon.
- Floor number and floor identifier mark different floors, and show on which floors the corridors are placed.
- An advanced card — marked with the battery icon.
Floor Card Triggers
- On reveal
- When excavating a corridor tile
- When collecting a mineral from this floor
- At the end of the Operations phase
Reminder: Before you draw the starting hand, shuffle a DAMAGE card into your deck and place a TORSO card on top.