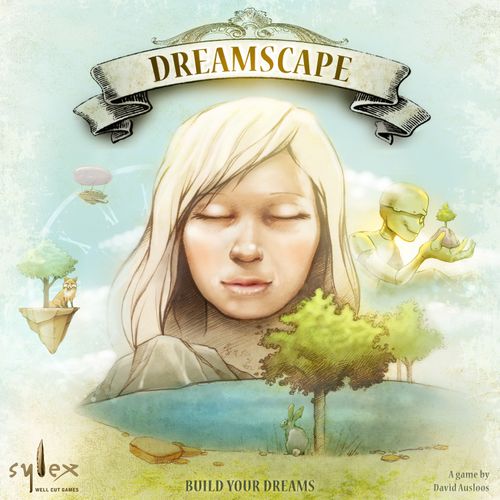
Dreamscape
Dreamscape Rulebook
Table of Contents
Table of Contents
Components
The Dreamworld board — Used during the Travel phase, it is composed of 6 locations. 6 plans of Dreams in which you will find the precious Dreamshards needed to build your Dreamscape. The board is also surrounded by the slumber points track. The number of each location will be crucial to determine the order of plays, and the number of cards drawn.
The Dreamshards and their shardbag — These colored round wooden tokens represent the essence of the dreams, the material to build a nice Dreamscape. They mainly form 4 landscape elements:
- 16 grass (green)
- 24 water (blue)
- 20 rocks (grey)
- 20 land (brown)
- 14 move (white)
- 4 score markers
- 4 Sleepers
- 1 Grey round marker
Your Sleeper will move around the Dreamworld, mainly to collect the Dreamshards on the 5 slots present on each location. More or less of those slots will be used, depending on the number of players. The strange locations and characters of the Dreamworld provide each a special power. Your Sleeper will be able to use one per round.
4 Dreamers — Representing the players, drifting in their Dreamscapes.
4 Dreamscape boards of 4 different colors — These form the personal boards for the players on which they will build their own little dream landscape, consisting of the Dreamshards they have collected during their travels. Each board has a Collect Zone on the right (hands) for keeping the collected shards.
4 Turn order markers — Used to determine the order in which the individual players will play their turn.
12 Tree pieces — Used when building your Dreamscape.
12 Dream purpose tiles — These tiles show building challenges/goals that all players can try to complete.
50 Dreamcards — Each card has a specific building challenge. Players will draw these and try to successfully build the shown pattern on their Dreamscape board. Dreamcards come in 3 levels of difficulty, easily identified by the back on the card.
1 Display for tiles and cards — Used to keep track of the 5 rounds (center of the board), hold the Purpose tiles in the 4 top slots available (representing common challenges for the players, explained on the playsheet) and offer 4 slots for the Dreamcards: 3 levels of difficulty and a 4th discard slot.
23 Nightmare shards and 1 Mr Nightmare pawn — Representing the evil character that travels on the Dreamworld board and spreads nightmares (red shards). Only used in advanced rules.
Setting Up the Game
In order to set up the game, follow the listed steps in order, going from 1 to 9 around the central setup illustration:
1/ Dreamworld board — Place it in the center of your playing area.
2/ Turn order markers — The turn order markers are numbered 1 to 4 and will determine the play order. Take as much markers as there are players and give each player one at random.
3/ Tiles — Shuffle all Dream purpose tiles, draw 4, and put them face up on the tileslots. The challenges of the Dream purpose tiles are explained on a separate playsheet found in the box. Take 1 blue, 1 green, 1 grey, and 1 brown shard from the bag and randomly put 1 of them on each slot marked on the tiles, if slots are present. Put the remaining unused shards back into the bag. Next, place the round marker (grey pawn) on position 1.
4/ Round token — The round token is put on slot 1.
5/ Dreamcards — Sort all the Dreamscape cards according to their level (indicated on their back, from 1 to 3) in 3 piles and shuffle them separately. Place these piles face down on the appropriate bottom slots of the display, marked with the level number. Starting with player one, each player draws from pile 1 a number of cards equal to the number of his turn order marker. Then, each select one of these cards to place face up in front of him. Discard the rest at the bottom of pile 1.
6/ Dreamscape, Dreamer, and Sleeper — Each player take 1 Dreamscape board of his choice and place 1 dreamer (pawn) next to it. Each player takes the score marker and the Sleeper of the color matching his Dreamscape's. Place the score markers on the first slot of the score track surrounding the board. Place each Sleeper on the Dreamworld location corresponding to its player's initiative marker.
7/ Cloth bag and Dreamshards — Put all the shards in the bag, except the red shards that will be used only for the advanced rules.
8/ Trees — Form a reserve with trees, depending on the number of players:
| Players | 2 | 3 | 4 |
|---|---|---|---|
| Trees | 6 | 9 | 12 |
9/ Finally — All unused tiles, initiative markers, and pawns are returned, face down if applicable, to the box.
You are now ready to enter Dreamscape and build your dreams!
How to Play
Dreamscape is played in 5 rounds, each consisting of these phases:
- The Emergence phase (for all players)
- The Travel phase
- The Creation phase
First the Upkeep (1) will be resolved each round for all the players.
Next, players resolve each their Travel phase (2) in the order, determined by the handed out turn order markers at the start of the round.
Once all players have completed their Travel phase (2), each player will do, still in order, their Creation phase (3).
Let us now look at the 3 phases in detail:
1) The Emergence Phase
Before players will act, specific elements are adjusted to create new opportunities inside the dreamworld:
A) Each Dream location receives randomly drawn Dreamshards from the bag, until it holds a specific amount that depends on the number of players (as shown by the amount of dots listed inside the shard slots). Shards are then placed on the circular slots found in each location. Slots are filled from left to right, starting with the one marked with a key symbol. When adding Dreamshards to a location, always add a shard in the first free slot starting from the left.
B) The round marker is moved one position further.
The following steps are only resolved from the 2nd turn and onwards:
C) The player positioned in the Dreamscape location with the lowest number receives the Initiative marker marked with "1" and will act first. The next lowest location receives the "2"....and so on, until all players received a marker determining the order in which players act their turn. If 2 or more Sleepers share a location, the Sleeper positioned at the top will receive the lower marker and as a result will act first, then the next one beneath it and so on (see further in the rules).
Example: As the other players are positioned on locations 5 and 6, the blue player in location 3 takes the initiative marker "1" and will act first on this round.
D) All Dreamscape shards that were put on Dreamcards are returned to the Collect Zone of its respective Dreamscape board (see "Using Dreamcards" below).
Now each player in turn order, determined by the turn order markers (1 goes first, then 2... ) resolves the next phase: the Travel phase.
2) The Travel Phase
During this phase, a player can use up to 5 action points with his Sleeper, in the order and combination of his choice. Any unused points are lost. If needed, you can use the track action points on the left of your Dreamscape.
You can choose from 2 different types of actions, each for 1 action point:
- Collecting a shard positioned in your Sleeper current Dream location.
- Moving your Sleeper to an adjacent Dream location.
During this phase you can also, for no action point:
- Move to an adjacent location if you have the right color of shards.
- Use the power of the location in which is your Sleeper, once per round.
- Use the power(s) of your Dreamcard(s) by putting a shard on the matching power icon — see "Using Dreamcards".
Example: The orange player starts his Travel phase in location 1 and spends 2 action points collecting the 2 Dreamshards present on the rightmost positions: the green (a) and the blue (b). 3 actions left. As a third action, he moves to the Clockwork Golem, the location 4 (c). 2 actions left. As a fourth action, he takes the brown shard (d) from location 4. 1 action left. Orange player may use a shard from his Collect Zone, to use the power of one of his Dreamcards. He chooses to put his green shard to pick a shard randomly from the bag. He picks a blue shard. Note that the green shard used will be back in his Collect Zone on next round. Still 1 action left.
Collecting Dreamshards
The main goal of the Travel phase is to collect as many Dreamshards as possible, in order to build an optimal Dreamscape and complete structures to score points.
A player can take one or more Dreamshards, each for 1 action point, that are positioned in his current location, by following these 2 rules:
A) When a player takes a shard, he has to take the rightmost one (closest to the hand symbol).
B) After being collected, each shard is put in the open hands found on the player board, which are called the Collect Zone. If a player already has 2 or more shards of a type in his Collect Zone, he can not collect more. Some location or Dreamcard power allows the player to have more than 2 shards of a kind.
Note that the Collect Zone could already hold one or more shards before the travel phase starts, due to step 4 in Upkeep.
Example: Note here the blue shard on the first slot of location 5, marked with a key. Orange player has a blue shard in his Collect Zone that will work as a key to enter location 5 for free, without spending any action point. He just needs to have it in his Collect Zone. Still 1 action left.
Moving to Another Dream Location
In order to get hold of Dreamshards positioned in a Dream location further away from his current position, a player can move in straight directions (following the location links) from location to location, spending 1 action point per movement.
Example: Now that he is on the Eternal Summer Lake (location 5), Orange player wants to collect a last shard. But he has already 2 blue shards in his Collect Zone, so he can not take a third one. Thus, one nice move could be to use the power of this location to rearrange the order of the shards in it. To do this, he flips back his turn order token to indicate he used a power this round. As a result, he may put the Green shard he needs, in the last position, and collect it. 0 action left.
Key Movements
You may have noticed that the first Dreamshard slot at a location is marked with a key symbol. The color of the shard on this position will determine which color may act as a key to enter this location.
As a result, if the player has this color of shard in his Collect Zone, he may move into this location from an adjacent location without spending an action point. Note that he may do that, even if he does not have any action point left.
So by collecting an optimal set of shards, movements through the different locations can cost the player less actions, leaving more actions available for collecting shards.
Example: Finally, even if he has no action point left, he chooses to use another Key movement to enter location 2, thanks to the brown shard in his Collect Zone. In this way, he will have more chances to be the first player on the next round. End of Orange player Travel phase.
Using a Location Power
Once per turn, anytime during his Travel phase, a player can utilize the power of the location where his Sleeper is positioned. As he can only use one special power per turn, he then flips back his turn order marker to the center of the table to denote this use.
Furthermore, he can also use the power of each card he owns once per turn, anytime during his turn. For further details, see locations and Dream card powers.
Example: Purple player just arrived on location 4, The Clockwork Golem. As he needs to remodel his Dreamscape, it is the perfect location to flip back his turn order marker and use this location power. This will cost him no action point, but that is allowed only once per round, that is why he needs to flip back his turn order token to mark this.
Ending the Travel Phase
When a player decides to stop his Travel phase, he lays down his Sleeper. If he ends his Travel phase in a location with already one or more Sleepers present, he puts his own on top of the other(s) already there, to mark he entered the location after the previously positioned player. This is to determine the player order for the next round.
Example: The purple player has just entered location 4, and chooses to end his turn now. As the blue Sleeper is already laid down here, he positions his own Sleeper on top of it, marking his later entrance into the location. As a result, on the next round, the purple player will act before the blue player.
3) The Creation Phase
After all players have resolved their Travel phase, each player, still in turn order will make the Creation phase.
The player now has the opportunity to use the shards in his Collect Zone to create his Dreamscape, mainly attempting to complete building challenges introduced by his Dreamcards.
When positioning a shard, please follow the specific rules:
A) The first shard placed in a Dreamscape is to be positioned on the entry slot (decorated center slot at the bottom).
B) Any other shard must be placed adjacent to an already placed shard, or on top of a shard that does not have already anything on top of it. So that no shard can be put on top of a Dreamer, or a Tree, nor under them.
Example: In this example, a player has already placed 2 water shards on the board with his Dreamer positioned on top of the shard placed on the entry slot. The player is now going to place a 3rd shard and he has 5 options available (don't forget the position on top of the already placed water shard). He must carefully consider if he will position on top of, or adjacent to the already present shards.
C) Your Dreamer may enter your Dreamscape whenever you want, freely, but always on top of shard(s) positioned on the entry slot.
D) If any shards still remain in your Collect Zone by the end of the phase, they must be discarded to the Shards bag. So that it will often be better to put them all in your Dreamscape even if they are not useful for now, or store them on your Dreamcards. See "Using Dreamcards".
Please note that you are always allowed to place the shards without following any guidelines from the cards.
Discarding Shards
At any point during the Creation phase, but only during the Creation phase, a player may discard shards from his Collect Zone to the bag to have some benefits. Please note that all these discard actions don't cost action points and can be completed as long as you have shards available:
- Discard 2 shards of the same color to choose one other from the bag. You may take a shard, even if you already have 2 or more of this specific color in your Collect Zone.
Example: The player has 2 blue water shards in his Collect zone. During his Creation phase, he chooses to discard them to the bag, and choose a new shard. He searches in the bag and take the white shard he needs.
- Discard 1 or more white Dreamer shards to move your Dreamer. Each white shard discarded allows the player to move his Dreamer from one shard to an adjacent one. A Dreamer may not end his turn on a shard with a Tree, but may pass through it during movement.
Example: Once his white shard taken from the bag, the player chooses to discard it to move his Dreamer one shard away.
- Discard 1 green Grass shards to put a tree (if one is still available in the reserve) anywhere on any shard, as long as there is nothing on top of it yet. Each tree gives you points once planted, as described below. At the end of the game, when scoring Common goals, each tree counts as the type of shard on which it is positioned.
End of a Player's Turn
A player ends his turn by following these 2 steps:
- He returns to the bag all unused shards left in his Collect Zone.
- He discards his turn order marker to the center of the table.
After all the players have completed their Travel and Creation phase, the round ends, initiating the Upkeep phase of the next round, and so on.
End of Game & Final Scoring
At the end of round 5, each shard placed on the cards are put back in the players' Collect Zone to be positioned or discarded. No more card powers can be used at that point. If a card is completed by doing so, score the points, but do not draw new card (see Dream cards below). Next, follow these steps for the final scoring:
A) Check the common goals formed by the Dream purpose tiles and add the points for players who reach the listed goal. When 2 or more players tie on a goal, all tied players score the listed amount of points.
B) Each uncompleted Dreamscape card scores -5 points.
The player with highest total score wins the game.
If there is a tie, use the following steps to determine the winner:
- The player who completed the most Dreamscape cards.
- In the unlikely case of a persistent tie, players share victory.
Dreamcards
Each Dream card represents the exploration and desired shape of player's dreams. The unique structure depicted on the card must be matched within the dreamscape in order to create the desired dream. You have some freedom to complete them in terms of position and orientation, but you must keep the exact placement of shards as shown on the card. Additionally, Dream cards offer you the benefit of powers you can perform during your turn. See "Location and Dream cards powers".
A Dream card shows a title, its victory points (if the player can complete this objective he will score the listed points), a power icon (this gives you the opportunity to use a special ability), and a structure showing the player the exact configuration he needs to arrange his collected shards as well as where to position his Dreamer in order to build and complete the structure.
Using Dreamcards
Each Dream card lists a power a player can perform at any point during his turn, even when the structure is not yet completed. To use it, simply put 1 shard from your Collect Zone onto the power icon. This shard will be back on your Collect Zone at the beginning of the next round. If there is already a shard on it, this power is no longer available during this turn.
As you are never forced to use a power, you can put a shard on a card only to store it until next turn instead of discarding it.
Completing Dreamcards
In order to achieve a Dreamcard, a player must build the configuration in his Dreamscape matching exactly the one listed on the card. Exactly means that there can be nothing on top of the asked elements, nor under them. Yet, the structure may be built in the orientation and position of your choice.
Obviously, as the Dreamer watches the scene you just built, he needs to be on that exact position listed on the card to complete the structure and score the listed points.
After the structure matches correctly, this part of your dream pleases you. As a result, score the matching amount of points and put the Dreamcard face down on the right side of your personal Dreamscape board, thus forming a deck of completed structures.
Should there be a shard on the power slot of the card you just completed, move it with the card on top of your finished dreams stack. If there was already a shard on the top card of the completed cards stack, choose 1 to keep on the pile and discard the other to the bag.
Please note that the power slot appears on the back of all the cards. So, as your last completed card will be on top of your completed cards pile, its power will still remain visible, and thus, activable with a shard (until you complete another card and so on).
After completion, you may draw new Dream cards, as described in the next section.
Drawing Dreamcards
When a player completes a Dream card structure or makes use of the "Halls of Power" location power (see below), he may draw additional cards from one and only one deck.
According to the number of your current location in the Dreamworld, draw 1 to 6 cards from the top of the chosen deck.
Now you have to choose wisely which card to keep as at the end of the game, each uncompleted structure scores 5 negative points.
Once done, put the chosen card face up next to your Dreamscape, and discard the other cards below the matching deck. You may also choose to discard all the cards if you do not want to take the risk...
Remember that you draw as many cards as the number of the location on which your Sleeper is, so if you plan to complete a card on this round, it may be wise to finish your turn on a higher location number. So draw carefully, and choose wisely which card you will attempt to complete.
Using Location & Dream Cards Powers
A smart use of the different powers can be crucial for sweeter dreams, and hence, for victory. They can be activated by moving on the right location, or by using a card.
Using a Power from a Location
You can use a Location Power on the dreamworld board during your Travel phase. To do it, you simply need to be present on the location with the power you want to use and discard your turn order marker.
Using a Power from a Card
To use the power listed on a Dreamcard, you simply need to put a shard from your Collect Zone onto it. Note that Dream Cards also have the same special power on their backside. So, you can also always employ the power shown on the top card of your personal finished dreams pile.
Some powers have a blue background on Dreamcards. These powers can be used only during the Travel phase.
Powers to Draw Dreamcards or Dreamshards
The Dream Archives — Pick randomly 1 shard from the bag and keep it on your Collect Zone, even if you already have 2 of this color.
Example: The player uses the Dream Archives power and picks randomly a shard from the bag. He gets a blue shard and he already has 2 blue shards in his Collect Zone. No problem, he keeps it in his Collect Zone with the others.
The Halls of Power — Draw 6 cards and keep 1, or discard them all, as described in the "Drawing Dreamcards" section.
Powers That Affect the Dreamworld
Dream Harvesters — Pick randomly 2 shards from the bag. Choose one or two locations to put them in, in the order of your choice.
Eternal Summer Lake — Choose a location and rearrange all its shards in the order of your choice.
Powers That Affect Your Dreamscape
Tower of Control — Move up to 2 shards from your Dreamscape out to your Collect Zone. You can not move out a shard if there is anything on top of it (another shard, your dreamer, a tree...).
Clockwork Golem — Use up to 3 moves inside your Dreamscape. For each move, choose any shard, and move it 1 space away, still adjacent to, or on top of an adjacent shard. Any element on top of the chosen shard always moves together with it.
Dream Shards and Their Functions
Each type of Dream shard offers your Dreamer some unique functions that help you to move and explore the Dreamscape.
Grass / Trees — Forms neutral terrain for the Dreamer to move over, but when a Grass shard is discarded during the Creation phase (see "Discarding Shards"), a player can grow a tree on an empty shard. Once your tree has been placed, score as many points as the total number of trees in your Dreamscape.
Land — Helps the Dreamer to swiftly move through the Dreamscape. Moving is crucial for completing structures as requested by Dreamcards. As adjacent Land shards form paths, it costs no white shard to move a Dreamer from a Land shard to another Land shard.
Rock — Creates panoramic views for your Dreamer, allowing him to contemplate and discover beauty. 2 or more rock shards in the same stack form a mountain. Each time a Dreamer is moved on a mountain, the player immediately scores 2 points.
Water — When his Dreamer moves onto a Water shard, the Dreamer takes a refreshing bath. This cool feeling makes the player score immediately 1 point.
Example: In this example you can see a few effects of landscape elements in action. In the route presented on the left, the Dreamer moves without spending any White shard onto the 2-level Land shard, as an uninterrupted path allows costless movement. In the alternative route presented on the right, the dreamer first swims through 2 water shards by spending 2 white shards, scoring the player 1 point for each water shard. As a next step he spends an additional white shard and climbs on top of the mountain. This panoramic view scores the player another 2 points.
Advanced Rules: The Nightmares
Once you will be familiar with the basic rules of Dreamscape, after a couple of games, or if you want from the start an extra challenge in your Dreams, try this Nightmare setup.
When playing with those advanced rules, Mr Nightmare comes to infest your dreams with his Nightmare shards that he will put on the special slots linking each location to another.
Moving from location to location is going to be more tricky as you have to manage with Nightmare shards placed by Mr. Nightmare, each costing you 3 points at the end of the game if you did not succeed to get rid of them.
Also, the presence of Mr Nightmare in a location blocks the power of this location, so that you can use him to create obstacles for other players.
Here you will find all additions or changes due to the presence of Mr Nightmare and his red shards. All other rules remain the same as usual.
Setup Changes
During setup, simply put Mr Nightmare on the Halls of Power (numbered 6), on the power icon of the location.
Then, put in the bag a number of red Nightmare shards, depending of the number of players:
| Players | In the bag | Out of the bag |
|---|---|---|
| 2 players | 8 red shards | 15 |
| 3 players | 5 red shards | 18 |
| 4 players | 3 red shards | 20 |
Put the other Nightmare shards next to the Dreamworld board to form a reserve.
Turn Phases Changes
The phases of each round change as this:
- The Emergence phase (for all players)
- A) The Travel phase
- B) The Nightmare phase
- The Creation phase
Once his Travel phase is finished, a player resolves his Nightmare phase, before next player goes on his own Travel phase, and so on.
2A) The Travel Phase
Each time you move through a slot linking 2 locations that holds a red Nightmare shard, you have to collect it without spending an action point.
At this point, remember this essential rule: you can not collect a shard of a color if you already have 2 or more shards of this color in your Collect Zone. As a result, collecting those red shards is mandatory, unless you already have 2 red shards in your Collect Zone. If so, simply ignore all the red shards in your way.
You may never put a Nightmare shard on a card, whether for storage or use of a card power.
Example: You can note a red shard on the slot between location 5 and 6, so when moving through it, the player will have to collect it without spending an action point.
2B) The Nightmare Phase
Place Mr Nightmare on the power icon of the location where you just ended your Travel phase.
If you ended your Travel phase on the same location as Mr Nightmare, this evil character will not move.
As long as Mr Nightmare haunts a place, its power can not be used until he departs from this location in a later Nightmare phase.
Next, take a red shard from the reserve and choose one empty Nightmare slot linked to the location to put it on.
If no linked slot is empty, do not put any. While moving from one location to another, if a player passes through one of these special slots holding a red shard, he must immediately put this shard in his Collect Zone, without spending an action point.
Of course it will be tricky not to collect Nightmare shards. As they can not be discarded unless you have 3 of them, you must place them in your Dreamscape by the end of your turn. They will then block potential valuable spaces, giving you each -3 points at the end of the game. Alternatively, if you managed to have 3 Nightmare shards in your Collect Zone, you will be able to swap them for another shard, chosen from the bag. So, you'd better learn to deal with Nightmare shards to face your Nightmares and master your dreams!
3) The Creation Phase
- A Dreamer can not pass through, or stop on a Nightmare shard.
- A red shard can not be put on top of anything, and nothing can be put on top of a red shard. By the end of the phase, all red shards must have been placed in your Dreamscape.
- You can discard 3 red shards to choose one other from the bag. You may take a shard, even if you already have 2 or more of this specific color in your Collect Zone.
Using Location & Dream Cards Powers (Advanced)
Using a power from a location — As long as Mr Nightmare is present on a location, no player can use the power of this location.
Using a power from a card — You may never put a Nightmare shard on a card, whether for storage or use of a card power.
End of Game & Final Scoring (Advanced)
At the end of round 5, each shard placed on the cards are put back in the players' Collect Zone to be positioned or discarded. No more card powers can be used at that point. If a card is completed by doing so, score the points, but do not draw new card. Next, follow these steps for the final scoring:
A) Check the common goals formed by the Dream purpose tiles and add the points for players who reach the listed goal. When 2 or more players tie on a goal, all tied players score the listed amount of points.
B) Each uncompleted Dreamscape card scores -5 points.
C) Each Nightmare shard in his dreamscape scores -3 points.
The player with highest total score wins the game.
If there is a tie, use the following steps to determine the winner:
- The player with the least nightmare shards in his Dreamscape.
- The player who completed the most Dreamscape cards.
- In the unlikely case of a persistent tie, players share victory.