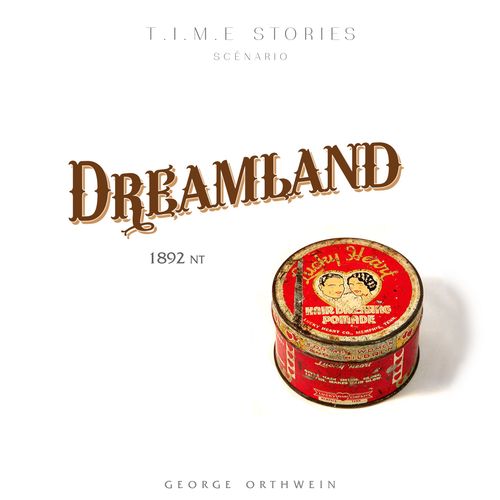
Dreamland (fan expansion for T.I.M.E Stories)
Dreamland (fan expansion for T.I.M.E Stories) Rulebook
Table of Contents
Table of Contents
Set-Up
Preparing the Base
Place the BASE cards next to the board. Read cards B to H in order, one at a time and out loud, as the base cards instruct. Card A is read at the start of each location visit.
Receptacles and Keywords
Each receptacle has four skill statistics: Convince (Pacify), Rile (Taunt), Frontier Survival and Brawl (Fight). The numeric values for each receptacle are printed on its card.
Receptacles also have KEYWORDS which reflect their personality traits. Take these into account when visiting locations.
Each receptacle starts with Dollars, using the green tokens.
OTHER: All Blue and Yellow state tokens you collect can be kept between runs.
Some cards show portraits and can only be accessed if the player is accompanied by the character shown.
Transfer
TRANSFER:
- Choose a receptacle. Don't forget to place its life points and Dollar tokens on the card.
- Keep the ICON REFERENCE card close at hand.
- Choose who the Time Captain will be. This person closes the BASE and places these cards next to the board, then opens the MAIN STREET (MORNING) location (a special version of MAIN STREET). The Time Captain then reads Card A out loud, and the adventure begins.
Final Preparations
Place:
- The ITEM cards face down on their space.
- The 4 PLAN cards face up on their dedicated space.
- The time token on 50 TU.
- The MISSION SUCCESSFUL/FAILED cards on their dedicated space, face down.
- Confirm that the SHERIFF and WILDERNESS codex cards are face up on the CODEX 1 and CODEX 2 spaces.
- The group token on MAIN STREET.
IMPORTANT: start with the [icon] token.
Codex Cards
Codex 1: Sheriff
When the Sheriff Kicks You Out of a location, all players MUST IMMEDIATELY leave the current Location. Then choose any other Location to visit as normal.
Place a spare token on this card each time he Kicks You Out. When you get 3 tokens, draw ITEM 20.
Codex 2: The Wilderness
When you go to THE WILDERNESS, roll a die to determine the location number. Then mark the location on this card with a spare token. If it already has a token, then reroll. Once you've visited all three locations, remove all of the tokens so you can visit them each again.
The three Wilderness locations are Location 11, Location 12 and Location 13. Their numbers are shown on this card as = Location 11, = Location 12 and / = Location 13 (the die-face icons did not survive extraction).
IMPORTANT: While in the Wilderness, you may wander to another random Wilderness location (rolling the Time Captain die as usual). However, you may NOT go to any non-Wilderness location without being instructed by a card.
Codex 3: Collection Plate
Reveal ITEM 7 and place it on Codex 3. It is empty when first revealed.
Place or remove Dollar tokens here to keep track of how much money is currently in the plate.
While here, you may add money to the plate, or take some out if it has any in it. You must take money if a PETTY THIEF. If you take money without having the [icon] token, then immediately reveal Card H.
Codex 4: Instantaneous Transfer Device
See "Switching Families (Instantaneous Transfer Device)" below. ITEM 26 is placed on Codex 4 during the run described there.
Standard Symbol Reminders
[icon] = Group Time Loss (no agents can act).
[icon] = Personal Time Loss (other agents can still take actions in the location).
Dreamwalk
THE DREAMWALK (read aloud the following rules):
- Time stops during the Dreamwalk. Continue taking turns as normal, just don't move the Time Marker.
- Players may not strategize verbally or even talk at all during the Dreamwalk except to read Card A in each location and if needed, clarify a rule. Pointing and gesturing is allowed, but you may not write messages on paper.
- After reading aloud Card A, players will choose spaces by pointing, only finalizing their decision by placing their agent pawn. You may want to use a "thumbs up" to show agreement.
- Place ITEM 40 near the board. This is the Dreampath you will each traverse. When instructed, place your small agent pawns here to track each player's journey.
- The I.T.D. may NOT be used during the Dreamwalk!
- Now start the Dreamwalk by going to LOCATION 61.
2 player note: Direct the receptacles you control to the same card so that each player is only seeing 1 card each turn during the Dreamwalk.
IMPORTANT: Players must traverse each card in the Dreampath straight, before something bad happens! Each player may individually pick [icon] or [icon] each round.
Switching Families (Instantaneous Transfer Device)
The Instantaneous Transfer Device (I.T.D.) is found on Codex 4 and lets the team switch between the two families.
- When switching locations (after placing the cards but before reading Card A) the agents may spend an additional 3 [icon] to activate the I.T.D. to switch families. Its use is unlimited but each activation costs precious Time Units.
- If currently the McArthurs, every agent must choose a Butterfield Clan receptacle. Also take ITEM 19 (Violette).
- If currently the Butterfields, every agent must choose a McArthur Family receptacle.
- Agents may never choose receptacles from opposing families at the same time!
- ITEMS: Agents keep stamped ITEMs, but all other items and round tokens are set aside with the inactive family (and may return to any family receptacle when switching back). The Butterfields get their starting dollars only the first time you switch to them. State tokens are never affected.
- NOTE: When switching, you may return to the same location.
- Reset the cards and roll the Time Captain die as normal.
- Some cards are accessible only to one family (printed "Only the Butterfields may access these cards" or "Only the McArthurs may access these cards", with a family icon).
Portrait Characters
Some characters stay with the team and unlock cards that show their portrait. Their card text says:
- Violette Butterfield: She stays with a player while you are in town and can switch to another player following item rules. She allows access to cards showing her portrait.
- Maneo McArthur: He stays with a player and can switch to another player following item rules. He allows access to cards showing his portrait.
- When using the I.T.D. to switch, keep Maneo with the McArthurs, removing him from play when switching to the Butterfields. Always return him to play when switching back to the McArthurs.
Spirit Animals
Spirit animal cards are not ITEMs. They permanently stay with the player (not their receptacle), and cannot be traded, lost, or discarded. Each is earned by choosing three traits; the animal chosen by the trait combination is listed below. The trait icons are [icon], and the effect symbols are [icon].
| Animal | Traits chosen | Effect |
|---|---|---|
| The Snake | Rebirth, Intelligence, Patience | You may reroll one of your dice in each roll of [icon] tests. |
| The Coyote | Rebirth, Intelligence, Playfulness | You may reroll one of your dice in each roll of [icon] tests. |
| The Eagle | Rebirth, Freedom, Patience | You may reroll one of your dice in each roll of [icon] tests. |
| The Crow | Rebirth, Freedom, Playfulness | You may add [icon] to your first roll of each [icon] test. |
| The Buffalo | Power, Intelligence, Patience | You may add [icon] to your first roll of each [icon] test. |
Each animal card reads: "You chose [traits], making the [animal] your spirit animal. Do not doubt your choice because it was just an appearance... in reality, the [animal] chose you."
Cattle Round Up
This is a card-driven mini-game played on the farm map. Its cards are the Farm Tools and Cattle Round Up cards (ITEMS 61 and 62 form the map).
SETUP: Place ITEMs 61 and 62 together to form a map and follow the setup on it before continuing. Mix 7 [icon] and 7 [icon] (cattle tokens; the icons did not survive extraction) and randomly place them on spots A to N. Place your small agent pawns where indicated.
3 player note: Violette Butterfield will help you as the 4th pawn. Decide her actions together.
GOAL: Herd all Brown cattle into the left pen and all Yellow cattle into the right pen. (The two cattle types are shown by icons that did not survive extraction; the colour names are as printed in the goal.)
PLAY: For 1 [icon], all agents one at a time may move their pawn up to 2 spaces. If it enters a space with cattle, its movement ends and all cattle in the space are immediately Herded as follows:
- Herded cattle move together to one adjacent space of your choice (without a player pawn).
- If the space has matching cattle, and there are now more than 2 cattle total, the excess cattle are again Herded (leaving 2 cattle behind).
- If the space has non-matching cattle, those cattle are Herded out by the incoming cattle.
- [icon] and [icon] cattle may never stay in the same space.
- Very rarely, cattle may be trapped by pawns or stuck in a loop. If so, they move to an adjacent agent pawn space and that agent loses 1 [icon].
Continue until you have completed the goal!
Tip: Drive similar cattle together into trains so you can move cattle down the line. Start at the opposite end so you don't leave any stranded!
Mission Points
You score the following points depending on your performance. Start with zero Mission Points (MP) and then adjust as follows:
- Add 10 MP if you didn't encounter the Mission Failed card.
- Add points for each Syaan plan thwarted (blue state token):
- +20 MP, Escaped the teepee without Razovsky's help.
- +10 MP, Cleared the poison from the Butterfield's feed mill.
- +10 MP, Redirected the sluice water away from the ranch.
- +10 MP, Rounded up the escaped cattle.
Beacons
You will receive beacons that you can keep from one scenario to the next. Their use is simple: break the beacon, use the effect depicted on it, then dispose of it. It can only be used once! Beacons are found under the plastic insert of your box.
You will earn beacons at the following rate:
- Fewer than 30 MP: 1 pink beacon.
- 30 MP: 1 beacon of your choice (pink, green, or blue).
- 40 MP: 1 pink beacon and 1 blue beacon.
- 50 MP: 1 blue beacon and 1 green beacon.
- 60 MP: 2 beacons of your choice (pink, green, or blue).
Failed Runs and Reboots
When a run ends in failure, the printed reboot cards tell you how to start again. The token icons on these cards did not survive text extraction, so the table below records the printed wording and the [icon] placeholders must be checked against the rendered cards (pages 27 to 30 of the PDF).
- Reboot with the same receptacles (first fail): "Reset the game (discarded cards, ITEMs, tokens, life points, etc.). Reread cards G and H of the BASE, and follow Laura's instructions, EXCEPT you must continue with the same receptacles—you're going straight back!"
- Demotion and the McArthur team: Bob demotes the team to the secondary, yellow-rank team. "This will be your last assignment acting as primary." The card reads: "Take the [icon] token for all future runs. Draw ITEMS 21-26. Place ITEM 26 on CODEX 4. Keep any [icon] stamped ITEMs as well as Blue & Yellow state tokens, but completely reset the rest of the game (discarded cards, ITEMs, tokens, life points, etc.). Reread cards G & H of the BASE, but take [icon] instead of [icon]. You MUST each choose from the new McArthur receptacles, though the I.T.D. remains for your use."
- Printed IMPORTANT note on the McArthur reboot card: "Do not reset the game for the next run. Reset Location 99 and start on Card A with 10 T.U. Keep all items and tokens. POMADES refill to 3 tokens. You may switch receptacles. Choose either the Butterfields OR the McArthurs as receptacles, but all players must choose from the SAME family."
Note on this section: the extraction pairs the reboot cards with the fail counts in a way that cannot be confirmed from text alone. The wording above is transcribed as printed; the mapping of each card to its fail count is not verified here.
Keeping Tokens and Between-Run Notes
Blue and Yellow state tokens are kept between runs (see the OTHER note under Receptacles and Keywords). Some character cards also say "Yellow and Blue state tokens are permanently kept."
Not Transcribed
The following are part of the scenario but are not reproduced in this entry:
- The read-aloud narration on each card (including the BASE Cards B to H and the Mission Successful/Failed cards).
- The card-by-card text of the locations (Main Street, General Store, Spanish Mission, Wilderness locations, mines, the Dreampath cards, and the others), the items, and the receptacle and portrait character cards, beyond the rules quoted above.
- The card art, the map artwork, and the ICON REFERENCE card.
These cards hold most of the scenario's location and item mechanics. They need card-by-card transcription from the rendered PDF pages, where the printed icons can be read.