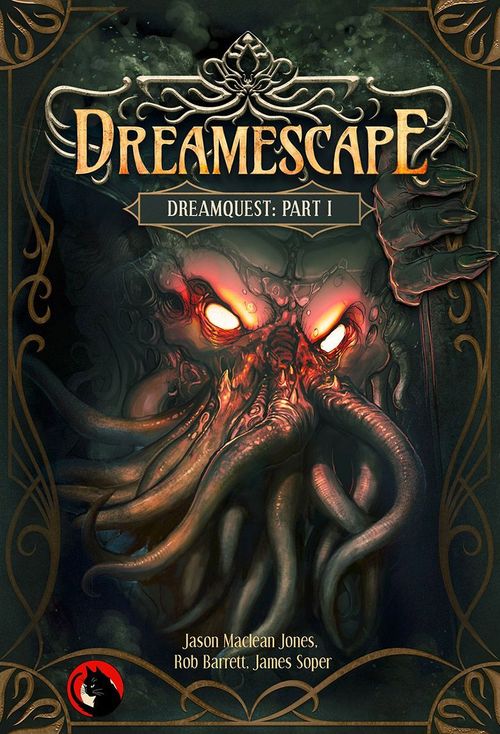
DreamEscape
DreamEscape Rulebook
Table of Contents
Table of Contents
- The Dreaming
- Components
- Setup (1 Player)
- Rulebook Version
- Winning
- Losing
- Shard Cards
- Dreamers
- Dreamer Setup & Advances
- Realm Decks
- Beginning
- Gameplay
- Phase 1 - Encounter
- Phase 2 - Reaction
- Phase 3 - Resolution
- Phase 4 - Outcome
- Phase 5 - Results
- Phase 6 - Memories
- Exploration
- Gaining Cthulhu Tokens
- Gaining Lore
- Gaining Items
- Fading Items
- Protecting Items
- Bartering & Exchanges
- Threat Challenges
- Using Deja Vu
- Using Lucid Dreaming
- Skill Mastery
- Gaining Conditions
- Gaining From Experience
- Gaining Talents
- Card Effects
- Progression
- Saving the Game
- Two Player Rules
- Game Ambiguity
- Game Modes & Variants
- Glossary & Index
- Iconography
- Quick Start Tutorial
The Dreaming
You play a Dreamer of the 1920's, trapped in a nightmare behind the gates of sleep. Your dreaming mind has been fractured into pieces; shards and fragments scattered throughout the Dreamlands. Your aim is simple: recover these fragments, escape the dream and wake up. To do so however, you must explore the Realms thoroughly, shifting between these fragments, surviving dangerous encounters until you find a gate and its matching key that leads back to the waking world. The powers of the Great Old Ones are of course set against you - eating away at your sanity, sapping your will and abilities and placing deadly obstacles in your way. The punishment for failure is high - to be trapped forever in a cage within your own mind!
Dreamescape is written in the Weird Fiction style of the 1920's and 30's. Outdated terms and phrases are used that fit with this time period.
Components
- 6 Character sheets
- 2 Dashboards
- 6 Character markers
- 9 Realm decks (380 cards)
- 12 Mythos Corruption tokens
- 16 Skill Mastery tokens
- 8 Cthulhu Influence tokens
- 10 Elder Sign tokens
- 44 Condition, Hunted and Superhunter tokens
- 1 Reward die
- 1 Elder die
- 1 Pip die
- 12 Location Portal cards
- 2 Event markers
- 2 Experience cubes
- 24 Elder Runes
- Event Track board
- 108 Item cards
- 26 Condition cards
- 81 Lore cards
- 16 Threat Challenge cards
- 3 Character cards
- 2 Shard cards
- 7 Talent tiles
- 4 Reference cards
Shattered Minds
The Dreamer's shattered mind will cause you to draw story encounters randomly at first, making the game feel non-linear. This simulates a real dream! Your task is to piece this narrative puzzle back together, learning from mistakes and avoiding Cthulhu's traps!
Non Consecutive Numbering
Story cards in Dreamescape are not consecutively numbered. Some numbered cards are only available in the expansions to this base game. Complete card lists are available on the BadCatGames website.
Setup (1 Player)
Dreamer Dashboard
- Choose and slot a Dreamer Character sheet (Tier 1 side up) into a Dashboard, setting the four stat dials to the values shown for that character on page 7 (see the table under Dreamer Setup & Advances below).
- Claim the relevant Character backstory card, Character marker and a 'Two shard' card. Apply the Shard Bonus shown on the upper half of the Shard card (see Shard Cards).
- Place the Experience (XP) cube in the first (left most) position of the Experience track. Take three 'Fortune' Elder runes that have half an icon on each side. These form your base Elder rune pool.
- Place the Condition and Lore decks to one side of the dashboard (do not shuffle them).
- Place an Event marker on the blue Start position of the Event track.
Realm Decks
- Separate all story cards into 9 decks based on their unique numbers (#100's separate from #200's etc) with their matching Portal cards on top. Portal cards also have a realm deck icon (top left corner) that matches the icon shown on each story card belonging to that deck.
- For each Realm deck, keep the locked cards (in chronological order) separate from open cards, but keep both together for now beneath the Portal card. Do not shuffle.
The #2000's are all locked cards and have no Portal card as they are not part of a Realm. These cards will remain secret until discovered. Place them within reach for now.
The Realm decks are: #100's, #200's, #300's, #400's, #500's, #600's, #1100's, #1300's, #1500's, and the #2000's (locked cards, no Portal).
Starting Items
- Separate the Item cards into two Item decks, Locked (icon on the card backs) and Open; both in numerical order.
- From the Open deck, place the #01 'Strange Heirloom' card above your dashboard and add the Heirloom Elder rune to it. Then randomly draw another 3 cards between #02 - #14 to be your starting items.
- Place these 3 cards next to your Dashboard (or in the protected item slots if you wish), then return the other cards to the top of the Open Item deck.
2 Player setup and rules are on page 20 (see Two Player Rules below).
The tableau consists of: the Dashboard with its three protected item slots, the base Elder rune pool, the area for in-play Item cards, the Open Item deck, the Locked Item deck, the area for placing Reward cards, the Condition deck, the Lore deck, the Event track, the Experience cube, and the Talent tiles.
In Play: A component is in play when it is part of the playing area (tableau). Any abilities or effects it has are considered active.
Supply
- Place all tokens, dice and Elder runes within reach as supplies.
- Place all Location Portal cards (showing a Location icon in the top left corner) within reach in a stack.
- Lastly place the set of Threat cards nearby, picture side up.
First Nightmare
First time playing Dreamescape? Remove the central sheet of this rulebook and follow the QUICK START Tutorial.
Rulebook Version
This Rulebook (v2026.01) will change periodically as new stories and rules are added. Download the latest version at www.badcatgames.eu/games/Dreamescape
Winning
The goal of Dreamescape is to escape the nightmare. If your Dreamer wakes up before Cthulhu can take control of the nightmare, you win the game! The card will tell you if you have escaped successfully.
Losing
There are two ways to lose the game:
- Running out of Shards.
- Gaining a 7th Mythos token.
Shard Cards
Shards represent the Dreamer's most precious dream fragments. When a shard is destroyed but another remains, the Dreamer loses some current advantages but can continue the game (see Losing a Shard). If no Shards remain, Cthulhu gains control of the Dream, ending the game immediately and you lose.
A Shard card shows: the possible starting Realm decks (four Realm icons at the top), the Shard Bonus (claim when first drawing the card), and an In Play ability (a permanent ability available during gameplay).
There are three ways to lose Shards:
- If Sanity drops to 0.
- If Vitality drops to 0.
- If a Story card outcome shows the Banish Shard card icon.
Dreamers
Each Dreamer character starts a new game at Tier 1 with a unique set of nine basic skills.
A Character sheet shows the current Tier, the Skills (used to attempt story tests) and the Dreamer Abilities.
Dreamer Abilities
Dreamers of Tier 2 and above have up to four special abilities. Activating these abilities requires spending 1 Elder sign from the Experience Track or from a Reward card only (see Rewards on page 11). Spare Elder signs gained from throwing Elder runes cannot be used to activate these abilities.
The four ability slots (in order: red, blue, orange, grey) provide abilities such as:
- Discard the current story card before making a reaction choice.
- Exchange 1 Sanity for 1 Vitality.
- Gain 1 High Fortune rune for the next test. Discard after use.
- Exchange 1 Sanity for 2 advances on the Experience Track.
- Spend 1 déjà vu for 2 Sanity.
- Reclaim 1 Reward card from Memories.
Dreamer Setup & Advances
Dreamer Dashboards keep track of statistics, skills, abilities and bonuses during the game. Each Dreamer character has four stats: Lucid Dreaming (ability to manipulate the dream world), Déjà vu (ability to recall memories or relive moments), Sanity (mental resistance to the nightmare) and Vitality (physical wellbeing).
The Dashboard shows: the inserted Character sheet with its current Tier, Skills and Dreamer Abilities; the Protected Items area (three slots to protect Item cards); the Stats (which change value during play*); and the Experience Track (records experience (XP) gained from story encounters).
* Stat values in dark grey are unlocked at Tier 2. Light grey values are not available until Vol. 2 of the Dreamescape series.
Each Character sheet is double-sided representing the level of power (Tiers) the character has in the dream world. The table below details the initial stats for starting characters at Tier 1 and the changes applied when advancing to Tier 2. It also shows the maximum Item cards and Reward cards allowed to be in play at any time.
| Character | T1 Lucid | T1 Déjà vu | T1 Sanity | T1 Vitality | T1 Max Items | T1 Max Rewards | T2 Lucid | T2 Déjà vu | T2 Sanity | T2 Vitality | T2 Max Items | T2 Max Rewards |
|---|---|---|---|---|---|---|---|---|---|---|---|---|
| Rosalinde | 1 | 1 | 9 | 9 | 13 | 6 | +1 | +1 | +3 | +3 | 16 | 6 |
| Arngeir | 0 | 0 | 11 | 11 |
Realm Decks
Each Realm is a draw deck of unique Story cards and a covering Portal card with a realm deck icon (such as the icon for Celephaïs) that matches the cards in that deck. Locked Realm decks can only be accessed through game play.
Portal cards are either 'passive' or 'active'. Activating a Realm Deck means flipping the Portal card to its 'active' side, then splitting the deck to separate locked from open cards. The locked cards become a supply. The open cards are shuffled to form a draw deck.
A Realm Portal shows: the deck icon, the locked deck icon, the commonly used skills, the type icons (story related icons specific to the Realm deck), the Deck Action, the Events, and the linked Story card (Location Portals).
Portals indicate what events will trigger when the event icon is shown on a Story card. Most Portals have a unique Deck Action that can be triggered when the action symbol appears on a Story card.
Location Decks
Location decks are like Realm decks, with a unique icon, Location Portal card but with a single linked Story card. Locations remain locked until discovered during play. They then remain active for the rest of the game.
Beginning
The current Shard card specifies possible starting Realms. Take the Portal cards indicated, select one randomly and return the others. Activate the selected Realm deck and place your Character marker onto the now active Portal card. This is now the active Realm deck from where you will draw Story cards.
Gameplay
Each turn follows a sequence of six phases:
- ENCOUNTER PHASE: Draw the top open Story card from the active Realm deck, check for Event trigger then read the narrative section.
- REACTION PHASE: Check for a Deck Action. Choose one reaction option or follow a secret Keycode link. Use character abilities, item cards, spend rewards or experience.
- RESOLUTION PHASE: Spend stat points or make a skill test by throwing runes.
- OUTCOME PHASE: Flip the card over and read your chosen outcome in the success or fail portion of the card.
- RESULT PHASE: Apply the results indicated and any rewards or penalties shown on the card.
- MEMORIES PHASE: If the Story card is not stored for rewards, discard it to Memories.
Phase 1 - Encounter
Draw the top open Story card from the active Realm deck and check for an event trigger symbol.
Story Cards
Story cards provide narrative situations that offer multiple choices, leading to fail or success outcomes. Story cards have unique reference numbers (one style if open, another if locked).
A Story card (front) shows: the Realm deck icon (indicates which Realm deck the card belongs to), the unique identifier code, secret icons (variable functions), the event trigger, the narrative, the deck action trigger, the reaction options, the story effect icon, and Keycodes (with a set icon).
Keycodes
Keycodes are secret storylines that can be chosen instead of the current Story card when matching the icons on Item or Lore cards with matching icons on Story cards. The icons must be horizontally aligned to be valid. The new card can be chosen instead to become active and the current Story card goes into Memories.
Example: David matches the icons on an Item card with the active Story card to reveal Keycode #2016. He may replace his current Story card with card #2016, which then becomes active.
Events
When the event trigger symbol is shown on a Story card, move the Event marker up one step on the Event track and check the active Portal for any applicable result. If the Event marker is already at the top of the Event track when an event is triggered, it remains here and no event is triggered.
If an event shows an alternate Story card, this new card becomes the active card and the previous card goes into Memories.
Example: While in Celephaïs, Zofia's player finds the event symbol on a Story card. She moves her Event marker up the Event track from position 2 to 3. She checks the active Portal which indicates Zofia gains +1 Déjà vu. Zofia's player then continues reading the Story card.
Empty Realm Decks
If the active Realm deck runs out of Story cards, gain an Elder Sign token. Remove all cards belonging to that Realm deck from Memories, separating locked from open cards. Shuffle the open cards to reform the Realm deck and return locked cards to their deck. Then choose a different open Realm deck to become active.
Phase 2 - Reaction
Do the following in order:
- Check for Deck Action - if present you may trigger the unique Deck Action shown on the active Portal.
- Check for Story effect - you must apply the effect shown.
- Activate tableau effects - spend experience, rewards or Dreamer abilities in any order.
- Make a Reaction Choice from those presented on the Story card or follow a complete Keycode link.
Phase 3 - Resolution
Each reaction option usually requires a skill test or reducing a stat, to complete the encounter successfully.
Note: If you choose an option that says 'end the encounter' or indicates you must draw another Story card, the currently active Story card is discarded directly to Memories without claiming any rewards or suffering penalties.
Skill Tests
Passing skill tests requires gaining successes equal to or exceeding a test difficulty level.
1 Elder Sign icon = 1 success.
A skill icon with a number (for example, a skill icon showing 2) has a test difficulty level of 2 and requires 2 successes to pass.
If the required number of successes is not met, the test is failed. Level 0 tests are automatically successful.
The symbols "? with red X" / "? with blue X" modify an applicable test difficulty, increasing or decreasing it by the value of [X].
Gaining successes for a test requires throwing Elder Runes and/or spending Elder Sign icons (usually from Rewards or the Experience track).
Elder Runes
- FORTUNE: Gained from skills on the character sheet and skill icons on cards. Provide half successes.
- MASTER: Gained from upgraded character skills and some items. Provide 1 success or none.
- CURSED: Gained from Cursed Items. Causes a Cthulhu token if a Cthulhu symbol is shown.
- HIGH FORTUNE: Gained from unusual Items or Lore cards. Provide half successes.
- ARTIFACT: Gained from rare Artifact Items. Provides 1 or 2 successes.
- HEIRLOOM: Gained from the Heirloom artifact. Provides 1+ successes or causes a Cthulhu token.
Cthulhu tokens gained when throwing Elder runes must be immediately placed over a character's ability slot (see Gaining Cthulhu Tokens) even if the rune is subsequently re-thrown.
Elder Rune Pool
Skill tests usually require throwing your Dreamer's Elder Rune pool to gain successes. The Elder Rune pool always contains a minimum of three Fortune runes (showing either a Left or Right half of the success icon). Two Fortune runes must be combined to form the complete icon to gain 1 success towards a test.
Each skill bonus icon that can be applied to the test (from components in play such as the Character sheet, Items or elsewhere) adds +1 Fortune rune to the pool.
Runes are thrown once only unless a re-throw action is used. After this initial throw, additional runes (gained from Rewards, Lucid Dreaming or Déjà vu points) can be thrown.
If a character skill is blocked by a Mythos token, or a test is for a skill not present on the Character sheet, the test can still be attempted.
FAILING TESTS: Even if you Fail an encounter, your Dreamer still learns from the experience, gaining any XP cubes shown on the card.
Dream Dice
Three types of dice are used in Dreamescape:
- ELDER DIE - faces: Cthulhu, blank, Elder Sign. Used for variable outcomes.
- PIP DIE - faces showing 1, 2 and 3 pips. Used for varying levels of effect.
- REWARD DIE - faces: Déjà vu, Lucid Dreaming, Sanity, Cthulhu token, Condition token, Hunted token. Provide variable rewards: +1 stat point / remove 1 Cthulhu token, Condition token or Hunted token from a card in play.
Skill Test Example
Arngeir hopes to purchase a Shantak which requires a Trade (3) skill test. His Elder Rune pool has 3 Fortune runes. He adds 1 Fortune rune for having the Trade bonus icon on his Character sheet and another for the 'Earthly Coins' Item card. He has two Reward cards showing the Trade icon so decides to spend both for another 2 Fortune runes, discarding them both to Memories. Finally, he chooses to maximise his chances by adding the special rune from his Strange Heirloom item.
Arngeir throws 8 runes and gets only 2 successes (by matching up half icons) - not enough to pass the test. Worse the heirloom attracts Cthulhu's attention gaining him 1 Cthulhu token immediately!
Arngeir does have another Reward card showing an Elder Sign (1 automatic success) but also an Item card with a rune re-throw action. He chooses to use the item and re-throws his 'Heirloom'... success! He gains the four successes, passes the test and can save that Elder Sign Reward card for another time.
Phase 4 - Outcome
Flip the Story card over to the appropriate success or fail section and read the relevant reaction outcome paragraph that matches the reaction option chosen. For example, if you failed a skill test, read that test's FAIL outcome paragraph only.
All icon actions in outcome paragraphs must be carried out. For example:
- (numbered Lore icon) = Gain Lore card #48;
- (numbered locked Story icon) = Draw locked story card #631
- (Item icon with -2) = Discard 2 Item cards;
- (Lucid Dreaming icon with +1) = Gain 1 Lucid dreaming point;
- (Realm shift icon) = Shift to Enchanted Woods Realm deck;
- (numbered Threat icon) = Resolve Threat card #05
Story Card (Back)
The back of a Story card shows: the recycle-this-card reminder (top and bottom corners); the Failure outcomes with a Penalties area (penalties incurred for failing a test); Experience (each XP cube advances the track by 1); the Success outcomes with Rewards (rewards gained for passing tests).
Phase 5 - Results
Apply the results of the relevant outcome paragraph. Advance the Experience cube along the Experience track by the number of XP icons shown on the card. Apply any penalties shown if the test was failed, or claim the card for any rewards shown if successful.
Story Rewards
Rewards are shown at the bottom of the success section. They can be used immediately or stored for later use. The current Tier level dictates how many Reward cards can be stored. Only one symbol or icon can be claimed from each Reward card unless two of the same are present.
In such cases both rewards must be used together for a single test or for a skill mastery upgrade (see Skill Mastery). The card is then discarded to Memories.
Story Penalties
All penalties shown on the failure side of Story cards must be resolved immediately. Each icon shown is 1 token or stat change unless specified otherwise. Penalties are explained on the Reference cards. Gained tokens (such as Condition or Hunted) must be added to an applicable card in play or otherwise can be ignored.
Typical Rewards
- STAT INCREASE: Increase the applicable stat by one for each icon shown (Vitality, Sanity, Déjà vu, Lucid Dreaming).
- RE-ROLL: Spend to roll or re-roll one Elder die.
- RE-THROW: Spend to throw or re-throw one Elder rune.
- ELDER SIGN: Spend to add +1 success to any test or use a character ability.
- REWARD DIE: Spend to roll the reward die immediately, claiming the indicated reward.
- RUNE: Spend to add one Elder rune of the type indicated to the next test.
Phase 6 - Memories
After completing the active Story card (and if it has not been stored for Rewards), discard it to Memories (or beneath its Location card if it is Location linked; see Shifting Locations). Begin again at Phase 1 until either you find a special 'Win' Story card, or you lose the game.
MISSING STORY CARDS
If a Story card is missing:
- Check Memories and Rewards. If it is present there, draw it again.
- If it has been Banished from the game, immediately suffer 1 Cthulhu token and choose an alternative reaction option. If no other options are possible, immediately suffer 1 Mythos token, discard the card to Memories and return to Phase 1 by drawing a new Story card.
Exploration
Travelling between Realm decks and/or Locations is called Shifting.
Shifting Realms
There are four possible shifting actions:
- Shift Realm deck - Most often the deck icon will be specified. ? means shift to any open Realm deck. To shift, follow these steps in order:
- Return the previous Portal card to its deck, then activate the Portal for the new deck. Move your Character marker to this new Portal card.
- Reset the Event marker to the start of the Event track then begin at Phase 1 by drawing a Story card from the new active Realm deck.
- Change Realm deck - Randomly select a new Realm deck (excluding locked Realms) by shuffling the Portal cards and drawing one. Then follow the two steps above.
- Choose Realm deck - It is your choice which Realm deck becomes active. Follow the two steps above.
- Story Card Shifts - When drawing a Story card from a different Realm deck the Dreamer automatically shifts to the new deck following the two steps above.
Shifting Locations
Locations are discovered either through card outcomes or from Lore cards. When the unique Location icon is indicated on a Story card, you shift to that specific Location.
- Shift location - Often a particular Location is specified. ? means shift to any discovered Location. To shift follow this step:
- Place the Location portal card 'active' side up on top of the active Realm portal card. Start at Phase 1 by drawing the linked Location story card indicated.
- Choose a Location - Follow the step shown above with any discovered Location.
- Location Keycodes - If an active Story card shows a Location keycode that matches the icon on a Lore card in play, you may shift to the indicated Location by following the step above.
To shift away from a Location, remove the Location portal card from on top of the Realm portal Card, placing it aside with its linked Location story card beneath, to create a Location deck. Then draw the next open Story card from the active Realm deck.
Shifting to a Location Example
Dalby gains Lore card (numbered) which mentions the Zoog Enclave Location. Later you draw a Story card showing the Zoog Enclave icon keycode. Because this keycode now links with the Lore card, you choose to send Dalby immediately to the Enclave. You flip Location portal card #01 'Zoog Enclave' to its coloured 'active' side, placing it over the active Realm portal card. The current Story card goes into Memories and the linked Location Story card is drawn instead as the new active card.
Gaining Cthulhu Tokens
Cthulhu tokens represent the Great Old One's influence over the nightmare. Gained Cthulhu tokens are placed onto character ability spaces on your Character sheet. If a token covers an ability symbol, that ability cannot be used until the token is removed.
Mythos tokens represent the Dreamer's mind becoming corrupted by the nightmare. When all four character ability spaces are filled by Cthulhu tokens, remove them all and place one Mythos token over a character skill instead. This skill bonus is now blocked for the rest of the game, unless the Mythos token can be subsequently removed.
Elder Sign Tokens
Elder tokens are powerful gifts from the Elder gods that have four possible uses (discard after use):
- Automatically succeed at one skill test
- Remove 2 Condition tokens
- Cancel out a Mythos token
- Remove 2 Hunted or 1 Superhunter token
Gaining Lore
Lore cards provide the secret knowledge necessary to unravel the puzzle and win the game. They are referenced by the Lore icon with a unique numerical code and are always locked. There is no limit to the number of Lore cards in play and their functions and abilities can be used at any time.
A Lore card shows: the set icon, title & type, token space, Keycodes, skill bonus icons, and the Lore ability.
Legacy Artifacts
Legacy Artifacts are remarkable and priceless rare items that become persistant once they enter play. All have the abilities shown below:
- They cannot be Discarded or Banished unless specified on another card.
- After being unlocked, you may begin a new game with any of these items in play.
- On gaining a legacy Artifact, place a token on the token space.
Gaining Items
Item cards provide skill bonuses, special abilities or powerful functions. Items can only be used once per turn. While abilities or functions can be used at any time, skill bonuses are applied only during the Resolution Phase.
The maximum number of Item cards allowed in play depends on a Dreamer's Tier level.
An Item card shows: the set icon, barter value (Item can be traded for the value shown), token space, title, type or keywords, Keycodes, skill bonus icons (each icon provides a single skill bonus for reaction options), the ability, and the card identifier (unique code).
There are two decks of Item cards; Locked (Rare or Unique items) and Open (Common items). Specific Item cards are referenced with the open icon or locked icon; where ? is often replaced with a unique numerical code. When gaining random items (and no identifier code is specified), draw the required number of cards from the open Item deck. You may draw cards from anywhere in the deck; not just the top card.
When gaining an Item card and the token space shows a token symbol with a number (including Elder Signs), place that number of tokens on the card. Token spaces showing symbols without numbers can hold a single token of that type later. When told to gain a specific Item card but already have that card in play, place one Condition token on the card instead.
Discarding Items
When discard items, any Item card can be chosen to be discarded and any tokens on it (or Elder runes associated with it) must also be discarded. Item cards always return immediately to their respective deck.
Unknown Realm or Location Icons
Sometimes a Story card will indicate a Realm or Location not present in the game. These links are for expansion content available seperately. Either choose the alternative option or draw a new Story card.
Fading Items
As Cthulhu exerts his influence, items can be lost, fade from the dream or be forgotten. Some actions, item abilities and penalties require making a Fade test (the number indicates how many consecutive Fade tests must be made). If a single Item card is not specified, choose which Item(s) must be tested.
Fade Test
To make a Fade test roll one Elder die. If the result shows a Cthulhu symbol, the item must be immediately discarded. Any other die result has no effect and the item does not fade. Condition tokens on the Item card can be discarded instead of making a Fade test on a 1:1 basis.
The action shown above for example (a Fade symbol with 1), means roll the Elder die once then make a Fade test once.
Protecting Items
Item #001 and two other items can be protected by placing them in the protected item slots above the Character dashboard. Items here are protected from normal discard actions (such as from Story card penalties) but not from discard or fade actions on the card itself, nor when directly specified on other cards. Items can be place in these slots at any time, but a Fade test must be made immediately after any item is removed from a protected slot.
Bartering & Exchanges
Bartering and Exchanges are two different options that both use the barter value of Item cards in play.
Bartering: Discarding Item cards provide +Elder Sign successes equal to their combined barter value for passing a Trade skill test. Item cards used for Bartering must be discarded regardless of the number of successes they provide.
Exchanges: Some Story cards offer Exchange actions (denoted by the Exchange symbol). The number shown on the symbol indicates the required combined barter value of Item cards that must be discarded to gain the benefit indicated.
Threat Challenges
Threat cards are special combat challenges. They are referenced on Story cards by the Threat icon with a unique code and by the Threat icon in reaction outcomes.
A Threat card shows: the set icon, faction icon, threat title, challenge start, test difficulty, challenge reward (highlighted in gold) and challenge penalty (result for failing the challenge).
A Threat challenge will either indicate which specific Threat card should be drawn or specify a Faction. To challenge a Faction, shuffle all Threat cards showing that faction symbol and randomly select one as the current Threat.
A Threat Challenge test is a sequence of connected steps leading to rewards (gold rope links) or penalties (silver chains). Red skill tests are compulsory, black stages are optional. You may choose to stop the challenge before attempting an optional test.
Each step requires a skill test or reducing a stat. Gold rope paths are followed after making a successful test while silver chain paths must be chosen after failing a test.
Ending the sequence on a reward step completes the challenge successfully and allows that reward to be claimed. Ending the challenge at an optional skill test does not yield a reward. In either instance, discard the Threat card back to the Threat deck and read the success reaction outcome on the Story card.
When ending the challenge on a fail step, the linked penalty shown must be applied. Discard the Threat card and read the failure reaction outcome on the Story card.
Threat Challenge Example
Hunted by Vrahke, Akiyo is forced into a Threat Challenge. Akiyo's Think skill has been upgraded to Mastery level (she has a Skill Mastery token) giving her a Master rune instead of a Fortune rune. She spends a reward card to gain another Fortune rune and risks using her Heirloom. She throws and gets:
STEP 1: Akiyo starts the challenge by having to make a skill test (shown on the Threat card). As well as her 3 base Fortune runes she has a bonus icon on her character sheet (one extra Fortune rune) and uses a skill bonus from an Item card (another Fortune rune) for a total of 5 runes to throw. Akiyo throws the runes, gets two successes and passes the test.
STEP 2: She follows the gold 'success' line to the next test - a compulsory test. Only 2 successes and some Cthulhu bad luck! She must immediately take a Cthulhu token but can choose to add to this test result by taking further actions. Akiyo spends another reward card showing a re-throw action to re-throw the Heirloom, gaining the last success she needs! Used reward cards are now discarded.
STEP 3: The next test is optional so Akiyo could stop here and complete the challenge successfully, but she would not gain a reward from the challenge. Instead she continues to the (3) test. As well as her 3 base runes, Akiyo has an Item card giving her a Master rune and a reward card with a matching skill icon, gaining another Fortune rune. Akiyo throws the 5 runes and gets: only 1 success! To avoid failure and having to take a Hunted token, she chooses to spend 1 Déjà vu (gaining a Master rune) and another reward card showing a re-throw action to re-throw the previous Master rune... Still a fail! Having come so close, she decides to spend all her accumulated XP, gaining 1 Elder Sign (an automatic success) but must reset the Experience track to the start. At last she has the 3 successes needed and passes this test!
STEP 4: With the final test completed she claims the 2 Cthulhu token removal reward, removing 2 Cthulhu tokens from her Character sheet.
Using Deja Vu
Déjà vu means 'already seen.' In Dreamescape this powerful ability represents the Dreamer's recurring dream fragments and memories. Use this ability to:
- Recall - spend 1 Déjà vu to recycle one Story card from Memories or Rewards. Shuffle it back into its Realm deck.
- Relocate - spend 3 Déjà vu to move to a discovered Location.
- Foreknowledge - spend 1 Déjà vu to gain one Master rune for the next test.
Using Lucid Dreaming
Lucid dreaming is the Dreamer's most powerful ability, allowing you to take direct control of the dream by:
- Stabilise - spend 1 Lucid Dreaming to immediately gain 2 Sanity and 2 Vitality (even if either stat has just dropped to 0).
- Dream skip - spend 1 Lucid Dreaming to discard the current Story card.
- Surge - spend 1 Lucid Dreaming to add one High Fortune rune to the pool for the next skill test only.
- Rejuvenate - spend 5 Lucid Dreaming to upgrade a Dreamer's Tier level from 1 to 2 (see Tier Advancement).
Skill Mastery
Skill Mastery tokens upgrade a character's base skills to mastery level. To gain a Skill Mastery token, discard four matching skill icons from reward cards (Elder Signs can be substituted on a 1:1 basis) and place the applicable Skill Mastery token over the matching skill on your character sheet.
A Master skill replaces the Fortune rune gained for the base skill with one Master rune. Skill Mastery tokens cannot be placed on skill slots containing Mythos tokens.
Gaining Conditions
Condition cards are temporary statuses gained from Story cards. They are referenced by the Condition icon with a unique code. There is no limit to the number of Condition cards that can be in play. All effects of Condition cards must be applied where possible to a situation.
When gained, add Condition tokens equal to the number shown in the token placement space. If gained again, add +1 Condition token to the card. Condition card abilities that indicate changes to Condition tokens, refer to that specific card.
A Condition card shows: the linked deck icon (Hunted cards only), the token placement space, flavour text, and the ability / effect.
Condition tokens can be removed by:
- Spending 1 Elder Sign token
- Rewards on a Story card
- Specific story outcomes
If all tokens are removed from a Condition card, you may discard it back to the Conditions deck.
Hunted Conditions
Hunter cards are a special type of Condition card with their own unique tokens. There are two kinds, Hunters and Superhunters.
Hunter cards are linked to a specific Realm and get discarded if the Realm deck shown on the Hunter card is no longer the active one. Hunter cards remain in play while the Dreamer is at a Location because the Location is still within the same Realm.
Hunter cards enter play with Hunted tokens on them equal to the number shown in the token placement space (unless a Story card specifies otherwise).
Hunted tokens can be gained as:
- Penalties on Story cards
- Specific story outcomes
Hunted tokens can be removed by:
- Spending 1 Elder Sign token
- Rewards on Story cards
- Specific story outcomes
If all Hunted tokens are removed from the card, discard it back to the Conditions deck.
Superhunter Conditions
Superhunter cards represent deadly pursuers that hunt the Dreamer throughout the game! They are global and have no linked Realm. They are not removed from play when the Dreamer shifts to a different Realm deck.
Superhunter cards enter play with a number of Superhunter tokens on them equal to the number shown in the token placement space (unless a Story card specifies otherwise).
They can only be discarded if all tokens have been removed. They cannot be removed using the Elder Sign action.
Gaining From Experience
Any icon shown below or lower than the current position of the Experience marker on the Experience track can be claimed. To do this, return the Experience marker to the starting position.
RULE CHANGES: If text on a card contradicts the rulebook, the card text always takes precedence.
Gaining Talents
Talents are character upgrades (three maximum) gained from the Experience track that sit below the Dreamer dashboard. A Talent can be activated by placing one token onto the Talent tile and cannot be used again until the token is removed.
Talent tile effects (each tile is shown with its icon strip; effects as printed):
- Exchange 1 Sanity for 1 Déjà vu or vice versa.
- Maximum Items in play increased by 3.
- Spend 1 Lucid Dreaming to discard 2 Hunted tokens.
- When losing 3 Sanity or more, recover 1 Sanity.
- Spend 2 Déjà vu to choose a known Location.
- When gaining a Condition, roll 1 Reward die.
- On gaining 5 new Lore cards gain 1 Lucid Dreaming.
- When suffering 3 Vitality loss or more, recover 1 Vitality.
- Discard 2 reward cards to gain 3 XP.
- Protect 1 Item card below this Talent tile.
- 2 gained Cthulhu tokens can be placed here. When 3 Cthulhu tokens become a Mythos token, remove these Cthulhu tokens.
- Gain 1 Sanity when gaining a Lore card.
- Discard 1 Item to draw one replacement.
- Spend 2 Déjà vu to discard 1 Story card to Memories (can be the active Story card).
Card Effects
Some functions and abilities are triggered when certain conditions are met. These action symbols are most often separated by arrows. In these cases the effect on the right of the arrow results from applying the action on the left. Black arrows are generic, while blue arrows indicate beneficial results and red arrows indicate detrimental results. Some examples are shown here:
- (1 Lucid Dreaming spent, arrow, 3 Sanity): You may spend 1 Lucid point to gain 3 Sanity.
- (3 Hunted tokens, arrow, discard Condition card): When 3 Hunted tokens are on this card, you must discard this Condition card.
- (X Vitality lost, arrow, X Condition tokens removed): You may discard [x] Vitality to remove an equal number of Condition tokens from this Condition card.
- (Willpower (4) test : blue arrow, remove 3 Condition tokens + 1 Fade test / red arrow, discard 2 Lore cards + 1 Fade test): Test Willpower (4): If successful discard 3 Condition tokens then test for Fade once; or if failed, discard 2 Lore cards then test for Fade once.
- (2 Lucid or 1 Elder Sign, arrow, Story card): Spend either 2 Lucid or 1 Elder token to action the Story card result indicated.
These symbols are explained in the Iconography section.
Progression
Tier Advancement
Each Tier is exponentially more powerful than the last. To advance your Dreamer from Tier 1 to 2:
- Spend 5 Lucid Dreaming and flip the Dashboard to the higher Tier side.
- Increase the Dreamer's current Stats by the amounts shown in the table on page 7 (see Dreamer Setup & Advances).
- You may also discard one Mythos token from the character sheet and redistribute any others that remain to cover different skill positions.
Losing a Shard
When losing the number two shard, flip the card over and make the following changes:
- Recycle all cards from Memories back into their Realm decks (separating open from locked cards). Return the active Realm Portal card to its deck.
- Discard all current Item cards (except in dashboard protected slots), unless you spend a token (icon shown in the manual) to keep them all. Alternatively spend 1 Déjà vu for each Item card you wish to keep. Lore cards are not discarded!
- Discard all Condition cards (including Hunted cards but not Superhunter cards). Discard all Reward cards in play then reset Sanity and Vitality to their starting levels.
- Reset the Experience Track to its starting position.
- Follow any setup instructions shown on the Shard card. Draw the Realm Portal cards indicated, choose one randomly to activate, returning the others to their Realm Decks. Place your Character marker on this new Realm Portal card.
If you lose the one shard, you lose the game immediately and Cthulhu wins!
Saving the Game
Dreamescape has no set time limit. The game can be saved at any point by following this sequence of steps:
- Discard the Experience marker and all Cthulhu tokens from your Dashboard. Discard any Hunted condition cards and Hunted tokens (keep Superhunter cards and their tokens). Place the active Realm Portal aside.
- Make a note of how many of these tokens are in play: Condition tokens, Superhunter tokens and the other token types (icons shown in the manual). Recycle Memories by returning all story cards to their respective decks.
- Place all in play Item, Lore, Condition, current Shard card, Reward cards and discovered Locations onto the active Portal card. Store this pack of saved components separately from the rest of the game.
- All other components are returned to the gamebox ready for next play.
Refreshing a Save
To reset your tableau:
- Lay out all stored Rewards, Items, Lore and Condition cards and the stored Shard card into the tableau as before.
- Redistribute the saved Condition tokens as equally as possible among these cards. Do the same with any saved superhunter tokens.
- Redistribute any saved Mythos tokens back to the character sheet.
- Return any Skill Mastery tokens to their dashboard skills. Return any other saved tokens to the dashboard or applicable Item cards. Place the Experience marker on the start position of the Experience track and the Event marker on the start position of the Event Track.
- Lay out all discovered Locations and all Realm decks within reach.
- Either activate your stored Portal card and begin at Phase 1 in the same Realm deck or spend 1 Déjà vu to choose a new active Realm deck.
Two Player Rules
2 Player Goal
The two player game is semi-cooperative. Each player seeks to be the first to escape the dream.
2 Player Setup
Follow all steps of Game Setup on page 3-4, taking 1 copy of Item card #001 and its matching Elder Rune token. Each player draws 3 Item cards from the #002 - #014 starting set.
2 Player Start
Each player determines their starting Realm deck, placing their Character marker on the active Portal card (Dreamers cannot begin in the same deck). The player to have most recently suffered a nightmare will take their turn first.
2 Player Gameplay
The 1st player follows the Phase 1 to 6 sequence until they must draw another Open Story card (new encounter) from their active Realm deck. It is now the 2nd player's turn to draw Story cards from their active Realm deck. Dreamers can explore the same active Realm deck, but will only meet if both Character markers are on the same Location card.
SHARED DREAMS: The 1st time Dreamers meet it is a revelation! Both players immediately gain 1 Lucid Dreaming (icon shown) for experiencing a shared dream.
Collective Memories
Dreamers benefit from collective memory. All revealed Lore cards, Memories cards, Elder runes and knowledge gained through play is shared by both players (encounters are read aloud). All other play elements such as Items and Talent tokens are not shared. In any situation where a unique game component such as a Condition is referenced but is already in play in the other player's tableau, the active player must immediately take it and add it to their tableau instead. This includes Skill Mastery upgrades.
Any tokens that are on cards when they are taken by the other player are also transferred.
Dreamer Exchange
Dreamers on the same Location card can exchange any number of Item cards (except #001).
At any time, if a token supply runs out, the active player must claim the required tokens from the other player's tableau. Players can freely discuss which to take, but ultimately the active player decides.
Game Ambiguity
Dreamescape is a game system that has a huge number of card interactions and combinations. Occasionally something (such as more complex symbol actions) might not be covered specifically in the rules, be explained in detail, or causes uncertainty as you play. If this situation occurs, Cthulhu demands you apply the Rule of Nightmare:
RULE OF NIGHTMARE - Resolve the situation in a way that is the worst outcome for your Dreamer character.
Game Modes & Variants
Here are a few game variants that change the Dreamescape experience. You can mix and match any of these rules changes to suit your play style:
- DREAMEASY: Game Setup - Choose 3 Starting Gear Item cards instead of choosing randomly. Item and Reward card hand limit is now 9 cards.
- STORY MODE: Choose reaction options based on narrative only (by covering up the skill option and test difficulty).
- FAILING FORWARDS: When starting a new game, activate any discovered Locations and keep up to 7 Lore cards from your previous game.
- NIGHTMARE: For a tougher challenge only gain XP from the Right Hand side of the story card.
Glossary & Index
- Action - Instruction on a card to perform (such as removing tokens, changing stat values or rolling a dice).
- Active - In play / in use (can apply to Realm Decks, Story cards, Items, etc...)
- Banish - To remove a component from play, making it unavailable during standard game play.
- Barter value - The relative worth of an Item Card. Used for trading, bribing or exchanging (page 14).
- Change Deck - Draw the next active Realm deck by randomising the available (open) Portal Cards and drawing one (page 12).
- Choose Deck - The player chooses the next active Realm deck (page 12).
- Conditions - Temporary bonuses / penalties with variable effects tracked by tokens on the card (page 17).
- Cthulhu Tokens - These negative counters build up and convert into Mythos Tokens (page 13).
- Déjà vu - A stat allowing the Dreamer to relive memories. Has various functions (page 16).
- Dreamer - The player's character in the game.
- Elder Runes - Allow skill tests to be attempted. Runes must show complete Elder Sign icons to gain successes (page 10).
- Elder Sign Tokens - Powerful rewards that help you survive and control Mythos tokens, amongst other perks (page 13).
Iconography
Paired icons in the manual's key (slash-separated pairs) are described as printed:
- Sanity / Vitality.
- Lucid Dreaming / Déjà vu.
- Card Identifier Codes (Open / Locked).
- 1 success towards a test or ability.
- Failure (Penalty) / Threat challenge.
- Hunter / Superhunter. Specific types of Condition cards.
- Banish something (often a card) from the game. Return it to the box.
- Number circle to indicate a quantity (e.g. cards or tokens to draw or discard, or points to spend).
- Story Card / Draw Open / Draw Locked story card.
- Re-draw the previously active Story card (even from Memories or Rewards).
- Unlock/Release the locked Story card indicated, shuffling it into the applicable open Realm deck.
- After reading the narrative section of a Story card you may discard the card directly to Memories.
- Flip over a Story card and either read the relevant outcome or choose an alternative reaction option.
- Recycle a Story card back into its Realm or Location deck / Banish a storycard from the game.
- Story card rewards. Can be recovered from / discarded to Memories.
- Experience (XP). The quantity gained is shown if more than 1.
- Barter or Exchange. The total Item value required for the exchange is often shown.
- Skill test. The number after the skill type shows the test difficulty.
- Skill Mastery. Upgrades a character skill from Fortune to Master rune.
- Realm / Location deck.
- Shift to a Realm / discovered Location. Most often a specific deck icon will be shown.
Quick Start Tutorial
Separate this sheet from the rulebook before your first play.
Follow this tutorial for your first game to quickly learn the most important rules.
Set up the tableau as shown in Setup. For this intro game we will have only 1 shard!
Character Setup
We first set Rosalinde's starting stats to (DJV 1, LUCID 1, SAN 9, VIT 9) as shown on the table in Dreamer Setup & Advances. She can have a maximum of 13 Item cards in play and keep 6 Reward cards in hand.
After taking Item #01 and its Elder rune, we draw 3 random Item cards from the starting gear set (cards #002 - #014). We draw #004, #008 and #013. The other undrawn Item cards are returned to the Open Items deck.
We want to protect these starting items from potential discard effects so must choose which to place in the three protected slots above our Character Sheet. Place the Heirloom #01 here and two others, leaving one item vulnerable.
We take the 'One shard' Shard card, make note of the ability on the lower part (she can spend 4 DJV to gain +1 Lucid at any time) and follow the instructions on the upper part. Rosalinde gains +1 Lucid Dreaming.
Gameplay
The Shard card specifies four possible Realm decks to start in, so we take the Portal cards from those decks and draw one randomly (Celephaïs) returning the others. The Celephaïs Portal card is flipped to its 'active' side. We place the Rosalinde Character marker on the Portal to show Rosa is travelling in the Celephaïs Realm deck and the Event marker is placed on the lowest (blue) space of the Event tracker board.
We split this Realm deck to separate the 'locked' story cards from the 'open' cards. The locked cards are placed aside, the open cards are shuffled ready for play.
We are now ready to join one of Rosalinde's scattered dream fragments, exploring the fair city of Celephaïs...
Phase 1: Encounter
We draw the top 'open' Story card from the shuffled Celephaïs deck. Normally this would be a random card but in our case is #615. We then read the narrative section.
We notice a Keycode on the bottom left position but we don't yet know what this is linked to so must ignore it for now.
Phase 2: Reaction
The reaction options require skill tests. The first two tests however are difficulty 0 and therefore automatic successes. The Trade (3) test is harder but applying both Rosa's character skill bonus and the bonus given by Item #08 would help us attempt it.
Phase 3: Resolution
The option about Athib sounds interesting so we choose that, succeeding the (0) skill test. Note, the other options are now closed to us unless we return to this card in future.
Phase 4: Outcome
We now flip the card over and read only the SUCCESS story entry.
Phase 5: Results
The Speech-icon paragraph states that we gain item #22, adding it to our tableau. We could swap this with a protected card if we wished but then we would need to test for Fade (1) for the removed item. Instead we leave the Thagweed unprotected.
Finally this card tells us to draw #621. #615 is now successfully completed so we can gain the card for the rewards shown (a Sanity icon, a Reward die icon, or a +1 Déjà vu icon). Instead of storing it for later, we choose to spend the card now for +1 déjà vu.
Phase 6: Memories
This Story card is now finished so we discard it to Memories and draw #621.
Phase 1:
There is no event icon nor deck action icon on this card. There is another keycode but for now we must ignore it. We read the narrative section...
Phase 2: Reaction
The reaction options again all require skill tests. We do not wish to leave Celephaïs yet, so instead decide to try the Trade (3) test.
Phase 3: Resolution
The Trade test option requires three successes to pass. Rosa's Elder rune pool has a base of three Fortune runes. Her Trade skill gives her one more and Item #08 provides another. We decide to add the Special rune from her 'Strange Heirloom' to the pool and therefore throw six Elder runes...
Only one Fortune rune can be matched (to the Heirloom rune) giving her only two successes. She fails the test.
Phase 4: Outcome
We now flip the card over and must read the FAILURE outcome only.
Phase 5: Results
Not too bad. There is no spice available. We can return later in the dream and try again. The penalty section shows two Hunted tokens which must be applied if possible. We have no 'Hunted' Condition cards in play so can ignore this penalty.
Phase 6: Memories
This finished Story card is discarded to Memories and because no other card is specified, we draw a new Story card from the current Realm Deck.
Phase 1:
This card (#618) shows an Event icon so we raise the Event track by 1. This triggers the deck action, so Rosa can raise her Vitality stat by 2.
Phase 2:
After reading the narrative and reaction options we gain a stat bonus to Rosa's Sanity. Considering options we decide to leave the Observe test for now and choose the (0) test instead.
Phase 3:
The (0) test is an automatic success so instead of rolling the Elder rune pool, we can move directly to Phase 4.
Phase 4:
The success outcome tells us we have discovered a new Location.
Phase 5:
Firstly however, we can claim the current card for rewards. We gain one experience point so can move the Experience marker up one step on the Experience Track.
The other rewards are skill bonuses which can be spent later to add a Fortune rune to our pool, or saved up towards gaining a Skill Mastery upgrade. We therefore store the card and do not place it in Memories.
Phase 6:
To discover a Location we flip over Location Portal card #24 - 'Iridescent Pool' to its active 'coloured' side, placing it on top of the Celephaïs Portal. This is now our temporary location within Celephaïs and will remain an 'active' location for the rest of the game. We move our character marker to here also.
Phase 1:
All Locations have a linked Story card (in this case #671) so we draw this now. After reading the narrative we gain Lore card #163 which shows the matching keycode.
As long as #163 remains in play, we will be able to find this Location in future by matching its keycode on Story cards. #671 shows the deck action icon so we can choose to trigger the deck action shown on the Location card.
The Wisest of Fish action requires a (4) test. If successful we get to roll one Elder die with different outcomes depending on the result: an Elder Sign would give us a precious +1 Lucid Dreaming, a Cthulhu symbol would send us to a different Realm Deck showing the 'City' icon in the top right corner.
We choose to skip the deck action for now and instead return to #671, reading the narrative and then choosing a reaction...
It is time for you to save Rosalinde from her nightmare...
Note: After completing this Story card, the Dreamer will return to the Celephaïs Realm Deck to draw a new story card. The Iridescent Pool Location card is set aside now face up and #671 is recycled below it for easy access later.
Rules Checker
Some rules can be easily overlooked during play. Here are the most common:
- FADE TESTS: Item cards in protected slots do not suffer discard effects but do require Fade tests if specified on the card's ability. The Fade (2) icon means after using the item, make two consecutive Fade tests.
- DEJA VU ABILITIES: the Déjà vu stat will help you to take control of the dream (by recycling Story cards from Memories back into their Realm decks to be experienced again). Keep the Reference cards close by during play to remind you of these abilities.
- DISCARDED ITEMS: Item cards discarded from play (not Banished) are immediately returned to their respective Item decks.
- EVENTS: The Event marker must be moved and any result applied before the narrative story section is read.
- EXPERIENCE: Dont forget to claim any XP points shown on Story cards.
- SKILL MASTERY: Spend 4 matching skill icons from reward cards to claim the matching Skill Mastery token. Upgraded skills replace the Fortune bonus rune with a Master rune.
- HUNTED CARDS: Hunted Condition cards are deck specific and get discarded when a new Realm deck becomes active. Superhunter cards however remain in play regardless of the active deck.
- LOCATION STORY CARDS: Location-linked Story cards are always returned to below their matching Location Portal Card after completion, so they can be easily drawn next time. They never have rewards so will never be saved or remain in play.
- LUCID DREAMING ABILITIES: Lucid Dreaming has very powerful abilities to help your Dreamer survive. Especially raising your character to the next Tier. Keep the Reference cards close by.