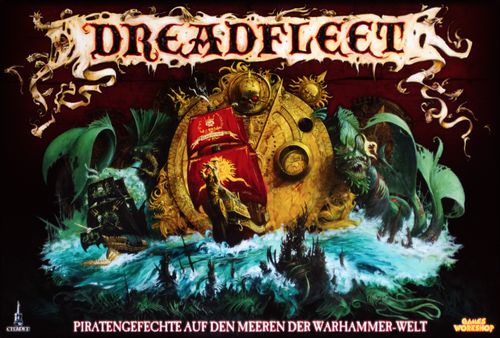
Dreadfleet
Dreadfleet Rulebook
Table of Contents
Table of Contents
Introduction
Sail Towards Adventure...
The box contains everything you need to play, including the ten warships around which the game revolves, the seascape on which the battles are fought, and the dangerous islands that must be navigated during the story.
Learning the game is not hard: you can skim the rules and start playing, although it will take a little longer to master the subtler strategies. There are twelve ready-made scenarios. Each represents a step in the Grand Alliance's campaign to finish off Count Noctilus, and includes tactical challenges that will test even the shrewdest pirate lord.
The Grand Alliance
The Grand Alliance is a coalition of titanic warships commanded by the veteran Pirate Lord Jaego Roth. Its ranks include a Dark Elf prince fallen from grace, a Dwarf Master Engineer seeking revenge, an icy-hearted pirate queen and a shameless Sorcerer.
The Fleet of Terror
Count Noctilus, the necromancer of the Bloody Reaver, dominates the Fleet of Terror. His supernatural warships are led by a traitorous Ratman, a furious Funerary King, a wicked ghost captain and a Chaos Dwarf pirate.
Assembling Your Fleet
Most of the Dreadfleet miniatures are made of several components that fit together. For miniatures that are a single piece, you only need to separate them from the sprue. For the others, decide which piece you want to assemble and separate all the parts of the sprue before fitting them together. The miniatures will withstand the rigours of battle better if the parts are glued with plastic cement, and they will look much better when painted. For information on the Citadel paint range and painting guides, see games-workshop.com. When assembling a warship, use clippers to separate all the pieces of the same letter from the sprue; the letters will help you identify which parts make up the different warships. Then fit the parts together carefully.
Most Dreadfleet warships are assembled starting from the central section of the miniature, fitting one of the outer sections into it. Then the same is done with the other outer section, pressing the miniature until it fits in place.
Finally, the missiles and the sails (if applicable) can be added before gluing the miniature to its base.
Overview of the Game
The game revolves around the adventures of the Grand Alliance, a coalition of Men, Elves and Dwarfs united in a deadly mission to eliminate Count Noctilus. One player takes the role of these desperate pirates, while his opponent takes the Fleet of Terror. All the commanders of the Fleet of Terror have crossed the frontier between life and death, which is an elegant way of saying that they are dead. Or rather, Undead: corpses that, in the Galleon Graveyard, do not rest in peace.
Each player takes turns to move, shoot and fight with one of the warships under his command. There is no real-time limit in Dreadfleet, so you can think carefully about your strategies before carrying them out.
When a player has resolved the actions of a warship of his turn, the other player will choose one of his warships and do the same, until all the warships have had the opportunity to act. Then the turn ends and it is time to begin a completely new turn.
What Is in This Book?
This book is divided, broadly speaking, into three sections. The first deals with the rules of the game, with diagrams and examples of play so that you can start playing as soon as possible. You do not need to read all the rules before playing; for now you only have to familiarise yourself with the main concepts (in bold), the text boxes and the diagrams.
The second section of the book details the ten warships and the stories of the captains who command them. Each ship has its own strengths, weaknesses and special abilities.
The third section details the twelve scenarios. Each scenario will ask you to place the islands in a specific way, and will challenge you with different objectives. Some scenarios are to-the-death battles in which you will have to sink the opponent's warships, but in others you will be rescuing a stranded character, recovering an exotic treasure or carrying your ships from one point to another... while you defend yourself from the enemy fleet!
Basic Terminology
Dreadfleet uses four types of basic components. The first of them are the cards, which are used to keep track of the situations that have occurred in the course of the battle (see the next page). The second type are the game accessories, which include the seascape, the wind indicator, the sailing ruler, twelve dice and the ship's rudder. The third are the treasures, which mark the location of treasures or other objectives.
The fourth type, the most important, are the miniatures. This is a broad category including the warships, the islands, the auxiliaries, and the wrecks and sea monsters. Although the larger miniatures of the Dreadfleet are the ones known as warships, some of them are quite exotic: the Leviathans, undead or giant mechanical squids, are not warships in the strict sense of the word, but they fight in much the same way, so we use that term. The smaller vessels are known as auxiliaries, since they are support vessels that the bigger warships can deploy. Some rules refer to auxiliaries or involve only auxiliaries, but most of the rules refer to "warships", meaning all ships, large or small.
The Seascape
The game mat is called the seascape, and it represents the waters of the Galleon Graveyard. It has numbers around its edge, which we call marks. The marks are used in each scenario to indicate the direction of the wind.
The Islands and the Wrecks
The box includes seven miniatures of islands and seven wrecks. Each scenario includes a map indicating which islands and wrecks should be placed on the seascape. Most islands have special features, such as castles or volcanoes. Some scenarios will make use of these special features, while others treat the islands as if they were totally normal.
Game Accessories
Apart from the seascape and the dice, there are three game accessories that you will use throughout the game. The first is the wind indicator; an element of the game that is placed on the edge of the seascape to indicate the direction from which the wind blows. The reverse of the wind indicator is sometimes used to indicate eddies and things like that. When it is used in this way, it is known as the whirlpool marker. When a card makes reference to the wind indicator we will assume it also refers to the whirlpool marker.
The next is the sailing ruler. It acts as a rule, allowing you to determine the distance between two points, or to move miniatures a certain number of inches. The sailing ruler also rotates at precise angles that will be useful to us later. The ruler comes in three sections that fit together before starting to play. Do not glue the sections of the ruler together!
Last, but not least, is the ship's rudder. This is used when you have to turn one of your warships (page 24).
Once you have finished using the sailing ruler and the rudder, place them again on the seascape in the area indicated in the side panel, so that your opponent can use them (together with the markers 6,3 and 3,3 respectively).
The Treasures
The game includes five treasure pieces. Only some specific scenarios will use them, so do not worry about them yet.
The Rules
Cards: The Scheme
Dreadfleet uses several types of cards to remind you of the rules and to keep track of what is happening in each game.
Warship cards. Each warship has a card detailing the attributes and abilities of the ship. Warship cards have marked areas under which to place the different damage cards. You will also find a Situation area. At the bottom of each card you will find the name and the special abilities of its captain.
In the example on the right, the Heldenhammer has suffered Speed damage, Hull damage, Crew damage and is in the "Curse of the Flying Dutchman" situation (the Situation card of the Curse of the Flying Dutchman is placed in its situation area). The Heldenhammer has also suffered some special Damage cards that have effects that are not very common. Its captain has suffered a "serious wound", represented by a Wound card.
(Card key from the diagram: A, warship card; B, Wound card; C, Damage card; D, Situation card.)
Wound cards. Wound cards are used to keep track of the wounds suffered by a warship's captain during duels with his enemies. For each wound a captain receives, a penalty will be applied to his abilities (page 40).
Situation cards. Situation cards are used to indicate the state of a warship. If there are no Situation cards placed next to it, the ship acts normally. As the game progresses, things, good or bad, will happen to your ship, voluntarily or not (page 36).
Damage cards. Damage cards are used when a warship suffers damage. It is possible for a warship to have to draw several Damage cards at once, which will be resolved one after another. There are four types of Damage card: hull, crew, speed and special, the effects of which are detailed on the cards. Each type of Damage card is placed on a different area of the warship card, as shown above. The speed and special cards entangle the ship, while if the ship accumulates many hull or crew cards it will end up sunk or taken by boarding (page 36).
Auxiliary cards. Auxiliaries have their own cards, which are much smaller than those of the warships (just like the auxiliaries themselves).
Destiny cards. Destiny cards are used to determine the random events of the Galleon Graveyard. Destiny cards cover different eventualities, from the unleashing of a storm to the attack of a sea beast. Destiny cards also include symbols at the bottom: the one on the left is the "wind force" and the one on the right indicates how to move the wind indicator this turn (page 23).
Other cards. There are two more types of cards in the game that are not mentioned here. The first of them are the Orders cards, which are very important and count on their own section (page 37). The other is a special card called Submerged, which is only used for the Black Kraken, and whose rules are found on page 67.
(Diagram captions: Wound card; Situation card; Damage card; Auxiliary card; Destiny card with "Wind force" and "Movement of the wind indicator" symbols.)
Basic Principles
Now that you have assembled the fleets, the first thing you need to learn are some basic concepts of the game, mainly the warships themselves.
The rules section of Dreadfleet is divided into several steps. Once you are familiar with the basic concepts we use to describe the warships (their attributes, which define who they are and how to move them across the seascape), you will learn how to move, fire the broadsides, fight against sea monsters and recover lost treasures. For the moment, let us look at some of the basics used in the game.
Dice: 1D6 and 1D3
Practically all rolls in Dreadfleet use normal six-sided dice (1D6 to be exact), but there are exceptions. There are special cases that require you to roll 1D3. As three-sided dice do not exist, roll 1D6 and divide the result, rounding up. This means that a roll of 1 & 2 = 1; 3 & 4 = 2 and 5 & 6 = 3.
You may also have to roll several dice at once, which will be described as 2D6, 3D6, etcetera. You roll the number of dice indicated and add up the results.
For example, a roll of 2D6 is equivalent to rolling two dice and adding them together, for a result between 2 and 12.
Rounding Fractions
There will be cases in which you will have to divide the result of a die roll, an attribute or some other value. When this happens, any fraction will always be rounded up. For example, a roll of 2D6 with a result of 7, divided by two, will give a result of 4.
Modifying Dice Rolls
You will see rules that modify the result of a die roll. This will be indicated as 1D6 plus or minus a number, such as 1D6+1. To obtain the result, roll the dice and add or subtract the number to or from the result of the roll (as applicable). For example, 1D6+2 requires you to roll one die and add 2 to the result, obtaining a total between 3 and 8.
A modifier of +1 adds one to the result of the die: a 2 becomes a 3, a 5 becomes a 6, etc. Conversely, a modifier of -1 means you must subtract one from the result of the die.
It is possible for a warship to be affected by two or more modifiers at the same time. Modifiers are always cumulative, so it is possible for a warship to have a double bonus, a double penalty, or even a positive and a negative bonus that cancel each other out.
Remember that no die roll can be modified by giving a final result of less than 1.
Re-rolling Dice
In some cases, the rules allow you to re-roll a die. This works exactly as it sounds: pick up the die you want to repeat and roll it again. The second result will count, even if it is worse than the first. No die can be re-rolled more than once, regardless of the source of the re-roll. A re-roll is used on a roll that involves more than one die (2D6, for example); you must re-roll the entire roll, not one of the dice alone.
The Highest Roll
If the rules require the players to roll for something that requires the highest roll, each player will roll one die, and the one with the highest result wins. If both players get the same result, they will re-roll until one of them wins. Any modifier applied to the first roll must also be applied to the following ones.
Random Decisions
You will come across cases in which you have to determine something randomly: a miniature, a player, a seascape edge, or something else. In this case, assign each of the things you have to choose between a number from 1D6 and roll the die. If there are fewer than six things to choose from, repeat the results of the die that are not assigned until you get one that is. For example, a player has to randomly choose one of his warships. Assign a number from 1 to 5 to each of his warships, and roll 1D6, repeating the results of 6 until you get a result between 1 and 5. If you need to choose randomly between more than 6 things, divide them into more or less equal sets, randomly designate one of those sets, and then randomly determine one of the objects members of that set.
Line of Sight
Line of sight determines what each miniature can "see". Many situations require checking whether a miniature can draw a line of sight to another. For one miniature to have line of sight to another, you must be able to draw a single straight line, without being blocked, from its hull/body to the hull/body of the target. There will be cases in which the only visible part of an enemy miniature is a sail, a missile or the base. In these cases, that miniature is considered not visible. This is done to prevent a ship from being buried by a shot that could barely tear its sails. Likewise, ignore the wings, tentacles and tails of dragons and sea monsters.
To say that line of sight is drawn to a miniature, the line must be able to run to the main section of its body (page 31). Often the line of sight will be obvious, for example if an island or another warship completely blocks the view, in which case the target will be clearly out of line of sight and not "visible". On occasions when it is not obvious, perhaps you will have to crouch down to the height of the seascape and look from "the captain's eyes". That is, put the height of your eyes at the level of the battlefield and "see" through their perspective.
Arcs of Sight
At several points in the rules you will find the concept of "arc of sight", or simply "arc". It is quite important to determine the direction from which a threat comes: the front, the side or the rear of a warship. It is also used to determine the effects of the wind on a ship when it sails.
To make this easier to determine, each warship counts on having a rectangular base. Imagine two diagonal lines extended from each of the corners of the base of the warship. This gives four arcs of sight: a bow arc, two side arcs and a stern arc. Warships can only fire at targets that are in one of their side arcs.
You can check the arcs of sight at any time by using the sailing ruler. Place it right at the corner of the warship's base, with the sections of the ruler fitted at an angle of 45 degrees, and then observe the diagonal line that you obtain to determine where the separation between a bow or stern arc and a side arc lies (see the illustration).
(Diagram: "Determining the arcs of sight". In this diagram, the Heldenhammer can fire at starboard on the Black Kraken, given that it is in its side arc, but not on the Curse of Zandri, which is in its bow arc. In the case of the Skabrus, it is hard to determine whether the greater part of the target is in a side arc of the Heldenhammer or not, so the players will roll 1D6 to reach a quick and impartial agreement. Arc labels: Bow, Port, Starboard, Stern.)
Command Checks
Other than the usual rules, you will also find command checks, which are used when the captain of a warship wants to exert his influence. This is covered in detail on pages 29 and 37, but the process is always the same.
When you have to make a command check you must roll 1D6. If the result is equal to or greater than the captain's current Command, you will have succeeded in the check. Otherwise it is a failure. Regardless of any modifier, a result of 1 on 1D6 is always a failure, and a result of 6 on 1D6 is always a success.
Measuring Distances
The crews of your warships are seasoned sailors, capable of judging distances at a glance. Because of this, you are free to measure the distances between points at any time in the game. You will see that determining the distance between objects can help you make decisions with judgement, so remember to measure before making your movements.
In Dreadfleet, all movements and increments are measured in inches ("). Distances from and to islands and wrecks are always measured to the closest point of those miniatures. When measuring to or from warships, the base is the only thing you must take into account. This abstraction is essential to ensure that a shot, which could barely graze a missile, does not end up destroying the hull of its target.
Oops! Too Late
There will be occasions in which you will have set a certain heading, and you will discover that the manoeuvre you are trying is impossible.
Once a warship has moved, its movement cannot be "rectified". This prevents players from trying headings until they find the one that works best. Veteran captains can be mistaken!
Rules Priority
Some of the warships and their captains have special abilities that allow them to avoid or adjust the main rules. You will see them printed on the corresponding warship cards. There are also other types of cards that can change the way the battle develops, such as Destiny cards, Situation cards, Wound cards or Damage cards. Some of these cards interact with the main rules in a clearly contradictory way.
The golden rule is that if a rule is written on a card, it takes precedence over the rules written in this book.
This rule allows our heroes (and villains) to act independently, interestingly and in a different way from their rivals; in the same way that Destiny and Damage cards will affect the development of the game in a way as unpredictable as it is entertaining and lethal.
"Hits" and "Damage" (box)
There are several occasions in the rules in which we say that a warship "receives a hit". This works the same way as suffering damage from a broadside, so that the target may make saving throws for armour against it (page 32). On other occasions it will be indicated that you must "draw a Damage card"; in this case you cannot make saving throws against it. Something special has happened and you have to accept your fate!
The Most Important Rule (box)
In a game of the scale and size of Dreadfleet, you will find situations that are not covered by the rules, or for which you will not be able to find a solution. And even when you know the rule, the situation will be covered by it only by the skin of its teeth.
Nobody wants to waste their precious game time arguing, so you will have to be prepared to interpret a rule on the fly, or to invent a solution that works for you for that situation yourselves (with the sportsmanship of gentlemen, of course; let us leave the cloak-and-sword duels to the captains).
If you see that you cannot agree on the application of a rule, roll a die to see which of the solutions you will apply during the game. On a 1 to 3, player A chooses; on a 4 to 6, player B chooses. And now carry on with the game!
Attributes
All warships have a set of six attributes, detailed both on the warship card and in this book, in what we will call the "attribute profile" (pages 49-67). A warship's attributes tell you its strengths and weaknesses. Broadly speaking, the higher an attribute, the better that miniature will be in that particular field. For example, a warship with a high Broadside attribute will be better at firing at its enemies than one with a lower Broadside attribute. The exception to this general rule are the Manoeuvrability and Armour attributes. In both cases, the lower the value of the attribute, the better; we will look at this in more detail shortly.
Speed
A warship's Speed attribute indicates the movement capacity, in inches, at its disposal each time you use it. In other words, the basic distance it can move across the seascape during your turn. This distance can be altered by external factors such as the direction of the wind, the orders of the ship's captain, or the damage the vessel has suffered to its sails, engines, etc.
If a warship's Speed is reduced to zero, it cannot move voluntarily, but otherwise it can act normally, firing its broadsides, fighting in boarding actions and so on.
Hull
The Hull attribute represents the volume of the vessel and the amount of damage it can absorb. One of the most common methods of "killing" your opponent's warships is to cause them enough damage to the Hull to sink them.
Sunk Ships
If a warship's Hull is reduced to zero, it "sinks" and counts as dead (or in the case of the Undead fleet, dead for good). Remove the miniature and its card from the game, and place all the cards that were applied to that warship in the corresponding discard pile (page 23).
Crew
The Crew attribute is a representation of the seafaring and martial qualities of the sailors. A warship's Crew does not literally indicate the number of people who occupy it. Most of these warships have crews made up of hundreds, if not thousands, of individuals, but it would be a bit odd to put such a high value on them. After all, who has that many dice?
The Crew attribute has no effect on either Speed or Broadsides. All our warships are capable of sailing the oceans and fighting their enemies even if their crew is made up of a few skeletons (some of the ships of the Fleet of Terror have few alternatives in this respect).
Bear in mind that Crew also represents the basic strength of a sea monster, a Dragon or any other strange creature.
Abandoned Ships
If a warship's Crew is reduced to zero, it is "abandoned" and will die for game purposes. So many sailors have died that the rest have surrendered, jumped overboard or perhaps been reduced to ashes. The warship is dead in the water (or dead for good... all right, let us drop the jokes about the Undead). Lacking hands to guide its course, it will drift, lost in the fog. Remove the miniature and its card from the game, and place all the cards that were applied to that warship in the corresponding discard pile (page 23).
Broadside
The Broadside attribute of a warship represents its firepower. This usually indicates the quantity and quality of the ship's offensive weapons, but never their exact quantity: the Heldenhammer has more than one hundred and eighty cannons on board, which are represented by its incomparable Broadside value of 6. The Broadside attribute can also represent the damage caused by missile launchers, the fiery breath of monsters, flashing lightning bolts, etc.
When a broadside is fired at a target, normally you will roll a number of dice equal to the Broadside attribute of your warship. You will find all the details of the rules for firing broadsides on pages 30 to 33.
Manoeuvrability
The Manoeuvrability attribute determines the manoeuvring capacity, the experience of the helmsman and the quality of the turning system, the gangway, the keel and other elements of the ship.
Manoeuvrability determines how often a warship can change direction, which we refer to as "changing facing"; we will see it in detail in the movement rules (pages 24-30). For the moment, just remember that the lower this value, the better. A warship with low Manoeuvrability will be able to avoid chains of islands and wrecks easily, while another ship with a higher Manoeuvrability value will have trouble sailing the more intricate areas of the Galleon Graveyard.
Armour
The Armour attribute determines the solidity and resistance of the warships' protection. If your warship suffers a hit, you may attempt to "save" the damage by passing a 1D6 roll called an armour save (see page 32). If the armour save is passed, the ship's shields will have protected it. Sometimes, instead of suffering a hit, you will be told that you must draw a Damage card. In these situations armour saves are not allowed.
Setting Up the Game
Before you start playing you will have to follow some steps to set up the game. These steps will not take long once you have done it a couple of times, especially if you and your opponent get organised.
Step 1: Lay Out the Seascape
First of all, lay out the play area of the seascape on a flat surface. A large table will be perfect, but you can also play on the floor. The seascape will provide the play area for your games of Dreadfleet; it represents the mysterious realm of the Galleon Graveyard. You will add the different configurations of island and wreck pieces later, depending on the scenario.
(Diagram key: 1 Island; 2 Wreck; 3 Seascape; 4 Orders cards; 5 Situation cards; 6 Wound cards; 7 Treasure; 8 Warship card; 9 Auxiliary card; 10 Destiny deck; 11 Damage deck.)
Step 2: Choose Sides
Next you will have to decide who will play the Grand Alliance fleet and who will play the Fleet of Terror. If you both want to control the same fleet, roll a die, and whoever rolls highest will play the fleet he wants. The opponent can choose the next one.
After having played a scenario with one of the fleets, you may want to swap sides and play it again from the other side to see if you can do better than your opponent under the same conditions.
Step 3: Choose the Scenario
The next thing to do is choose the scenario you want to play (page 68). You can agree with your opponent, or you can all play in order, discovering more rules of the game and the warships as you go. The scenarios are designed to incorporate new rules, locations and characters as the story develops. We advise you to begin with the first scenario, The Reef of the Dead (page 70), but experienced players can play whichever they want, or invent their own.
Step 4: Prepare the Scene
Now is the time to prepare the battlefield. Place the island and wreck pieces following the instructions in the "Preparing the Scene" section of the scenario you have chosen, using the Deployment map that accompanies it as a guide (the marks on the edge of the seascape will serve as a reference point to place things in their place). You will find instructions in each of the scenarios indicating which islands and which wrecks you will have to use so as to be able to fit the game. Whether you are fighting next to the lair of a mad necromancer, investigating the eruption of a volcano, or trying to escape the effects of a whirlpool.
Step 5: Shuffle the Decks
Now you will have to arrange the different types of cards in piles. The game includes decks of small cards: the Destiny deck and the Damage deck. There are also the Auxiliary cards (those of the Auxiliaries), and the Situation cards, which come into play only under certain conditions. In addition there are the Wound cards to keep track of the injuries of the captains. These cards will be used to determine the events and the fortunes that will befall your fleet in the course of the game. Shuffle the Destiny and Damage decks separately before placing them near one of the players, and leave the rest to one side.
Some larger cards are also included. They are divided into Orders cards, which modify the abilities of the warship, and warship cards, which correspond to each of the warships. Separate the warship cards between the sides of the Grand Alliance and the Fleet of Terror. Each player takes one of the two decks of warship cards, and a "hand" of five Orders cards (one of each type).
Step 6: Set the Direction of the Wind
At this moment you have to determine the direction from which the wind blows, which is represented by the place where the wind indicator is placed.
To determine the initial position of the wind indicator, each player rolls a different-coloured die, one red and one white. The result obtained corresponds to a mark on the edge of the seascape. The red die will always give the first number and the white die the second, giving a result between 1,1 and 6,6.
You have to locate the corresponding mark and place the wind indicator over these numbers.
Warships with sails will obtain additional movement when they sail with the wind blowing from behind. Conversely, these same ships will have a disadvantage when they sail with the wind against them. We will see the rules relating to the wind later (pages 26-28).
(Caption: When you determine the initial position of the wind indicator you will have to roll two dice of different colours. Here, the red die shows a result of 2 and the white die a result of 3. In this case, the wind indicator begins the game covering mark 2,3.)
Step 7: Prepare the Fleet
The next thing to do is prepare the fleet for battle. It will be easy to do in the first scenarios, as you will have few warships to use. Separate the miniatures corresponding to the scenario you are going to play; look for the necessary warship cards and place on your side the ones you are going to use. Then become familiar with the special rules that apply to each of your warships.
After preparing the cards and the corresponding miniatures, you can deploy your warships according to the deployment map of the scenario.
Some scenarios will require you and your opponent to take turns placing the warships. Others will have special deployment criteria. The different scenario maps have a section marked in which you must place your fleet for the battle. It is advisable to reflect on your strategy at this point, and to bear it in mind when deploying your warships; you could gain a strategic advantage from the start.
Step 8: Begin the Game
After having your warships in position, the cards and the islands, and having become familiar with the details of the scenario, you are ready to play.
Summary (box)
- Lay out the seascape: place the seascape on a flat surface.
- Choose sides: decide which player will play with each fleet.
- Choose the scenario: decide the encounter you are going to represent.
- Prepare the scene: place the islands and the wrecks as indicated in the scenario.
- Shuffle the decks: shuffle the Destiny and Damage decks.
- Set the direction of the wind: roll the dice of different colours to determine the direction of the wind.
- Prepare the fleet: see which warships you will use, and prepare the corresponding warship cards.
- Begin the game: let the battle begin!
The Game Turn
The game of Dreadfleet is played over a series of "turns". In each of these turns, the players go through several phases, one after another. During the main section of the turn (the Action phase), one player acts with one of his warships, and then the other player acts with one of his. There are a few phases that have to be resolved before the warships act, allowing us to set the scene of the battle.
Phase One: Initiative
First of all, you will have to determine which fleet has the initiative; that is, which player will have the option of acting first. The initiative can change hands throughout the game.
To determine who has the initiative, the players will have to roll off for the highest roll. Whoever wins it will have the initiative that turn. The player with the initiative can choose whether to play first or second. If he decides to move first, we call him the first player. If he decides to play second, he will be the second player.
Phase Two: Situation
In this phase you can think about the state of things; the calm before the storm. This is called the Situation phase because it is when you will attend to the effects that are in play and the effects of certain Situation cards are resolved (page 36). Perhaps you would like to think about your tactics for the next turn, check that there are no miniatures or cards on the table that no longer take part in the game, or go and get a cup of coffee.
"Stays in Play" and "Situation"
Cards that have to be resolved in the Situation phase have a red background. These include some Destiny cards with the words Stays in play printed on them, which are put "in play" when you draw them (that is, by placing them in the play area). There are also Burning cards and Damage cards with the word Situation printed on them. When resolving these cards, the first player will resolve all those that affect his warships first. Then the second player will resolve all those that affect his warships. Lastly, the first player will resolve the Situation cards that remain pending.
Phase Three: Destiny
It is during the Destiny phase that the game acts by itself. All kinds of strange and wonderful situations can occur during this part of the game! The Destiny phase begins with the first player drawing a card from the top of the Destiny deck and resolving the effects it indicates. Then the second player will do the same. The box beside it details rules for Destiny cards.
Phase Four: Action
Now the moment has come for the warships to enter combat. In the other phases of the game, the players "share" the phases, but during the Action phase the game will alternate between the players.
How are these action phases resolved? Well, the first player chooses one of his warships that has not yet been chosen this turn. Then he can resolve the actions available for that warship. This is known as "activating" a warship.
The action phases of the activated warships are divided into a sequence of subphases:
- A) Orders subphase. The captain of the warship may attempt to give an order (page 37).
- B) Movement subphase. The warship may move and manoeuvre during its travel across the seascape (page 24).
- C) Broadside subphase. The warship may fire a broadside at a target within its range, arc and line of sight (page 30).
- D) Boarding actions subphase. The warship must resolve a boarding action against the enemy warships that it has in contact with its base (page 34).
After a player has finished the actions he wishes to carry out with the warship he chose, his opponent will choose one of his warships that has not yet been activated that turn, and will carry out his action phase: giving orders, moving, firing broadsides and resolving boarding actions. The game will keep alternating until all the warships in play have been activated.
Too Many Ships?
Sometimes a player will have more warships than his opponent. When a player runs out of warships to choose from, the other will choose among the warships that he has left to activate, and will resolve their action phases one by one until all have acted.
Phase Five: End
Whenever the End phase is reached in a turn, you will have to check whether either player has fulfilled the criteria needed to win. If so, that player will have won, it will be time to shake hands, and if you have time, swap sides and play again. The other way of ending the game is when the turns run out. For example, if the game lasts six turns, and you are in the End phase of the sixth turn, the game will end automatically and the victory conditions will be checked. If the turns have not yet run out, and neither of the players has achieved victory, a new turn will begin with phase one: Initiative.
Resolving Destiny Cards (box)
Destiny cards allow you to represent certain events, such as attacks by sea monsters, storms of magical energy and so on. To resolve a Destiny card, simply follow the text indicated on the card itself. Most Destiny cards are resolved immediately and then discarded. Others are not resolved immediately, and some are also Situation cards that remain in play. Even if a Destiny card is not resolved until a later moment in the game, it will still affect the wind indicator as soon as it is drawn.
(Example card shown: "Sword Hurricane". Some Destiny cards can contain several different types of information.)
Moving the Wind Indicator
Because of the magical gales that blow in the Galleon Graveyard, the wind can change direction in the blink of an eye. After following the rules text of the Destiny card, the player who drew it must move the wind indicator around the edge of the seascape. Destiny cards have a symbol in the lower right corner that tells you how to move the wind indicator during that turn. The symbol has the shape of the wind indicator, with a number inside it.
If the number in the symbol is surrounded by directional arrows, these indicate whether the wind indicator must move clockwise or counter-clockwise. The player who drew the Destiny card has to move the wind indicator around the edge as many "marks" as the number inside the arrows indicates, in the direction that they indicate. The wind indicator may have to turn a corner in order to complete its movement.
(Example: the Destiny card shows an arrow counter-clockwise surrounding a number 2. The player will move the wind indicator two marks counter-clockwise.)
Other Destiny cards have a "2D6" symbol inside the wind indicator symbol. These indicate that you must move the wind indicator to a random position. Roll two dice, one red and one white. The result obtained will correspond to a mark on the edge of the seascape; the red die indicates the first number and the white die the second, giving a result between 1,1 and 6,6. Find the corresponding mark and place the wind marker on it.
Discard Piles
After a player has resolved a Destiny card, he must place it on top of the Destiny discard pile. The discard pile is a pile of cards that have been used, left face up next to the corresponding deck. Both the Destiny deck and the Damage deck will have their corresponding discard piles, so make sure you place the cards on the correct discard piles.
Running Out of Cards
When you run out of Destiny cards in the Destiny deck, take all the Destiny cards from the Destiny discard pile, shuffle them well and put them back into play as a new Destiny deck.
Destiny Cards and Brief Respites
Some Destiny cards have rules in their text that are only relevant in specific cases. In this category are Destiny cards with the words "Spell" or "Improvement" (Mejora) printed on the lower part (these will only affect warships), Destiny cards that repair specific types of damage, and Destiny cards that heal the wounds of a captain (we will go into these in detail later).
If a player draws a Destiny card with the letters (BR) printed after the rules text, and its effects cannot be applied, he will enjoy a "brief respite" (Breve Respiro). That player may immediately give a Repair order to one of his warships instead of resolving the rules of the text of the Destiny card. This has no effect on the Orders subphase, and he may give a Repair order if he wishes (see page 37 for more information about orders). Whether or not a Repair order is given, resolve the movement of the wind indicator as normal, and place the card on the Destiny discard pile.
For example, Sword Hurricane (see on the left) is a Spell that only has an effect on the Flaming Scimitar. If this card is drawn while the Flaming Scimitar is not in play, whether because it is not being used in the scenario, because it has been sunk, or for any other reason it does not take part in the game, the card will have no effect and instead will offer a brief respite.
Moving Your Warships
As mentioned previously, the Action phase is divided into several subphases. First we will see how to move your warships in the movement subphase.
The art of moving the warships in Dreadfleet is basic to winning the game. As long as you obey a few simple rules, you will be able to move your warships wherever you want across the seascape, provided that they do not cross over or end their movement on top of another miniature.
Moving Your Warships
As mentioned before, each warship has a Speed attribute in its profile, which is the basic number of inches it can move in a turn, provided it is not in contact with an enemy miniature, an island or a wreck.
When you move a warship, the first thing you have to do is decide where you want it to go. If it has to go in a straight line forward, it will be easy to move it: move that warship in that direction as many inches or fewer as its Speed attribute indicates, in a straight line. It is not necessary to move the whole distance at your disposal; sometimes it will be prudent to move only a couple of inches.
If you want to move in a direction that is not a straight line, you will have to "change facing" (see below).
Distances are always measured using the same common reference point: the start and end point of each movement will be measured from the front edge of the base (see the diagram).
(Diagram: Moving a warship. This warship moves 6" forward. In the first example, the warship is skipping its 6" distance incorrectly. In the second example, the front of the warship's base moves 6" forward correctly.)
Changing Facing
The warships that fight the battles in Dreadfleet are powerful forces of destruction, some of which are more like floating cities than conventional galleons. However, this great power comes at the cost of manoeuvrability. Even the lightest Elf ship needs a while to change course.
To represent this, there is a procedure that must be followed when turns are made with warships: the change of facing.
Potentially, a warship can change its facing several times during its movement subphase. Each time you want to change the facing of a warship you will have to use the ship's rudder: an accessory that lets you turn your ships in increments of up to 45 degrees each time.
When you change the facing of a warship you will determine which way you want to turn, to port (left) or to starboard (right), using the ship's rudder to complete the manoeuvre. The rules for turning warships with the ship's rudder are detailed on the next page.
Frequency of Facing Changes
Each warship has a Manoeuvrability attribute. It indicates the minimum distance it must travel in a straight line before changing its facing. A powerful warship cannot turn on the spot; it needs a certain inertia. The lower its Manoeuvrability value, the more manageable it will be.
Before it can change its facing, the warship must move in a straight line a number of inches equal to or greater than the value of its Manoeuvrability attribute. After doing so, it will have the right to make a single change of facing of up to 45 degrees, using the ship's rudder as shown on the next page.
You do not have to change facing immediately; the warship may change its facing after having moved further, or not turn at all. Warships must move at least a distance equal to their Manoeuvrability value before each change of facing of 45 degrees; you cannot save up all the facing changes for a radical turn.
Note on Auxiliaries (box)
Since auxiliaries are more manoeuvrable than the bigger warships that deploy them in battle, they do not have a Manoeuvrability attribute and can move in any direction they wish (page 42).
Using the Ship's Rudder
(Figure 1) To make a change of facing you will have to place the inner angle of the rudder (the straight part) touching one of the sides of a warship's base. The inner corner of the ship's rudder should be in contact with the front corner of the warship's base.
If you want to turn to port (left) you will have to place the rudder on the left side of the warship's base. If you want to turn to starboard (right) you will have to place the rudder on the right side of the warship's base.
(Figure 2) Next, hold the ship's rudder in place with one hand, and hold the rear part of the warship's base with the other. Pivot the warship so that the front side of its base is now in contact with the other straight section of the rudder. You will have changed the facing of your warship by 45 degrees.
You may opt to turn less than 45 degrees, but this will be the maximum angle of turn you will be able to make at one time, unless you give an order of Hard to Port or Hard to Starboard (page 38).
Changing Facing Several Times
Potentially, warships can change their facing several times during the same Movement subphase. With this "advance-turn-advance-turn" tactic (which sailors know as tacking or wearing for reasons only they know), a warship with a low Manoeuvrability attribute could manage a tight curve, surprising an enemy that was following it from behind.
Lastly, the inches that a warship has moved during its movement subphase are not carried over from one turn to the next for the purpose of counting when it can change its facing. In other words, having moved in a previous turn does not give you the right to change facing at the start of the next turn; warships start counting from zero at the start of each turn.
(Example: The Grand Alliance player wants to avoid the Heldenhammer crashing into some islands by changing its facing several times throughout its turn. First, the warship has to advance a distance equal to its Manoeuvrability value of 5 (that is, 5") in the direction in which it is facing. It cannot change its facing until after it has moved that distance, so it had better have that island more than 5" away! After having moved those 5", the player can use the ship's rudder to modify the facing of the vessel by up to 45 degrees. Then the player can continue moving his warship, using the rest of the distance he has left. The Heldenhammer uses the last 7" of its movement advancing in a straight line. At any moment after having moved 5" more, the Heldenhammer could make another change of facing of 45 degrees, so that the Heldenhammer changes its course one last time to make sure it will not have to make evasive manoeuvres in its next turn.)
Dropping Anchor
Many times, normally when there are treasures around, it will be worth dropping anchor. In the midst of a great racket and splashes, the warship hurls its heavy anchor into the waters, burying it deep in the sandy bottom of the archipelago and leaving the vessel static in its place.
A warship that is 2" or less from an island or a wreck at the end of its movement subphase may decide to drop anchor. Take an Anchored card and place it in the situation area of the corresponding warship card.
While the warship has an Anchored card in its situation area, the warship cannot move under any circumstances.
A warship that has dropped anchor can decide to weigh anchor (that is, haul it back in) at the end of any of the following movement subphases. All you have to do to weigh anchor is remove the Anchored card from the situation area of the corresponding warship card. The warship immediately goes back to operating under the normal movement rules. Since weighing anchor is a rather complex operation, you cannot drop anchor and weigh anchor in the same turn.
What reason might you have for immobilising your warship for a whole turn? Some manoeuvres are much easier to carry out while the warship is anchored; for example, it is simpler to deploy auxiliary craft without the risk of them capsizing. In addition, to represent the fact that the crew is not concentrating on making the vessel move, a warship that is anchored can repeat its Command check when giving a Repair order (see Orders cards, page 39).
"Burning" Versus "Anchored"
Ships can catch fire during a battle for several reasons, and few things provoke a quicker reaction in a crew than an uncontrolled inferno on deck! If an anchored warship catches fire, the Anchored card is turned over to show the Burning side. The warship will stop being anchored. Likewise, a warship that is on fire cannot drop anchor; the crew is too busy trying to put out the fire.
(The Anchored card is reversible, and also functions as the Burning card.)
The Force of the Wind
The force of the wind represents the impulse that warships can take thanks to their sails. The force of the wind is extremely important for these ships.
During the Destiny phase, Destiny cards will have been placed on the Destiny discard pile. The number in the lower left corner of the top card of the Destiny discard pile indicates the "force of the wind". If there are no Destiny cards in the Destiny discard pile, the force of the wind will automatically be 1.
Sailing Warships
Some warships have the word "Sails" (Velero) printed on their warship card. These are known as sailing warships (that is, "warships that have sails").
Sailing warships are affected in several ways by the force of the wind. A sailing warship must move at least a number of inches equal to or greater than the force of the wind during its Movement subphase. Even if that means having to move in circles, crash into other warships, or sail off the edge of the seascape, the warship has to do everything it can to move that distance as far as it can.
There will be cases in which a warship will not be able to move a distance equal to the force of the wind, perhaps because of damage suffered or bad luck. No problem; move the warship that turn as far as possible.
An anchored warship is not affected by the force of the wind, since it cannot move at all.
Running Before the Wind
The advantage of having sails is that sailing warships can sail much faster if they have the wind behind them.
A sailing warship that has the wind indicator in its stern arc at the start of its movement subphase will sail "before the wind" and may choose to add the force of the wind to its Speed for the rest of the turn.
Bear in mind that, since this bonus is applied to the ship's Speed during the movement subphase, it can allow the warship to make more changes of facing than usual (subject, equally, to the usual restrictions).
(Example: Thanks to the Heldenhammer sailing before the wind, the Grand Alliance player decides to take advantage of the wind and use the additional movement it gives him. He checks the Destiny discard pile and sees that the force of the wind at this moment is 5, a stroke of luck! This means the Grand Alliance player can add up to 5 additional inches to the Heldenhammer's movement in its movement subphase (for a total movement of 17). This means the Heldenhammer could change its facing up to three times during this movement subphase.)
Sailing Into the Wind
When warships have the wind against them, warships with sails suffer a disadvantage compared with those that have their own means of propulsion. "Sailing into the wind" is a term that indicates that the wind blows from the bow of the ship, and consequently against it. When a captain finds himself sailing into the wind, he can order the sails of the warship aligned with the bow to compensate, but this is a rather complex manoeuvre (especially in the middle of a battle).
A sailing warship that begins its movement subphase with the wind indicator in its front arc is sailing into the wind. The warship does not have to move any distance equal to the force of the wind.
Also, a sailing warship that is sailing into the wind must pass a Command check (see page 17). If the check is passed, the warship will move normally. If the Command check is failed, the current force of the wind will apply a negative modifier to the warship's Speed during that turn.
Lastly, a sailing warship that is sailing into the wind cannot use its Full Sail order.
Although this negative modifier only lasts a turn, it is cumulative with all other modifiers. It is possible that a ship sailing into the wind will be totally incapable of moving, and will have to wait for the weather to improve. Remember that a warship's Speed cannot be modified below zero.
(Example: The Flaming Scimitar begins its movement subphase with the wind indicator in its front arc. This warship is sailing into the wind. The Grand Alliance player fails his Command check to avoid the penalty, so the current Speed of the Flaming Scimitar is reduced by the force of the wind during that turn; in this case, 1".)
Running Aground
Sometimes warships will crash into an island or a wreck with a thunderous crunch. Inevitably this will cause great damage to the structure of the ship below the waterline.
If any part of a warship (or its base) comes into contact with an island or a wreck, it will have "run aground". A warship that has run aground cannot move any further and cannot change its facing. In addition, the warship must draw Damage cards until it draws a Hull result, applying its effect and discarding the others.
The warship that has run aground will remain fixed in place where it ran aground until it performs an "escape from danger" move to free itself (see the box on the right for details).
Leaving the Seascape
There are cases in which the base of a warship will come into contact with the "edge" of the seascape (the golden band around the mat). This edge is not part of the play area, and sailing up to it is usually a bad idea. If the base of a warship comes into contact with the edge of the seascape for whatever reason, the miniature will be removed from the game (it has sailed to calmer waters). Ignore the pieces of the border that enter the seascape (the corner decorations, the areas of the wind indicator and the sailing ruler). However, bear in mind that some scenarios require miniatures to escape deliberately through certain sides of the seascape in order to fulfil the victory conditions.
Ship Collisions
Over the course of the game you will see how, for one reason or another, your warships will come into base contact with another miniature (warships, islands or wrecks). These collisions will only inflict damage if the warship runs aground (see on the left). A collision will always end the movement subphase of a warship, regardless of the type of miniature it has collided with. The two miniatures will remain fixed in place until one or the other escapes from danger or is removed from the game. In addition, if your warship comes into base-to-base contact with an enemy miniature, regardless of whether this occurs voluntarily or not, a boarding action will have been initiated (page 34).
Escaping From Danger (box)
The crewmen run to the side to release the boarding hooks, use poles to separate the warships, and cast off the tow lines and rowing boats in order to take the vessel away from danger.
Instead of carrying out its normal movement subphase, a warship that has its base in contact with another miniature (and/or is within 1" of the edge of the seascape) may attempt to "escape from danger". An anchored ship cannot escape from danger.
To escape from danger the warship has to pass a Command check, with a modifier to the roll of -1 for each enemy miniature in contact with its base. If the Command check is passed, the player who controls it may move the escaping warship to any point 1D3+1" from its previous position. It cannot be placed with its base in contact with another miniature. Although in making this move it will have to remain facing in the same direction, the warship may then make a free change of facing. If the Command check is failed, the warship cannot move at all that turn. In any case, this process replaces the warship's movement subphase entirely, which implies that there are certain orders that cannot take effect.
(Example: The Swordfish is involved in a boarding action with the fearsome Black Kraken. After giving the Swordfish its order that turn, the Grand Alliance player decides to give up its movement subphase to escape from danger. The captain's current Command attribute is 3 or more (he tries to say this after a barrel of rum). The Grand Alliance player rolls a 5, to which the -1 for having its base in contact with an enemy warship is applied, resulting in a 4. In any case, that fortunate sailor has passed his Command check. He rolls 1D3+1 to see how far he can move the Swordfish, getting a result of 3, so he will separate the Swordfish 3" from the Black Kraken. Then he will make his free change of facing. The moment of the broadside subphase has come, and with a bit of luck, a hasty retreat for the next turn.)
Firing Broadsides
Now we can get into the rules for the cannons, magical storms of fire and all the things with which to attack your enemies from afar. Regardless of their format, we refer to the process of attacking from a distance as "firing a broadside".
The different miniatures will use different numbers of dice when firing their broadsides, depending on their Broadside attribute and the current situation they are in. The value you will need to score a hit will depend on several factors, but the most important of them is the distance between the firing miniature and its target. When firing a broadside you will have to go through a series of steps:
- Choose the target
- Check the arc of sight to the target
- Determine the number of Broadside dice
- Determine the result needed to hit
- Roll to hit
- The target makes Armour saves
- The target draws Damage cards
1. Choose the Target
The first element of firing a broadside is very simple: choose a single target to fire at, to which you believe you have line of sight, and announce it to your opponent (see page 17 for the line of sight rules). You may choose a different target if the original target turns out not to be viable.
Remember that you can fire a broadside even while locked in a boarding action. This means that your warship could fire at the target it is in base contact with (provided it is within line and arc of sight), or at another one while it is involved in a boarding action with the first.
In addition, you could also fire a broadside at a target locked in a boarding action with another miniature. The nautical nightmares of Dreadfleet are so large that these cases occur often.
2. Check the Arc of Sight to the Target
The warships of Dreadfleet have their main firing batteries arranged on their flanks, so they can only open fire against enemies that they have on their flank. So you will have to determine whether the chosen enemy miniature is a viable target.
A warship can only fire a broadside at a target if the greater part of the base of that target is within its side arc. Ignore intervening miniatures when determining this; your warship will be able to make a partial shot even when it can only see a portion of its target (see below). The broadside rules are deliberately quite permissive, in order to facilitate a great exchange of fire between the ships.
If a warship falls between two arcs of sight, it will count as if it were occupying the arc in which most of its surface is located. If it is hard to agree with your opponent about the arc a ship occupies, roll 1D6: on a 1 to 3 it is in one arc, on a 4 to 6 it is in the other.
3. Determine the Number of Broadside Dice
To determine the number of dice to roll when firing at an enemy, the warship's Broadside value is used. For example, a warship with Broadside 3 that has not suffered damage will roll three dice.
This number can be affected by several factors. For example, a warship can suffer damage that affects its firing batteries. In addition, warships are often in a position from which they cannot fire in the best conditions. These circumstances are known as "partial shots".
Partial shot: If your warship is in a position from which it cannot see its target completely, then its ability to fire broadsides will be compromised.
To determine whether a target can be seen in its entirety or not, draw two imaginary lines from the side corners of the firing warship to the two nearest corners of the target's base (see the diagram). These lines must not cross.
If there is something occupying the seascape between the two ships that interrupts the imaginary lines (except treasures), the target cannot be seen in its entirety. The firing warship can only make a "partial shot".
When a partial shot is made, the broadside of the firing warship will be halved. The number of dice is halved before applying any other modifiers.
(Caption of the sailing ruler photograph: In this example we use the sailing ruler to see whether the Curse of Zandri is in the side arc of the Heldenhammer. As the whole of the Curse's base is in the side arc of the Heldenhammer, it is within its arc of sight.)
(Fig. 1: The imaginary lines between the nearest corners of the warships cross. This is incorrect. Fig. 2: The imaginary lines do not cross, which is correct. One of the lines is interrupted, so the target cannot be seen in its entirety. The firing warship can only make a partial shot. Fig. 3: The imaginary lines are not interrupted; there is nothing in the way. This is not a partial shot. Fig. 4: The imaginary lines are not interrupted, but there is something interposed in the shot. This is clearly a partial shot.)
4. Determine the Result Needed to Hit
Making every shot count is no easy task in the Galleon Graveyard. Wisps of mist swirl among the splintered masts, the smoke of the shots distorts vision and a greenish haze seeps from the skull-shaped cliffs. Visibility is very limited and enemy warships can easily be lost in the fog. The range of our warships' weapons is not as fearsome as it would be on the waters of the Great Ocean, but if a short-range broadside hits its target it can cause considerable damage.
To determine the range between a warship and its target you have to measure from a point on the base of one of the warships to the nearest point on the base of the other. After determining the range between the firer and the target, consult the range table to determine what you need to roll on the die to hit.
The range values on the table include the minimum range of that category. For example, if the firing warship is exactly 6" from its target, you would use the short range category; between point-blank and 6" distance. If there is even a fraction of an inch more in the separation, we would use the medium range category.
To represent poor visibility, warships cannot fire their broadsides at more than 18". Such an uncertain shot would be an absurd waste of ammunition and powder.
Range Table
| Range | Result to hit on 1D6 |
|---|---|
| Short (0-6") | 4+ |
| Medium (6-12") | 5+ |
| Long (12-18") | 6+ |
Broadside Modifiers
The result you need to roll when firing your broadside can be modified; it will not always be as simple as just consulting the range table. The most common modifiers are the following:
First broadside. To represent the time that a ship's crew has had to reload its cannons with powder before the battle, the first broadside fired by each warship in each scenario will enjoy a +1 to hit.
Raking fire. Although an enemy that exposes only its bow or its stern to the shot will be a smaller target, a broadside fired through the front or the rear of a hull can pass through it from end to end. This is called "raking fire" (or sometimes simply "raking"). To represent this, if a firing warship has the greater part of its base within the bow or stern arc of its target, it will have a +1 to hit. Remember that modifiers are cumulative, so a warship that makes its first shot at a target at short range with raking fire will hit on 2+.
(Diagram: Raking fire. The greater part of the base of this warship is in the bow arc of the target. In this case it is possible to carry out raking fire and obtain the modifier. The case would be the same if it were in the stern arc of the target.)
5. Roll to Hit
After determining the number of dice you can use in the shot, and the result you need to roll to hit your target, the moment has come to see how much damage the attacking ship will inflict. Roll your Broadside dice and check the results. For each 1D6 result that equals or exceeds the result you needed, you will have scored a hit. Boom! Regardless of the modifiers, a result of 6 on 1D6 will always hit, and a 1 will always be a miss.
6. The Target Makes Armour Saves
For each hit you manage to score with your broadside, your opponent will have to roll an armour save. The player who controls the target of the broadside will roll 1D6. If the result equals or exceeds the Armour attribute of the target warship, it will cancel the hit. This represents the capacity of the solid protections to "save" the ship from the damage. If the target has been hit several times, the easiest way is to roll all the armour saves at the same time.
7. The Target Draws Damage Cards
For each hit that has not been saved, the player who controls the target must draw a card from the Damage deck and apply its effects immediately to the target of the broadside.
Once drawn, each Damage card must be fully resolved before drawing the next. See page 36 for the rules on resolving and discarding Damage cards.
Let's See It All Together (example)
The Heldenhammer opens fire on the Bloody Reaver. Unfortunately there is an island partially hiding the hull of the Bloody Reaver, so the Heldenhammer can only make a partial shot. The Heldenhammer has a Broadside value of 6, which is halved to 3 by the partial shot modifier. The base of the Heldenhammer is less than 9" from the base of the Bloody Reaver, so it has it at medium range. Each of the three dice of the broadside would normally need to roll 5+ to hit.
However, this is the first broadside the Heldenhammer fires in this game. Thus it benefits from the +1 "first broadside" modifier. In addition, the greater part of the Heldenhammer is in the stern arc of the enemy warship, so it benefits from the +1 raking fire modifier. In this way, the Heldenhammer will need results of 3+ to hit the Bloody Reaver. The Grand Alliance player rolls 3 dice and gets a 1, a 4 and a 5. As the difficulty to hit was 3+, the Heldenhammer will have scored two hits.
Next, the Fleet of Terror player has the opportunity to save himself from the damage suffered, through the Armour of 5+ of the Bloody Reaver. The Bloody Reaver has suffered two hits, so the Fleet of Terror player rolls two dice for his armour save, getting a 3 and a 5. He has "saved" one of the hits. As one of the hits has succeeded in beating the Armour, the Fleet of Terror player has to draw and resolve a Damage card.
Boarding Actions
Boarding actions are extremely dramatic moments, in which the crews of each ship fight in a duel to the death with sharpened sabres, flintlock pistols and their bare extremities. The captains seek each other out in order to get revenge in bloody duels, while sailors swing on ropes fighting the Undead enemy. Crude explosives are thrown onto the deck of the other ship, masts are brought down, and marksmen aim at the rigging as well as at the cabin boys.
Placing the Base in Contact
If a warship's base is touching the base of another miniature, its base is said to be in contact with that miniature. Neither of the miniatures involved can move until it escapes from danger (page 29). If one of your miniatures places its base in contact with an enemy miniature, for whatever reason, it is considered to have initiated a "boarding action".
Adjusting the Ships (box)
If you see that it is not possible to make the base of one ship come into contact with that of the other because there are parts of the miniature that stick out and get in the way, you can adjust the position of the warships a little, the minimum necessary to be able to place the bases in contact and proceed normally.
(Diagram: Placing the base in contact. The Heldenhammer has put its base in contact with the Bloody Reaver (its base is touching the base of the Bloody Reaver). The Grand Alliance player has launched a boarding action; the two warships will remain locked in that place until one or the other is removed from the game or escapes from danger (page 29).)
Resolving Boarding Actions
If a warship has its base in contact with an enemy miniature at the start of the boarding actions subphase, these warships will have to resolve a boarding action.
To resolve a boarding action, each player determines the current Crew value of his warship and rolls that number of six-sided dice; these are known as "boarding action dice".
To win the boarding action you will have to roll more "victories" with your boarding action dice than your opponent. Results of 1 to 4 on 1D6 have no effect. Each result of 5 or 6 on 1D6 represents a single victory each; the crew causes havoc.
Each player adds up his total victories, and the player who has fewer subtracts that number from his opponent's total victories. This gives us a number called the "boarding action result". The warship with the lowest number of victories will draw as many Damage cards as the boarding action result indicates. For example, if one player scores 4 victories and the other only 1, the player who has scored fewer victories draws 3 Damage cards.
If the players have scored the same number of victories, they have tied the combat. Each warship has to draw one Damage card, regardless of how many victories it has obtained. Both sides have suffered, but it is such a close combat that it is hard to determine a winner.
Multiple Boarding Actions
If there are more than two warships involved in the same boarding action (a tangle of fighting ships has formed), then all the boarding actions will be combined into one big battle called a "multiple boarding action". Each time a warship involved in a multiple boarding action reaches its Boarding Actions subphase, the multiple boarding action will be carried out.
In a multiple boarding action, the boarding action dice are rolled separately for each of the warships in contact with one or more enemy warships, and the number of victories each obtains is counted. Then each player combines the total number of victories obtained by his warships. This is then compared with the number obtained by the opponent's sum to see who has won the boarding action.
Each warship of the side with fewer victories draws as many Damage cards as the boarding action result indicates (the difference between the totals of the two sums).
If the players have scored the same number of victories, they have tied the combat. Each warship involved in the multiple boarding action will draw a single Damage card, regardless of how many victories it has obtained.
Fighting a Boarding Action (example)
In this example, the Heldenhammer and the Bloody Reaver are fighting a boarding action. At this moment the Heldenhammer has a Crew of 4; originally it was 6, but it has suffered some damage because of the enemy's broadsides. The Grand Alliance player rolls 4 dice. He gets a 1, 2, 5 and 6 on his roll. He obtains one victory for the 5 and one victory for the 6 (two victories in total). His opponent has an intimidating Crew value of 7. The Bloody Reaver has not yet suffered any damage to its Crew, so it rolls 7 dice: 1, 2, 3, 5, 5, 6; four victories in total. The Heldenhammer loses this boarding action and draws as many Damage cards as the boarding action result, in this case, two Damage cards (4-2=2).
Multiple Boarding Actions (examples)
Example (A): The Heldenhammer and Grimnir's Thunder are fighting a multiple boarding action with the Bloody Reaver and the Shadow Wraith. To complicate things a little more, a Blood Serpent joins the melee. The unruly sea monsters will always fight against any miniature whose base is in contact with them. Here it is in contact with the Heldenhammer, so it is considered part of the Fleet of Terror. If a sea monster is in contact with more than one miniature at the same time, the players will have to determine randomly which miniature it is going to attack.
Example (B): The two warships of the Grand Alliance are in contact with each other, but with two completely different warships of the Fleet of Terror. As a result, the combat "chain" is broken, and the battle is resolved in two different boarding actions instead of a single multiple boarding action.
Damage Cards and Situation Cards
Damage Cards
During the course of the game, your warships will suffer destruction thanks to the "attentions" of their enemies, and also from the insidious dangers of the Galleon Graveyard. All this destruction is represented with the Damage cards.
The cards of the Damage deck are divided into Damage to "Crew" cards, Damage to "Speed" cards, Damage to "Hull" cards, and "Special" Damage cards. Damage cards to the Hull, Speed or Crew reduce the corresponding attribute by one or more, diminishing the durability, speed and combat effectiveness of the ship in question. Some Damage cards inflict double or triple damage, but they are quite rare. A "Double" or "Triple" damage card still counts as a card of its type (for example, a "Double Hull" card is still a "Hull" card). "Special" Damage cards cover various events, from the death of the ship's mascot to the deterioration of the ship's gunpowder. The rules for Special Damage cards vary from one card to another.
Out of Damage Cards?
If there are no cards left in the Damage deck, gather all the Damage cards from the discard pile, shuffle them thoroughly, and return them to the game as a new Damage deck. Sometimes a player will be required to draw a Damage card of a specific type (for example, "The warship must draw Damage cards until it draws a Damage to the Crew card"). If the Damage deck runs out without having drawn the required type of card, apply the last card remaining in the deck instead of discarding it.
Resolving Damage Cards
Once a Damage card has been drawn, it is placed adjacent to the target's Warship card, in the appropriate area. If a warship accumulates a number of Damage to the Hull cards or Damage to the Crew cards equal to or greater than its Hull or Crew attributes (respectively), it is removed from the game. When a warship is removed from the game, all the Damage cards it had applied at that moment are placed on the discard pile of the Damage deck. Some scenarios require you to keep count of the number of Damage cards that are placed in the discard pile in this way as warships are removed from the game.
Excess Damage
If a warship receives a Damage card that cannot affect it, that Damage card is discarded without effect. This can occur in cases where a ship has its Speed reduced to zero through the accumulation of Damage to Speed cards, and is forced to draw yet another Damage to Speed card. Or also when a warship must draw a Damage card because of an attack that has already eliminated it from the game.
Situation Cards
Cards that have the word "Situation" printed on them reflect the current status of a warship. Any warship can have more than one Situation card in play at a time. For example, it is possible that a warship has been the prey of fire multiple times, resolving each "Burning" card separately in each Situation phase. However, it is impossible to have more than one Anchored card at a time. Some Situation cards only come into play when they are drawn from the Destiny deck. These Situation cards include the "Spell", "Improvement" and "Salvo" ones. Note that these cards can be affected by the "brief respite" rule (page 23).
"Spell" Situation Cards
Some of the Situation cards drawn from the Destiny deck represent spells prepared by a specific captain. If you draw a Destiny card with the word "Spell" on its lower part, it must be placed in the Situation area of the warship indicated on the card, even if it is your enemy's ship! The owner of the ship will have the spell in question at his disposal, and may use it as detailed on the card itself.
"Improvement" Situation Cards
Some Situation cards represent improvements that can reinforce the auxiliary ships of a warship (see page 42). When you draw a Destiny card with the word "Improvement" on its lower part, place it in the Situation area of the card of one of your warships or auxiliary cogs. That auxiliary cog will be improved as indicated on the card. If the card has been placed in the Situation area of a warship, its effects will be applied to an auxiliary cog that the warship deploys successfully.
"Salvo" Situation Cards
Some Situation cards represent special cannon shots carried out by the crew. When you draw a Destiny card with the word "Salvo" on its lower part, you may place it in the Situation area of any warship except the Skabrus, the Curse of Zandri or the Sea Dragon. Those warships do not carry cannons, and therefore cannot use "Salvo" cards. A warship cannot have more than one "Salvo" card at a time.
Orders Cards
The captains who sail the Galleon Graveyard have decades (if not centuries) of experience behind them, and for that reason they are capable of impressive feats of seamanship. Any order shouted by the captain will spread through the whole ship in seconds, the crew rushing to carry it out, if necessary changing the course of the ship completely (and on some occasions, even the course of history).
To represent this, the game has a series of Orders cards that you can give to your ships during the Orders subphase. These Orders cards, sometimes simply called "orders", allow you to modify the behaviour of your warship throughout its turn. There are five different orders, each of which modifies the abilities of your warship. Knowing how to choose the right order at each moment for the right ship can often mean the difference between a victory and a defeat.
Captains and Command
The heart and soul of a warship is always its captain. He is the only man (or woman) with the moral authority, the personality and the willpower necessary to lead the crew to victory. Not only is he a formidable warrior, armed with the best magical weapons and the best equipment to be found on board, but he is also the master and lord of the ship, both in nautical and in warlike matters.
If the sailors can see their captain proudly standing on the bridge, they will obey him without the slightest shadow of a doubt, and the result is that the ship will work like a perfectly oiled machine. On the contrary, if the captain is wounded, exhausted or simply disappears, his men will probably fall prey to confusion and doubt.
All warship captains have a Command attribute, which is mainly used when giving orders. Some commanders, such as the wicked Count Noctilus, know how to exert an iron control over their sailors and therefore have an excellent Command attribute of 2+. Others, however, only have a limited capacity to deal with the undisciplined rabble they call a "crew". For example, Captain Skretch Half-Dead of the warship Skabrus has a pitiful Command characteristic of 4+ (due in large part to the dangerous stupidity of the Skaven sailors when interpreting their orders).
Giving Orders
Each warship's Action phase begins with the Orders subphase. During that subphase you have the option of trying to give your warship a single Orders card.
To give an order, choose the Orders card you want to use and place it face up on the seascape, declaring to your opponent your intention to use it. Then look up the captain's Command attribute, which will appear printed on the appropriate warship card.
Finally, make a Command check. If you succeed, the order will have been transmitted without problems and you may use the effects indicated on the card. On the other hand, if you fail the Command check it means that the crew has not understood the order or has not acted quickly enough to carry it out, and therefore the warship will have to get by without being able to use the effects of the orders that turn.
The effects of each order differ depending on the card. There are five different orders you can give:
Full Sail, Hard to Port, Hard to Starboard, Repairs and Fire at Will. Four of the five Orders cards are resolved during the Movement subphase of the warship that has been activated. The fifth Orders card (Fire at Will) is resolved during your opponent's turn. Once an Orders card has been resolved, return it to your hand, since you will need it for your other warships.
Full Sail
This order represents the captain commanding his ship to move at the maximum speed it is capable of deploying. This order can be carried out by any type of ship, regardless of its method of propulsion; for example, in the case of a steam ship it will represent its engines working at full steam, while in the case of a ghost ship it will represent an additional discharge of the magical energy that moves it.
A warship that has successfully carried out this order will resolve it after having finished all the other movements of its Movement subphase (pages 24-29). When the Full Sail card is resolved, the warship that carried out the order must move 2D6" forward and in a straight line.
The warship MUST use all the additional movement that this order grants it, even if that means ending up running aground or coming into base-to-base contact with another warship (the warship has accelerated to the maximum and can no longer brake).
Also, note that the Full Sail order cannot be given to any warship whose current Speed is zero, nor to a sailing warship that is sailing into the wind. It is impossible to take advantage of the wind when it blows against you.
Hard to Port
This order represents the captain commanding his ship to carry out a sharp turn to its left. The pilot turns the rudder to the maximum, causing the sharpest turn that the ship is capable of.
A warship that has successfully carried out this order may resolve it at any point of its Movement subphase, even before having moved. When the Hard to Port card is resolved, the warship that carried out the order may carry out an immediate change of facing towards its port side. This change of facing may have a maximum of 45 degrees; use the ship's rudder in the normal manner to make it turn. This is an exception to the normal Manoeuvrability rules, since it is not necessary for the ship to move a distance equal to its Manoeuvrability attribute to carry out this additional turn. A skilful player will know how to combine the turn of a Hard to Port order with a normal change of facing (assuming his warship can carry one out). In this way he could make the ship modify its facing at one go up to a total of 90 degrees; which will be most useful in certain situations (for example, to surprise an enemy ship that is approaching from behind).
Hard to Starboard
This order works the same as Hard to Port, except that in this case the additional turn is carried out to starboard instead of to port. Hard to Starboard allows you to carry out a free change of facing of up to 45 degrees to starboard, following the same rules as Hard to Port.
Fire at Will
A tactic of proven effectiveness in naval combat is to hold the fire of the cannons until the enemy ship is close enough, or until it offers its whole surface as a target, so that the broadside is as devastating as possible. The nautical jargon usually used to give this order of preparing to fire at the most opportune moment is "Fire at Will".
When you successfully carry out a Fire at Will order, place the Orders card face up beside the ship that has received it. While this particular Orders card remains in play, it will be considered to be "out of your hand", and will not return to your hand of Orders cards until you have resolved it, until the warship that received it is sunk, or until that warship receives a new order (whichever happens first).
A warship that successfully carries out this order may resolve it in response to any other miniature that declares an attack against it. In most cases, this will happen when an enemy warship is about to fire a broadside or launch a boarding action, but it can also be resolved in response to an enemy spell or to the attack of a sea monster or any other nautical horror.
When the Fire at Will card is resolved, the warship that received that order immediately fires a free broadside against the enemy miniature that declared the attack.
This follows the normal rules for broadsides, except that it is resolved during the opponent's turn, immediately before the enemy warship (or monster) carries out its attack. Note that this order does not prevent the warship that carried it out from firing a normal broadside during its own turn. The Fire at Will order cannot be resolved against a target that is itself firing an additional broadside thanks to another Fire at Will order.
Fire at Will and Boarding Actions
Fire at Will can also be resolved just as an enemy warship is about to launch a boarding action. If you choose this option, then immediately after the enemy warship comes into base-to-base contact, the warship that carried out this order may fire a broadside against that enemy warship (as long as it is a viable target). After this, the turn continues as normal.
Repairs
Emergency repairs can be carried out even in the middle of a naval battle: ropes that have come loose or snapped are tied again, fallen or torn sails are sewn and unfurled again, leaks in the hull are covered with wooden planks, and the wounded are "patched up" by the ship's surgeon and sent back to the fray (and in the case of Undead sailors, they are reanimated again by the Necromancer on duty). A warship that has successfully carried out this order will resolve it at the start of its Movement subphase. When it resolves it, it may discard one of the Hull Damage, Speed, Special, Crew or Burning cards that it has on its warship card.
Irreparable Damage
Some Damage cards have the word "Irreparable" printed on them. As the term implies, these cards cannot be repaired or removed by any means.
Example card, "Gun Deck Flooded" (Special, Irreparable): The gun deck is flooded. The warship's Broadside value is reduced by 1.
Example card, "First Mate" (Special, Irreparable): The first mate has fallen, disrupting the chain of command. [The remainder of this example card is illegible in the scan; it modifies the captain's Command checks and limits the orders the warship can give.]
Duels and Wound Cards
When the melee of the boarding breaks out, the captains of the warships seek each other out to fight in single combat. While confusion takes over the place, the sound of the magic sword and the rusty blade clashing rings out again and again. After all, the best way to destroy the morale of a ship is to leave the corpse of its commander bleeding on the deck.
Each of the captains has a Fencing attribute on his warship card. This not only represents the physical strength of the captain, but also his skill in the bloody business of hand-to-hand combat. A captain's Fencing attribute is used mainly in the process called a duel.
Resolving a Duel
At the start of each boarding actions subphase, immediately before fighting the main boarding action, the captains of each warship will automatically seek each other out to fight a duel. It does not matter if one of the captains would prefer to be elsewhere; sooner or later every combatant's time comes to fight for his life.
To fight a duel, each player rolls a number of D6 equal to the current value of the Fencing attribute of his captain. Results of 1-4 have no effect, and results of 5-6 score a victory. Players add up their respective victories. If the totals are equal, both captains suffer a wound. If one player has a higher total than his opponent, he wins the duel and his opponent's captain is the only one to suffer a wound.
Duel Results Table
Wounds Suffered
| Wound | Effect |
|---|---|
| 1 | Light wound: The captain suffers a minor wound, perhaps losing an eye or a little blood. The captain's Command checks have a modifier of -1. |
| 2 | Serious wound: The captain is seriously wounded, perhaps having lost a hand or having had his enemy's sword driven deep into him. The captain's Fencing is reduced by 1, to a minimum of 1. |
| 3 | Horrendous wound: The captain has suffered a wound that endangers his life: his head has been split or a limb torn off. The captain's Fencing is reduced by 1, to a minimum of 1, and his Command checks suffer an additional -1. |
| 4 | Mortal wound: The captain has fallen and is probably dead. He will automatically fail all his Command checks, cannot take part in duels, and can no longer use his special ability. |
Suffering a Wound
When a captain suffers a wound, a Wound card is used to keep count. The first time a captain suffers a wound, the player who controls him draws a Wound card and places it under the corresponding warship card, so that the "light wound" result can be seen. That captain will be subject from now on to the penalty indicated on the light wound. If we look at the Wound card (on the table) we can see that his Command checks suffer a modifier of -1.
Suffering Further Wounds
Each time a wounded captain suffers another wound, adjust his Wound card so that the next, more severe result can be seen, along with the results of the less serious wounds. For example, if a captain has suffered a "light wound" we should only see the "light wound" result; but if he has suffered a "serious wound" then we show the results of "light wound" and "serious wound". The penalties of the different wounds are cumulative.
If a captain suffers four wounds over the course of the game, he will have suffered a "mortal wound", and will not be able to take part in more duels. He is out of the battle: losing blood is lethal for anyone.
For example, Brokk Gunnarsson the Red (Fencing 3) fights a duel against Count Noctilus (Fencing 5). The players roll a number of D6 equal to the current Fencing value of their captains. The Grand Alliance player rolls a 2, a 5 and a 6: two victories. The Terror Fleet player gets a 1, 2, 5, 5 and 6: three victories in total. Count Noctilus wins! As the loser of the duel, Brokk Gunnarsson the Red suffers a wound.
Brokk had already suffered a light wound in a previous duel, so his Wound card is advanced one position to show the "serious wound".
Duels During Multiple Boarding Actions
Occasionally more than two warships will take part in the same boarding action, offering opportunities for the captains to show their worth, or perhaps to die horribly under the accumulation of enemies. Honour is a scarce commodity among pirates and the Undead.
This process is known as a multiple duel. Multiple duels follow the same rules as normal duels, with the following exception. If several warships are locked in the same boarding action, all the captains of each fleet roll as many dice as their current Fencing value, adding up the totals of their victories. This is compared to the total sum of the victories of the enemy. The winner of the multiple duel will be the side with the most victories.
All the captains of the losing side will suffer a wound and adjust their Wound cards as appropriate.
If the multiple duel results in a tie, all the captains involved will suffer a wound.
The First Mate
If the captain of a warship suffers a mortal wound (page 40), then the first mate may try to give orders in his place. Regardless of the warship, the first mate will have a Command of 6+. The first mate is your last line of defence when it comes to restoring order among your unruly crew.
Auxiliaries
The titanic warships used in Dreadfleet can deploy smaller vessels from inside them or around their main body, allowing them to rescue stranded allies, obtain treasures and investigate the remains of sunken ships. The miniatures that represent these vessels are called auxiliaries.
The most common auxiliaries in the game are the cogs (a cog is a single-masted ship), but there are other types. Warships that deploy auxiliaries are known as mother ships. Each auxiliary has an Auxiliary card that indicates its profile, just like the other warships. At the start of the game, place the Auxiliary cards in their own separate deck. Unless the rules of the scenario you are playing say otherwise, auxiliaries start the game inside their mother ships, and will not be placed on the seascape until they are deployed.
If an auxiliary is destroyed during the game, remove its card to remember that it has already been used. Although there are two different miniatures for the cogs, both follow the same rules.
| Warship | Auxiliary |
|---|---|
| Heldenhammer | Grand Alliance cog |
| Flaming Scimitar | Grand Alliance cog |
| Swordfish | Grand Alliance cog |
| Sea Dragon | 2x Dragons |
| Grimnir's Thunder | 2x Dwarf Dirigibles |
| Bloody Reaver | Fleet of Terror cog |
| Shadewraith | None |
| Curse of Zandri | Fleet of Terror cog |
| Skabrus | Fleet of Terror cog |
| Black Kraken | Fleet of Terror cog |
Deploying Auxiliaries
A warship may deploy its auxiliary before moving during its Movement subphase. To do so, place the auxiliary's miniature anywhere within 1" of its mother ship, without being in contact with other miniatures or markers. Then take the corresponding Auxiliary card and place it next to your warship cards.
Deploying auxiliary cogs while under way can be dangerous. If a warship tries to deploy an auxiliary cog without having dropped anchor or being run aground, make a "capsize" check by rolling 1D6. On a result of 1-3, the cog will capsize, dragged away by the waves; remove the Auxiliary card and the cog miniature from the game.
Using Auxiliaries
Auxiliaries have their own action phases, their own areas in which to place Damage and Situation cards, and so on. Once in play, auxiliaries follow all the normal rules for warships, with the following exceptions:
- Auxiliaries do not have captains, so they cannot give orders or fight duels.
- Auxiliaries cannot escape from danger.
- Auxiliaries that come into contact with islands and wrecks do not run aground.
- Auxiliaries have no facings or arcs of sight. They can fire their broadsides in any direction. In addition, warships cannot benefit from the raking fire modifier against them.
- Any special Damage card drawn by an auxiliary is discarded. Draw another new card in its place.
- To determine line of sight from an auxiliary or to it, trace the sight at the level of the miniature from its highest point. The highest point of the miniature also serves as the two "corners" to determine whether any broadside that takes the auxiliary as its target can apply the partial shot modifier or not.
- Auxiliaries do not have a Manoeuvrability attribute; they can turn freely at any point of their Movement subphase.
Recovering Auxiliaries
There will be times when you want an auxiliary to seek refuge by joining the larger ship again. If an auxiliary comes into base contact with a warship of its own fleet, or vice versa, the auxiliary may immediately "recover" into that warship. Remove the auxiliary from the seascape, but leave its Auxiliary card face down next to the card of the warship it has been recovered into.
The recovered auxiliary immediately repairs its damage; discard any Damage cards it has suffered. That auxiliary may be deployed again later by the warship it has been recovered into. There is no limit to the number of auxiliaries that can be recovered into the same warship. However, the Dwarf Dirigibles and the Dragons can only be recovered into their own mother ships.
Treasures
Some scenarios can only be won by finding treasures (pages 74, 88, 90). Fortunately, unlike warships, auxiliaries can "carry" treasures. To claim a treasure, simply move an auxiliary into base contact with that treasure. The treasure is picked up by the auxiliary and from then on moves with it. Carrying, delivering or transporting a treasure does not affect the movement of any miniature in any way. An auxiliary can only pick up one treasure per turn; however, there is no limit to the number of treasures it can carry.
An auxiliary that is recovered into a warship automatically delivers the treasures it carries to that warship. From then on the treasures move with that warship. Note that treasures cannot be handed from one warship to another. However, they can be freely handed from one auxiliary to another if their bases are in contact, or from a warship to an auxiliary that it is deploying.
Note that the treasure figures do not represent physical objects. If the treasure miniature gets in the way of a movement, you can move it aside if necessary.
Losing Treasures
If a warship that is carrying a treasure is removed from the game, leave the treasures it was carrying at the point where it met its final fate.
Flying Auxiliaries
The Dirigibles and the Dragons are a special type of auxiliary known as "flying auxiliaries". Flying auxiliaries do not make capsize checks, and may move freely over other miniatures. Flying auxiliaries cannot voluntarily end their movement on top of other miniatures; they must end their Movement subphase on an empty area of the seascape.
Sea Monsters
The Galleon Graveyard is infested with undead sea monsters. The game includes three sea monsters: the Bone Hydra, the Blood Serpent and the Sea Giant. Sea monsters are auxiliaries that only enter the game when Destiny cards are drawn.
Each sea monster has its own Action phase. Unless it is controlled by Count Noctilus, it is played after all the other Action phases have been resolved (decide randomly who goes first). At the start of the Action phase of a given sea monster, determine which player has a warship closest to the sea monster; that player's opponent will control it. Resolve the Action phase as if it were a normal auxiliary. This will normally mean that the sea monster will attack the nearest warship.
Sea monsters cannot be recovered or deployed, but they can carry treasures like any other auxiliary. However, unlike other auxiliaries, they cannot hand over treasures (mmm... tasty treasure!).
Fleet Profiles
Each warship is presented with its captain and a profile of its attributes and special rules. The fiction describing each captain's history is omitted. Attribute names are Speed, Hull, Crew, Broadside, Manoeuvrability and Armour, followed by the type of propulsion.
The Grand Alliance
Heldenhammer (Captain Jaego Roth)
| Speed | Hull | Crew | Broadside | Manoeuvrability | Armour | Propulsion |
|---|---|---|---|---|---|---|
| 12 | 4 | 6 | 6 | 5 | 5+ | Sailing |
Special Rules
Wrath of Sigmar: The steam-animated figurehead of the Heldenhammer can be used to attack warships that are in base contact, as long as the greater part of the target warship is in its front arc. Roll 1D6-1 at the end of the Heldenhammer's Movement subphase. The target warship draws as many Damage cards as the result of the die indicates, discarding the Special cards and applying all the others.
Captain Jaego Roth: Command 3+; Fencing 3.
Iron Will: Captain Roth rerolls all his failed Command rolls. When he fights a duel he may reroll all dice that do not result in victories.
Swordfish (Captain Aranessa Malasal)
| Speed | Hull | Crew | Broadside | Manoeuvrability | Armour | Propulsion |
|---|---|---|---|---|---|---|
| 12 | 3 | 3 | 3 | 4 | 6+ | Sailing |
Special Rules
Ram: When the Swordfish starts a boarding action against an enemy warship, it may make a Ram attack as long as the greater part of the target warship's base is in the Swordfish's bow arc. At the end of the Swordfish's Movement subphase, the target warship draws 1D6-1 Damage cards, applying all the Hull cards and discarding the others.
Captain Aranessa Malasal: Command 3+; Fencing 3.
Blessing of Manann: The Swordfish may reroll 1D6 in each of its Movement, Broadside and Boarding Action subphases. Aranessa may reroll 1D6 in each duel.
Flaming Scimitar (The Golden Magus)
| Speed | Hull | Crew | Broadside | Manoeuvrability | Armour | Propulsion |
|---|---|---|---|---|---|---|
| 12 | 3 | 3 | 2 | 4 | 6+ | Sailing |
Special Rules
Summon Spirits: At the start of the Flaming Scimitar's Action phase you must choose which spirit you will use.
Storm Genies: +3 to Speed until the end of the turn. In addition, you may move the wind indicator up to 1D6 marks in the direction of your choice.
Fire Ifrit: Until the end of the turn, when firing a broadside or fighting a boarding action, roll one additional broadside or boarding action die separately. If the target draws a Damage card as a result of the additional broadside die, it will also receive a Burning card that is added to the normal effects.
Sea Nymphs: The Flaming Scimitar may immediately discard one Hull Damage card.
The Golden Magus: Command 3+; Fencing 1.
Sword of Burning Curses: The Golden Magus adds 1 to the number of victories he obtains in each duel.
Grimnir's Thunder (Brokk Gunnarsson the Red)
| Speed | Hull | Crew | Broadside | Manoeuvrability | Armour |
|---|---|---|---|---|---|
| 9 | 3 | 3 | 2 (+1*) | 3 | 3+ |
(The propulsion type of this warship is not legible in the scan.)
Special Rules
*Flaming Cannons: When firing a broadside, roll one additional broadside die separately. If the target draws a Damage card as a result of this additional die, it will also receive a Burning card that is added to the normal effects.
Dirigible Hangar: Grimnir's Thunder may deploy two Dwarf Dirigibles per scenario. Only one Dwarf Dirigible can be deployed at the same time.
Dwarf Dirigible (auxiliary)
| Speed | Hull | Crew | Broadside | Manoeuvrability | Armour |
|---|---|---|---|---|---|
| 8 | 1 | 1 | 1 | n/a | 6+ |
Brokk Gunnarsson the Red: Command 2+; Fencing 3.
Master Engineer: When you use the Repairs order, if Brokk the Red passes the Command check by 2 or more, he repairs two cards instead of just one.
Sea Dragon (Prince Yrellian)
| Speed | Hull | Crew | Broadside | Manoeuvrability | Armour | Propulsion |
|---|---|---|---|---|---|---|
| 16 | 3 | 3 | 2 | 2 | 6+ | Sailing |
Special Rules
Bolt Throwers: When a Damage card is drawn as a result of a broadside from the Sea Dragon, draw as many cards as necessary until a Crew card is drawn. Apply the Crew effects and discard the others.
Dragons: The Sea Dragon may deploy two auxiliary Dragons per scenario. Only one Dragon can be deployed at the same time.
Dragon (auxiliary)
| Speed | Hull | Crew | Broadside | Manoeuvrability | Armour |
|---|---|---|---|---|---|
| 12 | 2 | 2 | 1 | n/a | n/a |
Prince Yrellian: Command 2+; Fencing 4.
Charismatic Leader: Prince Yrellian may attempt to give two different Orders cards in each Orders subphase (roll the Command checks separately).
The Fleet of Terror
Bloody Reaver (Count Noctilus)
| Speed | Hull | Crew | Broadside | Manoeuvrability | Armour | Propulsion |
|---|---|---|---|---|---|---|
| 10 | 6 | 7 | 4 | 5 | 5+ | Sailing |
Special Rules
Regenerating Mass: Roll 1D6 at the start of each Situation phase. On a result of 4 or more, choose one of the Hull, Crew or Speed cards that the Bloody Reaver has suffered and discard it.
Count Noctilus: Command 2+; Fencing 5.
Control Sea Monster: Instead of giving an order, Count Noctilus may make a special Command check. If he passes it, choose a sea monster anywhere on the seascape. The Fleet of Terror player will control that sea monster for the rest of the turn.
Curse of Zandri (King Amanhotep)
| Speed | Hull | Crew | Broadside | Manoeuvrability | Armour |
|---|---|---|---|---|---|
| 8 | 3 | 4 | 2 (+1*) | 3 | 5+ |
(The propulsion type of this warship is not legible in the scan.)
Special Rules
*The Light of Ptra: When you fire a broadside, roll one additional broadside die separately. If the target draws a Damage card as a result of this additional die, it will also receive a Burning card that is added to the normal effects.
King Amanhotep: Command 2+; Fencing 4.
Let My Will Be Done: Once per game, instead of giving an order, Amanhotep may make a special Command check. If he passes it, roll 1D3 and add the result to the Speed, Crew and Broadside values of the Curse until the end of the turn.
Skabrus (Skretch Half-Dead)
| Speed | Hull | Crew | Broadside | Manoeuvrability | Armour |
|---|---|---|---|---|---|
| 12 | 3 | 3 | 3 | 3 | 6+ |
(The propulsion type of this warship is not legible in the scan.)
Special Rules
Warp Lightning: The Skabrus's cannons do not fire balls, but crackling discharges of warp energy that laugh at physical armour. Armour saves cannot be made against hits from the Skabrus's broadsides.
Skretch Half-Dead: Command 4+; Fencing 2.
Cut and Run: During any Situation phase in which the Skabrus is in base contact with a single enemy warship, Skretch may roll 1D6. On a result of 2 or more, it escapes from danger automatically. This does not prevent the Skabrus from carrying out its Movement subphase normally that turn, nor from trying to escape from danger in the normal way.
Shadewraith (Vangheist)
| Speed | Hull | Crew | Broadside | Manoeuvrability | Armour | Propulsion |
|---|---|---|---|---|---|---|
| 12 | 3 | 3 | 2 | 4 | 6+ | Sailing |
Special Rules
Semi-real: If the Shadewraith is the target of an enemy broadside, only results of 6 on the opponent's dice count as hits. Any other result is ignored.
Vangheist: Command 3+; Fencing 3.
Phantasmagorical Flight: Instead of giving an order, Vangheist may make a special Command check. If he passes it, the Shadewraith may move as if it were a flying auxiliary throughout its Movement subphase (page 43). While using the Phantasmagorical Flight ability, the Shadewraith cannot drop anchor or weigh anchor.
Black Kraken (Tordrek Hackhart)
| Speed | Hull | Crew | Broadside | Manoeuvrability | Armour |
|---|---|---|---|---|---|
| 10 | 3 | 3 | 2 | 3 | 5+ |
Special Rules
Tentacular Monstrosity: The tentacles of the Black Kraken can be used in any boarding actions subphase to attack a warship that has the greater part of its base in the Kraken's bow arc. Add 1D3+1 dice to that boarding action roll of the Kraken.
Submersible: If the Black Kraken is not in base contact with another miniature, instead of giving an order Hackhart may make a Command check. If he passes it, remove the Kraken from the game and replace it with the Submerged card (it does not count as removed from the game for victory conditions). During the End phase of that turn you must place the Kraken again anywhere within 10"+2D6" or less of the Submerged card, at least 1" from any other miniature, facing in any direction.
Tordrek Hackhart: Command 3+; Fencing 3.
Tenacious Bitterness: When Hackhart is wounded, he may cancel that wound by rolling [5 or 3 -- the digit is unclear in the scan] or more on 1D6.
How to Play the Scenarios
This section of the book takes you on a journey through the stormy backwaters of the Galleon Graveyard to the nightmarish accumulation of skulls at its heart. You will have to draw on every last scrap of cunning and skill you have if you intend to prevail. Whether you play the Grand Alliance or the Fleet of Terror, the game itself will play against you at the same time as your opponent does everything he can to send your ships to a watery grave.
Anatomy of a Scenario
Rarely will Dreadfleet games be straight battles. In some scenarios you will have to rescue a stranded captain, capture as many treasures as you can, or sink a particular warship in order to win. As a result of this inherent variety, each scenario has particular rules detailed in several categories. Here is a guide to what these categories mean.
-
Description. This details the events leading up to this battle. It forms a linear storyline about the efforts of the Grand Alliance to destroy Count Noctilus.
-
The Forces. The warships that take part in this particular scenario are detailed in two columns: that of the Grand Alliance and that of the Fleet of Terror, accompanied by icons that will help you identify each warship.
-
Preparing the Scene. Each time you play a scenario, the first thing you will have to do is place the island and wreck miniatures as indicated in this section. You will find an example of preparation in the deployment map section, below.
-
Deployment. This indicates the parameters for deploying the warships. When the text says that "a warship must be placed (x)" or less from the edge (y)", it means that the whole base of that warship must be within (x) distance of the indicated point of the edge of the seascape. The illustration of the edge is mainly aesthetic, so it is not considered part of the seascape for game or deployment purposes.
-
Game Length. This section tells you the length of the game. Some scenarios last six full turns. Others will have a variable length, or will end after something happens.
-
Victory. The victory conditions for winning a game are usually based on a comparison of the amount of damage one fleet has inflicted on the other, but there are cases in which they may consist of much more specific criteria, such as "The Grand Alliance player will win if 'such a thing happens', and the Fleet of Terror player will win if 'such another thing happens'".
-
Special Rules. Each scenario has a series of special rules that give colour to the battle, and represent the circumstances of a specific confrontation. These may vary from one game to the next, so make sure both players read and understand them well before starting to play.
Precision of Measurements
There are occasions during Dreadfleet games when it will be totally impossible to make an exact measurement between two points or two elements of the game. Do not worry too much about this; it is not necessary to get bogged down in an argument over a fraction of an inch. For example, it can be complicated to place the islands at the exact distance from one another. This does not have to be a big problem. As long as the measurements come as close as possible to the indicated inch, the scenario will play out without problems.
Remember that when you take precise measurements during the game, when you use the ship's rudder in a complicated situation, or when something falls right in the middle of two equally important opposing solutions, you should use the Most Important Rule (page 16) and roll a die to see whose interpretation wins out. It is called the Most Important Rule for a reason!
More Than Two Players
Sometimes you will want to play Dreadfleet with more than two players. Give each player a number of warships to play with (dividing them as evenly as possible). Make sure there is a player who is the supreme leader of each side, who will usually be the ones who control the Heldenhammer and the Bloody Reaver respectively. The supreme leader will be the one who draws the Destiny cards, and who has the last word in decisions that do not directly affect the warships controlled by his allies. While alternating the Action phases between the Grand Alliance and the Fleet of Terror, always bear in mind the Most Important Rule, and all will go well (a mutiny can be something very unpleasant...).
Scenarios
Scenario 1: The Dead Man's Reef
The Forces
- Grand Alliance: Heldenhammer
- Fleet of Terror: Bloody Reaver
Preparing the Scene
The players roll off; the highest roll chooses who starts placing the first island or the first wreck on the seascape, respecting the following restrictions. Later his opponent will do the same. The players take turns placing islands and wrecks until none are left.
No island or wreck may be placed 18" or less from the east or west edge of the seascape, and no island/wreck may be less than 3" from another.
Deployment
The Grand Alliance player deploys the Heldenhammer 6" or less from the west edge and 12" or less from the south edge. Then the Fleet of Terror player deploys the Bloody Reaver 6" or less from the east edge and 12" or less from the north edge.
Game Length
The game will only end when one of the sides reaches its victory conditions.
Victory
The fleet captains are trying to test the mettle of their adversary. If a warship has eight or more Damage cards or has been removed from the game, its opponent will win as soon as the next End phase arrives (the damaged warship withdraws into the mists to be repaired). If both warships have received eight Damage cards or have been removed from the game when the End phase arrives, the game ends in a draw.
Special Rules
None. This scenario is designed to introduce you to the rules of Dreadfleet, without further rules or complications.
Returning to the Dead Man's Reef
Perhaps you would like to play this scenario again with some changes. Here are some ideas:
- Use more warships per side.
- Use fewer islands/wrecks; decide how many you want before deploying them.
- A player can only win when all of the opponent's warships (not counting auxiliaries) except one have been removed from the game. If both sides reach this victory condition in the same End phase, the game ends in a draw.
Scenario 2: The Prisoner in the Citadel
The Forces
- Grand Alliance: Heldenhammer, Swordfish
- Fleet of Terror: Bloody Reaver, Curse of Zandri
Preparing the Scene
The set-up represents a continuation of the Dead Man's Reef. The Castle Island is placed in the centre of the seascape. Place the rest of the islands and wrecks as indicated on the map.
Deployment
The Grand Alliance player deploys the Heldenhammer 15" or less from the west edge and 6" or less from the south edge. The Swordfish starts the game run aground (but without having suffered any damage) on the west face of the Castle Island, facing the north-west corner of the seascape.
The Bloody Reaver arrives in the End phase of the second turn. The Curse of Zandri arrives in the End phase of the third turn. When they arrive they are placed with the stern edge of their base 1" or less from the north edge of the seascape.
Game Length
The game will last six turns.
Victory
- The first thing the Grand Alliance has to do is break the walls of the Forbidden Citadel so that Aranessa Malasal can escape (see below).
- Then the Swordfish must voluntarily leave the game by one of the edges of the seascape.
If the Grand Alliance player achieves these two objectives before the end of the sixth turn, he will win the scenario. If not, the Fleet of Terror player will win.
Special Rules
Initiative. The Grand Alliance automatically wins the initiative roll of the first turn.
Look Sharp, Lads. The crew of the Swordfish have sworn to wait for their Captain to rejoin them before acting. To represent this, the Swordfish is not considered a warship until its Captain rejoins it, so it cannot be activated or chosen as a target until then.
Breaking Down the Citadel Walls. The walls of the Citadel will be broken down when it has suffered two or more Damage cards (Hull, Crew or a combination of both). Once this happens, Captain Malasal will rejoin her warship in the End phase of that turn and from then on the "Look Sharp, Lads" rule is ignored.
The Forbidden Citadel. In this scenario the Castle Island will be known as the Forbidden Citadel, and represents the domains of a myriad of undead horrors. It is considered exactly as if it were an auxiliary of the Fleet of Terror (a large and powerful one). Place the Damage cards that apply to the Citadel in a separate place, to one side of the Fleet of Terror warship cards.
The Forbidden Citadel has the following rules:
- The Citadel is static. It will never move.
- The Citadel cannot target the Swordfish in any way while Captain Malasal has not returned.
- If the Citadel suffers a "Speed" or "Special" Damage card, that card is ignored (the shot will have hit the crags on which it stands).
- The Citadel is considered an island for the purposes of running aground and escaping from danger.
- The Heldenhammer may start a boarding action against the Forbidden Citadel (and vice versa) if it runs aground on it, or if it has dropped anchor 1" or less from the Citadel.
- The undead defenders of the Citadel will fall defeated as soon as it accumulates three or more Damage cards of the same type. However, the Island will stay in place just the same, but will no longer use the rules of the Forbidden Citadel. Discard the Damage cards it has suffered.
The Forbidden Citadel
| Speed | Hull | Crew | Broadside | Manoeuvrability | Armour |
|---|---|---|---|---|---|
| n/a | 3 | 3 | 2 | n/a | 4+ |
Scenario 3: Risen from the Abyss
The Forces
- Grand Alliance: Grimnir's Thunder, Flaming Scimitar
- Fleet of Terror: Black Kraken
Preparing the Scene
The island and wreck miniatures are arranged to recall the edges of an enormous sunken volcano. The spaces between the islands should be just wide enough for one auxiliary cog to pass through. The only spaces that should allow the passage of a warship are on the east and west sides of the crater.
Starting with the Grand Alliance player, the players take turns placing the five treasures anywhere within 1" of the inner edges of the islands and wrecks that form the crater (see the map). The treasures represent piles of barrels.
Deployment
The Grand Alliance player deploys his warships 6" or less from the south edge of the seascape. The Black Kraken is not deployed at the start of the game, but enters play in the End phase of the second turn (see below).
Game Length
The game will last six turns.
Victory
When the six turns have finished, the Grand Alliance player counts the number of treasures he has in his possession. The Fleet of Terror player counts the number of enemy warships and auxiliaries that have been destroyed. Whoever obtains the greater total wins.
Special Rules
Initiative. The Grand Alliance automatically wins the initiative roll of the first turn.
Mysterious Waves. All the treasures will be moved from their place, dragged by the power of the mysterious waves that push them away from the Grand Alliance warships. This happens during the End phase of each turn. During the End phase, the Fleet of Terror player rolls 1D3. He may move all the treasures that have not yet been picked up that number of inches in the direction he wants (treasures may move in different directions, but always in a straight line). Some treasures may not be able to move the full distance; in that case, move them as far as you can without ever coming into contact with another miniature or the edge of the seascape.
Recovering the Barrels. If an auxiliary places its base in contact with a treasure, it may pick it up. Roll 1D6 and consult the following table to see what kind of prize it has just rescued.
| 1D6 | Result |
|---|---|
| 1 | Blast! The barrels are full of holes and contain nothing, apart from a shoal of mussels swimming inside. Discard the treasure. |
| 2-5 | Good! More rum for the lads! The barrels are full of liquor. The auxiliary picks up the treasure. |
| 6 | Hooray! The barrels are full of Bugman's prized firewater. The auxiliary picks up the treasure. |
Risen from the Deep. The Black Kraken enters play in the End phase of the second turn, after the treasures have been moved. The Fleet of Terror player chooses a treasure that has not yet been picked up and replaces it with the Black Kraken, making sure that the Kraken's base is at least partly in the place that the treasure that has just been removed occupied, and at least 1" away from any other miniature. As long as these requirements are met, the Fleet of Terror player may place the Black Kraken as he pleases. Then he must place the treasure again 1" or less from the Kraken, and at least 1" from any other miniature.
They'll Swallow It. Bugman's firewater can be used against the Black Kraken with explosive results. At the start of a boarding action involving the Black Kraken, a miniature carrying a treasure that represents the firewater may set fire to a barrel and throw it against the mechanical parts of the Kraken. This attack automatically inflicts one Hull Damage card on the Black Kraken (draw cards from the Damage deck until you draw a Hull card, apply it and discard the rest). This attack does not "use up" the treasure.
Note: the scenario's deployment map (a ring of islands forming a crater, with the treasures placed within the ring) is not transcribed; the scenario text above is complete.
Scenario 4: The Wrath of the Volcano God
The Forces
- Grand Alliance: Heldenhammer, Swordfish, Flaming Scimitar, Grimnir's Thunder
- Fleet of Terror: Bloody Reaver, Curse of Zandri, Black Kraken, Skabrus
Preparing the Scene
The island with the volcano (which, in a display of boundless imagination, we have called the "Volcano Island") is placed in the centre of the seascape, arranging the rest of the islands and wrecks around it, no more than 4" from one another, and separated just enough for a cog to pass between them. A single wreck is placed to the east of the others (see the map).
Deployment
The Grand Alliance player deploys the Swordfish 6" or less from the south edge of the seascape. The Heldenhammer begins the game 1" from the eastern wreck and facing north, as shown on the map. Its auxiliary is placed next to the Volcano Island. All its crew has been devoured, so it will not be able to move unless Captain Roth boards it.
The Fleet of Terror player deploys his warships 6" or less from the north edge, and 15" or less from the west edge of the seascape.
Grimnir's Thunder and the Flaming Scimitar are not deployed at the start of the game. Instead, during the End phase of the first turn they are placed with the stern edges of their bases 1" from the edge of the seascape chosen by the Grand Alliance player (both must be placed on the same edge). They can be activated normally from the next turn.
Game Length
The game will last six turns.
Victory
The Grand Alliance player must return Captain Roth to the Heldenhammer. If Roth has returned to the Heldenhammer, has not suffered a mortal wound, and the Heldenhammer is still in play after completing six game turns, the Grand Alliance player will have won. If any of these conditions is not met, the victory will go to the Fleet of Terror.
Special Rules
Initiative. The Grand Alliance automatically wins the initiative roll of the first turn.
Chain of Islets. To represent the shallow waters that surround the volcano, the only vessels that can enter the circle of islands around the Volcano Island will be auxiliaries.
Rescue Captain Roth. Captain Roth cannot be rescued until the tribe of cannibal Necrophages that hold him prisoner has been defeated. In each of the Situation phases a special duel will be fought between Captain Roth and the King of the Necrophages.
The Necrophage King will be considered an enemy captain with a Fencing value of 2. Each player may add +1 to the Fencing attribute of his captain for each friendly auxiliary that has its base in contact with the Volcano Island (not counting the Heldenhammer's auxiliary).
Keep count of the Necrophage King's wounds in the same way as you would for any other captain, placing the Wound card under the seascape instead of under the corresponding warship card.
If the Necrophage King suffers a mortal wound, his followers will flee panic-stricken and be defeated. At the start of any of the following Action phases of the Heldenhammer, Captain Roth may board any friendly auxiliary that has its base in contact with the Volcano Island (if there is one). Place a treasure next to that auxiliary, representing Captain Roth. The Grand Alliance player must try to take that treasure back to the Heldenhammer. If the auxiliary is destroyed on the way, the treasure that represents Captain Roth will be left in that place. From then on it will be treated like any other treasure.
The Wrath of the Volcano God. Roll 1D3 in each Situation phase. If the result is lower than the turn number, a gigantic igneous god with magma skin will rise from the volcano. From that moment on, any warship that ends its Action phase 18" or less from the Volcano Island must roll 1D6. On a result of 4 or more, nothing happens. On a 2 or a 3, the warship will suffer a hit because of a discharge of magma that falls on it. On a 1, burning rocks will fall on the warship: it draws a Damage card and is Burning. Auxiliaries go unnoticed by the volcano god and do not have to roll.
Note: the scenario's deployment map is not transcribed; the scenario text above is complete.
Scenario 5: The Pride of Ulthuan
The Forces
- Grand Alliance: Heldenhammer, Flaming Scimitar, Swordfish, Grimnir's Thunder, Sea Dragon
- Fleet of Terror: Bloody Reaver, Skabrus, Black Kraken, Curse of Zandri
Preparing the Scene
The islands and wrecks are placed as two flooded volcanic craters, with small gaps between them (see the deployment map on the next page).
It is important that you leave a gap of 1" between each island and wreck. You have to be prepared to carry out very precise manoeuvres to prevail in this scenario.
Deployment
Starting with the Grand Alliance player, the players take turns placing their warships. Four Grand Alliance warships will be placed 18" or less from the west edge of the seascape. The Sea Dragon will be deployed in the zone delimited by the easternmost crater.
The Fleet of Terror player deploys his warships anywhere in his deployment zone marked on the map, which is limited to 4" from the crater in which the Sea Dragon is deployed (see the map). No Fleet of Terror warship may be deployed within 6" of another.
Game Length
The game will last six turns.
Victory
The Grand Alliance intends to inflict serious punishment on the Fleet of Terror, rescuing the Sea Dragon at the same time.
When six full turns have been played, each player adds up the number of Damage cards next to the warship cards and auxiliaries of his opponent, adding the number of Damage cards suffered by the opponent's warships and auxiliaries that have been removed from the game (counting them before placing them in the Damage deck's discard pile). This number will be his total of victory points.
If the Sea Dragon manages to voluntarily leave the seascape by its west edge, the Grand Alliance player adds 1D6+1 additional victory points. If the Sea Dragon is removed from the game in any other way, the Fleet of Terror player obtains 1D6+1 additional victory points.
Whoever obtains the most victory points is the winner.
Special Rules
Initiative. The Grand Alliance automatically wins the initiative roll of the first turn.
Burning Seas. The waters that surround the flooded craters bubble with tongues of fire. Any warship that is 2" or less from an island or a wreck at the end of its Movement phase must roll 1D6. On a result of 1, the player who controls that warship must draw Damage cards until he draws a Hull card, applying its effect and discarding the others.
Tip: The Grand Alliance player would do well to deploy the Sea Dragon last and move it first; keeping the Sea Dragon intact is going to matter a lot, so the sooner it reaches somewhere safe, the better.
Note: the scenario's deployment map is not transcribed; the scenario text above is complete.
Scenario 6: Unpredictable Tides
The Forces
- Grand Alliance: Heldenhammer, Flaming Scimitar, Swordfish, Grimnir's Thunder, Sea Dragon
- Fleet of Terror: Bloody Reaver, Skabrus, Black Kraken, Curse of Zandri
Preparing the Scene
The game begins with five wrecks arranged as shown (see the map). The wrecks are placed to give the idea of a scattering of small formations poking out of the water: they are the peaks of submarine mountain structures, which will no doubt play a leading role throughout the game.
Deployment
The Grand Alliance player deploys one of his warships 6" or less from the south edge of the seascape. The Fleet of Terror player deploys one of his warships 6" or less from the north edge of the seascape. The players take turns placing their warships in the same way.
Game Length
The game will last four turns.
Victory
The fleets will strive to destroy each other while the waters ebb around them. When four full turns have been played, each player adds up the number of Damage cards next to the warship cards and auxiliaries of his opponent, adding the number of Damage cards suffered by the opponent's warships and auxiliaries that have been removed from the game (counting them before placing them in the Damage deck's discard pile). This number will be his total of victory points. Whoever obtains the most victory points is the winner.
Special Rules
Supernatural Tides. At the start of the Situation phase of the second turn, the Fleet of Terror player removes the wrecks and replaces them with the larger islands. The islands represent the same rocky formations that the wrecks were, but with less water around them.
To do this, the Fleet of Terror player chooses a wreck and replaces it with an island. The island must be placed so that its highest point is as close as possible to the point that the wreck it replaces occupied. The island may be placed in contact with one or more warships (without rising underneath them). Apart from these restrictions, it may be placed in any orientation that the Fleet of Terror player wishes. If an island ends up touching a warship, that warship will automatically be run aground.
Once this process has been resolved, the Fleet of Terror player chooses another wreck and repeats the process, replacing them until all the wrecks in play have been replaced by islands.
At the start of the Situation phase of the third turn, the Fleet of Terror player places all the remaining islands and wrecks, one by one, at any point and orientation he wishes, as long as they are not 2" or less from another miniature. They represent new stone peaks rising as the tide recedes.
The deployment-map images show examples of how the seascape evolves during the game and are not transcribed.
Scenario 7: Empty Ships
The Forces
- Grand Alliance: Heldenhammer, Swordfish, Flaming Scimitar
- Fleet of Terror: Shadewraith
Preparing the Scene
The islands and wrecks are placed as indicated on the deployment map on the opposite page. The islands are numbered 2 to 6 on the map, corresponding to the table below (Volcano Island, Crumbling Castle, Skull Island, Leviathan Island and Corpse Face Cliff).
Deployment
The Grand Alliance player deploys all his warships 12" or less from the south-west edge of the seascape. The Shadewraith is not deployed at the start of the game (see the special rule "The Mists of the Damned", below).
Game Length
The game will last six turns.
Victory
The Grand Alliance player will win if, at the end of the game, the Shadewraith has been eliminated from the game and the defenders of the Crumbling Castle have been defeated (see below).
The Fleet of Terror player will win if, during any End phase, the Grand Alliance player has a total of ten or more Damage cards on his Warships and Auxiliaries. You must also keep count of how many Damage cards the Grand Alliance warships and auxiliaries that have been removed from the game have suffered; for the purposes of determining the victory conditions, those cards also count towards the total that the Fleet of Terror player needs in order to win.
If both (or neither) of these victory conditions have been fulfilled by the time the game ends, the result is considered a draw.
Special Rules
The Mists of the Damned. The Shadewraith enters play in the first turn, immediately after all the Grand Alliance warships have completed their Action phases. Roll two dice as if you were placing the wind indicator (see page 23 for a reminder) and place the Shadewraith with its stern end 1" from the marker indicated by the roll.
The Shadewraith may then carry out its Action phase. Each time the Shadewraith completes its Action phase, it may try to vanish into the mist, even if it is in base contact with another miniature (but not if it is anchored). Roll 1D6; on a result of 1 nothing happens, but on a 2 or more the Fleet of Terror player immediately moves the Shadewraith to the location corresponding to the result of the D6 on the table below. The Shadewraith may be placed at any point 3" or less from that island, in the facing chosen by the Fleet of Terror player, and at least 1" from all other miniatures.
| 1D6 | Island |
|---|---|
| 1 | Nothing happens |
| 2 | Volcano Island |
| 3 | Crumbling Castle |
| 4 | Skull Island |
| 5 | Leviathan Island |
| 6 | Corpse Face Cliff |
The Crumbling Castle. In this scenario, the Castle Island is called "the Crumbling Castle". This island is considered an auxiliary ship of the Fleet of Terror. The Damage cards that are applied to the Crumbling Castle are placed to one side of the Warship cards. The Castle has the following rules:
| Speed | Hull | Crew | Broadside | Manoeuvrability | Armour |
|---|---|---|---|---|---|
| n/a | 3 | 3 | 5 | n/a | 4+ |
- The Castle is treated as an island with respect to the rules for "running aground" and "escaping from danger".
- If a "Speed" or "Special" Damage card is drawn for the castle, that card is ignored (the shot is considered to have hit the hazards on which the Castle stands).
- The Castle is static. It can never move.
- An enemy warship may launch a boarding action against the Castle (and vice versa) if that enemy warship has run aground on the Castle or is anchored 1" from it.
- As soon as the Crumbling Castle accumulates three or more Damage cards of the same type, it means that its Undead defenders have been defeated. The island remains in play, but none of the special rules of the Crumbling Castle are used any more. All the Damage cards it has received are discarded.
Scenario 8: Between the Sword and the Wall
The Forces
- Grand Alliance: Heldenhammer, Swordfish, Flaming Scimitar, Grimnir's Thunder, Sea Dragon
- Fleet of Terror: Bloody Reaver, Skabrus, Shadewraith, Black Kraken, Curse of Zandri
Preparing the Scene
This scenario uses only two pieces of scenery: the Island of the Hellfish (use one of the Rocky Island pieces) and the Leviathan Island. Simply place the island pieces as shown on the deployment map. Make sure to place the two islands 14" apart, being as precise as you can.
Deployment
The Grand Alliance player deploys all his warships 12" or less from mark 4,6 (measuring from the little skull above it). Then the Fleet of Terror player deploys all his warships 12" or less from mark 1,6 (measuring from the little skull below it).
(Transcribed as printed in the Spanish edition; the marks refer to the tide marks on the seascape edge.)
Game Length
The game will last until the victory conditions have been fulfilled.
Victory
If a player is left with only two warships in play (auxiliary ships do not count) at the end of the End phase, his opponent wins the game. If both players are left with only two warships in play, the game is considered a draw.
Special Rules
Island of the Hellfish. A great swarm of flying hellfish will pounce on those vessels that come too close to the Island of the Hellfish, tearing them to pieces.
Each time a warship ends its Movement subphase 6" or less from the Island of the Hellfish, the player who controls it must roll 1D3, and then that warship must draw that same number of cards from the Damage deck, applying the Damage cards to the Crew and discarding the rest. The Shadewraith is immune to this rule; its crew are little more than phantoms, and therefore the carnivorous hellfish simply pass through them without causing damage.
Leviathan Island. The skeleton of an ancestral chelonian (that is, a sea turtle of unusual size) rises from the bottom of the sea to attack those who come too close to Leviathan Island.
Each time a warship ends its Movement subphase 6" or less from Leviathan Island, the player who controls it must roll 1D3, and then that warship must draw that same number of cards from the Damage deck, applying the Damage cards to the Hull and discarding the rest. The Sea Dragon is immune to this rule; its Dragon allies will distract the Undead monster long enough for the ship to move away from there.
Note that neither the hellfish nor the ancestral chelonian can be damaged or destroyed by any means, so the only solution is to avoid them.
Note: the scenario's deployment map is not transcribed; the scenario text above is complete.
Scenario 9: Gritting Our Teeth
The Forces
- Grand Alliance: Heldenhammer, Swordfish, Flaming Scimitar, Grimnir's Thunder, Sea Dragon
- Fleet of Terror: Bloody Reaver, Skabrus, Shadewraith, Black Kraken, Curse of Zandri
Preparing the Scene
The islands and wrecks are deployed so as to suggest part of an enormous, crowded chain of islands, with three passages big enough to let warships through between each island. The distance of 3" between the two central islands is important, since it can change in size during the game (see the deployment map).
Deployment
Starting with the Grand Alliance player, the players take turns placing one warship in play, until there are none left to place. No warship may be placed 6" or less from another. The Grand Alliance player must deploy his fleet 12" or less from the west end of the seascape, while the Fleet of Terror player must deploy his 12" or less from the east end.
Game Length
The game will last six turns, or until one of the two sides has no warships left in play, not counting auxiliaries (whichever happens first).
Victory
The objective of the Grand Alliance is to get as many warships as it can out through the east end. When the game ends, the Grand Alliance player will roll 1D3+1. If the result is equal to or less than the number of Grand Alliance warships (auxiliary ships do not count) that have left the game by the east end of the table, the Grand Alliance player will win the game. Otherwise, the winner will be the Fleet of Terror player.
Special Rules
The Oarsmen's Gate. This solid stone gate is magically enchanted to close as soon as any ship passes too close, crushing it between its stone jaws.
If at any point during its Movement subphase a warship moves 3" or less from the areas highlighted in red on the deployment map (which correspond to the Corpse Face Cliff and the Castle Island, the two islands that form the Oarsmen's Gate), both islands will immediately begin to move towards each other.
The warship that has activated the Oarsmen's Gate must temporarily halt its own Movement subphase while the movement of the islands is resolved. Roll 1D3 and reduce the distance between the two halves of the Oarsmen's Gate by a number of inches equal to the result of the roll (if possible, moving the two islands an equal distance towards each other). If this does not cause the warship that activated the Oarsmen's Gate to run aground, it may then complete its Movement subphase.
Once a warship has activated the special rule of the Oarsmen's Gate, roll 1D6 at the start of each subsequent Situation phase. On a result of 1 to 3, reduce the distance between the two halves of the Oarsmen's Gate by 1D3". On a result of 4 to 6, on the other hand, increase the distance between the two halves of the Oarsmen's Gate by 1D3". If this movement cannot be carried out in full, carry it out as far as you can. A warship that is in base contact with more than one island at the end of any Situation phase must immediately draw 1D6 Damage cards.
Note: the scenario's deployment map is not transcribed; the scenario text above is complete.
Scenario 10: The Hunt for the Witchstone
The Forces
- Grand Alliance: Heldenhammer, Swordfish, Flaming Scimitar, Grimnir's Thunder, Sea Dragon
- Fleet of Terror: Bloody Reaver, Skabrus, Shadewraith, Black Kraken, Curse of Zandri
Preparing the Scene
The scenery pieces are placed so as to represent a group of large scattered islands, with enough space between them to manoeuvre. Once the scenery has been placed, and starting with the Fleet of Terror player, the players take turns placing a treasure on the seascape until all of them have been placed, with the following restrictions:
- No treasure may be 12" or less from any end of the seascape.
- No treasure may be 6" or less from another.
- No treasure may be less than 6" from an island.
This process is repeated until there are no treasures left to place.
Deployment
The Fleet of Terror player will deploy all his warships 12" or less from the north-west corner of the seascape. Then the Grand Alliance player will deploy all his warships 12" or less from the south-east corner of the seascape.
Game Length
The game will last five turns.
Victory
The winner will be the player who has the most treasures in his possession at the end of the game. If both players have the same number of treasures, the game is considered a draw.
Special Rules
Strong Currents. While they try to recover the Witchstone fragments that lie in the sunken wrecks of this area, the warships must face a series of strong currents that move in an easterly direction.
To represent this, during each End phase the first player must roll 2D6, and then move all the treasures east a number of inches equal to the result of the roll (starting with the treasures that are furthest east, and continuing until finishing with the one that is furthest west). Any treasure that touches an edge of the seascape is removed from the game.
Collisions. The movement east of any treasure will stop immediately when it bumps into any warship or auxiliary. However, if it bumps into an island, instead of stopping it will keep moving around the contour of the island until it completes the inches of movement it still has left to cover. When a treasure has to be moved around an island in this way, always use the shortest possible route. Once the island in question is no longer blocking the treasure's path, it may continue moving directly east.
Headwinds. During the whole of the first turn, the wind indicator will remain on mark 3,3, ignoring all the wind movement symbols that appear on Destiny cards until the Destiny phase of turn two.
Low Swell. The strong currents mean that the sea does not raise very large waves. Auxiliary Cogs that have to make capsize checks will only capsize on a roll of 1 on the die.
Electrical Storm. The heavens unleash powerful discharges of electrical energy right above the battle. In the Situation phase, the first player must choose an enemy warship (not auxiliaries) and roll 1D6. On a result of 4 or more, that warship draws a Damage card.
Rescuing Witchstone. If an auxiliary comes into contact with a treasure, the player who controls it immediately rolls 1D6. On a result of 1, that treasure is immediately discarded, as the supposed "treasure" that has been rescued turns out to be worthless. On a result of 2 or more, however, the auxiliary may claim the treasure in question to represent the Witchstone that it has rescued. Any auxiliary belonging to the Fleet of Terror that is 3" or less from the Skabrus may reroll this roll, since the Skaven have an extremely developed sense of smell when it comes to detecting Witchstone.
Note: the scenario's deployment map is not transcribed; the scenario text above is complete.
Scenario 11: The Sea Jaws
The Forces
- Grand Alliance: Heldenhammer, Swordfish, Flaming Scimitar, Grimnir's Thunder, Sea Dragon
- Fleet of Terror: Bloody Reaver, Skabrus, Shadewraith, Black Kraken, Curse of Zandri
Preparing the Scene
Four of the islands are deployed so as to represent an area of outcrops scattered here and there, as shown on the deployment map. The rest of the islands and wreck pieces are used to create the "jaws" (or at least something that looks as much as possible like jaws). The warships must avoid this area of the seascape at all costs.
Once the scenery has been placed, and starting with the Fleet of Terror player, both players take turns placing a treasure on the seascape until all of them have been placed, with the following restrictions:
- No treasure may be 12" or less from any end of the seascape.
- No treasure may be 6" or less from another.
- No treasure may be less than 6" from an island.
Deployment
The Fleet of Terror player will deploy all his warships 12" or less from the north-east corner of the seascape. Then the Grand Alliance player will deploy all his warships 12" from the south-west corner of the seascape.
Game Length
The game will last five turns.
Victory
The players must not only recover the treasures but also escape with them by the west end of the seascape. Each player must place in a separate pile the treasures that his ships manage to take out through the west end of the seascape. At the end of the game, each player scores one victory point for each treasure he has on his ships, and 1D3 victory points for each treasure he has in his pile (that is, that he has managed to take out through the west end of the seascape). The player with the most victory points is the winner; if both players have the same victory points, the game is considered a draw.
Special Rules
The Deadly Whirlpool. The current generated by the Sea Jaws is practically irresistible. To represent this, at the end of each Situation phase the Fleet of Terror player will roll 2D6+2, and then move every ship (except flying auxiliaries) and every treasure a number of inches equal to the result of the roll, in a direction as far east as possible (starting with the ships and treasures that are furthest east, and continuing until finishing with those that are furthest west). When resolving these movements caused by the whirlpool current, the miniatures must keep the same facing that they had. Any miniature or treasure that bumps into the east end of the seascape, or that moves 2" or less from any of the islands or wrecks that form the "jaws", will be removed from the game. Miniatures that are anchored or run aground are immune to the special rule of the Deadly Whirlpool.
Collisions. The movement east of any treasure will stop immediately when it bumps into any warship or auxiliary. However, if it bumps into an island, instead of stopping it will keep moving around the contour of the island until it completes the inches of movement it still has left to cover. When a treasure has to be moved around an island in this way, always use the shortest possible route. Once the island in question is no longer blocking the treasure's path, it may continue moving directly east.
Low Swell. Auxiliary Cogs only capsize on a roll of 1 on the die when making their check.
Deafening Roar. To represent the deafening roar of the Sea Jaws, all Command checks suffer a penalty of -1.
Note: the scenario's deployment map is not transcribed; the scenario text above is complete.
Scenario 12: The Maelstrom
The Forces
- Grand Alliance: Heldenhammer, Swordfish, Flaming Scimitar, Grimnir's Thunder, Sea Dragon
- Fleet of Terror: Bloody Reaver, Skabrus, Shadewraith, Black Kraken, Curse of Zandri
Preparing the Scene
Numerous islands and wrecks are placed forming a sort of spiral that ends in the centre of the seascape (see the deployment map for an example). The vortex marker is placed in the centre of the seascape; in this scenario that marker will serve to mark the heart of the Maelstrom.
Deployment
The Grand Alliance player will deploy his warships 20" or less from the west end of the seascape, and 6" or less from its south end. Then the Fleet of Terror player will deploy his warships 20" or less from the east end of the seascape, and 6" or less from its north end.
Game Length
The game will last until the victory conditions have been fulfilled (this could be a really long game, so make sure you have a good supply of refreshments and cold snacks to hand).
Victory
If the Heldenhammer frees the ethereal kings that are inside the Great Urns, and as a result manages to calm the Maelstrom for ever, the Grand Alliance player will have won the game. If in addition the Bloody Reaver is removed from the game, then the Grand Alliance will have achieved a spectacular victory (they will have taken their revenge in full!). Conversely, if the Heldenhammer is removed from the game or Captain Roth suffers a mortal wound in a duel, the winner will be the Fleet of Terror player.
Special Rules
The Descending Spiral. The wind indicator is not used in this scenario. Instead, all warships (except flying auxiliaries) that are not anchored, run aground or locked in a boarding action must move each turn a distance equal to or greater than the speed of the current wind. This represents the currents that drag the ships along irresistibly (or their desperate effort to overcome the current). To represent the suction power of the Maelstrom, in this scenario warships may only change facing towards starboard. The only exceptions to this are turns made during an "escape from danger" movement, and those derived from a Hard to Port order. In these two cases, the warship may turn to port if the player who controls it wishes.
Thundering Roar. To represent the deafening roar of the Maelstrom, which makes it hard for captains to transmit orders, in this game all Command checks suffer a penalty of -1.
The Vortex Marker. Miniatures that touch the vortex marker for any reason will be immediately removed from the game, sucked for ever into the beyond.
Dragged to the Bottom. Because of the many underwater dangers that populate these waters, if a ship crosses the spiral line that extends between the islands and wrecks and mark 4,6 at the south end of the seascape, that ship will be removed from the game (see the deployment map). This rule does not affect flying auxiliaries.
The Ethereal Kings. If the Heldenhammer is anchored 1" or less from the Vortex, Captain Roth may try to free the spirits housed in the Great Urns. To do so, Captain Roth must make a successful Command check during the Situation phase. If he succeeds, it means that he and his crew will have managed to launch the Great Urns and calm the Maelstrom once and for all (in this case, the Grand Alliance will have won the game as described above). Conversely, if the Command check fails, nothing will happen, and Captain Roth will have to try his luck again in a later turn.
Note: the scenario's deployment map is not transcribed; the scenario text above is complete.
Campaign: Want More?
Perhaps you wonder whether there is some way of linking these games into a longer-lasting competition, or of keeping count of how things evolve from one game to the next. This last section lets you compare each player's success in each scenario, and add up your successes (or failures) over a campaign to see which player did best overall.
The simplest way for players to compare their successes is with the Campaign Score Table. The table lets players keep track of their successes (or failures) according to a series of criteria that vary from one scenario to the next. These criteria are expressed in the table with abbreviations, which are explained in the key below.
At the end of each scenario, the Grand Alliance player determines his score according to the following criteria, noting his score in pencil in the Total (1) column of the corresponding scenario.
His opponent will do whatever he can to prevent the Grand Alliance player from achieving his objectives. After the Fleet of Terror player has played the scenario controlling the Grand Alliance, he writes down his own result in the Total (2) column. These totals show a fair comparison that shows who has done best in each scenario. It is possible to obtain results of zero, or even negative numbers, if things go wrong. You could play all twelve scenarios in a row, always controlling one side, and swap them at the end... as you prefer.
After completing and adding up all the boxes of each column, write the totals in the corresponding Final Total box. The player with the highest Final Total at the end of the campaign will not only be able to boast about it, but will be crowned Supreme Admiral of the World. Hip, hip, hooray!
Campaign Score Table
| Scenario | Criterion | Total (1) | Total (2) |
|---|---|---|---|
| 1. The Dead Man's Reef | CD | ||
| 2. The Prisoner in the Citadel | VC x 2D6 | ||
| 3. Risen from the Abyss | VC x 2D6 | ||
| 4. The Wrath of the Volcano God | VC x 3D6 | ||
| 5. The Pride of Ulthuan | VP | ||
| 6. Unpredictable Tides | VP | ||
| 7. Empty Ships |
Key to the Abbreviations
DC = Damage cards. Add up the total number of Damage cards you have inflicted on your opponent's warships, as described in the victory conditions of the scenario; subtract the total obtained by your opponent, and enter the result in the corresponding column. (The Spanish edition's table abbreviates this "CD".)
VC = Victory conditions. If you have won, score one point and multiply it by the quantity indicated in the Campaign Score Table to find the total. If you lose, your total is zero. (Spanish "CV".)
VP = Victory points. Count the number of victory points or treasures you have obtained, and subtract the number of victory points or treasures obtained by your opponent, multiplied by the value obtained to find the total. (Spanish "PV".)
Summary
Preparing for Battle
- Set up the seascape.
- Choose sides.
- Choose the scenario.
- Prepare the scene.
- Shuffle the hands.
- Set the wind direction.
- Prepare the fleet.
- Begin the game.
The Game Turn (page 22)
Initiative phase: Each player rolls a die to see who obtains the initiative. The player with the initiative decides who will be the first player. The opponent of the first player will be the second player.
Situation phase: Resolve the effects in play and the Situation cards with a red background.
Destiny phase: The first player draws a Destiny card, resolves its effects and moves the wind indicator. The second player does the same.
Action phase: The first player chooses a warship that has not yet been activated this turn and resolves its actions in this order:
- Orders subphase (page 37). Try to give an order by making a Command check.
- Movement subphase (pages 24-29). Move across the seascape using the warship's Speed and Manoeuvrability values. If your warship has run aground and/or is in base contact with one or more enemy warships, you may try to escape from danger instead of playing a normal Movement subphase. Sailing ships have additional movement rules (page 26). Warships may make changes of facing of up to 45 degrees each time they move their Manoeuvrability value in inches as a minimum. If the warship has its base in contact with an enemy ship, you must resolve a boarding action during the next Boarding actions subphase (page 34). If the warship is 2" or less from an island or a wreck at the end of its Movement subphase, it may drop anchor. An anchored warship may weigh anchor at the end of any of its subsequent Movement subphases.
- Broadside subphase (page 30). Fire a broadside at an enemy warship:
- Choose a target 18" or less away.
- Check that the target is in a side arc of your warship and that you have line of sight to it.
- Measure the range between the two warships and check the result you need to roll on the table below.
- Apply the modifiers that correspond to the result you need to roll: (a) First broadside: the first broadside of the game of each warship has a +1 modifier to hit; (b) Raking fire: if the greater part of the base of your warship is in the bow or stern arc of its target, you will get a +1 modifier to hit; (c) Other modifiers: these usually come from Damage and Destiny cards.
- Check whether something is in the way of the shot. If so, it will be a partial shot and your Broadside value is halved, rounding up.
- Roll your broadside dice. Each die that equals or exceeds the difficulty you needed scores a hit.
- Your opponent must make an Armour save for each hit scored.
- The owner of the target warship draws one Damage card for each hit that has not been saved and resolves it, applying its effects to the target of the broadside.
| Range | Result needed to hit on 1D6 |
|---|---|
| Short (0-6") | 4+ |
| Medium (6-12") | 5+ |
| Long (12-18") | 6+ |
- Boarding actions subphase (page 22). You must resolve a boarding action against the enemies with which you are in base contact. If both sides have a captain who is still alive, then there is a duel to be fought.
Fighting a duel (page 40). Each player rolls a number of dice equal to the total current Fencing value of his captains involved in the boarding action. Each roll of 5 or 6 is a victory. Each player adds up his total number of victories, and the player who has the most wins the duel. Each captain on the losing side will suffer a wound by drawing a Wound card and placing it under his warship card. If a captain already has a Wound card, advance it one degree of severity. If the result is a tie, all the captains involved will suffer a wound. Once the duel has been resolved, the crews will resolve the rest of the boarding action.
Fighting a boarding action (page 34). Each player adds up the current Crew attributes of all the warships involved in the boarding action; the total indicates the boarding action dice. Each result of 5 or 6 is a victory. The players add up their respective victories, and whoever has the most will be the winner of the boarding action. Subtract the total obtained by the losing side from the total of the winning side to determine the result of the boarding action. The player who obtained the lowest victory value will draw as many Damage cards as the result of the boarding action indicates for each of the warships involved, sharing out the Damage cards among the warships. If the players obtain the same number of victories, every warship involved in the boarding action will draw one Damage card, regardless of the number of victories obtained.
Now the second player will choose a warship that has not yet been activated and will resolve its actions in the same order as the first player. The players alternate activating their warships, resolving the Action phase of each one of them until all the warships have acted.
End phase: Check the victory conditions. If a player has already won, or there are no turns left to play, the game ends. Otherwise return to the Initiative phase and begin a new turn.
Auxiliaries (page 42)
Auxiliaries count as warships, with the following exceptions:
- They can never receive orders.
- They cannot escape from danger.
- They do not "run aground" when they come into contact with islands or wrecks.
- They have no facings or arcs of sight.
- They can fire their broadsides in any direction.
- When firing against them, the raking fire modifier is not applied.
- When they draw Special Damage cards they discard them and draw another.
- Auxiliaries trace their lines of sight from their highest point. That point also counts as the corners when determining whether something is in the way of a broadside that takes the auxiliary as its target.
- They have no Manoeuvrability attribute, so they can turn without problems at any point of their Movement subphase.
Anatomy of a Warship
Diagram labels: Sails, Rigging, Mast, Bow (bowsprit, figurehead, forecastle), Stern (sterncastle, poop deck, cabin), Captain's quarters, Crow's nest, Square sails (these are mounted on the mast), Gun deck.