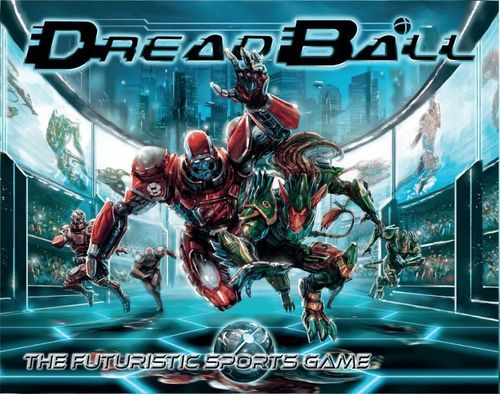
DreadBall (Second Edition)
DreadBall (Second Edition) Rulebook
Table of Contents
Table of Contents
- What Is DreadBall?
- Game Terms
- Strikes and Scoring
- Player Roles
- Player Stats
- Positioning Players
- Dice Rolls and Tests
- The Ball
- Starting the Game
- Playing a Rush
- Ending the Game
- Actions
- Run
- Sprint
- Dash
- Evade
- Pick Up
- Stand Up
- Slam
- Throw
- Catch
- Steal
- Dodge
- Armour Checks
- Run Interference
- DreadBall Cards
- Fouls
- Fan Checks
What Is DreadBall?
The DreadBall Board Game recreates this fast-paced action on your tabletop, with each player taking on the role of their team's Coach. Each Coach controls a team of miniatures based upon the many enigmatic races in Mantic's Warpath Universe, each with their own strengths, weaknesses and exciting special rules.
The game is played in a series of turns, called Rushes. Within each Rush a Coach makes Actions with their Players in an effort to take control of the ball, hold back the opposing Players, and score points by making a Strike.
The rules for DreadBall are simple, although there is a great deal of tactical depth to be found by combining them cleverly. Don't worry about that for now though; just begin with the basics. Once you start rolling dice and moving the models around the board, you'll be throwing your first Strike in no time.
Winning the Game
The winner is the Coach with the most points after 14 Rushes. However, if a team ever reaches 7 points, they immediately win by a landslide.
For more on how to win, see Ending the Game.
Game Terms
This rulebook contains many terms specific to DreadBall, so here's something of a glossary to familiarise yourselves with the lingo.
Coach
This is you! The Coaches are the real people playing the game.
Player
The Players are the playing pieces - the miniature men, women, and indescribable aliens that you move around on the pitch.
The Players are formed into teams that are controlled by the same Coach. The DreadBall boxed game includes two such teams: one of robot Players called the Draconis All-Stars, and another made up of Yndij Players called the Ninth Moon Tree Sharks. Once you're familiar with the game and fancy something a little different, there are over 20 more teams available!
You will find all the details for each team on their Team Card.
Referee
Each game of DreadBall is overseen by a robotic match official: the Referee, or Ref. It is their job to ensure that the game is played fairly, or at least that those who break the rules are punished.
For more on the Referee and Fouling, see Fouls.
Ball
This little sphere is what the game is all about. The plastic ball included in the game can be carried around by the Players by slotting it into the hole in each of their bases. While it is loose on the pitch, it has its own special base.
For more on the ball, see The Ball.
Rush
Each turn is called a Rush. Within each Rush a Coach takes Actions with their Players in an effort to take control of the ball and score points by making a Strike.
Rushes are tracked using the Rush Counter and the 0-14 Rush Tracker at the side of the pitch.
For more on Rushes, see Playing a Rush.
Actions
Each thing that a Player does on the board is an Action, from simply Running around, to Throwing the ball, to Slamming an opposing Player. For more on Actions, see Actions.
Actions are tracked by spending a Team's Action Tokens - the team may make 5 Actions per Rush.
The Home team uses the white tokens, while the Visiting team uses the red tokens.
Keeping Score
Opposite the Rush Tracker you will see the Score Tracker, running from 7, down to 0, and up to 7 again. The Score Counter is placed on this track to keep score.
Unlike most sports games, you track the difference in scores instead of each team's total, with each striving to gain the advantage.
The score marker starts on the 0. When a Strike is made, the counter is moved towards the scoring Coach by the number of points that they scored. For example, if Anne scored a 4 point Strike and then Brad scored a 2 point Strike then the track would show 2 in Anne's favour.
Remember that if this counter ever reaches 7 on either side, that Coach has won the game instantly!
Strikes and Scoring
To win a game of DreadBall, your Players must score points by Throwing the ball into the Strike Hex. This is called a Strike. The board is marked with six coloured Strike Zones, three white and three red. Each Strike Zone is made up of eight hexes in front of a Strike Hex, as shown in the diagram below.
A player who is standing within a Strike Zone and holding the ball can attempt to score a Strike by Throwing the ball into that zone's Strike Hex. Players from the white Home team can do this in the Visiting team's red Strike Zones, and vice versa.
The two Strikes Zones that are closest to the starting line along the centre of the pitch are worth 1 point, while the more distant Strike Zone is worth 3 points. If a player is standing in the Bonus Hex when they attempt a Strike, their Throw will be more difficult but will score an additional point if successful (making the Strike worth either 2 or 4 points).
For more on scoring Strikes, see the Throw Action.
The DreadBall Glove
Of all the equipment that a DreadBall player uses, the most iconic is the DreadBall glove. This takes many outward forms depending on the race of the team, but the function is the same for all: to catch and throw the titanium ball at high speed without it tearing the user's hand off.
Some teams take a technical route and use elegantly crafted holographic designs that incorporate a crescent-shaped launcher on the back of the wrist. Using these is simplified by the focussed electromagnetic funnelling devices that are carefully calibrated to slot the moving ball into the launcher.
Some races take another route. They rely on carefully honed blades and scoops to capture and decelerate the ball by a combination of the glove's shape and the player's skill. Of course, when the ball can top 200mph, accidents do happen! However, there is never any shortage of keen youngsters eager to try their hands at the game.
Player Roles
Not all Players are the same. There are three roles or Player types: Guard, Jack, and Striker. Some teams use all three while others specialise in only one or two of the standard roles.
Guard
The biggest and strongest Players take to the pitch as Guards. These are the most heavily-armoured, and they need every bit of that protection because their role is both to flatten the opposing Players and protect their own lightly-armoured Strikers.
Guards rarely wear DreadBall gloves and therefore cannot typically handle the ball. They're too busy cracking heads!
The brute simplicity of the Guard's role appeals to many fans who love to see their favourites crashing through the opposition lines.
Important: Guards gain a +1 modifier on Strength and Armour tests.
Jack
The "jack of all trades", or Jack for short, is the all-rounder of the game. They are able to fill any role, whether that's holding the line against the opposing Guards, or passing the ball about like a Striker. Naturally, they sacrifice the finesse of the specialists, but they allow a team to adapt quickly to the rapidly changing nature of the game.
Their armour is a compromise between the protection needed by the Guards and the lightness needed by the Strikers. They also wear DreadBall gloves and can throw Strikes with the best of them (on a good day). Fans love the Jacks for their willingness to try anything, and many a desperate gamble by a Jack has saved a team from certain defeat.
Important: Jacks gain a +1 modifier on Speed tests.
Striker
Often seen as the golden boys of the game, the Strikers are typically the ones who score the most points. However, without the protection of their teammates they are quickly taken out of the game as they are only lightly protected, sacrificing armour for manoeuvrability.
Strikers have been described as simply a means of getting a DreadBall glove into the right place at the right time to make a Strike. This is a little harsh, but contains an element of truth. It is certainly their signature piece of equipment.
Everyone loves a winner, and scoring points is the easiest way to capture the attention of the adoring fans. It is also the riskiest position to play as the opposing Guards will be only too happy to crush any opposing Striker they can reach.
Important: Strikers gain a +1 modifier on Agility and Skill tests.
Player Stats
Each Player is represented on the table by a set of statistics, or 'stats', as shown on the Team Card. These values are used when carrying out the various Actions in the game.
Move
This represents the distance the model can move on the pitch during a standard Run Action.
Strength
Strength represents a Player's physical brawn or knowledge of how to best leverage their power. This is typically used by Players performing violent Actions such as a Slam.
Guards gain a +1 modifier on Strength tests.
Agility
Agility represents a Player's grace, nimbleness and sure-footedness. Agile Players are good at Evading through a press of bodies, Dodging their opponent's attacks and Standing Up after being knocked to the ground.
Strikers gain a +1 modifier on Agility tests.
Speed
Speed represents a Player's light-footedness and energy. A Player with a high Speed can Dash around the pitch more quickly.
Jacks gain a +1 modifier on Speed tests.
Skill
Skill represents a Player's ability to handle the ball. A Player with a higher Skill will be better able to manipulate the ball on the pitch, whether it's through Throwing, Catching, or simply Picking Up the ball.
Strikers gain a +1 modifier on Skill tests.
Armour
Players are outfitted with armour to protect them while playing the game. The better a Player's Armour the more protected they will be from injury by the ball or other Players.
Guards gain a +1 modifier on Armour tests.
Cost
This indicates the Cost, in millions of credits, or mc, of purchasing a particular Player for a team.
For now the starting team is chosen for you, so you won't need to worry about this. However, later expansions will allow you to build a team from scratch and play in a League, where money will become far more important!
Recommended Team
This number specifies how many of a given Player type are included with the suggested starting team. As an example, the Draconis All-Stars Jack has a Starting Number of x2, meaning that the Coach starts with 2 such Jacks if they choose to play the All-Stars team.
Abilities
Many Players will have their own unique abilities, available to them through rigorous training or simply their alien physiology. These additional rules will be detailed on the Team Card.
Money Money Money: The GCPS being what it is, much of the league organization revolves around money - lots of money. DreadBall uses millions of credits (mc) for all transactions, as anything smaller is too tiny for the big leagues to notice.
Positioning Players
Facing
In the game, all standing Players have a facing. This simply means that the Player is looking in a particular direction. Prone Players do not have a facing.
A Player has a front and a rear arc, divided as shown by drawing an imaginary line through the model from left to right, extending to the edges of the board. Each hex on the pitch is in either the front or rear arc of a Player.
Placing and Moving Models
Each Player occupies a single hex. You should position each one so that it is clear which hex they are in and which of the six edges they are facing.
No Player may enter a hex containing the Ref or another Player, friend or foe, standing or prone.
Routes and Distances
Measuring distance is very simple. You don't count the hex you start in, but you do count the hex you end in.
When you measure distance for a Throw you must take the shortest route possible. However, you will notice that there is often more than one route that is equally short. The choice is made by the Coach controlling the active Player.
Threat Hexes
Standing Players also have 3 Threat Hexes in front of them. These are important, as opponents in these hexes risk being tripped, grabbed or otherwise hindered. A Player's Threat Hexes can be identified by the 3 ridged sides of its base.
The three adjacent hexes in a Player's front arc are their Threat Hexes. When an opposing Player is standing in one of these hexes they may suffer modifiers to their dice rolls.
Prone Players
During the game, Players may fall or be knocked prone. If this happens, the model should be placed on its side, or replaced with one of the prone Player models from the box.
- The only Action a prone Player can make is Stand Up.
- If a Player is laid prone while carrying the ball, they drop it and it scatters.
- Prone Players do not have Threat Hexes and consider everywhere to be in their rear arc.
- When attacked, they can only Dodge.
- They are never pushed back, but may still move after doubling a Dodge (as explained later). They remain prone.
- The ball can scatter and be Thrown over prone Players, but will scatter if it lands on them.
The History of DreadBall
Who could have known when this new sport was invented, that it would sweep to such a success in less than a lifetime? From its humble beginnings in the grimy hangers of the flagship of its creator to the vid screens of every home in the central planets, it has been a whirlwind ride.
It all began in the mind of now retired Senior Flank Commander Jesus Ortiz. In his own words "it was something to keep the troopers happy, fighting fit and hungry for blood. I had no idea it would grow to be so popular".
But grow it has. It began in the stark steel shell of drop hangar 91 aboard the Corporation warship Dread. The first games were played with dismantled cluster munitions for a ball, wearing decommissioned armour. The modern player takes to the pitch in specially-built, multi-arena stadiums wearing carefully designed and personalized DreadBall suits worth millions of credits. These suits last no more than 2 or 3 games before they are damaged beyond repair. The weapons-grade titanium balls are replaced every time a new one enters the arena, such are the stresses on them. It is a violent sport.
Surprisingly, throughout this evolution, the game has remained true to the creator's vision, mainly due to the sacrifice of time and energy which Ortiz himself has given to it. It is overseen by the DreadBall Governing Body, usually known as the DGB, or "Digby". The Chairman of the DGB is Jesus Ortiz himself, still maintaining control over the game to ensure that it retains its true spirit and isn't debased by the many influences that smell money and power seeking to corrupt it. "As long as I'm in charge", says Ortiz, "DreadBall will remain pure."
Dice Rolls and Tests
The success or failure of most Player Actions in DreadBall is decided by rolling dice.
The Home team should use the white dice, while the Visiting team should use the red dice.
With a few exceptions (explained in their own sections) all dice tests are resolved the same way and are written as follows:
Throw: Skill test (1)
- The name of the test.
- The stat value to use.
- The number of successful dice rolls required to pass the test. a. If the target value is a single number, you need that many successful rolls to pass the test. For example, a target value of (2) requires 2 successful rolls. b. If the target value is (X), the result is compared to your opponent's score to see who has won. Both Coaches roll simultaneously (potentially against different stat values) and count up their successful rolls. c. If the target number is (123) then the first attempt within a single Action requires one success, and each subsequent attempt in the same Action needs 1 more - the second attempt needs 2, the third needs 3, and so on.
Rolling the Dice
Most dice tests are made using 3 dice. These are all rolled at once and then each one is compared to the appropriate stat. Each dice that equals or beats the stat value is a success.
For example if an Yndij Jack was making the Throw shown above, the Coach would roll 3 dice and compare them to the Yndij's 4+ Skill stat. Each dice that scored a 4 or higher would be successful, and only a single successful roll out of the three would be required to pass the test.
Modifiers
Sometimes, modifiers will apply to a dice roll, making it more or less difficult by increasing or reducing the number of dice rolled. This will be detailed under each test.
Continuing the example, let's say that the Yndij Jack was aiming at a target 4 hexes away, and had already moved as part of the Throw Action. The Throw Action lists the following modifiers:
- -1 modifier at a distance of 4-6 hexes
- -1 modifier if the Player moved or turned during this Throw Action
These modifiers will reduce the roll from 3 dice down to just 1, so there is a much smaller chance of succeeding.
Important! Modifiers always add or subtract from the number of dice to be rolled. They never modify the stat or the target number of successes.
If the modifiers reduce the number of dice to zero or less, the roll cannot be made and is considered to have achieved no successes. A roll like this can only be made with Coaching Dice. Note that even with zero successes, the Action itself can still be made - you could still draw in a Slam for example, and a Throw with no successes can still be Caught.
Exploding Successes
Dice that score a 6 count as a success like any other. However, for each 6 rolled you may take an additional dice and add it to your roll. If these subsequent dice also roll 6s the process is repeated. Keep rolling until no 6s are rolled. This is called an Exploding Success. In this way, a lucky Player can roll more successes than they had dice!
Re-rolls
Some rules allow a Coach to re-roll one or more dice from a test. This is decided after all dice have been rolled (and exploded) by both Coaches.
If both Coaches are able to re-roll all or part of a test, the Coach currently taking their Rush decides if they will do so first, and re-rolls any dice before the opposing Coach decides if they will also re-roll.
If both Coaches can re-roll the same single dice, the Coach that rolled that dice decides if they will do so first.
A dice that has been re-rolled can never be re-rolled again for any reason. The second result stands. A roll of a 6 on a re-roll will explode as normal, unless it was previously a 6 and had already been rolled up.
Doubling
In some tests, rolling double the target value or more achieves an improved effect.
So, if your target value was (1) and you achieved 2 or more successes, you have doubled the roll. You would also have doubled the roll if you rolled 4 successes in an (X) roll and your opponent only rolled 2.
If an opponent rolls zero successes, any number of successes will double their roll.
Coaching Dice
The blue dice included in the game are used by both Players and are called Coaching Dice. Some teams start the game with Coaching Dice, but they can also be earned by pleasing your fans during the match!
Any number of Coaching Dice can be added to a Player's test during your Rush or your opponent's, just like a modifier, and are treated just like regular dice. They cannot be used for scattering the ball or any other purpose. You must decide whether to use Coaching Dice before attempting a roll, or before both Coaches roll in the case of an (X) test.
Coaching Dice may be used to attempt otherwise 'impossible' rolls where other modifiers had reduced the number of dice for a test to zero or less.
Coaching Dice can only be used once - they are removed from play after being rolled.
The Ball
Launching the Ball
At the start of the first Rush, and every subsequent Rush that follows a successful Strike, a new ball is launched onto the pitch. This is carried out as follows:
- The ball is launched along the centreline of the pitch from the left of the Coach who is starting their Rush. Roll 1 dice to see how far it goes. Only count the hexes containing a DB logo. One of three things will happen: a. The ball moves 1-5 hexes without hitting anything. It will then stop. Go to step 2. b. The ball moves 5 hexes without hitting anything, a 6 was rolled. This means that it hits the opposite wall and then ricochets. Roll a second dice. On a 1-3 it is deflected towards the Rushing Coach; on a 4-6 it is deflected away. Roll a third and final dice to see how many hexes it moves in the new direction. c. There is a Player on one of the hexes into which the ball needs to travel. The ball cannot be Caught, and hits the Player regardless of their role and facing, even if prone. Treat this as if the ball had been Thrown at the Player. The number of dice rolled for the Throw depends on the distance the ball has travelled: 6 dice if the ball struck a Player in its first hex of movement, then 5, 4, 3, and 2 dice as it moves across the board. If it hits a Player after ricocheting, the Throw rolls 1 dice. The launched ball is treated as having 4+ Skill for the purposes of this test. Coaching dice cannot be used for the Throw as the Coach is rolling on behalf of the ball launcher, not themselves. The ball will then scatter as normal and can be Caught after it has scattered. Being struck by a launched ball does not end the Rush, but failing to Catch a scattered ball does.
- Unless a Player from the Rushing team failed in an attempt to Catch the ball, the Rush continues as normal.
Scattering the Ball
Much of the time the ball will be safely controlled by a Player. However, whether because of a missed Strike or because it is knocked from a Player's grasp, the ball will sometimes bounce randomly, or scatter, across the pitch as follows:
- Roll a dice for direction - see the scatter diagram at the side of the pitch. This is the direction the ball scatters in.
- Roll a dice for distance. The ball scatters this many hexes in a straight line.
If the ball hits a standing Player before it moves its full distance then either:
- The Player can try to Catch the ball if they would normally be allowed to. This works like an inaccurate pass. When working out if the Player can see the ball coming in order to Catch it, count the hex the ball originally scattered from as if it was the Thrower. A Player can double the Catch for a scattered ball with the normal benefits, even during the opponent's Rush. If this happens, then your opponent will resume their interrupted Rush once any Free Actions have been resolved.
- The Player is able to Catch the ball (even if they have no dice to do so), but does not want to. The Fans do not like such reluctance, and so the Coach must discard the top two cards from their Fan Support area (whether face-up or down). Scatter the ball again from the Player's hex.
- The Player cannot try to Catch the ball because they are a Guard or are facing the wrong way. Scatter the ball again from that hex.
Note that if a Player holding the ball is sent off or leaves the pitch while holding the ball, the ball will scatter as above from the hex they were occupying.
Ricocheting off the Wall
The unusual shape of the pitch sides can make the ball bounce dramatically. When a ball scatters into the edge of the pitch and hits the wall it will ricochet as follows:
The most common situation is when a ball hits an angled part of the wall. This works both ways, so a ball moving from one direction would bounce back towards the other. Most of the edge of the pitch is like this.
The second possible situation is in the corners of the pitch. In these cases the ball comes straight back in the direction it came from.
Inaccessible Ball
It is possible for a team to completely block access to the ball by the other side, which is frustrating for the opponent and crowds alike and slows down the game. The DGB is dedicated to keeping the game fast and fun, and so the ball is programmed to detect and prevent such situations.
If a Coach ends an Action with the Ref or their own Players blocking all routes to the ball for the opposing team (see Routes and Distances), it will instantly scatter.
In addition, the Entry Hexes must always be kept clear. If the ball scatters or is carried into an Entry Hex (only the single hex, not the surrounding entry area), it will instantly scatter.
Starting the Game
You now know everything you need to get started, so let's set up a game. Getting ready to play is quick and easy - just follow these steps.
- Each Coach chooses the team they want to use for the match, and takes the Team Card and miniatures.
- The Coaches toss a coin or roll a dice to see who will be the Home team, and who will be the Visiting team.
- Place the pitch between the Coaches, with the Home and Visitor's ends next to their respective teams.
- Shuffle the DreadBall Card deck and place it face down in the draw deck space on the board. Put the Special Effect counter next to it. See DreadBall Cards for more on cards.
- Deal each Coach the number of cards shown on their Team Card, if any.
- Place the Rush and Score counters on their respective '0' spaces.
- Place the Referee on the chequered hex near the centreline.
- Give each Coach the 5 Team Action Tokens and dice of their colour, along with any Coaching Dice listed on their Team Card.
- The Home Coach places up to 6 of their Players anywhere on their side of the starting line. The remainder of the team is placed on their Subs' Bench.
- The Visiting Coach then places up to 6 of their Players anywhere behind their starting line. The remainder of the team is placed on their Subs' Bench.
- The Home Coach starts their first Rush.
Playing a Rush
Each Rush consists of the following steps:
- Move the Rush counter one step along the track.
- Launch the ball if there isn't one in play.
- Spend an Action Token or Action card on a Player.
- Resolve the Action.
- Repeat steps 3 and 4 until your Rush ends (see below).
- End of Rush: a. Move any Players in the Sin Bin one step to the left, towards the Subs' Bench. b. Take back your 5 Action Tokens. c. Turn over the top card of the draw deck and move the Ref accordingly (see Fouls). d. Discard any Special cards in play and remove the Special Effect counter from any Player it is affecting.
None Left Standing: DreadBall is a violent game, and it is possible for a team to end up with no Players left on the pitch. In this case, the team still takes its Rushes as normal, hoping its injured Players recover before the opposition scores too many Strikes. Of course, in the bizarre history of the game it has been known for teams to win games with nobody left alive to collect the trophy if they racked up a big enough lead in advance.
Ending a Rush
A team's Rush can end in one of three ways:
- The team makes a successful Strike.
- The Coach runs out of Players that can act, or Actions that they wish to or are able to spend.
- Each Player can potentially act more than once, but the maximum for a single Player is 2 Team Actions and 1 Action card in each Rush.
- There is no set order to playing Action cards and Tokens. A Rush may continue as long as a Coach can play either.
- The team loses the ball. This can be by:
- Failing to Pick Up the ball
- Failing to make a Catch
- Missing a Strike
- Throwing the ball at another Player
- Falling over while carrying the ball
In all of these cases the ball will scatter.
As soon as one of these is true, the current Rush ends. Complete any remaining parts of the current Action (scattering the ball, etc.) and then resolve the End of Rush step. The opposing Coach then starts their next Rush by moving the counter along the Rush track.
Important: In all variations of case 3, if a scattering ball is caught by any member of the team that lost it then the Rush is not ended after all.
Also, note the distinction between falling over with the ball in your hands, and onto the ball on the floor:
- Falling over into a hex that already contains a ball on the floor will scatter it, but will not end your Rush. The same is true for a Guard that moves into a hex containing a ball.
- Falling over when you are carrying the ball will make you drop it, which will scatter the ball and will end the Rush.
Ending the Game
If a team manages to gain a 7 point lead at any point in the game they achieve an instant landslide victory. The other team is clearly outclassed and there is no point in continuing their embarrassment.
If the game reaches the end of the 14th Rush without either side gaining a 7 point lead then the team with the higher score wins.
If at the end of 14 Rushes the score difference is 0 then things are clearly well-matched. However, the DreadBall Governing Body doesn't like a draw, so the game goes into Sudden Death.
Sudden Death
Continue the game from the end of the 14th Rush, moving the counter back to Rush 1.
In Sudden Death you continue to play as normal with the following exceptions:
- No Player may come onto the pitch. It doesn't matter if they were sent off for a Foul, an injury, or moved off by choice - nobody comes back on.
- At the end of any Visiting team's Rush, if one team has the advantage, that team wins.
- At the end of any Visiting team's Rush, the score is still zero but only one team has Players left on the pitch who can Throw the ball (and therefore make a Strike), then that team wins.
In the rare event of both teams losing their last Jack or Striker at the same point, or neither team having any left when Sudden Death is called, the game actually is a draw.
Actions
During your Rush, you can spend your 5 Action Tokens to make Actions with your Players. You do not need to spend all 5 - you can use as many as you like up to this limit.
Each Player can have up to 2 Action Tokens spent on them per Rush.
To make an Action, nominate a Player and declare what type of Action they will make from the list below.
Prone Players must Stand Up before carrying out any other Action.
- Run
- Sprint
- Stand Up
- Slam
- Throw
- Steal
Carry out the Action as detailed in the following pages, and then place your Action Token to one side. It is now spent and cannot be used again in this Rush.
At the end of your Rush, take back your Action Tokens ready for the next Rush.
Things to Remember
- Throw, Slam and Steal Actions allow you to make a Run Action first, so you can move into position before carrying out the chosen Action.
- Some Actions are restricted to certain Player roles (listed under the Action's name). A Player who is not of the correct role may not perform that Action.
- Although a Player can act more than once in a Rush, these Actions do not have to be consecutive. A Coach may therefore make an Action with Player A, then make an Action with Player B, before returning to Player A. However, any Free Actions must be taken immediately by the Player that earned them; otherwise they are lost.
Free Actions
In some cases, when a Player carries out an Action particularly well they will be given a Free Action. This is an Action that doesn't cost an Action Token to use, and does not count towards the limit of 2 Actions per player. It follows all the normal rules for that Action. It must however be made immediately after the Action that generated it - you may not act with another Player and then come back to the Free Action.
The times at which Free Actions are granted are listed in the following pages.
Clever use of Free Actions can allow an individual Player to do far more than their normal limit of 2 Actions per Rush. In fact, it is even possible to score without using any Actions at all!
Cards
Additional Actions can be made over and above the Action Token limit by using Action cards from the Coach's hand.
In addition, Coaches may spend their Action Tokens to draw additional cards from the deck, instead of making Actions with their Players.
For the full rules for cards, see DreadBall Cards.
Run
Available to any Player
The Player may move a number of hexes up to their Move stat. During this movement, the Player can change facing freely - turning does not count towards the distance moved.
- Even if a Player only wants to turn on the spot, they must use a Run Action to do so.
- If a Player wishes to move further than their Move stat would allow, they may Dash (see Dash).
- If a Player is in an opposing Player's Threat Hex at any point and wishes to move out of that hex, they must Evade (see Evade).
- If a Jack or Striker enters a hex containing the ball they must try to Pick it Up (see Pick Up).
- If a Guard enters a hex containing the ball, it will scatter before the Player continues its movement.
A Run Action is very flexible and is not restricted by facing or turns.
Moving onto the Pitch
In order to move onto the board, a Player must be in the Subs' Bench and have a Run or Sprint Action played on them (this can be a Run Action made as part of another Action).
Their first hex of their movement must be into the Entry Hex adjacent to the Subs' Bench, and they may face any direction they want. The rest of their Action is resolved as normal.
Note that a Player cannot make any Actions such as a Slam while they are standing in the Subs' Bench - they must have moved onto the Pitch first.
Sprint
Available to any Player
The Player may move a number of hexes up to double their Move stat. Players may not freely change facing during a Sprint.
Instead, they can only move into the hex directly in front of them (i.e. their centre Threat Hex).
Sprinting Players may turn, but each 60° turn (one side of a hex) counts as one hex towards their total movement.
Sprinting Players Dash, Evade and Pick Up the ball just like Running Players.
A Sprint Action must pay for turning so is best at moving in a straight line. Even with twice the movement it cannot go as far if it tries to follow the path of the Run Action.
Moving off the Pitch
Moving off the pitch is just like entering the pitch, but in reverse. The Player must move off through the Entry Hex, and must have enough movement to continue into the Subs' Bench as if it was a separate hex.
You may only move onto your own Subs' Bench, never your opponent's.
Note that Players removed from the pitch following an injury or a Foul are simply placed into the Subs Bench or Sin Bin - they do not need to move off of the pitch in the normal way.
Dash
Available to any Player
A Dash allows a Player to extend a Run or Sprint Action, including those made as part of other Actions such as Slamming or Throwing.
Once a Player has moved as far as their Move stat will allow, they can attempt to move further by passing a Dash test.
A separate test must be made for each additional hex of movement or 60° turn (when Sprinting). There is no limit to the number of times this can be attempted in one Action.
Dash: Speed test (123)
Modifiers
- -1 per opposing Player threatening the hex you are moving from (maximum modifier -2)
Pass: The Player moves into the chosen hex or turns in the chosen direction. The Player may attempt to Dash again if they wish, but remember that it will be harder to succeed with each subsequent attempt. Otherwise, the Action ends.
Fail: The Player is laid prone in the hex they were moving to or turning in. The Action ends.
- If they were carrying the ball, they drop it and it scatters.
- If a loose ball was in the hex they were moving to, it scatters.
Evade
Available to any Player
A Player standing within one or more Threat Hexes runs the risk of being grabbed or tripped by their opponents. To leave such a hex, a Player must make an Evade test. Turning within a Threat Hex does not require a test.
Before rolling the dice, the Coach must state which hex they are attempting to move into.
A separate test must be made each time a player Evades during a move. There is no limit to the number of times this can be attempted in one Action.
Evade: Agility test (123)
Modifiers
- -1 per opposing Player threatening the hex you are moving from (maximum modifier -2)
Pass: The Player moves into the chosen hex. The Player may continue their move, Evading again if necessary. Remember that it will be harder to succeed with each successive attempt.
Fail: The Player is laid prone in the hex they were moving to. The Action ends.
- If they were carrying the ball, they drop it and it scatters.
- If a loose ball was in the hex they were moving to, it scatters.
Between a Rock...: Note that a Player may need to both Dash and Evade to move to a new hex. In this case, both tests must be passed in order for the move to be made. Roll each separately, the Evade first and then the Dash.
A Player can Dash and/or Evade to reach the Subs' Bench if they wish. Unless the Player is Restrained (see Fouls), any tests to move the final hex off of the board will be automatically passed.
Pick Up
Available to Jacks and Strikers only
If a Jack or Striker enters a hex containing a loose ball, they must attempt to Pick it Up.
During a Sprint, the Player will maintain their facing from before they moved into the hex with the ball. During a Run, the Player may choose their facing before attempting the Pick Up test.
Pick Up: Skill test (1)
Modifiers
- -1 per opposing Player threatening the hex you are in (maximum modifier -2)
- -1 if the Player was Sprinting
Pass: The Player picks up the ball. Place it onto the Player's base. The Action ends.
Pass Doubles: As above. In addition the Player may make an immediate Run or Throw Free Action.
Fail: The Player has fumbled and the ball scatters. The Action ends. If it is the Player's owning Coach's Rush, the Rush ends.
Stand Up
Available to any Player
A Player that has fallen or been knocked to the ground must make a Stand Up Action to try and recover.
Stand Up: Agility test (1)
Modifiers
- -1 per opposing Player threatening the hex you are in (maximum modifier -2)
Pass: The Player is placed upright, facing a direction of the Coach's choice. The Action ends.
Pass Doubles: As above. In addition the Player may make an immediate Run, Throw, Slam or Steal Free Action.
Fail: The Player is still groggy from the fall, and remains prone. The Action ends.
Slam
Available to Jacks and Guards only
A Slam is a brutal attempt to move an opponent out of the way, or take them out of the game for good!
Important: Players can make a Run Action as part of a Slam, before making the attack. This follows all the normal rules for a Run.
The target of a Slam must be a single opponent in one of the Slamming Player's 3 Threat Hexes.
- If the target Player is a Jack or Guard, and has the Slamming Player in one of their own Threat Hexes, they have two options - either to Dodge (see Dodge), or to Slam back. The target Player's Coach must choose before any dice are rolled.
- If the target Player is a Striker, or has the Slamming Player in their rear arc, they may only Dodge.
- If the target is prone, or a Player starts an Action in an opponent's front arc and uses a single Action to move behind them and Slam them in the back, then these are Stomp and Sucker Punch Fouls respectively. See Fouls.
As an (X) test, the successes for the Slam will be compared to the successes rolled by the opposing Player's Dodge or Slam.
Slam: Strength test (X)
Modifiers
- +1 if the Slamming Player did not start the Action adjacent to the target, but moved adjacent before Slamming
- -1 per opposing Player threatening the hex you are in, ignoring the Player you are attacking (maximum modifier -2)
Slam Wins: The winning Player turns to face the losing Player. The losing Player is pushed into one of the 3 hexes directly away from the winning Player, chosen by the winning Coach, and turns to face the hex they just vacated.
The winning Player may then move into the vacated hex if the Coach wishes, without needing to Evade. If so, they must again turn to face the losing Player. The Action ends.
Slam Doubles: As above. In addition, the losing Player is knocked prone and must make an Armour Check (see Armour Checks).
Draw: The Players both turn to face each other.
Slam Loses: The Slamming Player turns to face their opponent. Then, see the results for the other test.
Pushing Back
Sometimes one or more of the hexes behind an opponent may already be occupied. Players can only be pushed back into an empty hex.
If all 3 hexes behind an opponent are already occupied, then they cannot be pushed back. If they fall, they will instead fall down in the hex they started in.
If a Player is pushed onto a hex containing the ball, they must try to Pick Up the ball, if they can. This Pick Up test occurs after the Slamming Player has chosen whether to move into the vacated hex. If they cannot Pick Up the ball, fail their Pick Up test, or fall onto the ball, it scatters as normal.
Throw
Available to Jacks and Strikers only
This Action may only be used by a Player currently holding the ball. A Throw can be made to score a Strike, to pass the ball to a teammate, or even to hurl the ball at an opponent to injure them! In all cases a Throw test must be made.
Important: Players can make a Run Action as part of a Throw, before throwing the ball. This follows all the normal rules for a Run.
Firstly, you must nominate your target, which must be a Strike Hex, a teammate, or an opposing player.
- The target must be in your front arc.
- The target must be within 9 hexes.
- At least one of the shortest routes to the target (see Routes and Distances) must be clear of standing Players or the Ref, and every part of the route must be within the Throwing Player's front arc. If all possible shortest routes are blocked or leave the Player's front arc, the shot cannot be made. Prone players do not block Throws.
Note that Throwing the ball at an opponent is a DodgeBall Foul - see Fouls.
Once you have chosen a valid target, make the appropriate test. All Throw tests have the following modifiers:
Modifiers
- -1 modifier at a distance of 4-6 hexes
- -2 modifier at a distance of 7-9 hexes
- -1 modifier if the Player moved or turned during this Throw Action
- -1 per opposing Player threatening the hex you are in (maximum modifier -2)
Making a Strike
In addition to the standard criteria for picking a target, check the following before making the Throw:
- The Throwing Player must be within a Strike Zone, and can only aim at the Strike Hex in that Zone.
- The Throwing Player cannot be standing in a Strike Hex they are aiming at.
- You can target a Strike Hex even if another Player is standing in it. If you fail to score, the Throw will instead be resolved as if you had Thrown the ball at that Player, rolling all of the dice again as normal. This is not a Foul.
Throw (Strike): Skill test (1)
Additional Modifiers
- -1 modifier for aiming at a small target
Pass: Strike! Move the score counter towards you by the number of points scored (see Strikes and Scoring). The Action ends. If it is the Player's owning Coach's Rush, the Rush ends.
Pass Doubles: Strike! As above. In addition, the Coach may make a Fan Check (see Fan Checks). This is in addition to any other Fan Checks made for the Throw.
Fail: Miss! The ball scatters from the Strike Hex. The Action ends. If it is the Player's owning Coach's Rush, the Rush ends.
Passing to a Teammate
In addition to the standard criteria for picking a target, check the following before making the Throw:
- The teammate they must be capable of Catching the ball (i.e. not a Guard), and the Throwing Player must also be in the target's front arc.
Throw (Pass): Skill test (0)
Any Result: Keep note of how many successes you rolled. Move the ball to the Catching Player's hex, and the other Player must now attempt a Catch test. See below.
Catch
Available to Jacks and Strikers only
Catching the ball is not an Action in its own right, it is simply the result of a Throw Action. It does not use an Action Token or count towards a Player's limit.
Unlike most other tests, Catch tests are made with a variable number of dice. The number of dice used for the test is equal to the number of successes rolled for the Throw.
A Throw that achieved no successes is called an inaccurate pass. It can however still be caught. Remember that Strikers will still get their +1 dice for making a Skill test, and Coaching Dice can also be used to make the roll as usual.
Catch: Skill test (1)
Start with a number of dice equal to the number of successes rolled for the Throw.
Modifiers
- -1 per opposing Player threatening the hex you are in (maximum modifier -2)
Pass: The Player catches the ball. Place it into the hole on the Catching Player's base. The Action ends.
Pass Doubles: The Player catches the ball as above. In addition the Player may make an immediate Run or Throw Free Action.
Fail: The Player has fumbled and the ball scatters. The Action ends. If it is the Player's owning Coach's Rush, the Rush ends.
Steal
Available to Jacks and Strikers only
A Steal is a sneaky way to turn the game around by grabbing the ball from an opponent's hands before they can score.
Important: Players can make a Run Action as part of a Steal, before attempting to take the ball. This follows all the normal rules for a Run.
The target of a Steal must be a single standing opponent in one of the Stealing Player's 3 Threat Hexes that is holding the ball.
- If the target Player is a Jack, and has the Stealing Player in one of their own Threat Hexes, they have two options - either to Dodge (see Dodge), or to Slam (see Slam). The target Player's Coach must choose before any dice are rolled.
- If the target Player is a Striker, or has the Stealing Player in their rear arc, they may only Dodge.
As an (X) test, the successes for the Steal will be compared to the successes rolled by the opposing Player's Dodge or Slam.
Steal: Agility test (X)
Modifiers
- -1 per opposing Player threatening the hex you are in, ignoring the Player you are attacking (maximum modifier -2)
Steal Wins: The ball is knocked from the opponent's hands. Scatter the ball. The Action ends.
Steal Doubles: The Stealing Player takes the ball. Place it into the hole on the Stealing Player's base. The Action ends.
Draw: The Players both turn to face each other.
Steal Loses: The Stealing Player turns to face the other Player. Then, see the results for Slamming/Dodging.
Dodge
Available to any Player
Dodging is not an Action in its own right, it is simply a way of escaping a Slam, Steal or a Thrown ball. It does not use an Action Token or count towards a Player's limit.
As an (X) test, the successes for a Dodge will be compared to the successes rolled by the opposing Player's Slam, Steal or Throw.
Dodge: Agility test (X)
Modifiers
- -1 per opposing Player threatening the hex you are in, ignoring the Player attacking you (maximum modifier -2)
- -1 if the Player is Dodging an attack of any kind coming from their rear arc
- -2 if the Player is Dodging a Thrown ball
Dodge wins: The Dodging Player may turn to face any direction. The Action ends.
Dodge Doubles: The Dodging Player may move 1 hex in any direction, and choose any facing, without making any Evade rolls.
Draw, or Dodge Loses: See the rules for the Slam, Steal or Thrown Ball that the Player was Dodging.
Armour Checks
In DreadBall, Players are subjected to a huge amount of physical punishment, whether from the 200mph weapons-grade titanium ball itself or the gentle ministrations of their fellow Players. To prevent their star attractions from becoming a smear on the neodurium five minutes into a match, all teams invest large sums of money into personal armour for their Players.
Whenever a Player might suffer damage, such as being on the receiving end of a vicious Slam, the Player must make an Armour Check. This is not an Action in its own right, it is simply a way of deflecting damage. It does not use an Action Token or count towards a Player's limit.
The damage applied to a Player is equal to the difference between the winning and losing rolls made during the Action that damaged them.
An Armour Check is a normal 3 dice test, but the target number is equal to the damage received.
Armour Check: Armour test (Damage)
Each success made on the Armour Check cancels a single point of potential damage.
If the total number of successes equals or beats the amount of damage then the Player is unharmed.
If there is damage remaining, they have been injured and will be sent off of the pitch to recover. They will be placed in the section of their Coach's Sin Bin equal to the remaining damage, and will take that many Rushes to recover. If the remaining damage is 4 or more, the Player has been seriously injured and is removed from the game permanently.
Run Interference
Available to Jacks only
Jacks may not be as strong as Guards or as nimble as Strikers, but they do have a knack for being in the right place at the right time (or the wrong place at the wrong time, depending on which team you're betting on).
Run Interference is perfect for taking out an unsuspecting Striker making a dash for the Strike Zone, picking up a ball left carelessly close by, or simply getting in the opponents' way.
It is not a normal Action and cannot be chosen as part of a team's Rush. Instead it is used in the opposing Coach's Rush as a way of interrupting their plays. The Action can only be made by using an 'Any Action' card on a Jack. Note that this is an exception to the normal rules where an Action card can only be played in your own Rush.
The Run Interference Action allows the Player to make a one-hex move, and/or a Slam or Steal. They may not Run before making the Slam or Steal - they may only move the single hex.
Run Interference can happen at any point during an opposing Player's Action. The opposing Coach finishes any tests that they had started rolling for, fully resolving any results, and then stops. The Run Interference Action is carried out. If able, the opposing Coach may resume any remaining parts of their original Action once you are finished.
Each opposing Action can only be interrupted by Run Interference once, even if you have multiple cards.
Important Points
- The Interfering Player cannot Dash, but may need to Evade as normal.
- The one-hex move can be used to move a Player onto the pitch from the Subs' Bench.
- If the Player moves into a hex containing the ball they may attempt a Pick Up as normal.
- Should an Interfering Player move to block the path of a Strike attempt, the interrupted Player may continue their Action as normal but may be unable to score if there is no longer a clear path to the Strike Hex. The interrupted Player must choose a new target for their Throw, or complete their Run without Throwing.
- The target of any Slam or Steal does not need to be the Player whose Action was interrupted.
- The interrupted Player's Action ends if the Interfering Player wins a Slam against them.
- The interrupted Coach's Rush is over if their team loses the ball as a result of the Run Interference Action.
"Romeo Blue has the ball, and he's bearing down on the Tree Shark's three point zone. But the crafty jungle dwellers have a three-deep defence that the rambling robot will have to get past first - I don't like those odds."
"I'll take that bet Elmer - with T'tana and Na'huatl focused on Romeo, his teammate Whiskey Rose has the opportunity to slam Da'nogo out of position, opening up a chance for Romeo to slip past and score!"
"Except Romeo must have a circuit loose Dobbs - I don't know what he was waiting for, but Na'huatl and T'tana are taking the fight to the All-Star's captain, with a vicious double body-check that puts the machine on the ground. The ball is free - it's anybody's game at this point!"
"Na'huatl is scrambling for the ball, but so is Whiskey Rose! It's a race between muscle and machine, as the two athletes dive for their titanium prize-"
"-and it's Whiskey Rose! She scoops the ball into her glove and whips it up and away right out from under the crafty Yndij!"
"Who in the wide galaxy does she think is going to catch it - and it's Blue! Romeo Blue is in the Strike Zone! You can't keep a good 'Bot down, and Blue makes it look easy with a masterful catch. Blue winds up for a Strike, and there's the throw-"
"And it's good! Three points to the Draconis All-Stars! The crowd cannot believe it!"
"That's twenty credits you owe me Elmer."
DreadBall Cards
To add an extra layer of tactics to your games, DreadBall includes a deck of cards that allow you to subvert the usual sequence of play and pull off some exceptional combinations. You may not have used them for your first few games, but you'll get used to them very quickly.
The Card Deck
At the start of the game, shuffle the deck of cards and place them face down in the draw deck space on the board as explained in Starting the Game.
These will be drawn and used by the Coaches during the match. Once a card has been used, it is discarded - place it in the discard pile space on the board.
If the draw deck ever runs out, shuffle the discard pile to make a new draw deck.
Each card has three distinct functions, which we will cover in turn:
- They are primarily drawn and played during the game to support your team, granting additional Actions to your Players and executing special effects. The cards in each Coach's hand are used for this purpose.
- They are used to move the Referee (this will be covered in the Fouls section).
- They are used to generate 'Cheers' following a Fan Check (see Fan Checks).
Your Hand of Cards
Before the first Rush, each Coach must be dealt the number of cards shown on their Team Card, if any.
Each Coach's hand of cards is to be kept secret from the opposing Coach until the cards are played.
During the game, Coaches will have a chance to draw additional cards into their hand. There is no limit to the number of cards that a Coach can hold.
Drawing Cards
During their Rush, a Coach can spend an Action Token to take the top card of the draw deck into their hand, instead of making an Action with a Player.
In each Rush, a Coach can draw up to the number of cards listed on the team's starting roster, to a minimum of 1, even if the team started with no cards. There is no maximum hand size.
Playing Cards
Cards can be played from each Coach's hand during the game. For the purposes of playing cards, ignore the number in the top left, as well as the Fan Support value at the bottom - we'll get to those later. For now all that matters is the main card text.
You will notice that the cards come in two different colours.
- The blue-headed cards are Action cards. These are used to grant additional Actions to your Players.
- The orange-headed cards are Special cards. These introduce new effects to the game that can aid your Players or hinder your opponents.
Action Cards
These cards can be played any time that you would be able to play an Action Token, but they may be restricted to a certain Player role or Action type, as detailed on the card.
Playing an Action card allows a Player to make any Action specified on the card. No more than one card may be played on a single Player in each Rush.
This can take the Player over their usual limit of 2 Actions per Rush, and will allow a Coach to make more than 5 Actions per Rush in total.
Once the Action has been made, the card is discarded.
Special Cards
These can be played at any time during either Coach's Rush, and the text on the card will be resolved immediately.
Once the text has been resolved, the card is discarded. If the card states that it 'Remains in Play', it is placed in the space to the side of the discard pile as a reminder. It will be discarded at the end of the current Rush.
Only one card can be in play at a time. If there is already a card in this space, any other 'Remains in Play' card played by either Coach in that Rush will replace the one previously in play.
Special cards can be played during an opposing Player's Action. The opposing Coach finishes any rolls and tests that they had started rolling for, fully resolving any results, and then stops. The card text is then resolved. If able, the opposing Coach may resume any remaining parts of their original Action once you are finished.
Some cards will affect a specific Player. That Player (or their number in the Action Log area) should be marked with the Special Effect Counter. This counter is removed when the card is discarded at the end of the Rush.
There is no limit to the number of Special cards that can affect a Player in a Rush.
For example, if a Player was Running towards the Strike Zone to score, the opposing Coach could interrupt their Run to put the Worse for Wear card into play, selecting the interrupted Player as the target. The interrupted Player could then continue their Action, finishing the Run and making the Throw, but the rules on the card would affect the roll.
If the card was put into play after the Player had already started rolling for their Throw Action, the Throw test would be fully resolved before the card text came into play. As you can see, it's important to watch the game carefully and play any cards at the right time.
Turning the Tide
In addition, cards can be used to regain the advantage when things aren't going your way. Any card can be discarded from your hand after making a dice test to re-roll a single dice of your choice. The card's type and text are ignored. See Re-rolls.
Fouls
It may be an amazingly fast and brutal sport, but even DreadBall has rules. Each game is overseen by a robotic match official: the Ref. It is their job to ensure that the game is played fairly, or at least that those who break the rules are punished.
A Foul is the term for an illegal Action - something that breaks the rules of sporting conduct. This is a game term and refers to the Players on the pitch, not to Coaches palming cards and other real-world cheating. In the real world, Coaches should play entirely fairly. What their Players get up to on the pitch is another matter...
While the opposing Coach may not be too happy about you Fouling their Players, the fans on the other hand can't get enough of it! If you're lucky, Fouling can be a great source of cheers...
The Referee
The Referee, or 'Ref', will have a chance to Spot Fouls that take place nearby, and potentially send Players off for cheating.
The Ref is on the pitch with the Players, and can't be everywhere at once. Although they sometimes literally have eyes in the back of their heads, they can be distracted, and if their attention is focused elsewhere it's possible to sneak a Foul past them.
The Ref can see in every direction, and has no facing or rear arc.
The Ref may never be the target of any Action or card except Distract. If they are ever hit by the ball for any reason it will scatter with no further effect.
Moving the Ref
The Ref starts the game on the hex that looks like this. The Ref moves around the pitch at the end of each Coach's Rush.
The Coach who has just completed their Rush discards the top card from the draw deck. This is where the number in the top left corner comes in. The Rushing Coach may then move the Ref up to the number of hexes shown at the top of the card. The Ref does not have to move the full distance, or even at all, if the Coach wishes.
However, because the Ref is trying not to get in the way they may not end their move within the Strike Zones, Entry Areas, or on the centreline. Moving through these areas is fine as long as the Ref does not end its move within them.
In addition, a Ref will never move into a hex containing the ball.
The Ref never needs to Evade and cannot Dash.
Calling Foul
In the hurly-burly of the game, it's easy to miss a Foul. To keep the game moving (and because it's fun) a Coach has to call Foul when one of their opponent's Players breaks the rules.
There are several types of Foul, listed below.
A Coach can call Foul at any point during an opponent's Action in which a Foul is being committed, and must declare which Foul(s) they have seen.
Note that the Player committing the Foul might not be the one currently acting.
If you do not call Foul before the next Player is chosen for an Action (from either team), you have missed your chance and the Foul goes unnoticed. Play continues as normal. You'll just have to find another way to get your own back...
Some Fouls are continuous, and may last longer than a single Action, such as a Sneak. The opposing Coach must remember to call Foul during each Action while it is happening, and a Spot Foul test must be made each time until the Foul is no longer being committed.
If a Foul continues into your own Rush, you will have to wait until the opponent's next Rush to call it again.
Spotting a Foul
Spotting a Foul is a test made when a Foul is called. The test is rolled by the Coach that called Foul, after the Fouling Coach's current Action has been resolved.
In response, other Players from the Fouling team can attempt to Distract the Ref. These two new Actions do not require an Action Token to be spent and are not made against any particular stat - they will succeed on a 4+.
Spot Foul rolls are made on 3 dice as normal. Coaching dice cannot be used as the Coach is rolling on behalf of the Ref, not themselves.
Distract rolls however are made on a number of dice equal to the number of Players that choose to Distract the Ref. Only standing Players from the Fouling team within 7 hexes of the Ref and not within an opposing Player's Threat Hex are eligible to Distract, and Players can choose not to Distract if the Coaches wishes. The Player committing the Foul themselves cannot Distract the Ref. Coaching dice can be rolled as normal.
If there are no eligible Players from the Fouling team within 7 hexes of the Ref, the Distract roll is considered to have rolled zero successes. As with any other test, even if both rolls result in zero successes (or roll no dice in the first place) the overall result can still be a draw.
Note that certain cards can modify these tests in addition to modifiers listed here.
If more than one Foul has been committed at the same time, resolve them in an order of the calling Coach's choice. The Coach calling Foul must have declared each of them - if they only noticed one, only one can be Spotted!
Spot Foul: 4+ test (X)
Modifiers
- +1 if the Foul was committed within 7 hexes of the Ref
Distract: 4+ test (X)
Start with a number of dice equal to the number of Players that chose to Distract.
Modifiers
- +1 if any of the Distracting Players are Guards
Distract Wins: The Ref has been Distracted and not noticed the Foul. There is no further effect.
Draw: The Fouling Player is sent off, and placed in their Coach's Subs' Bench.
Spot Foul Wins: The Fouling Player is sent off, and placed in the section of their Coach's Sin Bin equal to the difference in successes rolled. If this number is 4 or more, the Player is sent off for the rest of the game.
Spot Foul Doubles: As above. In addition, the winning Coach chooses one of the Distracting Players (if any) and sends them to their Coach's Subs' Bench.
Sucker Punch
Available to Jacks and Guards only
Running around behind someone to Slam them in the back is considered unsporting. A Sucker Punch is where a Player starts their Action in an opposing Player's front arc, and uses a single Action to move behind them and Slam them in the back.
If the Slam doubles, the Slamming Coach makes a Fan Check, even if the Slamming Player was sent off.
Note that moving behind someone with one Action, and then Slamming them from behind with a second Action is not a Foul; nor is Slamming someone from behind if they just happen to be facing away from you.
Stomp
Available to Jacks and Guards only
Some Players find the sight of an opponent on the floor too tempting, and they put the boot in to ensure that their opponents stay down. A Stomp is a Slam made against a prone opponent.
If the Slam doubles, the Slamming Coach makes a Fan Check, even if the Slamming Player was sent off.
See Prone Players for more details.
DodgeBall
Available to Jacks and Strikers only
Sometimes, desperate situations call for desperate measures, and this is one of them. Throwing the ball at an opponent will likely end your Rush, so it's not to be tried lightly.
A DodgeBall Foul is a Throw, with all the normal modifiers, where the target is an opposing Player. Move the ball to the target Player's hex, and the opposing Player must then attempt to Dodge the ball (see Dodge). As an (X) test, the successes for the Throw will be compared to the successes rolled by the opposing Player's Dodge.
In all cases, after determining the result, the ball scatters from the target hex. If it is the Throwing Player's owning Coach's Rush, the Rush ends.
Throw (Opposing Player): Skill test (X)
Throw Wins: The losing Player is pushed into one of the 3 hexes directly away from the winner, chosen by the winning Coach, and turns to face the hex they just vacated. The Action ends.
Throw Doubles: As above. In addition, the losing Player is knocked prone and must make an Armour Check (see Armour Checks). The Throwing Coach makes a Fan check, even if the Throwing Player was sent off.
Draw: The Dodging Player may turn to face any direction. The Action ends.
Throw Loses: See the results for Dodging.
Restrain
Available to any Player
Slams, nudges and trips are all fair game, but physically holding a Player in place and preventing them from taking part in the game goes against DreadBall's fast playstyle.
A Player may choose to commit a Restrain Foul whenever an opposing Player in one of their Threat Hexes attempts to Evade.
The Evade roll will suffer an additional -1 modifier as the Player is held in place, which can take the test past the -2 maximum. If the Evading Player falls over, they fall in the hex they were moving from, rather than the one they were moving to.
Whether the Evading Player succeeds or not, the Player who Restrained them has committed a Foul.
If the Evading Player falls over, the Restraining Coach makes a Fan Check, even if the Restraining Player was sent off.
Stall
Available to any Player
The gate by the Subs' Bench opens onto the Entry Area, and an unscrupulous Player can deliberately block this so that the opposing Coach can't reinforce their team.
If a Coach ends an Action with a Player within the opposing Coach's Entry Area (even if the Player entered the area involuntarily or is prone), that Player is committing a Stall Foul.
A Player is not committing a Stall Foul if they Picked Up the ball as part of the current Action. Players are given one chance to retrieve a ball, but if they haven't vacated the area by the end of the Coach's next Action, they are Stalling again.
This is a continuous Foul.
If the Fouling Coach ends their Rush without their Stall Foul being Spotted, the Stalling Coach makes a Fan Check.
Sneak
Available to any Player
The legal maximum number of Players on the pitch at any one time is 6. However, this isn't always enough for a desperate Coach.
If a Coach ends an Action with more than 6 Players on the pitch, they are committing a Sneak Foul.
This is a continuous Foul.
All of the Players in the team are committing this Foul at once, and so it can be Spotted without penalty if the Ref is within 7 hexes of any of the team's Players.
All standing, unthreatened Players on the Fouling team within 7 hexes of the Ref may contribute a dice to any Distract roll made.
The Player to be sent off if the Foul is spotted will be the one closest to their own Subs' Bench. If there are multiple Players an equal distance from the Subs' Bench, the opposing Coach chooses who gets sent off. If a Coach is Sneaking with more than one extra Player, a separate test must be made for each one called by the opposing Coach.
If the Fouling Coach ends their Rush without their Sneak Foul being Spotted, the Sneaking Coach makes a Fan Check.
Keeping Quiet
Although committing Fouls gets the crowd to pay attention, it doesn't mean that your opponent is... All Fan Checks made after a successful Foul are optional. If the opposing Coach hasn't noticed you Fouling, it might be best to stay quiet!
Fan Checks
The fans like to see their teams trying their hardest, and the Players like to hear the roar of approval from the crowd. Each feeds off the other. The fervent support of your fans can earn you extra Coaching Dice, so it's well worth keeping them happy!
Whenever a Player achieves one of the dramatic acts listed below the crowd goes wild, and you must immediately make a Fan Check.
- Scores a bonus point.
- Doubles when making any Strike.
- Inflicts 3 or more damage on an opponent in one go.
- Catches a scattering ball or a 9-hex pass.
- Dashes 3 times in the same Action without falling.
- Evades 3 times in the same Action without falling.
- Triples their opponent in any (X) roll as long as at least 3 successes are rolled.
- Committing a particularly successful Foul (see Fouls for details).
To make a Fan Check, simply turn over the top card of the draw deck. This is where the Fan Support value on each card comes in - all other parts of the card are ignored.
The number shown on the card is the number of 'cheers' generated by the fans. Place this card face up in the Fan Support Bank on your side of the pitch.
If the card you have just drawn takes the total number of visible cheers to 3 or more then all the face-up cards are turned over and placed face down instead. In return, your team is so inspired by the crowd's support that you gain your choice of a Coaching Dice or a card.
Note that some Actions can result in more than one Fan check being due. In these cases, simply make each Fan check in turn, taking Coaching Dice or Cards as they are earned.