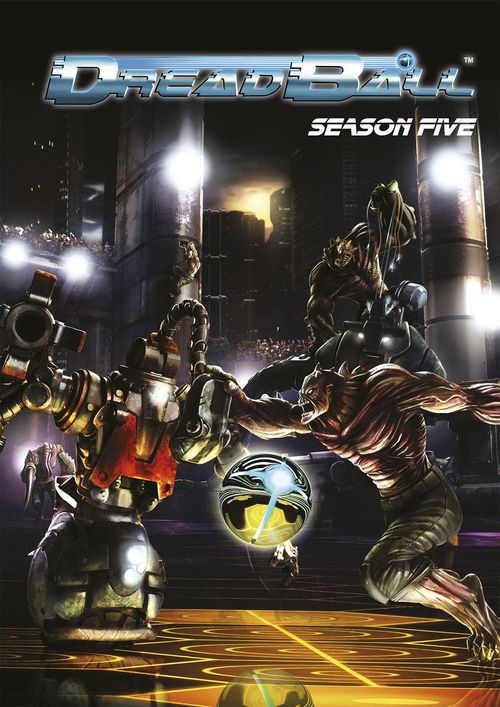
Dreadball: Season 5
Dreadball: Season 5 Rulebook
Table of Contents
Table of Contents
New Rules
Exhibition Matches
Exhibition Matches have grown in popularity over the years and now form a major part of the sport's promotional work. Digby uses exhibition matches to raise funds for charities, to showcase rising stars within the game, and to test out new teams to see how the audience reacts. It is the most deliberately populist and customer-centric part of the DGB's plans. As fans leave matches they are likely to be asked to take part in surveys, offered prizes for their opinions and generally bribed or cajoled into giving up their views for research that genuinely does affect the future of the game. DGB takes its customers very seriously.
With the popularity of DreadBall Xtreme, the exhibition matches have recently been filled with almost convicts and sort of aliens to test the waters of opinion. They have been a big hit.
If you want to play your own exhibition matches then simply follow the guidelines laid out on page 50 of the main rules. Teams for exhibition matches also have access to all the additional rules for coaching staff, cheerleaders and new teams from Seasons 2, 3 and 4. Coaching dice and cards are bought as they are in leagues (see page 61 of the main rules).
One unusual option for Exhibition Matches is the ability to pick your players from a variety of different teams. You can even build yourself a mutant or robot or two to mix in with other, more normal, players. This flexibility is a very potent tool for a Coach, perhaps too potent, and this may be why the DGB restrict it to one-off matches rather than allow it in leagues. Perhaps also it is the similarity to the way Xtreme teams are organised which sets the DGB so strongly against it. Despite this, for the limited purposes of an Exhibition Match, it does provide a dramatic spectacle for the crowds and you may want to experiment with it in your matches. Quite apart from anything else, understanding how an opposing player works, their advantages and disadvantages, helps you to play against them when your league team next meets them. And what better way to understand a player than have them on your team for a match?
Brewed in a Vat – Customised Mutant Teams
Since time immemorial people have wanted to be stronger, faster or simply better. Some tried fad diets, rigorous exercise, brain training or meditation. Still others turned to science for the answer. For generations, learned men and women have strived to understand the body in all its intricacies so that they could manipulate the most basic of life's building blocks. It took centuries of endeavour, but in the end the scientists finally achieved their goal. Within their grasp was the means to create any form of life they chose and to manipulate it in any way. Naturally, it was banned almost immediately.
However, once something has been invented it is very hard to uninvent it again, and backstreet "mutie parlours" began to spring up on the dangerous planets at the edge of civilised space. Rumours abounded about slaves being brewed in vats for the sex trade or the asteroid mines – willing drones who cared about nothing except fulfilling their designated role. In some ways, the perfect citizens.
Recent changes in the law have brought some of this technology back a little closer to the mainstream. Now, under strict guidelines, certain cosmetic and elective changes are allowed. Now children can be designed for height, intelligence, hair colour, or any other feature. Now those Coaches with enough cash can create exactly the players they need.
The process begins with a basic human template. This is the most easily grown and most easily manipulated. That is the reference point. This can then be modified by adding different limbs, head or legs depending on the intended role the player will take. Any parts that are not upgraded will remain outwardly human, though there may be internal improvements as well. Whether the end result is still human or not is the matter of some debate.
Breeding a Better Player
It is a matter of some amazement to the other civilised races of the galaxy that the human race makes distinctions between 'pure bred' and 'mutated' humans. No other race has so readily embraced the ability to adjust and modify their own characteristics to best suit environment, vocation, or simple personal whim. Indeed, it is the opinion of several of the more radical thinkers amongst the Kalyshi that it is this willingness to 'mongrelise' themselves that has led to humanity being the fastest growing species in the galaxy.
Technology that could enhance any particular physical or mental aspect of a human being from birth was commonplace even before the McKinley drive first pushed humanity to the farthest reaches of the galaxy, and has only been refined ever since. In the polite society of the inner Sphere, it is an act viewed with immense distaste to debase one's gene pool in this way. Further out, in an environment where life is harsh and work difficult to come by, men and women will happily have their children modified in whatever way is necessary and affordable in order to be better equipped for whatever life confronts them. It was only a matter of time before someone realised the potential applications for DreadBall.
Initially, the DGB banned such artificially modified players, claiming that it was an ethics issue which diluted the sport. However, as time went on and 'mutant rights' became a more pressing issue, they found themselves increasingly unpopular for this stance. Eventually, it was decided that enhanced players could compete, so long as the enhancements that they were given were fitted to one particular role, thus preventing the creation of a team of 'super players' which could dominate in every position on the pitch. Unfortunately (or not dependent on your point of view) the DGB neglected to regulate the source of the enhancements. This led to some very unusual combinations of body parts and inter species experimentation from all the races involved in the game. Still, it brings the fans in…
Perfection by Design
In game, a Coach can create the player(s) they want by using the following system.
Importantly, the crowd is expecting to see a team of mutants, and you can't disappoint the crowd. For this reasons, whatever combinations you choose for your players, you must always make sure that:
- Each player has at least one upgraded body part.
- No two players in the team have exactly the same set of upgrades.
Start by choosing the player role you want to create. Read through the options for that role listed in the upgrade tables over the next few pages, and choose which you want to add to the player. Each upgrade is listed with the cost in Megacredits that will be required to use it. The total cost of each player modified will be the normal baseline cost of that player, plus the cost of any upgrades taken. That player's stat line will be the basic stat line listed for that role, modified by their upgrades.
Each part (head, arms, etc) may only be upgraded once. This includes Internal and Additional upgrades.
When you upgrade a body part you should change the player's model accordingly. This gives a great opportunity to have some fun with your models, and really create some bizarre and memorable characters for your collection. Internal upgrades of course do not require modelling, but you can have a lot of fun trying to decide how best to portray them on your players.
The following upgrades are available. You cannot mix options from different roles on the same player – even the DGB has limits!
Guard
Base stat line: Move 5, Strength 4+, Speed 4+, Skill 4+, Armour 4+. Base cost 11mc.
| Upgraded body part | Upgrade type | Stat/Ability changes | Cost |
|---|---|---|---|
| Head | Grogan | Threatening | 4 |
| Head | Nameless | Alert | 1 |
| Arm(s) | Tentacle | Gotcha! | 4 |
| Arm(s) | Teraton | 3+ Strength, Keeper | 8 |
| Arm(s) | Z'zor claw | 3+ Strength | 3 |
| Internal | Enhanced muscle density | Grizzled | 4 |
| Internal |
Jack
Base stat line: Move 5, Strength 4+, Speed 4+, Skill 4+, Armour 4+. Base cost 7mc.
| Upgraded body part | Upgrade type | Stat/Ability changes | Cost |
|---|---|---|---|
| Head | Compound eyes | 360 Vision | 2 |
| Arm(s) | Z'zor blade | A Safe Pair Of Hands | 2 |
| Torso & Legs | Yndij | Move 6, Duck & Weave | 5 |
| Additional | Kraaw wings | Jump | 2 |
| Additional | Sphyr tail | Tail | 2 |
| Internal | Enhanced twitch response | Stretch | 2 |
Striker
Base stat line: Move 5, Strength 4+, Speed 4+, Skill 4+, Armour 5+. Base cost 11mc.
| Upgraded body part | Upgrade type | Stat/Ability changes | Cost |
|---|---|---|---|
| Head | Judwan | Alert | 1 |
| Head | Asterian | Taking a Dive | 4 |
| Arm(s) | Judwan | Long Arms | 4 |
| Additional | Veer-myn tail | Tail | 2 |
| Internal | Augmented focus | 3+ Skill | 4 |
| Internal | Accelerated metabolism | Move 6 | 3 |
Building Bots – Customised Robot Teams
For those who lack the stomach or the funds to engage in biological manipulation and mutation, and all of the troubling side effects and potential mistakes, there are always the cheaper and easier options of customisation available to robots.
Long before humans learned how to tinker with their own inner workings they were building artificial copies of themselves. The crude beginnings eventually led to extraordinarily skilled machines that are often more capable than the humans who built them.
Robot teams are of course a regular feature of the DreadBall leagues and have been for some time. However, these teams usually tend to be standardised factory line assemblies – uniform chassis with identical features and capabilities that are designed to switch between roles and be reasonably competent at each one. Sometimes however a coach will want to take a more bespoke approach, sacrificing the usual versatility of robot players for the opportunity to create tailor-made machines to fulfil each role on the pitch perfectly. It's a gamble, but one that several coaches with slightly deeper pockets than the average have taken with no small degree of success.
The Mechanics of Perfection
A Coach can create one or more different types of robot player using the following steps.
- Decide on the role you want the robot to play in by selecting its Basic Coding. You will see that this will restrict some options later.
- Choose one option from each of: locomotion, chassis, and head – these will help to make the player unique.
- Select 2 arms – one for each side as you might expect. Though robots can theoretically have as many as they like, the DGB limits modifications to two to keep things reasonably fair (and sane!)
- Finally, if you choose, you may add as much optional programming as you like, subject to the restrictions on player type that each one comes with. These will help to individualise each player further.
The cost of each player is worked out as you go along as follows:
- If a new part adds or improves a stat or ability then you must pay for it.
- If a new part does not add or improve a stat or ability then you get it for free.
By the time you have added the cost of the last programming option you select you will have calculated the total cost of the robot.
A robot's final stat line is made up of the stats and abilities listed in the separate parts. If the same stat is listed for two different parts, keep the better value. For example, if part A says Strength 3+ and part B says Strength 4+ then use 3+. All other stats and abilities attached to both parts are used. There is no benefit for having the same ability twice.
The model parts for the robot player can be assembled in the same order as you make the choices, below. Of course, this gives a great opportunity for you to get really creative with your models.
Basic Coding
At the very core of a DreadBall robot is its role coding. This defines its physical build quality and parameters as well as its tactical outlook and basic strategy software suite.
| Type | Role | Stat/Ability changes | Cost |
|---|---|---|---|
| Guard | Guard | Guard role bonuses | 4mc |
| Jack | Jack | Jack role bonuses | 2mc |
| Striker | Striker | Striker role bonuses | 4mc |
Locomotion
There are of course many ways in which a robot may get about, from wheels to multi jointed legs. Differences tend to be more pronounced in form rather than function, but a canny coach knows the choice can be crucial.
| Type | Role | Stat/Ability changes | Cost |
|---|---|---|---|
| Quad wheels | Any | Move 5, Speed 5+, Steady | 4mc |
| Monowheel | Any | Move 6, Speed 5+ | 4mc |
| Quad legs | Any | Move 4, Speed 5+, Steady | 2mc |
| Bird leg | Jack or Striker | Move 6, Speed 5+, Duck & Weave | 6mc |
| Armoured legs | Jack or Guard | Move 5, Speed 5+ | 3mc |
Chassis
The Chassis is where most of the mechanics and electronic control systems of a robot are housed, and it will consequently tend to be the densest and most well protected part of the machine, regardless of role. Further modifications are then made to tailor the robot to its position, making it fast, strong or agile enough to fulfil its duties on the pitch.
| Type | Role | Stat/Ability changes | Cost |
|---|---|---|---|
| Body A | Any | Strength 4+ | 2mc |
| Body B | Jack or Striker | Strength 5+, Speed 4+ | 3mc |
| Body C | Any | Strength 5+ | 1mc |
| Body D | Jack or Guard | Strength 4+, Can't Feel A Thing | 5mc |
Head
Speed of reaction and Skill is not so much a physical thing as a programming refinement, and this is traditionally housed in the head. This may seem like a throwback to the humans who built it, but in fact it is a practical decision. Shortening the distance that information needs to travel between sensors and processing has two main advantages. Firstly, it cuts down the chance of damage interfering with the information flow as there is less cabling to interrupt. Secondly, a shorter physical distance to travel means less wiring to travel through, and this can reduce the response time by milliseconds. Sometimes milliseconds count.
| Type | Role | Stat/Ability changes | Cost |
|---|---|---|---|
| Cranehead | Jack or Guard | Skill 5+, Gotcha! | 5mc |
| Quadeye | Any | Skill 4+, Speed 4+ | 4mc |
| Radar | Jack or Striker | Skill 3+, Fragile | 5mc |
| Slim | Any | Skill 4+ | 2mc |
| Tank | Jack or Guard | Skill 5+ | 1mc |
Arms
Mortal players are restricted to what training, drugs or the compatibility of tissue will grant them in terms of arm strength and dexterity. Robots have no such restriction, and the variety of arms available help to really tailor each one into a perfect player. From delicate manipulators designed to perfectly catch a fast thrown ball to the brute force of hammers and rams to smash opponents out of the way, it is here that the true nature of a robot may quickly be discerned.
Choose two from the following list. A Jack must take at least one of the arms marked with an asterisk.
| Type | Role | Stat/Ability changes | Cost |
|---|---|---|---|
| Wrecking ball | Jack or Guard | Strength 3+ | 5mc |
| Air cannon | Jack or Guard | Shove | 2mc |
| Grab | Jack or Guard | Gotcha! | 5mc |
| Hammer | Jack or Guard | Pile Driver | 3mc |
| Ram | Jack or Guard | Strength 4+, Shove | 5mc |
| Hand* | Any | Skill 4+ | 2mc |
| Launcher* |
Note that Long Arms is allowed to robots with Launchers even though the ability is normally restricted to Judwan players.
Programming
Once a robot has been assembled, its performance can be slightly tweaked by adding new software to alter the way it uses that body. This ranges from different ways to allocate and use its available power to upgraded awareness of opposing player's likely trajectories.
| Type | Role | Stat/Ability changes | Cost |
|---|---|---|---|
| Damage control | Any | Quick Recovery | 4mc |
| Tactics Upgrade | Jack | Run Interference | 2mc |
| Situational awareness | Jack or Striker | Alert | 1mc |
| Motion focus | Any | Stretch | 2mc |
Robot Armour
This is not an option, but a reflection of the player's role on the pitch. Guards have the heaviest armour, followed by Jacks and finally Strikers. The protective value of the armour for each role is fixed by strict regulations from the DGB, though the exact shape is not.
The value of a robot's armour in the game is based on his role. See page 36 of the main rules.
In modelling terms, you should use whatever looks appropriate for your model. You also need the different roles to be obvious. As a guideline, you could try using the armoured shoulders and extra chest plates for a Guard, just the shoulders for a Jack and neither for a Striker.
We Can Rebuild Him
DreadBall is a natural crucible, which moulds those who survive its rigours into better, faster, stronger players. Veterans of the game will tend to excel in their chosen role – Guards with phenomenal strength and power, Strikers with balletic grace and timing and Jacks who are just great all-rounders. This is all well and good, but it is a process which takes time and faith – a corporate sponsor may not have the credits to risk a lengthy investment in a player with great potential who may then end up having their career ended by some catastrophic injury. These sponsors occasionally decide not to wait – after all, why take all that long term risk to invest in a player who may one day be great, when you can simply modify one anyway to enhance them?
Any player from a team other than Mutant or Mechanite can have a single robotic or mutant part grafted onto them. This is an expensive process as you're modifying a finished being rather than making them from scratch. The surgeons have to take care not to damage the player in other ways by mistake, and all this additional monitoring and staff doesn't come cheap. However, it is very fast. Simply pay the amount for the improvement between matches and the player is ready to take to the field without missing a game.
The minimum base cost for such an improvement is 6mc, regardless of what it actually does. Upgrades or parts which already list a cost of more than 6mc are charged as normal. This amount is added to the cost of the player.
An upgrade changes the player's stat(s) to those of the new part, regardless of whether these are better or worse than the player's original values. Any abilities associated with the new part are added to the player's profile if he doesn't have them already.
Free Agents
MVPs are all very well, but those exceptional individuals who rise above their fellows on the pitch and in the hearts and minds of the fans are expensive and rare. The Xtreme game by its very nature tends to breed even fewer of these types of individual, and instead makes extensive use of 'Free Agents'. These individuals essentially tend to be those not suited to a team game – perhaps they are very different from their fellows, or maybe they just aren't bright or sociable enough to get together in the numbers required – but they can still make valuable additions to an established team.
The branching out of the DGB leagues into their own sanitised version of the Xtreme game gave these free agents the opportunity of exercising their skills in an arena less likely to be imminently terminal, and they have seized on this gratefully. Not every Yndij wants to fight for the rebellion, and not every coach can afford the latest and shiniest robots to make up the team numbers. Free Agents are a relatively new addition to the arenas of the GCPS, but they have been rapidly taken to the hearts of the fans and coaches alike.
The Underdog rules remain as stated on page 54 of the main rulebook with the addition of the following two tables. When a Coach rolls for a Free Agent they may choose to roll on either the table in the main rulebook, or one of those from the Season books. They must decide which table to use before the dice are rolled.
| Dice roll | Free Agent |
|---|---|
| 1 | Convict Jack |
| 2 | Kalyshi Jack |
| 3 | Convict Striker |
| 4 | Kalyshi Striker |
| 5 | Vat-brewed Jack. Roll a second dice to see which upgrades they have: |
| 6 | Robot Jack (quad wheels, chassis C, slim head, claw and ram arms, no additional programs). |
Vat-brewed Jack upgrades (second dice):
- 1-2: Compound eyes and an enhanced twitch response.
- 3: Z'zor blade.
- 4-5: Spyhr tail and accelerated regen.
- 6: Yndij torso and legs with Kraaw wings.
| Dice roll | Free Agent |
|---|---|
| 1 | Jetari Training Drone (player's choice of Brawler or Thrower) |
| 2 | Avaran Treebeast |
| 3 | Nameless Bloodsucker |
| 4 | Pusk Rampager |
| 5 | Vlorox Spinpede |
| 6 | 2 Zee Buccaneers* or Yndij Reaver (player's choice) |
* Even as Free Agents, Zees travel in packs.
Jetari Training Drones
The background text and quotations for each Free Agent are omitted here; only the rules content is transcribed.
Jetari GL14 "Brawler"
| Role | Move | Strength | Speed | Skill | Armour | Notes |
|---|---|---|---|---|---|---|
| Guard | 4 | 3+ | 4+ | 5+ | 3+ | Grizzled, Can't Feel A Thing |
Jetari SL22 "Thrower"
| Role | Move | Strength | Speed | Skill | Armour | Notes |
|---|---|---|---|---|---|---|
| Striker | 5 | 5+ | 4+ | 3+ | 4+ | 360 Vision, A Safe Pair Of Hands |
Avaran Treebeast
| Role | Move | Strength | Speed | Skill | Armour | Notes |
|---|---|---|---|---|---|---|
| Jack | 3 | 3+ | 5+ | 4+ | 4+ | Tongue, Can't Feel A Thing |
Pusk Rampager
| Role | Move | Strength | Speed | Skill | Armour | Notes |
|---|---|---|---|---|---|---|
| Guard | 4 | 4+ | 4+ | 6+ | 4+ | Ram, Quick Recovery |
Nameless Bloodsucker
| Role | Move | Strength | Speed | Skill | Armour | Notes |
|---|---|---|---|---|---|---|
| Jack | 6 | 4+ | 3+ | 5+ | 4+ | Steady, Poison Blade |
Vlorox Spinpede
| Role | Move | Strength | Speed | Skill | Armour | Notes |
|---|---|---|---|---|---|---|
| Striker | 4 | 3+ | 5+ | 4+ | 4+ | Rolling, Can't Feel A Thing |
Yndij Reaver
| Role | Move | Strength | Speed | Skill | Armour | Notes |
|---|---|---|---|---|---|---|
| Striker | 6 | 4+ | 3+ | 4+ | 5+ | Jump, Backflip, Duck & Weave |
Zee Buccaneer
| Role | Move | Strength | Speed | Skill | Armour | Notes |
|---|---|---|---|---|---|---|
| Jack | 5 | 5+ | 3+ | 5+ | 4+ | Runaround, Duck & Weave |
New Abilities
Season 5's player customisation rules as well as its new teams and MVPs bring these abilities to the game. You may be familiar with some of them from previous Season books.
360 Vision
(Any Player)
The player has no rear arc. Everywhere counts as being to their front. This replaces the diagram on page 11 of the main rules. In effect it does not matter which direction the model faces, though it usually looks better to turn the model as appropriate.
The model has 6 Threat Hexes instead of 3. See the diagram.
[The diagram on printed page 26 is not reproduced.]
Alert
(Any Player)
The player is able to read the game far better than most, and is rarely surprised.
When any opposing player moves into an adjacent hex, the Alert player may immediately choose to turn to face them if they want to. Note that this turn happens before any Slam is resolved or the opposing player moves any further. Note also that this turn does not stop any further action by the opposition; it merely allows the player to realign themselves.
Whilst this turning will not necessarily help a player resist a Slam, it will place a Threat Hex on the opposition, which may modify their chances to move further or require them to make an Evade roll.
Backstab
(Guard or Jack)
The player is adept at causing maximum damage to vulnerable areas. When the player makes a Slam against an opponent that does not project a Threat Hex onto the Slamming player, then add +1 dice in addition to other modifiers.
Duck and Weave
(Any Player)
The player gets +1 dice on any attempts to Dodge.
Fragile
(Any Player)
The player counts as rolling 1 less success on each Armour check. Work out the check as normal and then reduce the final total of successes by 1, to a minimum of zero.
Long Arms
(Any Player)
A player with the Long Arms rule has a maximum Throwing range of 12 hexes, not 9.
The following table replaces the one on page 38 of the main rulebook when calculating the initial number of dice a player with Long Arms gets for a Throw. As usual, the number of dice a Throwing player gets depends on the distance between him and his target.
- 1-4 hexes: 3 dice
- 5-8 hexes: 2 dice
- 9-12 hexes: 1 dice
Apart from the different range bands, a Throw from a player with Long Arms is worked out just like any other.
Important note: As a concession from the DGB to the regular teams, a player with Long Arms cannot score bonus points. This means that the Strike Zones are always worth either 1 or 3 points, regardless of which hex within the Strike Zone the ball is Thrown.
Pile-Driver
(Any Player)
When a player with this ability beats an opponent with a Slam then they may choose to use the following Pile-Driver result instead.
Pile-Driver wins: the losing player is smashed to the ground in the hex they are in. The winning player is turned to face the target.
In addition, if the player with Pile-Driver doubles his opponent then their armour check is at an additional -1 modifier.
Poison Blade
(Guard or Jack)
When the player doubles a Slam or Slamback, the opposing player makes their Armour check with +1 dice. If any damage goes through the armour then add +1 to the total.
Ram
(Guard or Jack)
When the player makes a Slam action their target is pushed back (and the player must follow up) before the Slam is resolved. This could result in the target player being pushed back twice.
Rolling
(Any Player)
When the player takes a Sprint action they move at triple their movement value instead of double. However, because they are going so fast they may only turn once during the whole action, and then only by a single hex side. This player may not Sprint normally.
Runaround
(Any Player)
A single Team Action Token can buy a Run action for two players with this ability instead of the normal one. Both players must have this ability and they must take their actions immediately one after the other. This action counts towards both the players' total actions for that Rush.
Quick Recovery
(Any Player)
If a player is damaged and fails an Armour check then they are removed from the pitch. A player with Quick Recovery follows all the normal rules for damage and Armour checks with the exception of where they are placed once a final damage value of 2 or 3 has been calculated. In both these cases the damage is treated as if it were only 1. The effects are therefore:
- 0 damage: the player remains on the pitch as normal.
- 1-3 damage: place the player in the 1 area of the Sin Bin.
- 4+ damage: the player is dead as normal. Remove them from the game.
Shock Collar
(Any Player)
Unlike the explosive collars worn by real convicts, Arena Xtreme teams wear the less fatal shock collar. This allows Coaches to use them in games without ending up on the wrong side of a murder charge.
The Coach may activate a single Shock Collar in each of his team's Rushes by spending a Team Action Token. This sets off a massive shock and a spectacular, crowd-pleasing arcing of electricity from the unfortunate wearer to anyone nearby. Every adjacent player from either team is hit by the storm of electricity. Roll 3 dice and inflict 1 damage for each 5+. Roll up each 6 as usual. The target cannot roll to Dodge electricity and Armour has no effect. Any adjacent players that remain on the pitch are knocked to the ground. The wearer automatically suffers 3 damage and is removed from the pitch to recover as usual.
Shove
(Any Player)
If a player with this ability takes a Slam or Slamback option against an opposing player in their Threat Hex then they may choose to Shove them instead of rolling the test as normal. Both players roll their test as normal, with the Shoving player getting an additional +2 modifier.
If the opposing player wins or the result is a draw then follow the normal rules. If the Shoving player wins by any amount then their opponent is automatically pushed back as described on pages 35-6 of the main rules. The Shoving player must turn to face the hex the opponent has just vacated, but may not follow up.
Stretch
(Any Player)
The player gets +1 dice on any attempts to Dash.
Tail
(Any Race with a Tail/Any Player)
The player with this ability can use their tail to fend off attacks from behind. Tail only affects an opponent who is standing in the player's rear arc. A Slam or Steal attempt against the player with Tail is at an additional -1 modifier.
Taking a Dive
(Jack or Striker)
Each player with this ability may use it once per match, and each team may use it a maximum of once per Rush (of either side).
Whilst taking any action that involves movement, the player may decide to Take a Dive. The player chooses to deliberately fall to the ground either in the hex he begins the action in, or as he moves into a new hex. If this hex is adjacent to an opposing player then the falling player's Coach may call Foul! against that player. The Coach calling Foul! must choose one if several opposing players are adjacent to the falling player. Resolve this Ref check as normal. As with Dirty Tricks, the opposing player hasn't actually committed a foul (this time), he is just made to look as if he has.
If the player also has the Run Interference ability then he could choose to Take a Dive as part of that because it is an action that involves movement.
The player may not choose to Take a Dive if he has fallen over for any other reason, such as failing a Dash or being Slammed. He could, however, declare that he is Taking a Dive instead of making a Dash attempt whilst moving to a hex that would normally require one. If so, he must decide to do so before any dice are rolled for the Dash.
If the player falls over in a hex containing a loose ball then it scatters. This does not end the current Rush. If the player was carrying the ball when he Takes a Dive then the ball scatters and the Rush ends.
Threatening
(Any Player)
The player's Threat Hexes always modify a test (up to the maximum for that test) if the modifier is listed at all. For example, if a Threatening player Slams an opponent then that target player will take a -1 penalty for being in the Slamming player's Threat Hex.
Tongue
(Any Player)
The player has a prehensile tongue that can be used to act at a distance.
The player can Slam an opponent as normal. Alternatively, the player can use its ability to Slam an opponent that is 2 hexes away. There must be a clear path, ignoring the ball and fallen players, to the target model in order for the Slam to be made. The clear hex counted between the models to check this becomes the hex from which the target is pushed back, if this happens. This target of the Slam cannot make a Slamback unless it also has the Tongue ability. The player can also pick up a ball that is on the floor up to 2 hexes away. Check that there is a clear path from the player to the ball's hex as if it were a 2 hex Throw. Picking up the ball is resolved as normal.
Trail Blazer
(Any Player)
This is an action, completed as part of moving a player in a similar way to Evade, and is done as and when necessary during the move. It may be done as many times as is required in a single action.
If a player with this ability wants to move into a hex that is occupied by a standing opposing non-GIANT player they may try to brush them aside rather than Slamming them. This will allow them to carry on moving rather than ending their action.
You can only use Brush Aside if there is a space you can push that player into.
You cannot Brush Aside the Referee.
Brush Aside is a 3 dice Strength test (123). Roll separately each time you need to Brush Aside. [The "(123)" is as printed in the source.]
This is modified by:
- +1 if the player is a Guard.
- -1 if the obstructing player is a Guard.
Brush Aside fails: the player's action ends. Turn the obstructing model to face the player.
Brush Aside succeeds: the player pushes the obstructing player into a hex of the player's choosing directly away from him, and then moves to occupy the hex himself. This move is not optional. He may then continue his action.
Brush Aside doubles: the player pushes the obstructing player into a hex of the player's choosing directly away from him, and then moves to occupy the hex himself. This move is not optional. The displaced player is knocked over. Do not make an Armour check for the fallen player. The player may then continue his action.
In The Locker Room
The in-world introduction ("The Xtreme Xperience Starts Here"), the "DreadBall Facts" sidebars, and the background text and quotations for each team and MVP are omitted; the rules content of each entry is transcribed below.
Long Rock Lifers
Remember that you can play this team as either the Long Rock Lifers themselves or as another Convict team of your own. The game values will be the same for all Convict teams though your team will be the most wanted.
Team statlines
| Player | Move | Strength | Speed | Skill | Armour | Starting Team | Cost | Notes |
|---|---|---|---|---|---|---|---|---|
| Guard | 5 | 3+ | 4+ | 5+ | 4+ | x2 | 16mc | Shock Collar, Threatening |
| Jack | 5 | 4+ | 4+ | 4+ | 4+ | x3 | 9mc | Shock Collar |
| Striker | 5 | 4+ | 4+ |
Extras: a Convict team starts with an Offensive Coach (the Warden), 0 Coaching Dice and 0 DreadBall Cards.
Bremlin Nebulas
Remember that you can play this team as either the Bremlin Nebulas themselves or as another Kalyshi team of your own. The game values will be the same for all Kalyshi teams though your team will shiver the most timbers.
Team statlines
| Player | Move | Strength | Speed | Skill | Armour | Starting Team | Cost | Notes |
|---|---|---|---|---|---|---|---|---|
| Jack | 6 | 5+ | 3+ | 4+ | 4+ | x4 | 11mc | Shove, Backstab |
| Striker | 6 | 5+ | 3+ | 4+ | 5+ | x4 | 14mc | Jump |
Extras: a Kalyshi team starts with 0 Coaching Dice and 0 DreadBall Cards.
Kovoss Kryptics
Source note: the page references in the "Picking a Team" text below are transcribed as printed. They appear to be swapped: mutant player design is on printed page 9 (Perfection by Design) and robot part tables are on printed pages 10–14 (see the Mechanite note below).
Picking a Team
A mutant team does not have a fixed player roster to choose from like most teams. Instead, use the rules on pages 10–14 to design the players you want.
You have a 100mc budget to buy as many players as you want for your team. You may also purchase Coaching Dice, DreadBall cards, cheerleaders, assistant coaches and any other standard non-player team bonuses at double their normal cost. Note that the cost for these is also doubled if purchased between matches during a league, and that these purchases add this doubled value to the team's Ranking. Costs for MVPs and Free Agents are not doubled.
Team Rule – Boiled Down
In a league, a mutant team Coach may choose to boil down any players he no longer needs, whether they are dead or not. This is done during the step on dealing with player fatalities. Recycling living players earns the Coach 7mc instead of the usual 5mc because their organs are more easily reusable. If he recycles dead players then they are worth 5mc as normal.
Ro-Tek Brutes
Source note: the Mechanite "Picking a Team" text below refers to "page 9" as printed. The robot part rules are on printed pages 10–14; page 9 is the mutant Perfection by Design page. Transcribed as printed.
Picking a Team
A Mechanite team does not have a fixed player roster to choose from like most teams. Instead, use the rules on page 9 to design the players you want.
However, the small workshops and tight budgets to which these techs work put some limitations on what they can turn out for a match. Much as they'd love to have a wide array of top-of-the-line specialist players, they know that it's simply beyond their means. Guards and Strikers simply take more time and effort to build, and so they inevitably have to settle for some lesser players to be able to field something that actually looks vaguely like a team.
To reflect this, for every Guard or Striker in a Mechanite team, there must also be at least one Jack. During a league, a Mechanite team Coach may add a new Guard or Striker only if the total number of Guards and Strikers already in the team is less than the current number of Jacks. They can always add new Jacks.
When you have created your players, you have a 100mc budget to buy as many as you want for your team. You may not buy Coaching Dice (Mechanites lack the appropriate team tactics software). You may purchase other team bonuses such as DreadBall cards, cheerleaders, assistant coaches and so on at their normal cost.
MVPs
Kailasa
Plays for anyone
Player statline
| Player | Move | Strength | Speed | Skill | Armour | Min Cost per Game | Notes |
|---|---|---|---|---|---|---|---|
| Guard | 6 | 4+ | 3+ | 4+ | 4+ | 8mc | Backstab, Does This Hurt? |
'Brickbat' Vognar
Plays for anyone
Player statline
| Player | Move | Strength | Speed | Skill | Armour | Min Cost per Game | Notes |
|---|---|---|---|---|---|---|---|
| Guard | 5 | 3+ | 4+ | 5+ | 4+ | 10mc | Lucky, Steady |
'Dead Man' Davitz
Plays for anyone except Orx and Goblins
Player statline
| Player | Move | Strength | Speed | Skill | Armour | Min Cost per Game | Notes |
|---|---|---|---|---|---|---|---|
| Guard | 5 | 3+ | 5+ | 6+ | 4+ | 8mc | Grizzled, Can't Feel A Thing |
Brute Force
Plays for anyone
Player statline
| Player | Move | Strength | Speed | Skill | Armour | Min Cost per Game | Notes |
|---|---|---|---|---|---|---|---|
| Guard | 5 | 3+ | 4+ | 5+ | 4+ | 8mc | Trail Blazer |