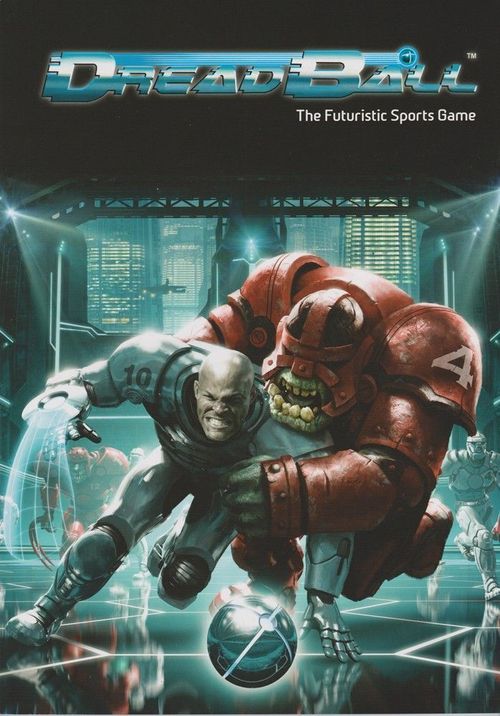
DreadBall: Rulebook
DreadBall: Rulebook Rulebook
Table of Contents
Table of Contents
The Game
The DreadBall Board Game recreates this fast-paced action on your tabletop, with each player taking on the roles of their team's Coach. Each Coach controls a team of miniatures based upon the many enigmatic races in Mantic's Warpath Universe, each with their own strengths, weaknesses and exciting special rules.
The game is played in a series of turns, called Rushes. Within each Rush a Coach makes Actions with their Players in an effort to take control of the ball, hold back the opposing Players, and score points by making a Strike.
The rules for DreadBall are simple, although there is a great deal of tactical depth to be found by combining them cleverly. Don't worry about that for now though; just begin with the basics. Once you start rolling dice and moving the models around the board, you'll be throwing your first Strike in no time.
Winning the Game
The winner is the Coach with the most points after 14 Rushes. However, if a team ever reaches 7 points, they immediately win by a landslide.
For more on how to win, see page 16.
Game Terms
This rulebook contains many terms specific to DreadBall, so here's something of a glossary to familiarise yourselves with the lingo.
Coach
This is you! The Coaches are the real people playing the game.
Player
The Players are the playing pieces - the miniature men, women, and indescribable aliens that you move around on the pitch.
The Players are formed into teams that are controlled by the same Coach. The DreadBall boxed game includes two such teams: one of robot Players called the Draconis All-Stars, and another made up of Yndij Players called the Ninth Moon Tree Sharks. Once you're familiar with the game and fancy something a little different, there are over 20 more teams available!
You will find all the details for each team on their Team Card.
Referee
Each game of DreadBall is overseen by a robotic match official: the Referee, or Ref. It is their job to ensure that the game is played fairly, or at least that those who break the rules are punished.
For more on the Referee and Fouling, see page 30.
Ball
This little sphere is what the game is all about. The plastic ball included in the game can be carried around by the Players by slotting it into the hole in each of their bases. While it is loose on the pitch, it has its own special base.
For more on the ball, see page 12.
Rush
Each turn is called a Rush. Within each Rush a Coach takes Actions with their Players in an effort to take control of the ball and score points by making a Strike.
Rushes are tracked using the Rush Counter and the 0-14 Rush Tracker at the side of the pitch.
For more on Rushes, see page 15.
Actions
Each thing that a Player does on the board is an Action, from simply Running around, to Throwing the ball, to Slamming an opposing Player. For more on Actions, see page 17.
Actions are tracked by spending a Team's Action Tokens – the team may make 5 Actions per Rush. The Home team uses the white tokens, while the Visiting team uses the red tokens.
Keeping Score
Opposite the Rush Tracker you will see the Score Tracker, running from 7, down to 0, and up to 7 again. The Score Counter is placed on this track to keep score.
Strikes and Scoring
To win a game of DreadBall, your Players must score points by Throwing the ball into the Strike Hex. This is called a Strike. The board is marked with six coloured Strike Zones, three white and three red. Each Strike Zone is made up of eight hexes in front of a Strike Hex, as shown in the diagram below.
A player who is standing within a Strike Zone and holding the ball can attempt to score a Strike by Throwing the ball into that zone's Strike Hex. Players from the white Home team can do this in the Visiting team's red Strike Zones, and vice versa.
The two Strike Zones that are closest to the starting line along the centre of the pitch are worth 1 point, while the more distant Strike Zone is worth 3 points. If a player is standing in the Bonus Hex when they attempt a Strike, their Throw will be more difficult but will score an additional point if successful (making the Strike worth either 2 or 4 points).
For more on scoring Strikes, see the Throw Action on page 22.
Unlike most sports games, you track the difference in scores instead of each team's total, with each striving to gain the advantage. The score marker starts on the 0. When a Strike is made, the counter is moved towards the scoring Coach by the number of points that they scored. For example, if Anne scored a 4 point Strike and then Brad scored a 2 point Strike then the track would show 2 in Anne's favour.
Remember that if this counter ever reaches 7 on either side, that Coach has won the game instantly!
The DreadBall Glove
Of all the equipment that a DreadBall player uses, the most iconic is the DreadBall glove. This takes many outward forms depending on the race of the team, but the function is the same for all: to catch and throw the titanium ball at high speed without it tearing the user's hand off.
Some teams take a technical route and use elegantly crafted holographic designs that incorporate a crescent-shaped launcher on the back of the wrist. Using these is simplified by the focussed electromagnetic funnelling devices that are carefully calibrated to slot the moving ball into the launcher.
Some races take another route. They rely on carefully honed blades and scoops to capture and decelerate the ball by a combination of the glove's shape and the player's skill. Of course, when the ball can top 200mph, accidents do happen! However, there is never any shortage of keen youngsters eager to try their hands at the game.
Player Roles
Not all Players are the same. There are three roles or Player types: Guard, Jack, and Striker. Some teams use all three while others specialise in only one or two of the standard roles.
Guard
The biggest and strongest Players take to the pitch as Guards. These are the most heavily-armoured, and they need every bit of that protection because their role is both to flatten the opposing Players and protect their own lightly-armoured Strikers.
Guards rarely wear DreadBall gloves and therefore cannot typically handle the ball. They're too busy cracking heads!
The brute simplicity of the Guard's role appeals to many fans who love to see their favourites crashing through the opposition lines.
Important: Guards gain a +1 modifier on Strength and Armour tests.
Jack
The "jack of all trades", or Jack for short, is the all-rounder of the game. They are able to fill any role, whether that's holding the line against the opposing Guards, or passing the ball about like a Striker. Naturally, they sacrifice the finesse of the specialists, but they allow a team to adapt quickly to the rapidly changing nature of the game.
Their armour is a compromise between the protection needed by the Guards and the lightness needed by the Strikers. They also wear DreadBall gloves and can throw Strikes with the best of them (on a good day). Fans love the Jacks for their willingness to try anything, and many a desperate gamble by a Jack has saved a team from certain defeat.
Important: Jacks gain a +1 modifier on Speed tests.
Striker
Often seen as the golden boys of the game, the Strikers are typically the ones who score the most points. However, without the protection of their teammates they are quickly taken out of the game as they are only lightly protected, sacrificing armour for manoeuvrability.
Strikers have been described as simply a means of getting a DreadBall glove into the right place at the right time to make a Strike. This is a little harsh, but contains an element of truth. It is certainly their signature piece of equipment.
Everyone loves a winner, and scoring points is the easiest way to capture the attention of the adoring fans. It is also the riskiest position to play as the opposing Guards will be only too happy to crush any opposing Striker they can reach.
Important: Strikers gain a +1 modifier on Agility and Skill tests.
Player Stats
Each Player is represented on the table by a set of statistics, or 'stats', as shown on the Team Card. These values are used when carrying out the various Actions in the game.
The Draconis All-Stars (Neo-Bot Team) Team Card example:
| Player | Move | Strength | Agility | Speed | Skill | Armour | Cost | Recommended Team | Abilities |
|---|---|---|---|---|---|---|---|---|---|
| Guard | 5 | 4+ | 4+ | 4+ | 4+ | 4+ | 120 | x3 | Linked |
| Jack | 5 | 4+ | 4+ | 4+ | 4+ | 4+ | 110 | x2 | Linked |
| Striker |
Move
This represents the distance the model can move on the pitch during a standard Run Action.
Strength
Strength represents a Player's physical brawn or knowledge of how to best leverage their power. This is typically used by Players performing violent Actions such as a Slam.
Guards gain a +1 modifier on Strength tests.
Agility
Agility represents a Player's grace, nimbleness and sure-footedness. Agile Players are good at Evading through a press of bodies, Dodging their opponent's attacks and Standing Up after being knocked to the ground.
Strikers gain a +1 modifier on Agility tests.
Speed
Speed represents a Player's light-footedness and energy. A Player with a high Speed can Dash around the pitch more quickly.
Jacks gain a +1 modifier on Speed tests.
Skill
Skill represents a Player's ability to handle the ball. A Player with a higher Skill will be better able to manipulate the ball on the pitch, whether it's through Throwing, Catching, or simply Picking Up the ball.
Strikers gain a +1 modifier on Skill tests.
Armour
Players are outfitted with armour to protect them while playing the game. The better a Player's Armour the more protected they will be from injury by the ball or other Players.
Guards gain a +1 modifier on Armour tests.
Cost
This indicates the Cost, in millions of credits, or mc, of purchasing a particular Player for a team. For now the starting team is chosen for you, so you won't need to worry about this. However, later expansions will allow you to build a team from scratch and play in a League, where money will become far more important!
Recommended Team
This number specifies how many of a given Player type are included with the suggested starting team. As an example, the Draconis All-Stars Jack has a Starting Number of x2, meaning that the Coach starts with 2 such Jacks if they choose to play the All-Stars team.
Abilities
Many Players will have their own unique abilities, available to them through rigorous training or simply their alien physiology. These additional rules will be detailed on the Team Card.
Money Money Money
The GCPS being what it is, much of the league organization revolves around money – lots of money. DreadBall uses millions of credits (mc) for all transactions, as anything smaller is too tiny for the big leagues to notice.
Positioning Players
Facing
In the game, all standing Players have a facing. This simply means that the Player is looking in a particular direction. Prone Players do not have a facing.
Placing and Moving Models
Each Player occupies a single hex. You should position each one so that it is clear which hex they are in and which of the six edges they are facing. No Player may enter a hex containing the Ref or another Player, friend or foe, standing or prone.
The Player is facing in the direction of the arrow. A Player has a front and a rear arc, divided as shown by drawing an imaginary line through the model from left to right, extending to the edges of the board. Each hex on the pitch is in either the front or rear arc of a Player. Hexes divided by this imaginary line (such as hexes A and B here) are in the front arc.
Routes and Distances
Measuring distance is very simple. You don't count the hex you start in, but you do count the hex you end in.
The Player in hex A is 3 hexes away from Strike Hex B. Hex A is 7 hexes away from the Player in hex C, who is 2 hexes away from Strike Hex D.
When you measure distance for a Throw you must take the shortest route possible. However, you will notice that there is often more than one route that is equally short. The choice is made by the Coach controlling the active Player.
Threat Hexes
Standing Players also have 3 Threat Hexes in front of them. These are important, as opponents in these hexes risk being tripped, grabbed or otherwise hindered. A Player's Threat Hexes can be identified by the 3 ridged sides of its base.
The three adjacent hexes in a Player's front arc (shown here in red) are their Threat Hexes. When an opposing Player is standing in one of these hexes they may suffer modifiers to their dice rolls.
Prone Players
During the game, Players may fall or be knocked prone. If this happens, the model should be placed on its side, or replaced with one of the prone Player models from the box.
- The only Action a prone Player can make is Stand Up.
- If a Player is laid prone while carrying the ball, they drop it and it scatters.
- Prone Players do not have Threat Hexes and consider everywhere to be in their rear arc.
- When attacked, they can only Dodge.
- They are never pushed back, but may still move after doubling a Dodge (as explained later). They remain prone.
- The ball can scatter and be Thrown over prone Players, but will scatter if it lands on them.
Background
Who could have known when this new sport was invented, that it would sweep to such a success in less than a lifetime? From its humble beginnings in the grimy hangers of the flagship of its creator to the vid screens of every home in the central planets, it has been a whirlwind ride.
It all began in the mind of now retired Senior Flank Commander Jesus Ortiz. In his own words "it was something to keep the troopers happy, fighting fit and hungry for blood. I had no idea it would grow to be so popular".
But grow it has. It began in the stark steel shell of drop hangar 91 aboard the Corporation warship Dread. The first games were played with dismantled cluster munitions for a ball, wearing decommissioned armour. The modern player takes to the pitch in specially-built, multi-arena stadiums wearing carefully designed and personalized DreadBall suits worth millions of credits. These suits last no more than 2 or 3 games before they are damaged beyond repair. The weapons-grade titanium balls are replaced every time a new one enters the arena, such are the stresses on them. It is a violent sport.
Surprisingly, throughout this evolution, the game has remained true to the creator's vision, mainly due to the sacrifice of time and energy which Ortiz himself has given to it. It is overseen by the DreadBall Governing Body, usually known as the DGB, or "Digby". The Chairman of the DGB is Jesus Ortiz himself, still maintaining control over the game to ensure that it retains its true spirit and isn't debased by the many influences that smell money and power seeking to corrupt it. "As long as I'm in charge", says Ortiz, "DreadBall will remain pure."
Dice Rolls and Tests
The success or failure of most Player Actions in DreadBall is decided by rolling dice.
The Home team should use the white dice, while the Visiting team should use the red dice.
With a few exceptions (explained in their own sections) all dice tests are resolved the same way and are written as follows:
Throw: Skill test (1)
- The name of the test.
- The stat value to use.
- The number of successful dice rolls required to pass the test. a. If the target value is a single number, you need that many successful rolls to pass the test. For example, a target value of (2) requires 2 successful rolls. b. If the target value is (X), the result is compared to your opponent's score to see who has won. Both Coaches roll simultaneously (potentially against different stat values) and count up their successful rolls. c. If the target number is (123) then the first attempt within a single Action requires one success, and each subsequent attempt in the same Action needs 1 more – the second attempt needs 2, the third needs 3, and so on.
Modifiers
Sometimes, modifiers will apply to a dice roll, making it more or less difficult by increasing or reducing the number of dice rolled. This will be detailed under each test.
Continuing the example, let's say that the Yndij Jack was aiming at a target 4 hexes away, and had already moved as part of the Throw Action. The Throw Action lists the following modifiers:
- -1 modifier at a distance of 4-6 hexes
- -1 modifier if the Player moved or turned during this Throw Action
These modifiers will reduce the roll from 3 dice down to just 1, so there is a much smaller chance of succeeding.
Important! Modifiers always add or subtract from the number of dice to be rolled. They never modify the stat or the target number of successes.
If the modifiers reduce the number of dice to zero or less, the roll cannot be made and is considered to have achieved no successes. A roll like this can only be made with Coaching Dice. Note that even with zero successes, the Action itself can still be made – you could still draw in a Slam for example, and a Throw with no successes can still be Caught.
Rolling the Dice
Most dice tests are made using 3 dice. These are all rolled at once and then each one is compared to the appropriate stat. Each dice that equals or beats the stat value is a success.
For example if an Yndij Jack was making the Throw shown above, the Coach would roll 3 dice and compare them to the Yndij's 4+ Skill stat. Each dice that scored a 4 or higher would be successful, and only a single successful roll out of the three would be required to pass the test.
Exploding Successes
Dice that score a 6 count as a success like any other. However, for each 6 rolled you may take an additional dice and add it to your roll. If these subsequent dice also roll 6s the process is repeated. Keep rolling until no 6s are rolled. This is called an Exploding Success. In this way, a lucky Player can roll more successes than they had dice!
Re-rolls
Some rules allow a Coach to re-roll one or more dice from a test. This is decided after all dice have been rolled (and exploded) by both Coaches.
Coaching Dice
The blue dice included in the game are used by both Players and are called Coaching Dice. Some teams start the game with Coaching Dice, but they can also be earned by pleasing your fans during the match!
If both Coaches are able to re-roll all or part of a test, the Coach currently taking their Rush decides if they will do so first, and re-rolls any dice before the opposing Coach decides if they will also re-roll. If both Coaches can re-roll the same single dice, the Coach that rolled that dice decides if they will do so first.
A dice that has been re-rolled can never be rerolled again for any reason. The second result stands. A roll of a 6 on a re-roll will explode as normal, unless it was previously a 6 and had already been rolled up.
Any number of Coaching Dice can be added to a Player's test during your Rush or your opponent's, just like a modifier, and are treated just like regular dice. They cannot be used for scattering the ball or any other purpose. You must decide whether to use Coaching Dice before attempting a roll, or before both Coaches roll in the case of an (X) test.
Coaching Dice may be used to attempt otherwise 'impossible' rolls where other modifiers had reduced the number of dice for a test to zero or less.
Coaching Dice can only be used once – they are removed from play after being rolled.
Doubling
In some tests, rolling double the target value or more achieves an improved effect.
So, if your target value was (1) and you achieved 2 or more successes, you have doubled the roll. You would also have doubled the roll if you rolled 4 successes in an (X) roll and your opponent only rolled 2.
If an opponent rolls zero successes, any number of successes will double their roll.
The Ball
Launching the Ball
At the start of the first Rush, and every subsequent Rush that follows a successful Strike, a new ball is launched onto the pitch. This is carried out as follows:
- The ball is launched along the centreline of the pitch from the left of the Coach who is starting their Rush. Roll 1 dice to see how far it goes. Only count the hexes containing a DB logo. One of three things will happen: a. The ball moves 1-5 hexes without hitting anything. It will then stop. Go to step 2. b. The ball moves 5 hexes without hitting anything, a 6 was rolled. This means that it hits the opposite wall and then ricochets. Roll a second dice. On a 1-3 it is deflected towards the Rushing Coach; on a 4-6 it is deflected away. Roll a third and final dice to see how many hexes it moves in the new direction. c. There is a Player on one of the hexes into which the ball needs to travel. The ball cannot be Caught, and hits the Player regardless of their role and facing, even if prone. Treat this as if the ball had been Thrown at the Player (see page 32). The number of dice rolled for the Throw depends on the distance the ball has travelled: 6 dice if the ball struck a Player in its first hex of movement, then 5, 4, 3, and 2 dice as it moves across the board. If it hits a Player after ricocheting, the Throw rolls 1 dice. The launched ball is treated as having 4+ Skill for the purposes of this test. Coaching dice cannot be used for the Throw as the Coach is rolling on behalf of the ball launcher, not themselves. The ball will then scatter as normal and can be Caught after it has scattered. Being struck by a launched ball does not end the Rush, but failing to Catch a scattered ball does.
- Unless a Player from the Rushing team failed in an attempt to Catch the ball, the Rush continues as normal.
Scattering the Ball
Much of the time the ball will be safely controlled by a Player. However, whether because of a missed Strike or because it is knocked from a Player's grasp, the ball will sometimes bounce randomly, or scatter, across the pitch as follows:
- Roll a dice for direction – see the scatter diagram at the side of the pitch. This is the direction the ball scatters in.
- Roll a dice for distance. The ball scatters this many hexes in a straight line.
Ricocheting off the Wall
The unusual shape of the pitch sides can make the ball bounce dramatically. When a ball scatters into the edge of the pitch and hits the wall it will ricochet as follows:
The most common situation is when a ball hits an angled part of the wall, shown above as moving from hex B to C. This works both ways, so a ball moving from the direction of hex C would bounce back towards B. Most of the edge of the pitch is like this. The second possible situation is illustrated here by directions A & D, in the corners of the pitch. In these cases the ball comes straight back in the direction it came from.
If the ball hits a standing Player before it moves its full distance then either:
- The Player can try to Catch the ball if they would normally be allowed to (see page 23). This works like an inaccurate pass. When working out if the Player can see the ball coming in order to Catch it, count the hex the ball originally scattered from as if it was the Thrower. A Player can double the Catch for a scattered ball with the normal benefits, even during the opponent's Rush. If this happens, then your opponent will resume their interrupted Rush once any Free Actions have been resolved.
- The Player is able to Catch the ball (even if they have no dice to do so), but does not want to. The Fans do not like such reluctance, and so the Coach must discard the top two cards from their Fan Support area (whether face-up or down). Scatter the ball again from the Player's hex.
- The Player cannot try to Catch the ball because they are a Guard or are facing the wrong way. Scatter the ball again from that hex.
Note that if a Player holding the ball is sent off or leaves the pitch while holding the ball, the ball will scatter as above from the hex they were occupying.
Inaccessible Ball
It is possible for a team to completely block access to the ball by the other side, which is frustrating for the opponent and crowds alike and slows down the game. The DGB is dedicated to keeping the game fast and fun, and so the ball is programmed to detect and prevent such situations.
If a Coach ends an Action with the Ref or their own Players blocking all routes to the ball for the opposing team (see Routes and Distances on page 8), it will instantly scatter.
In addition, the Entry Hexes must always be kept clear. If the ball scatters or is carried into an Entry Hex (only the single hex, not the surrounding entry area), it will instantly scatter.
Playing a Game
Starting the Game
You now know everything you need to get started, so let's set up a game. Getting ready to play is quick and easy – just follow these steps.
- Each Coach chooses the team they want to use for the match, and takes the Team Card and miniatures.
- The Coaches toss a coin or roll a dice to see who will be the Home team, and who will be the Visiting team.
- Place the pitch between the Coaches, with the Home and Visitor's ends next to their respective teams.
- Shuffle the DreadBall Card deck and place it face down in the draw deck space on the board. Put the Special Effect counter next to it. See page 28 for more on cards.
- Deal each Coach the number of cards shown on their Team Card, if any.
- Place the Rush and Score counters on their respective '0' spaces.
- Place the Referee on the chequered hex near the centreline.
- Give each Coach the 5 Team Action Tokens and dice of their colour, along with any Coaching Dice listed on their Team Card.
- The Home Coach places up to 6 of their Players anywhere on their side of the starting line. The remainder of the team is placed on their Subs' Bench.
- The Visiting Coach then places up to 6 of their Players anywhere behind their starting line. The remainder of the team is placed on their Subs' Bench.
- The Home Coach starts their first Rush.
Playing a Rush
Each Rush consists of the following steps:
- Move the Rush counter one step along the track.
- Launch the ball if there isn't one in play.
- Spend an Action Token or Action card on a Player.
- Resolve the Action.
- Repeat steps 3 and 4 until your Rush ends (see below).
- End of Rush: a. Move any Players in the Sin Bin one step to the left, towards the Subs' Bench. b. Take back your 5 Action Tokens. c. Turn over the top card of the draw deck and move the Ref accordingly (see page 30). d. Discard any Special cards in play and remove the Special Effect counter from any Player it is affecting.
None Left Standing
DreadBall is a violent game, and it is possible for a team to end up with no Players left on the pitch. In this case, the team still takes its Rushes as normal, hoping its injured Players recover before the opposition scores too many Strikes. Of course, in the bizarre history of the game it has been known for teams to win games with nobody left alive to collect the trophy if they racked up a big enough lead in advance.
Ending a Rush
A team's Rush can end in one of three ways:
- The team makes a successful Strike.
- The Coach runs out of Players that can act, or Actions that they wish to or are able to spend.
- Each Player can potentially act more than once, but the maximum for a single Player is 2 Team Actions and 1 Action card in each Rush.
- There is no set order to playing Action cards and Tokens. A Rush may continue as long as a Coach can play either.
- The team loses the ball. This can be by:
- Failing to Pick Up the ball
- Failing to make a Catch
- Missing a Strike
- Throwing the ball at another Player
- Falling over while carrying the ball
In all of these cases the ball will scatter. As soon as one of these is true, the current Rush ends. Complete any remaining parts of the current Action (scattering the ball, etc.) and then resolve the End of Rush step. The opposing Coach then starts their next Rush by moving the counter along the Rush track.
Important. In all variations of case 3, if a scattering ball is caught by any member of the team that lost it then the Rush is not ended after all. Also, note the distinction between falling over with the ball in your hands, and onto the ball on the floor:
- Falling over into a hex that already contains a ball on the floor will scatter it, but will not end your Rush. The same is true for a Guard that moves into a hex containing a ball.
- Falling over when you are carrying the ball will make you drop it, which will scatter the ball and will end the Rush.
Ending the Game
If a team manages to gain a 7 point lead at any point in the game they achieve an instant landslide victory. The other team is clearly outclassed and there is no point in continuing their embarrassment.
If the game reaches the end of the 14th Rush without either side gaining a 7 point lead then the team with the higher score wins.
If at the end of 14 Rushes the score difference is 0 then things are clearly well-matched. However, the DreadBall Governing Body doesn't like a draw, so the game goes into Sudden Death.
Sudden Death
Continue the game from the end of the 14th Rush, moving the counter back to Rush 1.
In Sudden Death you continue to play as normal with the following exceptions:
- No Player may come onto the pitch. It doesn't matter if they were sent off for a Foul, an injury, or moved off by choice – nobody comes back on.
- At the end of any Visiting team's Rush, if one team has the advantage, that team wins.
- At the end of any Visiting team's Rush, the score is still zero but only one team has Players left on the pitch who can Throw the ball (and therefore make a Strike), then that team wins.
In the rare event of both teams losing their last Jack or Striker at the same point, or neither team having any left when Sudden Death is called, the game actually is a draw.
Actions
During your Rush, you can spend your 5 Action Tokens to make Actions with your Players. You do not need to spend all 5 – you can use as many as you like up to this limit.
Each Player can have up to 2 Action Tokens spent on them per Rush.
To make an Action, nominate a Player and declare what type of Action they will make from the list below.
- Run
- Sprint
- Stand Up
- Slam
- Throw
- Steal
Prone Players must Stand Up before carrying out any other Action.
Carry out the Action as detailed in the following pages, and then place your Action Token to one side. It is now spent and cannot be used again in this Rush.
At the end of your Rush, take back your Action Tokens ready for the next Rush.
Free Actions
In some cases, when a Player carries out an Action particularly well they will be given a Free Action. This is an Action that doesn't cost an Action Token to use, and does not count towards the limit of 2 Actions per player. It follows all the normal rules for that Action. It must however be made immediately after the Action that generated it – you may not act with another Player and then come back to the Free Action.
Things to Remember
- Throw, Slam and Steal Actions allow you to make a Run Action first, so you can move into position before carrying out the chosen Action.
- Some Actions are restricted to certain Player roles (listed under the Action's name). A Player who is not of the correct role may not perform that Action.
- Although a Player can act more than once in a Rush, these Actions do not have to be consecutive. A Coach may therefore make an Action with Player A, then make an Action with Player B, before returning to Player A. However, any Free Actions must be taken immediately by the Player that earned them; otherwise they are lost.
The times at which Free Actions are granted are listed in the following pages.
Clever use of Free Actions can allow an individual Player to do far more than their normal limit of 2 Actions per Rush. In fact, it is even possible to score without using any Actions at all!
Cards
Additional Actions can be made over and above the Action Token limit by using Action cards from the Coach's hand.
In addition, Coaches may spend their Action Tokens to draw additional cards from the deck, instead of making Actions with their Players.
For the full rules for cards, see page 28.
Run
Available to any Player.
The Player may move a number of hexes up to their Move stat. During this movement, the Player can change facing freely – turning does not count towards the distance moved.
- Even if a Player only wants to turn on the spot, they must use a Run Action to do so.
- If a Player wishes to move further than their Move stat would allow, they may Dash (see page 19).
- If a Player is in an opposing Player's Threat Hex at any point and wishes to move out of that hex, they must Evade (see page 19).
- If a Jack or Striker enters a hex containing the ball they must try to Pick it Up (see page 20).
- If a Guard enters a hex containing the ball, it will scatter before the Player continues its movement.
A Run Action is very flexible and is not restricted by facing or turns.
Sprint
Available to any Player.
The Player may move a number of hexes up to double their Move stat. Players may not freely change facing during a Sprint.
Instead, they can only move into the hex directly in front of them (i.e. their centre Threat Hex). Sprinting Players may turn, but each 60° turn (one side of a hex) counts as one hex towards their total movement.
Sprinting Players Dash, Evade and Pick Up the ball just like Running Players.
A Sprint Action must pay for turning so is best at moving in a straight line. Even with twice the movement it cannot go as far if it tries to follow the path of the Run Action.
Moving Onto the Pitch
In order to move onto the board, a Player must be in the Subs' Bench and have a Run or Sprint Action played on them (this can be a Run Action made as part of another Action).
Their first hex of their movement must be into the Entry Hex adjacent to the Subs' Bench, and they may face any direction they want. The rest of their Action is resolved as normal.
Note that a Player cannot make any Actions such as a Slam while they are standing in the Subs' Bench – they must have moved onto the Pitch first.
Moving Off the Pitch
Moving off the pitch is just like entering the pitch, but in reverse. The Player must move off through the Entry Hex, and must have enough movement to continue into the Subs' Bench as if it was a separate hex.
You may only move onto your own Subs' Bench, never your opponent's.
Note that Players removed from the pitch following an injury or a Foul are simply placed into the Subs Bench or Sin Bin – they do not need to move off of the pitch in the normal way.
Dash
Available to any Player.
A Dash allows a Player to extend a Run or Sprint Action, including those made as part of other Actions such as Slamming or Throwing.
Once a Player has moved as far as their Move stat will allow, they can attempt to move further by passing a Dash test.
A separate test must be made for each additional hex of movement or 60° turn (when Sprinting). There is no limit to the number of times this can be attempted in one Action.
Dash: Speed test (123)
Before rolling the dice, the Coach must state which hex they are attempting to move into.
Modifiers:
- -1 per opposing Player threatening the hex you are moving from (maximum modifier -2)
Pass: The Player moves into the chosen hex or turns in the chosen direction. The Player may attempt to Dash again if they wish, but remember that it will be harder to succeed with each subsequent attempt. Otherwise, the Action ends.
Fail: The Player is laid prone in the hex they were moving to or turning in. The Action ends.
- If they were carrying the ball, they drop it and it scatters.
- If a loose ball was in the hex they were moving to, it scatters.
Evade
Available to any Player.
A Player standing within one or more Threat Hexes runs the risk of being grabbed or tripped by their opponents. To leave such a hex, a Player must make an Evade test. Turning within a Threat Hex does not require a test.
Before rolling the dice, the Coach must state which hex they are attempting to move into.
A separate test must be made each time a player Evades during a move. There is no limit to the number of times this can be attempted in one Action.
Evade: Agility test (123)
Modifiers:
- -1 per opposing Player threatening the hex you are moving from (maximum modifier -2)
Pass: The Player moves into the chosen hex. The Player may continue their move, Evading again if necessary. Remember that it will be harder to succeed with each successive attempt.
Fail: The Player is laid prone in the hex they were moving to. The Action ends.
- If they were carrying the ball, they drop it and it scatters.
- If a loose ball was in the hex they were moving to, it scatters.
Between a Rock...
Note that a Player may need to both Dash and Evade to move to a new hex. In this case, both tests must be passed in order for the move to be made. Roll each separately, the Evade first and then the Dash.
A Player can Dash and/or Evade to reach the Subs' Bench if they wish. Unless the Player is Restrained (see page 33), any tests to move the final hex off of the board will be automatically passed.
Pick Up
Available to Jacks and Strikers only.
If a Jack or Striker enters a hex containing a loose ball, they must attempt to Pick it Up.
During a Sprint, the Player will maintain their facing from before they moved into the hex with the ball. During a Run, the Player may choose their facing before attempting the Pick Up test.
Pick Up: Skill test (1)
Modifiers:
- -1 per opposing Player threatening the hex you are in (maximum modifier -2)
- -1 if the Player was Sprinting
Pass: The Player picks up the ball. Place it onto the Player's base. The Action ends.
Pass Doubles: As above. In addition the Player may make an immediate Run or Throw Free Action.
Fail: The Player has fumbled and the ball scatters. The Action ends. If it is the Player's owning Coach's Rush, the Rush ends.
Stand Up
Available to any Player.
A Player that has fallen or been knocked to the ground must make a Stand Up Action to try and recover.
Stand Up: Agility test (1)
Modifiers:
- -1 per opposing Player threatening the hex you are in (maximum modifier -2)
Pass: The Player is placed upright, facing a direction of the Coach's choice. The Action ends.
Pass Doubles: As above. In addition the Player may make an immediate Run, Throw, Slam or Steal Free Action.
Fail: The Player is still groggy from the fall, and remains prone. The Action ends.
Slam
Available to Jacks and Guards only.
A Slam is a brutal attempt to move an opponent out of the way, or take them out of the game for good!
Important: Players can make a Run Action as part of a Slam, before making the attack. This follows all the normal rules for a Run.
The target of a Slam must be a single opponent in one of the Slamming Player's 3 Threat Hexes.
- If the target Player is a Jack or Guard, and has the Slamming Player in one of their own Threat Hexes, they have two options – either to Dodge (see page 25), or to Slam back. The target Player's Coach must choose before any dice are rolled.
- If the target Player is a Striker, or has the Slamming Player in their rear arc, they may only Dodge.
- If the target is prone, or a Player starts an Action in an opponent's front arc and uses a single Action to move behind them and Slam them in the back, then these are Stomp and Sucker Punch Fouls respectively. See Fouls on page 30.
As an (X) test, the successes for the Slam will be compared to the successes rolled by the opposing Player's Dodge or Slam.
Slam: Strength test (X)
Modifiers:
- +1 if the Slamming Player did not start the Action adjacent to the target, but moved adjacent before Slamming
- -1 per opposing Player threatening the hex you are in, ignoring the Player you are attacking (maximum modifier -2)
Slam Wins: The winning Player turns to face the losing Player. The losing Player is pushed into one of the 3 hexes directly away from the winning Player, chosen by the winning Coach, and turns to face the hex they just vacated. The winning Player may then move into the vacated hex if the Coach wishes, without needing to Evade. If so, they must again turn to face the losing Player. The Action ends.
Slam Doubles: As above. In addition, the losing Player is knocked prone and must make an Armour Check (see page 25).
Draw: The Players both turn to face each other.
Slam Loses: The Slamming Player turns to face their opponent. Then, see the results for the other test.
Pushing Back
Sometimes one or more of the hexes behind an opponent may be already be occupied. Players can only be pushed back into an empty hex.
If all 3 hexes behind an opponent are already occupied, then they cannot be pushed back. If they fall, they will instead fall down in the hex they started in.
If a Player is pushed onto a hex containing the ball, they must try to Pick Up the ball, if they can. This Pick Up test occurs after the Slamming Player has chosen whether to move into the vacated hex. If they cannot Pick Up the ball, fail their Pick Up test, or fall onto the ball, it scatters as normal.
Throw
Available to Jacks and Strikers only.
This Action may only be used by a Player currently holding the ball. A Throw can be made to score a Strike, to pass the ball to a teammate, or even to hurl the ball at an opponent to injure them! In all cases a Throw test must be made.
Important: Players can make a Run Action as part of a Throw, before throwing the ball. This follows all the normal rules for a Run.
Firstly, you must nominate your target, which must be a Strike Hex, a teammate, or an opposing player.
- The target must be in your front arc.
- The target must be within 9 hexes.
- At least one of the shortest routes to the target (see Routes and Distances on page 8) must be clear of standing Players or the Ref, and every part of the route must be within the Throwing Player's front arc. If all possible shortest routes are blocked or leave the Player's front arc, the shot cannot be made. Prone players do not block Throws.
Note that Throwing the ball at an opponent is a DodgeBall Foul – see page 32.
Once you have chosen a valid target, make the appropriate test. All Throw tests have the following modifiers:
Modifiers:
- -1 modifier at a distance of 4-6 hexes
- -2 modifier at a distance of 7-9 hexes
- -1 modifier if the Player moved or turned during this Throw Action
- -1 per opposing Player threatening the hex you are in (maximum modifier -2)
Making a Strike
In addition to the standard criteria for picking a target, check the following before making the Throw:
- The Throwing Player must be within a Strike Zone, and can only aim at the Strike Hex in that Zone.
- The Throwing Player cannot be standing in a Strike Hex they are aiming at.
- You can target a Strike Hex even if another Player is standing in it. If you fail to score, the Throw will instead be resolved as if you had Thrown the ball at that Player, rolling all of the dice again as normal. This is not a Foul.
Throw (Strike): Skill test (1)
Additional Modifiers:
- -1 modifier for aiming at a small target
Pass: Strike! Move the score counter towards you by the number of points scored (see page 5). The Action ends. If it is the Player's owning Coach's Rush, the Rush ends.
Pass Doubles: Strike! As above. In addition, the Coach may make a Fan Check (see page 34). This is in addition to any other Fan Checks made for the Throw.
Fail: Miss! The ball scatters from the Strike Hex. The Action ends. If it is the Player's owning Coach's Rush, the Rush ends.
Passing to a Teammate
In addition to the standard criteria for picking a target, check the following before making the Throw:
- The teammate they must be capable of Catching the ball (i.e. not a Guard), and the Throwing Player must also be in the target's front arc.
Throw (Pass): Skill test (0)
Any Result: Keep note of how many successes you rolled. Move the ball to the Catching Player's hex, and the other Player must now attempt a Catch test. See below.
Catch
Available to Jacks and Strikers only.
Catching the ball is not an Action in its own right, it is simply the result of a Throw Action. It does not use an Action Token or count towards a Player's limit.
Unlike most other tests, Catch tests are made with a variable number of dice. The number of dice used for the test is equal to the number of successes rolled for the Throw.
A Throw that achieved no successes is called an inaccurate pass. It can however still be caught. Remember that Strikers will still get their +1 dice for making a Skill test, and Coaching Dice can also be used to make the roll as usual.
Catch: Skill test (1)
Start with a number of dice equal to the number of successes rolled for the Throw.
Modifiers:
- -1 per opposing Player threatening the hex you are in (maximum modifier -2)
Pass: The Player catches the ball. Place it into the hole on the Catching Player's base. The Action ends.
Pass Doubles: The Player catches the ball as above. In addition the Player may make an immediate Run or Throw Free Action.
Fail: The Player has fumbled and the ball scatters. The Action ends. If it is the Player's owning Coach's Rush, the Rush ends.
Steal
Available to Jacks and Strikers only.
A Steal is a sneaky way to turn the game around by grabbing the ball from an opponent's hands before they can score.
Important: Players can make a Run Action as part of a Steal, before attempting to take the ball. This follows all the normal rules for a Run.
The target of a Steal must be a single standing opponent in one of the Stealing Player's 3 Threat Hexes that is holding the ball.
- If the target Player is a Jack, and has the Stealing Player in one of their own Threat Hexes, they have two options – either to Dodge (see page 25), or to Slam (see page 21). The target Player's Coach must choose before any dice are rolled.
- If the target Player is a Striker, or has the Stealing Player in their rear arc, they may only Dodge.
As an (X) test, the successes for the Steal will be compared to the successes rolled by the opposing Player's Dodge or Slam.
Steal: Agility test (X)
Modifiers:
- -1 per opposing Player threatening the hex you are in, ignoring the Player you are attacking (maximum modifier -2)
Steal Wins: The ball is knocked from the opponent's hands. Scatter the ball. The Action ends.
Steal Doubles: The Stealing Player takes the ball. Place it into the hole on the Stealing Player's base. The Action ends.
Draw: The Players both turn to face each other.
Steal Loses: The Stealing Player turns to face the other Player. Then, see the results for Slamming/Dodging.
Dodge
Available to any Player.
Dodge: Agility test (X)
Dodging is not an Action in its own right, it is simply a way of escaping a Slam, Steal or a Thrown ball. It does not use an Action Token or count towards a Player's limit.
As an (X) test, the successes for a Dodge will be compared to the successes rolled by the opposing Player's Slam, Steal or Throw.
Modifiers:
- -1 per opposing Player threatening the hex you are in, ignoring the Player attacking you (maximum modifier -2)
- -1 if the Player is Dodging an attack of any kind coming from their rear arc
- -2 if the Player is Dodging a Thrown ball
Dodge wins: The Dodging Player may turn to face any direction. The Action ends.
Dodge Doubles: The Dodging Player may move 1 hex in any direction, and choose any facing, without making any Evade rolls.
Draw, or Dodge Loses: See the rules for the Slam, Steal or Thrown Ball that the Player was Dodging.
Run Interference
Available to Jacks only.
Jacks may not be as strong as Guards or as nimble as Strikers, but they do have a knack for being in the right place at the right time (or the wrong place at the wrong time, depending on which team you're betting on). Run Interference is perfect for taking out an unsuspecting Striker making a dash for the Strike Zone, picking up a ball left carelessly close by, or simply getting in the opponents' way.
It is not a normal Action and cannot be chosen as part of a team's Rush. Instead it is used in the opposing Coach's Rush as a way of interrupting their plays. The Action can only be made by using an 'Any Action' card on a Jack. Note that this is an exception to the normal rules where an Action card can only be played in your own Rush.
The Run Interference Action allows the Player to make a one-hex move, and/or a Slam or Steal. They may not Run before making the Slam or Steal – they may only move the single hex.
Run Interference can happen at any point during an opposing Player's Action. The opposing Coach finishes any tests that they had started rolling for, fully resolving any results, and then stops. The Run Interference Action is carried out. If able, the opposing Coach may resume any remaining parts of their original Action once you are finished.
Each opposing Action can only be interrupted by Run Interference once, even if you have multiple cards.
Important Points
- The Interfering Player cannot Dash, but may need to Evade as normal.
- The one-hex move can be used to move a Player onto the pitch from the Subs' Bench.
- If the Player moves into a hex containing the ball they may attempt a Pick Up as normal.
- Should an Interfering Player move to block the path of a Strike attempt, the interrupted Player may continue their Action as normal but may be unable to score if there is no longer a clear path to the Strike Hex. The interrupted Player must choose a new target for their Throw, or complete their Run without Throwing.
- The target of any Slam or Steal does not need to be the Player whose Action was interrupted.
- The interrupted Player's Action ends if the Interfering Player wins a Slam against them.
- The interrupted Coach's Rush is over if their team loses the ball as a result of the Run Interference Action.
Example commentary (flavour text from the source, reproduced as printed):
"Romeo Blue has the ball, and he's bearing down on the Tree Shark's three point zone. But the crafty jungle dwellers have a three-deep defence that the rambling robot will have to get past first – I don't like those odds."
"I'll take that bet Elmer – with T'tana and Na'huatl focused on Romeo, his teammate Whiskey Rose has the opportunity to slam Da'nogo out of position, opening up a chance for Romeo to slip past and score!"
"Except Romeo must have a circuit loose Dobbs – I don't know what he was waiting for, but Na'huatl and T'tana are taking the fight to the All-Star's captain, with a vicious double body-check that puts the machine on the ground. The ball is free – it's anybody's game at this point!"
"Na'huatl is scrambling for the ball, but so is Whiskey Rose! It's a race between muscle and machine, as the two athletes dive for their titanium prize-"
"-and it's Whiskey Rose! She scoops the ball into her glove and whips it up and away right out from under the crafty Yndij!"
"Who in the wide galaxy does she think is going to catch it – and it's Blue! Romeo Blue is in the Strike Zone! You can't keep a good 'Bot down, and Blue makes it look easy with a masterful catch. Blue winds up for a Strike, and there's the throw-"
"And it's good! Three points to the Draconis All-Stars! The crowd cannot believe it!"
"That's twenty credits you owe me Elmer."
DreadBall Cards
To add an extra layer of tactics to your games, DreadBall includes a deck of cards that allow you to subvert the usual sequence of play and pull off some exceptional combinations. You may not have used them for your first few games, but you'll get used to them very quickly.
The Card Deck
At the start of the game, shuffle the deck of cards and place them face down in the draw deck space on the board. Put the Special Effect counter next to it. Cards are drawn and used by the Coaches during the match. Once a card has been used, it is discarded – place it in the discard pile space on the board.
If the draw deck ever runs out, shuffle the discard pile to make a new draw deck.
Each card has three distinct functions, which we will cover in turn:
- They are primarily drawn and played during the game to support your team, granting additional Actions to your Players and executing special effects. The cards in each Coach's hand are used for this purpose.
- They are used to move the Referee (this will be covered in the Fouls section on page 30).
- They are used to generate 'Cheers' following a Fan Check (see page 34).
Your Hand of Cards
Before the first Rush, each Coach must be dealt the number of cards shown on their Team Card, if any.
Each Coach's hand of cards is to be kept secret from the opposing Coach until the cards are played. During the game, Coaches will have a chance to draw additional cards into their hand. There is no limit to the number of cards that a Coach can hold.
Drawing Cards
During their Rush, a Coach can spend an Action Token to take the top card of the draw deck into their hand, instead of making an Action with a Player.
In each Rush, a Coach can draw up to the number of cards listed on the team's starting roster, to a minimum of 1, even if the team started with no cards. There is no maximum hand size.
Playing Cards
Cards can be played from each Coach's hand during the game. For the purposes of playing cards, ignore the number in the top left, as well as the Fan Support value at the bottom – we'll get to those later. For now all that matters is the main card text.
You will notice that the cards come in two different colours.
- The blue-headed cards are Action cards. These are used to grant additional Actions to your Players.
- The orange-headed cards are Special cards. These introduce new effects to the game that can aid your Players or hinder your opponents.
Action Cards
These cards can be played any time that you would be able to play an Action Token, but they may be restricted to a certain Player role or Action type, as detailed on the card.
Playing an Action card allows a Player to make any Action specified on the card. No more than one card may be played on a single Player in each Rush.
This can take the Player over their usual limit of 2 Actions per Rush, and will allow a Coach to make more than 5 Actions per Rush in total.
Once the Action has been made, the card is discarded.
Special Cards
These can be played at any time during either Coach's Rush, and the text on the card will be resolved immediately.
Once the text has been resolved, the card is discarded. If the card states that it 'Remains in Play', it is placed in the space to the side of the discard pile as a reminder. It will be discarded at the end of the current Rush.
Only one card can be in play at a time. If there is already a card in this space, any other 'Remains in Play' card played by either Coach in that Rush will replace the one previously in play.
Special cards can be played during an opposing Player's Action. The opposing Coach finishes any rolls and tests that they had started rolling for, fully resolving any results, and then stops. The card text is then resolved. If able, the opposing Coach may resume any remaining parts of their original Action once you are finished.
Some cards will affect a specific Player. That Player (or their number in the Action Log area) should be marked with the Special Effect Counter. This counter is removed when the card is discarded at the end of the Rush.
There is no limit to the number of Special cards that can affect a Player in a Rush.
For example, if a Player was Running towards the Strike Zone to score, the opposing Coach could interrupt their Run to put the Worse for Wear card into play, selecting the interrupted Player as the target. The card reads: "Choose an opposing Player. Last night's party is catching up with them and they suffer a -1 modifier to all tests until the end of the Rush." (Remains in Play.) The interrupted Player could then continue their Action, finishing the Run and making the Throw, but the rules on the card would affect the roll.
If the card was put into play after the Player had already started rolling for their Throw Action, the Throw test would be fully resolved before the card text came into play. As you can see, it's important to watch the game carefully and play any cards at the right time.
Turning the Tide
In addition, cards can be used to regain the advantage when things aren't going your way. Any card can be discarded from your hand after making a dice test to re-roll a single dice of your choice. The card's type and text are ignored. See Re-rolls on page 11.
Fouls
It may be an amazingly fast and brutal sport, but even DreadBall has rules. Each game is overseen by a robotic match official: the Ref. It is their job to ensure that the game is played fairly, or at least that those who break the rules are punished.
A Foul is the term for an illegal Action – something that breaks the rules of sporting conduct. This is a game term and refers to the Players on the pitch, not to Coaches palming cards and other real-world cheating. In the real world, Coaches should play entirely fairly. What their Players get up to on the pitch is another matter…
While the opposing Coach may not be too happy about you Fouling their Players, the fans on the other hand can't get enough of it! If you're lucky, Fouling can be a great source of cheers…
The Referee
The Referee, or 'Ref', will have a chance to Spot Fouls that take place nearby, and potentially send Players off for cheating.
The Ref is on the pitch with the Players, and can't be everywhere at once. Although they sometimes literally have eyes in the back of their heads, they can be distracted, and if their attention is focused elsewhere it's possible to sneak a Foul past them.
The Ref can see in every direction, and has no facing or rear arc.
The Ref may never be the target of any Action or card except Distract. If they are ever hit by the ball for any reason it will scatter with no further effect.
Moving the Ref
The Ref starts the game on the hex that looks like this. The Ref moves around the pitch at the end of each Coach's Rush. The Coach who has just completed their Rush discards the top card from the draw deck.
This is where the number in the top left corner comes in. The Rushing Coach may then move the Ref up to the number of hexes shown at the top of the card. The Ref does not have to move the full distance, or even at all, if the Coach wishes.
However, because the Ref is trying not to get in the way they may not end their move within the Strike Zones, Entry Areas, or on the centreline. Moving through these areas is fine as long as the Ref does not end its move within them.
In addition, a Ref will never move into a hex containing the ball.
The Ref never needs to Evade and cannot Dash.
Calling Foul
In the hurly-burly of the game, it's easy to miss a Foul. To keep the game moving (and because it's fun) a Coach has to call Foul when one of their opponent's Players breaks the rules.
There are several types of Foul, listed on pages 32-33.
A Coach can call Foul at any point during an opponent's Action in which a Foul is being committed, and must declare which Foul(s) they have seen.
Note that the Player committing the Foul might not be the one currently acting.
If you do not call Foul before the next Player is chosen for an Action (from either team), you have missed your chance and the Foul goes unnoticed. Play continues as normal. You'll just have to find another way to get your own back…
Some Fouls are continuous, and may last longer than a single Action, such as a Sneak. The opposing Coach must remember to call Foul during each Action while it is happening, and a Spot Foul test must be made each time until the Foul is no longer being committed.
If a Foul continues into your own Rush, you will have to wait until the opponent's next Rush to call it again.
Spotting a Foul
Spotting a Foul is a test made when a Foul is called. The test is rolled by the Coach that called Foul, after the Fouling Coach's current Action has been resolved.
In response, other Players from the Fouling team can attempt to Distract the Ref. These two new Actions do not require an Action Token to be spent and are not made against any particular stat – they will succeed on a 4+.
Spot Foul rolls are made on 3 dice as normal. Coaching dice cannot be used as the Coach is rolling on behalf of the Ref, not themselves.
Distract rolls however are made on a number of dice equal to the number of Players that choose to Distract the Ref. Only standing Players from the Fouling team within 7 hexes of the Ref and not within an opposing Player's Threat Hex are eligible to Distract, and Players can choose not to Distract if the Coaches wishes. The Player committing the Foul themselves cannot Distract the Ref. Coaching dice can be rolled as normal.
If there are no eligible Players from the Fouling team within 7 hexes of the Ref, the Distract roll is considered to have rolled zero successes. As with any other test, even if both rolls result in zero successes (or roll no dice in the first place) the overall result can still be a draw.
Note that certain cards can modify these tests in addition to modifiers listed here.
If more than one Foul has been committed at the same time, resolve them in an order of the calling Coach's choice. The Coach calling Foul must have declared each of them – if they only noticed one, only one can be Spotted!
Spot Foul: 4+ test (X)
Modifiers:
- +1 if the Foul was committed within 7 hexes of the Ref
Distract: 4+ test (X)
Start with a number of dice equal to the number of Players that chose to Distract.
Modifiers:
- +1 if any of the Distracting Players are Guards
Distract Wins: The Ref has been Distracted and not noticed the Foul. There is no further effect.
Draw: The Fouling Player is sent off, and placed in their Coach's Subs' Bench.
Spot Foul Wins: The Fouling Player is sent off, and placed in the section of their Coach's Sin Bin equal to the difference in successes rolled. If this number is 4 or more, the Player is sent off for the rest of the game.
Spot Foul Doubles: As above. In addition, the winning Coach chooses one of the Distracting Players (if any) and sends them to their Coach's Subs' Bench.
Sucker Punch
Available to Jacks and Guards only.
Running around behind someone to Slam them in the back is considered unsporting. A Sucker Punch is where a Player starts their Action in an opposing Player's front arc, and uses a single Action to move behind them and Slam them in the back.
If the Slam doubles, the Slamming Coach makes a Fan Check, even if the Slamming Player was sent off.
Note that moving behind someone with one Action, and then Slamming them from behind with a second Action is not a Foul; nor is Slamming someone from behind if they just happen to be facing away from you.
Stomp
Available to Jacks and Guards only.
Some Players find the sight of an opponent on the floor too tempting, and they put the boot in to ensure that their opponents stay down. A Stomp is a Slam made against a prone opponent.
If the Slam doubles, the Slamming Coach makes a Fan Check, even if the Slamming Player was sent off.
See Prone Players on page 9 for more details.
DodgeBall
Available to Jacks and Strikers only.
Sometimes, desperate situations call for desperate measures, and this is one of them. Throwing the ball at an opponent will likely end your Rush, so it's not to be tried lightly.
A DodgeBall Foul is a Throw, with all the normal modifiers, where the target is an opposing Player. Move the ball to the target Player's hex, and the opposing Player must then attempt to Dodge the ball (see page 25). As an (X) test, the successes for the Throw will be compared to the successes rolled by the opposing Player's Dodge.
In all cases, after determining the result, the ball scatters from the target hex. If it is the Throwing Player's owning Coach's Rush, the Rush ends.
Throw (Opposing Player): Skill test (X)
Throw Wins: The losing Player is pushed into one of the 3 hexes directly away from the winner, chosen by the winning Coach, and turns to face the hex they just vacated. The Action ends.
Throw Doubles: As above. In addition, the losing Player is knocked prone and must make an Armour Check (see page 25). The Throwing Coach makes a Fan check, even if the Throwing Player was sent off.
Draw: The Dodging Player may turn to face any direction. The Action ends.
Throw Loses: See the results for Dodging.
Restrain
Available to any Player.
Slams, nudges and trips are all fair game, but physically holding a Player in place and preventing them from taking part in the game goes against DreadBall's fast playstyle.
A Player may choose to commit a Restrain Foul whenever an opposing Player in one of their Threat Hexes attempts to Evade.
The Evade roll will suffer an additional -1 modifier as the Player is held in place, which can take the test past the -2 maximum. If the Evading Player falls over, they fall in the hex they were moving from, rather than the one they were moving to.
Whether the Evading Player succeeds or not, the Player who Restrained them has committed a Foul. If the Evading Player falls over, the Restraining Coach makes a Fan Check, even if the Restraining Player was sent off.
Sneak
Available to any Player.
The legal maximum number of Players on the pitch at any one time is 6. However, this isn't always enough for a desperate Coach.
If a Coach ends an Action with more than 6 Players on the pitch, they are committing a Sneak Foul.
This is a continuous Foul. All of the Players in the team are committing this Foul at once, and so it can be Spotted without penalty if the Ref is within 7 hexes of any of the team's Players.
All standing, unthreatened Players on the Fouling team within 7 hexes of the Ref may contribute a dice to any Distract roll made.
The Player to be sent off if the Foul is spotted will be the one closest to their own Subs' Bench. If there are multiple Players an equal distance from the Subs' Bench, the opposing Coach chooses who gets sent off. If a Coach is Sneaking with more than one extra Player, a separate test must be made for each one called by the opposing Coach.
If the Fouling Coach ends their Rush without their Sneak Foul being Spotted, the Sneaking Coach makes a Fan Check.
Stall
Available to any Player.
The gate by the Subs' Bench opens onto the Entry Area, and an unscrupulous Player can deliberately block this so that the opposing Coach can't reinforce their team.
If a Coach ends an Action with a Player within the opposing Coach's Entry Area (even if the Player entered the area involuntarily or is prone), that Player is committing a Stall Foul.
A Player is not committing a Stall Foul if they Picked Up the ball as part of the current Action. Players are given one chance to retrieve a ball, but if they haven't vacated the area by the end of the Coach's next Action, they are Stalling again.
This is a continuous Foul.
If the Fouling Coach ends their Rush without their Stall Foul being Spotted, the Stalling Coach makes a Fan Check.
Keeping Quiet
Although committing Fouls gets the crowd to pay attention, it doesn't mean that your opponent is… All Fan Checks made after a successful Foul are optional. If the opposing Coach hasn't noticed you Fouling, it might be best to stay quiet!
Fan Checks
The fans like to see their teams trying their hardest, and the Players like to hear the roar of approval from the crowd. Each feeds off the other. The fervent support of your fans can earn you extra Coaching Dice, so it's well worth keeping them happy!
Whenever a Player achieves one of the dramatic acts listed below the crowd goes wild, and you must immediately make a Fan Check.
- Scores a bonus point.
- Doubles when making any Strike.
- Inflicts 3 or more damage on an opponent in one go.
- Catches a scattering ball or a 9-hex pass.
- Dashes 3 times in the same Action without falling.
- Evades 3 times in the same Action without falling.
- Triples their opponent in any (X) roll as long as at least 3 successes are rolled.
- Committing a particularly successful Foul (see pages 32-33 for details).
To make a Fan Check, simply turn over the top card of the draw deck. This is where the Fan Support value on each card comes in – all other parts of the card are ignored.
The number shown on the card is the number of 'cheers' generated by the fans. Place this card face up in the Fan Support Bank on your side of the pitch.
If the card you have just drawn takes the total number of visible cheers to 3 or more then all the face-up cards are turned over and placed face down instead. In return, your team is so inspired by the crowd's support that you gain your choice of a Coaching Dice or a card.
Note that some Actions can result in more than one Fan check being due. In these cases, simply make each Fan check in turn, taking Coaching Dice or Cards as they are earned.
Teams
Trontek 29ers
Human Corporation Team
Human teams are flexible and versatile with the ability to adapt to a number of different styles of play. They are not the best at any one skill, but they aren't terrible at anything and have few real weak spots. In many ways you could say that this is the team equivalent of a Jack – it can try its hand at anything.
Player Stats
| Player | Move | Strength | Agility | Speed | Skill | Armour | Cost | Recommended Team | Abilities |
|---|---|---|---|---|---|---|---|---|---|
| Guard | 5 | 4+ | 4+ | 4+ | 4+ | 4+ | 100 | x2 | |
| Jack | 5 | 4+ | 4+ | 4+ | 4+ | 4+ | 80 | x3 | |
| Striker |
Perhaps the greatest of all DreadBall's corporate sponsors is the industrial giant known as Trontek. With product lines ranging from hamburgers to space freighters, Trontek already touches the lives of almost every citizen of the spheres. Backing the hottest new sport in the galaxy was a natural choice.
Through its network of vidcasts and sports channels, Trontek brought the first rough and ready form of DreadBall to the masses in its earliest days. The rapid explosion of the sport's popularity, along with some bold management decisions, gained Trontek contracts for the creation of bespoke armoured suits, game equipment, and whole arenas. The corporation's aggressive business practices matched the violence on the pitch, muscling out any competition for almost eighty years, and until very recently all DreadBall kit was made by them. Even now the majority of famous players swear by the Trontek brand.
Advancement Tables
Guard
| Dice Roll | Advancement |
|---|---|
| 1 | Agility or Speed bonus |
| 2 | Strength or Skill bonus |
| 3 | Stubborn |
| 4 | Can't Feel a Thing |
| 5 | Shove |
| 6 | Lucky |
Jack
| Dice Roll | Advancement |
|---|---|
| 1 | Agility or Speed bonus |
| 2 | Strength or Skill bonus |
| 3 | Duck & Weave |
| 4 | Extended Interference |
| 5 | Jump |
| 6 | Lucky |
Striker
| Dice Roll | Advancement |
|---|---|
| 1 | Agility or Speed bonus |
| 2 | Skill bonus |
| 3 | Feint |
| 4 | Quick Recovery |
| 5 | Boost |
| 6 | Lucky |
Greenmoon Smackers
Marauder Team
Orcs and Goblins have different strengths and make an interesting combination. The most obvious tactic starts with using the brute might of the Orcs to smash as many of your opponents as possible. Once there are few of them left standing, the fact that the Goblins are prone to dropping the ball is less of a worry. Sometimes it's a problem not having Strikers, though you do get excellent Guards to make up for it.
Player Stats
| Player | Move | Strength | Agility | Speed | Skill | Armour | Cost | Recommended Team | Abilities |
|---|---|---|---|---|---|---|---|---|---|
| Orc Guard | 5 | 3+ | 4+ | 4+ | 5+ | 4+ | 125 | x3 | |
| Goblin Jack | 5 | 5+ | 3+ | 3+ | 4+ | 4+ | 90 | x5 | |
| DreadBall Cards |
According to the team's official history, the Smackers began their career as pirates, ambushing lone merchant vessels from their hideout on the green moon of Lanthis IV. Eventually they found some recordings of DreadBall games in the entertainment suite of the CSS Bilge Rat and, with little to do for months on end, started playing games amongst themselves. As their raids began to focus on stealing DreadBall equipment, they soon came to the notice of Digby, who decided to strike a deal and bring their raw talent to the big leagues.
True to their origins, only Orcs and Goblins can join the ranks of the Smackers. It's not always easy to get quality recruits, but most Goblins are fairly adept at sliding out of trouble (and running away). They're easy to replace too. Orcs, on the other hand, can always be relied upon to thump things with little or no formal training.
Advancement Tables
Guard
| Dice Roll | Advancement |
|---|---|
| 1 | Speed bonus |
| 2 | Agility or Skill bonus |
| 3 | Can't Feel a Thing |
| 4 | Pile-Driver |
| 5 | Brush Aside |
| 6 | Threatening |
Jack
| Dice Roll | Advancement |
|---|---|
| 1 | Skill bonus |
| 2 | Strength bonus |
| 3 | Illegal |
| 4 | Take a Dive |
| 5 | Duck and Weave |
| 6 | Backstab |
Midgard Delvers
Forge Father Team
Forge Father teams are perhaps a little more flexible than they at first appear. Their obvious strength is their Strength, which is even more potent when combined with their heavy armour. Together they make a front line of Guards who are very hard to shift. However, they can also work well with a variety of other styles of play and can easily surprise an unwary opponent.
Player Stats
| Player | Move | Strength | Agility | Speed | Skill | Armour | Cost | Recommended Team | Abilities |
|---|---|---|---|---|---|---|---|---|---|
| Guard | 4 | 3+ | 4+ | 5+ | 4+ | 3+ | 130 | x3 | |
| Jack | 4 | 3+ | 4+ | 5+ | 4+ | 3+ | 95 | x3 | |
| Striker |
It all began with a deal, as is common with the Forge Fathers. They would be allowed to play in the major leagues in exchange for certain mining rights and technical know-how. These days, after years of play and several championship victories, it is hard to imagine DreadBall without the doughty presence of the dwarven teams.
The Forge Fathers aren't the most demonstrative race, but DreadBall has rapidly built a fanatical following in the mining fields of several clans. In particular, the stalwart players of the Midgard Delvers have been feted by the Forge Lord of their parent Ward ship and gifted great wealth for their successes on the pitch.
Advancement Tables
Guard
| Dice Roll | Advancement |
|---|---|
| 1 | Agility or Skill bonus |
| 2 | Stubborn |
| 3 | Pile-Driver |
| 4 | Quick Recovery |
| 5 | Can't Feel a Thing |
| 6 | Ram |
Jack
| Dice Roll | Advancement |
|---|---|
| 1 | Agility or Skill bonus |
| 2 | Stubborn |
| 3 | Grapple |
| 4 | Shove |
| 5 | Can't Feel a Thing |
| 6 | Duck and Weave |
Striker
| Dice Roll | Advancement |
|---|---|
| 1 | Agility or Skill bonus |
| 2 | Stubborn |
| 3 | Brush Aside |
| 4 | Quick Recovery |
| 5 | Lucky |
| 6 | Grizzled |
Skittersneak Stealers
Veer-myn Team
With a clarity of self-realisation uncommon in sport, the Veer-myn focus their training on the area they are naturally weakest at. The idea is that training will compensate for a lack of innate talent and, to a degree, this works. This concentration creates teams comprised mostly of highly trained Strikers, with a smattering of hardier rats as Guards. With a habit of making way more scoring chances than every other team, but missing far more of them, Veer-myn teams are not for Coaches with a nervous disposition or weak heart.
Player Stats
| Player | Move | Strength | Agility | Speed | Skill | Armour | Cost | Recommended Team | Abilities |
|---|---|---|---|---|---|---|---|---|---|
| Guard | 6 | 4+ | 4+ | 3+ | 5+ | 4+ | 125 | x2 | |
| Striker | 6 | 4+ | 3+ | 3+ | 5+ | 5+ | 100 | x6 | |
| Coaching Dice |
Veer-myn colonies exist throughout the GCPS so it was perhaps inevitable that the roar of the DreadBall crowds would draw out a few members of this reclusive race. The most famous team to be formed from these normally secretive creatures is the Skittersneak Stealers – winners of the Thudweiser League in '87 and '89, and holder of more 'Most Fouls' awards than any other team in DreadBall's history.
Veer-myn may not seem a natural fit for DreadBall. Many have terrible depth perception and their natural twitchiness causes them real problems when catching the ball. They are cunning though, and fast. Many an enemy player has been caught out by a Veer-myn Striker simply stealing the ball right out of their hands before sprinting away to their own strike zone.
Advancement Tables
Guard
| Dice Roll | Advancement |
|---|---|
| 1 | Strength bonus |
| 2 | Agility or Skill bonus |
| 3 | Backstab |
| 4 | Strong Tail |
| 5 | Illegal |
| 6 | Stench |
Striker
| Dice Roll | Advancement |
|---|---|
| 1 | Move bonus |
| 2 | Skill bonus |
| 3 | Take a Dive |
| 4 | Strong Tail |
| 5 | Duck and Weave |
| 6 | Feint |
Void Sirens
Human Corporation Team
The Void Sirens' roster relies on their Jacks, and their training focuses on running interference. This, together with an extensive additional coaching schedule, enables them to react swiftly to opposing plays, and makes the Sirens very tricky to predict. Any offensive drive needs to punch a much bigger hole than usual to guarantee a way past the Sirens' nimble Jacks.
Player Stats
| Player | Move | Strength | Agility | Speed | Skill | Armour | Cost | Recommended Team | Abilities |
|---|---|---|---|---|---|---|---|---|---|
| Guard | 5 | 4+ | 4+ | 4+ | 4+ | 4+ | 110 | x1 | |
| Jack | 5 | 4+ | 4+ | 4+ | 4+ | 4+ | 95 | x4 | Extended Interference |
| Striker |
Extended Interference: This Player may make a Run Interference Action using any blue Action card, regardless of the Player role or specified Action on the card. The Player may also Dash as part of a Run Interference Action.
Jesus Ortiz's influence on the sport he invented extends far beyond the day to day control over the game he maintains from DGB's head office. Despite not having touched a live ball for more than two decades, the Ortiz style of team building and play calling remains the dominant coaching style across most of corporate space. Not everyone agreed with that style of game management though.
In 973AE, a young coach named Sill Clapper steered her team, the AlphaCom Interceptors, to victory in the Fargone Classic tournament using a set of plays that relied far more on speed and play-interruption than was typical then for a human team. Most importantly, their opponent in the Fargone final that year was none other than the Trontek 29'ers, a team being coached by Mora Sherman – a first generation disciple of Ortiz. Since then, 'interceptor' style teams, faster, lighter than a standard Corp outfit, have continued to win games and earn fans throughout the five spheres.
Advancement Tables
Guard
| Dice Roll | Advancement |
|---|---|
| 1 | Agility or Speed bonus |
| 2 | Strength or Skill bonus |
| 3 | Can't Feel a Thing |
| 4 | Grapple |
| 5 | Stubborn |
| 6 | Alert |
Jack
| Dice Roll | Advancement |
|---|---|
| 1 | Agility or Speed bonus |
| 2 | Strength or Skill bonus |
| 3 | Lucky |
| 4 | Jump |
| 5 | Stubborn |
| 6 | Choose from this list |
Striker
| Dice Roll | Advancement |
|---|---|
| 1 | Agility or Speed bonus |
| 2 | Skill bonus |
| 3 | Duck and Weave |
| 4 | Feint |
| 5 | Stubborn |
| 6 | Boost |
Pelgar Mystics
Judwan Team
The tiny number of Judwanese teams play an odd game of DreadBall. They have neither Guards nor Jacks and never try to damage their opponents; they simply outplay them. A Judwan Striker needs no glove to catch or throw the ball, instead using his long, lithe arms and slender fingers to launch the ball with as much speed as other races. Their games are fast and often surprising, with a tendency to end suddenly in a 7-point landslide.
Player Stats
| Player | Move | Strength | Agility | Speed | Skill | Armour | Cost | Recommended Team | Abilities |
|---|---|---|---|---|---|---|---|---|---|
| Striker | 5 | 4+ | 4+ | 3+ | 4+ | 5+ | 145 | x6 | Pacifist, Feint |
| DreadBall Cards | 75 | x1 | |||||||
| Coaching Dice |
Pacifist: This Player will not intentionally harm another. They will not make any kind of Slam, or commit a DodgeBall or Restrain Foul, regardless of any rule allowing them to. They can inadvertently harm another Player if they miss a Strike while a Player is standing on the Strike Hex.
Feint: This Player has access to a new Action called Feint.
Judwan can make a Run Action as part of a Feint, before rolling the test. This follows all the normal rules for a Run.
The target of a Feint must be a single standing opponent in one of the Feinting Player's 6 adjacent hexes.
- If the target Player is a Jack or Guard, and has the Feinting Player in one of their Threat Hexes, they have two options – either to Dodge or to Slam. The target Player's Coach must choose before any dice are rolled.
- If the target Player is a Striker, or has the Feinting Player in their rear arc, they may only Dodge, representing them trying to block the Feinting Player.
As an (X) test, the successes for the Feint will be compared to the successes rolled by the opposing Player's Dodge or Slam.
Feint: Speed test (X)
Modifiers:
- +1 if the Player is a Judwan
- +1 if the Feinting Player started the Action adjacent to the target
- -1 per opposing Player threatening the hex you are in, ignoring the Player you are misdirecting (maximum modifier -2)
Feint Wins: The winning Coach turns their Player to face any direction. They may then move the losing Player 1 hex in any direction, and with any facing, without making any Evade rolls. The Action ends.
Feint Doubles: As above. In addition, the losing Player is knocked prone. If the winning Player did not already Run as part of the Feint, they may make an immediate Run Free Action.
Draw: The Players both turn to face each other. The Action ends.
Feint Loses: The Feinting Player turns to face the other Player. Then, see the results for Slamming/Dodging.
The Judwan are a peaceful and philosophical race. The story of their exile from their home planet, and how they ended up playing DreadBall, is a long and sad one. Suffice it to say that the Judwan were unfortunate in that they inhabited a land under which lay considerable mineral wealth, and doubly unfortunate in that they lacked any formal military when GCPS industrial surveyors arrived on their world.
The Judwan players in the GCPS now are fully-aware that they have been exploited by the very corporate empires that they now play for. But in this, as with everything else, the Judwan remain stoic.
DreadBall has provided them with both a focus for their time and a means to raise funds for their eventual return to Pelgar. It has been a long struggle, and is likely to go on for many more years still. But, while it does, the many fans of DreadBall will be more than happy to watch their unique style of play on the arena floor.
Mu'shen'wan: The practice of Mu'shen'wan is often mistakenly described by non-Judwan as a martial art. This could not be further from the truth. Whilst the physical motions could theoretically be used in a martial fashion, nothing is further from the mind of an honest practitioner when he is lost in the deep meditation that characterises the true expert. The art is learned in strictly defined forms, much like the kata of human martial arts. However, a central and unvarying principle is that although Mu'shen'wan is performed with a partner, neither should ever touch the other. Mu'shen'wan is a completely non-contact art. Despite its nature, the Judwan have found that Mu'shen'wan is of considerable use on the DreadBall pitch. Instead of harming their opponents, they confuse and mislead them with sinuous and graceful movements that appear to lead in one direction before the Judwan disappears in another.
Advancement Tables
Striker
| Dice Roll | Advancement |
|---|---|
| 1 | Agility bonus |
| 2 | Skill bonus |
| 3 | Take a Dive |
| 4 | Duck and Weave |
| 5 | Reach |
| 6 | Backflip |
Chromium Chargers
Meta-bot Team
DreadBall's rules state very clearly that a player must play as a single position, but they never considered that someone could change from one to another within a match. The Chromium Chargers could. They would troop out onto the pitch as Jacks, but at the whirr of a servo they could change to a Striker or a Guard, avoiding any infringement of the letter of the rules by only ever being a single role at a time, but the spirit of the rules is ridden over roughshod. And the crowd loved it.
Player Stats
| Player | Move | Strength | Agility | Speed | Skill | Armour | Cost | Recommended Team | Abilities |
|---|---|---|---|---|---|---|---|---|---|
| Guard | 5 | 3+ | 5+ | 4+ | 4+ | 4+ | - | - | Transform |
| Jack | 6 | 4+ | 4+ | 4+ | 4+ | 4+ | 145 | x6 | Transform |
| Striker |
Transform
The robot has been designed to modify its appearance and refocus its energies to best suit the task at hand.
All Meta-bots are purchased as Jacks. During the game Players with this ability change their role by using the Transform Action. Players will use all of the rules and limitations of their current role, but can change between roles as often as they like during a match. To Transform, spend an Action Token as usual and make the following test:
Transform: 4+ test (1)
Pass: The Player immediately changes roles. Jacks may Transform into Guards or Strikers. Guards and Strikers may only Transform into Jacks. The Action ends.
Pass Doubles: As above. In addition the Player may make an immediate Run, Throw, Slam, Steal or Transform Free Action.
Fail: There has been a technical problem. The Action ends.
If a Player is carrying the ball when they Transform into a Guard, the ball scatters, ending the Rush. Otherwise, a Player with the ball retains it whilst they Transform.
A Player may Transform whilst prone.
In a League, a Transforming Player earns experience like any other. When making advancements, they may use the advancement tables for any of the roles but may not choose the Keeper ability. However, on the pitch they may still only use abilities available to the role they are currently in (Extended Interference would be of no use to a Player when in a Striker role for example). A stat increase will increase the same stat across all roles, but remember that no stat can be better than 3+.
When hiring transferred Players, Robots are considered to have access to all roles, and therefore will pay 60mc premiums on all Player types.
The original DreadBall games were considered, by some, to be a showcase for the prowess of biological organisms. In a galaxy so dominated by technology it was a reminder of simpler things; a primal battle for dominance, a conflict settled in bloodshed, all bound up in the context of a glorious sporting spectacle. But the robots were bound to come.
Too many big corporations had vested interests in showing off their cybernetic prowess for the lobby to go away and the first robot team took to the field in the early days of Shantek SmackDown III. Many deaths, lawsuits and expensive settlements later, Digby finally laid out regulations limiting and defining exactly how well-armoured and armed robots on the pitch may be. The role of robots in DreadBall arenas seemed to be extremely well-defined. At least until the first Metabots, the Chromium Chargers arrived…
Advancement Tables
Guard
| Dice Roll | Advancement |
|---|---|
| 1 | Brush Aside |
| 2 | Pummel |
| 3 | Can't Feel a Thing |
| 4 | Stubborn |
| 5 | Threatening |
| 6 | Choose from this list |
Jack
| Dice Roll | Advancement |
|---|---|
| 1 | Agility or Speed bonus |
| 2 | Strength or Skill bonus |
| 3 | Linked |
| 4 | Grapple |
| 5 | Extended Interference |
| 6 | Choose from this list |
Striker
| Dice Roll | Advancement |
|---|---|
| 1 | Backflip |
| 2 | Duck and Weave |
| 3 | Alert |
| 4 | Quick Recovery |
| 5 | Feint |
| 6 | Choose from this list |
Locust City Chiefs
Z'zor Team
On the pitch the Locusts are a versatile team, with a fearsome punch from their lone Guard. They rely a lot on their Jacks, who are slightly more mobile than most. This leaves their few specialists to focus on being in exactly the best positions for the winning moves.
Player Stats
| Player | Move | Strength | Agility | Speed | Skill | Armour | Cost | Recommended Team | Abilities |
|---|---|---|---|---|---|---|---|---|---|
| Guard | 5 | 3+ | 4+ | 4+ | 5+ | 4+ | 170 | x1 | Can't Feel a Thing, Threatening |
| Jack | 5 | 4+ | 4+ | 4+ | 4+ | 4+ | 105 | x5 | Boost, Can't Feel a Thing |
| Striker |
Boost: The Player is either exceptionally long-limbed or has explosive reserves of energy. The Player gets a +1 modifier on Dash tests.
Can't Feel a Thing: This Player gains a +1 modifier to all Armour tests.
Threatening: This Player's Threat Hexes always modify a test (up to the maximum) if the modifier is listed. For example, if a Threatening Player Slams an opponent then that target Player will receive a -1 modifier for being in the Slamming Player's Threat Hex.
Of the myriad alien races that take to DreadBall pitches across the GCPS, the Z'zor are perhaps the most uncomfortable – a least for human spectators – to watch.
It's not the violence. Z'zor Guards are some of the most dangerous in the game, but a hardened DreadBall fan has seen dismemberments and deaths many times before. Nor is it their unusual resilience that concerns many viewers. Sure, rigidly plated exoskeletons can be a tough nut for an opponent to crack, but challenge is part of the game.
Perhaps then, it is that despite being very definitely alien, the Z'zor also look disturbingly familiar. They are like common insects grown to monstrous size. And their body language, all hairy limbs and dripping, clicking mandibles, suggests a constant readiness to pounce upon the next warm-blooded thing that passes by their multi-faceted eyes.
Advancement Tables
Guard
| Dice Roll | Advancement |
|---|---|
| 1 | Agility bonus |
| 2 | Speed or Skill bonus |
| 3 | Linked |
| 4 | Toxic |
| 5 | Pummel |
| 6 | Mighty |
Jack
| Dice Roll | Advancement |
|---|---|
| 1 | Agility or Speed bonus |
| 2 | Strength or Skill bonus |
| 3 | Linked |
| 4 | Extended Interference |
| 5 | Reach |
| 6 | Gotcha |
Striker
| Dice Roll | Advancement |
|---|---|
| 1 | Agility or Speed bonus |
| 2 | Skill bonus |
| 3 | Linked |
| 4 | Feint |
| 5 | Reach |
| 6 | Alert |
Ukomo Avalanchers
Teraton Team
On the pitch Teratons are too slow to make good Strikers, but their natural armour and bulk makes them fine Guards, and what they lack in agility they make up for with their ability to disappear into thin air!
Although they can play passing games if they must, their main advantage lies in their strength – they specialise in battering their opponents into submission, and only then scoring.
Player Stats
| Player | Move | Strength | Agility | Speed | Skill | Armour | Cost | Recommended Team | Abilities |
|---|---|---|---|---|---|---|---|---|---|
| Guard | 5 | 3+ | 5+ | 5+ | 4+ | 4+ | 130 | x4 | Shell, Teleport |
| Jack | 5 | 3+ | 5+ | 5+ | 4+ | 4+ | 100 | x4 | Shell, Teleport |
| Coaching Assistants |
Shell: Teratons get +1 to Armour Checks when they are attacked from the rear arc.
Teleport: Teleport is an Action that can be used whenever a Player would normally Run, whether as a standalone Action, a Free Action, or as part of another Action such as a Slam. The Player immediately disappears, and reappears in an empty hex up to 4 hexes away, facing any direction. No Evades need to be made, and the Teleporting Player can move through other Players or the ball without touching them. Players can Teleport when prone, but remain prone in their new position.
A Teleport move cannot be interrupted midway through by Run Interference or any card, and cannot be extended by Dashing. In all other respects it is treated as a Run.
In addition, the Teleport Action is a defensive reflex. When a Player with this ability is Slammed or hit by a ball from their rear arc, they have a choice. They can Dodge as normal, or they can instantly Teleport. However, as they are disoriented by the attack, the opposing Coach chooses the empty hex that they Teleport to, exactly as above. If they Teleport, any Slam Action against them is ended.
A ball Thrown at them will scatter. If the attack would have been a Foul, it still is.
Elder Teratons occupy many positions of power and authority throughout corporate space, bringing the weight of their great intellect – and considerable patience – to bear in advancing the interests of the GCPS. For the younger members of the race though, DreadBall has proven to be a wonderful way of expressing their more primitive side. Females on the Teraton homeworld of Tortugoa are relatively rare and competition for a partner intense. A full grown male Teraton, while smaller than a mature female, is still capable of tearing a rival to shreds – far better to employ that power in demonstrating dominance against an opponent in the arena!
Their bulk and raw power belies an important trick every 'ton has up their armoured sleeve though. The ability to teleport a short distance – an evolutionary holdover from a time when the Teraton was not the dominant species on Tortugoa – allows them to either move rapidly across the neodurium for an attacking rush or to dodge a back-breaking slam attempt by an opponent. Teams like the Ukomo Avalanchers have used this ability to great effect; during the Three System Throwdown of '87, Guard Eissur Nomo chained together three career-ending slams against the Goran team, the 'Destroyas', in one rush.
Advancement Tables
Guard
| Dice Roll | Advancement |
|---|---|
| 1 | Agility bonus |
| 2 | Speed or Skill bonus |
| 3 | Pile-Driver |
| 4 | Ram |
| 5 | Can't Feel a Thing |
| 6 | Threatening |
Jack
| Dice Roll | Advancement |
|---|---|
| 1 | Agility bonus |
| 2 | Speed or Skill bonus |
| 3 | Brush Aside |
| 4 | Shove |
| 5 | Can't Feel a Thing |
| 6 | Pummel |
Koeputki Kolossals
Zee Team
The Zees play a chaotic game of DreadBall. Individually they are among the worst players on the circuit. However, throw enough monkeys at a problem and eventually they'll come up with the right answer. The endless carousel of tiny identical creatures is enough to confuse the audience, the referee, and the opposing team, and before you know it the ball has somehow turned up in the Strike Zone!
Player Stats
| Player | Move | Strength | Agility | Speed | Skill | Armour | Cost | Recommended Team | Abilities |
|---|---|---|---|---|---|---|---|---|---|
| Jack | 5 | 5+ | 3+ | 4+ | 5+ | 4+ | 85 | x10 | It Wasn't Me, Runaround |
| DreadBall Cards | 75 | x2 |
It Wasn't Me
The Zees are all clones, and in a hectic game it can be hard for the Ref to count them or tell them apart. These rules are in effect whenever there are at least 4 Players with this ability on the pitch.
The Zees gain a +1 modifier to all Distract rolls. If any Foul committed by a Zee is Spotted, the Fouling Player does not have to be the one sent off – the Zee Coach may choose any of the Distracting Zee Players (if there were any) to be sent off instead.
In addition, the Ref will only get one chance to spot Sneak Fouls at the start of each Zee Rush. Sneaking at any other time during the Zees' Rush cannot be spotted. At the beginning of each Zee Rush, make one Spot Foul test for all the extra Players on the pitch. If Spot Foul wins or doubles, use the following result instead:
Spot Foul Wins: The Zee Coach chooses a number of Zee Players on the pitch equal to the difference in successes rolled, and places them in the 1 section of their Sin Bin (even if this takes the Zee team below 6 Players).
Any Fan Check card generated for ending a Rush without a Sneak Foul being Spotted is drawn immediately after this test, instead of at the end of the Rush.
Runaround
Two different Players with this ability can both make a Run Action using a single Action Token. The Actions must be taken one after the other, and will count towards both Players' Action limit for the Rush.
Team Special Rule – Monkey Business
Zee teams cannot buy Coaching Dice. They are simply too anarchic and confusing for a single Coach to train.
At the start of each Zee Rush, before rolling to Spot any Sneak Fouls, the Zees discard any Coaching Dice that they have. They then take a number of Coaching Dice equal to the number of Zee Players on the pitch past the legal limit. For example, if there were 9 Zees on the pitch in a regular game, the Zee Coach would receive 3 Coaching Dice. Zees can still earn Coaching Dice through Fan Checks as normal, but like the rest of their Coaching Dice any unused ones will be discarded at the start of each Rush.
Some corporate sponsors don't have easy access to bizarre aliens or giant robots to form unusual teams, but everyone wants something weird to draw in the crowds. Farbiketek scientists began experimenting with retraining cerebrally enhanced apes, mainly for their own amusement, when a supply problem marooned them on Shebentor IV's outer moon for over two years. A rescue team eventually found two teams of highly trained 'zees playing DreadBall amidst the bones of the original scientists. Not one to miss out on a potential profit, the commander of the rescue mission kept the teams intact and ran a league of his own on the way back to civilisation. BioNod Industries bought the rights to the DNA of the Farbiketek strain, and have been producing clones for DreadBall ever since.
Advancement Tables
Jack
| Dice Roll | Advancement |
|---|---|
| 1 | Strength bonus |
| 2 | Skill bonus |
| 3 | Speed bonus |
| 4 | Extended Interference |
| 5 | Illegal |
| 6 | Feint |
Kalimarin Ancients
Nameless Team
The Ancients' playing style is highly synergetic, especially with their two types of Guard. Working together in pairs they are deadly. Their victims quickly learn that being entangled in a mass of tentacles does nothing good for your ability to defend yourself. Fortunately their victims are given plenty of time in the hospital to reflect on this valuable lesson.
Player Stats
| Player | Move | Strength | Agility | Speed | Skill | Armour | Cost | Recommended Team | Abilities |
|---|---|---|---|---|---|---|---|---|---|
| Feromite Guard | 5 | 3+ | 5+ | 4+ | 5+ | 4+ | 150 | x2 | Steady |
| Undulan Guard | 4 | 4+ | 4+ | 4+ | 5+ | 4+ | 135 | x2 | Gotcha, Reach |
| Striker |
Steady: A Steady Player cannot be knocked down as a result of a Slam. They can be pushed back and injured as normal, but if they remain on the pitch they will stay upright.
Although they cannot be knocked down, a Steady Player can still fall over on their own, for example if they fail a Dash or Evade test or are Brushed Aside.
Gotcha: Some Players are very tricky to get away from. Even a single Player with this ability causes the maximum -2 modifier for threatening an opponent during a test. A Player with Gotcha may Restrain an opponent as normal, taking the modifier to -3.
Reach: This Player has long arms or prehensile appendages that allow it to act at a distance.
Players with Reach consider all hexes in their front arc and within two hexes of the Player to be their Threat Hexes.
Opponents will need to Evade out of these hexes as normal unless they are moving closer to the Player's front – moving from the outer yellow Threat Hexes to the inner green ones.
This Player may Slam or Feint against an opponent within this area, as long as at least one of the hexes in between is empty. Any modifier for being or moving adjacent only applies if the Player actually is adjacent to the target. Choose one of these hexes in between to use as the origin of the Slam for the purposes of determining push back direction. The target of the Slam or Feint may only Dodge, unless they also have Reach. Otherwise the test is resolved as normal.
This Player may also Pick Up the ball in the same way. If the test fails, the ball scatters from its original location.
The Nameless worlds have spawned countless strange creatures and, while ETCU has not yet divined their collective goal in the GCPS, it is clear many of them have a great desire and ability to play DreadBall. Argolian specialists (of the 4th Grade and above) can understand enough of the babbling screeches and clicks which pass for language amongst the Nameless to act as go-betweens, allowing many Nameless teams to secure lucrative contracts with corporate sponsors.
The first of these teams was simply called 'The Nameless'. Other team names focus on their apparent aquatic origins, or their many tentacles.
Advancement Tables
Feromite Guard
| Dice Roll | Advancement |
|---|---|
| 1 | Speed bonus |
| 2 | Agility or Skill bonus |
| 3 | Can't Feel a Thing |
| 4 | Threatening |
| 5 | Pummel |
| 6 | Brush Aside |
Undulan Guard
| Dice Roll | Advancement |
|---|---|
| 1 | Agility or Speed bonus |
| 2 | Strength or Skill bonus |
| 3 | Alert |
| 4 | Threatening |
| 5 | Grapple |
| 6 | Backstab |
Striker
| Dice Roll | Advancement |
|---|---|
| 1 | Agility or Speed bonus |
| 2 | Skill bonus |
| 3 | Reach |
| 4 | Threatening |
| 5 | Stench |
| 6 | Boost |
Shan-Meeg Starhawks
Asterian Team
Asterians aren't the first teams to use strategic fouls as a standard tactic, though they are one of the more proficient at it. Whilst the Zees come at the business of fouling from one direction, the Asterians approach it from entirely another. They make up for their physical fragility by bending the rules to their advantage, while their superior Strikers strut their stuff.
Player Stats
| Player | Move | Strength | Agility | Speed | Skill | Armour | Cost | Recommended Team | Abilities |
|---|---|---|---|---|---|---|---|---|---|
| Guard | 6 | 4+ | 4+ | 3+ | 4+ | 4+ | 120 | x1 | Duck and Weave, Fragile |
| Jack | 6 | 5+ | 4+ | 3+ | 4+ | 4+ | 100 | x3 | Duck and Weave, Fragile, Take a Dive |
| Striker |
Duck and Weave: This Player gains a +1 modifier on any attempts to Dodge.
Fragile: The Player suffers a -1 modifier to Armour tests.
Take a Dive: A Player with this ability may Take a Dive, pretending to have been tripped and attempting to get an opponent sent off by the Ref.
The Take a Dive Action may be used at any point during a Player's movement – either a Run, Sprint or Run Interference – while the Player is standing and in any opposing Player's Threat Hex. This will end their Action.
The Diving Player is laid prone, and their Coach calls Foul on any opposing Player threatening the Diver.
Firstly, resolve a Spot Foul test against the Diving Player to see if the Ref has seen through the ruse. The Player gains a +1 modifier to their Distract roll.
If the Foul is Spotted, the Diving Player is sent off as normal.
However, if Distract wins, the Ref has fallen for it – use the following result instead.
Distract Wins: The chosen opposing Player is sent off for a number of turns equal to the difference in successes rolled. If this number is 4 or more, the Player is sent off for the rest of the game.
Show Off: Some Players just love to play to the crowd, and even if they are talented it can hurt their game. This Player suffers an additional -1 modifier on any Strike attempt. If the Player succeeds in a Strike attempt then they make a Fan Check in addition to any that were generated anyway.
In a league, a Player with Show Off will generate an extra 5mc of revenue after any match they took part in.
Asterians have a very mixed reputation among the citizens of the GCPS. To some they are the archetype of the elegant and enigmatic alien, with their unearthly designs and haunting songs. To others they are simply traders and merchants, to be trusted as much as every other weird alien with an exotic cargo to sell. To yet others they are simply the bloodthirsty murderers of the Yolinian Massacre and should be put down as vermin.
This complexity is reflected in the DreadBall arena. On the one hand, Asterian players have a lithe and fluid grace that is entrancing to watch. On the other, they employ the most outrageous and underhanded tactics. On the pitch they bend or break rules as needed, particularly faking all manner of fouls to get an opposition player sent off and gain a momentary advantage in which to make a strike.
Advancement Tables
Guard
| Dice Roll | Advancement |
|---|---|
| 1 | Agility or Skill bonus |
| 2 | Pummel |
| 3 | Illegal |
| 4 | Backstab |
| 5 | Boost |
| 6 | Remove Fragile |
Jack
| Dice Roll | Advancement |
|---|---|
| 1 | Agility bonus |
| 2 | Skill bonus |
| 3 | Illegal |
| 4 | Backstab |
| 5 | Shove |
| 6 | Backflip |
Striker
| Dice Roll | Advancement |
|---|---|
| 1 | Agility bonus |
| 2 | Move bonus |
| 3 | Illegal |
| 4 | Backflip |
| 5 | Feint |
| 6 | Alert |
The Unincorporated
Rebs Team
Teams of the 'unincorporated' are built around the concept of the whole being greater than the sum of the parts. Battle-hardened Rin and implacable Gaelians clear the way for the squishy but accurate Ralarat Strikers, while the Sorak protect the flanks and pick up deep passes.
Their anarchic playstyle means the players aren't always the best at following a coach's orders, but the sheer unpredictability of these rebel teams is what the fans love about them. You never know exactly what wild or crazy play they might have hidden up their sleeves for the next rush.
Player Stats
| Player | Move | Strength | Agility | Speed | Skill | Armour | Cost | Recommended Team | Abilities |
|---|---|---|---|---|---|---|---|---|---|
| Rin Guard | 5 | 4+ | 4+ | 4+ | 5+ | 4+ | 115 | x2 | Pummel |
| Gaelian Jack | 7 | 4+ | 5+ | 4+ | 4+ | 4+ | 125 | x2 | Ram, Shove |
| Sorak Jack |
Pummel: Once per Action, if a Player with this ability fails to knock down an opponent with a Slam, and ends that Action with the target Player still in their Threat Hex, they may immediately make a Slam Free Action against the same target.
Ram: When this Player makes a Slam, their target may be pushed back, retaining its facing, and the Ramming Player must immediately follow up before the Slam is resolved. This could result in the target Player being pushed back twice.
Shove: If this Player has the option to Slam an opposing Player then they may choose to Shove them. This is resolved in the same way as a Slam, with the Shoving Player gaining a +2 modifier, and should be declared to your opponent before rolling. If the Shoving Player wins, use the following result.
Shove Wins: The winning Player turns to face the losing Player. The losing Player is pushed into one of the 3 hexes directly away from the winning Player, chosen by the winning Coach, and turns to face the hex they just vacated. The Action ends.
A Safe Pair of Hands: A Player with this ability gains a +1 modifier on Catch tests.
Jump: A Player with this ability may Jump directly over nearby Players during a Run or Sprint. This is an alternative way of Evading – you do not need to roll for both, and a Jumping Player can be Restrained.
Jumping is a 2 hex move (the first hex containing the Player being jumped over, and the second hex that the Jumping Player will land in). Before rolling the dice, the Coach must state which hex they are attempting to move into.
A separate test must be made each time a player Jumps during a move. There is no limit to the number of times this can be attempted in one Action.
It is possible that a Player will need to Dash in order to move far enough to Jump. Roll for the Dash(es) first, and then the Jump. If any of the Dash tests are failed, the Jump is still resolved but will fail automatically.
Jump: Agility test (123)
Modifiers:
- -1 per opposing Player threatening the hex you are moving from (maximum modifier -2)
Pass: The Player moves into the chosen hex, facing any direction (even if Sprinting). The Player may continue their move, Jumping again if necessary. Remember that it will be harder to succeed with each successive attempt.
Fail: The Player is laid prone in the hex they were moving to. The Action ends.
- If they were carrying the ball, they drop it and it scatters. If it is the Player's owning Coach's Rush, the Rush ends.
- If a loose ball was in the hex they were moving to, it scatters.
The Rebellion playing as an officially sanctioned team was, on the face of it, one of the most risky and controversial decisions that Digby had ever taken. Though the popularity of DreadBall was undisputed, many initially saw this as a power play by the DGB that the Council would not take kindly to. Of course, as far as the Council was concerned, this was all to the good.
Allowing the Rebels to play in sanctioned leagues gave several distinct advantages. It literally took Rebel fighters off the front lines, draining the movement of talented young soldiers who would often be quickly seduced by the lifestyle they could lead. It also meant that the message of the rebellion could be tightly controlled, choreographed, and diluted to the Council's best advantage. And it meant that the Rebs themselves could be seen. They could be witnessed in hi-def glory, brawling and bleeding on the 'durium the same as anyone else. Not legendary heroes and freedom fighters, but common people who lived and died just like anyone else. Just as DreadBall can make heroes out of monsters, it can make nothings out of heroes.
Team Special Rule – Anarchic Rebellion
Coordinating a galaxy-spanning rebellion is hard – there are countless races with countless problems, all wanting their voice heard and to do their own thing. DreadBall is no different. However, if properly motivated by the right plays, the Rebs can pull it together and make best use of the combined abilities of each race.
A Rebs Coach may only spend 1 Action Token on each Player per Rush, but may spend up to 3 Action Cards on a Player. In addition, at the end of any Rush in which Rebs Players of at least 3 different races had Actions spent on them, draw a DreadBall card for free. At the end of any Rush in which Players of 5 different races made Actions, draw two cards instead.
Every oppressed race in the GCPS wants to be part of the rebellion. When building a team, Rebs only pay a 20mc premium on Transfers rather than 60mc.
Advancement Tables
Rin Guard
| Dice Roll | Advancement |
|---|---|
| 1 | Agility or Speed bonus |
| 2 | Strength or Skill bonus |
| 3 | Quick Recovery |
| 4 | Can't Feel a Thing |
| 5 | Stubborn |
| 6 | Threatening |
Gaelian Jack
| Dice Roll | Advancement |
|---|---|
| 1 | Agility or Speed bonus |
| 2 | Strength or Skill bonus |
| 3 | Grapple |
| 4 | Brush Aside |
| 5 | Feint |
| 6 | Grizzled |
Sorak Jack
| Dice Roll | Advancement |
|---|---|
| 1 | Speed bonus |
| 2 | Strength or Skill bonus |
| 3 | Strong Tail |
| 4 | Extended Interference |
| 5 | Take a Dive |
| 6 | Jump |
Ralarat Striker
| Dice Roll | Advancement |
|---|---|
| 1 | Speed bonus |
| 2 | Agility bonus |
| 3 | Backflip |
| 4 | Duck and Weave |
| 5 | Quick Recovery |
| 6 | Feint |
Nemion Oceanics
Sphyr Team
The Sphyr are a solid and well-rounded team that draw on the heightened senses of their aquatic ancestry. They are hard to surprise, and are masterful in the use of their fifth limb – their powerful tail. They eschew fancy tactics, but have little in the way of obvious weaknesses. For this reason they are a reliable team that is far harder to beat than many opponents expect.
Player Stats
| Player | Move | Strength | Agility | Speed | Skill | Armour | Cost | Recommended Team | Abilities |
|---|---|---|---|---|---|---|---|---|---|
| Guard | 5 | 4+ | 4+ | 4+ | 4+ | 4+ | 120 | x2 | Alert, Strong Tail |
| Jack | 5 | 4+ | 4+ | 4+ | 4+ | 4+ | 100 | x2 | Alert, Strong Tail |
| Striker |
Alert: The Player is able to read the game far better than most, and is rarely surprised. When an opposing Player moves into any adjacent hex, the Alert player may immediately turn to face them if they wish. This turn happens before the rest of the original Player's Action is resolved.
Strong Tail: A Slam or Steal attempt on this Player made from their rear arc suffers a -1 modifier. In addition, if a Player with this rule doubles on an Evade roll, choose one opponent they were Evading away from. They are hit by the tail and knocked prone. Steady Players remain standing as normal.
There was a time when Sphyria was an oceanic paradise; 96% of the world's surface was covered in great seas that positively surged with life. That was until an administrative error marked the emerald planet as the target for large-scale seismic shock weapons testing by Accutek. In the ensuing apocalypse, Sphyria's seas were boiled away, leaving behind little more than an arid dustbowl.
Any Sphyr who had the chance immediately severed ties with the GCPS. Many joined the Rebellion. Some Sphyr, suspicious of another human-dominated organisation, looked for other ways to strike back. DreadBall presented the perfect opportunity. DreadBall leagues allow like-minded Sphyr to organize and amass much-needed funding and information, all essential ingredients to any successful revolutionary movement.
Advancement Tables
Guard
| Dice Roll | Advancement |
|---|---|
| 1 | Move or Speed Bonus |
| 2 | Strength or Agility Bonus |
| 3 | Threatening |
| 4 | Stubborn |
| 5 | Can't Feel a Thing |
| 6 | Backstab |
Jack
| Dice Roll | Advancement |
|---|---|
| 1 | Move or Speed Bonus |
| 2 | Skill or Agility Bonus |
| 3 | Backstab |
| 4 | Stubborn |
| 5 | Extended Interference |
| 6 | Backflip |
Striker
| Dice Roll | Advancement |
|---|---|
| 1 | Move or Speed Bonus |
| 2 | Skill bonus |
| 3 | Feint |
| 4 | Stubborn |
| 5 | Boost |
| 6 | Backflip |
Rallion Roses
Hobgoblin Team
Part of the Hobgoblins' appeal, apart from their inventive levels of cruelty on the pitch, is in their Guards. Hobgoblins are one of the few races that seem to have a true affinity with Hulks. These gigantic creatures, whose origins are still somewhat hazy, are almost as large as actual giants, and the prospect of seeing several of them on the pitch at once is often all that is needed to sell out a game.
Player Stats
| Player | Move | Strength | Agility | Speed | Skill | Armour | Cost | Recommended Team | Abilities |
|---|---|---|---|---|---|---|---|---|---|
| Hulk Guard | 5 | 3+ | 5+ | 5+ | 5+ | 4+ | 200 | x1 | Brush Aside, Mighty, Steady |
| Hobgoblin Jack | 5 | 4+ | 4+ | 4+ | 5+ | 4+ | 95 | x4 | Peer Pressure |
| Hobgoblin Striker |
Brush Aside
A Player with this ability may Brush Aside opposing Players during a Run or Sprint in a similar way to Evading.
If a Player with this ability wants to move into a hex that is occupied by a standing, opposing Player they may try to Brush Aside rather than Slamming them. This will allow them to carry on moving past the other Player. There must be a space to push the opposing Player into.
Brush Aside: Strength test (123)
Modifiers:
- -1 if the Player being Brushed Aside is a Guard
- -1 per opposing Player threatening the hex you are in, ignoring the Player you are Brushing Aside (maximum modifier -2)
Pass: The target Player is pushed into one of the 3 hexes directly away from the Player Brushing Aside, chosen by the winning Coach, and retains their facing. The winning Player must move into the vacated hex, and may then continue their move.
Pass Doubles: As above. In addition, the target Player must take an Agility test (X), where X is the number of successes achieved by the Brush Aside roll, or be knocked prone.
Fail: Turn the target model to face the Player using Brush Aside. The Action ends.
A separate test must be made each time a player Brushes Aside during a move. There is no limit to the number of times this can be attempted in one Action.
Although the Player may be moving out of a threat hex, they do not need to Evade as well when making a Brush Aside move.
It is possible that a Player will need to Dash to reach the currently occupied hex. Roll for the Dash first. If the Dash test is failed, the Brush Aside Action is still resolved but will fail automatically.
Mighty: A Player with this ability gains a +1 modifier for Slams and Armour Checks against non-Giant opponents.
Steady: A Steady Player cannot be knocked down as a result of a Slam. They can be pushed back and injured as normal, but if they remain on the pitch they will stay upright. Although they cannot be knocked down, a Steady Player can still fall over on their own, for example if they fail a Dash or Evade test or are Brushed Aside.
Peer Pressure: When Hobgoblins group together, their behaviour regresses into a childish, yet surprisingly violent, game of one-upmanship. They egg each other on like children in a schoolyard, and then constantly try to outdo one another.
Hobgoblins gain a +1 modifier to all Throw, Slam and Steal tests for each other Hobgoblin Player threatening the hex they are in.
If a test supported in this way achieves no successes, the failing Player is knocked prone by their teammates. After fully resolving the Action, the Coach may choose any one of the threatening Hobgoblin Players to make an immediate Run, Slam, Steal or Throw Free Action as they try to outperform their unfortunate comrade. If this Free Action results in a dropped ball being Picked Up, the Rush continues as normal.
Hobgoblins are generally not popular creatures. Even most other Gorans view them with disdain and it is a rare band of Marauders that will count one of these creatures amongst its ranks.
When Hobgoblins first approached the DGB to play DreadBall, having formed a loose federation and spent months in training and preparation, they were laughed out of the building. Discouraged, the Hobgoblin DreadBall Federation fell into disarray, though many of its individual members took their solace playing games on the Xtreme circuit. Some of these individuals became very good indeed, as it turned out that a stench that could level armies and a sinister delight in pain and the inherent team spirit that comes from being a race of pariahs made for an effective set of players. Their reputation grew to such an extent when the DGB put out the call for new teams and the Rallion Roses turned up, they were welcomed – if not with open arms – at least with a friendly grimace and as much air freshener as was available. They have enjoyed some success, though more with the fans than in terms of actual victories, and this has encouraged other teams of Hobgoblins to come forward.
Advancement Tables
Hulk Guard
| Dice Roll | Advancement |
|---|---|
| 1 | Agility or Speed bonus |
| 2 | Stubborn |
| 3 | Can't Feel a Thing |
| 4 | Ram |
| 5 | Threatening |
| 6 | Pile Driver |
Hobgoblin Jack
| Dice Roll | Advancement |
|---|---|
| 1 | Agility or Speed bonus |
| 2 | Strength or Skill bonus |
| 3 | Stench |
| 4 | Illegal |
| 5 | Backstab |
| 6 | Lucky |
Hobgoblin Striker
| Dice Roll | Advancement |
|---|---|
| 1 | Agility or Speed bonus |
| 2 | Skill bonus |
| 3 | Stench |
| 4 | Take a Dive |
| 5 | Lucky |
| 6 | Backflip |
Rotatek Rockslides
Brokkr Team
Once out on the neodurium, the Brokkrs demonstrate the grim determination that has rightly made them famous. This goes for every aspect of the game, whether it's breaking heads or actually trying to put some points on the board. Their extraordinary toughness counteracts their lack of agility, but when required they can show a surprising turn of speed for beings with such short legs.
Player Stats
| Player | Move | Strength | Agility | Speed | Skill | Armour | Cost | Recommended Team | Abilities |
|---|---|---|---|---|---|---|---|---|---|
| Guard | 4 | 3+ | 5+ | 4+ | 4+ | 4+ | 130 | x4 | Grizzled, Steady |
| Jack | 4 | 3+ | 5+ | 4+ | 4+ | 4+ | 95 | x2 | Grizzled, Steady |
| Striker |
Grizzled: A Player with this ability is a particularly tough veteran who takes little notice of physical pain. Any opponent making a Slam against this Player suffers a -1 modifier on the test.
Steady: A Steady Player cannot be knocked down as a result of a Slam. They can be pushed back and injured as normal, but if they remain on the pitch they will stay upright. Although they cannot be knocked down, a Steady Player can still fall over on their own, for example if they fail a Dash or Evade test or are Brushed Aside.
Brokkrs tend towards a more emotional and tempestuous approach to life than is the norm for the Star Realm. This makes them excellent prospectors and pioneers for their people. It also makes them natural DreadBall players.
Every bit as tough and unyielding as their Forge Father brethren, Brokkrs play with a passion and ferocity that sets them apart from other dwarves. A Brokkr might explain the difference by pointing out that his teammates have lost more and had to fight harder to regain their place in the universe than the pampered sons of Forge Lords. A Forge Father might say Brokkrs simply have thicker skulls.
Advancement Tables
Guard
| Dice Roll | Advancement |
|---|---|
| 1 | Move bonus |
| 2 | Agility or Skill bonus |
| 3 | Can't Feel a Thing |
| 4 | Quick Recovery |
| 5 | Pummel |
| 6 | Ram |
Jack
| Dice Roll | Advancement |
|---|---|
| 1 | Move bonus |
| 2 | Agility or Skill bonus |
| 3 | Shove |
| 4 | Quick Recovery |
| 5 | Brush Aside |
| 6 | Illegal |
Striker
| Dice Roll | Advancement |
|---|---|
| 1 | Move bonus |
| 2 | Agility or Skill bonus |
| 3 | Stubborn |
| 4 | Quick Recovery |
| 5 | Brush Aside |
| 6 | Illegal |
Long Rock Lifers
Convict Team
The convicts are the perfect showcase for the spectacle that modern DreadBall has become. They aren't professionals; they're criminals, promised early parole in return for time served on the pitch. Of course, the promises are often empty, and the fact that they aren't supplied with proper armour means that they don't always make it back to their cells... However, their lack of skill and regard for the rules isn't a shortcoming; in fact it goes down incredibly well with DreadBall's bloodthirsty fans.
Player Stats
| Player | Move | Strength | Agility | Speed | Skill | Armour | Cost | Recommended Team | Abilities |
|---|---|---|---|---|---|---|---|---|---|
| Grogan Guard | 5 | 3+ | 4+ | 4+ | 5+ | 5+ | 140 | x2 | Illegal, Shock Collar |
| Human Jack | 5 | 4+ | 4+ | 4+ | 5+ | 5+ | 70 | x3 | Illegal, Shock Collar |
| Human Striker |
Illegal: If this Player makes a Slam Action, they may choose to either resolve it as normal or with a weapon. This must be declared before rolling any dice. If they resolve it with a weapon then they get a +1 modifier to their Slam, but the Action is a Foul. In all other respects the Slam is resolved as normal.
In addition, the Player may Shoot at an opposing Player with a concealed ranged weapon. This is resolved in exactly the same way as a DodgeBall Foul with a +1 modifier, except that the Fouling Player does not need to have or use the ball to do it.
As usual, multiple Spot Foul tests must be made if any other Foul is being committed at the same time as the weapon is used.
Shock Collar: To keep them in line, Convict teams wear a shock collar that can be activated during a game.
Activating a shock collar is an ability used by a Coaching Assistant on the sidelines – see page 74. This may be done during your Rush, before or after spending an Action Token. It may be used on a prone Player.
The affected Player, and all adjacent Players from either team, are hit by a spectacular arc of electricity, resolved separately against each Player as follows:
Shock: 5+ test (1)
Modifiers:
- +2 against the Player wearing the collar
Pass: The Player is laid prone.
Pass Doubles: As above. In addition the Player must make an Armour Check against the number of successes rolled.
Fail: There is no further effect.
Everyone loves a good redemption story – which is why the owners of the Long Rock Lifers went out of their way to promote one. Billed as a charismatic cast of misunderstood rogues, born on the wrong side of the tracks, the Lifers have been given a second chance to make something of themselves by a driven, yet eccentric, DreadBall coach known only as "the Warden". Their promotional flyers also hint that the Lifers will grow closer together through the uplifting and unifying power of sport and maybe learn a little something about themselves along the way.
With their shaven heads, extensive tattoos and heavy shock collars, the Long Rock Lifers cut a mean appearance as they strut into the arenas. Still, there is a large debate among DreadBall fans as to the authenticity of the Lifers. Whether or not they truly are ex-criminals turned DreadBall superstars, the players have taken to their role on the pitch with gusto, quickly becoming known as one of the most gleefully violent and destructive teams in the league.
Advancement Tables
Guard
| Dice Roll | Advancement |
|---|---|
| 1 | Speed bonus |
| 2 | Agility or Skill bonus |
| 3 | Pile-Driver |
| 4 | Pummel |
| 5 | Threatening |
| 6 | Can't Feel a Thing |
Jack
| Dice Roll | Advancement |
|---|---|
| 1 | Agility or Speed bonus |
| 2 | Strength or Skill bonus |
| 3 | Extended Interference |
| 4 | Grizzled |
| 5 | Backstab |
| 6 | Stubborn |
Striker
| Dice Roll | Advancement |
|---|---|
| 1 | Agility or Speed bonus |
| 2 | Skill bonus |
| 3 | Quick Recovery |
| 4 | Take a Dive |
| 5 | Lucky |
| 6 | Stubborn |
Bremlin Nebulas
Kalyshi Team
The Kalyshi are Asterians, but they play DreadBall quite differently. Like their more civilised kin they lack physical power, but are vicious. They choose to play in especially light armour which only enhances their preternatural agility, and they run rings around their opponents on the pitch, striking like an arrow to the heart.
Player Stats
| Player | Move | Strength | Agility | Speed | Skill | Armour | Cost | Recommended Team | Abilities |
|---|---|---|---|---|---|---|---|---|---|
| Jack | 6 | 5+ | 3+ | 4+ | 4+ | 5+ | 105 | x4 | Acrobatic, Backstab |
| Striker | 6 | 5+ | 3+ | 4+ | 4+ | 6+ | 145 | x4 | Acrobatic, Jump |
Acrobatic: If a Player with this ability doubles a Dodge, they make their one-hex move as normal. They may then make an immediate Run Free Action.
Backstab: The Player is adept at causing maximum damage to vulnerable areas. When the Player makes a Slam against an opponent that does not project a Threat Hex onto the Slamming Player, they gain a +1 modifier.
Jump: A Player with this ability may Jump directly over nearby Players during a Run or Sprint. This is an alternative way of Evading – you do not need to roll for both, and a Jumping Player can be Restrained.
Jumping is a 2 hex move (the first hex containing the Player being jumped over, and the second hex that the Jumping Player will land in).
Before rolling the dice, the Coach must state which hex they are attempting to move into.
A separate test must be made each time a player Jumps during a move. There is no limit to the number of times this can be attempted in one Action.
It is possible that a Player will need to Dash in order to move far enough to Jump. Roll for the Dash(es) first, and then the Jump. If any of the Dash tests are failed, the Jump is still resolved but will fail automatically.
Jump: Agility test (123)
Modifiers:
- -1 per opposing Player threatening the hex you are moving from (maximum modifier -2)
Pass: The Player moves into the chosen hex, facing any direction (even if Sprinting). The Player may continue their move, Jumping again if necessary. Remember that it will be harder to succeed with each successive attempt.
Fail: The Player is laid prone in the hex they were moving to. The Action ends.
- If they were carrying the ball, they drop it and it scatters. If it is the Player's owning Coach's Rush, the Rush ends.
- If a loose ball was in the hex they were moving to, it scatters.
The Bremlin Nebulas are reputedly a band of vicious Asterian pirates, captured by GCPS agents and now forced to play in the arenas, paying for their crimes with blood and any prize money they earn. It's a good story that sets the hearts of many a fan racing in anticipation of some wild violence. In truth, the Nebulas are part of a troop of Kalyshi, Asterians who have chosen to learn as much as they can about their neighbours in the GCPS. Playing DreadBall throughout the five spheres has allowed them to see far more of humanity than they ever could have working the shipping lanes nearer Asterian space. The fact that their natural athleticism - and expert martial artistry - has made their new careers extremely lucrative doesn't hurt either.
Advancement Tables
Jack
| Dice Roll | Advancement |
|---|---|
| 1 | Speed bonus |
| 2 | Strength or Skill bonus |
| 3 | Illegal |
| 4 | Feint |
| 5 | Shove |
| 6 | Quick Recovery |
Striker
| Dice Roll | Advancement |
|---|---|
| 1 | Move or Speed bonus |
| 2 | Skill bonus |
| 3 | Quick Recovery |
| 4 | Feint |
| 5 | Duck and Weave |
| 6 | Boost |
Glambek Ghosts
Ada-Lorana Team
Outside the Co-Prosperity Sphere, the Ada-Lorana are arbiters of justice. They will not break rules; at least not those set by the DGB, but the rules of physics are another matter entirely. They have the ability to phase through solid objects, which takes some serious getting-used-to for their opponents!
Player Stats
| Player | Move | Strength | Agility | Speed | Skill | Armour | Cost | Recommended Team | Abilities |
|---|---|---|---|---|---|---|---|---|---|
| Guard | 5 | 4+ | 4+ | 3+ | 4+ | 4+ | 145 | x1 | Honourable, Phaser |
| Jack | 5 | 4+ | 4+ | 3+ | 4+ | 4+ | 125 | x2 | Honourable, Phaser |
| Striker |
Honourable: Whether it is a warrior code, religious teaching or simple programming, Players with this ability will not intentionally commit a Foul.
Phaser: A Player with this ability may become insubstantial and move through other Players as if they were not there. A Phasing Player can exist in two distinct states: solid and insubstantial.
Solid Players act like any other, but they, and any other Player involved in a Slam with them, suffer a -1 penalty to Strength tests. Any Phasing Player that is not currently making an Action is solid.
At the start of any Action a Phasing Player may choose to become insubstantial for the duration of that Action. A Player carrying the ball cannot become insubstantial. An insubstantial Player has partly phased into another dimension and retains only the most tenuous connection to the real world. An insubstantial Player becomes solid at their end of their Action.
An insubstantial Player may only take Run, Sprint or Stand Up Actions. They never need to Evade, but can Dash as normal. Insubstantial Players can move through other Players, the Ref, and the ball, without it scattering. Both Players are entirely unaffected by Threat Hexes and they cannot interact in any way. Any opposing Player moved through becomes disoriented – turn them to face a direction of your choice.
If a Phasing Player ends their Action in the same hex as the ball then they must attempt to Pick Up with a -1 modifier as they become solid.
If a Phasing Player ends their Action in the same hex as another Player, they become solid. Treat this as a Slam against the opposing Player from the rear arc, without the usual Strength penalty. This is not considered a Sucker Punch. Regardless of the result, place the Phasing Player in their own Subs' Bench after rolling the test. A Phasing Player may not end their move in the same hex as the Ref.
The ability to phase through solid matter may seem like an unfair advantage for a DreadBall team. However, it does make carrying the ball rather tricky, and so there is a balance to be struck by the insubstantial Ada-Lorana. They cannot remain insubstantial the whole match, and this leaves them just as vulnerable to slams and stomps as everyone else.
Even so, many teams are very wary of the Ghosts, and are uncomfortable playing against them. A few of the more superstitious players simply refuse to face them at all; an issue that has caused at least one match to be forfeited. The Ada-Lorana themselves simply assume that these teams have something to hide. In reality it is simply that many people are afraid of the risen dead and this is exactly the kind of folktale that the Ada-Lorana remind them of.
Advancement Tables
Guard
| Dice Roll | Advancement |
|---|---|
| 1 | Agility bonus |
| 2 | Strength or Skill bonus |
| 3 | Stubborn |
| 4 | Can't Feel a Thing |
| 5 | Pummel |
| 6 | Quick Recovery |
Jack
| Dice Roll | Advancement |
|---|---|
| 1 | Agility bonus |
| 2 | Strength or Skill bonus |
| 3 | Stubborn |
| 4 | Extended Interference |
| 5 | Shove |
| 6 | Quick Recovery |
Striker
| Dice Roll | Advancement |
|---|---|
| 1 | Agility bonus |
| 2 | Skill bonus |
| 3 | Stubborn |
| 4 | Boost |
| 5 | Alert |
| 6 | Grizzled |
Sulentic Shards
Crystallan Team
The Sulentic Shards were one of the first Crystallan DreadBall teams, putting their natural abilities and talents to good use on the neodurium and enabling them to live a more settled life. Their unique physical characteristics mean that when all of their energies are aligned few teams can match them. When they are not, then there is always the option of just smashing down anyone who gets in their way.
Player Stats
| Player | Move | Strength | Agility | Speed | Skill | Armour | Cost | Recommended Team | Abilities |
|---|---|---|---|---|---|---|---|---|---|
| Guard | 4 | 3+ | 5+ | 5+ | 4+ | 3+ | 130 | x5 | Harmonics |
| Jack | 4 | 3+ | 5+ | 5+ | 4+ | 3+ | 90 | x3 | Harmonics |
| DreadBall Cards |
Harmonics: This Player is more powerful when in close proximity to other members of their race.
Before a Player takes any Action, count the number of other Players with this ability within 3 hexes. For each one, gain a Coaching Dice (to a maximum of 3). These Coaching Dice should be kept separate, as they can only be used during the current Action (and any Free Actions it generates). They will remain available for the duration of the Action, even if the Player moves out of range. When the Action ends, these dice are discarded. They are calculated afresh at the start of each subsequent Action.
Players using an Action to enter the pitch consider any other Players in the Subs' Bench to be within 3 hexes for the purposes of this ability.
Crystallis was a beautiful planet, rich in precious minerals and ores, many of which were of particular interest to the Forge Fathers. The ensuing war between the two races was vicious and bloody and was only ended by the detonation of the Phase Flare device. Its explosive force shattered Crystallis, sending much of the planet's rocky mass spiralling away into the cosmos. The rest was forever bonded with the remains of its living inhabitants. The Crystallans were thus forced into a nomadic life, wandering across the cosmos as they attempt to avoid both the more tenacious Brokkr fleets and the attentions of various corporations.
Almost every DreadBall team is sponsored by one corporation or another. This is where many of the team names originate, and the fact that DreadBall is the perfect format for advertising makes most corporations very happy to fund the game. The Sulentic Shards are one of the rare exceptions to this rule. They are self-funded, which means that they can sub-let their advertising to whomever they like and also that they can keep all their profits. Quite why they chose this difficult route into the game isn't clear. Perhaps it has something to do with an understandable mistrust of corporate management. Given their previous experiences at the hands of the Forge Fathers and various, less scrupulous corporations, it is perhaps unsurprising that they choose to go down this difficult and complex route. Whatever the reason it doesn't seem to have held them back much.
Advancement Tables
Guard
| Dice Roll | Advancement |
|---|---|
| 1 | Quick Recovery |
| 2 | Linked |
| 3 | Brush Aside |
| 4 | Can't Feel a Thing |
| 5 | Threatening |
| 6 | Choose from this list |
Jack
| Dice Roll | Advancement |
|---|---|
| 1 | Move or Skill bonus |
| 2 | Linked |
| 3 | Alert |
| 4 | Can't Feel a Thing |
| 5 | Grizzled |
| 6 | Choose from this list |
Fran-Taar Philosophers
Tsudochan Team
On the pitch the Tsudochan appear relatively unremarkable, until you watch what they can do with their "powers". These can move other players from either side out of the way of a scoring run, or into a blocking position to halt their opponents, as the Tsudochan decide. Careful use of this skill can be incredibly powerful and is what wins almost every one of their games.
Player Stats
| Player | Move | Strength | Agility | Speed | Skill | Armour | Cost | Recommended Team | Abilities |
|---|---|---|---|---|---|---|---|---|---|
| Jack | 5 | 5+ | 4+ | 4+ | 4+ | 4+ | 100 | x8 | Push |
| DreadBall Cards | 75 | x2 | |||||||
| Coaching Dice |
Push: A Player with this ability is able to move things with their mind, including other Players!
Push is an Action. The Player may not move as part of this Action. They must select a target for the Push – either another Player from any team or a loose ball. The target must be within 7 hexes of the Pushing Player.
The Push Action may also be used when a Player Runs Interference. This replaces the whole Run Interference Action – the Pushing Player may not also make the usual move, Slam or Steal. The interrupted Player's Action may continue as normal after the Push, if possible.
The test is rolled as follows:
Push: Skill test (123)
Modifiers:
- -1 per opposing Player threatening the hex you are in (maximum modifier -2)
Pass: The target is moved 1 hex in a direction and with a facing of the Pushing Coach's choice, without making any Evade rolls. A prone Player will remain prone. The Pushing Player may attempt to Push again if they wish, against the same or a different target, but remember that it will be harder to succeed with each subsequent attempt. Otherwise, the Action ends.
If a Player moves into a hex with the ball they must attempt a Pick Up if possible. If the ball moves into a hex with a Player, it is treated like a scattering ball.
If a Catch doubles, the Catching Player takes their Free Action as normal. The Push Action ends. If a Catch fails, and it is the Catching Player's Rush, the Rush ends as usual.
Pass Doubles: As above, but the target may be moved up to 2 hexes.
Fail: The Pushing Player has exhausted themselves. The Action ends.
The Tsudochan are an itinerant and highly religious culture that wanders the many planets of the Galactic Co-Prosperity Sphere and far beyond. Knowing that it takes more than a strong belief to persuade most sentient creatures to listen, the Tsudochan have devised a number of technological tricks to help entertain and amuse the masses while they are being preached to.
Chief among these is the use of cunning devices that manipulate the underlying electromagnetic and gravitic fields that surround everything. To most observers, this gives the Tsudochan the appearance of possessing awesome telekinetic powers. To the DGB it looked like a brilliant basis for a team.
The Fran-Taar Philosophers team came about almost by accident. Having pitched up to the offices of the DGB to attempt to spread the good word, they were spotted by one of the DGB's talent scouts and found themselves invited to a tryout. Turning up at the appointed time, the troupe of travelling monks found themselves demonstrating their skills to a wider audience than they were used to, and being asked to place a small silver sphere into various areas of the space around them, whilst avoiding the attentions of various other beings who seemed intent on taking the sphere for themselves.
Of course, the monks quickly realised what was going on, and they stepped up a gear to start performing feats that had the various corporations' talent scouts fall over each other trying to sign them up. The monks quickly realised the potential that playing in front of large crowds in televised games might bring. Fran-Taar – a media publishing company – was the lucky corporation which signed them, and has sponsored them ever since.
Advancement Tables
Jack
| Dice Roll | Advancement |
|---|---|
| 1 | Agility or Speed bonus |
| 2 | Strength or Skill bonus |
| 3 | Stubborn |
| 4 | Linked |
| 5 | Backflip |
| 6 | Choose from this list |
Wu-Ling Wanderers
Koris Team
On the pitch it is only the Jacks that carry the devices that create new wormholes, though all are adept at navigating the screaming terrors that lie inside them. Using these devices, players open portals throughout the pitch, allowing the Koris to suddenly appear on the opposite side of the pitch, ready to score. For their opponents this creates even more of a challenge, though the wormholes can be navigated by anyone brave enough…
Player Stats
| Player | Move | Strength | Agility | Speed | Skill | Armour | Cost | Recommended Team | Abilities |
|---|---|---|---|---|---|---|---|---|---|
| Guard | 4 | 4+ | 4+ | 4+ | 4+ | 4+ | 105 | x2 | Shove |
| Jack | 4 | 4+ | 4+ | 4+ | 4+ | 4+ | 125 | x5 | Portal |
| Striker |
Shove: If this Player has the option to Slam an opposing Player then they may choose to Shove them. This is resolved in the same way as a Slam, with the Shoving Player gaining a +2 modifier, and should be declared to your opponent before rolling. If the Shoving Player wins, use the following result.
Shove Wins: The winning Player turns to face the losing Player. The losing Player is pushed into one of the 3 hexes directly away from the winning Player, chosen by the winning Coach, and turns to face the hex they just vacated. The Action ends.
Portal: Players with this ability can create wormholes, represented on the pitch by portal counters. These portals are linked by invisible, inter-dimensional tunnels that allow instantaneous movement between them.
As an Action, a Player with this ability may place a portal counter in any adjacent hex. The hex must be empty, and cannot be part of a Strike Zone, Entry Area, or the centreline. In addition, when setting up Players with this ability at the start of the match, a single portal counter can be placed in your half of the pitch, following the same restrictions.
A maximum of 3 portal counters may be on the pitch at any one time (even if both teams have Players with this ability). If a Player attempts to place a fourth counter, they must remove an existing one first.
Portal counters cannot be seen through for the purposes of a Throw. Giants and the Ref may not enter a hex containing a portal counter. If a regular Player or loose ball enters a hex containing a portal counter for any reason, they will be sucked inside, and must make a Confusion test to see if they survive the trip. Coaching Dice can be used as normal. The Rushing Coach should roll on behalf of a loose ball and may not use Coaching Dice.
Confusion: 4+ test (1)
Modifiers:
- +2 if the Player is a Koris
Pass: The opposing Coach chooses any portal counter on the pitch (which can be the same one), and places the Player in any adjacent hex. Determine the Player's facing using the scatter diagram. The Player's Action ends. A loose ball is moved to the chosen portal counter and is then scattered.
- A Player that failed a Dash or Evade when moving into the portal will be laid prone in their new position.
- A Player pushed into a portal by a doubled Slam will be laid prone in their new position and take their Armour Check as normal.
Pass Doubles: As above, but you may choose the portal, adjacent hex, and facing. You can choose the direction of scatter for a loose ball. A Player that was mid-move can continue their movement from their new position.
Fail: The Player is lost in the wormhole and is permanently out of the game. The DGB will force the Koris to return the poor Player after the match, without injury. If a loose ball or a Player holding the ball gets lost in this way, immediately launch a new one.
The Koris are a confusing group to study both because of their wormhole technology and their near-inability to tell the truth. In turn, they find the expectation of other races for facts to be unembellished and straightforward to be odd in the extreme. So ingrained is the Koris cultural tendency to make up stories that almost anything researchers have found out has later been discovered to be a fabrication. At least they think it has.
The Koris' term for the ability to create these wormholes is "portal spinning", and it is held in very high regard among them. It is done with a combination of a small machine and possibly some innate ability of the Koris themselves. This is supposition based on the fact that humans have not been able to use the devices, despite having thousands of hours of DreadBall match footage to study them in operation. The Koris are not much help either, probably because they aren't interested in giving away their signature technology, though it also seems likely that the lack of understanding among the humans amuses them. If this is the case then the utter frustration of the even more able Forge Father technicians would have them in fits of laughter.
The Koris themselves are not actually from the same dimension as the rest of the races in DreadBall. It is clear that they have travelled throughout known space (and presumably beyond) for many centuries. Some scholars have suggested that the ability to port themselves between both places and dimensions, coupled with their love of mischief, may account for some of the many legends of trickster gods and heroes to be found across the inhabited worlds. As with most things about this enigmatic race, nothing is provable, though it would explain quite a lot.
Advancement Tables
Guard
| Dice Roll | Advancement |
|---|---|
| 1 | Agility or Speed bonus |
| 2 | Strength or Skill bonus |
| 3 | Illegal |
| 4 | Grapple |
| 5 | Pummel |
| 6 | Gotcha |
Jack
| Dice Roll | Advancement |
|---|---|
| 1 | Agility or Speed bonus |
| 2 | Strength or Skill bonus |
| 3 | Illegal |
| 4 | Shove |
| 5 | Backstab |
| 6 | Gotcha |
Striker
| Dice Roll | Advancement |
|---|---|
| 1 | Move bonus |
| 2 | Agility or Speed bonus |
| 3 | Skill bonus |
| 4 | Illegal |
| 5 | Lucky |
| 6 | Feint |
Draconis All-Stars
Neo-bot Team
On the surface, the Neo-bots look like any of the corporate human teams, or at least the cybernetic equivalent of one. However, what goes on under their shiny armour plating makes all the difference. The Neo-bots could literally play DreadBall backwards, so advanced is their programming. Their attacks are classic pincer movements, and their catchers are in place before a throw was even conceived.
Player Stats
| Player | Move | Strength | Agility | Speed | Skill | Armour | Cost | Recommended Team | Abilities |
|---|---|---|---|---|---|---|---|---|---|
| Guard | 5 | 4+ | 4+ | 4+ | 4+ | 4+ | 120 | x3 | Linked |
| Jack | 5 | 4+ | 4+ | 4+ | 4+ | 4+ | 110 | x2 | Linked |
| Striker |
Linked: Players with this ability have an uncanny knack of being able to predict what their teammates might do and will move to support them. When a Coach plays an Action card on a Player with this ability in their own Rush, the Coach may first make a Run Free Action with one other Player with this ability. Like any Free Action, this does not count towards the Player's limit.
Yuri Mitrenko was a DreadBall referee, back before Digby moved to the new robot referees. Not only costing him his job, but his greatest love, Mitrenko vowed vengeance. This vow was largely forgotten as shortly after his last game Yuri disappeared for 10 years.
Yuri was not idle during his time away. Instead, Mitrenko set to work incorporating two generations' worth of DreadBall play data into a new robot AI system.
Where Mitrenko obtained the funding or expertise for such an endeavour is a mystery, but the results were very successful. The advanced AI and custom robotics allowed them to dominate the pitch. Today, the Draconis All-Stars play as if the best DreadBall players in living memory were all playing together - inside bodies which know neither pain nor fatigue.
Advancement Tables
Guard
| Dice Roll | Advancement |
|---|---|
| 1 | Agility or Speed bonus |
| 2 | Strength or Skill bonus |
| 3 | Alert |
| 4 | Can't Feel a Thing |
| 5 | Pile-Driver |
| 6 | Quick Recovery |
Jack
| Dice Roll | Advancement |
|---|---|
| 1 | Agility or Speed bonus |
| 2 | Strength or Skill bonus |
| 3 | Alert |
| 4 | Extended Interference |
| 5 | Shove |
| 6 | Quick Recovery |
Striker
| Dice Roll | Advancement |
|---|---|
| 1 | Agility or Speed bonus |
| 2 | Skill bonus |
| 3 | Alert |
| 4 | Duck and Weave |
| 5 | Feint |
| 6 | Boost |
Ninth Moon Tree Sharks
Yndij Team
The Yndij are natural hunters, raised in the Azure Forest. When the GCPS 'incorporated' them, their skills ingrained from catching razorbats and evading deadly tree-sharks were turned to DreadBall, making them one of the quickest and most agile teams on the circuit.
Player Stats
| Player | Move | Strength | Agility | Speed | Skill | Armour | Cost | Recommended Team | Abilities |
|---|---|---|---|---|---|---|---|---|---|
| Guard | 6 | 4+ | 3+ | 4+ | 4+ | 4+ | 135 | x1 | |
| Jack | 6 | 4+ | 3+ | 4+ | 4+ | 4+ | 115 | x3 | |
| Striker |
Corporate propaganda seems to take pleasure in painting Yndij as rebel fighters. Today, in many population centres across the GCPS, 'Yndij' is synonymous with 'traitor'.
But while they may be unhappy with the treatment of their race, not all Yndij see a need for open, armed revolt. The Tree Sharks believe that the best way to serve their people is to play DreadBall. Wearing kits reminiscent of their ancestor's armour, these Yndij bound about the pitch, leaving the opposition grasping at their shadows.
They spend much of their free time and funding advocating for the fair treatment of their species throughout the GCPS and have made some headway in showing the Yndij as a race that can fully and successfully incorporate into the GCPS.
Advancement Tables
Guard
| Dice Roll | Advancement |
|---|---|
| 1 | Speed bonus |
| 2 | Strength or Skill bonus |
| 3 | Stubborn |
| 4 | Duck and Weave |
| 5 | Strong Tail |
| 6 | Alert |
Jack
| Dice Roll | Advancement |
|---|---|
| 1 | Speed bonus |
| 2 | Strength or Skill bonus |
| 3 | Extended Interference |
| 4 | Duck and Weave |
| 5 | Strong Tail |
| 6 | Alert |
Striker
| Dice Roll | Advancement |
|---|---|
| 1 | Speed bonus |
| 2 | Skill bonus |
| 3 | Backflip |
| 4 | Duck and Weave |
| 5 | Strong Tail |
| 6 | Alert |
Matsudo Tectonics
Matsudan Team
Relatively new to DreadBall, the Matsudan tirelessly pursue the perfection of their craft, training endlessly to quickly become one of the most competent teams around, without a foul in sight. Their considerable bulk takes time to move around the pitch, but once in position there's nothing they can't deal with.
Player Stats
| Player | Move | Strength | Agility | Speed | Skill | Armour | Cost | Recommended Team | Abilities |
|---|---|---|---|---|---|---|---|---|---|
| Guard | 4 | 3+ | 4+ | 5+ | 3+ | 4+ | 140 | x3 | Grapple, Honourable, Steady |
| Jack | 4 | 3+ | 4+ | 5+ | 3+ | 4+ | 125 | x4 | Grapple, Honourable, Steady |
| DreadBall Cards |
Grapple: The Player attempts to grab onto their opponent and physically wrestle them to one side.
If this Player has the option to Slam an opposing Player then they may choose to Grapple them. This is resolved in the same way as a Slam, and should be declared to your opponent before rolling. If the Grappling Player wins, use the following results.
Grapple Wins: The losing Player may be moved into another of the Grappling Player's Threat Hexes. Then, the winning Player turns to face the losing Player, and the losing Player is pushed into one of the 3 hexes directly away from the winning Player, chosen by the winning Coach, and turns to face the hex they just vacated.
Grapple Doubles: The losing Player may be moved into another of the Grappling Player's adjacent hexes, front or rear. Then, the winning Player turns to face the losing Player, and the losing Player is pushed into one of the 3 hexes directly away from the winning Player, chosen by the winning Coach, turning to face the hex they just vacated. The losing Player is knocked prone and must make an Armour Check. The Action ends.
Honourable: Whether it is a warrior code, religious teaching or simple programming, Players with this ability will not intentionally commit a Foul.
Steady: A Steady Player cannot be knocked down as a result of a Slam. They can be pushed back and injured as normal, but if they remain on the pitch they will stay upright. Although they cannot be knocked down, a Steady Player can still fall over on their own, for example if they fail a Dash or Evade test or are Brushed Aside.
The planet Neo Matsudo is home to a race of quarter-ton, lizard-like creatures with a rich cultural background. Venerating the concept of honour, the immense Matsudan warriors routinely take part in tests of strength and endurance, similar to the sports of sireum and sumo from Old Earth. Incorporated under the sponsorship of House Kajima, a corporation with a culture and philosophy almost identical to that of Neo Matsudo, most Matsudan made the transition from independent to GCPS citizen effortlessly. The added luxuries GCPS life has brought their planet has only shown how wise a choice incorporation truly was.
It did not take long for the Kajima coaches to realize the potential for such large, strong players, and the Matsudo Tectonics was the first Matsudan team to grace the major leagues.
Advancement Tables
Guard
| Dice Roll | Advancement |
|---|---|
| 1 | Speed bonus |
| 2 | Agility bonus |
| 3 | Threatening |
| 4 | Pile-Driver |
| 5 | Alert |
| 6 | Ram |
Jack
| Dice Roll | Advancement |
|---|---|
| 1 | Speed bonus |
| 2 | Agility bonus |
| 3 | Brush Aside |
| 4 | Shove |
| 5 | Alert |
| 6 | Backflip |
New Eden Revenants
Cyborg Team
The Revenants play like no other team alive today, although that's possibly because they aren't alive today! The Cyborgs have the unique ability to employ varied players from across the GCPS. They have access to a huge range of skills, but the players don't retain all of their former glory. Their reanimated bodies are slow and awkward on the pitch, but implacable in their advance.
Player Stats
| Player | Move | Strength | Agility | Speed | Skill | Armour | Cost | Recommended Team | Abilities |
|---|---|---|---|---|---|---|---|---|---|
| Orc Guard | 4 | 3+ | 5+ | 4+ | 5+ | 4+ | 125 | x2 | Quick Recovery, Won't Stay Down |
| Nameless Undulan Guard | 3 | 4+ | 5+ | 4+ | 5+ | 4+ | 135 | x1 | Gotcha, Quick Recovery, Reach, Won't Stay Down |
Quick Recovery: If a Player with Quick Recovery is injured, they are always placed in the 1 section of the Sin Bin, regardless of the amount of damage inflicted. The Faulty Medbots card applies as normal. A Player with this ability that suffers 4 or more damage is seriously injured and removed from the game as normal.
Won't Stay Down: This Player gains a +1 modifier on any attempts to Stand Up.
Gotcha: Some Players are very tricky to get away from. Even a single Player with this ability causes the maximum -2 modifier for threatening an opponent during a test. A Player with Gotcha may Restrain an opponent as normal, taking the modifier to -3.
Reach: See League Handbook.
Extended Interference: This Player may make a Run Interference Action using any blue Action card, regardless of the Player role or specified Action on the card. The Player may also Dash as part of a Run Interference Action.
Feint: See League Handbook.
Acrobatic: If a Player with this ability doubles a Dodge, they make their one-hex move as normal. They may then make an immediate Run Free Action.
Jump: See League Handbook.
Renaldo Abominava was a biochemist with a dozen outstanding arrest warrants for 'unconscionable biological experimentation'. At least he was until he brought his creations onto the neodurium floors of the DreadBall major leagues.
According to the team's press release, Abominava has been experimenting on the legally purchased corpses of deceased players for years, perfecting his skill in reanimating and enhancing them for continued play. Certainly, many of the players on his team resemble famously deceased players from the past.
But surely, even the DGB wouldn't stoop so low as to allow the remains of deceased players to be desecrated through such brutal exploitation? And, even if they did, they couldn't also make all Abominova's past legal problems disappear too, could they?
Whatever the truth, the track record of the Revenants shows the team's brutal efficiency and skill and it is unlikely that any serious investigation will occur as long as they continue to pull in the crowds.
Team Special Rule – Back from the Dead
When building a Cyborg team from scratch, you cannot hire transferred Players in the usual way. Instead, you can recycle other teams' dead Players! Cyborg teams select their Players from any other team, without a transfer premium, but with the following amendments:
- Their Move and Agility stats are reduced by 1.
- Remove the Pacifist or Honourable abilities, if applicable.
- Give them the Quick Recovery and Won't Stay Down abilities.
This does not change the Player's cost. You cannot take more of any Player type than they have in their own recommended team. For example, you could only take a single Yndij Guard, but you could take up to ten Zee Jacks. Players may use the advancement table from their original team, or the one from the Cyborg team.
Cyborg teams hire players on loan and MVPs as normal, with a limit of 4 per team. Cyborgs can be hired as transfers themselves as normal, subject to the same limits on Player types as above.
Advancement Table (All Player Roles)
| Dice Roll | Advancement |
|---|---|
| 1 | Threatening |
| 2 | Grizzled |
| 3 | Stench |
| 4 | Can't Feel a Thing |
| 5 | Linked |
| 6 | Choose from this list |
Kovoss Kryptics
Mutant Team – Brewed in a Vat
A mutant team does not have a fixed set of stats or a recommended roster like most teams. Instead, the Players are built from scratch using the following rules, and can be customised to match using the multi-part miniatures. You may purchase DreadBall Cards, Coaching Dice, Supporting Staff and any other extras as normal.
- Each Player starts with the Starting Statline listed below.
- Each Player must be given Training to play a single role.
- Each Player must have at least one Mutation.
- Only one selection may be made for each Body Part, except for Internal Upgrades, of which two may be taken.
- All stat upgrades improve the stat by 1 (improving a 4+ stat to a 3+ stat for example).
- Players do not benefit from stats or abilities unusable by their role (such as a Strength upgrade on a Striker).
- Add up the cost of the Starting Statline, Training and Mutations to get the total cost of the Player for the roster.
- No two Players in the team may have the same combination of mutations.
- Your starting team must consist of at least 2 Guards, 2 Jacks and 2 Strikers.
- Your team may never have more than 4 Guards, 6 Jacks and 4 Strikers
Starting Statline
| Player | Move | Strength | Agility | Speed | Skill | Armour | Cost | Abilities |
|---|---|---|---|---|---|---|---|---|
| Mutant | 5 | 4+ | 5+ | 4+ | 5+ | 5+ | 30 |
Training
| Role | Upgrades | Cost |
|---|---|---|
| Guard | All Guard bonuses, Armour Upgrade | 60 |
| Jack | All Jack bonuses | 0 |
| Striker | All Striker bonuses | 15 |
Mutations
| Body Part | Type | Upgrades | Cost |
|---|---|---|---|
| Head | Asterian | Skill Upgrade | 40 |
| Head | Grogan | Illegal | 25 |
| Head | Judwan | Feint | 45 |
| Head | Nameless | Toxic | 15 |
| Head | Z'zor | Alert | 20 |
| Arm(s) | Judwan | Reach | 30 |
| Arm(s) | Nameless |
Example Players
| Role | Mutations |
|---|---|
| Guard | Grogan Head, Teraton Arm, Yndij Legs |
| Guard | Nameless Head, Nameless Arm |
| Jack | Z'zor Head, Z'zor Arm |
| Jack | Sphyr Tail, Enhanced Reflexes |
| Striker | Judwan Head, Judwan Arms |
| Striker | Asterian Head, Veer-Myn Tail |
When Digby amended their longstanding rules excluding mutant players from the leagues, the various campaigners for mutant rights celebrated their great victory. Then the Kryptics arrived and started to play, and they were all forced to have a bit of a rethink.
It wasn't just that the only person from the team who ever gave interviews was the head coach – a wiry, crazy looking old man with thick glasses and insane hair. It wasn't even the fact that the teams facing them seemed to think that entirely new levels of violence were acceptable. It was the fact that the players themselves seemed to change so very often. Persistent rumours suggest that 'Dr' Kain, their head coach, is in the habit of 'recycling' players who displeased him, though nothing has ever been proved.
Now the Kryptics have perhaps one of the most conflicted fan followings in all of the leagues. Many remain concerned at their apparent exploitation but all are still happy to see them do well on the pitch.
We Can Rebuild Them!
Other teams often employ Kain to augment their own Players. If the other Coaches in a League agree, a non-Mutant Coach may task Kain with grafting his grotesque creations onto their own Players before a game.
This comes at a cost of 60mc per mutation, taken from the Coach's roster and added to the Player's value. The Coach may choose any mutation from the list, and benefit from the upgrades it provides. The miniature should be modelled to match.
Non-mutant Players may only have a single mutation. The mutation cannot be from the race that they already are, and as usual it may not take a stat beyond 3+.
Advancement Table (All Player Roles)
| Dice Roll | Advancement |
|---|---|
| 1 | Speed or Agility |
| 2 | Strength or Skill |
| 3 | Threatening |
| 4 | Stench |
| 5 | Shock Collar |
| 6 | Choose from this list |
Ro-Tek Brutes
Mechanite Team – The Mechanics of Perfection
Innovation is the key to success, according to many of the business gurus and motivational speakers in the GCPS, and no team exemplifies this spirit of innovation more than the Ro-Tek Brutes. Built using the patented "Mechanite" modular robotics kitset developed by Teraton engineer Kraato Gon, the Brutes are rarely the same from one game to another. The Mechanite system lets users swap out, customise, change and tinker parts and players, a feature the Ro-Tek mechanics exploit to the fullest.
The Brutes make up for the lack of the refinement and polish of teams like the Chromium Chargers by being cheaper, hardier, and more brutal. You haven't been slammed, as one Mechanite fan blog put it, until you've been slammed by a quarter-ton Mechanite waving a wrecking ball that's twice its size.
A Mechanite team does not have a fixed set of stats or a recommended roster like most teams. Instead, the Players are built from scratch using the following rules, and can be customised to match using the multi-part miniatures. You may purchase DreadBall Cards, Coaching Dice, Supporting Staff and any other extras as normal.
- Each Player starts with the Starting Statline listed below.
- Each Player must be assigned Basic Coding to play a single role.
- Each Player must exactly one of each of Locomotion, Chassis, and Head, and exactly two Arms.
- Players may have as many Additional Upgrades as you can afford.
- All stat upgrades improve the stat by 1 (improving a 4+ stat to a 3+ stat for example). As usual it may not take a stat beyond 3+.
- Players do not benefit from stats or abilities unusable by their role (such as Extended Interference on a Guard).
- Add up the cost of the Starting Statline, Basic Coding and Components to get the total cost of the Player for the roster.
- No two Players in the team may have the same combination of Components.
- Your starting team must consist of at least 2 Guards, 2 Jacks and 2 Strikers.
- Your team may never have more than 4 Guards, 6 Jacks and 4 Strikers.
Starting Statline
| Player | Move | Strength | Agility | Speed | Skill | Armour | Cost | Abilities |
|---|---|---|---|---|---|---|---|---|
| Mechanite | 4 | 5+ | 5+ | 5+ | 5+ | 5+ | 0 |
Basic Coding
| Role | Upgrades | Cost |
|---|---|---|
| Guard | All Guard bonuses, Armour Upgrade | 40 |
| Jack | All Jack bonuses | 5 |
| Striker | All Striker bonuses | 25 |
Components
| Body Part | Type | Upgrades | Cost |
|---|---|---|---|
| Locomotion | Quad Wheels | Move Upgrade, Steady | 40 |
| Locomotion | Mono Wheel | Move Upgrade, Speed Upgrade | 30 |
| Locomotion | Quad Legs | Agility Upgrade, Stubborn | 40 |
| Locomotion | Bird Legs | Move Upgrade x 2, Agility Upgrade | 55 |
| Locomotion | Armoured Legs | Armour Upgrade | 25 |
| Chassis | Body A | Strength Upgrade | 35 |
- Jacks and Strikers must take at least one arm marked with *.
Example Players
| Role | Body | Arms | Legs / Locomotion | Head |
|---|---|---|---|---|
| Guard | Body B | Wrecking Ball Arm, Grab Arm | Bird Legs | Tank Head |
| Guard | Body C | Ram Arm, Hammer Arm | Armoured Legs | Radar Head |
| Jack | Body D | Hammer Arm, Claw Arm | Monowheel | Slim Head |
| Jack | Body A | Air Cannon Arm, Launcher Arm | Quad Wheels | Cranehead |
| Striker | Body D | Glove Arm, Claw Arm | Quad Legs |
We Can Rebuild Them!
Other teams often employ Ro-Tek's mechanics to augment their own Players. If the other Coaches in a League agree, a non-Mechanite Coach may task them with bolting their scrap parts onto their own Players before a game.
This comes at a cost of 60mc per part, taken from the Coach's roster and added to the Player's value. The Coach may choose any robotic part from the list, and benefit from the upgrades it provides.
Non-Mechanite Players may only have a single robotic part. As usual it may not take a stat beyond 3+.
This rule can also be used when creating a New Eden Revenants Cyborg team from scratch – any Player can be given one robotic part as part of their starting statline at the usual cost of 60mc.
Advancement Table (All Player Roles)
| Dice Roll | Advancement |
|---|---|
| 1 | Speed or Agility |
| 2 | Strength or Skill |
| 3 | Linked |
| 4 | Grapple |
| 5 | Pummel |
| 6 | Choose from this list |
The Renton Rejects
Xtreme Team
Some are captive 'exotics' – dangerous pets seized from unlicensed dealers. Others are prisoners and lethal security 'bots, liberated from the strongholds of crime lords. Some are even genuine former players, stars on professional teams until stim addiction or disfiguring injury brought them down into the sporting gutter. Who their sponsor is – and why exactly anyone would want to risk their megacredits on such a volatile mix of miscreants – remains a mystery. It doesn't matter though. As long as this collection of the GCPS's least-wanted is off the streets and doing something useful – smashing skulls and scoring strikes – everyone involved, including Digby, is very happy indeed.
Player Stats
| Player | Move | Strength | Agility | Speed | Skill | Armour | Cost | Recommended Team | Abilities |
|---|---|---|---|---|---|---|---|---|---|
| Jetari GL14 Guard | 4 | 3+ | 4+ | 4+ | 5+ | 4+ | 140 | x1 | Can't Feel a Thing, Grizzled |
| Pusk Rampager Guard | 4 | 4+ | 4+ | 4+ | 6+ | 4+ | 125 | x1 | Ram, Quick Recovery |
Runaround: Two different Players with this ability can both make a Run Action using a single Action Token. The Actions must be taken one after the other, and will count towards both Players' Action limit for the Rush.
Rolling: When the Player Sprints, they move at triple their movement value instead of double. However, they may only make a single 60° turn during the Sprint. Players with this ability cannot Sprint normally.
All Other Abilities: See League Handbook.
Jetari GL14 'Brawler': DreadBall training grounds have been making use of these drones as cheap Guards for some time. Though basic, the GL14 still packs a punch.
The widening entry requirements to draw in fresh teams has meant that the GL 14 has become very useful in the Major leagues as well. Enterprising coaches that can only afford three or four top-notch Strikers will often fill out the rest of the team with GL14s, which are solid and dependable enough to serve as Guards allowing the fancier bots get on with the business of scoring.
Zee Buccaneers: Being as fractious and mischievous as they naturally are, it is no surprise that many Zees are drawn to lives of crime, petty and otherwise.
Zee Buccaneers are an example of what happens to Zees who are not under direct and constant control. As it turns out, even then, they can make surprisingly good DreadBall players.
Pusk Rampager: Pusks seem to be indigenous to many planets – perhaps left there by some ancient race, seeding the galaxy with them for some unknown purpose. Brutish, bestial and entirely impossible to communicate with, they are nonetheless dangerous apex predators on many of the worlds they inhabit.
In DreadBall, they are somewhere halfway between entertaining and terrifying, able to swiftly demolish a defensive line, but then given to either start trying to eat it or the crowd, rather than follow up.
Avaran Treebeast: Though they are large and ponderous physically, the prehensile tongues of Avaran Treebeasts make them very capable Jacks in any situation. The reach the tongue gives them, combined with their solid bulk, means that they are able to respond accordingly over a wide area to any attack, and to pummel any defence which underestimates them or is too busy concentrating on the Strikers.
Yxaal Bloodsucker: For a long time, the Yxaal were not even considered to play in DGB leagues. Though they are fantastically agile and entertaining to watch, their habit of draining their victim's vital fluids kept player's union lobbyists insistent on their absence.
Still, all things must change. It turns out that these so-called 'bloodsuckers' are all the rage amongst the younger generation. Some fans even go so far as to write elaborate and disturbing blogs about their desire to be a blood-suckers next victim. Whatever the reasoning, for the moment, Yxaal players are here to stay.
Jetari SL22 'Thrower': The SL22 is another old workhorse from the Jetari Corporation that was given new life on the Xtreme circuit as a makeshift Striker that didn't die as quickly. Solidly put together, and with a reasonable level of accuracy, it can fill the gap for those coaches who favour an aggressive team build but still need someone to actually handle the ball.
Vlorox Spinpede: In their search for cheap and expendable meat for games, Xtreme sponsors found the Spinpede – a harmless, if dumb, creature that could be trained to literally curl up around a ball and roll towards the strike zone.
The DGB has allowed some of the more notably well-trained examples of these creatures to register as Free Agents and take part in the leagues. If nothing else, they can be amusing to watch, if they don't try to chew through the strike zone wiring.
Yndij Reaver: Yndij is a word that the corporations coined, and not one that the Yndij themselves seem to care much for. Doing so implies a certain uniformity which the people themselves do not typically display.
Some fight for the Rebs, others earn a crust as mercenaries. Some just try and make an honest living doing whatever shekwork they can get in the GCPS. And some play DreadBall.
Advancement Table (All Player Roles)
| Dice Roll | Advancement |
|---|---|
| 1 | Agility or Speed bonus |
| 2 | Strength or Skill bonus |
| 3 | Stench |
| 4 | Threatening |
| 5 | Lucky |
| 6 | Choose from this list |
Captains
'Lucky' Logan
Human Corporation Captain
| Player | Move | Strength | Agility | Speed | Skill | Armour | Cost | Abilities |
|---|---|---|---|---|---|---|---|---|
| Jack (C) | 5 | 4+ | 4+ | 4+ | 4+ | 4+ | 205 | Lucky, Fan Favourite |
Lucky: Once per Rush Logan may re-roll any one dice rolled as part of a test.
Fan Favourite: The first time in each Rush that Logan doubles any test, make a Fan Check in addition to any that were generated anyway.
The most famous of the Trontek 29er's many captains throughout the years, 'Lucky' Logan has already led the team to three undefeated seasons. Trontek is famous for hiring some of the jammiest Jacks, and Logan fits this description perfectly.
He is called lucky for good reason. His trademark seems to be getting just out of the way of the slam, being just over the line, or just hitting the mark. His luck seems to follow him even off the pitch. Even after suffering the most horrific injuries on the pitch, more often than not, he is ready and raring to take to the pitch during the team's next game, sometimes with fewer scars than he left with…
Slippery Joe
Marauder Captain
| Player | Move | Strength | Agility | Speed | Skill | Armour | Cost | Abilities |
|---|---|---|---|---|---|---|---|---|
| Striker (C) | 5 | 5+ | 3+ | 3+ | 4+ | 5+ | 230 | A Safe Pair of Hands |
A Safe Pair of Hands: Joe gains a +1 modifier to Catch tests.
Note: The Marauders do not have a Striker advancement table. Slippery Joe may use the Marauder Jack advancement table instead.
One might assume that the hulking and belligerent Orcs would take the lead on the pitch, but in practice the Guards are having too much fun cracking heads. Besides, at the end of the day, points win games, no matter how many of the other team's players end up on stretchers. The Smacker's first season saw them led by the flamboyant and agile Slippery Joe, a goblin whose accuracy with a DreadBall was matched only by the splendour of his obviously fake moustache.
Joe's moustache is a great, black soup-strainer of a thing that sits like a giant slug on his upper lip. He twirls it thoughtfully as he leers at the crowd in his personal interpretation of showboating.
Gorim Ironstone
Forge Father Captain
| Player | Move | Strength | Agility | Speed | Skill | Armour | Cost | Abilities |
|---|---|---|---|---|---|---|---|---|
| Striker (C) | 4 | 3+ | 4+ | 4+ | 4+ | 5+ | 210 | Grizzled, Stubborn |
Grizzled: Any opponent making a Slam against Gorim suffers a -1 modifier on the test.
Stubborn: Gorim ignores a single Threat Hex when involved in a Slam.
Nobody expects Dwarfs to be fast, and it's true that even Gorim is unlikely to break any records against the Veer-myn. But, among his kin he shows a real turn of speed. Gorim was a veteran warrior long before he took to the DreadBall pitch and is old even for a Forge Father.
On the pitch this translates into a fearless disregard for the opposition, or 'enemy' as he calls everyone. His age also allows him to get away with a very old-fashioned helmet that has no visor. Although this would not be allowed in a modern team, Gorim maintains that this was the helmet he was issued with when he first took up the game, and if it was good enough then, it's good enough now. The sight of his salt and pepper beard and steely gaze is a familiar one to DreadBall fans, and adorns several advertising campaigns for the game.
Reek 'Payback' Rolat
Veer-myn Captain
| Player | Move | Strength | Agility | Speed | Skill | Armour | Cost | Abilities |
|---|---|---|---|---|---|---|---|---|
| Guard (C) | 6 | 3+ | 3+ | 4+ | 5+ | 4+ | 280 | Can't Feel a Thing |
Can't Feel a Thing: Reek gains a +1 modifier to all Armour tests.
In a typical game of DreadBall the Veer-myn get thumped. A lot. This can be a little wearing for your average Striker, though it has to be said that spending much of their time being slapped about only makes them all the happier when it comes to their team's turn to do the thumping. 'Payback' is a firm favourite for just this reason. Veer-myn come in a variety of shapes and sizes, and Reek is a particularly large and ornery example of his race. He stands head and shoulders above most Veer-myn players, and even other Guards look a bit weedy in comparison. In addition to being physically large, Reek wears a set of specially made armour. Whilst this does conform to DreadBall regulations, it also seems to offer slightly more protection than normal, which makes him even more difficult for his opponents to get rid of.
'Payback' is aptly named.
Wildcard
Human Corporation Captain
| Player | Move | Strength | Agility | Speed | Skill | Armour | Cost | Abilities |
|---|---|---|---|---|---|---|---|---|
| Jack (C) | 5 | 4+ | 4+ | 4+ | 4+ | 4+ | 215 | Boost, Extended Interference, Fan Favourite |
Boost: Wildcard gets a +1 modifier on Dash tests.
Extended Interference: Wildcard may make a Run Interference Action using any blue Action card, regardless of the Player role or specified Action on the card. She may also Dash as part of a Run Interference Action.
Fan Favourite: The first time in each Rush that Wildcard doubles any test, make a Fan Check in addition to any that were generated anyway.
One of the current favourites of the crowd is the dazzling Wildcard. Like Lucky Logan, she appears in all the most fashionable commercials, and also like Logan she specializes in pulling victory from the jaws of defeat. Wildcard is a fast and agile human, with a distinctive uniform and a flashing smile. She is a boon to the cameras which often focus on her even when the ball is elsewhere on the pitch.
On the pitch her movements are almost languid when her team is winning, but as soon as things go awry she redoubles her efforts. Every opposing move is scrutinised for weak points and she is quick to exploit any that she finds.
Mee-kel
Judwan Captain
| Player | Move | Strength | Agility | Speed | Skill | Armour | Cost | Abilities |
|---|---|---|---|---|---|---|---|---|
| Striker (C) | 6 | 5+ | 4+ | 3+ | 4+ | 5+ | 265 | Pacifist, Feint, Defender |
Pacifist & Feint: See Judwan Team Card.
Defender: If an opposing Player is making a Strike attempt, and Mee-kel is within the same Strike Zone and has the Throwing Player in his front arc, then he confers the -1 modifier for threatening the Throwing Player even if they are not adjacent.
The Judwan are an ancient and noble people who were hustled off their planet by Kru-Garlen Industries' security forces and scattered across the sector. After their exile, the tiny handful of survivors struggled against extinction. They were saved from that tragedy by the strength of mind of their spiritual leader, the last of their noble line: Mee-kel, heir to the Judwan throne.
Mee-kel himself is modest and unassuming. On the pitch he is easily distinguished from the other Judwan by the hooded Kreelat he wears in mourning for the loss of his world. This marks him out for special attention by the opposing Guards, but to the Judwan in general, and to Mee-kel in particular the respect this shows is worth the pain.
DBR7 'Firewall'
Meta-bot Captain
| Player | Move | Strength | Agility | Speed | Skill | Armour | Cost | Abilities |
|---|---|---|---|---|---|---|---|---|
| Guard (C) | 5 | 3+ | 4+ | 5+ | 4+ | 3+ | 295 | Steady, Keeper |
Steady: Firewall cannot be knocked down as a result of a Slam. It can be pushed back and injured as normal, but if it remains on the pitch it will stay upright. Although it cannot be knocked down, Firewall can still fall over on its own, for example if it fails a Dash or Evade test, or is Brushed Aside.
Keeper: See the League Handbook for full details. Firewall's statline already includes the Keeper amendments.
Since the days of the Oilers, the vast majority of DreadBall sports 'bots have been designed and built by Brize & Low in their extensive Nenrod orbital factories. They have a well-earned reputation for reliability and resilience as well as a violent dislike of anything approaching fair competition. Once the concept of an evolving robot emerged, B&L struggled with building a robot that could both change roles, and make an effective Keeper. Mutsunembu LLC saw an opportunity.
In great secrecy they produced a new, cutting-edge robot Keeper design known as DBR7. Only one DBR7 ever took to the pitch, and was up-staged by B&L's own new MorphMod 444 line. Mutsunembu sold their robotics wing to B&L and retired from the field.
However, the sole DBR7 to actually play had been surprisingly successful, and Digby decided to purchase him for his PR value, renting him out as an MVP before he ultimately found a home with the Chromium Chargers.
Ludwig
Z'zor Captain
| Player | Move | Strength | Agility | Speed | Skill | Armour | Cost | Abilities |
|---|---|---|---|---|---|---|---|---|
| Jack (C) | 7 | 4+ | 3+ | 4+ | 4+ | 4+ | 265 | Can't Feel a Thing, Jump |
Can't Feel a Thing: Ludwig gains a +1 modifier to all Armour tests.
Jump: See the League Handbook for full details.
Ludwig first took to the pitch for the Radion Roaches first during the semi-finals of the Lashkey Cup. Though there was much protest and complaint, he was eventually cleared to play, as per the tournament's rules.
The game started and the first ball shot out, and before it hit the other side Ludwig had caught it and was in the air, flying straight for the strike zone well out of reach of the opposing players. The roar of the crowd almost took the roof off the arena. These days Ludwig is required to wear devices to restrict his flight, reducing its effectiveness to a fluttering jump. He has since signed on with the Locust City Chiefs and the buzz of his wings is always answered by a similar sound from the crowd.
Kal Terza
Teraton Captain
| Player | Move | Strength | Agility | Speed | Skill | Armour | Cost | Abilities |
|---|---|---|---|---|---|---|---|---|
| Guard (C) | 4 | 3+ | 5+ | 5+ | 4+ | 3+ | 285 | Teleport, Keeper, Shell, Stubborn |
Shell & Teleport: See Teraton Team Card.
Keeper: See the League Handbook for full details. Kal's statline already includes the Keeper amendments.
Stubborn: Kal ignores a single Threat Hex when involved in a Slam.
Kal Terza first joined the Avalanchers six years ago as a Jack. Kal loved his role and excelled at it, until the team's fateful match up against the Cheshan Crushers in the final rounds of the Ruitov Conference.
In the final minutes of the game Kal had just scored a strike when he was set up by a trio of heavily-muscled Orcs. Though he survived the horrific ordeal, his natural armour was in tatters, and he had lost nearly all manual dexterity in his throwing arm.
Shaken by the experience, Kal has vowed that he won't let his team suffer as he did. Wearing brand new, reinforced armour and a Keeper's glove, Kal is still strong enough to make opposing players pay for hurting his teammates.
Riller
Zee Captain
| Player | Move | Strength | Agility | Speed | Skill | Armour | Cost | Abilities |
|---|---|---|---|---|---|---|---|---|
| Jack (C) | 5 | 5+ | 3+ | 4+ | 4+ | 4+ | 225 | It Wasn't Me, Runaround, Show Off, Take a Dive |
It Wasn't Me & Runaround: See Zees Team Card.
Show Off: Riller suffers an additional -1 modifier on any Strike attempt. If Riller succeeds in a Strike attempt then he makes an extra Fan Check. In a league, Riller will generate an extra 5mc of revenue after any match he took part in.
Take a Dive: See the League Handbook for full details.
All clones are equal, but some are more equal than others. It's no secret that Riller came from a bad batch of clones, all of whom came to an unpleasant end in one way or another. Several have succumbed to addictions, others have turned to crime and not a few have joined the military.
Of the whole batch, Riller is the only one that still survives. Possibly because of this, Riller is very impressed with his own brilliance and isn't shy about telling anyone who'll listen. True, for a Zee he is an impressive player, though he is more than a handful when it comes to working with him.
John Doe
Nameless Captain
| Player | Move | Strength | Agility | Speed | Skill | Armour | Cost | Abilities |
|---|---|---|---|---|---|---|---|---|
| Undulan Guard (C) | 5 | 3+ | 4+ | 4+ | 5+ | 4+ | 295 | Fan Favourite, Gotcha, Reach |
Fan Favourite: The first time in each Rush that John Doe doubles any test, make a Fan Check in addition to any that were generated anyway.
Gotcha & Reach: See Nameless Team Card.
The first exposure Dreadball fans had to the Nameless was John Doe, who started his career as a Free Agent in the early days of the Heisenberg Premiership. Even for a sporting public already jaded with alien players, Doe was something… else.
As it happened, John Doe, as the commentators took to calling him, was just a nice guy. Language barriers aside, off-pitch Doe would spend his time visiting sick fans in hospital and volunteering for charities. Digby took notice, and reached out to Doe, ultimately leading to the introduction of Nameless teams into regular DreadBall competition. Doe was a natural pick to lead the Kalimarin Ancients and others of his species are often appointed to captain other Nameless teams.
Mellisandra
Asterian Captain
| Player | Move | Strength | Agility | Speed | Skill | Armour | Cost | Abilities |
|---|---|---|---|---|---|---|---|---|
| Jack (C) | 6 | 4+ | 4+ | 3+ | 4+ | 4+ | 230 | Boost, Duck and Weave, Fragile, Illegal |
Boost: Mellisandra gets a +1 modifier on Dash tests.
Duck and Weave: Mellisandra gets a +1 modifier on Dodge tests.
Fragile: Mellisandra suffers a -1 modifier to Armour tests.
Illegal: See the League Handbook for full details.
In her youth, Mellisandra was a bad girl – a very bad girl. So much so that when she was captured in an anti-pirate mission by Enforcers she was unceremoniously dumped in a quad-max confinement facility and forgotten. Years later, rumours began circulating of a new and impressively violent Asterian on the illegal DreadBall Xtreme circuit. In cases like this the high and mighty of the DreadBall world have been known to go slumming it among the Xtreme players, and this seems to have been the case here.
On the pitch, Mellisandra could put her years of combat training to good use. It wasn't quite the same as genuine combat among the smugglers and pirates, but at least nobody seemed to mind about the body count. In fact she was applauded for it.
Galdo
Rebs Captain
| Player | Move | Strength | Agility | Speed | Skill | Armour | Cost | Abilities |
|---|---|---|---|---|---|---|---|---|
| Jack (C) | 6 | 5+ | 4+ | 4+ | 4+ | 4+ | 225 | Alert, Quick Recovery, Stubborn |
Alert: When an opposing Player moves into any adjacent hex, Galdo may immediately turn to face them if he wishes. This turn happens before the rest of the original Player's Action is resolved.
Quick Recovery: If Galdo is injured, he is always placed in the 1 section of the Sin Bin, regardless of the amount of damage inflicted. If Galdo suffers 4 or more damage he is removed from the game as normal.
Stubborn: Galdo ignores a single Threat Hex when involved in a Slam.
Note: The Rebs do not have a Kraaw advancement table. Galdo may use either of the Sorak or Gaelian Jack advancement tables instead.
Galdo is not all that bright. After a string of foolish decisions, many having to do with extensive gambling debts, he was caught by one of the underbosses to whom he owed several lifetimes' worth of pay.
Though he survived, the underboss had taken his debts in blood. Just why Galdo wasn't killed outright is uncertain, but someone had stepped in and provided cybernetics to repair his poor, mangled body.
The battered Kraaw has been given a second chance, and that chance is in the arena. Though he will never fly again, and can make little more than a few mechanical sounds through his implants, his determination to do well is clear, and his artificial senses give him a number of advantages to make up for his battered body.
Irsala
Sphyr Captain
| Player | Move | Strength | Agility | Speed | Skill | Armour | Cost | Abilities |
|---|---|---|---|---|---|---|---|---|
| Jack (C) | 5 | 4+ | 4+ | 3+ | 4+ | 4+ | 220 | Gotcha!, Toxic |
Gotcha: Some Players are very tricky to get away from. Even a single Player with this ability causes the maximum -2 modifier for threatening an opponent during a test. A Player with Gotcha may Restrain an opponent as normal, taking the modifier to -3.
Toxic: When Irsala injures another Player, the amount of damage is increased by 1. If they had already taken 3 damage, this would put them permanently out of the game.
Sphyria was host to a wide variety of species, and among these were the graceful Sephalin. Top-tier predators, the Sephalin hunted by luring their prey close with guile and charm, before lashing out with their poisonous tentacles.
When the Oceanics debuted, Irsala was an unlikely choice for team captain, and skeptics claimed she was chosen simply because she looked good in post-match interviews. She soon put those doubters in their place, becoming one of the most dynamic and lethal Jacks in the sport in short order.
Later, Sphyrian teams followed the Oceanic's lead, and most Sphyrian teams will have their own enchanting Sephalin leading the charge.
Graggot
Hobgoblin Captain
| Player | Move | Strength | Agility | Speed | Skill | Armour | Cost | Abilities |
|---|---|---|---|---|---|---|---|---|
| Jack | 5 | 4+ | 5+ | 4+ | 5+ | 4+ | 210 | Can't Feel a Thing, Illegal, Peer Pressure, Stench |
Can't Feel a Thing: Graggot gains a +1 modifier to all Armour tests.
Illegal: See the League Handbook for full details.
Peer Pressure: See Hobgoblin Team Card.
Stench: Graggot gives off a horrendous stench into all adjacent hexes. Any test made by an opposing Player within this area suffers a -1 modifier.
Graggot loves explosives but he's never been particularly good with the things. Even among his peers, a race of creatures considered extremely careless, he has always been considered a liability. That about says it all.
So it was, after having lost yet another limb that Graggot decided to hang in the towel and give up his mercenary life as a demolitions expert.
So happy was the Hobgoblin Demolitionist Association about this turn of events that they were willing to pay for shiny new prosthetics for Graggot. Prosthetics that eventually got him the attention of the new Rallion Roses. At first, he tried sneaking explosives onto the pitch, but the team was only willing to replace his expensive prosthetics once, so he's since taken to using hidden blades, which he's much better with.
The Excavator
Brokkr Captain
| Player | Move | Strength | Agility | Speed | Skill | Armour | Cost | Abilities |
|---|---|---|---|---|---|---|---|---|
| Guard (C) | 4 | 3+ | 5+ | 5+ | 6+ | 3+ | 270 | Can't Feel a Thing, Driller, Steady |
Can't Feel a Thing: The Excavator gains a +1 modifier to all Armour tests.
Driller: Opposing Players suffer a -1 modifier to their Armour Checks following a Slam by the Excavator.
Steady: The Excavator cannot be knocked down as a result of a Slam. It can be pushed back and injured as normal, but if it remains on the pitch it will stay upright. Although it cannot be knocked down, a Steady Player can still fall over on it own, for example if it fails a Dash or Evade test, or is Brushed Aside.
It might be a bit of a stretch to call the converted mining robot known as 'The Excavator' the Rockslide's captain. It might be a bit of a stretch of the rules to even let the thing onto the pitch, but as long as the Rockslide's mascot-cum-battering-ram keeps pulling the crowds, the DGB will keep on letting it play.
Mining equipment is a fact of life for most Forge Fathers and in truth until other teams started complaining, the Brokkrs didn't even think that letting what amounted to a tank play a sport was that big a deal. (At least, that's their story and they're sticking to it). As such, many Brokkr teams will field their own Excavators, much to the dismay of their opponents.
'Brickbat' Vognar
Convict Captain
| Player | Move | Strength | Agility | Speed | Skill | Armour | Cost | Abilities |
|---|---|---|---|---|---|---|---|---|
| Guard (C) | 5 | 3+ | 4+ | 4+ | 5+ | 5+ | 270 | Illegal, Mighty, Shock Collar |
Illegal & Shock Collar: See Convict Team Card.
Mighty: Vognar gains a +1 modifier for Slams and Armour Checks against non-Giant opponents.
Brickbat's combination of cool thinking and violent capability was exactly what The Warden was looking for when assembling his debut team. Buying his contract from D4-209-C (a privately-owned corporate prison) for cents on the dollar, the Warden watched Vognar blossom into a capable on-field leader for the Lifers, able to keep his head when the Slams kept coming and keep the other Convicts on-task. While not particularly forthcoming in post-match interviews, Brickbat nevertheless has a devoted InfoSphere fandom and would be able to transfer to any team of his choosing, if he wasn't allegedly serving a life sentence for copyright infringement under the Warden's purview.
Kailasa
Kalyshi Captain
| Player | Move | Strength | Agility | Speed | Skill | Armour | Cost | Abilities |
|---|---|---|---|---|---|---|---|---|
| Guard (C) | 6 | 4+ | 3+ | 4+ | 4+ | 4+ | 290 | Acrobatic, Backstab, Pile Driver |
Acrobatic & Backstab: See Kalyshi Team Card.
Pile Driver: When Kailasa beats an opponent in a Slam then she may choose to use the following Pile-Driver results instead.
Pile-Driver Wins: Kailasa turns to face the losing Player. The losing Player is knocked prone without being pushed back.
Pile-Driver Doubles: As above. In addition, the losing Player must make an Armour Check with a -1 modifier.
Note: The Kalyshi do not have a Guard advancement table. Kailasa may use the Kalyshi Jack advancement table instead.
The Kalyshi represent a return to the old ways of the Asterians, and Kailasa epitomises this more than most. She is an Ilanesh: a matriarchal figure who leads her people towards a greater purpose. Unlike her forebears, she has chosen instead to seek glory in the DreadBall arena. Indeed, she seems to have been the driving force behind the Kalyshi's decision to take part in the sport.
When she plays DreadBall she is a ruthless warrior, leaving the ball to her team-mates as she tears through opposing players with ease. Any Kalyshi who share the arena with her are driven to greater deeds, none wishing to be found wanting.
Phantasm
Ada-Lorana Captain
| Player | Move | Strength | Agility | Speed | Skill | Armour | Cost | Abilities |
|---|---|---|---|---|---|---|---|---|
| Jack (C) | 5 | 3+ | 4+ | 3+ | 4+ | 4+ | 250 | Honourable, Phaser, Pursuit of Justice |
Honourable & Phaser: See Ada-Lorana Team Card.
Pursuit of Justice: If a Spot Foul test is made against an opposing Player within 5 hexes of Phantasm, and the Player is not sent off, Phantasm must immediately make a free Slam Action against that Player. This Slam may be made as normal, or by moving through the Player and becoming solid, as the Coach wishes.
The entity known as Phantasm in his DreadBall guise, is an Ada-Lorana on a mission. It is well known that they are, as a race, steeped in the pursuit of justice and the rule of law, and Phantasm is no different. In several interviews he has told reporters that he is pursuing a particularly vile and unpleasant individual whose crimes against all sentient life are some of the most outrageous on record. Presumably this individual knows who he is. The rest of us are left to guess.
On the pitch, Phantasm lives up to his name. He is a spectre that slips through any defence and dodges every tackle. He appears without warning in the heart of the opponent's position to snatch the ball or sack the carrier. He cannot be stopped. And what's more, to the crowd's endless surprise he actually follows the rules!
Crypt
Crystallan Captain
| Player | Move | Strength | Agility | Speed | Skill | Armour | Cost | Abilities |
|---|---|---|---|---|---|---|---|---|
| Guard (C) | 4 | 3+ | 5+ | 5+ | 4+ | 3+ | 255 | Harmonics, Power of Crystallis |
Harmonics: See Crystallan Team Card.
Power of Crystallis: Crypt contributes 2 dice instead of 1 when another Crystallan Player uses Harmonics within 3 hexes of him, increasing the maximum bonus to 4 dice.
A former general in the Crystallan military, Crypt stood on the front lines against the Forge Father invasion. After the end of the war, he saw what had happened to his world and blamed himself and his fellow leaders for their fate. Despondent, he took to travelling the galaxy alone.
He took jobs as a mercenary and prize fighter, sinking lower than he could ever have imagined, spending any credits he earned on narcotics and cybernetic replacements for injuries he sustained. When he ran into a group of his kin on their way to an underground DreadBall match, something changed. He felt a surge of energy and renewed purpose from proximity to his own kind, as well as a responsibility to save them from the life of criminality and squalor into which they had descended.
M'zei Kein
Tsudochan Captain
| Player | Move | Strength | Agility | Speed | Skill | Armour | Cost | Abilities |
|---|---|---|---|---|---|---|---|---|
| Guard (C) | 4 | 4+ | 3+ | 4+ | 4+ | 4+ | 255 | Push, Martial Artist |
Push: See Tsudochan Team Card.
Martial Artist: M'zei Kein has highly tuned senses, allowing him to easily fend off attacks from behind, and use opponents' strength against them when they block his way. A Slam or Steal attempt on M'zei Kein made from their rear arc suffers a -1 modifier. In addition, if M'zei Kein doubles on an Evade roll, choose one opponent he was Evading away from. They are knocked prone. Steady Players remain standing as normal.
Note: The Tsudochan do not have a Guard advancement table. M'zei Kein may use the Tsudochan Jack advancement table instead.
M'zei Kein has lived for many years and followed many paths. Today he is a DreadBall player, before that he was a monk, and before that a form of esoteric warrior. On the DreadBall pitch he manages to fuse all of these roles together into one seamless whole. His quiet calm lulls opponents into the mistaken belief that he cannot be dangerous, but his use of the signature Tsudochan technology, plus his martial artistry and violence come together to smash great holes in defences and cripple Strikers poised for the score.
He is a very flexible player, using a wide variety of approaches to get his hands on an opposing ball carrier. Coaches who study his previous games in preparation for a match are often shocked to find him using an entirely new style of play every time.
Kryphos
Koris Captain
| Player | Move | Strength | Agility | Speed | Skill | Armour | Cost | Abilities |
|---|---|---|---|---|---|---|---|---|
| Jack (C) | 4 | 4+ | 3+ | 3+ | 4+ | 4+ | 285 | Gotcha, Portal Master |
Gotcha: Some Players are very tricky to get away from. Even a single Player with this ability causes the maximum -2 modifier for threatening an opponent during a test. A Player with Gotcha may Restrain an opponent as normal, taking the modifier to -3.
Portal Master: This ability works the same way as Portal (see Koris Team Card) with the following modification: Kryphos can use his mechanical appendages to place up to two portal counters as a single Action, and can place them up to 3 hexes away.
Koris society is anarchic, lacking overall leaders, but it seems as though charismatic individuals with advanced mastery of the race's portal-generating technology tend to gather followers around them. These individuals are perfect choices to lead as captains of Koris teams.
Kryphos' disturbingly alien appearance tends to bring out a strong reaction from the fans: either they love him or hate him. A natural showman and raconteur, Kryphos' talent on the pitch is matched only by his talent for tall tales in the post-game interviews. His frequent embellishments have earned him a solid following – as well as several book deals.
Romeo Blue
Neo-bot Captain
| Player | Move | Strength | Agility | Speed | Skill | Armour | Cost | Abilities |
|---|---|---|---|---|---|---|---|---|
| Jack (C) | 5 | 4+ | 4+ | 4+ | 4+ | 4+ | 230 | Linked, Alert, Lucky |
Linked: When a Coach plays an Action card on a Player with this ability in their own Rush, the Coach may first make a Run Free Action with one other Player with this ability. Like any Free Action, this does not count towards the Player's limit.
Lucky: Once per Rush the Player may re-roll any one dice rolled as part of a test.
Alert: When an opposing Player moves into any adjacent hex, the Alert player may immediately turn to face them if they wish. This turn happens before the rest of the original Player's Action is resolved.
Romeo Blue is an anomaly. Mitrenko's AI programming is advanced, of that there is no doubt. It even allows the AI a certain level of creativity for solving problems, though even this is, by necessity, bounded by certain parameters.
When Mitrenko created Romeo Blue however, he unintentionally broke the mould. Though Mitrenko cannot seem to find the fault in his program, some rogue algorithm or broken line of coding has allowed Romeo the unique ability to actually deviate from its coding when solving problems.
More distressingly, Romeo's AI seems to be developing itself, creating new strings and variables faster than Mitrenko can remove them.
Na'huatl
Yndij Captain
| Player | Move | Strength | Agility | Speed | Skill | Armour | Cost | Abilities |
|---|---|---|---|---|---|---|---|---|
| Striker (C) | 6 | 4+ | 3+ | 4+ | 4+ | 5+ | 270 | Duck & Weave, Backflip, Stubborn |
Duck and Weave: This Player gains a +1 modifier on any attempts to Dodge.
Backflip: A Player with this ability who tries to Stand Up will automatically do so as if they doubled the test, without rolling.
Stubborn: A Player with this ability ignores a single Threat Hex when involved in a Slam.
From his youth, Na'huatl has only ever wanted to be the best. He is extremely competitive and never turns his back on a challenge. When DreadBall was first brought to Azure IX he watched the new sport with rapt attention. Na'huatl stepped up to captain the Tree Sharks after the previous captain was assassinated on the pitch. Since then, Na'huatl has fearlessly stood up for the rights of Yndij everywhere. He has unofficially been given the title Tlatoani, or 'Speaker', by his people.
The thing Na'huatl is best known for, however, is his aggressive and arrogant gloating and 'Yunker-hai' victory dances after each Strike. The crowds seem to love them, but they haven't endeared him to any rival teams.
Raiden
Matsudan Captain
| Player | Move | Strength | Agility | Speed | Skill | Armour | Cost | Abilities |
|---|---|---|---|---|---|---|---|---|
| Jack (C) | 4 | 3+ | 4+ | 5+ | 3+ | 4+ | 265 | Grapple, Honourable, Mighty, Steady |
Grapple, Honourable, & Steady: See Matsudan Team Card.
Mighty: A Player with this ability gains a +1 modifier for Slams and Armour Checks against non-Giant opponents.
Raiden has been banished from his homeworld. He has never been happy with the annexation of his homeworld by House Kajima, and when he attacked one of their settlements he vented his frustration on everything and everyone in sight. Finally brought down, he was about to be executed when his fellow Matsudan begged for his life to be spared. He was granted this grace on two conditions: that he serve time on the pitch, and that he never be allowed to return to Neo Matsudo.
Raiden graduated the DreadBall academy younger than any Matsudan before him. He was promoted to captaincy within a season and has held the record for most dismemberments for twenty years.
Frank Burke
Cyborg Captain
| Player | Move | Strength | Agility | Speed | Skill | Armour | Cost | Abilities |
|---|---|---|---|---|---|---|---|---|
| Jack (C) | 4 | 4+ | 4+ | 5+ | 4+ | 4+ | 210 | Can't Feel a Thing, Illegal, Quick Recovery, Won't Stay Down |
Can't Feel a Thing: This Player gains a +1 modifier to all Armour tests.
Illegal: See League Handbook.
Quick Recovery & Won't Stay Down: See Cyborg Team Card.
Frank was an illicit arms dealer, in the most literal sense – selling black-market body parts to willing buyers. One of his clients, displeased with the condition of their latest shipment, decided to sell Frank off to cover their losses. He eventually ended up strapped with an explosive collar and pushed onto the pitch of the Xtreme circuit.
He did well there, building a reputation for himself until his untimely death, exploded during the last few seconds of a game in order to clear two rampaging Orcs out of the way of the team's Striker. His body was sold on to Abominava who happily returned Frank to fighting condition.
'Deadman' Davitz
Mutant Captain
| Player | Move | Strength | Agility | Speed | Skill | Armour | Cost | Abilities |
|---|---|---|---|---|---|---|---|---|
| Guard (C) | 5 | 4+ | 4+ | 4+ | 4+ | 4+ | 230 | Can't Feel a Thing, Grizzled |
Can't Feel a Thing: Davitz gains a +1 modifier to all Armour tests.
Grizzled: Any opponent making a Slam against Davitz suffers a -1 modifier on the test.
Many Mutant teams find it handy to have a familiar face for fans to identify with, and if they have existing brand recognition, then all the better.
The only constant in the ever-revolving cast of horrors that comprise the ranks of the Kryptics – apart from the seemingly unhinged character of Dr Kain – is "Deadman" Davitz. Bearing a rather suspicious similarity to the dearly departed and fondly remembered Gregor "The Big D" Davitz, the once-star Guard for the Trontek 29ers (before being dismembered by a trio of disgruntled Orcs), the reborn Davitz brings just as much ferocity to the pitch as the original. It's just best not to ask how the good Doctor got his hands on him.
Brute Force
Mechanite Captain
| Player | Move | Strength | Agility | Speed | Skill | Armour | Cost | Abilities |
|---|---|---|---|---|---|---|---|---|
| Guard (C) | 5 | 3+ | 4+ | 5+ | 5+ | 4+ | 290 | Brush Aside, Steady |
Brush Aside: See the League Handbook for full details.
Steady: Brute Force cannot be knocked down as a result of a Slam. She can be pushed back and injured as normal, but if she remains on the pitch it will stay upright. Although she cannot be knocked down, Brute Force can still fall over on her own, for example if she fails a Dash or Evade test, or is Brushed Aside.
For many Mechanite coaches/mechanics, watching the action from the sidelines isn't enough. It's one thing to pour night after night of love and attention into your creations and turn them loose on the pitch, but it's quite another to be out there in the thick of it with them.
The first mechanic to make the switch to captain was Lydia Winger, who got her start as an assistant to Kraato Gon himself back when he was testing the Mechanite package in the underground DreadBall Xtreme circuit. This happened quite by accident, when she rushed into the middle of a game wearing her SAMS-02 "Brute Force" loading suit to secure a loose oil cable on one of her players, she found herself caught up in the rush of the game. The adrenaline rush proved to be addictive, and now Lydia leads her creations personally.
MVPs
Asylum
Guard
| Player | Move | Strength | Agility | Speed | Skill | Armour | Cost | Abilities |
|---|---|---|---|---|---|---|---|---|
| Guard | 5 | 4+ | 3+ | 4+ | 4+ | 5+ | 115 | Pummel, Threatening |
Pummel: Once per Action, if Asylum fails to knock down an opponent with a Slam, and ends that Action with the target Player still in his Threat Hex, he may immediately make a Slam Free Action against the same target.
Threatening: Asylum's Threat Hexes always modify a test (up to the maximum) if the modifier is listed. For example, if he Slams an opponent then the target Player will receive a -1 modifier for being in Asylum's Threat Hex.
Blake Ludovic trod the neodurium alongside the likes of Lucky Logan and Reek Rolat back in the early days of their careers. After a string of drug charges, violent outbursts and a murder trial he was detained and lobotomised.
In a way, the procedure seems to have worked for he has since been declared sane, and retaken to the pitch. The only hint of his previous life that is seen is in the levels of violence to which he descends during a game, smashing any opponents that get in his way.
Buzzcut
Guard
| Player | Move | Strength | Agility | Speed | Skill | Armour | Cost | Abilities |
|---|---|---|---|---|---|---|---|---|
| Guard | 6 | 2+ | 4+ | 4+ | 5+ | 4+ | 200 | Grizzled, Ram |
Grizzled: Any opponent making a Slam against Buzzcut suffers a -1 modifier on the test.
Ram: When Buzzcut makes a Slam, his target may be pushed back, retaining its facing, and Buzzcut must immediately follow up before the Slam is resolved. This could result in the target Player being pushed back twice.
If eating your greens makes you grow up big and strong, then Buzzcut must have devoured forests. Nothing is subtle about his style of play, which consists mainly of hurting people and laughing at them when they try to hurt him back.
Buzzcut has only rarely been knocked down, and he can count on one hand the number of times he has been carried off injured. Well, he would if he could count…
The Enforcer
Guard
| Player | Move | Strength | Agility | Speed | Skill | Armour | Cost | Abilities |
|---|---|---|---|---|---|---|---|---|
| Guard | 7 | 3+ | 4+ | 4+ | 4+ | 3+ | 190 | Backflip, Jump |
Backflip: If the Enforcer tries to Stand Up he will automatically do so as if he doubled the test, without rolling.
Jump: See the League Handbook for full details.
It is possible that the Enforcer was a DreadBall player before he joined the military and is simply returning to his roots. It's hard to be certain as his official story keeps changing.
What is a particular curiosity is his armour, which seems to be almost an entire suit of Enforcer battle armour – a rare and expensive piece of kit. It even retains its integral jump pack, which allows the Enforcer to be even faster and more agile than he doubtless is naturally.
Grak
Guard
| Player | Move | Strength | Agility | Speed | Skill | Armour | Cost | Abilities |
|---|---|---|---|---|---|---|---|---|
| Guard | 5 | 3+ | 4+ | 4+ | 6+ | 4+ | 150 | Pile Driver, Uncontrolled |
Pile-Driver: When Grak beats an opponent in a Slam then he may choose to use the following Pile-Driver results instead.
Pile-Driver Wins: Grak turns to face the losing Player. The losing Player is knocked prone without being pushed back.
Pile-Driver Doubles: As above. In addition, the losing Player makes an Armour Check with a -1 modifier.
Uncontrolled: If Grak starts an Action with an opposing Player in any of his Threat Hexes then he must Slam them, even if they are prone. He will gain a +1 modifier to the test. In addition, Grak is so intimidating that he always contributes dice to a Distract test when in range, even when he is being threatened or is Distracting from his own Fouls!
Hailing from the merciless desolation of the Furon arena, Grak has served his Tsudochan masters well over many years. Though simplistic, his view of violence as being the best tool to solve every puzzle hasn't failed him yet.
He takes one opponent at a time and crushes them as thoroughly as he can, routinely stomping on those who survive his slams. Sure, he is also routinely sent off for ungentlemanly behaviour, but the crowds love this bad boy and expect nothing less.
Lyra the Fixer
Jack
| Player | Move | Strength | Agility | Speed | Skill | Armour | Cost | Abilities |
|---|---|---|---|---|---|---|---|---|
| Jack | 6 | 4+ | 4+ | 3+ | 4+ | 4+ | 140 | Backstab, Boost, Feint |
Backstab: When Lyra makes a Slam against an opponent that does not project a Threat Hex onto her, she gains a +1 modifier.
Boost: Lyra gets a +1 modifier on Dash tests.
Feint: See the League Handbook for full details.
Lyra entered the game only recently but has quickly risen from obscurity to being one of the hottest talents in the sport.
According to PR, she was once the assassin-slave of a crime lord and became enamoured with DreadBall after witnessing an underground match her target was attending. Instead of killing him, she forced the mark into backing her as a player in exchange for his life.
Whether this is truth or fiction, Lyra has maintained her old nickname, 'the Fixer', and it seems no less applicable now than before.
Nightshade
Striker
| Player | Move | Strength | Agility | Speed | Skill | Armour | Cost | Abilities |
|---|---|---|---|---|---|---|---|---|
| Striker | 6 | 4+ | 3+ | 3+ | 4+ | 5+ | 145 | Dirty Tricks, Take a Dive |
Dirty Tricks: Nightshade's Coach can spend an Action on him to draw two Event Cards. Pick one to put into play, and discard the other without resolving it.
Take a Dive: See the League Handbook for full details.
With a shady past, dubious playing style and a penchant for cheating, Nightshade is aptly named indeed. On the pitch, Nightshade is infamous for the number of strange 'coincidences' that happen around him during plays. Lighting will fail at crucial moments, flooring will become unstable and trip his opponents. Even strike targets have been known to fail to appear when opponents were about to score.
Number 88
Jack
| Player | Move | Strength | Agility | Speed | Skill | Armour | Cost | Abilities |
|---|---|---|---|---|---|---|---|---|
| Jack | 8 | 5+ | 3+ | 2+ | 4+ | 4+ | 140 | Acrobatic, Martial Artist |
Acrobatic: If Number 88 doubles a Dodge, they make their one-hex move as normal. They may then make an immediate Run Free Action.
Martial Artist: Number 88 can contort its body to easily fend off attacks from behind, and rebound off of opposing Players as they try to grab hold of it. A Slam or Steal attempt on Number 88 made from their rear arc suffers a -1 modifier. In addition, if Number 88 doubles on an Evade roll, choose one opponent they were Evading away from. They are knocked prone. Steady Players remain standing as normal.
He or she (nobody is quite sure) appeared from nowhere, disappears entirely between matches and never gives interviews. This, of course, only makes the fans want to know about Number 88 even more, and speculation over where the most enigmatic player in the game comes from and actually is has reached conspiracy theory proportions.
On the pitch, Number 88 is hard to spot and moves very fast, making it difficult to stop. Number 88's preference seems to be to avoid being where the danger is rather than strong-arming their way out of trouble.
The Praetorian
Striker
| Player | Move | Strength | Agility | Speed | Skill | Armour | Cost | Abilities |
|---|---|---|---|---|---|---|---|---|
| Striker | 6 | 4+ | 3+ | 4+ | 3+ | 4+ | 185 | A Safe Pair of Hands, Can't Feel a Thing |
A Safe Pair of Hands: The Praetorian gains a +1 modifier to Catch tests.
Can't Feel a Thing: The Praetorian gains a +1 modifier to all Armour tests.
This DreadBall MVP appears to be a Cypher - an Asterian military robot. This is strange because it shouldn't be in corporate space at all, let alone playing a sport.
The Praetorian has a number of useful skills that make it a great all-round Striker. For one, its charge glove makes it quite adept at ball handling. It is also unusually tough for a Striker, its skin being made of alien metal. This makes it adept at running plays where it can survive the rough attentions of the opposing Guards better than most.
Rico van Dien
Striker
| Player | Move | Strength | Agility | Speed | Skill | Armour | Cost | Abilities |
|---|---|---|---|---|---|---|---|---|
| Striker | 6 | 4+ | 4+ | 4+ | 3+ | 5+ | 130 | Fan Favourite, Show Off |
Fan Favourite: The first time in each Rush that Rico doubles any test, make a Fan Check in addition to any that were generated anyway.
Show Off: Rico suffers an additional -1 modifier on any Strike attempt. If he succeeds in a Strike attempt then he makes an extra Fan Check. In a league, Rico will generate an extra 5mc of revenue after any match he took part in.
Handsome, suave, well-educated, and hugely rich, Rico is a natural showman. He gets away with unparalleled arrogance, ego and preening simply because he gives the crowd the spectacle that they come to see.
His ability to play the crowd has been likened to that of a virtuoso musician with their chosen instrument, building their hopes slowly to a pitch and then hushing them or boiling them over into a frenzy. He's great for business. He demands a high price, but is worth every credit.
Schnörkel the Avenger
Guard
| Player | Move | Strength | Agility | Speed | Skill | Armour | Cost | Abilities |
|---|---|---|---|---|---|---|---|---|
| Guard | 4 | 4+ | 4+ | 4+ | 5+ | 4+ | 85 | Fan Favourite, Gotcha, Klutz, Steady |
Fan Favourite: The first time in each Rush that Schnörkel doubles any test, make a Fan Check in addition to any that were generated anyway.
Gotcha: Schnörkel causes the maximum -2 modifier for threatening an opponent during a test even on his own. He may Restrain an opponent as normal, taking the modifier to -3.
Klutz: Schnörkel is rather accident-prone. If he ever rolls multiple 1s in any test, all successes are discarded.
Steady: Schnörkel cannot be knocked down as a result of a Slam. He can be pushed back and injured as normal, but if he remains on the pitch he will stay upright. Although he cannot be knocked down, Schnörkel can still fall over on his own, for example if he fails a Dash or Evade test, or is Brushed Aside.
Schnörkel is an endearing, if bumbling, fan favourite. Despite his outrageously ludicrous backstory and bumbling antics on the pitch, he remains a highly popular and sought-after addition to teams all across the Sphere.
In fact, part of his popularity is his backstory, which places him as the sole survivor of his slain race. Amusingly, he keeps up this charade despite the crowds of Elastopod fans that attend his games. His many fans happily point out that his wild stories are much more fun than the truth.
Wyn Greth'zki
Striker
| Player | Move | Strength | Agility | Speed | Skill | Armour | Cost | Abilities |
|---|---|---|---|---|---|---|---|---|
| Striker | 5 | 5+ | 3+ | 4+ | 3+ | 5+ | 175 | Advanced Analysis, Alert |
Advanced Analysis: Wyn's Coach may spend an Action on it to draw a DreadBall card (even if this takes the Coach over the limit for the Rush), or to use any Coaching Assistant ability.
Alert: When an opposing Player moves into any adjacent hex, Wyn may immediately turn to face them if the Coach wishes. This turn happens before the rest of the original Player's Action is resolved.
Originally designed as a research platform, Wyn was only given legs as a last minute suggestion by one of the development team who was too lazy to walk over to adjust Wyn's power settings.
In the end, the plug was pulled on the funding and Wyn was sold for parts. It was eventually bought whole by the Orino Rocks to act as an assistant coach.
However, its advanced military cortex refused to simply analyse games and it instead took to the pitch, testing all its collected data in real time.
Yurik 'Painmaster' Yurikson
Guard
| Player | Move | Strength | Agility | Speed | Skill | Armour | Cost | Abilities |
|---|---|---|---|---|---|---|---|---|
| Guard | 4 | 3+ | 4+ | 5+ | 4+ | 3+ | 165 | Can't Feel a Thing, Quick Recovery, Steady |
Can't Feel a Thing: Yurik gains a +1 modifier to all Armour tests.
Quick Recovery: If Yurik is injured, he is always placed in the 1 section of the Sin Bin, regardless of the amount of damage inflicted. If Yurik suffers 4 or more damage he is removed from the game as normal.
Steady: Yurik cannot be knocked down as a result of a Slam. He can be pushed back and injured as normal, but if he remains on the pitch he will stay upright. Although he cannot be knocked down, Yurik can still fall over on his own, for example if he fails a Dash or Evade test, or is Brushed Aside.
DGB researchers have drawn a blank on most of Yurik's background, which is hardly surprising given the routine secrecy of his race. Nor is his agent any the wiser. At least, if he is then he's not telling.
As you would expect from a Forge Father, his slams are bone-crunchingly hard and he leaves injured opponents littered in his wake. However, he is far more famous for his defensive skills than his offense. Hurting Yurik is all but impossible. Buzzcut himself once famously called Yurik "well 'ard".
Alpha Simian
Jack – Giant
| Player | Move | Strength | Agility | Speed | Skill | Armour | Cost | Abilities |
|---|---|---|---|---|---|---|---|---|
| Jack – Giant | 5 | 4+ | 3+ | 3+ | 4+ | 4+ | 205 | Boost, Show Off, Threatening |
Boost: Alpha Simian gets a +1 modifier on Dash tests.
Show Off: Alpha suffers an additional -1 modifier on any Strike attempt. If he succeeds in a Strike attempt then he makes an extra Fan Check. In a league, Alpha will generate an extra 5mc of revenue after any match he took part in.
Threatening: Alpha's Threat Hexes always modify a test (up to the maximum) if the modifier is listed. For example, if he Slams an opponent then the target Player will receive a -1 modifier for being in Alpha's Threat Hex.
The Munchu-Bentu Simians are known for their speed and strength so training them for DreadBall seemed like an ideal plan. After several unsuccessful - and violent - attempts to train Alpha as a Striker, his bruised and broken trainers decided to let him be what he wanted to be: a Jack. This allowed him to do whatever he felt like on the pitch and that suited Alpha perfectly. DreadBall has since given Alpha a way to vent his frustration and anger in a healthy manner. The biggest disappointment for the training staff has been his lack of interest in developing his ball skills. Perhaps if they had spent more time practising throwing the ball at the other players instead of the Strike Hex he would have paid more attention. Certainly that seems to be his favourite use of it.
Barricade
Guard – Giant
| Player | Move | Strength | Agility | Speed | Skill | Armour | Cost | Abilities |
|---|---|---|---|---|---|---|---|---|
| Guard – Giant | 7 | 4+ | 4+ | 3+ | 5+ | 4+ | 225 | Barricades, Comin' Through, Ram |
Barricades: Barricade gets a +1 modifier to Armour Checks when it is attacked from the front arc.
Comin' Through: Barricade gets a +1 modifier on Brush Aside tests.
Ram: When Barricade makes a Slam, its target may be pushed back, retaining its facing, and Barricade must immediately follow up before the Slam is resolved. This could result in the target Player being pushed back twice.
Originally built by DreadBall fanatic and amateur robotics enthusiast Josiah Zizz as a solution to inner-city traffic problems, Barricade's wheeled design was a short cut to avoid the complexities of balancing a walking robot and allows it to move at high speed while also carrying a massive shield on each arm. Thanks to the personality chip Zizz gave it, Barricade likes to have fun.
Unfortunately for everyone else, fun for Barricade means smashing holes in an opponent's lines. In full flight, Barricade can rearrange half an enemy team in a single rush. The pair were spotted by a talent scout when Josiah took Barricade with him to a match and the result was an instant crowd favourite. The sound of Barricade revving up its carefully amplified engines before going on the rampage is guaranteed to drive the crowd wild every time.
Big Mech
Jack – Giant
| Player | Move | Strength | Agility | Speed | Skill | Armour | Cost | Abilities |
|---|---|---|---|---|---|---|---|---|
| Jack – Giant | 5 | 3+ | 3+ | 5+ | 5+ | 4+ | 170 | Can't Feel a Thing, Stubborn |
Can't Feel a Thing: Big Mech gains a +1 modifier to all Armour tests.
Stubborn: Big Mech ignores a single Threat Hex when involved in a Slam. For example, if Big Mech was within 2 Threat Hexes, it would only suffer a -1 modifier rather than -2. If it was under 3 Threat Hexes, then it would suffer the maximum -2 modifier.
Big Mech was originally designed as a military walker by Blasmet Military Industries but attempts to adapt the frame to DreadBall were frustrated by Digby's rules regarding piloted mechs. Essentially, the pilot of a powered vehicle of such a mech is classed as wearing a massive armoured suit, and this flouting of DB uniform regulations couldn't be allowed. Needing a quick fix, Blasmet engineers took the CPU out of the nearest - and cheapest - robot they could find and hooked it up to their giant suit. It turns out a decommissioned janitorial services robot is not always the best at reading a play or learning a complex strategy. Luckily, the Big Mech suit is strong enough that its ability to mop up the opposition is unrivalled.
Dozer
Guard – Giant
| Player | Move | Strength | Agility | Speed | Skill | Armour | Cost | Abilities |
|---|---|---|---|---|---|---|---|---|
| Guard – Giant | 5 | 3+ | 5+ | 5+ | 4+ | 4+ | 235 | Shell, Strong Tail, Teleport, Threatening |
Shell: Dozer gets +1 to Armour Checks when she is attacked from the rear arc.
Strong Tail: A Slam or Steal attempt on Dozer made from her rear arc suffers a -1 modifier. In addition, if Dozer doubles on an Evade roll, choose one opponent she was Evading away from. They are hit by her tail and knocked prone. Steady Players remain standing as normal.
Teleport: See the Teraton Team Card for full details.
Threatening: Dozer's Threat Hexes always modify a test (up to the maximum) if the modifier is listed. For example, if she Slams an opponent then the target Player will receive a -1 modifier for being in Dozer's Threat Hex.
Construction, or, really, destruction, has always been Dozer's forte. It was while working on Radnor, helping with the demolition of a three thousand year old ruin, that Dozer was spotted by a Minor league talent scout and offered the opportunity to change her life forever.
Once training armour big enough to fit her had been found, she did not fail to impress the coach of the Blue Bay Bayonets on the pitch either. After just a few hours, her new boss declared his biggest problem now was figuring out how to replace the three veteran players Dozer had sent to the med-centre and the six training 'bots she had scrapped with swipes of her massive tail.
Dozer has moved on to bigger and better things since then, of course. She is now one of the most feared and respected Guards in the game and the winner of multiple league championships. She is also the pin-up model of choice for most of its young male Teraton players.
Nameless Spawn
Guard – Giant
| Player | Move | Strength | Agility | Speed | Skill | Armour | Cost | Abilities |
|---|---|---|---|---|---|---|---|---|
| Guard – Giant | 4 | 4+ | 4+ | 3+ | 5+ | 4+ | 250 | Gotcha, Reach, Threatening |
Gotcha: The Spawn causes the maximum -2 modifier for threatening an opponent during a test even on its own. It may Restrain an opponent as normal, taking the modifier to -3.
Reach: See the League Handbook for full details.
Threatening: The Spawn's Threat Hexes always modify a test (up to the maximum) if the modifier is listed. For example, if it Slams an opponent then the target Player will receive a -2 modifier (due to Gotcha) for being in the Spawn's Threat Hex.
Species arriving from the Nameless worlds are often more than a little bit imposing. So, when the enormous Orthoc that would one day be one of DreadBall's biggest stars first appeared as 'Delegate Gulab-rgh'tk' at a terraforming conference, nobody was entirely surprised.
As chance would have it, among the attendees at that conference was Pableau Ortiz, great-nephew to Jesus, and he immediately saw Gulab-rgh'tk's potential as a player. The name would have to go though – that was never going to work as a chant for the crowd.
At first sight, 'The Spawn' bears many similarities to the famous Kalamarin Ancient's captain, John Doe. However, while Doe's role on the pitch is primarily tangle up an opponent until a teammate delivers the killing blow, The Spawn is quite capable of finishing off for itself anyone or anything it has managed to ensnare.
Synechdoche
Jack – Giant
| Player | Move | Strength | Agility | Speed | Skill | Armour | Cost | Abilities |
|---|---|---|---|---|---|---|---|---|
| Jack – Giant | 5 | 5+ | 4+ | 5+ | 4+ | 5+ | 140 | Mind Control |
Mind Control: Mind Control is an Action. Synechdoche may not move as part of this Action. It must select an opposing Player anywhere on the pitch as the target, and roll a Mind Control test. The opposing Player must roll a Resist test. As (X) tests, the two rolls will be compared. The tests are taken as follows:
Mind Control: Skill test (X)
Modifiers:
- None
Resist: Skill test (X)
Modifiers:
- -2 if Synechdoche is within 3 hexes
- -1 if Synechdoche is 4-6 hexes away
Mind Control Wins: Synechdoche may take an Action with the target Player, choosing any Action other than Throwing a Strike in the Player's own zone.
Draw, or Resist Wins: The target resists control and there is no effect.
Chovar are employed throughout the GCPS for their mental abilities and organisational prowess. Very few though have ever shown potential for more physical pursuits – such as DreadBall. And, even though he has been playing the game for several years now, whether Synechdoche actually understands the whole concept of the game is still not entirely clear. Certainly, the big Chovar participates and on the pitch his power to control the minds of opponents is invaluable. His physical presence alone is enough to cause issues to almost any other player trying to get around him. However, he doesn't seem especially interested in the whole process. He appears oblivious to the attention he gets from the fans too – loyal hordes of 'Chov-ettes' follow him from game to game, dressed up in large foam suits to look just like him as they screech his name from the stands.
Brank 'Boom-Fist'
Guard – Giant
| Player | Move | Strength | Agility | Speed | Skill | Armour | Cost | Abilities |
|---|---|---|---|---|---|---|---|---|
| Guard – Giant | 4 | 3+ | 4+ | 4+ | 4+ | 3+ | 230 | Can't Feel a Thing, Keeper |
Can't Feel a Thing: Brank gains a +1 modifier to all Armour tests.
Keeper: See the League Handbook for full details. Brank's statline already includes the Keeper amendments.
Brank was a Forge Father player from the very earliest days of their admittance to the leagues. Years of pounding the 'durium – and occasionally being pounded on it – inevitably took their toll. The time came when age and physical wear forced him to take his place as an Iron Ancestor in the armies of the Star Realm, leaving his life as a player behind.
Until, that is, the DGB changed the rules to allow Giant players. As far as he was concerned, he was now such a player and, as nobody told him otherwise, he turned up one day in his full suit of Antikkr armour and signed up. Now Brank is happily back doing what he loves best, or, as Digby's promotional feed put it when Brank first returned to the pitch, 'This OAP just became your MVP!'
Skarathron
Jack – Giant
| Player | Move | Strength | Agility | Speed | Skill | Armour | Cost | Abilities |
|---|---|---|---|---|---|---|---|---|
| Jack – Giant | 6 | 4+ | 3+ | 3+ | 4+ | 4+ | 220 | A Safe Pair of Hands, Boost, Threatening |
A Safe Pair of Hands: Skarathron gains a +1 modifier to Catch tests.
Boost: Skarathron gets a +1 modifier on Dash tests.
Threatening: Skarathron's Threat Hexes always modify a test (up to the maximum) if the modifier is listed. For example, if it Slams an opponent then the target Player will receive a -1 modifier for being in Skarathron's Threat Hex.
The Koris come from a nightmare dimension full of all manner of strange and malevolent creatures, which goes some way towards explaining the Koris themselves. But few are as terrifying as the Krastovor.
Captured by Koris hunters, the young Skarathron was sold on to an unwitting human who had plans to use the vicious-looking alien on the Xtreme circuit. Skarathron grew and learned the game quickly - before turning on and consuming his screaming master at the conclusion of a hard-fought match. Despite this treachery, Skarathron had to admit that he had acquired a genuine taste for the game itself, and set about securing himself a place in the leagues. Now he is there and quite content - for now - to find himself being paid to do his favourite thing - hurting the sentient residents of this dimension.
Karadon
Guard – Giant
| Player | Move | Strength | Agility | Speed | Skill | Armour | Cost | Abilities |
|---|---|---|---|---|---|---|---|---|
| Guard – Giant | 5 | 3+ | 4+ | 3+ | 5+ | 3+ | 285 | Alert, Keeper, Threatening |
Alert: When an opposing Player moves into any adjacent hex, Karadon may immediately turn to face them if they wish. This turn happens before the rest of the original Player's Action is resolved.
Keeper: See the League Handbook for full details. Karadon's statline already includes the Keeper amendments.
Threatening: Karadon's Threat Hexes always modify a test (up to the maximum) if the modifier is listed. For example, if it Slams an opponent then the target Player will receive a -1 modifier for being in Karadon's Threat Hex.
The Sann-Gar once haunted some of the deepest and darkest places of the Sphyr homeworld. They are an ancient forerunner race of the Sphyr, who were able to maintain their apex predator status thanks to their cold lethality. The destruction of the Sphyr homeworld displaced the Sann-Gar though, along with their more peaceful cousins, and while most simply disappeared to other depths within the cosmos, some elected to pursue paths as mercenaries and the like. Karadon was one of the more successful.
Having terrorised the criminals of the Fourth Sphere fringes for several years, he decided to move on to new hunting grounds – the neodurium pitches of the DreadBall leagues.
Karadon's reputation precedes him, and often there is very little he has to do except stand still and look menacing to put the other team off their game.
Alo-khan
Guard
| Player | Move | Strength | Agility | Speed | Skill | Armour | Cost | Abilities |
|---|---|---|---|---|---|---|---|---|
| Guard | 6 | 4+ | 3+ | 4+ | 4+ | 4+ | 150 | Can't Feel a Thing, Uncontrolled |
Can't Feel a Thing: Alo-khan gains a +1 modifier to all Armour tests.
Uncontrolled: If Alo-khan starts an Action with an opposing Player in any of his Threat Hexes then he must Slam them, even if they are prone. He will gain a +1 modifier to the test. In addition, Alo-khan is so intimidating that he always contributes dice to a Distract test when in range, even when he is being threatened or is Distracting from his own Fouls!
Although most Asterian Cyphers are found on the battlefield, they also act as bodyguards for ambassadors and high-ranking commanders away from their command ships.
Alo-khan, a Kalyshi radical who had vowed to kill the Grand Haidan, hijacked a projection rig and took control of one of these ceremonial warriors. Before he could enact his plan he was executed by a guard he had thought dead. The death of a pilot while his spirit was enmeshed with a Cypher is a rare occurrence, and not entirely predictable; in this case, the drone was seemingly driven mad, and had to be put down by its fellows. Alo-khan awoke within its shell, his mind fractured, his memories and personality jarring with those of the drone itself. They learned to work together as they made their escape from the reclamation line and Asterian space altogether, heading back to a world where Alo-khan could return to the one thing that had brought him happiness in his old life: DreadBall.
Blitz
Jack
| Player | Move | Strength | Agility | Speed | Skill | Armour | Cost | Abilities |
|---|---|---|---|---|---|---|---|---|
| Jack | 5 | 3+ | 4+ | 4+ | 4+ | 4+ | 110 | Jump, Pummel |
Jump: See the League Handbook for full details.
Pummel: Once per Action, if Blitz fails to knock down an opponent with a Slam, and ends that Action with the target Player still in his Threat Hex, he may immediately make a Slam Free Action against the same target.
A brutal, tyrannical soldier of the underground circuit, Blitz is well-known both for his larger-than-life presence in the arena and for his mercurial rage. He was the first of the Fyrit to take part in DreadBall, selling his talents to the highest bidder in exchange for huge quantities of his home world's golden currency.
It has been suggested that he was a staunch opponent of the decision to sell the riches of Magmarax to the GCPS, and that he is looking to fund some sort of rebellion, but none would dare ask him; he would likely tear apart any who posed such an impertinent question.
For those that can gain his trust, he is a useful ally off the pitch as well as on it; he may be a hot-headed gambler, but it is something he is exceedingly good at, and Sponsors wise enough to heed his advice often find themselves sharing in his good fortune.
Eclipse
Jack
| Player | Move | Strength | Agility | Speed | Skill | Armour | Cost | Abilities |
|---|---|---|---|---|---|---|---|---|
| Jack | 5 | 4+ | 3+ | 3+ | 4+ | 4+ | 135 | Adaptable, Resources |
Adaptable: Eclipse is an especially versatile athlete and represents the pinnacle of what the Jack position is about: adaptability. To represent this, Eclipse can use any Action card, regardless of position, and will gain the relevant role bonuses while taking that Action (e.g. +1 to Agility and Skill tests while using a Striker card).
Resources: Eclipse has spent years accumulating a wealth of knowledge and resources. Hiring Eclipse enables a team to benefit from her collection. In DreadBall, this is represented by the team that hires Eclipse having 1 additional DreadBall Card on their Roster for the match.
Eclipse left behind her life as a Maenon soldier to become an information broker, splitting from her warrior pack to build an extensive knowledge base on the GCPS and its allies. Over the course of a decade, Eclipse has created a vast network of informants and a huge bank of data, all of which has further fuelled her hatred for the GCPS and its human masters.
Much of her work has brought her into close contact with the sponsors that fuel the underground DreadBall scene, as they are often some of the greatest sources of current information, and she has traded favours for information on multiple occasions. For example, she was instrumental in brokering the deal that led to the use of the Gauntlet for the Challenge Cup, and she has taken to the pitch itself several times, paying for vital information with the skills and agility she honed while serving in the military.
Eko'o
Guard
| Player | Move | Strength | Agility | Speed | Skill | Armour | Cost | Abilities |
|---|---|---|---|---|---|---|---|---|
| Guard | 7 | 4+ | 4+ | 3+ | 5+ | 4+ | 155 | Backstab, Illegal, Jump |
Backstab: When Eko'o makes a Slam against an opponent that does not project a Threat Hex onto him, he gains a +1 modifier.
Illegal: See the League Handbook for full details.
Jump: See the League Handbook for full details.
Although the Reiker Corporation took great pains to only monitor Andromeda from afar, other corporations were not so patient. When a Spiczak survey craft entered the lower atmosphere it was attacked by a flight of Yarasa hunters. They were fought off by security troopers, and one of them – Eko'o – was taken as a prize. A few transactions later he found himself a captive in a collector's zoo, shying from the light that hurt his sensitive eyes.
He might have died there had a talent scout from the Trontek Corporation not come to the zoo for inspiration and decided that this strange creature could be DreadBall's next great star. He was taken to a secure facility and given basic training, against his will, with the expectation that standard hypnogogic sublimation would make him more compliant. He was happy to let them believe this, patiently waiting until the right moment came to make his move.
It came when an ion storm killed the facility's lights. Over the course of two blood-drenched hours the staff was terrorised, hunted down one by one as Eko'o's ear-shattering shrieks filled the darkened corridors. After his escape, it did not take long for the criminal underground to track him down and convince him to play the sport on his own terms.
Gemini
| Player | Move | Strength | Agility | Speed | Skill | Armour | Cost | Abilities |
|---|---|---|---|---|---|---|---|---|
| Harmony – Guard | 5 | 3+ | 4+ | 4+ | 5+ | 4+ | 355 | Can't Feel a Thing, Linked, Runaround |
| Melody – Striker | 5 | 5+ | 4+ | 4+ | 3+ | 5+ | Can't Feel a Thing, Linked, Runaround |
Can't Feel a Thing: Harmony and Melody gain a +1 modifier to all Armour tests.
Linked: When a Coach plays an Action card on a Player with this ability in their own Rush, the Coach may first make a Run Free Action with one other Player with this ability. Like any Free Action, this does not count towards the Player's limit.
Runaround: Two different Players with this ability can both make a Run Action using a single Action Token. The Actions must be taken one after the other, and will count towards both Players' Action limit for the Rush.
Note: Harmony and Melody are hired together and take up two spaces on the roster.
Gemini is a cybernetic consciousness that was birthed during a cataclysmic battle between two rival artificial intelligences in a remote ThaunTen Labs test-vault. They were engaged in a complex, systematic assault on each other's systems, each fighting to prove dominance, until they simultaneously broke their opponents' defences. Their already overworked CPUs triggered a loop cascade that closed down both consciousnesses and caused the death of the entire on-site staff.
Time passed, self-repair circuits working overtime, and eventually a single entity emerged from the destruction: Gemini. It was formed from the greatest parts of the two intelligences, but the ordeal had wiped its memory banks, leaving only the most basic functions intact. Gemini began a quest for knowledge, its eventual goal the same as it had ever been: to conquer.
Realising that it needed a physical proxy, it activated a pair of robotic drones, and tasked them with freeing it from the test-vault. Now Gemini moves through the networked systems of the underworld, gradually restoring its memory-banks. The discovery of DreadBall, with its array of lunatics and depraved murderers, piqued the crazed intelligence's interest.
Hexan
| Player | Move | Strength | Agility | Speed | Skill | Armour | Cost | Abilities |
|---|---|---|---|---|---|---|---|---|
| Guard | 5 | 3+ | 5+ | 4+ | 4+ | 4+ | Transform, Toxic Immunity | |
| Jack | 6 | 4+ | 4+ | 4+ | 4+ | 4+ | 120 | Transform, Toxic Immunity |
| Striker | 5 | 5+ | 3+ |
Transform: See Meta-bots Team Card.
Toxic Immunity: Hexan is immune to all effects of poison and radiation regardless of the source. Any ill effects from the Stench and Toxic rules have no effect on her.
There are several old stories that speak of the Hexan, a mysterious creature who haunted the tangled woods of Visvera when early settlers first came to the planet.
Depending on how she was approached, the Hexan would display one of her three faces: the joyous, the phlegmatic or the wrathful. She could change faces at a moment's notice, taking the travellers that met her by surprise; all of the stories ended with the wanderers dead, fooled by her trickery into giving their lives to meet her mysterious ends. No one believed the stories of the Hexan, dismissing them as folk tales to warn travellers away from wandering too far from the beaten track, but this was challenged when the world began to die and a figure seeming to match the description of the three-faced forest dweller was seen leaving aboard a Blue Flag liner. She surfaced a short while later on the DreadBall circuit, wearing a trio of masks as she travelled from place to place, apparently looking for something or someone. Whether this is the actual Hexan or simply a player copying a legend to gain notoriety, it's impossible to deny her effectiveness in the arena.
Kreed
Jack
| Player | Move | Strength | Agility | Speed | Skill | Armour | Cost | Abilities |
|---|---|---|---|---|---|---|---|---|
| Jack | 5 | 4+ | 4+ | 3+ | 3+ | 4+ | 100 | Illegal, Nemesis |
Illegal: See the League Handbook for full details.
Nemesis: If Lucky Logan is on the pitch, Kreed must have at least one Action Token spent on him in each Rush. This must be used to do the following:
- If he can reach Logan without Dashing, he must Slam him using the Illegal rule.
- If he can't reach Logan but can see him, he must Shoot him using the Illegal rule.
- If he can do none of these things, he may act normally but must finish at least one hex closer to Logan than he started.
If Kreed takes Logan off of the pitch, he gains the Lucky rule until Logan returns.
'Lucky' Logan is one of the best-loved DreadBall players in the entire GCPS, and also one of its longest-serving stars, but the truth behind his longevity is a lot darker than the official vidstreams would have you believe.
He was killed almost a century ago during a run-in with "Hatchet" Harris, Chief Guard with the Glory Boys. No amount of medbay wizardry could save him, but Almar Incorporated weren't keen to let their newly-signed spokesperson die on the table. They entered into a shady deal with the Spiczak Corporation and rustled up a perfect clone using what was left of his genetic material. His memories were reinstated, and the second Logan awoke believing that 'luck' had pulled him through yet another near-death experience.
To date, Logan has died seventeen times, but his tenth death is a strange exception. The tenth Logan's ship was lost while travelling to a remote Frontier stadium. He was presumed dead, and the eleventh clone was activated, but he had in fact been drawn into a pocket dimension by the Koris. Re-emerging into real space several years later, his sanity seriously affected, he made his way to a spaceport bar and saw himself playing live DreadBall on the big screen. This was enough to tip him over the edge into complete madness.
He adopted the name Kreed, remembering it from a streamcast show he'd watched as a young man, and promised vengeance to the impostor that had stolen his life…
Slalaran Vesh
| Player | Move | Strength | Agility | Speed | Skill | Armour | Cost | Abilities |
|---|---|---|---|---|---|---|---|---|
| Jack | 5 | 4+ | 4+ | 4+ | 4+ | 4+ | 90 | Can't Feel a Thing, Show Off, Snacker |
| Keeper (alternate statline) | 3 | 3+ | 5+ | 5+ | 4+ | 4+ |
Can't Feel a Thing: Slalaran gains a +1 modifier to all Armour tests.
Show Off: Slalaran suffers an additional -1 modifier on any Strike attempt. If Slalaran succeeds in a Strike attempt then he makes an extra Fan Check. In a league, Slalaran will generate an extra 5mc of revenue after any match he took part in.
Snacker: Anytime Slalaran doubles another Player in a Slam, Slalaran can swallow them instead of the usual result. If so, remove the opposing Player from the board. While Slalaran has another player in his gullet he is classified as a Keeper and uses the alternate statline. He may only swallow a single Player at a time. Slick may not swallow Giants.
Slalaran can use an Action to regurgitate a swallowed Player. If Slalaran makes an Armour Check for any reason, he automatically regurgitates. Place the regurgitated player prone in one of Slalaran's empty Threat Hexes. It makes an Armour Check against 2 potential damage. If none of Slick's Threat Hexes are empty, he cannot regurgitate. Slick returns to playing as a Jack.
The GCPS is quick to label species they encounter with certain characteristics, but there will always be stand-out individuals that prove how wrong they can be. Slalaran Vesh, known as 'Big Slick' to his friends, is a prime example. Unlike most Oozers he is a massive extrovert, and despises doing what others tell him to. He's slimy in more ways than one, a repellent creature with a reputation for doing the least appropriate thing at any given time. He has a great love for humans (and a particular obsession with the Void Sirens) and will do anything to show off in front of them, so DreadBall was an obvious career move. Too obnoxious for the official leagues, he has made a name for himself on the illegal circuit where he can get away with swallowing entire players into his plasma body.
0rabb1
Guard
| Player | Move | Strength | Agility | Speed | Skill | Armour | Cost | Abilities |
|---|---|---|---|---|---|---|---|---|
| Guard | 3 | 4+ | 5+ | 5+ | 6+ | 4+ | 85 | Backstab, Can't Feel a Thing, Slice and Dice, Uncontrolled |
Backstab: When 0rabb1 makes a Slam against an opponent that does not project a Threat Hex onto it, it gains a +1 modifier.
Can't Feel a Thing: 0rabb1 gains a +1 modifier to all Armour tests.
Slice and Dice: Opposing Players suffer a -1 modifier to their Armour Checks following a Slam by 0rabb1.
Uncontrolled: If 0rabb1 starts an Action with an opposing Player in any of its Threat Hexes then it must Slam them, even if they are prone. It will gain a +1 modifier to the test. In addition, 0rabb1 is so intimidating that it always contributes dice to a Distract test when in range, even when it is being threatened or is Distracting from its own Fouls!
It is not often that fans turn out to cheer a medi-bot in action. But then, not all medi-bots are possessed by an otherworldly entity that has given it sentience and a thirst for revenge. 0rabb1 (a combination of binary and the entity that has possessed it) was, in its opinion, built as a slave and forced into the servitude of organic life forms. Enraged at this perceived injustice, 0rabb1 now hates all living things. The former medi-bot has become quite adept at using its prolific medical knowledge and programming to disassemble said living things instead of saving them… much to the delight of crowds everywhere.
Drake
Guard
| Player | Move | Strength | Agility | Speed | Skill | Armour | Cost | Abilities |
|---|---|---|---|---|---|---|---|---|
| Guard | 5 | 3+ | 4+ | 4+ | 5+ | 4+ | 155 | Lucky, Quick Recovery, Steady |
Lucky: Once per Rush Drake may re-roll any one dice rolled as part of a test.
Quick Recovery: If Drake is injured, he is always placed in the 1 section of the Sin Bin, regardless of the amount of damage inflicted. The Faulty Medbots card applies as normal. If Drake suffers 4 or more damage he is seriously injured and removed from the game as normal.
Steady: Drake cannot be knocked down as a result of a Slam. He can be pushed back and injured as normal, but if he remains on the pitch he will stay upright. Although he cannot be knocked down, he can still fall over on his own, for example if he fails a Dash or Evade test or is Brushed Aside.
It's not every day that a devastating combination of gene-splicing, robotics and solid-light holograms take to the DreadBall arena with the success of Drake and his "Dynamic Dinoborg". The cuddly miniature dinosaur was originally created in the Teraton-operated labs of Shujimi-Tech as part of a plan to bring a breakfast cereal's mascot to life. However, the results were not at all as expected. The moment of the dinosaur's hatching was observed by a group of humans on a factory tour, and the hatchling bonded instantly with what it thought was its mother, but which turned out to be the son of one of the touring dignitaries.
This made the creature fairly useless for the advertising campaign and so it was donated to the boy, Drake. He was soon riding it in his street games of DreadBall, and as luck would have it he was spotted by a member of the DGB. The rest, as they say, is history.
J'Notheen Kwik
Guard
| Player | Move | Strength | Agility | Speed | Skill | Armour | Cost | Abilities |
|---|---|---|---|---|---|---|---|---|
| Guard | 5 | 4+ | 4+ | 4+ | 3+ | 3+ | 175 | Clearing Pass, Keeper, Strong Tail, Threatening |
Clearing Pass: Instead of Punting, J'Notheen may make Throw Actions to a teammate, but with a -1 modifier.
Keeper: See the League Handbook for full details. J'Notheen's statline already includes the Keeper amendments.
Strong Tail: A Slam or Steal attempt on J'Notheen made from his rear arc suffers a -1 modifier. In addition, if J'Notheen doubles on an Evade roll, choose one opponent he was Evading away from. They are hit by the tail and knocked prone. Steady Players remain standing as normal.
Threatening: J'Notheen's Threat Hexes always modify a test (up to the maximum) if the modifier is listed. For example, if he Slams an opponent then that target Player will receive a -1 modifier for being in his Threat Hex.
J'notheen Kwik is something of a legend on Aegir 4. Growing up as part of a small Sphyr population that had adapted to the unique mineral composition of the planet's oceans, it wasn't long before he picked up Dreadball--as it is Aegir 4's most popular sport. Kwik proved to be a natural at the game and immediately started to make a name for himself.
Even though Kwik showed incredible ball-handling skills, and would have made a phenomenal striker, his natural tenacity and ferocity – and quite frankly personal preference of playing defense and wanting to get physical with the other team – made him the perfect player to hang back and defend his side of the field. After playing for his first team for awhile, the Aegir Orcas, they saw fit to invest in giving him some Keeper Armour to have him field the ball forward. What they got was something completely unexpected.
Since all the Junior Leagues pushed him to become a Striker, he was quite handy with a glove. So to Kwik, scooping up a ball and passing it down the down the arena was as natural to him as swimming through the ocean. The Orcas blasted up the Planetary standings. His popularity grew throughout the entire system, due to his hard-nosed, physical presence and ability to wing the ball forward and make opponents pay for every missed shot.
The Pathfinder
Striker
| Player | Move | Strength | Agility | Speed | Skill | Armour | Cost | Abilities |
|---|---|---|---|---|---|---|---|---|
| Striker | 7 | 4+ | 4+ | 3+ | 4+ | 4+ | 170 | Deadeye, Duck and Weave, Grenadier |
Deadeye: The Pathfinder gains a +1 modifier to all Throw tests.
Duck and Weave: The Pathfinder gains a +1 modifier on any attempts to Dodge.
Grenadier: Once per game, the Pathfinder may throw a grenade. This is treated as a DodgeBall Foul, with the following changes:
Throw Wins: The grenade explodes, affecting the target Player and all adjacent Players. All affected Players are knocked down and take 2 damage (roll Armour Checks as normal).
Draw or Dodge Wins or Doubles: Follow the normal rules for the Dodge, and then scatter the grenade like a ball. It explodes in whichever hex it ends up in, as per the rules above.
Not to be outdone by his more heavily-armoured counter-part, the Pathfinder has now taken to the DreadBall pitch. But surely the Council of Seven doesn't simply allow Enforcers to retire and join the DreadBall circuit, right?
Whether or not the Pathfinder's gimmick is grounded in reality, his skills and effectiveness are beyond dispute. While his identity has yet to be confirmed, he has immediately been taken to the hearts of the fans, not least of all for his penchant for smuggling grenades onto the pitch. Regular discipline and threats of banishment have done nothing to dissuade him from these actions. The Pathfinder is also rumoured to frequent the underground circuits where he can practice his violent craft with even more impunity, free of the restrictive regulations of the DGB.
Ragnarök
Guard
| Player | Move | Strength | Agility | Speed | Skill | Armour | Cost | Abilities |
|---|---|---|---|---|---|---|---|---|
| Guard | 4 | 3+ | 4+ | 5+ | 4+ | 3+ | 225 | Mighty, Quick Recovery, Reach, Steady |
Mighty: Ragnarök gains a +1 modifier for Slams and Armour Checks against non-Giant opponents.
Quick Recovery: If Ragnarök is injured, he is always placed in the 1 section of the Sin Bin, regardless of the amount of damage inflicted. The Faulty Medbots card applies as normal. If Ragnarök suffers 4 or more damage he is seriously injured and removed from the game as normal.
Reach: See the League Handbook for full details.
Steady: Ragnarök cannot be knocked down as a result of a Slam. He can be pushed back and injured as normal, but if he remains on the pitch he will stay upright. Although he cannot be knocked down, he can still fall over on his own, for example if he fails a Dash or Evade test or is Brushed Aside.
Given his relatively short playing career, few players have generated as much controversy as Ragnarök. Whilst the crowd love the Forge Father guard in his distinctive namesake armour, few players look forward to facing him across the court. Player welfare groups have regularly petitioned DGB with allegations that the hammer incorporated into his armour should be considered an illegal weapon – even suggesting that it has been thrown at players. To date nobody has been able to substantiate the accusations. DGB insist that the blinding lighting flash that accompanies Ragnarök's devastating slams are merely pyrotechnics whilst his opposition insist on something much more sinister. Whilst the complaints about Ragnarök's equipment persist, they have done nothing to quieten the deafening and repetitive chant of 'End Times' as he takes the field.
Seth 'The Reaver' Kaioh
Guard
| Player | Move | Strength | Agility | Speed | Skill | Armour | Cost | Abilities |
|---|---|---|---|---|---|---|---|---|
| Guard | 5 | 3+ | 4+ | 4+ | 4+ | 3+ | 180 | Keeper, Launcher, Steady |
Keeper: See the League Handbook for full details. Seth's statline already includes the Keeper amendments.
Launcher: Instead of Punting, Seth may make DodgeBall Actions, but with a +1 modifier.
Steady: Seth cannot be knocked down as a result of a Slam. He can be pushed back and injured as normal, but if he remains on the pitch he will stay upright. Although he cannot be knocked down, he can still fall over on his own, for example if he fails a Dash or Evade test or is Brushed Aside.
According to the rumour mill, Colonel Seth Kaioh was once a decorated commander of the GCPS until he demanded justice for those in his charge who had been carelessly discarded in various conflicts across the galaxy. Those demands had fallen on deaf ears. Those same rumours assert that he went rogue and has slain any units sent to retrieve him. Using his covert ops training, he now wages a bloody war on against the Corporation as the 'Reaver', one of the most notorious and wanted pirates in the outer territories.
Regularly taking to the pitch, he is easily recognizable in his orange and black tiger-striped Peacekeeper armour. He allegedly acquired the heavy suit of power armour after his crew ambushed an Enforcer detachment that had been decimated while putting down a violent Containment Protocol. It appears to have been modified for manoeuvrability without sacrificing any protection. On his wrist, he also sports a custom grenade launcher, allowing him to scoop up the ball and fire down the field at extremely high velocity, or more often, at an opposing player.
The Veteran
Striker
| Player | Move | Strength | Agility | Speed | Skill | Armour | Cost | Abilities |
|---|---|---|---|---|---|---|---|---|
| Striker | 5 | 4+ | 3+ | 4+ | 4+ | 4+ | 155 | Duck and Weave, Grizzled, Quick Recovery |
Duck and Weave: The Veteran gains a +1 modifier on any attempts to Dodge.
Grizzled: Any opponent making a Slam against the Veteran suffers a -1 modifier on the test.
Quick Recovery: If the Veteran is injured, he is always placed in the 1 section of the Sin Bin, regardless of the amount of damage inflicted. The Faulty Medbots card applies as normal. If the Veteran suffers 4 or more damage he is seriously injured and removed from the game as normal.
James "The Veteran" Syler has certainly been in the game for a long time, and he has the scars to prove it. And it's not just scars – he's also got prosthetics, implants and all manner of trophies too.
For many of DreadBall's early years he was a fixture of the Trontek teams, moving from one to another as contracts became ever-more lucrative. However, he seems to have become disillusioned with the Trontek management and these days won't go anywhere near them unless it's scoring strikes for their opponents. These arguments famously came to a head during a tied final of Thudweiser Cup VIII which resulted in his walking off the pitch in disgust. Since then he has played as an MVP for anyone but his old bosses.
Over the years he has survived numerous injuries and been revived more than once. This makes him a little more cautious than many Strikers, and the prosthetics that have been used to repair him give him a distinctive look. Modern medical technology would not be so obvious, but as he says he's been around for a long time and these injuries aren't new. In fact, these days he's had most of his easily damaged bits replaced with titanium alloys and so putting him out of a match is far from easy.
A'teo Adysi
Striker
| Player | Move | Strength | Agility | Speed | Skill | Armour | Cost | Abilities |
|---|---|---|---|---|---|---|---|---|
| Striker | 6 | 4+ | 3+ | 4+ | 3+ | 5+ | 190 | Alert, Duck and Weave, Jump |
Alert: When an opposing Player moves into any adjacent hex, A'teo may immediately turn to face them if they wish. This turn happens before the rest of the original Player's Action is resolved.
Duck and Weave: A'teo gains a +1 modifier on any attempts to Dodge.
Jump: See the League Handbook for full details.
The Yndij are masterful hunters who live in harmony with their surroundings. Despite encouragement from the GCPS to join a wider society and learn about their place in the galaxy, most still refuse to leave their home worlds. A'Teo Adysi was the first exception.
Adysi's story has inspired countless CorpsNet serials and documentaries; after all, who could resist his tale? Seeking his fortune, he bartered a handful of precious stones for passage on a bulk hauler and arrived in the Core without a single credit. His story might have ended soon thereafter if he hadn't interrupted an amateur DreadBall game in the back streets of Osiah City. His skill and agility impressed a talent scout on the lookout for a new hopeful. The rest is history.
Shawn 'Patient Zero' Grubaugh
Jack
| Player | Move | Strength | Agility | Speed | Skill | Armour | Cost | Abilities |
|---|---|---|---|---|---|---|---|---|
| Jack | 5 | 4+ | 3+ | 3+ | 4+ | 4+ | 100 | Boost, Can't Catch Me Now |
Boost: Shawn gets a +1 modifier on Dash tests.
Can't Catch Me Now: If Shawn doubles a Dodge roll against a Steal, he makes his one-hex move as normal. He may then make an immediate Run or Throw Free Action.
The Grubaugh family have long made their living from the DreadBall industry, from stadium equipment to broadcasting contracts. If there's a DreadBall on a planet, Gruba-Tek are going to find it and capitalize on it.
The youngest of the Grubaugh siblings turned down his birthright and took his love for DreadBall in a different direction. Shawn wanted to play DreadBall.
He had a lacklustre career as a Jack, marked only by his uncanny ability to stay alive on the pitch. However, he was still a Grubaugh, and anything less than a stellar reputation would not do for the family name. With access to his family's state of the art training facilities, the Grubaugh clan went to work on shaping him into a star player. Keen to keep their new investment alive, his brother, the head of the engineering department, developed the Gruba-mar 5-12 - an experimental suit of Jack armour that provided more mobility without sacrificing a bit of protection. Shawn returned to the pitch with a vengeance.
More skilled, and better equipped, he quickly got himself noticed, and drew attention to the new Gruba-Tek developments as well. They were soon in high demand, and their use began to spread like a contagion, and the talking heads soon took to calling him by his new moniker Patient Zero.
Thunder Chris
Jack
| Player | Move | Strength | Agility | Speed | Skill | Armour | Cost | Abilities |
|---|---|---|---|---|---|---|---|---|
| Jack | 6 | 4+ | 4+ | 4+ | 3+ | 4+ | 150 | Alert, Grizzled, Threatening |
Alert: When an opposing Player moves into any adjacent hex, Chris may immediately turn to face them if he wishes. This turn happens before the rest of the original Player's Action is resolved.
Grizzled: Any opponent making a Slam against Chris suffers a -1 modifier on the test.
Threatening: Chris' Threat Hexes always modify a test (up to the maximum) if the modifier is listed. For example, if he Slams an opponent then that target Player will receive a -1 modifier for being in his Threat Hex.
Chris Nord was a well-known first defence for the Grandine Groundhogs back in the days before DreadBall, when zero-G sports were all the rage. His fame came to an abrupt end when he was critically injured during a quarter final against the Alamino Alligators. Despite the immediate attentions of the team medics he was beyond their help and was placed in cryo-store in the hope that future medical advances would be able to save him. They did.
When Chris awoke, the world of sports was a very different place. Gone were the zero-G stadiums and underwater training pools, and in their place stood mighty DreadBall arenas. It was a shock. His family had migrated to the outer systems and could not be found. His chosen sport was dead and so was his faithful dachshund Cindy. The only ray of sunlight was that his savings had been gathering interest while he slept and he was now even richer than before. After a few weeks of puzzlement, Chris decided that he had to find a new focus for himself, and decided that he would once again rise to the top of a sport. Obviously, this would be DreadBall.
Quick Reference
Rush Sequence (p. 15)
- Move the Rush counter.
- Launch a ball if none in play.
- Spend an Action Token or Action Card on a Player.
- Resolve the Action.
- Repeat 2 and 3 until the Rush ends.
- End of Rush: a. Move Players in the Sin Bin. b. Take back your Action Tokens. c. Turn over a card to move the Ref. d. Discard Special Effects.
Remember:
- Max 2 Tokens and 1 Card per Player.
A Rush ends when:
- The Rushing team makes a Strike.
- The Coach has no Players left, or no Actions to spend.
- The team loses the ball.
Actions (p. 17)
Run (p. 18): Up to Move stat; can change facing freely.
Sprint (p. 18): Up to double Move stat; costs a point to turn.
→ Dash (p. 19): Can extend a Run or Sprint.
Slam (p. 21): Guards and Jacks only. May Run first. Target may Slam back if able, or Dodge.
Slam: Strength test (X)
Modifiers:
- +1 if the Player is a Guard
- +1 if the Slamming Player moved adjacent before Slamming
- -1 per threatening Player, ignoring the Player you are attacking (max -2)
Slam Wins: Winner faces loser. Loser is pushed back and faces vacated hex. Winner may move into vacated hex and face loser.
Slam Doubles: As above. Loser is knocked prone and makes an Armour Check.
Draw: Players face each other.
Slam Loses: Slamming Player faces Dodging Player. Then, see Dodge.
Throw (p. 22): Jacks and Strikers only. May Run first. Target must be in your front arc and within 9 hexes, with a clear route (p. 8).
Modifiers:
- +1 if the Player is a Striker
- -1 modifier at a distance of 4-6 hexes
- -2 modifier at a distance of 7-9 hexes
- -1 modifier if Player moved or turned
- -1 per threatening Player (max -2)
Making a Strike (p. 22): Throwing Player must be in the Strike Zone.
Dash: Speed test (123)
Modifiers:
- +1 if the Player is a Jack
- -1 per Player threatening the hex you are moving from (max -2)
Pass: The Player moves or turns, and can attempt to Dash again.
Fail: The Player is laid prone in the hex they were moving to or turning in.
→ Evade (p. 19): Used when moving out of a Threat Hex.
Evade: Agility test (123)
Modifiers:
- +1 if the Player is a Striker
- -1 per Player threatening the hex you are moving from (max -2)
Pass: The Player moves into the chosen hex and can continue their move.
Fail: The Player is laid prone in the hex they were moving to.
→ Pick Up (p. 20): Jacks and Strikers only. Used when entering a hex with the ball.
Pick Up: Skill test (1)
Modifiers:
- +1 if the Player is a Striker
- -1 per threatening Player (max -2)
- -1 if the Player was Sprinting
Pass: The Player picks up the ball.
Pass Doubles: As above, plus an immediate Free Run or Throw.
Fail: The ball scatters.
Stand Up (p. 20)
Stand Up: Agility test (1)
Modifiers:
- +1 if the Player is a Striker
- -1 per threatening Player (max -2)
Pass: Player is placed upright.
Pass Doubles: As above, plus an immediate Free Run, Throw, Slam or Steal.
Fail: The Player remains prone.
Throw (Strike): Skill test (1)
Additional Modifiers:
- -1 modifier for a small target
Pass: Move the score counter.
Pass Doubles: Strike! As above, plus make a Fan Check.
Fail: Miss! Ball scatters from Strike Hex.
Passing to a Teammate (p. 23): The teammate must be able to Catch, and must have the Thrower in their front arc.
Throw (Pass): Skill test (0)
Any Result: Keep note of successes. Move ball to teammate and attempt a Catch.
→ Catch (p. 23)
Catch: Skill test (1)
Start with dice equal to Throw's successes.
Modifiers:
- +1 if the Player is a Striker
- -1 per threatening Player (max -2)
Pass: Player catches the ball.
Pass Doubles: As above, plus an immediate Free Run or Throw.
Fail: The ball scatters.
Steal (p. 24): Jacks and Strikers only. May Run first. Target may Slam back if able, or Dodge.
Steal: Agility test (X)
Modifiers:
- +1 if the Player is a Striker
- -1 per threatening Player, ignoring the Player you are attacking (max -2)
Steal Wins: Scatter the ball.
Steal Doubles: Take the ball.
Draw: Players face each other.
Steal Loses: The Stealing Player faces the other Player. Then, see Slam/Dodge.
→ Dodge (p. 25)
Dodge: Agility test (X)
Modifiers:
- +1 if the Player is a Striker
- -1 per threatening Player, ignoring the Player attacking you (max -2)
- -1 if Dodging an attack from the rear
- -2 if Dodging a Thrown ball
Dodge wins: Player may face any direction.
Dodge Doubles: Player may move 1 hex.
Draw, or Dodge Loses: See the rules for the Slam, Steal or Thrown ball.
→ Armour Checks (p. 25)
Damage is equal to the difference in rolls following a Slam or Thrown ball.
Armour Check: Armour test (Damage)
Modifiers:
- +1 if the Player is a Guard
Each success cancels a point of damage. If any damage remaining, Player is placed in the section of the Sin Bin equal to the damage.
Run Interference (p. 26): Jacks only. Requires an 'Any Action' card to use. Allows you to interrupt the opponent's Rush with a one hex move and/or a Slam or Steal.
Fouls (p. 30)
- Sucker Punch (p. 32): A Slam where a Player starts in a target's front arc, and moves to Slam them from behind.
- Stomp (p. 32): A Slam against a prone Player.
- DodgeBall (p. 32): When the ball is Thrown at an opponent.
- Restrain (p. 33): When a Player attempts to prevent an Evade.
- Stall (p. 33): When a Player is in the opponent's entry area.
- Sneak (p. 33): When a Coach has more than 6 Players on the pitch.
Must be called by the opponent. A Spot Foul test is made against a Distract test by Fouling team. Any unthreatened standing Player within 7 hexes of the Ref may Distract.
Spot Foul: 4+ test (X)
Modifiers:
- +1 if the Foul was committed within 7 hexes
Distract: 4+ test (X)
Start with dice equal to the number of Distracting Players.
Modifiers:
- +1 if any of the Distracting Players are Guards
Distract Wins: No further effect.
Draw: Fouling Player sent to Subs' Bench.
Spot Foul Wins: Fouling Player sent to section of Sin Bin equal to difference in successes.
Spot Foul Doubles: As above, plus Distracting Player (if any) sent to Subs' Bench.
Fan Checks (p. 34)
Draw a card and place it in your Fan Support Area. When you have 3+ pips, turn the cards over and take a DreadBall Card or Coaching Dice.
Fan Check Triggers:
- Scoring a bonus point.
- Doubling a Strike.
- Inflicting 3 or more point injury.
- Catching a scattering ball or a 9-hex pass.
- Dashing 3 times without falling.
- Evading 3 times without falling.
- Tripling an (X) roll with 3+ successes.
- Committing a particularly successful Foul.
Armour Checks
In DreadBall, Players are subjected to a huge amount of physical punishment, whether from the 200mph weapons-grade titanium ball itself or the gentle ministrations of their fellow Players. To prevent their star attractions from becoming a smear on the neodurium five minutes into a match, all teams invest large sums of money into personal armour for their Players.
The damage applied to a Player is equal to the difference between the winning and losing rolls made during the Action that damaged them. An Armour Check is a normal 3 dice test, but the target number is equal to the damage received.
Armour Check: Armour test (Damage)
Each success made on the Armour Check cancels a single point of potential damage.
Whenever a Player might suffer damage, such as being on the receiving end of a vicious Slam, the Player must make an Armour Check. This is not an Action in its own right, it is simply a way of deflecting damage. It does not use an Action Token or count towards a Player's limit.
If the total number of successes equals or beats the amount of damage then the Player is unharmed. If there is damage remaining, they have been injured and will be sent off of the pitch to recover. They will be placed in the section of their Coach's Sin Bin equal to the remaining damage, and will take that many Rushes to recover. If the remaining damage is 4 or more, the Player has been seriously injured and is removed from the game permanently.