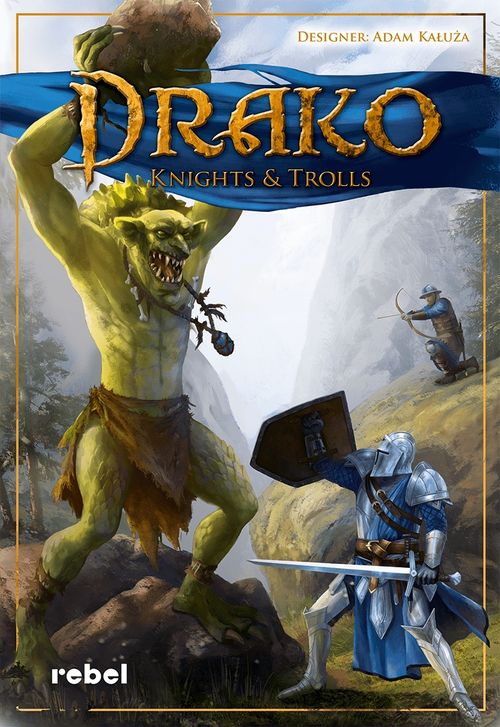
Drako: Knights & Trolls
Drako: Knights & Trolls Rulebook
Table of Contents
Table of Contents
Goal of the Game and Victory Conditions
Drako is a two-player only game where one player will lead a team of three knights against another player's two trolls. The troll player must defeat the enemy knights before all troll cards have been played. The second player directs the knights — a swordmaster and 2 archers, whose purpose is to survive through the troll player's time limit. If the troll player is out of cards, the sun rises above the valley, the trolls turn to stone, and the knight player wins. The knights may also win if they manage to defeat both trolls.
Before the game, players decide (randomly or by preference) which side each will play. If this is your first game of Drako: Knights and Trolls, note that the trolls are slightly easier to play.
Game Components
- board,
- 27 wound markers,
- pieces for the knight player:
- 1 knight player mat,
- 1 deck of 38 knight cards,
- 1 evasion token,
- 3 knight figures.
- pieces for the troll player:
- 1 troll player mat,
- 1 deck of 38 troll cards,
- 10 rock tokens,
- 2 troll figures.
Game Preparation
Before the first game, gently punch out the player mats and tokens.
Place the board in the middle of the table, with wound markers nearby so that both players have easy access to them.
The knight player sets up their pieces — the player mat goes in front of the player, and the evasion token next to it. The knight figures are placed on the board as pictured and the knight cards are shuffled and placed face down in a stack. They then draw 4 cards from the deck and look at them — this is their starting hand.
The troll player sets up the troll pieces — the player mat goes in front of the player, and the 10 rock tokens next to it. The troll figures are placed on the board as pictured and the troll cards are shuffled and placed face down in a stack. They then draw 4 cards from the deck and look at them — this is their starting hand.
Game Sequence
Players take their turns one after the other, starting with the troll player.
On the first turn, the troll player performs only 1 action.
In all subsequent turns, players perform 2 actions. Therefore, the troll player performs 1 action, then the knight player performs 2 actions, then the trolls perform 2 and so on — both players perform 2 actions until the end of the game.
The possible actions are:
- draw 2 cards,
- play 1 card.
Actions may be done in any order and each action may be repeated. For example, a player may choose to play two cards on their turn and not draw any. Players must perform two actions — passing an action is not allowed.
Near the end of the game, it is possible for the knights to run out of cards before the trolls. In this case, the knight player must pass each remaining turn until the game ends.
However, if the troll player runs out of cards, the game ends immediately and the knight player wins.
Drawing 2 Cards
The player draws two cards from their deck and adds them to their hand. A player may never have more than six cards. If the player has more than six cards after taking this action, they must immediately discard down to six.
Playing 1 Card
The player plays a card from their hand and chooses to use one of the options presented symbolically in the upper left corner of the card. They may choose to not resolve any of the options.
After playing a card, discard it from the game.
Most of the symbols allow a move or an attack, as described on the following pages.
Move
When playing a card for movement, the player moves one (or more) of their figures up to as many hexes as the card's movement value, the number next to the movement symbol. Not all movement points must be used, nor all figures moved; it is even possible to not move at all, though the card is still discarded.
A player cannot move their figure through, nor stop on, a space containing another figure.
Attack
When playing a card for attack, the player attacks with one (or more) of their figures for as much damage as the card's attack value, the number next to the attack symbol. The attacking player decides which figure is being attacked.
If a player plays a card for attack, the opponent may immediately respond by playing a card with a defense symbol as a free action. This fully blocks the attack against one of their figures, regardless of the attack value. If the defender suffers more than 1 attack, the defender decides which attack they want to block, and can discard additional defense symbols per attack.
If the attack is successful (not blocked), the target figure takes damage — place as many wound markers as the card's attack value onto the owner's player mat.
If a knight is attacked, the wound markers go onto that specific knight's space on the player mat.
If a troll is attacked, the wound markers go onto that specific troll's space on the player mat, starting from the top and moving to the bottom. The first wounds are placed on the fields corresponding to that troll's powers; after those are covered the troll player can no longer use the ability of that troll (see Troll Player Mat and Abilities). After all of a figure's spaces are wounded, the figure is killed and removed from the board.
Knight Player Mat and Abilities
The knight player has two types of figures with different abilities: 1 swordmaster and 2 archers. The swordmaster has the ability to evade an attack, while the archers may shoot from a distance. During the game, wound markers will be placed on the corresponding spaces of the knight whom was attacked. Each knight has a different number of wound spaces. If all of a knight's spaces are wounded, the knight is killed and removed from the board. If all 3 knights are killed, the knights are defeated and the knight player loses the game.
Evasion
Once during the game, when the swordmaster is targeted for an attack, they may spend their evasion token to ignore one attack — exactly as if the knight player had played a card with the defense symbol. The knight player returns the evasion token to the box and cannot use this ability again this game. After using this ability, the swordmaster may move to an adjacent free space, if one is available.
If the swordmaster is the target of more than one attack, they have to accept the injuries of the other unblocked attacks, even if the knight is now out of range.
Archery
Lets the archers use the Bow Attack symbol, which allows for long-distance attacks.
Symbols on the Knight Cards
1 Knight Moves
1 knight can move up to as many hexes as the card's movement value.
2 Knights Move
1 or 2 knights can move, each up to as many hexes as the card's movement value.
1 Knight Attack
1 knight, adjacent to an opponent's figure, can attack that figure using the card's attack value. The attack can be blocked by a defense card.
2 or 3 Knights Attack
2 or 3 knights, adjacent to any opponent figures, can each attack an adjacent figure simultaneously using the card's attack value. The opponent can play defense cards to block attacks, one card per attack.
A card that allows 2 knights to attack can be used to let up to 2 knights attack. A card that allows 3 knights to attack can be used by up to 3 knights. If less knights attack than allowed, the action will result in less damage.
Defense
This can block a single attack by the opponent, regardless of its type or attack value.
Double Defense
This can block up to 2 attacks by the opponent, regardless of their type or attack value. It can be used to defend 1 knight from 2 attacks, or 2 knights from 1 attack each.
Shoot with Bow
If an archer is in a straight line of hexes with the targeted figure, with no other obstacles (another knight or opponent) between them, then the archer can shoot the opponent using the card's attack value. The attack can be blocked by a defense card. If more than one opponent is in the same line, only the nearest opponent may be targeted.
Summon Reinforcements
If any of the archers have been removed from the board — and the swordmaster is still alive — the knight player may use the reinforcements symbol to put a single removed archer back onto the board (fully healed). The archer must be returned to one of the knight player's unoccupied starting spaces. If there aren't any available spaces, the reinforcement cannot be summoned.
Knight Card Examples
Example: John plays a card and chooses the "2 knights move" symbol with movement value 1. He moves the knight and an archer one hex each towards the trolls.
Example: John plays a card and chooses the "summon reinforcements" symbol. He places a previously removed archer figure on a chosen start space. His new archer is in a hex row with the throwing troll, so he can shoot. John plays a card with the "Shoot with Bow" symbol. Kate, the troll player, plays a defense card in reaction to this attack. The symbol requires her to remove 1 rock, so she discards 1 rock token from her supply. The thrower troll receives no wounds.
Troll Player Mat and Abilities
The troll player has 2 troll figures available. One of them has the ability to throw rocks (thrower), and the other (berserker) has the ability to charge. Both can use rocks as defense (see the defense description below). Each used rock token gets discarded back to the box. The troll player starts the game with 10 rock tokens available. If the rock supply is ever empty, the troll player may not use actions that require rocks.
The troll player mat has spaces for wound markers received during play. As a figure receives wounds, the troll player places the wound markers in order from the top of the mat to the bottom. These will cover troll abilities first: rock throwing (first 3 spaces) and charge (first 4 spaces). If an ability becomes completely covered, that troll cannot use the given ability. When all of the spaces for a given figure are covered, that troll's figure is removed from the game board. If both troll figures are removed, the trolls are defeated and the troll player loses the game.
Charge (Ability)
While unfilled, the berserker may use the charge symbol on the cards. This allows the berserker to move quickly and attack.
Rock Throw (Ability)
While unfilled, the thrower may use the rock throw symbol on the cards. This allows the thrower to make a ranged attack.
Symbols on the Troll Cards
1 Troll Moves
1 troll can move up to as many hexes as the card's movement value.
2 Trolls Move
Up to 2 trolls can move, each up to as many hexes as the card's movement value.
1 Troll Attack
1 troll, adjacent to an opponent's figure, can attack that figure using the card's attack value. The attack can be blocked by a defense card.
2 Trolls Attack
2 trolls, adjacent to any opponent figures, can each attack an adjacent figure simultaneously using the card's attack value. One troll will use the higher attack value, the other the lower. After values are assigned, the opponent can play defense cards to block attacks, one card per attack. This card can also be used by 1 troll, using the higher attack value.
Defense
This can block a single attack by the opponent, regardless of its type or attack value. Some defense cards also require an extra cost in rocks. The troll player must discard as many rock tokens as indicated by the card to use it.
Rock Throwing
The thrower can throw a rock in a straight line of hexes (if the thrower can rock throw — see the Troll Player Mat and Abilities section). Each figure in that line will take damage, starting with the nearest figure and progressing in order. The first figure takes the full damage value shown on the card, with each subsequent figure taking one less damage than the figure before it.
For example, if the thrower hurls a rock of value 2 towards a line of 3 opponents, the nearest opponent is attacked for 2 damage, the next closest is attacked for 1, and the third is attacked for 0. These act like normal attacks and can be blocked (or evaded) as usual.
If the berserker is in that line of attack at all, the thrower cannot use this ability.
The troll player must discard a rock token after using this ability.
Charge
The berserker can charge in a straight line of hexes (if the berserker can charge — see the Troll Player Mat and Abilities section). The troll player picks a direction and moves the berserker any number of spaces in that direction until it would hit an obstacle or go off the map. If the obstacle that caused the berserker to stop is an opponent figure, the berserker may attack that figure with 2 attacks, each with a value of 1. These act like normal attacks and can be blocked (or evaded) as usual.
The berserker may charge an already adjacent figure to gain the two attacks. In this case, the berserker doesn't move.
Troll Card Examples
Example: Kate plays a card and chooses the "charge" symbol. She moves the berserker in a straight line and stops it before an archer. Then the berserker performs 2 attacks, each with value of 1. Unfortunately, John doesn't have any defense cards so he assigns 2 wounds to the archer.
Example: On her turn, Kate plays 2 cards. First, she chooses a "charge" symbol, but only to move the berserker. For her second card, she chooses "2 Trolls Attack". The thrower cannot attack the swordmaster, but the berserker can and will (with attack value of 2). The thrower will attack an archer (with the remaining attack value of 1). John has a card with a "double defense" symbol, which he uses to block both of the trolls attacks.
Game End
The game can end in the following ways:
- The knights are all dead — the troll player wins.
- The trolls are all dead — the knight player wins.
- At least one knight is still alive after the last troll card is played — the knight player wins.
From the Author and Rebel Studio
Drako: Knights and Trolls is an asymmetrical game. Playing the knights is different from playing the trolls. The knight player's most important character is the swordmaster, whose death removes the ability to summon reinforcements. The trolls, meanwhile, have very powerful abilities that the troll player will want to keep active as long as possible. It is also important to use the cards wisely. The troll player must remember that they lose when their cards run out. The knight player must be careful not to use up their cards too early while the trolls still have cards to play, as it might end badly for them.
Expansion Variants
The game Drako: Knights and Trolls is compatible with the game Drako: Dragon and Dwarves — the players can engage in all possible cross variants. Detailed rules are explained below.
Trolls and Dragon
The basic rules from Drako: Knights and Trolls as well as Drako: Dragon and Dwarves remain unchanged, aside from the ones described below.
Game preparation. After drawing 4 cards, players place their figures as presented in the rulebook picture (trolls on the green spaces, dragon on the red). The troll player starts the game with 6 rock tokens instead of 10.
Players alternate their turns, starting with the dragon player. On their first turn, the dragon player can only take 1 action. In each subsequent turn, both players take 2 actions.
Rule changes:
- If a player runs out of cards, they shuffle their discard pile and make a new deck.
- The berserker cannot use the defense cards (this includes cards with additional 1 or 2 rock cost and ones without any cost).
Game end. The game lasts until either the dragon or all trolls are dead, therefore it can end in the following ways:
- The dragon has been killed — the troll player wins.
- The trolls have been killed — the dragon player wins.
Trolls and Dwarves
The basic rules from Drako: Knights and Trolls, as well as Drako: Dragon and Dwarves, remain unchanged aside from the ones described below.
Game preparation. After drawing 4 cards, players place their figures, starting with the troll player and as presented in the rulebook picture (trolls on the green spaces, dwarves on the blue).
Players alternate their turns, starting with the troll player. On their first turn, the troll player can only take 1 action. In each subsequent turn, both players take 2 actions.
Rule changes:
- If the dwarf player runs out of cards in their deck, they may recreate it at a cost. Shuffle the discard pile and deal out 18 cards into a new deck. The excess cards are removed. The troll player then gains 5 rock tokens from those removed from the game (or all removed rock tokens if less than 5 are available to be gained).
- If the dwarf player uses the net, they place the net token on the picture of the targeted troll on the troll player's mat. The chosen troll cannot move or use rocks — including for defense — until they remove the net.
- The "rock throw" attack is always considered to have a value of 3, no matter the value shown on the card.
Game end. The game can end in the following ways:
- All dwarves have been killed — the troll player wins.
- All trolls have been killed — the dwarf player wins.
- Both players run out of cards (in case of the dwarf player this includes the extra 18 cards) — the winner is the player with more figures on the board. In case of a tie, the dwarf player wins.
Knights and Dragon
The basic rules from Drako: Knights and Trolls, as well as Drako: Dragon and Dwarves, remain unchanged aside from the ones described below.
Game preparation. After drawing 4 cards, players place their figures starting with the dragon being placed in the center of the map (the red space) as presented in the rulebook picture. The knight player may place their figures on any of the spaces not adjacent to the dragon.
Players alternate their turns, starting with the dragon player. On their first turn, the dragon player can only take 1 action. In each subsequent turn, both players take 2 actions.
Game end. The game can end in the following ways:
- The dragon has been killed — the knight player wins.
- All knights have been killed — the dragon player wins.
- If the dragon is still alive after all knight cards have been played — the dragon player wins.
Knights and Dwarves
The basic rules from Drako: Knights and Trolls, as well as Drako: Dragon and Dwarves, remain unchanged aside from the ones described below.
Game preparation. After drawing 4 cards, players place their figures, starting with the knight player and as presented in the rulebook picture (knights on the yellow spaces, dwarves on the blue).
Players alternate their turns, starting with the knight player. On their first turn, the knight player can only take 1 action. In each subsequent turn, both players take 2 actions.
Rule changes:
- If the dwarf player uses the net, they place the net token on the picture of the targeted knight on the knight player's mat. The chosen knight cannot move or shoot (until they remove the net), but they may still attack and use defense cards. If the swordsmaster was targeted, they may defend against the attack with their evasion ability, but they do not get the free movement after using it.
- The dwarven "defense" cards are modified. To block a single attack (regardless of its value), the dwarf player must discard 2 defense cards instead of 1.
- The dwarf player cannot do the "draw 2 cards" action if they have more than 4 cards in their hand.
- The "summon reinforcements" ability has changed. When played, place the card on top of a living knight character on the knight player's mat. The next time that figure would be wounded, ignore one of the wounds and remove the card instead. This card effectively gives the character more health. A character may have multiple cards placed on it at any given time.
Game end. The game can end in the following ways:
- All dwarves have been killed — the knight player wins.
- All knights have been killed — the dwarf player wins.
- The last dwarf card has been played — the dwarf player wins.