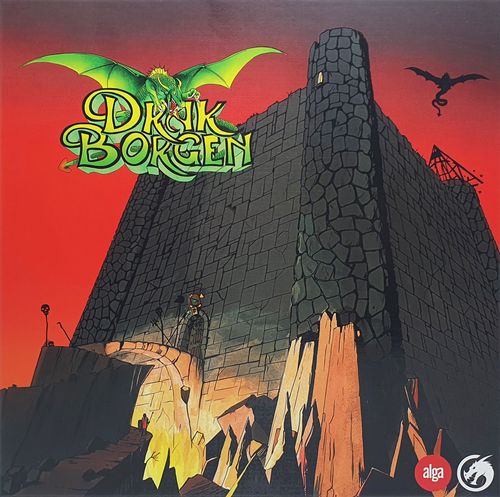
Drakborgen
Drakborgen Rulebook
Table of Contents
Table of Contents
- Object of the Game
- How to Separate Basic Game from Expansions
- Components
- The Game Board
- Hero Figures and Hero Badges
- Cards
- Room Tiles
- Preparations
- Hero Badges and Hero Bases
- How to Play Drakborgen
- Classification of Effects
- Encounter with a Monster
- The Treasure Chamber
- The Sundial
- Escaping Drakborgen
- Determine Who Is the Winner
- Some Tactical Advice
- Combat with STRIDSKORT
- Additional Rules
- Drakborgen II
- Follow Instructions in Drakborgen II
- New Classifications of Effects
- The Catacombs
- Calculate Your Position (Ascension Track)
- Monsters Without STRIDSKORT
- The Magic Amulets
- The Spellbook Table
- Obeväpnad Strid (Unarmed Combat)
- Drakborgen III
- Follow Instructions in Drakborgen III
- The New Heroes
- Alternative Rule Variants
- Alternative Combat Rules
- Alternative Movement Rules
- Monster Table
- Room Tile Index
Object of the Game
The object of Drakborgen is to collect treasure and escape before the sun sets. In your path, the old castle will throw everything it can; monsters, traps, rotating chambers, and pits blocking the passage, and not least the dragon guarding her treasures. The treasure chamber contains the biggest treasures, but the heroes may also find valuables elsewhere in Drakborgen.
To escape, a hero must reach one of the Tower rooms located at each corner of the castle. The player with a surviving hero carrying the most treasure wins the game.
Sometimes, no heroes survive. In this case, all players have lost and Drakborgen has won.
How to Separate Basic Game from Expansions
Once cards and room tiles from Drakborgen II (see page 17) and Drakborgen III (see page 31) have been mixed with the basic game, it can be difficult to separate them, should you wish. Therefore, all cards and room tiles that belong to the expansions are clearly marked with an expansion symbol that distinguishes them from those that belong to the basic game and other Drakborgen expansions.
Components
Drakborgen contains the following components:
- 1 Rule booklet & 1 Reference booklet
- 1 Game board
- 8 Hero figures (4 male and 4 female)
- 21 Plastic stands
- 4 Hero badges (male/female on each side)
- 254 Cards, consisting of:
- 84 rumskort (chamber cards)
- 8 drakkort (dragon cards)
- 32 skattkort (treasure cards)
- 15 fällkort (trap cards)
- 15 dörrkort (door cards)
- 15 kistkort (chest cards)
- 15 sökningskort (corpse cards)
- 15 rumsletningskort (search cards)
- 36 stridskort (combat cards)
- 15 monsterkort (monster cards)
- 4 magisk ring (magic ring cards)
- 115 Room tiles (12 black tiles are not used)
- 1 Treasure chamber (plus 1 as backup)
- 24 Markers, consisting of:
- 6 red
- 6 green
- 8 blue
- 2 black
- 2 yellow
- 4 Hero bases
- 1 Monster badge
Please note that the content listed above applies to the basic game only. More content for the expansions in this box is presented later in this booklet.
The Game Board
The game board is divided into spaces representing chambers. The bigger space in the center is double: this is where the Treasure chamber is placed. The whole area is surrounded by a thick outer wall. In every corner of the game board, there is a Tower room from where the heroes start their adventure. The compass rose on the game board points out directions. The card slots for "särskild plats" (special location) are not used in the basic game.
Hero Figures and Hero Badges
The game includes four male and four female heroes. These are represented on the game board by hero figures (see "The heroes" on page 16). Put each hero figure in a plastic stand to mark the location of each hero.
Each hero has a hero badge with the information needed to play with each hero. Note that a male hero is printed on one side and a female equivalent on the other.
Cards
Over the course of the game, players will draw cards of various types to find out what their heroes are facing. In general ruling text, card types are often printed in CAPITALS (such as RUMSKORT or RUMSLETNINGSKORT). Most cards also have classifications, which means they may have properties outside of what is written in the ruling text of the card, for example, föremål (item) or monster. In general ruling text, classifications are printed in italics (see "Effects of a card" on page 10).
RUMSKORT (Chamber cards)
When a hero steps onto a room tile with a black direction arrow (see "Room tiles breakdown" on page 6) the player must draw a RUMSKORT. Follow the instructions on the card drawn. A player normally does not draw more than one RUMSKORT per turn.
SÖKNINGSKORT (Corpse cards)
Drakborgen has become the final resting place for many heroes. The rotting corpses of these unfortunate souls may carry items that will benefit your hero more than the previous owner. To search the corpse of a dead warrior, the player must draw a SÖKNINGSKORT.
DRAKKORT (Dragon cards)
If a hero survives long enough to reach the Treasure chamber, that hero may attempt to steal treasures from it. But the Treasure chamber contains more than gold: it is guarded by the very same dragon that lends its name to the castle. For every turn the hero lingers in the Treasure chamber, the player must draw a DRAKKORT to see if the dragon awakens, or if it continues to slumber.
RUMSLETNINGSKORT (Search cards)
Heroes may linger and search through a chamber looking for valuables or secret doors. Sadly, such activities may trigger traps of the more unpleasant kind. To search a chamber, the player must draw a RUMSLETNINGSKORT.
MAGISK RING (Magic ring cards)
Each hero brings a magic ring on their adventure (see "The magic rings" on page 15) that can save the day in a dire situation. This card can only be used once. The exact ruling of each ring is stated on the card.
SKATTKORT (Treasure cards)
These cards represent the treasures from the Treasure chamber. Most SKATTKORT have a very high value and often guarantee victory if no other hero made it to the Treasure chamber (and escaped).
MONSTERKORT (Monster cards)
Each time a hero encounters a monster, the player is presented with a number of choices (for example attack, wait, or flee). Once the player has chosen, the player on the right (hereafter referred to as the "monster player") draws a MONSTERKORT and checks the result where the relevant row and column meet.
FÄLLKORT (Trap cards)
Some instructions force the player to draw a FÄLLKORT. Most of these cards represent various traps that one way or another may halt, hurt, or even kill a careless hero.
DÖRRKORT (Door cards)
Some room tiles have passages that are blocked by a sturdy door. To attempt to move a hero past a door, the player must draw a DÖRRKORT and follow the instructions.
STRIDSKORT (Combat cards)
Heroes and monsters typically combat with their STRIDSKORT. Every STRIDSKORT is marked with A, B, or C. Some STRIDSKORT have bonus effects that apply if the player hits with that card.
Please note that there are heroes in some Drakborgen expansions that do not have any STRIDSKORT. This is generally the case when the hero lacks weapons with reach (such as a spear or sword), but typically that hero will have other advantages instead.
KISTKORT (Chest cards)
Over the course of the game, the heroes will discover various types of chests and coffins. To open a container, the player must draw a KISTKORT. Sometimes, these containers hold unpleasant surprises.
Room Tiles
Room tiles represent the chambers the heroes discover as they move through the castle. As soon as a hero steps into an empty square on the game board, the player must draw a random room tile from the bag and place the tile on the empty square. In this way, the winding chambers and corridors of Drakborgen are slowly revealed. The names of room tiles are generally written with capital initial letter, such as Korridor.
The Sundial
The sundial measures time. All heroes try to reach the Treasure chamber and escape through a Tower room in 26 game rounds, or less. A hero that has not yet escaped before round 27 meets a horrible death, and the player has lost the game.
Modification Dice
Black and white modification dice are used to keep track of attribute modifications on the hero base. The black negative dice run from -1 to -6, and the white positive dice run from +1 to +6.
For example, if a player is required to subtract an attribute with -1, a black negative die is placed in the relevant attribute slot on the hero base with the -1 facing up. Turn it to -2 if the attribute is lowered an additional -1, and so on. Please note, there are limits to the modifications of an attribute (see "Roll against an attribute" on page 15).
Markers
To keep track of all items and abilities, the player uses markers in different colors (see "The hero badge" on page 7). A red marker keeps track of a hero's health (Kroppspoäng, KP), a black marker keeps track of a monster's health (Kroppspoäng, KP), a green marker keeps track of finite resources (like ammunition), a blue marker keeps track of expendable items (for example a potion), and a yellow marker keeps track of time on the sundial.
In the basic game, only Bardhor Bågman and Béla Snabbskäkta use a green marker for their crossbows (see "The crossbow" on page 16). However, in some expansions there are heroes who have additional equipment and more advanced abilities.
Other Dice
Drakborgen is shipped with a six-sided die (called T6) and a twelve-sided die (called T12). References to dice rolls are often printed in bold.
Dice Roll Modifications
Sometimes, a player must add or subtract a value after a dice roll.
Example: Bardhor has triggered a trap and the instructions state that his loss of KP is T6-2. He rolls with the six-sided die, gets 5, and subtracts 2: which is 3. Bardhor's red marker moves downward 3 steps, since he has lost 3 KP. All die rolls must end up in an integer (no decimals) and should be rounded down. A die roll can never be lower than zero. If Bardhor in the example above had rolled 1, the result would still count as zero: in this case he would not lose any KP at all.
Sometimes, a player must subtract one of the attributes instead of a set value.
Example: Aelfric has triggered a trap and the instructions state that his loss of KP is T12-RF. He rolls with the twelve-sided die, gets 6, and subtracts his RF attribute (armor). Aelfric Brunkåpa has RF 4, which means the result is 6 minus 4: and therefore he will lose 2 KP. Aelfric's red marker is moved 2 steps downward, toward the skull.
Monster Badge
The "monster player" (who is playing the monster during combat) keeps track of a monster's health (Kroppspoäng, KP). This is done on the monster badge with a black marker (see "Encounter with a monster" on page 11).
The player whose hero is in combat with a monster does normally not know how much health (Kroppspoäng, KP) the opponent has. Therefore – for each loss of 1 KP – the black marker on the monster badge is moved upwards (from zero), whereas the red marker of the hero is moved downward (toward the skull).
Preparations
If you are playing Drakborgen for the first time, we recommend that you follow the preparations as follows:
- Place the game board on the table, visible and reachable to all.
- Separate the room tiles that belong to the basic game (those without an expansion symbol) and put them in the bag. The idea is that each player draws random room tiles from the bag as they move around the castle. Place the Treasure chamber (the double-sized room tile) on the center space of the game board. This room tile is the goal of all heroes.
- Bring out the hero figures that belong to the basic game. Place each of them in a plastic stand.
- Bring out all cards that belong to the basic game (those without an expansion symbol) and place them facedown in ten decks: RUMSKORT, FÄLLKORT, RUMSLETNINGSKORT, KISTKORT, SÖKNINGSKORT, DÖRRKORT, SKATTKORT, MONSTERKORT, and two smaller decks for DRAKKORT and MAGISK RING.
- Select a starting player or roll dice to decide. The starting player chooses a hero badge and takes the corresponding hero figure. The hero badge is placed in a hero base. In turn, the other players follow the same procedure.
- The player who chose a hero last, will now choose a MAGISK RING first and openly declares its ruling text to the others. In reversed turn order, the other players follow the same procedure. The starting player should be the one who chooses a MAGISK RING last.
- Each player takes the three STRIDSKORT that belong to their hero. The twelve STRIDSKORT for monsters are placed next to the game board. All remaining hero figures, hero badges, and hero STRIDSKORT are returned to the box.
- Each player takes a red marker for their health (Kroppspoäng, KP) and a green marker for equipment (if the hero has any) that requires use of the resource meter (see "The hero base" on page 7). The starting player takes the yellow marker and places it on the first step of the sundial, which is then placed next to the game board, visible to all.
- The starting player chooses a Tower room to start from and places the hero figure there. In turn, the other players follow the same procedure. Two or more heroes are allowed to start from the same Tower room.
- The game begins with the starting player making their first turn (see "How to play Drakborgen" on page 8).
Room Tile Breakdown
- Wall: A wall blocks passage. Heroes may not step into or out of a chamber through a wall, unless they find a secret passage.
- Passage: A passage is a path that is not blocked by a wall or any other hinder (obstacle). Heroes may typically only step into the next room tile through a passage.
- Direction symbol: When a player draws a random room tile, it must be placed so that the direction symbol connects to the passage the hero came from. The color of the direction symbol reveals what type of room tile the hero has discovered (see "Room tiles" on the back of this booklet).
- Door: A door blocks a passage, just like a wall. A door must be opened before a hero may pass it (see "Pass through doors" on page 8).
- Portcullis: A portcullis lowers behind a hero who just stepped onto a room tile, and blocks the passage back again. A portcullis counts as a hinder (obstacle). To get past a portcullis, the hero must attempt to lift it in an attribute roll with T12 against SF (see "Pass through a portcullis" on page 8).
- Expansion symbol: Room tiles from the basic game have no expansion symbols. Room tiles from expansions have a colored expansion symbol in a corner that reveals which expansion it belongs to.
Hero Badges and Hero Bases
Each player places their hero badge in one of the hero bases. Put the hero base in front of you on the table. The hero base keeps track of health and equipment with colored markers, and attribute modifications with black and white modification dice.
Each player controls a hero who will encounter monsters, trigger traps, discover mysterious chambers, and find fantastic treasures. Each hero has a corresponding hero badge that summarizes that particular hero's attributes and abilities.
The Hero Badge
- Kroppspoäng (KP): A hero's KP (health) represents durability. A hero always starts the game with the amount of KP stated on the hero badge. Place a red marker on the equivalent number on the KP meter on the hero base. As heroes lose KP from combat, traps, and other dangers, the red marker is moved an equal number of steps toward the skull. If the red marker reaches the skull of the KP meter, the hero is killed (see "Heal" on page 15).
- Styrkefaktor (SF): A hero's SF (strength) shows how easy it is to lift, move, or push away hinder (obstacles) of various kinds.
- Vighetsfaktor (VF): A hero's VF (dexterity) shows how easy the hero may climb or avoid traps.
- Rustningsfaktor (RF): A hero's RF (armor) shows how well the armor protects from certain injuries that may lead to loss of KP.
- Turfaktor (TF): A hero's TF (luck) shows how lucky the hero is in certain situations, such as överfall (surprise attacks).
- Equipment and abilities: Some heroes have special equipment, for example a crossbow (see "The crossbow" on page 16). Heroes in expansions may also have abilities with special ruling.
- Resource meter: Some heroes in Drakborgen expansions have equipment or abilities that are finite: the resource meter keeps track of these with a green marker.
Expendables: Some heroes in Drakborgen expansions have equipment or abilities that are expended as soon as they are used. The expendable slots on some hero badges keep track of this with blue markers. Expendables are not a part of the basic game.
How to Play Drakborgen
Drakborgen is played over a series of turns, beginning with the starting player, and then continued clockwise. Once all players have completed their turn, a game round is completed and a new one begins.
A game of Drakborgen normally lasts no longer than 26 game rounds: once the yellow marker on the sundial reaches the last step (the skull), the game ends and all heroes left inside the castle die.
On a player's turn, one out of two actions must be taken:
- Move the hero figure into an adjacent space OR
- Search the chamber where the hero figure is
Movement
If a player chooses to move the hero figure onto an adjacent space, this must be done through a passage that is not blocked by a wall or a hinder (obstacle). Heroes may not move diagonally. Heroes may never enter a space already occupied by another hero, the exception being the Treasure chamber (see "The Treasure Chamber" on page 12) and the Tower rooms.
Two adjacent doors count as one door.
Movement to a Room Tile
If a hero figure moved onto a space that already contains a room tile, the player may NOT draw a new room tile from the bag. Also, the direction of the room tile may not be changed. Resolve the effects of the room tile as normal (see "Effects of a room tile" on page 10).
Movement to an Empty Space
If there is no room tile where the hero figure moved, the player must draw a random room tile from the bag and place it underneath the hero figure. Resolve the effects of the tile (see "Effects of a room tile" on page 10).
Pass Through Doors
Some passages on a room tile are blocked by a door that must be opened before the hero may pass. Some doors are easy to open, whereas other remain shut or hold unpleasant surprises. Each time a hero attempts to pass through a door, the player must draw a DÖRRKORT (door card) and follow the instructions.
If the card says "Öppnar sig" (opens), the hero may continue to move in the same turn. If the card says "Förblir stängd" (remains shut), or if the door is a trap, the hero must remain in the same space and the turn is over. On another turn, the hero may attempt to open the door again, or leave the space via another passage.
If the hero returns to a door previously opened, the player must still draw a new DÖRRKORT. The exception being if the hero encounters a monster and wants to flee back through the opened door: this is allowed, providing the hero succeeds in fleeing (see "Flee from a monster" on page 11).
A door is a hinder (obstacle).
Pass Through a Portcullis
The room tile must be placed so that the direction symbol connects to the passage the hero came from. The hero "steps over" the direction symbol, so to speak. A portcullis always falls down behind a hero, which means that the passage is now blocked, should the hero want to go back. If a room tile has no direction symbol, it can be placed in any direction on that space.
Some passages are blocked by a portcullis that must be lifted before the hero may pass. Each time a hero attempts to lift a portcullis, the player must roll a T12 against SF (see "Roll against an attribute" on page 15). If the roll succeeds, the hero may continue the move. If the roll fails, the hero must remain in the same space and the turn is over. On another turn, the hero may attempt to lift the portcullis again, or leave via another passage.
If the hero returns to a portcullis that was lifted earlier, the player must still attempt to lift it again in order to pass. The exception being if the hero encounters a monster and wants to flee back through the lifted portcullis: this is allowed, providing the hero succeeds in fleeing (see "Flee from a monster" on page 11).
Two adjacent portcullises count as one portcullis.
A portcullis is a hinder (obstacle).
Example of Movement
Aelfric can only choose to move to either B or C. He may not move to A since this passage leads right into a wall and is blocked.
Pass Through Both a Door and a Portcullis
If the hero wants to move through a passage blocked by both a door and a portcullis, the two attempts must be made one after another (see "Example of move through both door and portcullis" on next page). The door and the portcullis count as two separate hinder (obstacles).
Example of move through both door and portcullis: To get to the adjacent space on her right, Béla must both open a door and lift a portcullis. The door is in the same space as Béla, so she must attempt to open that first. Béla draws a DÖRRKORT and triggers a trap. After losing KP, Béla's turn is over – and she has not even reached the portcullis yet. Tough luck! On her next turn, Béla attempts to open the door again. This time she draws a DÖRRKORT that says "Öppnar sig" and she now may attempt to also lift the portcullis by rolling T12 against SF. Her roll is successful, and she can move into the adjacent space and resolve its effects. Sigeir moves to an adjacent empty space. He draws a random room tile.
If Béla had failed her roll against SF, she would have a new chance on her next turn. If she had wanted to go back to the space she came from, she would not have had to draw a new DÖRRKORT.
Dead Ends
If all passages out of a space are blocked by a wall, the hero has reached a dead end. The only way to continue (apart from going back, if possible) is to search for a secret door (see "Search a chamber" on next page).
Example of a dead end: the room tile is a Vridrum (rotating chamber). Sigeir steps into the chamber, which turns 180 degrees (halfway around). All passages are now blocked by walls that imprison him. It is not possible to search in a Vridrum – so Sigeir can do nothing but wait for the sun to set and his inevitable fate. Or hope for a miracle.
Search a Chamber
Instead of moving to an adjacent space on their turn, a player may instead have the hero search a chamber for valuables or secret doors. To search a chamber, the player must draw a RUMSLETNINGSKORT (search card) and follow the instructions (see "Follow instructions" on page 10).
The basic rule is that a hero may only search a chamber that has a black direction symbol (i.e., chambers that require you to draw a RUMSKORT when you enter them).
Once a hero has searched a chamber, the turn is over. You are normally not allowed to move and search in the same turn.
A hero may only search a chamber two turns in a row. On the third turn, the hero must move out of the space. If a hero later returns to the same space, the hero may search again as normal. In case a hero is caught in a dead end and did not find a secret door in the two search attempts, the hero is imprisoned and can only await the sunset – or hope for a miracle.
If a hero has searched two turns in a row, and the only free passage leads to a space occupied by another hero figure, the moving hero is blocked. A blocked hero must make their move until it is possible to move again. A hero may not voluntarily forfeit a move, unless the instructions state otherwise.
Classification of Effects
Follow Instructions
Regardless of what a hero chooses to do on a turn, the player will sooner or later face instructions that must be followed – and subsequent effects that will trigger and must be resolved. Examples of effects are loss of KP, drawing a card, or the instructions that follow "Framgång" (success) or "Misslyckande" (failure) after dice rolls.
After the effects of a card or a room tile have been triggered and played out, they are considered resolved. Once all effects of drawn cards and room tiles are resolved, that player's turn is over. Sometimes, instructions explicitly state that a turn is over, for clarity's sake.
Effects of a Room Tile
Most room tiles have effects that trigger as soon as the hero steps onto a space (see "Room tiles" on the back of this booklet). Some room tiles (and also some cards) have effects that force heroes to remain on a space instead of moving (such as hinder, or obstacle). Such effects always take precedence over normal movement rules.
Effects of a Card
Some room tiles force the player to draw a card from a certain deck once the player steps onto a room tile and triggers its effects. The instructions on this card may then force or offer the player to draw a card from another deck. If the instructions tell the player to draw a card, it is mandatory. If the instructions state that the player may draw a card, it is voluntary.
Example: A hero moves to a room tile with a black direction symbol, which means that the player must draw a RUMSKORT. The card is "Stupad krigare" (fallen warrior), a card that states that the player may (but does not have to) draw a SÖKNINGSKORT (corpse card).
Some effects linger into the next turn of a player ("on your next turn"). In these cases, the player keeps the card in front of the hero base as a reminder that the effects are still active on their next turn.
Some cards can be kept and should be placed next to your hero base, until the instructions state otherwise.
Some cards are taken out of play after the effects are resolved, in which case you put the card back into the box. It will no longer be used until you play a new game. Cards that were taken out of play are not reshuffled into their respective decks until this game session is over.
When a player draws a card, it is normally the top card of a deck that should be drawn. After the effects are resolved, a card is normally thrown, which means that it is put facedown at the bottom of its deck.
If the effects of a card are to be ignored, they never trigger: the card is immediately thrown, unless it has other effects that need to be resolved.
Classifications
Most cards also have classifications, which means they have properties outside of what is written on the card. Classifications are not tied to a specific type of card: a hero may find a föremål (item) in several of the card decks. There are many classifications. Among the most important are:
- Dryck (potion): A potion is a föremål (item). A hero may only carry one potion at a time, other potions must be thrown. If the hero consumes a potion (see "Potion table" on page 15), this must be done at the beginning of their turn. Please note, a potion cannot be consumed if the hero is busy with something else in this turn, such as combat with a spider.
- Fall: This is normally the result of a failed roll against an attribute. Climbing up after a fall requires a full turn when you do nothing else.
- Föremål (item): These are cards that can be picked up and kept faceup next to your hero base. Some items can be consumed, and their effects are stated in the instructions. A hero is allowed to voluntarily throw an item, provided the instructions on the card does not prohibit it.
- Förvaring (container): Some sort of container, like a chest or a coffin. To open a container, the player must draw a KISTKORT (chest card).
- Hinder (obstacle): One or several objects that block the movement of a hero figure. Examples of obstacles include door, portcullis, and Debris. Traps and Bottomless well are not obstacles.
- Händelse (event): A global effect that typically cannot be prevented by the heroes. Sometimes, an event affects several heroes at once, no matter where they are on the game board.
- Kvarlevor (corpse): The remains of a fallen adventurer. To search a corpse, the player must draw a SÖKNINGSKORT (corpse card).
- Monster: A forced encounter with one of the creatures of Drakborgen. The typical choice alternatives after encountering a monster are to attack, wait, or flee. Combat with a monster is normally resolved with STRIDSKORT (combat cards). A creature that is not a monster will not be affected by effects that only apply to monsters. Example: a tusenfoting (centipede) is a bug and an animal, but no monster.
Encounter with a Monster
As soon as a player draws a card with the classification monster, an encounter will follow. The instructions may vary, but encounters with monsters often lead to combat, unless hero or monster succeeds in fleeing.
An encounter with a monster normally follows the following steps:
- Monster player is appointed
- Hero makes a choice
- Choice results in combat or flight
1. Monster Player Is Appointed
During an encounter with a monster, the player sitting to the right becomes the "monster player". This player acts like the monster until the encounter is resolved.
The monster player draws a MONSTERKORT (monster card) and reads from the section "Hjälten flyr" (flee) and "Skelett". The monster player does not reveal how many KP the skeleton has.
Example: Aelfric encounters a skelett (skeleton) and attempts to flee instead of combat. The card reads "Hugg T6−2, strid, KP 3". This means that Aelfric first gets a hugg (stab) for loss of T6-2 KP. Aelfric is lucky and rolls 2. He does not suffer any loss of KP at all from the stab. Thereafter, combat (strid) is unavoidable, which the monster player tells him. Aelfric fails to flee and is forced to combat the skeleton. Not a great day.
2. Hero Makes a Choice
An encounter with a monster often offers the player a choice: usually between attack, wait, and flee.
If the hero chooses to attack or wait – and the instructions state that the monster flees – nothing more happens. The turn is over, and the cards are thrown.
After the player has decided what choice the hero makes, this must be openly declared. If the instructions do not state otherwise, the monster player draws a MONSTERKORT (monster card) and reads from the relevant section – "Hjälten anfaller" (attack), "Hjälten avvaktar" (wait), or "Hjälten flyr" (flee) – and the relevant row of monsters.
If the instructions state that there will be strid (combat), the monster player declares so – but does not reveal how many KP (health) the monster has (see "Combat with STRIDSKORT" on page 14).
Flee From a Monster
If the hero chooses to flee (provided it is possible), the monster player reads on the MONSTERKORT (monster card) from the section "Hjälten flyr" (flee) and the relevant monster row (please note that for example spiders have their own rules for fleeing).
If the hero chooses to flee, this must result in the hero running back to the previous space. If this is not possible, for example if the hero entered this space through a secret door (which immediately shut behind you), the hero may not flee. It is possible to flee back through a door that was just opened (see "Pass through a door" on page 8) or through a portcullis that was just lifted (see "Pass through a portcullis" on page 8).
If the instructions on the MONSTERKORT state that "flykten lyckas" (you succeed in fleeing), the player moves the hero figure back to the previous room tile (but does not draw a RUMSKORT: all other effects are triggered as normal), and the turn is over.
If the instructions on the MONSTERKORT state that "hugg/flykten lyckas" (stab/you succeed in fleeing), the monster stabs the hero in the back and that player must roll for injury and eventual loss of KP. After this is resolved, the player may flee as explained above.
3. Choice Results in Combat or Flight
If the instructions on the MONSTERKORT states "hugg/strid" (stab/combat), the player must roll for injury and loss of KP as above. After this is resolved, the hero must engage in combat with the monster. The attempt to flee has failed.
Överfall! (Surprise Attack)
If a player draws the card "Överfall!" (surprise attack), they must roll T12-TF (see "Die modifications" on page 5) to determine the injury and loss of KP.
Neither the hero nor the monster may flee from combat once it has begun. If the instructions state that it is not possible to flee, neither the hero nor the monster may attempt to flee.
After this is resolved, the hero must encounter the monster as normal (see "Encounter a monster" above). However, the hero may no longer choose to wait, as the monster is obviously aggressive.
The Treasure Chamber
The Treasure chamber at the center of Drakborgen is guarded by the sleeping dragon that lends its name to the castle. If a hero should awaken the dragon, the beast will breathe its terrible fire at anyone who dares to disturb her, which is very bad for your health. The Treasure chamber is a room tile, just like any other, but of double size.
Once a hero steps into the Treasure chamber, the player may immediately draw two SKATTKORT (treasure cards) but does not have to reveal them to the other players (unless you want to). If the player is satisfied with the treasures, the player may move out of the Treasure chamber on their next turn. But first, the player needs to determine the state of the dragon.
On that player's next turn, the hero may choose to remain in the Treasure chamber to draw yet another two SKATTKORT. In that case, the player sitting to the right shuffles the deck of DRAKKORT once again, but now there are only seven of them. In this way, the risk of waking up the dragon increases for each turn a hero lingers in the Treasure chamber.
When a player is satisfied and wants to move out of the Treasure chamber, this is done in a normal move – but without drawing neither SKATTKORT nor DRAKKORT.
Reshuffle the Cards
The player sitting to the right shuffles the deck with eight DRAKKORT (dragon cards) and places them facedown on the table. The player with the hero in the Treasure chamber picks one of the cards and shows it to all.
As long as there is at least one hero left in the Treasure chamber, no DRAKKORT are shuffled back into the deck. Not until the Treasure chamber is empty of heroes, all eight DRAKKORT are reshuffled so that the next daring hero may pick from a full deck of eight DRAKKORT.
If the card picked shows a sleeping dragon, nothing happens, the turn is over. The player keeps the DRAKKORT card faceup next to his hero base. No DRAKKORT are reshuffled until the last hero has left the Treasure chamber.
Dragon Awakens
If a hero draws the DRAKKORT with a dragon that is awake, all heroes in the Treasure chamber must immediately throw all SKATTKORT they are carrying (but no other cards). Afterwards, each hero rolls T12 to determine their injuries and loss of KP from the dragon fire. Those who survive must move their hero figures out of the Treasure chamber to an adjacent space (all heroes must choose different spaces) without taking any RUMSKORT (chamber cards). This is done clockwise, but outside of the normal turn order (see "Several heroes in the Treasure Chamber at once" below).
Several Heroes in the Treasure Chamber at Once
If there are several heroes in the Treasure chamber at once when the dragon awakes, they must all move to an adjacent space outside of the normal turn order (after rolling for loss of KP).
Example: Rohan and Aelfric are both in the Treasure chamber, whereas Sigeir and Bardhor are somewhere else on the game board. Rohan accidentally awakens the dragon, throws all his SKATTKORT, rolls a 5 on T12, and moves his red marker 5 steps toward the skull – and moves his hero figure out of the Treasure chamber.
Even if the next turn is not Aelfric's, he will perform the exact same procedure immediately after Rohan and before anyone else. Thereafter, the turns proceed as normal with the player whose turn it is after Rohan.
The Sundial
After sunset, Drakborgen turns into an inferno as the darkness lowers itself over the kingdom. No one knows exactly what happens inside, but it is clear that no hero will survive a night inside Drakborgen. Therefore, the course of the sun is important. All players have 26 turns at their disposal to reach the Treasure chamber and escape through one of the Tower rooms. This is represented by the sundial, which has 26 steps plus one final step depicting a skull.
The starting player is responsible for the sundial and for advancing the yellow marker at the beginning of each new game round. Before the very first game round, the starting player takes the yellow marker and places it on the first step of the sundial. Thereafter, all players make their first turns. In the beginning of the second game round, the first player moves the yellow marker one step toward the skull. The game continues in this way until the yellow marker either reaches the skull or until all heroes are dead, imprisoned, or have escaped.
Every hero must reach one of the Tower rooms (any will do) before the sun sets. At the beginning of the 27th game round the sun sets and the yellow marker reaches the skull. All heroes still in Drakborgen have lost.
Escaping Drakborgen
Eventually, a hero will want to leave Drakborgen and escape with their treasures and valuables. The only exits are the four Tower rooms. A hero stepping into a Tower room may immediately choose to escape Drakborgen and calculate the total value of all valuables and treasures.
If the player chooses to not have the hero escape after having stepped into a Tower room, the hero must instead move into an adjacent space. Tower rooms offer the same "free turns" as a Korridor, but are not voluntary. A hero may not linger in a Tower room, unless instructions state otherwise. A hero may choose to escape through a different Tower room than the one used for entrance. Any Tower room will do.
Once a hero has escaped Drakborgen, the player removes the hero figure from the game board. All effects that resolve "vid utgång" (after escape) now trigger. A hero may not return to Drakborgen after having escaped. The player must wait until all other players have either escaped or lost – until a winner can be determined (see "Determine who is the winner" below).
All effects that trigger "vid utgång" (after escape) must be resolved before the total value is calculated. Those effects activate one at a time in player turn order.
Regardless of whether the starting player has escaped or not, that player is still responsible for moving the yellow marker on the sundial.
Determine Who Is the Winner
The game is over once the yellow marker on the sundial reaches the skull, or once all heroes have either died, are imprisoned, or have escaped. Once the game is over, all players whose heroes have escaped calculate the total value in gold coin (gm) from valuables and treasures collected. All players must also reveal their SKATTKORT (treasure cards) at this point, if they have not done so before. The player with the highest total value in gm wins the game.
If two or more heroes reach the same total value, the winner is the player whose hero has the single most valuable föremål (item). If there is still a tie, the winner is the player with the most treasures. If there is still a tie, the winner is the player with the most valuables. If there is still a tie, those players will share the victory.
If no hero has escaped with at least one föremål (item) with a value in gold coin (gm), all players lose and Drakborgen wins.
A hero may escape Drakborgen without any valuables and treasures. Furthermore, a hero does not have to visit the Treasure chamber to win the game. A hero may not, however, win the game without any föremål (items) with a value in gold coin (gm), unless the instructions state otherwise.
Sometimes, the winner escaped with one measly valuable. Sometimes, the winner has amassed loads of treasures. A nice tradition is to keep record over the wins to determine who is the most successful hero over time. At www.drakborgen.com there are lists to download and print.
Some Tactical Advice
Drakborgen requires more skill than you may think after playing just a few games. Chance does play a role, but chance plays a role in real life too.
The main challenge is the limited amount of time; 26 game rounds from sunrise to sunset. This means that the heroes must choose wisely which path to take, both to and from the Treasure chamber. Will they dare taking a theoretically shorter but unknown path, where no room tiles are revealed, or a longer path where the room tiles are known? Is it worth trying to get past a Dark chamber (see "Room tiles" on the back of this booklet)?
The real test of character happens during encounters with monsters. The monster reaction to the choice of a hero is not random; there is a discernable pattern for the cunning to discover. And the ability to defeat a monster in combat is really a mind game between players.
The third challenge is to keep cool in the Treasure chamber. The longer a hero lingers there, the more treasures can be found – but do not forget that the sun relentlessly travels across the sky while you dig around, and did that sleeping dragon just flinch …?
Combat with STRIDSKORT
Both the hero and the monster player take their three STRIDSKORT (combat cards), marked with the letters A, B, and C. Each monster type has its own set of cards. Do not reveal which card is which in your hand.
Combat is fought in combat rounds until either the hero or the monster is defeated. A combat round may consist of different steps, depending on the instructions, but the most common way is that the hero and the monster combat with STRIDSKORT (combat cards). These cards represent the attacks the hero and the monster lunge at each other.
Each combat round is divided into three steps that need to be resolved in order. This is repeated until either the hero or the monster is defeated. All combat rounds take place in one single turn.
The monster player takes the monster badge (see "Monster badge" on page 5) and places a black marker on zero. Whenever the monster loses KP, the black marker is moved upwards from zero. The reason we are counting upwards like this is to not reveal to other players how many KP a monster has, until it is defeated. This adds to the tension of combat, that none other than the monster player knows how much resistance a monster will offer.
The three steps of a combat round are:
- Select STRIDSKORT (combat card)
- Reveal and compare the two cards
- Deal damage and lose KP
Let the combat begin.
1. Select STRIDSKORT
The player with the hero chooses and picks one of his cards without revealing it. Then, the monster player does the same.
2. Reveal and Compare the Two Cards
Both players show their cards simultaneously and compare them. If the cards show the same letter (A, B, or C) none of the attacks hit.
If the cards show different letters, one of the combatants has hit the other, according to the following mechanic:
- A hits B
- B hits C
- C hits A
3. Deal Damage and Lose KP
If the cards show the same letter, both the hero and the monster lose 1 KP. The hero's red marker is moved down one step on the hero base, and the monster's black marker is moved up one step on the monster badge.
If the cards show different letters, the combatant who is hit loses 1 KP plus eventual bonus effects: if the instruction of a card says that additional damage is made (for example +1), the loser of this combat round loses an additional 1 KP.
These three steps are repeated each combat round until either the hero has zero KP left, or the monster's loss of KP is equal to or higher than the monster's KP (a number that is only known to the monster player). When the monster is defeated, the turn is over. Put all STRIDSKORT aside.
Remember: combat with STRIDSKORT is a tactical game of skills, with no random mechanics.
Example of Combat
Riddar Rohan encounters a bergstroll (mountain troll) and attacks. The monster player draws a MONSTERKORT (monster card) and that says "strid" (combat). He does not reveal that the troll has 4 KP.
Both players take their STRIDSKORT (combat cards) into their hands, and the combat may begin.
In the first combat round, Rohan shows an A, and the monster player shows a C: Rohan is hit and loses 1 KP. In the next combat round, both combatants show B: both lose 1 KP even if no one hits. In the third combat round, Rohan again shows an A, and the monster player shows a B. Rohan hits the troll, and on his card it says that he inflicts +1 loss of KP if he hits with this card. So, the troll loses 2 KP and has now a total of 3 loss of KP. But is still alive.
In the fourth combat round, the monster player shows a B and Rohan shows a C: Rohan is yet again hit and loses 1 KP. This is a tough troll!
In the fifth combat round, Rohan shows a C, and the monster player shows an A. The troll loses an additional 1 KP and its total loss of KP is now 4, which is exactly the KP it has, according to the MONSTERKORT.
The monster player admits that the mountain troll is defeated. Combat is over, as is Rohan's turn. The RUMSKORT and the MONSTERKORT are returned to the bottom of their respective decks.
Additional Rules
The following sections deal with rulings not previously covered.
Directions
The game board features a compass rose that points out the directions of North, South, East, and West. Whenever an instruction refers to a direction, it is the direction of the compass rose it refers to – not the directions in real life.
Roll Against an Attribute
All heroes have four attributes represented by a numeric value: Styrkefaktor, SF (strength), Vighetsfaktor, VF (dexterity), Rustningsfaktor, RF (armor), and Turfaktor, TF (luck). The higher an attribute is, the better chances the hero has. These attributes will make the hero do better or worse in certain situations, and every player should take them into consideration when confronted with a choice in the game.
Sometimes, a player must roll a die and compare the result with one of the attributes in a "roll against an attribute". The instruction may for example state: "Slå SF med T12" (roll T12 against SF). This means the player must roll equal to or less than the hero's Styrkefaktor (SF) with a twelve-sided die. If the roll is equal to or less than the attribute, it is considered a "framgång" (success). If the roll is higher, it is considered a "misslyckande" (failure). Instructions will vary depending on the outcome.
Please note, that a hero's attributes (including modifiers) may never be less than 1 or exceed 12, no matter how many the modifications are.
Please also note, that a negative modification (a black die) may never be less than -6 and a positive modification (a white die) may never exceed +6.
Example of a roll against an attribute: Sigrunn triggers a trap and must roll T12 against VF (dexterity) to avoid getting injured. She has Vighetsfaktor 5, which means it is a tough task. Sigrunn rolls 8 with a T12 and must therefore follow the instruction next to "misslyckande" (failure).
Heal
During the course of the game, there are plenty of opportunities to heal. Healing a hero lets the red marker move back up toward the initial starting value. The instructions will state exactly how many KP a hero may heal. A hero may never heal beyond the initial starting value.
The Magic Rings
Do not forget that each hero is given a MAGISK RING (magic ring) that may aid the hero in dire situations. A ring may only be used once. Exactly how the ring is used is stated on each card. The instructions on a MAGISK RING are always visible to all players, not just the owner.
Drakborgen has been tested thoroughly to make sure the various combinations of attributes, KP, weapons, and equipment offer the heroes about the same chance of survival.
Potion Table
If an effect refers to the Potion table, you must roll T12 at the beginning of your turn and check the result in the table below:
| T12 | Result |
|---|---|
| 1 | You die immediately. |
| 2 | Lose half your KP (rounded down). |
| 3 | Poison, lose 2 KP. |
| 4–8 | No effect. |
| 9 | Heal 1 KP. |
| 10 | Heal 2 KP. |
| 11 | Heal 3 KP. |
| 12 | Health potion, heal to starting value. |
When a Hero Dies
Sadly, it is not uncommon for a valiant hero to die within the walls of Drakborgen. There are many ways of dying, for example falling into a Bottomless well or rot in a dead end. Another common way of ending a promising adventure is to lose all KP and have the red marker reach zero.
The hero figure of a dead hero is immediately removed from the game board, and all cards that player has is returned to the bottom of its respective deck. A dead hero may no longer affect the game in any way. However, if the other players agree, the player of a dead hero may take the role as monster player for the rest of the game.
The Crossbow
Bardhor Bågman and Béla Snabbskäkta each carry a crossbow. A crossbow is a ranged weapon that can be used against a monster before combat, but not during combat itself.
When a hero equipped with a crossbow encounters a monster, the hero may fire a bolt instead of making a choice (see "The hero makes a choice" on page 11). To find out how many KP the monster has, the monster player draws a MONSTERKORT (monster card) and checks the section for "Hjälten anfaller" (attack) and the relevant monster. If the monster does not flee, the hero may fire another bolt before combat.
To fire a bolt, the player rolls a T6 and checks the crossbow table on the hero badge. The instructions on that table will tell whether the bolt hits or misses, and the eventual loss of KP.
After having fired a bolt, the player must lower the resource meter for crossbow bolts 1 step on the hero base. This is done by moving the green marker one step down for each fired bolt.
A hero may not use the crossbow after an överfall (surprise attack).
Fired bolts are gone, they may not be recovered.
Stop Reading Here
If this is the first time you play, these rules are all you need to get going. The rest of this booklet deals with the expansions Drakborgen II and Drakborgen III. Do not play them before you master the rules of the basic game.
May your travels be safe – and the dragon sleep heavily.
Drakborgen II
Game Overview
Drakborgen II is the first expansion to the basic game of Drakborgen. This expansion adds eight new heroes, but it also adds a new dimension: it is now possible to descend into the catacombs beneath Drakborgen to find new treasures – or even a faster way to the Treasure chamber.
Drakborgen II requires that you master the basics of the rules of Drakborgen. All new cards have ruling text that explain most of what is needed, but UNDERJORDSKORT (catacomb cards) and the new heroes demand some experience from the player.
For clarity's sake, there are short summaries of special effects and ruling on each hero badge, but each hero also has a set of detailed rulings in this booklet (see "The new heroes" on page 23).
The rules of the basic game are found earlier in this booklet. This section only covers the rules from Drakborgen II and its new content. All original heroes from the basic game can be played with Drakborgen II.
How to Separate Expansions from the Basic Game
Once cards and room tiles from Drakborgen II have been mixed with the basic game, it can be difficult to separate them, should you wish. Therefore, all cards and room tiles that belong to Drakborgen II are clearly marked with an expansion symbol that distinguishes them from those that belong to the basic game and other Drakborgen expansions.
Components
Drakborgen II contains the following:
- 8 Hero figures (6 male and 2 female)
- 8 Hero badges
- 98 Cards, consisting of:
- 12 rumskort (chamber cards)
- 8 skattkort (treasure cards)
- 2 fällkort (trap cards)
- 2 kistkort (chest cards)
- 32 underjordskort (catacomb cards)
- 12 rumsletningskort (search cards)
- 15 stridskort (combat cards)
- 11 amulettkort (amulet cards)
- 4 magisk ring (magic ring cards)
- 20 Room tiles
- 5 Floor tiles
- 4 Direction arrows
- 1 Ten-sided die (called T10)
Drakborgen II includes six male and two female heroes. These are represented on the game board by hero figures (see "The new heroes" on page 23). Put each hero figure in a plastic stand.
Each hero has a hero badge with the information needed to play with them. The new heroes have special abilities and equipment (see "Abilities and equipment" below) and are as such more advanced compared to the original heroes of the basic game.
Our recommendation is to try out one hero at a time to get used to all special situations that may occur.
The new cards of Drakborgen II are shuffled into their respective decks (but see "RUMSKORT" on next page for some tweaking).
This expansion introduces two new card types, UNDERJORDSKORT (catacomb cards) and AMULETTKORT (amulet cards), which are explained on next page. In total, you should have 12 different decks within easy reach for all players.
Abilities and Equipment
In the basic game of Drakborgen there are a few heroes with special equipment: Bardhor and Béla each have a crossbow, a ranged weapon. In this expansion, most of the heroes have such special equipment and one or several abilities (see "The new heroes" on page 23).
- Some equipment require finite resources that are continuously consumed after each use. Shuriken are for example managed on the resource meter (see "The hero badge" on page 7) with a green marker. There are several heroes in this expansion using the resource meter on the hero badge in a similar way.
- In this expansion, there are heroes with abilities and equipment that are expended as soon as they are used: these are managed on expendable slots on the hero badge (see "The hero badge" on page 7) with one or several blue markers.
Read the ruling of each hero and keep track of what meter is used for each ability or piece of equipment.
RUMSKORT (Chamber Cards) and Other Cards
Drakborgen II introduces 12 new RUMSKORT that are shuffled into the deck. You should also remove a few RUMSKORT from the basic game to balance dangers and opportunities. For a tougher game, keep all cards as they are.
Sort out these cards from the basic game:
- 1 "Jättespindel" (giant spider)
- 1 "Vampyrfladdermöss" (vampire bats)
- 1 "Orch" (orc)
- 1 "Skelett" (skeleton)
- 1 "Svartalv" (goblin)
- 1 "Bergstroll" (mountain troll)
- 1 "Facklan slocknar" (torch goes out)
This expansion also contains 8 SKATTKORT, 2 FÄLLKORT, 2 KISTKORT, and 12 RUMSLETNINGSKORT. These are shuffled into their respective deck from the basic game. No other cards need to be sorted out for sake of balance.
Room Tiles
In this expansion, 20 new room tiles are introduced and are put in the bag together with the room tiles from the basic game (see "Room tiles" on the back of this booklet). The total amount of room tiles (excluding the Treasure chamber) in the bag should now be 135.
Floor Tiles
A floor tile reminds of a room tile, but it represents only the floor of the room, not its walls or passages. A floor tile is normally not drawn randomly but is placed on top of a room tile and will replace the contents of the room (see "Effects of a floor tile" on page 21). The names of floor tiles are generally written with capital initial letter.
In Drakborgen II, the floor tile is introduced. A floor tile is similar to a room tile but works a bit differently. The floor tile, like the room tile, typically remains for the rest of the game, unless the instructions say otherwise.
The two main differences are:
- A floor tile only represents the contents of a room, not its walls or passages. The floor tile is placed on top of a room tile on which the hero figure stands and will cover all the contents of that room tile.
- A floor tile is normally not drawn randomly but is placed when instructions tell you to. When a floor tile is placed on top of a room tile, not only the contents of the room are replaced, but even the direction symbol is covered. This means that a direction symbol is no longer valid as long as the floor tile remains.
Example: Rut moves to an empty space and draws a random room tile with a black direction symbol on it. She draws a RUMSKORT (chamber card) that says "Väg ned" (way down) and places it on top of the room tile, thereby covering the black direction symbol. As long as this floor tile remains on top of that room tile no more RUMSKORT will be drawn here. Also, no hero may search this chamber anymore.
Cards that instruct a player to place a floor tile on the game board often has the classification särskild plats (special location). This is a classification that future expansions will use (see "What is a special location?" on page 35) but it has less significance in Drakborgen II. In future expansions there are more floor tiles and special locations.
Magic Rings
Drakborgen II contains four new cards with a magic ring that the players may choose from before game starts (see "Preparations" on page 6). The ruling of each ring is stated on the card.
Amulets (Amulettkort)
Amulets are magic föremål (items) that heroes may find during their adventures in Drakborgen. Amulets differ from MAGISK RING (magic rings) in that they: 1) typically have permanent effects (the card is not taken out of play after use), and 2) the effects are normally not known until they trigger (see "The magic amulets" on page 30).
Underjordskort (Catacomb Cards)
The catacombs make up the atrium to the hidden depths beneath the world, into which T'siraman allegedly descended a long time ago. Some say that the power of the evil wizard is still hidden below; whereas others claim that there is nothing down there but the ominous gates to hell. Catacombs in Drakborgen II are represented by UNDERJORDSKORT (catacomb cards) that a player must draw (instead of RUMSKORT) when moving around in the dark (see "Catacombs" on page 28).
Direction Arrows
A direction arrow is used to keep track of in which direction (North, South, East, or West) a hero sets out after descending into the catacombs (see "Catacombs" on page 28). As soon as the hero ascends again from the catacombs, the direction arrow is removed from the game board.
Ten-Sided Die
This expansion includes a ten-sided die (called T10). It does not replace the six-sided or twelve-sided die but is a compliment to fine-tune the outcome of certain rolls.
Follow Instructions in Drakborgen II
Drakborgen II utilizes the same instructions and effects as the basic game. In addition, a few new ones have been added, of which we explain the most important here.
Överrumpling! (Caught Off Guard)
If a hero triggers an överrumpling (caught off guard), they have been careless enough to be ambushed by a skelett (skeleton) and will have to wrestle it unarmed.
A hero will not be able to use any föremål (items), utrustning (equipment), or abilities before or during an överrumpling, unless instructions specifically allow it (see "The new heroes" on page 23).
Before combat begins, the player whose hero is caught off guard rolls a T6 to see how many KP (health) the skeleton has. Combat is divided into combat rounds that are repeated, in the same turn, until either the hero or the skeleton is defeated.
In the beginning of each combat round, the player rolls T10 against SF. If it succeeded, the skeleton loses 1 KP due to injury. If it failed, the hero loses 1 KP due to injury.
New Classifications of Effects
Drakborgen II introduces some new classifications, for example:
- Amulett (amulet): See "Magic amulets" on page 30.
- Likätare (ghoul): The number of ghouls crawling up through the floor is managed by the monster badge.
- Nedgång (way down): A way down allows the hero to descend into the catacombs on their next turn (see "Catacombs" on page 28). A way down is marked, either with a room tile (see "Room tiles" at the back of this booklet) or a floor tile (see "Effects of a floor tile" on previous page). A way down remains for the rest of the game unless the instructions state otherwise.
- Teleportera (teleport): See "Teleportation" below.
- Underjord (catacombs): Cards with the catacombs classification represent all things taking place in the catacombs (see "Catacombs" on page 28).
- Uppgång (way up): A way up allows the hero to ascend from the catacombs on their next turn (see "Catacombs" on page 28).
- Överrumpling (caught off guard): If a hero is careless enough to be caught off guard, a skelett (skeleton) attacks from behind and the hero needs to combat it unarmed (see "Överrumpling!" on previous page).
Teleportation
Being teleported is to magically transport a hero figure from one place to another. If there is already a room tile at the target space of a teleportation, that room tile remains as it is. If the target space is empty, the player draws a new room tile at random from the bag as normal – but may place it in any direction.
After teleportation, the player does not draw a RUMSKORT (chamber card) if a RUMSKORT has already been drawn this turn. Also, the player does not draw a RUMSKORT if the teleportation occurs in another player's turn.
However, the effects or a room tile trigger as usual (see "Room tiles" at the back of this booklet), with the following exceptions:
- If the hero teleports to a Korridor (corridor) the turn is over. In this case, the hero gets no "free turn".
- If the hero teleports to a Bottenlös brunn (bottomless well), (s)he falls and is dead.
- If the hero teleports to a Bro (bridge), (s)he falls and loses KP due to injury according to the instructions.
- If the hero teleports to a Rum med bråte (debris) or Spindelnät (spider web) they are stuck and must begin their turn with attempting to cut themselves loose.
- If the hero teleports to the Treasure chamber, the player does not draw any SKATTKORT (treasure cards) this turn but must immediately draw a DRAKKORT (dragon card).
- If the hero teleports to the outer walls of Drakborgen, they are crushed by the weight of the boulders and suffer a horrible death.
- If the hero teleports to a Tower room, the same effects apply as if the hero had just entered the space from an adjacent space (see "Escaping Drakborgen" on page 13).
- If there is already a hero figure on the space a hero teleports to (except the Treasure chamber or Tower room), the die that caused the teleportation must be re-rolled. If it was not a die roll causing the teleportation, choose an adjacent space.
Effects of New Cards
The new card types that are introduced with Drakborgen II are UNDERJORDSKORT (catacomb cards) and AMULETTKORT (amulet cards). The effects of these cards trigger as normal.
Some effects linger into the coming turn (the instructions typically say "i varje drag" (on every turn). In these cases, the player keeps the card in front of them as a reminder that the effects are still valid.
Some effects depend on whether something is "i spel" (in play) or not. If a hero figure or a tile is placed on the game board, or if a card is placed faceup next to any hero base, they are in play. A card that is facedown is not in play.
The New Heroes
Drakborgen II includes eight new heroes. Most of them have more advanced abilities and equipment (see "Abilities and equipment" on page 19) compared to the original heroes of the basic game.
This section is a detailed presentation of the ruling of each new hero. Stat lines read SF (Styrka), VF (Vighet), RF (Rustning), TF (Tur), and KP (Kroppspoäng) as printed on each hero badge.
Yūshugom Bogd-Uul
Abilities: Principfast (principled) Equipment: Three longswords Stats: SF 6 · VF 6 · RF 6 · TF 5 · KP 19
Principled (ability): Your religion and your ascetic living have made you a cunning and endurable warrior without any weaknesses. You put faith in your training and your longswords since your beliefs forbid you to deal with supernatural things.
Limitations: Your conviction and your principles come with a cost: you are not allowed to carry or use magiska föremål (magic items). Therefore, you may not pick a MAGISK RING (magic ring) at the beginning of the game. Also, you may not pick up any magic items you find during your adventure: ignore these cards.
Durim Dolkspänne (no combat cards)
Abilities: Dyrka dörrar (lockpicking) and Finna dolda ting (spot hidden things) Utrustning: Four daggers Stats: SF 3 · VF 9 · RF 4 · TF 7 · KP 10
Lockpicking (ability): When you draw the DÖRRKORT "Förblir stängd" (remains shut) you may treat it as "Öppnar sig" (opens) and continue your turn.
Spot hidden things (ability): When you search a chamber, you may draw one or two RUMSLETNINGSKORT in the same turn, but both apply in order. You may still only search two turns in a row.
Daggers (equipment) Resource meter: A dagger can be used both for close combat and as a ranged weapon.
- Close combat: If you have at least one dagger left, you may use it in normal combat with a monster: instead of using STRIDSKORT (combat cards) you openly declare A, B, or C after the monster player has picked their card (but before revealing it). The monster player uses STRIDSKORT as normal. After each combat round, you may choose to throw a dagger (see below).
- Throw dagger: When you encounter a monster you may immediately choose to throw up to four daggers. This counts as an attack. After an överfall (surprise attack) you may only throw one dagger, which also counts as an attack. You may also throw a dagger after each completed combat round during close combat (see above). Move the resource meter 1 step down on your hero base for each dagger thrown.
- Loss of KP: When you throw a dagger, the monster player picks a combat card, without revealing it. You openly declare two letters (choose from A, B, or C). If any of the letters match the letter on the combat card, you hit and the monster loses T6 KP due to injury. Exceptions: skelett (skeleton): T6-2 KP, spindel (spider) dies instantly. If none of your chosen letters match the letter on the combat card, you miss – and lose 1 KP.
- Ammunition: Once combat is over, you may search for your daggers: roll T6 for every thrown dagger. If the result is even, you retrieve the dagger. If the roll is odd, you have lost it. You always lose daggers thrown in the catacombs. If you lose all your daggers, you will have to fight unarmed (see "Obeväpnad strid" on page 30).
Yūbara Tori-Jima
Abilities: Undvika överfall (avoid surprise attacks) and Förbli dold (remain hidden) Equipment: Curved sword, shuriken, and blowpipe with poison Stats: SF 4 · VF 10 · RF 4 · TF 5 · KP 10
Avoid surprise attacks (ability): You have awesome reflexes and may thereby avoid some överfall (surprise attacks). Use: When you trigger a surprise attack, roll T6. If the result is even, you react in time and may ignore its effects: encounter the monster as normal. If the result is odd, you deal with the surprise attack as normal.
Remain hidden (ability): You may hide in the shadows, becoming almost invisible. Use: You may hide and try to avoid some monsters (but not all). When you encounter a bergstroll, orch(er), svartalv, or skelett, choose a number on a T6 in secret and hide it. The player sitting to your right declares two numbers (bergstroll/orch) or three numbers (svartalv/skelett). If any number match your die, you must encounter the monster as normal. If not, you may ignore the monster.
Shuriken (equipment) Resource meter: Shuriken is a ranged weapon used against monsters, both before and during combat. When you encounter a monster, you may choose to throw all your shuriken, one after another. This counts as an attack. You may also wait and throw your shuriken in case of combat. You may always throw up to four shuriken in a row.
Attack: Roll T6 and read from the table below. Move the green marker on your hero base 1 step down for each shuriken thrown.
| Roll (T6) | Svartalv | Bergstroll | Orch | Skelett | Jättespindel |
|---|---|---|---|---|---|
| 1 | Miss | Miss | Miss | Miss | Miss |
| 2 | Miss | 0 | Miss | Miss | Miss |
| 3 | Miss | −1 | −1 | 0 | Miss |
| 4 | −1 | −1 | −2 | 0 | Miss |
| 5 |
* Counts as −3 KP against "två orcher" (two orcs).
Limitations: You may not throw any shuriken in case of an överfall (surprise attack) unless you successfully avoided it (see above).
Ammunition: Thrown shuriken are gone, they may not be retrieved.
Blowpipe with poison (magic equipment) Expendable: Your blowpipe is an almost infallible weapon with a magically enhanced poisonous powder. Your blowpipe can be used against any monster except odöd (undead) and those who are immun mot magi (immune to magic). When you encounter a monster, you may choose to use your blowpipe before combat. This counts as an attack. You may not use the blowpipe once combat has begun.
Attack: Remove the blue marker from your hero base and roll T12: if the result is 1 you missed, otherwise you hit. A hit defeats the monster instantly (treat two orcs as one monster).
Limitations: The blowpipe can only be used once per game. If you have already removed the blue marker, this weapon cannot be used.
You may not use your blowpipe in case of an överfall (surprise attack) unless you successfully avoided it (see above).
Thargrim the Dark
Abilities: Läka (heal) and Injaga skräck (invoke fear) Equipment: Longsword and shield Stats: SF 7 · VF 4 · RF 8 · TF 5 · KP 13
Heal (special ability): You have the power to heal KP through meditation. Use: Heal 1 KP for every turn you forfeit while meditating. You may not do anything else on a turn you are meditating.
Invoke fear (ability): You have the power to invoke fear in monsters, except djur (animals) and odöd (undead). If successful, the monster will flee. This ability may be used after an överfall (surprise attack). Please note that this is an ability, and not a magic spell. Use: As soon as you attempt to invoke fear, you lose 1 KP due to strain. Roll four times with T6 and add all numbers rolled. If the total sum is 12 or higher, you are successful, and the monster flees. If the total sum is lower than 12, you fail and lose T6 KP (T6-3 for svartalv) in a counterattack. Continue the encounter as normal. Invoking fear counts as an attack: if the monster did not flee from this ability, it may very well still flee due to what the monster player reads on the MONSTERKORT (monster card). Limitations: If fleeing is not possible, you fail automatically.
Iril Fëaneline, Princess of Nardhuinar
Abilities: Leap Equipment: Longsword, shield, and slingshot Stats: SF 4 · VF 8 · RF 5 · TF 6 · KP 12
Leap (ability): You may make two moves in one turn across revealed room tiles, but only if you carry no more than eight föremål (items). You only draw a RUMSKORT (chamber card) in the first room (providing the ruling of the room tile allows it). Use: Declare in the beginning of your turn that you will leap. You may not leap through a door, portcullis, or any hinder (obstacles). You may leap past a Bottenlös brunn (bottomless well) or a Bro (bridge), providing you succeed the roll against VF (but with T12 in both cases). A Korridor (corridor) still gives you a "free turn". Limitations: You must stop when you encounter a monster: you may not use your slingshot. If you trigger an överfall (surprise attack), you must roll T12-4 for loss of KP. In a trap you lose 2 KP extra. You ignore all föremål (items), kvarlevor (corpses), and förvaring (containers). Treat händelse (event) and besvärjelse (spell) as normal.
Slingshot (equipment): Your slingshot is a ranged weapon used against certain monsters. You may only fire one shot, before combat begins. When you encounter a monster, you may fire immediately. This counts as an attack. You may also wait and fire in case of combat, and later use close combat with STRIDSKORT (combat cards) as normal.
Attack: Roll T10 and check table below. Roll T6 for eventual loss of KP.
| Svartalv | Bergstroll | Orch | Skelett | Två orcher | |
|---|---|---|---|---|---|
| Hit (T10) | at least 8 | at least 3 | at least 6 | at least 5 | at least 5 |
| Loss of KP | T6 | T6−3 | T6−2 | T6−3 | T6−2 |
Limitations: You may not use your slingshot before or after överfall (surprise attack).
Ammunition: Your slingshot has unlimited ammunition, there are small stones scattered everywhere.
Chārāk-Hai, wolf-killer
Abilities: Berserk Equipment: Axe and war hammer Stats: SF 8 · VF 5 · RF 6 · TF 4 · KP 16
Berserk (ability): You may become a berserk – albeit not always on purpose – and become a formidable adversary, but with poor judgement. Use: When you begin combat with a monster, or lose KP due to a door trap, you must roll T6. If the result is 5-6, you will become a berserk. When this happens, turn you hero badge around. Being a berserk brings a number of new effects.
Effects during berserk:
- Increase your KP* 4 steps (not beyond maximum, decrease again when berserk ends).
- You deal double loss of KP when hitting a monster with STRIDSKORT (combat cards).
- You kill a spindel (spider) by rolling 2-6 with T6 (but lose 1 KP if you rolled 1).
- You strike down two ghouls extra every combat round.
- You open a door or lift a portcullis by rolling 2-12 with T12.
- You draw RUMSKORT and UNDERJORDSKORT as normal, but always attack monsters.
- You may not draw any SKATTKORT, but you must draw two DRAKKORT.
- You ignore all föremål (items) you find, but you keep the ones you already carry.
- You do not draw any KISTKORT, SÖKNINGSKORT, or RUMSLETNINGSKORT.
- You will not voluntarily descend to the catacombs but will try to ascend if the opportunity occurs.
- Berserk automatically ends if you encounter "Facklan slocknar". If so happens, turn your hero badge. Berserk does not end in Mörkerrum.
* Please note that if berserk ends, your KP meter will decrease 4 steps. Should this mean that the red marker reaches the skull, you immediately die of exhaustion.
Special: During berserk, you must roll T6 at the beginning of each turn. If the result is 6, berserk ends: turn your hero badge. If the result is 1, you lose control: the player sitting to your right will decide your next movement.
You may voluntarily (once per turn) incite yourself to berserk by rolling T6. If the result is 3-6, you become a berserk.
Dzála Náryn of Zimendell (no combat cards)
Abilities: Besvärjare (spellcaster) och Oracazmästare (oracaz master) Spells: Ljusklot (light orb) Equipment: Helande salva (healing salve) Stats: SF 2 · VF 6 · RF 3 · TF 8 · KP 6
Spellcaster (ability): You are a spellcaster. You master a magic spell. Limitations: You have no weapons, and no STRIDSKORT (combat cards). If you end up in combat without your oracaz, you will have to fight unarmed (see "Obeväpnad strid" on page 30).
Oracaz master (ability): You have a very rare and dangerous animal in a chain: an oracaz. Use: This rare beast will be loyal to the death. It will fight for you and warn about traps in your way. As long as you have your oracaz by your side, it will also increase your VF (dexterity) by 3. Since you and your oracaz are two separate creatures, you have separate KP. The KP of your oracaz are handled in the KP meter on your right, whereas your own KP are handled by the resource meter on your left.
Special: Please note that you normally roll two times for events, traps, Bottenlös brunn (Bottomless well), and Bro (bridge). Once for you, and once for your oracaz. You are both exposed to the same effects – apart from dörrfälla (door trap), trampfälla (floor trap), and kistfälla (chest trap): these only affect you. Modifications of attributes only apply to you. Effects that require a Turfaktor, TF (luck) also only apply to you.
If you fall into the catacombs, the oracaz will voluntarily climb down to you (without any loss of KP), and you may also do so if the oracaz falls. If you are teleported, your oracaz will also teleport.
Light orb (magic spell): You may conjure a magic light orb that protects you from the dark. Use: Thanks to the orb, you may ignore all events about "Facklan slocknar" (torch goes out). You may also ignore the effects of a Mörkerrum (dark chamber).
Healing salve (equipment) Expendable: You carry a healing salve made of herbs from the remote lands of Jarsama. Your oracaz rolls the die indicated by its KP: 7–14 KP (T12), 4–6 KP (T10), 1–3 KP (T6). Use: The healing salve will either replenish your KP completely or heal 3 KP to your oracaz (you choose which). Remove the blue marker and forfeit one full turn while using the salve. You may not do anything else on the turn you are using the salve. Limitations: The healing salve can only be used once per game. If you have already removed the blue marker, the healing salve cannot be used.
Oracaz (creature)
Stats: SF 5 · VF 9 · RF 8 · TF — · KP 14 Abilities: Styrka (strength), Varna (warn), and Strid (combat)
Strength (ability): An oracaz is very aggressive and may remove most hinder (obstacles) in your way. Use: To destroy a door or a portcullis: roll T10 against the SF of the oracaz to pass. In all situations requiring a roll against SF, it is the SF of the oracaz that applies, not yours (unless your SF happen to be higher than that of the oracaz).
Warn (ability): An oracaz is very perceptive and may warn you of dangers by hissing fiercely. Use: When you move to an empty space, you place your hero figure on the passage leading to the space. The player sitting to your right draws a random room tile for you, looks at it and places it facedown on the empty space. If the room tile is a Rumsfälla (trap room), Bottelös brunn (Bottomless well), or a Vridrum (turning room) the player hisses like an oracaz, but otherwise keep silent.
But sometimes the oracaz is wrong: the player to your right first rolls a T10. If the result is 1, your oracaz will hiss when it is safe and be quiet near danger. If you decide to move onto the space, you reveal it and move your hero figure as normal. If you decide not to move onto the empty space, you may place your hero figure on another passage and repeat the procedure. If you do not want to make that move either, your turn is over. Let all room tiles remain.
Special: If you (despite your oracaz) trigger a trap, roll T12. If the result is even, your oracaz reacts, and you may ignore the trap.
Limitations: If you just entered this space through a secret door, your oracaz will have no time to warn you: a trap then triggers as normal.
Combat (ability): As long as it lives, your oracaz will do combat in your place, according to the instructions for the monster you are facing. Attack and loss of KP: When you are about to combat a monster with combat cards, and you have the oracaz by your side, you may only choose attack or wait: an oracaz will not flee. The oracaz has no combat cards, instead you and the monster player roll dice in each combat round.
Your oracaz rolls the die indicated by its KP: 7–14 KP (T12), 4–6 KP (T10), 1–3 KP (T6). The monster player rolls T6 for svartalv/bergstroll, T10 for skelett/orch and T12 for other monsters. Whoever rolls lower loses 1 KP due to injury (plus eventual bonus effects) and if there is a tie, both lose 1 KP. Repeat combat rounds until someone is defeated.
Special: Överrumpling (caught off guard) is resolved as normal, but your oracaz uses his SF instead of yours. Your oracaz will warn you of överfall (surprise attack): this card counts as a normal encounter with a monster (but see "Limitations" above).
Mrishnahk the Magician (no combat cards)
Abilities: Besvärjare (spellcaster) and Principfast (principled) Spells: Osynlighet (invisibility), Gå genom väggar (walk through walls), Stanna tiden (stop time), Eldklot (fireball), and Fördriva monster (scare monster) Equipment: Helande örter (healing herbs) Stats: SF 1 · VF 4 · RF 3 · TF 6 · KP 14
Spellcaster (ability): You are a spellcaster. You master five magic spells, of which you can only use one at a time. However, there is no limit to how many spells you may use per turn. Place the green marker on the spell you use at the moment. Limitations: You have no weapons, and no STRIDSKORT (combat cards). If you end up in combat, you will have to fight unarmed (see "Obeväpnad strid" on page 30). If you trigger an överrumpling (caught off guard), you must immediately roll T6 for loss of KP due to injury, because of your lack of combat training.
Principled (ability): Since you only rely on your own magic, you will not choose a MAGISK RING (magic ring) in the beginning of the game, and you may not pick up any magic items you find during your adventure: ignore these cards.
Stop time (magic spell): You have the power to stop time. This allows you to take several turns in a row, without having to move the yellow marker on the sundial. Use: This spell must be used at the beginning of your turn: for each turn time is stopped, you lose 1 KP due to strain. When time is stopped, Vridrum (rotating chambers) do not move until you quit using this spell. Also, a Korridor (corridor) does not offer you a "free turn". Mörkerrum (dark chambers) work as normal. You draw RUMSKORT as normal, but ignore all monsters, events, spells, and traps. Limitations: If you use another spell while time is stopped, time will immediately start running again. You must always end this spell with a normal turn, where time is running normally.
Fireball (magic spell): You have the power to throw a fireball (at any time) that disintegrates (ignore) a hinder (obstacle) or a monster. This spell can also be used after an överfall (surprise attack) or during överrumpling (caught off guard). You must still roll T6 for loss of KP during överrumpling (see above). Use: You may throw a fireball at all monsters to immediately defeat them before combat. A fireball also removes all hinder (obstacles) for free passage. Limitations: As soon as you have used a fireball, your turn is over. After you have used a fireball, you must forfeit your next turn while resting. Fireball has no effect on the dragon or creatures that are immune to magic.
Scare monster (magic spell): You have the power to force a monster to flee. This spell does not affect animals or monsters that are immune to magic. This spell can also be used after a surprise attack or when caught off guard. You must still roll T6 for loss of KP. Use: As soon as you use this spell, you lose 1 KP due to strain. This spell counts as an attack: have the monster player read the MONSTERKORT (monster card). If the monster does not flee, roll T10. If you rolled higher than the KP of that monster, it flees anyway. If not, it stays for combat. Limitations: If fleeing is not possible, you fail automatically.
Invisibility (magic spell): You have the power to become invisible to ignore a monster, even those who are immune to magic. While you are invisible, you may ignore all överfall (surprise attacks) and överrumpling (caught off guard). Use: As soon as you use invisibility, you lose 2 KP. You may continue to be invisible several turns in a row: lose an additional 1 KP at the beginning of each turn. Remember to declare this openly to all. Limitations: All events and traps will affect you as normal. If you trigger a surprise attack while you are visible, you may not become invisible to avoid it: but you may become invisible after the surprise attack (or use other spells) to avoid combat. If you use another spell while being invisible, you will immediately become visible again.
Healing herbs (equipment) Expendable: You are carrying a pouch full of healing herbs. Use: Healing herbs can be used anywhere, except in the Treasure chamber: remove the blue marker on the hero badge and forfeit your next turn. The healing herbs will either heal 3 KP or you may test your luck and heal T6 KP (you choose which). Limitations: Healing herbs can only be used once per game. If you have already removed the blue marker, healing herbs cannot be used.
Walk through walls (magic spell) Expendable: You have the power to walk right through a wall as if it does not exist. Use: This spell must be used in the beginning of your turn: remove the blue marker from the hero badge. This turn, you may move to an adjacent space regardless of walls or hinder (obstacles). This spell can also be used to move through the outer wall and escape from Drakborgen (but not the other way around). Limitations: This spell can only be used once per game. If you have already removed the blue marker, this spell cannot be used. You need at least 6 KP to be able to use this spell.
The Catacombs
The catacombs make up the atrium to the Depths beneath the World. Allegedly, T'siraman the Wizard once descended far below to unveil them. A hero may voluntarily descend into the catacombs to look for treasures or find a faster way to the Treasure chamber. A hero may also end up in the catacombs involuntary, via a fälla (trap), teleportation, or fall.
Ascend From the Catacombs
When a hero encounters an uppgång (way up), they may attempt to ascend from the catacombs on their next turn. Some ways up are simple, whereas some require rolls against attributes or even certain föremål (items).
If a hero chooses not to ascend from the catacombs, the player continues to draw UNDERJORDSKORT on their next turn. A hero may not return to a way up, once passed. Even inside Drakborgen, a way up is always temporary and does not remain in play. A hero may therefore never ascend through the same way up twice.
When a hero successfully ascends, the player must first "bestämma läge" (calculate position) to find out on what space the hero will ascend (see "Calculate your position" below).
Once the player knows what space the hero will ascend onto, the direction arrow is removed from the game board. The hero figure is returned to the game board on that space. Then, the player throws all UNDERJORDSKORT (apart from eventual items) and reshuffles the deck.
After rolling for loss of KP and other eventual effects, the hero continues to move in the catacombs on their next turn (see "Movement in the catacombs" below), unless they attempt to climb back up again.
Descend Into the Catacombs
When a hero encounters a nedgång (way down), they may continue their move in the catacombs on their next turn. Even if the hero chooses not to descend, the way down remains (unless the instructions say otherwise).
A hero may also end up in the catacombs involuntarily, via a trap or by falling (for example from a Bridge). A hero may voluntarily descend into the catacombs from a Bro (bridge) without losing KP.
If there is already an existing way down on an adjacent space (even diagonally), the hero must be placed there instead. If there are several ways down on adjacent spaces, the player may choose from those spaces.
Keeping Track of Directions
If a hero ascends onto a space already occupied by another hero figure (apart from the Treasure chamber and the Tower rooms), the player must roll again to calculate a new position.
As soon as a hero ends up in the catacombs, the player must place a direction arrow on the room tile from which the hero descended (unless they decide to climb up again). Remove the hero figure from the game board: a player's direction arrow and hero figure may not be in play at once.
If a hero ascends into a hopeless situation (for example a Vridrum against a wall), the hero may descend again (without rolling). The player yet again removes the hero figure and marks the direction with a direction arrow, but still throws away the UNDERJORDSKORT, as explained above.
The player must point the direction arrow in the direction the hero will move next turn: North, South, East, or West. After that, the direction arrow cannot be turned, unless the instructions explicitly say so.
A hero may not move outside of the outer walls, even in the catacombs. If the player reaches beyond the outer wall when calculating the position (due to too many UNDERJORDSKORT), only count the number of spaces until you reach the outer wall. A hero may never ascend outside of the outer wall. However, a hero may ascend in one of the Tower rooms and may technically escape Drakborgen in the same turn.
A direction arrow has no effect on other heroes entering the same space. There can be several direction arrows on the same room tile.
Movement in the Catacombs
In the catacombs, a hero may neither move nor search in the same way as inside Drakborgen. In the catacombs, a player does not draw room tiles from the bag for movement. As long as a hero is in the catacombs, the player draws UNDERJORDSKORT (catacomb cards) for movement. These cards are similar to RUMSKORT and have similar instructions and effects. The main difference is that UNDERJORDSKORT are not thrown away after their effects are resolved: instead, the player keeps them in a pile next to the hero base – until the hero has ascended again.
Calculate Your Position (Ascension Track)
The Ascension Track is used to calculate a new position of a hero: exactly on which space the hero will emerge from the catacombs. The number of UNDERJORDSKORT (catacomb cards) drawn shows how many spaces the hero has moved in the direction of the arrow. Roll T10 to see if the hero has deviated from the direction. Place the hero figure on the corresponding space on the game board.
The track graphic is transcribed below as a table: each row is the number of UNDERJORDSKORT drawn, and each cell gives the T10 result that places the hero in that column relative to the direction arrow. A dash means the track has no position in that column.
| UNDERJORDSKORT drawn | 4 left | 3 left | 2 left | 1 left | Straight | 1 right | 2 right | 3 right | 4 right |
|---|---|---|---|---|---|---|---|---|---|
| 12 | 1 | 2 | 3 | 4 | 5–6 | 7 | 8 | 9 | 10 |
| 11 | 1 | 2 | 3 | 4 | 5–6 | 7 | 8 | 9 | 10 |
| 10 |
Example: Durim encountered a way up and wants to climb out of the catacombs. He has drawn six UNDERJORDSKORT (including the way up) and rolls 2 on T10. Durim will emerge six spaces from the direction arrow, and he has deviated one space to the left. He draws a random room tile and gets a Mörkerrum. On his next turn he will roll for the dark. He throws all UNDERJORDSKORT, apart from a treasure he has found, which he keeps.
Ascend Onto a Faceup Room Tile
If there already is a faceup room tile on the space where a hero emerges, the effects of that room tile resolve as normal (see "Room tiles" on the back of this booklet). Please note that:
- If the hero encounters a monster, the hero may attempt to flee – but the only way is back down into the catacombs.
- If the hero emerges in a Bottenlös brunn (bottomless well) or a Bro (bridge), the player needs to roll again to calculate their position.
- If the hero emerges in the Treasure chamber, the player draws no SKATTKORT this turn but must immediately draw a DRAKKORT.
- If the hero emerges in a Rum med bråte (debris) or Spindelnät (spider web), that hero is stuck and must begin next turn with rolling against an attribute, according to the tile ruling.
- If the hero emerges on a special location, the same rules apply as with teleportation (see "What is a special location?" on page 35).
Ascend Onto an Empty Space
If there is no room tile on the space where a hero emerges, the player must draw a random room tile from the bag and place it in any direction (see "Room tiles" on the back of this booklet).
The effects of this room tile trigger as normal, but please note that:
- If the hero emerges in a Bottenlös brunn (bottomless well) or a Bro (bridge), the player must draw a new one.
- If the hero emerges in a Rumsfälla (trap room), the effects are triggered as normal.
Monsters Without STRIDSKORT
Some monsters do not have STRIDSKORT (combat cards) of their own, and do not have rows/columns of their own in certain tables. In some cases, the instructions state that a monster "slåss som" (fights as) something else, for example "slåss som skelett" (fights as skeleton).
In these cases, the monster player uses the STRIDSKORT of that monster, and reads tables accordingly.
The fact that a monster "fights as" another monster does not mean the two monsters are the same or share the same classifications: it just states which STRIDSKORT to be used and what rows/columns to read from. To "fight as" a specific monster does not mean you should use the die of that monster in an unarmed fight. Instead, use the die for other monsters (T12).
Example: Thargrim encounters Rash-Kharg in the catacombs and is forced to fight. Rash-Kharg has no STRIDSKORT, but the instructions state that this monster "slåss som skelett" (fights as skeleton). The monster player takes the STRIDSKORT of the skeleton and prepares for combat.
Thargrim wants to use his ability to invoke fear, which is fine: invoke fear does not work on odöd (undead), but Rash-Kharg is not undead. Thus, Thargrim may use his ability.
The Magic Amulets
In Drakborgen, a hero may find various magic amulets (magisk amulett) that are very powerful. These legendary items are allegedly collected by T'siraman the Wizard himself from remote kingdoms and ancient magic orders during the Dark Ages.
If a hero finds an amulet, the player sitting to the right must draw the top AMULETTKORT (amulet card) and read it – but may not reveal it. The player whose hero found the amulet must now choose whether the hero shall wear the amulet (use it) or not (throw it away). An amulet may only be kept if it is used. If the amulet is used, both players keep their cards.
The player sitting to the right now has a task of remembering when the effects of the amulet trigger, which is stated in the instructions on the AMULETTKORT. Once the requirements are met, that player will read out loud the text in italic. All effects of that amulet are stated on the AMULETTKORT. These effects are often permanent, as long as the amulet is kept.
Once the effects of an amulet are revealed, they are no longer secret. The player who owns the amulet therefore takes the AMULETTKORT too. The card that gave the amulet, and the AMULETTKORT itself, now count as the same föremål (item). Sometimes, a player will never know what the amulet does, in case the effects never trigger during the game.
A hero may always throw away an amulet that is being used, unless the instructions state otherwise. A hero may only wear one amulet at a time.
If a hero finds two amulet halves, these may be repaired to form a whole amulet. The player must then draw three AMULETTKORT and keep one of them. The effects of a repaired amulet are never secret.
The Spellbook Table
One of the new treasures in this expansion is the Spellbook of Ishanti, a föremål (item) with no value in gold coins (gm). If a hero finds the spellbook, it can be read from at the beginning of that player's turn: then throw the card. Please note that the spellbook as such is not magic.
A hero may not bring the spellbook: throw the card when you make a move.
If a hero reads from the spellbook, roll T12 and read the table below:
| T12 | Result |
|---|---|
| 1–2 | The dragon awakens and snaps at you. If you are in the Treasure chamber, you are dead. Other heroes follow the instructions for the awakened dragon as normal. |
| 3–4 | When you utter the spell, you get a shock: lose T6 KP (injury). |
| 5–9 | All the spells are illegible. |
| 10 | You are suddenly very perceptive: draw four SKATTKORT in the Treasure chamber and keep two (permanent effect). |
| 11 | You are miraculously healed. Replenish all your KP. |
| 12 | You are immediately teleported out of Drakborgen, but you drop all but two treasures. Keep any two treasures and throw the rest. |
Obeväpnad Strid (Unarmed Combat)
A hero that is forced into combat without STRIDSKORT is considered "obeväpnad" (unarmed). Fighting unarmed is a great disadvantage, but there are still ways to win.
A hero forced to fight unarmed rolls T6 in each combat round.
The monster player also rolls a die: which die depends on the monster. The monster player rolls T6 for svartalv/bergstroll, T10 for skelett/orch, and T12 for other monsters (but not spindel, see below).
Whoever rolls lowest is hit and loses 1 KP due to injury (plus bonus effects). If there is a tie, both lose 1 KP due to injury (without bonus effects). Repeat each combat round until someone is defeated.
An unarmed fight against a spindel (spider) is not recommended due to the dangerous web. The hero must attempt to flee by rolling T6: 1-2: success. 3-6: lose 1 KP due to injury. Repeat until the hero succeeds in fleeing or dies. A hero may normally not defeat a spider when unarmed.
Överrumpling (caught off guard) resolves as normal, no matter if the hero is unarmed or not (see "Överrumpling" on page 21).
Drakborgen III
Game Overview
Drakborgen III is the second expansion to the basic game of Drakborgen. This expansion adds four new heroes, new special locations, and a new type of föremål (item) called artefakt (artifact). The artifacts are powerful and ancient but may often require a cost from its user.
Drakborgen III requires that you master the basics of the rules of Drakborgen and the expansion Drakborgen II. All new cards have ruling that explain most of what is needed, but the new special locations and the new heroes demand some experience from the player.
For clarity's sake, there are short summaries of special effects and rulings on each hero badge, but each hero also has a set of detailed rulings in this booklet (see "The new heroes" on page 36).
The rules of the basic game and Drakborgen II can be found earlier in this booklet. The rulings of this expansion only deal with the new components and rulings. All previous heroes from the basic game can naturally be played with Drakborgen III. This expansion does not require Drakborgen II but is more fun if all expansions are included.
How to Separate Expansions from the Basic Game
Once cards and room tiles from Drakborgen III have been mixed with the basic game, it can be difficult to separate them, should you wish. Therefore, all cards and room tiles that belong to Drakborgen III are clearly marked with an expansion symbol that distinguishes them from those that belong to the basic game and other Drakborgen expansions.
Components
Drakborgen III includes one female and three male heroes. These are represented on the game board by hero figures (see "The new heroes" on page 36). Put each hero figure in a plastic stand.
Each hero has a hero badge with the information needed to play with them. The new heroes have special abilities and equipment (see "Abilities and equipment" on page 19) and are more advanced compared to the original heroes of the basic game.
Our recommendation is to try out one hero at a time to get used to all special situations that may occur.
Drakborgen III includes 11 monster figures (2 orcs, 2 trolls, 2 goblins, 2 skeletons, and 3 spiders). With these, you may make up your own house rules around monsters. These figures may also be required for use with future Drakborgen expansions.
Drakborgen III includes alternative rule variants allowing several heroes to occupy the same space. In addition, these rule variants require alternative combat rules (see "Alternative rule variants" on page 38). These rule variants require combat wheels that replace STRIDSKORT (combat cards). Each combat wheel has one hero side and one monster side.
The new cards from Drakborgen III are shuffled into their respective decks. This expansion introduces a new card type, ARTEFAKTKORT (artifact cards) with 10 unique cards (see "Effects of an artifact" on page 35).
Drakborgen III contains the following components:
- 4 Hero figures
- 1 Cat figure
- 4 Hero badges
- 11 Monster figures
- 4 Combat wheels
- 56 Cards, consisting of:
- 15 rumskort (chamber cards)
- 5 skattkort (treasure cards)
- 2 dörrkort (door cards)
- 7 kistkort (chest cards)
- 5 sökningskort (corpse cards)
- 6 rumsletningskort (search cards)
- 6 stridskort (combat cards)
- 10 artefaktkort (artifact cards)
- 12 Floor tiles
RUMSKORT (Chamber Cards)
Drakborgen III introduces 15 new RUMSKORT that are shuffled into the deck. 9 of these are särskild plats, or a special location (see "What is a särskild plats?" on page 35). The other 6 RUMSKORT are there to balance the deck.
Other Cards
This expansion also contains: 5 SKATTKORT, 2 DÖRRKORT, 7 KISTKORT, 5 SÖKNINGSKORT, and 12 RUMSLETNINGSKORT. These are shuffled into their respective deck from the basic game. No other cards need to be sorted out for sake of balance.
Note: the component list above gives 6 rumsletningskort, while this paragraph gives 12 RUMSLETNINGSKORT. Both figures are as printed in the source.
ARTEFAKTKORT (Artifact Cards)
Artifacts are powerful magic föremål (items) that heroes may find during their adventure in Drakborgen.
See "Effects of an artifact" on page 35.
Floor Tiles
A floor tile reminds of a room tile, but it represents only the floor of the room, not its walls or passages. A floor tile is normally not drawn randomly but is placed on top of a room tile and will replace the contents of the room (see "Effects of a floor tile" on page 21).
New Floor Tiles
Drakborgen III introduces nine new floor tiles in seven unique variants. Some floor tiles have different sides: the instructions on the card normally states which side to place faceup.
If a hero is teleported to any of these floor tiles, the instructions are resolved as normal, apart from Brunn (well) and Avgrund (chasm) where the hero dies immediately.
The floor tile depicting a Spider web is not used in Drakborgen III but will be used in future expansions.
The names of floor tiles are generally written with capital initial letter.
The floor tiles are:
- Brunn (well): A well with tentacles spread out over the floor.
- Ofarlig brunn (harmless well): Same well, but with chopped-off tentacles. This chamber is now harmless.
- Hemlig kammare (secret chamber): Chamber with mysterious items and trinkets.
- Inrasad kammare (caved-in chamber): Same ruling as Rum med bråte (see back of this booklet).
- Bronsstaty (bronze statue): Silent chamber with a bronze statue. If the diamond is already taken, this chamber is harmless.
- Bottenlöst hål (bottomless pit): Same ruling as Bottenlös brunn (see back of this booklet).
- Järnstaty (iron statue): Dark chamber with an iron statue.
- Besegrad staty (defeated statue): Destroyed iron statue, this chamber is harmless.
- Avgrund (chasm): A large chasm divides the chamber in two.
- Vanligt golv (normal floor): Normal floor, this chamber is harmless.
- Fontän (fountain): Chamber with a fountain by the wall.
- Spegelsal (mirror hall): Mirrors in confusing paths and angles.
Follow Instructions in Drakborgen III
Drakborgen III utilizes the same instructions and effects as the basic game. Besides, a few new ones are added, of which the most important are explained here.
What Is a Särskild Plats? (Special Location)
A särskild plats is a classification (see "classification of effects" on page 10) that is usually triggered by a RUMSKORT (chamber card) instructing the player to "mark the room tile" with a floor tile.
This means that the player places the floor tile on top of the room tile, and thereby replaces its content (see "Effects of a room tile" on page 21).
If the card states that the floor tile has specific instructions or effects, the RUMSKORT must be placed in one of the slots marked "särskild plats" on the game board, visible to all. This card will remain here until the instructions say otherwise.
Do not draw a RUMSKORT on a särskild plats: instead, do what the instructions tell you to.
Example: Farast steps onto an empty space. He draws a room tile with a black direction symbol and then draws a RUMSKORT (chamber card) that says "Hemlig kammare" (secret chamber). He places the floor tile with that name on top of the room tile and follows the instructions on the card. When all effects are resolved, he places the card on one of the "särskild plats" slots on the game board. From now on, these instructions will apply to all heroes entering that space, until the instructions say otherwise.
Särskild plats will often change a room entirely. This is in order and is just another example of the mysterious forces that govern the ever-changing features of Drakborgen.
You may not search a särskild plats unless the instructions explicitly allow it. In this case, you may still only search up to two turns in a row.
Effects of an Artifact
Drakborgen III introduces artifacts: powerful magic föremål (items) that heroes may find on their adventures in Drakborgen.
All artifacts are items and all artifacts are magic. A hero may carry and use an unlimited number of artifacts, unless the instructions state otherwise. Please note that artifacts are rare.
The three main differences between an artifact and other items are:
- Each artifact is unique.
- An artifact typically has very powerful effects.
- An artifact often demands something from its user. Some feel like living creatures of their own and are not so easily tamed by its user.
Many artifacts have permanent effects. This means that the artifact binds itself to its user and refuses to let go. In some cases, the hero can not get rid of the artifact, at least not until the hero has escaped Drakborgen.
Please note that an artifact is not a treasure, and typically has no value in gold coins (gm). There are alternative rule variants in Drakborgen III that let artifacts play an important role when a winner is determined (see "The Holy Journey" on page 38).
Immune to Magic
Some items, equipment, and abilities are magic.
If a creature is immun mot magi (immune to magic), no magic items, equipment, or abilities may inflict loss of KP, kill, or make it flee. The creature is still affected by magic effects that do not inflict loss of KP, kill, or make it flee – for example invisibility or stopped time, unless the instructions state otherwise.
Example 1: Mrishnahk encounters a strange iron statue with a large ruby for an eye. He touches the big jewel, and the iron colossus wakes up and attacks. This statue is immune to magic, so a fireball or scaring it will not do. He is therefore forced to either become invisible or face the statue in unarmed combat, as fleeing is not possible.
Example 2: Thore has stepped into a chamber with a large well, out of which limp tentacles are spread out. He accidentally steps on one of the tentacles and is forced to combat the monster in the water. The creature in the water is immune to magic. But Thore's spear is cursed, not magic and so, the effect (automatically defeat a monster) resolves as normal. Doing this will shatter the spear, according to its ruling. The tentacles are defeated and retreat into the dark water – but Thore is now unarmed.
The New Heroes
Drakborgen III includes four new heroes. Most of them have more advanced abilities and equipment (see "Abilities and equipment" on page 19) compared to the original heroes of the basic game.
This section is a detailed presentation of the ruling of each new hero. Stat lines read SF (Styrka), VF (Vighet), RF (Rustning), TF (Tur), and KP (Kroppspoäng) as printed on each hero badge.
Note: the source prints the name "Farast Fartaniel" for two different hero entries (the first with Farnalion and the ring rules, the second with the cursed spear and Buster the cat). Both are reproduced under the printed name.
Farast Fartaniel
Abilities: Ringmagiker (ring magician), Kräsen (picky), and Nogräknad (fastidious) Equipment: Farnalion and a wooden staff Stats: SF 4 · VF 4 · RF 3 · TF 5 · KP 12
Ring magician (ability): You collect all kinds of trinkets with magic effects. You may begin the game with two MAGISK RING (magic rings). Limitations: The second ring must be chosen after all other players have made their choice.
Picky (ability): You ignore all föremål (items) that are not magisk (magic) or skatt (treasures).
Fastidious (ability): When you are in the Treasure chamber, you may draw three SKATTKORT (treasure cards) per turn, but only keep one (regardless of other effects allowing more). Throw the cards you do not want. Limitations: Being fastidious has its downside: in case the dragon awakens while you are in the Treasure chamber, it kills you immediately. Other players resolve the dragon as normal.
Farnalion (magic equipment): Farnalion is a magic sword that consumes most enemies with a bright flame and can disintegrate hinder (obstacles) in your way. Farnalion makes a monster lose an additional 1 KP in combat each time you hit with STRIDSKORT A or B. Use: You may use Farnalion at the beginning of your turn to disintegrate (ignore) a hinder (obstacle) so that you may pass on your next turn. Limitations: As soon as you have used Farnalion to ignore a hinder, you lose 1 KP due to strain, and your turn is over. If a monster is immune to magic, Farnalion inflicts no loss of KP at all: Farast must then do combat with his wooden staff that has no bonus effects. In combat with your staff, you openly declare A, B, or C instead of using STRIDSKORT (combat cards), but it still counts as combat with STRIDSKORT. The monster player uses STRIDSKORT as normal.
Ragnar from Gandril
Abilities: Ohelig allians (unholy alliance) Equipment: Runsvärd (rune sword) Stats: SF 4 · VF 8 · RF 7 · TF 4 · KP 11
Unholy alliance (ability): Due to your impulsiveness and inquietude, you have entered a pact with a demon that resides within your rune sword. This alliance makes you almost invincible as long as the demon favors you. Use: Each time you lose KP due to injury, you may roll T12 against your VF. If you succeed, you may ignore the loss of KP entirely. If you fail, you lose an additional -1 KP. Exception: if the result is 12 (regardless of success), you lose an additional -2 KP. Limitations: This ability only lets you ignore loss of KP from injury specifically. If loss of KP is caused by something else (such as strain), you may not ignore it.
Rune sword (magic equipment): Within your sword lives a demon named Angantyr. He commands both you and the sword in combat. As a reward, he shares some of the life power he steals when you defeat a monster. You do not have to combat with your rune sword: you may choose unarmed combat. Attack: Angantyr does not allow any other choice than attack when you encounter a monster, no matter if you enter combat with STRIDSKORT or unarmed. Life power: Each time you defeat a living monster (not undead) in combat with STRIDSKORT, Angantyr will let you heal 1 KP. Limitations: Each time you defeat an odöd (undead) in combat with STRIDSKORT, you lose 1 KP because Angantyr draws life power from you instead. If a monster is immune to magic, your rune sword has no effect: Ragnar is then forced to unarmed combat.
Farast Fartaniel (no combat cards)
Abilities: Spiritus Familiaris Equipment: Förbannat spjut (cursed spear), sköld (shield), and Buster the cat Stats: SF 6 · VF 5 · RF 5 · TF 4 · KP 14
Spiritus Familiaris (ability/equipment) Expendable: You have a very rare follower: a lucky cat named Buster who used to belong to an evil witch. As long as Buster is not let loose, he counts as equipment (and cannot die) and increases your TF by 4. As soon as you let Buster loose, this bonus effect disappears, and Buster becomes a playable cat figure with 1 KP.
Use: You may only set Buster loose, or recover him, at the beginning of your turn. As soon as you let him loose, place the cat figure on the game board on the same space as you. Before your own movement, you may move Buster individually (but you do not have too). He draws room tiles as normal, but he never draws RUMSKORT (chamber cards). Buster ignores all effects caused by a portcullis, Mörkerrum (dark chambers), Bråte (debris), Bro (bridge), special locations, the dragon, and the Treasure chamber. The "free turn" in a Korridor applies to him as well.
After Buster has moved, you may move to the same space – or do something else – on your turn. Buster can only become equipment again if both figures are on the same space. Buster cannot move on his own in the catacombs. Buster may, however, follow you as equipment in the catacombs. Buster is teleported with you if he is equipment, otherwise not.
Buster ignores all harmful effects (such as death or losing KP) caused by händelse (events), besvärjelse (spells), djur (animals), monsters (including överfall and överrumpling), and cannot be injured by a trap that was triggered by a hero. All other heroes are affected as normal.
Buster may enter a space that is occupied by another hero. Other heroes may not use him as equipment or interact with him in any way.
Limitations: Buster dies immediately if he draws a Rumsfälla (trap room) or Spindelnät (spider web). Afterwards, the trap room is harmless. He may not pass through a door or Bottenlös brunn (bottomless well). He cannot carry items. He may not search a chamber.
If Buster dies: Remove the blue marker from the hero base to clarify that Buster is gone. Remove the cat figure from play.
Cursed spear (equipment) Expendable: Long time ago, when you were a member of the Nternysea guard, you were rewarded with a beautiful spear. But you had to promise only to use it when "in grave danger".
As long as you carry the cursed spear, it will increase your SF by 2. You may also add +2 to your rolls during unarmed combat.
Use: The cursed spear is an infallible weapon that can be thrown against a monster to automatically defeat it, even those who are immune to magic. Remove the blue marker on your hero base when you use it in this way. If you do not use the cursed spear, you are forced to unarmed combat, unless the instructions state otherwise.
Limitations: Your spear is cursed and will shatter as soon as it is used in combat: it can only be used once per game. If you have already removed the blue marker, this weapon cannot be used, and will not give you any bonus effects.
Nea Solsvans (no combat cards)
Abilities: Besvärjare (spellcaster) Magi: Levande hår (living hair) and Samla kraft (recover power) Utrustning: Chakram Stats: SF 3 · VF 6 · RF 4 · TF 8 · KP 11
Spellcaster (ability): You are a spellcaster. You master two magic spells. Limitations: You have no weapons, and no STRIDSKORT (combat cards). If you end up in close combat, you will have to fight unarmed (see "Obeväpnad strid" on page 30) but you may fight with your living hair (see below).
Living hair (magic spell) Resource meter: Your long hair is alive and can be controlled magically by you. This spell allows you to increase your SF (strength) by X, where X is the power of your hair on the resource meter. Example: if the resource meter reads 3, your SF is 3 + 3, that is 6 in total (plus other modifications). Attack: In combat, you fight with the rules for unarmed combat (see "Obeväpnad strid" on page 30) but may add the power of your hair to the combat roll. Example: if the resource meter reads 2, you roll T6+2. The monster player rolls according to the instructions. You are allowed to combat a spider in the same way (it rolls T6 and has 1 KP). Limitations: At the end of a turn in which you have used this spell, you must move the green marker 1 step down. The SF modification applies throughout the full turn. If a monster is immune to magic, you may not use your living hair to add to your SF. You are forced to unarmed combat as normal or use your chakram (see below) as a ranged weapon.
Recover power (magic spell): You have the power to recover hair power through meditation. Use: Recover 1 step on the resource meter for each turn you forfeit while meditating. You may not do anything else on a turn you are meditating. You may not recover beyond the starting number.
Chakram (equipment) 2 x Expendable: Your chakram is a ranged weapon that may be used once against a monster before combat, but not during combat. When you encounter a monster, you may throw you chakram immediately. This counts as an attack. You may also wait and fire in case of combat.
Attack: Roll T12 against TF. If you are successful, the monster loses as many KP (injury) as the difference in the throw. Example: if you have TF 8 and rolled 5, the monster will lose 3 KP (8-5). If you fail, you miss the throw and must remove one blue marker from the hero badge.
Limitations: Your chakram will break if you miss too often. If you no longer have any blue markers on your hero badge, this weapon cannot be used. You may not use your chakram after an överfall (surprise attack).
Alternative Rule Variants
The following section deals with alternative rule variants that can be used if you want to spice up a game. In general, these additions demand more from the players, but may also make the game experience richer and more interesting.
"Death or Honor"
Merely escaping Drakborgen brings no honor. The winning player must also carry at least one treasure to win the game. In all other regards, victory conditions are the same (see "Determine who is a winner" on page 13).
Demon Table
If a hero finds the bottle with "Djimmi the demon" inside, it can be kept for later. If the hero decides to release the demon, this must be done in the beginning of that player's turn.
If a hero releases the demon, roll T10 and read from the table below:
| T10 | Result |
|---|---|
| 1 | The demon escapes, the bottle breaks. |
| 2 | The Treasure chamber moves two steps in a direction of your choice (the spaces where it ends up must be empty). |
| 3 | All room tiles with no player figure on them are returned to the bag (except the Treasure chamber). |
| 4 | Draw a number of random room tiles equal to the number of players. Place them on empty spaces of your choice. |
| 5 | Time is reversed! The yellow marker on the sundial moves in the opposite direction. Once the marker reaches the first step, all who have not escaped are dead. |
| 6 | All hero figures switch places, and you decide how. ALL heroes must switch. |
| 7 | Each player draws an ARTEFAKTKORT in order. |
| 8 | Each player draws a SKATTKORT in order. But you may draw one extra! |
| 9 | All heroes change floors: those on the game board teleport downward into the catacombs (use direction arrow) and those in the catacombs teleport upwards (calculate position). |
"The Holy Journey"
The object of the adventure is not gold and treasure. Kings and queens throughout the world make sinister plans on how to best use the legendary artifacts of T'siraman. The player whose hero escapes with most artifacts is the winner. If two or several heroes escape with the same number of artifacts, a winner is determined as normal by counting gold coins (see "Determine who is the winner" on page 13).
"Mortal Dragon"
If the dragon awakes, each player has a theoretical chance of killing it. After losing KP and SKATTKORT from the fire, each player may attempt to kill the dragon in combat. Each hero plays one combat round at a time clockwise.
The dragon fights with STRIDSKORT (fight as skelett), but never flees. The dragon has 20 KP and will inflict -3 KP (injury) for each hit. The dragon is immune to magic and counts as a dragon, not monster or animal. For all combat ruling purposes, the dragon is a monster (see "Strid med STRIDSKORT" on page 14).
If the dragon is defeated, each hero may from now on draw up to four SKATTKORT (treasure cards) per turn but is no longer required to draw any DRAKKORT (dragon cards).
"Locked Doors"
All doors only allow one attempt to open them: if a player draws "Förblir stängd" on a DÖRRKORT (door card), the door is considered locked and there may be no more attempts of opening it, until the hero has left this space and returned.
Alternative Combat Rules
The alternative combat rules will extend combat. On the other hand, it will make combat more tactical and monsters more varied. In the alternative combat rules, we use Stridspoäng (SP) instead of Kroppspoäng (KP) for victory purposes.
SP (combat points) represent a combatant's tactical advantage/disadvantage in combat. If a hero loses SP, it does not represent physical injury, it means that the hero is pushed back.
In general, a hero begins combat with a number of SP equal to KP/2 (rounded up). The monster player checks the Monster table (see "Monster table" below) to see how many SP a monster has. The amount of monster SP is never secret.
We recommend that players keep track of their SP with the help of a T10 (only one included). Whoever loses all SP in combat is defeated: but if a hero survives combat, no KP are lost. All injuries outside of combat are treated as normal. All SP of a hero is normally restored when the yellow marker on the sundial is moved.
Instead of STRIDSKORT, all combatants use a combat wheel and a colored marker (color does not matter): the hero uses the hero side up and the monster player uses the monster side up. Each combat round, all combatants place their marker on one of the four attributes on the wheel, but do not reveal which. In the first round, they may place the marker anywhere, but in following rounds the marker may only move one step in any direction.
The basic combat mechanic is the following: each attribute will hit the adjacent attribute to its right (in the direction of the arrow) but is hit by the adjacent attribute to its left.
Any combatant who chose an attribute that is hit loses SP instead of KP. Normally, each hit means -1 SP, but some monsters may inflict more than that. If two combatants chose opposite attributes, they both miss. If two combatants chose the same attribute, the higher attribute will hit the lower attribute – and the lower loses as many SP as the difference between the two. After hits are resolved, the combat round is over and the next one begins. You may choose not to move your marker at all.
Example 1: Rohan placed his marker on SF and the monster player chose TF: the monster is hit and loses 1 SP.
Example 2: Rohan placed his marker on RF, but so did the skeleton. Rohan has RF 9, and the skeleton has RF 4. The means that the skeleton loses 5 SP (9-5).
Flee
A hero may also flee during combat (providing it is possible) and declares this openly before the end of a combat round in which the opponent was hit. If this is the case, the opponent will not lose any SP at all this combat round – and if the hero does not lose any SP next round, the hero succeeds in fleeing.
If all combatants miss three combat rounds in a row, the monster flees (if possible) and combat is over.
Alternative Movement Rules
The alternative movement rules allow several heroes on the same space. In this scenario, heroes may cooperate (or oppose each other) as they like. The basic mechanics consist of two phases in a turn: a voluntary Movement phase and a possible Event phase.
In the Movement phase, all heroes may move in order to an adjacent space. Two or more heroes may choose the same space, but no one draws a room tile just yet. Attempts to pass a hinder (obstacle) is also handled in the Movement phase.
In the Event phase, all players on an empty space draw a random room tile from the bag in order – or trigger the effects if the space is not empty. This phase happens simultaneously if two heroes occupy the same space, apart from the Treasure chamber where turn order is as normal.
Example: Rohan (starting player) and Aelfric moved to the same empty space in the Movement phase. In the Event phase Rohan goes first, and the room tile he draws at random applies for both him and Aelfric. If the room tile states that he must draw a RUMSKORT too, this also applies for both heroes: Aelfric gets no Event phase of his own this turn.
These alternative rules (with a turn divided into two phases) allow two or more players to travel together and face dangers as a team. Therefore, if you use the alternative movement rules you should also use the alternative combat rules (previous page) that allow combat with or between several heroes at once.
Several Combatants
The alternative combat rules allow for combat between more than two combatants. Each player combatant needs a combat wheel, and a player does not have to hit another hero if they do not want to. All movements on the combat wheel are still hidden and may not be revealed beforehand. All hits apply, even though it means that one combatant will hit several opponents at once.
Most effects apply to all heroes at once on the same space (but each hero rolls separately for them). A few exceptions are: överfall (surprise attack), kryp (bug), dörrfälla (door trap), kistfälla (chest trap), and trampfälla (floor trap), where the effects only apply to the active player drawing the card. Överrumpling can be ignored completely: encounter a skeleton as usual. Every time a choice must be made, heroes occupying the same space need to decide who is making that choice (for example opening a container). Since each phase is simultaneous, there is no default way of determining who gets to pick up an item. The heroes need to agree on all choices: do bear in mind that disagreement might result in combat between heroes.
If the heroes combat each other, all equipment and all abilities apply as normal, unless something else is agreed upon before the game starts. In this way, some heroes are deadlier than others. The classification monster goes for all heroes in combat with each other: in all tables and in all rulings, a hero should count as an orc, unless the instructions specifically say otherwise.
A hero may pick up the items of a dead hero (unless the instructions say otherwise) if they were on the same space when the latter died. If they were not, the hero figure is removed from play and all cards that hero had are thrown.
Two or more heroes may move together in the catacombs: but if they get separated, they must both calculate their location (see "Bestämma läge" on page 29) and mark their respective direction with the direction arrow anew. After that, the two heroes will not run into each other again, until they both have ascended into Drakborgen once again.
Example: Rohan and Sigeir is in combat with two orcs, the total number of combatants is therefore four. Rohan moves to SF and Sigeir moves to TF. Rohan could hit Sigeir if he wants to but chooses not to. Orc 1 moves to TF and orc 2 moves to RF. Rohan hits orc 1 who will lose 1 SP, but Rohan is also hit by orc 2 and will also lose 1 SP. Sigeir and orc 1 have both moved to TF, which means that orc 1 will lose 1 SP (5 – 4 is 1).
One or several heroes may choose to not participate in combat, provided that at least one hero does partake in combat. The hero who chose not to participate cannot reenter mid-combat. However, the hero who opted out must continue the combat if the other heroes are defeated.
Unarmed Combat
In unarmed combat, a hero has a disadvantage: this means that the hero will not be able to hit at all if both combatants have chosen the same attribute. If both combatants chose the same attribute, and the hero has the higher attribute value, the hero will still lose 1 SP. If the monster has the higher attribute value, the hero will lose SP as normal.
Monster Table
In case a hero uses a ranged weapon or an ability to hit a monster before combat, the monster's SP will decrease with the same amount. Two orcs are handled as separate monsters in combat with the alternative combat rules, but the monster player only draws one MONSTERKORT (monster card).
| Monster | SF | VF | RF | TF | SP |
|---|---|---|---|---|---|
| Svartalv | 3 | 9 | 3 | 7 | KP |
| Bergstroll | 11 | 3 | 5 | 4 | KP+3 |
| Skelett | 5 | 6 | 4 | 8 | KP |
| Orch | 7 | 5 | 6 | 4 | KP |
| Jättespindel |
* see the instructions on the card
Example: Béla fires at a troll before combat, and it loses 1 KP. The monster player checks the MONSTERKORT (monster cards) and finds out that it has 2 KP, which will be reduced to 1 KP after loss of KP is resolved. A bergstroll has a number of SP that equals KP+3, which means that it has 4 SP when combat begins (1+3).
Room Tile Index
The index of room tiles (Förteckning över rumsbrickor) at the back of the booklet. The symbol named in brackets is the direction symbol on the room tile.
Drakborgen (basic game)
Chamber (black symbol): Draw a RUMSKORT. You may search a chamber with a black direction symbol.
Bottomless well: Do not draw a RUMSKORT. Instead, roll T12 against VF to see if you managed to jump in time. If you moved here from a secret door or through teleportation, you fail automatically. You may not search in a Bottomless well. Bottomless well does not count as a hinder (obstacle). Success: Continue your movement as normal on your next turn. However, you lose T6-2 random items. Failure: You fall. You are dead.
Debris: Do not draw a RUMSKORT, your turn is over. On your next turn, you may choose to go back, or to break through the Debris to pass. To break through, roll T12 against VF. Debris counts as a hinder (obstacle). You may not search Debris. Success: Continue your movement into a passage of your choice. Failure: You may not pass. Turn around or try to break through the Debris again on your next turn.
Corridor (yellow symbol): Do not draw a RUMSKORT. You may move again in the same turn (also known as "free turn"). You may not search a Corridor.
Trap room (red symbol): Do not draw a RUMSKORT. Instead, draw a FÄLLKORT (trap card). Once the effects of the trap are resolved, your turn is over. A Trap room only triggers in the turn it was placed: afterwards, this chamber is harmless. You may not search a Trap room. A Trap room does not count as a hinder (obstacle).
Dark chamber (blue symbol): Do not draw a RUMSKORT, your turn is over. In a Dark chamber, your torch fails, and you lose your sense of direction. On your next turn, you must roll T6 to find out which passage you end up in. You may not search a Dark chamber.
Rotating chamber: Do not draw a RUMSKORT. When you step into this chamber, it rotates 180 degrees. This rotation makes sure you will not be able to go back the same way. A Rotating chamber only rotates when it is placed on the game board: afterwards it will stay where it is. You may not search a Rotating chamber.
Bridge: Do not draw a RUMSKORT. A narrow bridge crosses a chasm. On your turn, you may attempt to balance across, or remain where you are. You may not search a Bridge. If you attempt to cross the Bridge, roll T10 against VF. If you carry too many items, you get a negative modification to your VF, according to the table below.
| Items carried | VF modification |
|---|---|
| 2–4 items | −1 VF |
| 5–8 items | −2 VF |
| 9+ items | −3 VF |
Success: Continue your movement on your next turn. Failure: You fall and lose T10 KP due to injury. Also, you lose T6-2 random items in the dark. Your turn is over. On your next turn, you must continue moving through the catacombs. You may not climb up from a Bridge, not even with a rope.
Drakborgen II
Descent (green symbol): Do not draw a RUMSKORT. A Descent marks a way down into the catacombs. On your next turn, you may choose to climb down into the catacombs, or continue to move as normal. You may not search a Descent.
Spider web (white symbol): Do not draw a RUMSKORT, your turn is over. On your next turn, you may choose to go back, or to cut your way through. To cut your way through, roll T12 against SF. You may not search a Spider web. Spider web counts as a hinder (obstacle). Success: Continue your movement into a passage of your choice. Failure: You may not pass. You are also stuck and must roll T12 against SF at the beginning of each turn until you succeed and are free to move.