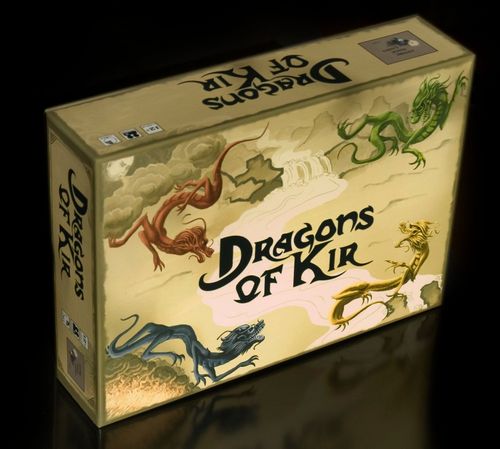
Dragons of Kir
Dragons of Kir Rulebook
Table of Contents
Table of Contents
Game Components
The Battlefield
The game is played on an 8x8 grid. An important feature of the battlefield is that there are no edges. All four edges wrap around, creating a continuous field of play.
The Dragons of Kir
Four Dragons of Kir have been set loose and are wreaking havoc on the land. Each turn they advance. Dragons are the only pieces that move in the game. When a dragon would move off the board, place it instead on the opposite side of the board facing in the same direction.
The War Tents
Each player has a war tent on the battlefield, which must be protected from the Dragons of Kir. War tents do not move and are vulnerable to a dragon attack from any side.
The Tiles
There are fourteen different tiles in the game, and four of each tile. Tiles are used to control the Dragons of Kir. There are three types of tiles: Impact Tiles, Proximity Tiles, and Dragon Tiles.
Game Setup
- Determine who will play first. The same player will play first each turn.
- Place one dragon, facing counter-clockwise in each of the four squares marked with a diamond.
- Place the war tents in opposite corners of the battlefield. Advanced Play: beginning with the first player, strategically place your war tent on the board.
- Arrange all of the tiles face down next to the board. Each player draws a hand of four tiles. Keep the tiles in your hand concealed from your opponent.
Playing the Game
Object of the Game
Outlast your opponent and force one of the Dragons of Kir to hit your opponent's war tent and you win.
Order of Each Turn
- Each player places a tile.
- Resolve any Dragon Tiles played.
- Move each dragon forward one square.
- Resolve any activated tiles.
- Remove any destroyed tiles.
- Each player draws a replacement tile.
Step 1: Place Tiles
Players place tiles on the board to influence the movement of the dragons. The first player always places the first tile each turn. You may place a tile in any unoccupied square on the board (Dragon Tiles are the only exception). A square is unoccupied if it does not contain a tile, a dragon, or a war tent. Pay attention to how the tile is oriented when you place it on the board.
Step 2: Resolve Dragon Tiles
Dragon tiles are activated immediately after both players have placed a tile, and before dragon movement.
Step 3: Move Each Dragon
All dragons move forward one square each turn. Dragon movement ends, unless a dragon activates a tile as a result of its movement. When placing a tile, remember to take into account this initial forward movement.
Step 4: Resolve Activated Tiles
Check to see if a dragon's movement has activated a tile. A dragon activates an Impact Tile when the dragon hits the Impact Tile head-on by moving into the Impact Tile's square from an approachable side. A dragon activates a Proximity Tile when the dragon moves into one of the Proximity Tile's squares of influence and is facing in the proper direction. Once a tile is activated by a dragon, it will move the dragon. A dragon moved by a tile cannot be affected by any other tile until the first tile's effect is complete. A tile can be activated by the initial forward movement of a dragon, or by subsequent movement caused by another tile. A dragon, in a single turn, can re-activate a tile, but no single tile can be activated twice in a row by the same dragon.
Step 5: Remove Destroyed Tiles
Tiles can be destroyed by the movement of the dragons. An Impact Tile is destroyed when a dragon enters from an unapproachable side of the tile, or enters the tile's square with its side. Proximity Tiles are destroyed when a dragon enters the same square as the Proximity Tile. Destroyed tiles are removed at the end of each turn, after all dragons have completed their movement.
Step 6: Draw a Replacement Tile
Each player draws a replacement tile to bring the number of tiles in their hand back to four.
The Tiles
Impact Tiles
A dragon activates an Impact Tile if it enters the same square as the Impact Tile, hits the tile head-on, and enters the square from an approachable side. Once activated, an Impact Tile will move the dragon. Impact Tiles have either one, two, three, or four approachable sides depending on the tile. There are six Impact Tiles: Monk, Samurai, Ronin, Single River, Two Rivers, Three Rivers.
Proximity Tiles
A dragon activates a Proximity Tile if it enters one of the tile's squares of influence, and is facing in a proper direction. Each Proximity Tile has a specific set of squares of influence, and once activated, will move the dragon. Proximity Tiles have influence in one, two, or all four directions depending on the tile. A Proximity Tile's squares of influence which would reach off the board, extend to the opposite side of the board. There are six Proximity Tiles: Watchfire, Wildfire, Wind, Storm, Lotus Flower, Lotus Pond.
Dragon Tiles
A Dragon Tile can only be placed on top of a dragon. Dragon Tiles resolve before any movement occurs. There are two Dragon Tiles: Dragon Breath, Dragon Lair.
Monk (Impact Tile)
The monk is used to ward off a dragon from any direction. This tile turns the dragon 180-degrees and deflects it in the opposite direction. All four sides of the monk are approachable. If a dragon hits the monk with its side, the monk tile is destroyed and removed from the game at the end of the turn.
Samurai (Impact Tile)
The samurai is used to deflect the dragon off the samurai's shield. This tile turns the dragon 90-degrees and propels it forward into the square adjacent to the samurai. The two shield sides of the samurai are approachable. If a dragon approaches the samurai from one of the two unprotected sides, or if a dragon hits the samurai with its side, the samurai tile is destroyed and removed from the game at the end of the turn.
Ronin (Impact Tile)
The ronin are used to deflect a dragon off either one of their shields. This tile turns the dragon 180-degrees and deflects it in the opposite direction. The two shield sides of the ronin are approachable. If a dragon approaches the ronin from one of the two unprotected sides, or if a dragon hits the ronin with its side, the ronin tile is destroyed and removed from the game at the end of the turn.
Single River (Impact Tile)
The single river is used to accelerate a dragon. The dragon will move through the river tile into the next square. Both sides of the single river are approachable. If a dragon moves into the single river tile's square from one of the two unapproachable sides, or if a dragon enters the river with its side, the river tile is destroyed and removed from the game at the end of the turn.
Two Rivers (Impact Tile)
The two rivers are used to turn a dragon 90-degrees. The dragon will move through the river and exit out of the waterfall side of the tile. The two river sides of the tile are approachable. If a dragon moves into the river tile's square from one of the two unapproachable sides, or if a dragon enters the river with its side, the river tile is destroyed and removed from the game at the end of the turn.
Three Rivers (Impact Tile)
The three rivers are used to turn a dragon 90-degrees or move it down stream. The dragon will move through the river and exit out of the waterfall side of the tile. Three sides of the river tile are approachable. If a dragon moves into the river tile's square from the single unapproachable side, or if a dragon enters the river with its side, the river tile is destroyed and removed from the game at the end of the turn.
Watchfire (Proximity Tile)
The watchfire is used to ward off approaching dragons. When a dragon moves into one of the watchfire's two squares of influence and is facing in a proper direction, the dragon is drawn around the tile, and turned 90-degrees. The dragon is considered to have entered only the squares in which it began and ended the movement caused by the watchfire. If a dragon moves into the same square as the watchfire, the tile is destroyed and removed from the game at the end of the turn.
Wildfire (Proximity Tile)
The wildfire is used to ward off approaching dragons. When a dragon moves into one of the wildfire's two squares of influence and is facing in a proper direction, the dragon is drawn around the tile, and turned 180-degrees. The dragon is considered to have entered only the squares in which it began and ended the movement caused by the wildfire. If a dragon moves into the same square as the wildfire, the tile is destroyed and removed from the game at the end of the turn.
Wind (Proximity Tile)
The wind is used to blow a dragon off course, or to propel a dragon forward. When a dragon moves into one of the wind's two squares of influence and is not facing directly toward the wind, the dragon is pushed one square further away. If a dragon moves into the same square as the wind, the tile is destroyed and removed from the game at the end of the turn. Dragons cannot be pushed backwards.
Storm (Proximity Tile)
The storm is used to blow a dragon off course, or to propel a dragon forward. When a dragon moves into one of the storm's eight squares of influence and is not facing directly toward the storm, the dragon is pushed one square further away from the storm. If a dragon moves into the same square as the storm, the tile is destroyed and removed from the game at the end of the turn. Dragons cannot be pushed backwards.
Lotus Flower (Proximity Tile)
The lotus flower is used to pull a dragon. When a dragon moves into one of the lotus flower's two squares of influence and is not facing directly away from the lotus flower, the dragon is drawn one square closer. If a dragon is drawn into or moves into the same square as the lotus flower, the tile is destroyed and removed from the game at the end of the turn. Dragons cannot be pulled backwards.
Lotus Pond (Proximity Tile)
The lotus pond is used to pull a dragon. When a dragon moves into one of the lotus pond's eight squares of influence and is not facing directly away from the lotus pond, the dragon is drawn one square closer. If a dragon is drawn into or moves into the same square as the lotus pond, the tile is destroyed and removed from the game at the end of the turn. Dragons cannot be pulled backwards.
Dragon Breath (Dragon Tile)
This tile is used to remove tiles in play before the dragons move. The Dragon Breath is placed on top of a dragon, and any tiles in the four squares adjacent to the dragon are destroyed. Remove the destroyed tiles and the Dragon Breath from the game after both players have placed tiles, and before moving the dragons.
Dragon Lair (Dragon Tile)
This tile is used to delay a dragon's movement. The Dragon Lair is placed on top of a dragon and prevents that dragon from moving or activating tiles this turn. Remove the Dragon Lair from the game at the end of the turn.
Tile Systems
Creating systems of tiles is a way to move a dragon further each turn. Dragons will continue to move until all possible interactions are resolved. Systems can be two tiles working together, or many tiles.
Tile Conflicts
Whenever a dragon activates more than one tile at the same time, you must determine which tile will move the dragon.
- Impact Tiles always have priority over Proximity Tiles.
- The nearest Proximity Tile always has priority over other Proximity Tiles.
- Equidistant Proximity Tiles pulling/pushing in different directions cancel each other out. This can give priority to a tile farther away.
- Equidistant Proximity Tiles pulling/pushing in the same direction: the tile in the direction the dragon will move is activated. Check to see if the second tile is activated as a result of the movement caused by the first.
Loops
A loop occurs when a dragon moves through a tile system and never comes to rest. If a dragon gets stuck in a loop, move the dragon through the loop stopping in the square where the loop begins to repeat. Move the dragon completely through the loop each turn. The dragon will remain in the loop until the loop is disrupted.
Loop example:
- The dragon moves forward one square.
- The wildfire is activated and moves and rotates the dragon.
- The wind is activated and pushes the dragon forward one square.
- The wildfire is activated and moves and rotates the dragon.
- The wind is activated and pushes the dragon forward one square.
- The dragon is stuck in a loop, and by rule, ends its movement in this square.
Winning
You win the game when a dragon destroys your opponent's war tent. A war tent is destroyed when a dragon enters the same square as the war tent. The dragon can approach from any side and hit the war tent head-on or with its side. The dragon does not have to end its movement in the same square as the war tent in order to destroy it. If both war tents are destroyed in the same turn, it does not matter whose was destroyed first, the game is a tie. If there are no tiles left to draw and both players hands have been emptied, continue moving dragons, and resolving and destroying tiles, to see if one or both of the war tents are destroyed. It is possible that both war tents will be destroyed in the same turn by the same dragon.