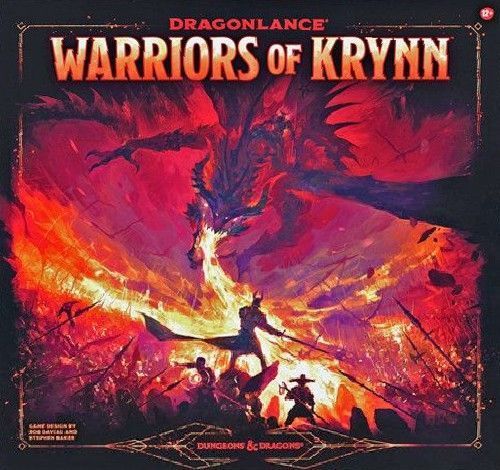
Dragonlance: Warriors of Krynn
Dragonlance: Warriors of Krynn Rulebook
Table of Contents
Table of Contents
Overview
Dragonlance: Warriors of Krynn is a cooperative battle game in which 3 to 5 players join the War of the Lance, with each person playing a hero who aids the valiant Alliance against the Dragon Queen's invading army. The war unfolds in a multiple-scenario campaign, with play progressing through 3 tiers—Recruit, Veteran, and Legendary—as the heroes take on greater challenges. In each of the scenarios, the heroes bolster troops, harry enemy units, and carry out side missions—all with the aim of overcoming the terrifying might of the Dragon Army.
The First Time You Play
Before playing for the first time, punch out the game's components and open the Recruit cards. Set aside the Veteran and Legendary cards and tokens for later use. You'll also want to read the rest of this rulebook.
Once you've set up the game, start playing with scenario 0, "Training Grounds," in the scenario book.
Playing through Scenarios
After scenario 0, the campaign's scenarios should be played in order. Each scenario tells you how it ends and provides you any special rules it requires. Depending on how well the heroes meet the scenario's objective, they can earn rewards that increase their capabilities the next time you play. At the end of each scenario, record the results in the Campaign Chronicle on the back of the scenario book, and take any honor cards earned for use in subsequent scenarios.
For scenarios 1-4, use only Recruit cards and tokens. For scenarios 5-8, add in Veteran cards and tokens. For scenarios 9-12, add in Legendary cards and tokens.
Turn Sequence
In every scenario, the heroes each take turns as they try to meet the scenario's objectives. When it's your hero's turn, you play through the following phases in order: (1) event phase, (2) action phase, (3) respite phase, and (4) battle phase. Those phases are detailed in the "On Your Turn" section (page 8). After your turn, play passes to the next player in clockwise order, and that player goes through the same phases.
The group keeps playing until you reach one of the scenario's end conditions. For more information on how to finish a scenario, see "Ending a Scenario" on page 11.
Combine with D&D: You can enhance Warriors of Krynn by playing it in concert with the Dungeons & Dragons roleplaying game adventure Dragonlance: Shadow of the Dragon Queen. "D&D Companion Adventure" on page 12 explains how to combine these experiences.
Battlefield Overview
In this game, the heroes maneuver around the battlefield as they race to complete missions, while the Dragon Army attempts to rout the Alliance defenders. In this sample battlefield, the Alliance is threatened by Dragon Army forces, as well as by a fire, a war engine, and a vile champion!
Diagram key:
- War engine card
- War engine token
- Adventure tile
- Objective token
- Barricade token (under a unit)
- Alliance Commander card
- Alliance Mounted unit marker
- Alliance Missile unit marker
- Alliance Foot unit marker
- Stop token
- Tactic token (on the Missile line)
- Commander card
- Flank token
- Battle tile
- Fire token
- Vile champion token
- Hero figure
- Wilderness token
- Dragon Army Foot unit marker
- Dragon Army Missile unit marker
- Dragon Army Mounted unit marker
- Skirmish die
- Battle die
- Key moment tracker
- Key moment marker
Setting Up a Scenario
Take the following steps when setting up a scenario (these steps refer to components described in the next few pages):
- Turn to the scenario's entry in the scenario book, then set up the battlefield tiles according to its diagram.
- Shuffle the Recruit vile champion tokens face down to make a pool. For each vile champion location shown in the scenario's diagram, place a random vile champion token on that tile. Turn the vile champion tokens face up as you place them.
- Set up the Alliance and Dragon Army commanders and units as shown in the scenario. Commanders and units may be either ready or shaken at the beginning of a scenario, and units sometimes start with barricade tokens underneath them.
- Create the event deck using the event cards listed in the scenario's entry, shuffle it, and place it near the battlefield face down. (Players may look at the event cards they are putting into the deck before shuffling it.)
- Shuffle the equipment deck, and place it near the battlefield face down.
- Sort the unit cards into 6 decks of each type (Foot, Missile, and Mounted for both the Alliance and the Dragon Army). Shuffle them individually and place them near the battlefield.
- Place the key moment tracker near the battlefield with the key moment marker on 0.
- Each player chooses a hero board and hero figure and takes a stress marker, then places their hero board in front of them and their hero figure on the Command Tent or Command Post tile. Each player begins the scenario with their stress marker on 0 on the stress tracker at the bottom of their hero board.
- Each player chooses class cards (as appropriate for the scenario's tier), places the cards in front of them, and takes the ability cards listed on the back of the class cards. (Ability cards form each player's hand of cards, which should be placed face up to be visible to all players.)
- Place any honor cards earned during the campaign face up near the battlefield.
- If the heroes lost the previous scenario, you start play with the loss bonus: Draw 2 equipment cards and give them to any player or players. Then, as a group, decide where to place 2 tactic tokens on any Alliance lines.
- Read the text in the scenario's "Starting the Scenario" section aloud, and learn the scenario's special rules. Choose a starting player, and the scenario begins.
Battlefield Components
Each scenario includes a list of the game components in play and a diagram of its battlefield. Other components may be put into play during the scenario.
If you run out of a type of token or marker, no more are available until some in play are removed. If the effect of a card or power can't be resolved in full, resolve it as much as possible. For example, if an effect says to apply 2 hits to a line that has only 1 unit, you would still apply 1 hit to that unit.
Tiles
Adventure Tiles
Adventure tiles represent areas where heroes might encounter boons, obstacles, and conflicts as they make their way around the battlefield. Only heroes, vile champions, and certain tokens may be placed on adventure tiles. Some adventure tiles have powers that heroes can activate (see "Initiate an Encounter" on page 9). When an effect causes an adventure tile to be flipped, transfer any tokens and figures on that tile to the new face-up side.
Battle Tiles
Battle tiles are regions that can become flanks of the battles between Alliance and Dragon Army units.
Each battle tile has 6 battle lines—3 for each side—on which units are deployed. Each battle line has space for 6 units. The image and the shapes on the battle tile note where to set up each type of unit on a battle tile (from the Dragon Army side to the Alliance side: Dragon Army Mounted, Dragon Army Missile, Dragon Army Foot, Alliance Foot, Alliance Missile, Alliance Mounted).
Markers and Tracker
Unit Markers
The Alliance and Dragon Army each have 3 unit types: Foot, Missile, and Mounted. Unit markers are limited to their respective battle lines on battle tiles—they can't move from line to line. Unit markers stay on their tile unless moved by certain effects.
Key Moment Tracker and Marker
The key moment tracker and marker track important narrative moments in a scenario. Each time a key moment occurs, move the marker farther along the track and read the next scenario entry listed in the scenario book.
Tokens
Barricade Tokens
Barricade tokens provide defense to units, both by absorbing hits that would apply to a unit on a barricade and by preventing any unit on a barricade from being shaken by the effects of cards and powers. Each unit can have only 1 barricade, and barricades can't be placed on spaces without units. Once a barricade has absorbed a hit, it is removed. Any card or power that would directly Shake a unit on a barricade has no effect on the barricade or the unit (see "Ready/Shaken," page 7, for the effect of Shaking a unit). If a unit on a barricade is removed directly by a power, the barricade is also removed.
Fire Tokens
A fire token occupies 3 unit spaces on half of a battle line. When a fire token is placed on spaces with units, those units are removed. Units can't be added to any space with a fire token. If a fire token would be placed on an Alliance line, choose where to place it. If a fire token would be placed on a Dragon Army line, the token must be placed so that it removes the fewest Dragon Army units possible.
Flank Tokens
A flank token states the relative position of that battle flank in a given scenario: far left, left, center, right, and far right. When the "Active" side is up, the battle tile it's on is the active flank.
Objective Tokens
Objective tokens are used differently depending on the scenario. Each scenario tells you what they represent and how they will be used.
Stop Tokens
Stop tokens indicate a tile has become a stop tile during a scenario (see "Stop" on page 8).
Tactic Tokens
Tactic tokens are added next to battle lines to represent a tactical advantage. Each tactic token on a battle line increases the combat strength of that line by 1 for its next fight. Once the line has fought, its tactic tokens are removed. Tactic tokens can't be added to a battle line with no units. If all the units on a line are removed, any tactic tokens on that line are also removed.
Vile Champion Tokens
Vile champion tokens represent servants of the Dragon Army who oppose the Alliance heroes. Vile champion tokens are found only on adventure tiles.
War Engine Tokens
War engine tokens represent fearsome Dragon Army weapons. Each appears on an adventure tile and is accompanied by a war engine card that explains its powers.
Wilderness Tokens
Wilderness tokens indicate that a tile has become a wilderness tile during a scenario (see "Wilderness" on page 8).
Cards
Commander Cards
In most scenarios, each side has a commander card assigned to each battle tile. A commander may be ready or shaken. Ready commanders have powers that activate before some battles. A commander's power affects only that commander's battle tile unless the power specifically says otherwise. The shaken side of an Alliance commander card shows the actions needed to Refresh that commander (see "Refresh a Shaken Commander" on page 9).
Equipment Cards
Equipment cards are single-use items. The timing for playing each piece of equipment is printed on the card. When a player uses an equipment card, it is removed. If all equipment cards are removed over the course of a scenario, the equipment deck remains out of play for the rest of that scenario. Heroes may transfer equipment to one another (see "2: Action Phase" on page 8).
Event Cards
Event cards are drawn at the start of each player's turn. They have an effect and then tell you about the battle that will occur that turn. For example, event cards can cause skirmishes, affect the number of units in a battle line, or move the battle to a different flank. Each scenario uses a particular set of event cards listed in the scenario book.
Honor Cards
Honor cards are earned by completing missions in scenarios. There are two types: reputations and medals. At the start of each scenario, all honor cards earned during previous scenarios are in play as a shared pool. Any player can use those honor cards as though they were ability cards (page 6) in that player's hand. Honor cards can be played only with correct timing. Once an honor card is used, it is removed until the beginning of the next scenario.
Unit Cards
The Alliance and the Dragon Army each have 3 unit card decks, 1 for each type of unit: Foot, Missile, and Mounted. Unit cards are revealed when a battle line becomes the attacking line during battle (see "Battle Phase" on page 10). They can affect the defending side's units and commanders, determining the number of battle dice rolled, the line that hits are applied to, and more.
War Engine Cards
War engine cards describe the powers of the Dragon Army's weapons, which are represented on the battlefield by war engine tokens. Keep a war engine card near its token for reference.
Dice
Battle Dice
Battle dice are used to resolve battles and conflicts. Each battle die has one or more of each of these faces:
- Single Hit. 1 hit
- Double Hit. 2 hits
- Woe. 1 hit to a unit on the attacking line or 1 stress to a hero
- Blank. No effect
During Battle. For an attacking Alliance battle line, hits are applied to the Dragon Army, while each Woe result is a hit applied to the Alliance battle line.
For an attacking Dragon Army battle line, hits are applied to the Alliance, while each Woe result is a hit applied to the Dragon Army battle line.
During a Conflict. Hits a player rolls count toward meeting or exceeding that conflict's difficulty (see "Initiating a Conflict" on page 8), while each Woe result causes the hero to take 1 stress.
Skirmish Die
The skirmish die is used to determine which battle lines will be involved in a skirmish (and whether commander powers will activate before the fight begins). The skirmish die's faces use these symbols:
- Foot. The Foot lines fight.
- Missile. The Missile lines fight.
- Mounted. The Mounted lines fight.
- Commander. The commander symbol appears above a battle line symbol to indicate that ready commanders' powers activate before the skirmish.
Building Your Hero
At the start of a scenario, you choose a hero figure, a hero board and stress marker, and a Recruit class card. One side of each hero board has the name and an illustration of a hero from the world of Krynn. Backstories for these heroes appear in the scenario book. Alternatively, you may use the nameless side of a hero board and your class card choice to represent any hero you imagine.
Whenever you start a new scenario, you may keep the same hero or build a new one.
Hero Board and Stress Marker
Hero boards include a reminder of actions you can take on your turn, as well as a stress tracker. As your stress changes, move the stress marker along the stress tracker. For Recruit-tier scenarios, your maximum stress is 4; for Veteran-tier scenarios, it's 5; and for Legendary-tier scenarios, it's 6. See "Stress" on page 8 for more details.
Class Cards
At the Recruit tier, you get your class's Recruit class card, which determines your hero's 2 mastered abilities, the 4 ability cards you will have in your hand, and the 3 class powers you will have access to.
At Veteran tier, you'll also get your class's Veteran class card, and at Legendary tier, you'll also get your class's Veteran and Legendary class cards. These cards will grant you additional starting ability cards and access to more class powers (see "Tiers of Play" on page 12).
Mastered Abilities
Your hero has 2 mastered abilities set by their class. Mastered abilities help you during encounters and conflicts you face in scenarios.
Class Powers
Class powers represent your hero's class-specific abilities. You may activate one of your hero's class powers by discarding an ability card. For example, a barbarian may discard a Constitution ability card to activate one of their Constitution-based powers or a Strength ability card to activate their Strength-based power.
Class powers can be used only at specific times. Those labeled "Action," like the barbarian's Awake power, can be activated during the action phase on your turn, at the cost of 1 action and the associated ability card. Those labeled "Response," like the Rage power, can be activated by discarding the associated ability card in the circumstance listed.
You can use each class power only once per turn, but you may use multiple different powers during the same turn. Unless a class power specifically states otherwise, it affects only the tile your hero is on when you use the power.
Ability Cards
Ability cards represent your hero's range of abilities. Some ability cards must be played during the action phase on your turn, and some can be played as a response on any player's turn if their requirements are met. An ability card's power affects the tile your hero is on. Ability cards can also be discarded to activate class powers.
Throughout the game, abilities use the colors shown on the cards and the following abbreviations:
- STR: Strength
- DEX: Dexterity
- CON: Constitution
- INT: Intelligence
- WIS: Wisdom
- CHA: Charisma
Key Terms
Action Timing
A card or power with action timing can be played during your turn's action phase. See "2: Action Phase" on page 8 for more details.
Active Flank
The active flank is the battle tile where units are presently locked in combat. A battle tile can become the active flank due to an event card or another effect. When a battle tile becomes the active flank, flip its flank token to the green Active Flank side. That tile remains the active flank until another event card or effect makes another tile the active flank. Only 1 tile at a time is the active flank. When a new tile becomes the active flank, flip the previous tile's flank token to the red side. The active flank can change many times over the course of a scenario.
Adjacent/Neighboring Tiles
Tiles are adjacent to each other if they touch. Battle tiles are neighboring if they are either adjacent to each other or separated from each other only by adventure tiles.
Battle Line
A battle line, or just line, is a row of units on a battle tile. The Alliance and the Dragon Army each have a line for each unit type: Foot, Missile, and Mounted.
Discard Pile
Each player has their own discard pile for ability cards they discard or play. Additionally, the event deck and each unit card deck have their own discard piles. A card in a discard pile is still in play—it hasn't been removed.
Free Action Timing
Some cards and powers have the words "Free Action" printed on them, which means that you can play them as free actions during your turn's action phase (see "Play Free Action Cards" on page 10).
Place a Hero
Some cards and powers let you place a hero on a tile instead of moving there. When placing a hero, ignore all the tiles between the hero's origin and the destination—any vile champions or stop tiles between those tiles don't affect the hero.
Ready/Shaken
Commanders and units on the battlefield are either ready or shaken. They show whether they are ready or shaken in the following ways:
Commanders. Each commander card has a ready side and a shaken side.
Units. When a unit is ready, the solid side of its marker faces up. When a ready unit takes a hit, it becomes shaken, and its marker is flipped over so the hollow side is up. If a shaken unit is hit, it is removed.
Refresh/Shake
Refreshing a shaken commander or unit makes it ready. When text says to Shake a commander or unit, make that commander or unit shaken.
Remove
When a card or an object is removed, it is no longer considered to be in play or on the battlefield. When units are removed, they return to the pool of available unit markers that can be added to the battlefield. When non-event cards are removed, they return to play at the beginning of the next scenario unless an effect returns them to play sooner.
Response Timing
Some cards and powers have the word "Response" printed on them, which means that they may be used only in response to certain conditions. If a card or power must be played as a response, it states the condition that allows it to be played. For example, several cards and powers can be played only "At the start of battle" or "After battle dice are rolled."
Many cards and powers have the response timing "After battle dice are rolled." A hero can use them after battle dice are rolled in a conflict, in a battle, or due to a commander power, as long as the hero is on the affected tile. A hero can play these cards and powers after dice are rolled but before the results are resolved.
Reveal
To reveal a card, turn it over so its text is visible to all players, resolve its effects, and place it on top of the discard pile.
Stop
Some adventure and battle tiles contain an obstacle represented by either a stop symbol printed on the tile itself or a stop token placed on the tile. If you move to a tile that has a stop symbol or token on it, you must stop moving until your next turn, unless an effect allows you to cover the symbol or remove the token.
A tile can't be both a stop and a wilderness tile. If an effect would add a stop token to a tile with a wilderness symbol or token on it, the stop token should cover the wilderness symbol or replace the wilderness token.
Stress
When a hero expends effort or something goes wrong, they take stress. For example, a hero might take stress due to a Woe result or leaving a tile with a vile champion on it. When a hero's stress changes, move their stress marker higher or lower by the specified amount. Once a hero has reached their maximum stress, they must remove 1 card from their hand per additional stress they would take.
If a hero would take stress beyond their maximum and they have no cards in their hand, the scenario immediately ends in a loss.
Wilderness
A tile with a wilderness symbol printed on it or a wilderness token on it is a wilderness tile. A tile can't be both a stop tile and a wilderness tile. If an effect would add a wilderness token to a tile with a stop symbol or token on it, the wilderness token should cover the stop symbol or replace the stop token on that tile.
On Your Turn
A player's turn progresses through 4 phases in order.
- Event Phase: Reveal and resolve event cards.
- Action Phase: Use your actions.
- Respite Phase: Reduce your stress or regain ability cards, if possible.
- Battle Phase: Resolve this turn's battle.
1: Event Phase
Reveal the top card of the event deck and follow the instructions in the box labeled "Right Now" before doing anything else. Some event cards tell you to reveal another event card and resolve its "Right Now" text. When that happens, reveal the next event card and resolve its "Right Now" text. Continue until you reveal an event card with a box labeled "Battle Phase" at the bottom—this box will let you know the kind of battle that will occur in the battle phase. When you have resolved that card's "Right Now" text, the event phase ends.
Key Moments
Each scenario's event deck contains the Key Moment event card. When this card is revealed, advance the key moment tracker by 1, check the table in the scenario's "Key Moments" section to find the corresponding scenario entry, then look it up in the "Scenario Entries" section of this rulebook and follow its instructions.
2: Action Phase
During each of your turns, you get 4 actions you can use during the action phase. You may spend actions on any combination of actions from among those below. You can take the same action more than once. Additionally, you can play cards with free action timing. Once you have taken all the actions you wish to take and played all the free action cards you wish to play, the action phase ends.
Activate a Class Power
You may spend 1 action and discard the required ability card to activate one of your hero's class powers if that power has action timing (see "Class Powers" on page 6).
Initiate a Conflict
Conflicts are challenges that involve risk, such as trying to defeat a vile champion or complete a dangerous scenario-specific task. You can initiate a conflict if your hero is on the same tile as a vile champion or on a tile specified by the scenario.
Each conflict specifies a numerical difficulty and an ability. A vile champion's difficulty and an associated ability are shown on its token, while the difficulty and any associated abilities of a scenario-specific conflict are noted in the scenario. A conflict's difficulty is reduced by 1 if the specified ability is one of your hero's mastered abilities. Initiating a conflict requires spending at least 1 action.
To succeed in a conflict, you must roll hits on the battle dice equal to or greater than the conflict's difficulty. You start with 1 battle die to roll during the conflict. You may spend any number of your remaining actions and discard any number of ability cards of the specified type to add that many dice to your dice pool—the total number of dice you roll during the conflict.
Once your dice pool is set, roll the dice and count the hits. If the hits equal or exceed the difficulty, you succeed. If you defeat a vile champion this way, remove it. If you roll more hits than the difficulty against a vile champion, you also draw 1 equipment card. If you roll fewer hits, you fail, but you may spend 1 or more actions to try again.
Example: Initiating a Conflict. You are playing a Fighter, and you initiate a conflict against a Hill Giant, a vile champion whose difficulty is 3 and whose associated ability is Constitution.
- You initiate the conflict by spending 1 action. You have 1 battle die.
- Because your hero has Constitution as a mastered ability, the vile champion's difficulty is automatically reduced from 3 to 2.
- You spend 1 additional action and discard a Constitution ability card to gain 2 more dice for your pool.
- You roll a Single Hit, a Double Hit, and a Woe for a total of 3 hits (see "Battle Dice" on page 5).
- You win the conflict, and the vile champion is removed. You draw 1 equipment card because you exceeded the difficulty. Because of the Woe result, your hero takes 1 stress.
Initiate an Encounter
Encounters are the heroes' interactions with a scenario's locations, objectives, and characters. You can initiate an encounter if your hero is on the same tile as the thing you seek to encounter.
You may not initiate an encounter on a tile that has a vile champion on it. You may initiate more than 1 encounter during your turn, but you may not initiate the same encounter more than once during the same turn. There are three kinds of encounters—Activate a Tile's Power, Refresh a Shaken Commander, and Examine an Objective, each of which is described below.
Activate a Tile's Power
Each power specifies an action cost and an ability. This cost is automatically reduced by 1 if the specified ability is one of your hero's mastered abilities. You may discard any number of ability cards of the specified type to reduce the action cost by that amount. The action cost can't be reduced to less than 1 action.
Example: Activating a Tile's Power. You are playing a Fighter, and you initiate an encounter to activate the Mine Entrance tile's power, whose action cost is 3 and whose associated ability is Constitution.
- Because your hero has Constitution as a mastered ability, the action cost is automatically reduced from 3 to 2.
- You discard a Constitution ability card to reduce the action cost from 2 to the minimum cost of 1 action.
- You spend 1 action to activate the Mine Entrance tile's power.
Refresh a Shaken Commander
If you're on a tile with a shaken Alliance commander, you can Refresh that commander. The commander card's shaken side specifies an action cost to refresh the commander and an associated ability. This cost is automatically reduced by 1 if the specified ability is one of your hero's mastered abilities. You may discard any number of ability cards of the specified type to reduce the cost by that amount. The cost can't be reduced to less than 1 action.
Examine an Objective
You may spend 1 action to initiate an encounter with a scenario objective (represented by an objective token as specified in the scenario book). When you do, refer to the scenario to find out what happens next.
Move Your Hero
Moving your hero to an adjacent tile costs 1 action.
Tiles Connected by Roads
Some tiles have roads, which can connect to roads on other tiles. Yellow pointers at the edges of tiles show where connections are available. When you spend an action to move your hero onto a tile with a road, you may move along the road to any tile along the road without spending additional actions. In the example in the rulebook, you could move along the road from the far left adventure tile to the battle tile without spending more actions. The road ends there, so you'd have to spend another action to move to the adventure tile on the right.
Stop Tiles
If you move to a tile that has a stop symbol or token on it, you must stop moving, even if you're moving along a road. Unless an effect allows you to remove the stop token or cover the stop symbol, you can't move again until your next turn. However, you may still play a card or activate a power that places your hero on a different tile (see "Place a Hero" on page 7).
Vile Champions
If you move off a tile with 1 or more vile champions on it, even if traveling by road, you take 1 stress for each vile champion on that tile.
Enemy Territory
You can't move from the Dragon Army's side of a battle tile to an adjacent adventure tile; you must use another route.
Play Free Action Cards
Ability, equipment, and honor cards with free action timing can be played as free actions. These cards must be played during the action phase of your turn, but they don't count toward your total of 4 actions.
Put Out a Fire
You may spend 1 action to remove a fire token from the tile your hero is on.
Transfer Equipment
On your turn, you may spend 1 action to either give an equipment card to another player or receive an equipment card from another player. In either case, the other player's hero must be on the same tile as your hero, and only the player whose turn it is spends an action.
3: Respite Phase
During the respite phase, if your hero is on a tile with no Dragon Army units or vile champions on it, you may take respite: either reduce your hero's stress by 2 or return 2 ability cards from your discard pile to your hand.
If you still have actions left, you can take respite again for each remaining action. For example, if you have 1 action left, you can take respite a second time, allowing you to do one of the following during this phase: return 4 ability cards to your hand, reduce your stress by 4, or regain 2 ability cards and reduce your stress by 2.
4: Battle Phase
Each turn ends with a battle on the active flank—either a skirmish (1 battle line from each side fights) or an all-out battle (all 3 pairs of lines fight, one after the other). The kind of battle is set by the last event card revealed during the event phase.
- Battle Starts: Activate class powers or play cards.
- Activate commander powers.
- Resolve fights between lines.
- Update controlled battle tiles.
- End the turn.
If the battle is a skirmish, roll the skirmish die before the start of battle. If you roll the Foot, Missile, or Mounted symbol, only that line fights. If you roll the Foot, Missile, or Mounted symbol plus the commander symbol on the same face, commander powers may also come into play (see "Activate Commander Powers" on page 10).
Battle Starts: Activate Class Powers or Play Cards
First, heroes on the active flank may activate class powers or play cards if those powers or cards have one of the following response timings: "At the start of battle," "At the start of a skirmish" (if the battle is a skirmish), or "At the start of an all-out battle" (if the battle is an all-out battle). Heroes can use as many eligible cards or powers as they want in any order.
Activate Commander Powers
Next, activate the commander powers of ready commanders on the active flank, depending on the type of battle:
All-Out Battle—activate if instructed to by the last event card's "Battle Phase" text.
Skirmish—activate if the skirmish die's result included the commander symbol.
If commanders on both sides are ready, activate the Dragon Army commander's powers first.
Resolve Fights between Lines
Perform the following steps for each line that's fighting. If the battle is an all-out battle, all 3 lines fight in the following order: Foot, Missile, then Mounted (from the inside of the battle tile to the outside).
1: Determine Combat Strength
Determine the combat strength of the 2 lines that will fight. To do this, add the number of units (ready or shaken) on that line to the number of tactic tokens on that line (see page 4 for how tactic tokens work). The line with the greater total is the attacking line. If the lines' combat strength is equal, the Dragon Army's line is the attacking line. Once the combat strength of a line is determined, remove any tactic tokens on that line.
2: Reveal a Unit Card
Reveal a unit card from the deck matching the attacking line's unit type. If that line's unit deck is empty, shuffle its discard pile to form a new unit deck first.
When the unit card is revealed, any hero on the active flank may play cards and activate powers with the response timing "When a unit card is revealed." Once any responses have been resolved, resolve the unit card and put it in the corresponding discard pile.
3: Roll Battle Dice and Apply Hits
Apply hits according to the unit card. A unit card states whether to apply a certain number of hits or to roll battle dice. The unit card also states which of the defending side's lines takes any hits that are rolled (for example, an Alliance Missile line might apply its hits to a Dragon Army Mounted line). Once hits have been applied to the defending line, any hits from Woe results are applied to the attacking line. If a unit card says hits may be applied to any line, the hero whose turn it is decides which defending line to apply them to.
Use these guidelines when hits are applied:
- Hits to a line are applied to its barricades, if any, first. After a barricade has absorbed a hit, it is removed. Any remaining hits are applied to that line's units.
- A ready unit that takes 1 hit is shaken.
- A shaken unit that takes 1 hit is removed.
- Heroes on the active flank may choose to absorb hits instead of units or barricades. For each hit they absorb, a hero takes 1 stress.
- Apply hits to a line until the hits have all been applied or no units remain on that line.
- If a unit card is targeting a line with no units, it doesn't apply hits to that line, but any other effects still happen.
Update Controlled Battle Tiles
A tile becomes controlled by one side either when all the opposing side's units are removed from that tile or when all the opposing side's units on that tile are shaken.
When a tile becomes controlled, remove all commanders from that tile. Then remove all shaken units from the defeated side. Finally, move that tile's flank token and 1 unit of each type from the victorious side to a neighboring battle tile (for example, the Center Flank token would move to either the right or left flank along with a Foot unit, a Missile unit, and a Mounted unit from the victorious side). Once control is established, war engines can't add units or tokens to the controlled tile, and any power that would affect that tile is ignored.
When the Dragon Army takes control of a battle tile, add a stop token to that tile. Then check the scenario book to find the scenario entry listed under "Dragon Army Control," locate that entry in the "Scenario Entries" section that starts on page 13, and read it aloud. The events of a scenario entry can cause the scenario to end in a loss.
As tiles become controlled, uncontrolled battle tiles may gain multiple flank tokens, so they're more likely to be the active flank on future turns. It's possible for the entire battle to focus on a single tile that holds all the flank tokens.
If all the battle tiles become controlled and the scenario hasn't ended in a loss, the scenario immediately ends. The outcome depends on which side controls more tiles.
| Controls More Tiles | Outcome |
|---|---|
| Alliance | Win |
| Dragon Army | Loss |
| Tie | Hold |
End the Turn
The turn ends once the battle has been resolved and any controlled battle tiles have been updated. If you revealed the Key Moment event card during the event phase, shuffle the event discard pile (including the Key Moment card) and add the pile to the bottom of the event deck. Play then passes to the player on the left.
Ending a Scenario
A scenario always ends when one of the following occurs:
- The final key moment is read.
- The Dragon Army takes control of too many battle tiles (set by the scenario's "Dragon Army Control" section).
- A player has no ability cards left when their hero's stress would increase beyond the maximum (automatic loss).
- All the battle tiles become controlled (outcome varies).
Each scenario also has one or more scenario-specific end conditions, such as completing the objective.
Aftermath
If the scenario didn't end in an automatic win, hold, or loss, check the scenario's "Aftermath" section to see how the heroes and the Alliance fared—each scenario has its own criteria. The heroes might earn honor cards depending on the outcome. Record the outcome and any honor cards earned on the Campaign Chronicle in the scenario book. Keep honor cards the heroes have earned separate from the other cards in the storage tray between scenarios.
Win
The heroes gain a reputation card set by the scenario and 1 medal card chosen from those available.
Hold
The heroes gain a reputation card set by the scenario.
Loss
At the beginning of the next scenario, the heroes will draw 2 equipment cards and place 2 tactic tokens.
Campaign Chronicle
After each scenario, update the Campaign Chronicle on the back cover of the scenario book. At the start of each scenario, check this record to see what honor cards are in play at the start of the game, and whether the players should start with extra equipment and tactic tokens due to a previous loss.
Tiers of Play
The campaign has 3 tiers of play: Recruit, Veteran, and Legendary. The first 4 scenarios of the campaign are the Recruit tier, with the Veteran and Legendary components removed. When the heroes reach the latter tiers, those components are added into the game, and other aspects of game play change as well.
Veteran Tier (Scenarios 5-8)
At Veteran tier, add the Veteran class cards, unit cards, war engine cards, and commander cards to the game.
At the start of each Veteran-tier scenario, you get your class's Veteran class card in addition to your Recruit class card. You can use the class powers of both. Some class powers at the Veteran tier require you to remove ability cards rather than just discarding them.
Your maximum stress increases to 5, and you start with 6 ability cards: the 4 shown on your Recruit class card and the 2 on your Veteran class card.
Veteran Vile Champions
Two vile champions are introduced at the Veteran tier: the Aurak Draconian and the Wyvern. Veteran vile champions are added only by effects that identify them by name, never by effects that add a randomly chosen vile champion, and they are never shuffled into the pile of Recruit vile champions. For each Veteran vile champion on a tile that a hero moves off, the hero takes 2 stress.
Your Valor Is Known
At the start of each Veteran- or Legendary-tier scenario, count the honor cards earned during the campaign. Each scenario specifies a number of honor cards that represents drawing the Dragon Army's attention. If the heroes have earned at least that many honor cards, the Dragon Army's strength increases for that scenario. Each scenario also specifies an even greater number of honor cards to signify that the Dragon Army considers the heroes a serious threat. If the heroes have earned at least that many honor cards, add the Your Reputation Precedes You event card (40) to the event deck at the start of the scenario.
Legendary Tier (Scenarios 9-12)
At the Legendary tier, add the Legendary class cards, unit cards, war engine cards, and commander cards.
At the start of each Legendary-tier scenario, you get your Legendary class card in addition to your class's Recruit and Veteran cards. You can use the class powers of any of your class cards.
Your maximum stress increases to 6, and you start with 8 ability cards: the 4 shown on your Recruit class card, the 2 on your Veteran class card, and the 2 on your Legendary class card.
Legendary Vile Champions
Two vile champions are introduced at the Legendary tier: the Death Dragon and the Red Dragon. Legendary vile champions work similarly to Veteran vile champions, but they also make their tile a stop tile, and they have event cards that add them to the battlefield.
D&D Companion Adventure
This game is designed to work with the D&D adventure Dragonlance: Shadow of the Dragon Queen. Dungeon Masters can use this game to play through that adventure's battles on a grand scale. The adventure explores how results from this game carry over into D&D. Players are encouraged to narrate their turns as they would in D&D and can use their characters' minis instead of the hero figures provided in this game.
Role of the Dungeon Master
If you are a Dungeon Master including this game in your D&D adventure, you can participate in playing this game's scenarios in two ways: you can play a hero (as long as the total number of players is 5 or fewer), or you can bring the role of Dungeon Master to this game by reading narrative text and scenario entries and by rolling dice and revealing cards for the Dragon Army.
Portraying Player Characters
The details of D&D characters are abstracted in this game as ability cards and class powers—this keeps the focus on the epic battles being played out. To approximate D&D characters, encourage players to choose class cards that align with their D&D character's class features.
At a DM's discretion, characters might further customize their hero by swapping their ability cards. Record whatever adjustments players make to their class cards to keep them consistent between scenarios.
Scenario Entries
Not included: the rulebook's "Scenario Entries" section (beginning on p. 13) was not part of the source scan and is therefore not transcribed here.