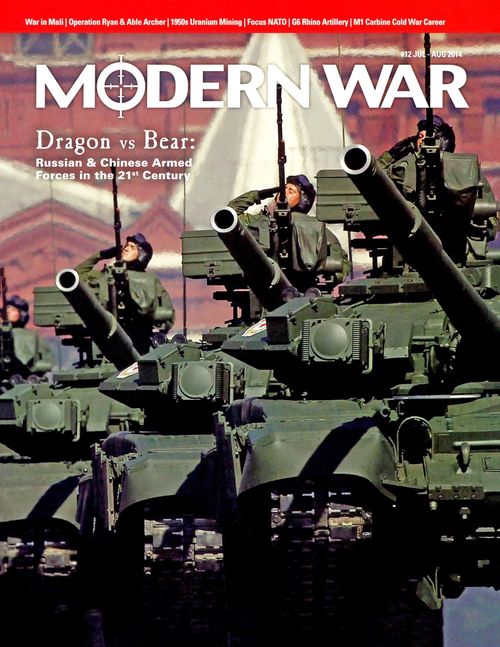
Dragon vs Bear: China vs Russia in the 21st Century
Dragon vs Bear: China vs Russia in the 21st Century Rulebook
Table of Contents
Table of Contents
- 1.0 Introduction
- 2.0 Components
- 3.0 Initial Deployment
- 4.0 Sequence of Play
- 5.0 Hyperwar
- 6.0 Reinforcements
- 6.1 Reinforcements Defined
- 6.2 Reinforcement Pools
- 6.3 Non-Drawn Reinforcements
- 6.4 Reinforcement Placement
- 6.5 Chinese Placement
- 6.6 Russian Placement
- 6.7 North Korean Placement
- 6.8 Mongolian Placement
- 6.9 Coalition Placement
- 6.10 Hyperwar and WMD Strikes
- 6.11 Incidental Requirements
- 6.12 Eliminated Units
- 7.0 Reorganization
- 8.0 Land Movement
- 8.1 Movement Phase(s)
- 8.2 Movement Allowances
- 8.3 Hyperwar Movement
- 8.4 General Movement Procedure
- 8.5 Movement Restrictions/Prohibitions
- 8.6 Movement Limitation
- 8.7 Minimum Movement
- 8.8 Zones of Control
- 8.9 Effects of Terrain on Movement
- 8.10 Prohibited Terrain
- 8.11 Road & Railroad Movement
- 8.12 Trains
- 9.0 Ground Unit Stacking
- 10.0 Zones of Control (ZOC)
- 11.0 Combat
- 12.0 Combat Results
- 13.0 Retreat
- 14.0 Pursuit (Advance After Combat)
- 15.0 Logistics
- 16.0 Airpower
- 17.0 Air Combat Operations
- 18.0 Interception & Air-to-Air Combat
- 19.0 Fog of War
- 20.0 Off Map Areas
- 21.0 Crossing Borders
- 22.0 Victory Conditions
- 23.0 Airmobile Operations
- 24.0 Amphibious Operations
- 25.0 Other Special Units
- 26.0 Logistics Units
- 27.0 Weapons of Mass Destruction (Optional Rule)
- 28.0 Scenario Contingencies
1.0 Introduction
Dragon vs Bear: China vs Russia in the 21st Century is a wargame based on the premise that the People's Republic of China and the Russian Federation go to war sometime in the twenty-first century. The game is an update of SPI's East Is Red game, specifically showing the developments in warfare that have occurred in the intervening decades, and projected out to the near future. Both side's armed forces are smaller than they were during the Cold War, but have access to modern high-tech weapons and tactics, termed in the game as Hyperwar.
Dragon vs Bear: China vs Russia in the 21st Century is operational level with two players: One for China and one for Russia. It puts players in the position of having to utilize the full spectrum of military operations, which also include weapons of mass destruction.
The game is played in scenarios, each postulating different reasons for the war, as well as different levels of mobilization. You win by defeating the enemy and gaining national objectives.
1.1 Game Assumptions
The game emphasizes land and airpower. Naval warfare is factored out on the premise that the Chinese and Russian navies would cancel each other out for the period that the game scenarios covered.
Conventional land and airpower are treated in a generally similar manner. This is in part because of the lack of sophisticated higher level airpower doctrines in the Chinese and Russian armed forces, but also because of the range and lethality of modern munitions: firepower is going to be the same whether delivered by a multiple rocket launcher system, an attack helicopter, or a jet bomber. The real difference will come in with the application of Hyperwar capabilities. Hyperwar is inherent in certain unit types, and can be assigned to others via Hyperwar strikes.
2.0 Components
2.1 Players
There are two sides in the game: China and Russia. Additionally, other countries may be involved as allies of these powers: Mongolia, North Korea, and even a US-Coalition.
2.2 Game Equipment
A complete game of Dragon vs Bear: China vs Russia in the 21st Century includes: A game map, this rules set and a sheet of die-cut counters. Players will also need to provide themselves with a six-sided die, plus several wide mouthed opaque containers, such as coffee mugs, to serve as unit pools. Pencil and paper is also useful.
2.3 The Game Map
The map shows northeast Asia. A hexagonal grid has been superimposed on it to regularize the movement of units and to delineate terrain types. Units are placed in hexes and must remain within hex boundaries at all times. The game map is divided into "countries". These include China (People's Republic of), the Russian Federation, Mongolia and North Korea.
China is divided into two Military Regions: Beijing and Shenyang. These are used for initial deployments only. China is otherwise considered to be one country.
2.4 Off Map Areas
Each side has an off map Area. For China, this represents the areas to the southwest of the map. For Russia, this represents areas to the west and south. These areas contain various boxes for use during game play, listed as follows:
Hyperwar/WMD Strikes Available. This is a convenient place to keep Hyperwar and WMD Strikes until they are used.
Logistics Units Box. This is a convenient place for supply units which can be used in the scenario.
Reorganization Units Box. This is a convenient place for units which are used for the Reorganization rule (see 7.0).
Reinforcement Units Box. This is a convenient place for units which are assigned as reinforcements by a scenario.
2.5 Counters
There are three basic types of counters in the game:
Units: Units represent ground and air forces.
Strikes: Strikes represent Hyperwar (modern and near future technologies) and weapons of mass destruction (WMD, nuclear, chemical, biological and EMP weaponry).
Function Counters: Function counters are used to record various game functions and display information.
2.6 Unit Types
The following types of NATO symbols or other icons are defined as follows:
Ground Combat Units
Support Units: Airbase; Logistics.
Air Units: Attack; Fighter; 5th Generation Aircraft; Long Range Aviation.
Strikes: Hyperwar; Weapon of Mass Destruction.
2.7 Information on Combat Units
Each ground combat unit has the following information:
Airmobile Movement. These units have an aircraft icon next to their movement allowance, and are governed by separate movement rules.
Hyperwar Capable. These are units with inherent Hyperwar capabilities, and are printed with a plus (+) symbol.
2.8 Information on Support Units
Support units are printed with different symbols, defined as follows:
Airbases. The circled number is the number of units which can be based on it.
Logistics unit. The circled number is the support radius.
2.9 Back-Printing
Logistics units are backprinted with their Base status.
2.10 Information on Strikes
Strike counters are printed as follows:
WMD (Optional). WMD represents weapons of mass destruction (nuclear, biological, chemical). The counters are printed on both sides, with their front side showing them as deployable; the reverse side showing them as contamination after usage.
Hyperwar. Hyperwar represent advanced weapons and networking systems, such as precision guided munitions, cruise missiles, cyberwar, EW, sensors, etc.
2.11 Unit Sizes
Unit sizes represent the organizational size, listed as follows:
XXX = Russian Operational Maneuver Group or Chinese Group Army (larger than a division).
XX = Division (larger than a brigade).
Note: In some cases, divisions represent two brigades combined for game purposes.
X = Brigade or detachment.
2.12 Abbreviations on Units
Chinese Units
- BMR: Beijing Military Region
- SMR: Shenyang Military Region
- SLCU: Snow Leopard Commando Unit
Russian Units
- EMD: Eastern Military Direction
- GR: Guards Recon
- Irk: Irkutsk
- MVD: Ministry of the Interior
- OMON: Elite security troops
- PacF: Pacific Fleet
- Tyn: Tynda
- VVS: Air Force
Mongolian Units
- RD: Rapid Deployment
North Korean Units
- PDC: Pyongyang Defense Command
- RB: Reconnaissance Bureau
Coalition Units
- JF: Joint Force
- JSOC: Joint Special Operations Command
2.13 Unit Colors
- Chinese: Red
- Russian: Blue
- Mongolian: Purple
- North Korean: Yellow
- Coalition: Green
2.14 Markers
The following counters are used as explained:
Turn: The Turn marker is used to record the current game turn on the turn track on the map.
Crash: Crash markers are used to designate cities and units whose infrastructure has collapsed.
Insurgent: Insurgent markers are used to represent areas with large numbers of guerrillas or other paramilitary forces.
2.15 Game Scale
Each hex on the map represents 40 miles (~64 kilometers) from side to opposite side. Each game turn represents anywhere from three days of intense operations to a month of refitting.
3.0 Initial Deployment
3.1 Starting the Game
The game is played in scenarios, each of which covers a different potential starting set up. Players should first agree which scenario they'll play and the side each will command. They then place the units for their side as listed under the initial deployment rules in the order listed. Play starts with the first turn of the scenario and continues until its final turn, one player wins an automatic victory or one player concedes.
3.2 Set Ups
The scenario instructions describe set ups in terms of unit types and combat factors. Specific unit historical identifications don't matter (for example, if a scenario calls for the Russians to set up a mechanized brigade in a specific location, it could be the Russian 1st or 2nd, etc). Units may be set up anywhere in their designated areas. Units may set up in enemy zones of control, but units may not be set up over stacked.
3.3 Friendly Forces
A player may control more than one national contingent. Except where specifically noted, all units on each side are friendly to each other, meaning they may stack and conduct combat together, use each other's supply, etc. Specific rules may alter this, however.
3.4 First and Second Player
Before beginning the game, determine who will be First Player. This is done as follows:
Each player secretly bids a number of Hyperwar markers from zero up to the number which is listed per Initial Deployment. Then, reveal the bids. The higher bidding player is First Player, the other is Second. In the event of a tie, each player rolls a die and the higher rolling player is First Player. Both players then return the bid Hyperwar markers to their own Reinforcement Pool.
Then, the First Player takes all of the actions designated as occurring during a "First Player" phase, while the Second Player takes all the actions designated as occurring during a "Second Player" phase.
Note: Some scenarios may give a shock advantage to the first player.
3.5 Control
The terms "control" and "occupy" are used somewhat interchangeably in the rules when referring to hexes. They mean the same thing: To "control" a hex, a player must have a ground unit in physical occupation of it. If a player's units enter a hex and then all leave, that player no longer controls that hex. This is so regardless of which side of the front line the hex was on.
4.0 Sequence of Play
4.1 Game Turns
The game is played as a series of game turns. Each game turn is composed of a series of step called the "sequence of play." Players must conduct these steps in the order stated under rule (4.2).
4.2 Sequence of Play
Each game turn is composed of the following:
1) Mobilization Phase (6.0)
a. The First player takes reinforcements as directed by the scenario.
b. The Second player takes reinforcements as directed by the scenario.
2) First Player Initial Impulse
a. First Player Reorganization Phase (7.0). The First Player may reorganize units and flip Logistics units from their mobile sides to their logistic base sides, and vice versa.
b. First Player Movement Phase (8.0), (23.0), (24.0). The First Player may move his units.
c. First Player Air Phase (16.0). The First Player conducts aerial unit movement.
d. Second Player Interception Phase (18.0). The Second Player conducts any Interceptions.
e. First Player Combat Phase (11.0), (17.0). The First Player conduct attacks with ground and air units.
f. Mutual Air Return Phase. All air units flown during phases "c" and "d" must now return to bases.
3) First Player Follow-on Impulse (5.0)
The First Player conducts another impulse, following phases "2a" through 2"f" above. Only units which are Hyperwar capable may conduct actions in the Follow-on Impulse.
4) Second Player Initial Impulse
a. Second Player Reorganization Phase (7.0). The Second Player may reorganize units and flip Logistics units from their mobile sides to their logistic base sides, and vice versa.
b. Second Player Movement Phase (8.0), (23.0), (24.0). The Second Player may move his units.
c. Second Player Air Phase (16.0). The Second Player conducts aerial unit movement.
d. First Player Interception Phase (18.0). The First Player conducts any Interceptions.
e. Second Player Combat Phase (11.0), (17.0). The Second Player conduct attacks with ground and air units.
f. Mutual Air Return Phase. All air units flown during phases "c" and "d" must now return to bases.
5) Second Player Follow-on Impulse (5.0)
The Second Player conducts another impulse, following phases "4a" through "4f" above. Only units which are Hyperwar capable may conduct actions in the Follow-on Impulse.
6) End of Turn Phase
a. Victory Check Step (22.0). Check to see if the conditions exist for an automatic victory for either player.
b. Turn Advance Step. Move the Game Turn marker ahead one space on the Turn Record Track. If it is the last turn of the scenario, the game ends and the players check for victory.
4.3 Phasing and Non-Phasing Players
A player directed to take actions during a specific phase is defined as the "Phasing Player"; the other player would be the "Non-Phasing Player". For example, during a Chinese combat phase, the Chinese player would be the Phasing Player and the Russian player would be the Non-Phasing Player.
5.0 Hyperwar
5.1 Hyperwar Capable Units
These are defined as units which either (1) have a printed Hyperwar capability; or (2) have been given temporary Hyperwar capability via the expenditure of Hyperwar markers.
5.2 Printed Hyperwar Units
Certain units have a Hyperwar + symbol. These units may (but are not required to) conduct the following:
-
Initiate attacks using the Hyperwar CRT.
-
Conduct all actions during a Second Impulse (note this includes both the Friendly Impulse and the Interception step in the other player's turn).
-
Conduct any other action designated as requiring a Hyperwar capable unit.
5.3 Acquiring Hyperwar Strikes
Players are assigned Hyperwar Strikes during initial deployment. Others Strikes will be placed in the Reinforcement Pool per scenario instructions, and may be picked during the course of a scenario. Players must keep them in their own Hyperwar box, ready to use.
5.4 Playing Hyperwar
A player may play Hyperwar Strikes at designated points during a game turn. After playing a Hyperwar Strike, return it to the Pool.
5.5 Hyperwar Strike Enabled Capability
Hyperwar strikes give non-Hyperwar capable units Hyperwar capacities (per the above allowances). This may represent retrofitting of older equipment, or the inclusion of new hardware, men or even leaders in a regular unit to give it an extra capability.
-
For Hyperwar attacks, expend one Hyperwar Strike at the instant the attack is declared. This can be done in either friendly Impulse. Expending one Strike enables one Hyperwar attack by all non-Hyperwar units involved in the same attack. See the Combat rule (11.0) for details.
-
For Second Impulse movement, expend one Hyperwar Strike. This allows any one unit, of any size, to move during the Second Impulse.
-
For Second Impulse Air Interception, expend one Hyperwar Strike. This allows all units in one airbase to make an interception move (and engage in defensive air combat) during that Second Impulse.
Note: Each player may take only two impulses, maximum, per turn.
6.0 Reinforcements
6.1 Reinforcements Defined
Reinforcements are new units and Strikes which are introduced into the game after initial deployment. Scenarios will state the number of and type of reinforcements which will appear.
6.2 Reinforcement Pools
During initial setup each player (Russian and Chinese) sets up a Reinforcement Pool (a wide-mouthed opaque container). Place all reinforcements (designated by the scenario) into the pool. Each scenario will designate the number of reinforcements which a player draws from his pool. (Units which are deployed initially on the map by scenario instruction are not reinforcements; they are deliberately picked.)
Each side uses one reinforcement pool for all nationalities it may control. If an allied country is added via Scenario Events, and that country has reinforcements, add them to that pool.
In all cases, reinforcements are drawn at random, and then placed via the deployment instructions outlined in the rules or scenario.
Exception: Logistical units are placed separately, face up (not in a pool). They are deployed per the scenario instructions.
6.3 Non-Drawn Reinforcements
Some scenarios may provide for specific units to be placed as reinforcements on certain game turns. In such cases, put those units aside during initial setup and then place them per the scenario.
6.4 Reinforcement Placement
Reinforcement units are placed on the map according to the instructions listed as follows:
Exception: Units may never be placed in hexes containing enemy units, EZOC or prohibited terrain (although they may be placed in excess of stacking limits). Note that placement is not considered movement and therefore doesn't cost any movement points.
6.5 Chinese Placement
Chinese reinforcements are placed as follows:
-
The Chinese off map Area, and/or…
-
Any Chinese airbase unit or Chinese occupied city in China. However, no more than three Chinese reinforcements may be placed in each Military Region per game turn.
-
Chinese air units may be placed in the off map Area or in the same hex as a Chinese base unit (within capacity).
6.6 Russian Placement
Russian reinforcements are placed as follows:
-
The Russian off map Area, and/or...
-
Up to one reinforcement per Mobilization Phase may be placed in one Russian base unit, or Russian occupied city in Russia.
-
Air units may be placed in the off map Area or in the same hex as a Russian airbase unit (within capacity). This is in addition to any unit placed on an air base per "(2)" above.
6.7 North Korean Placement
North Korean reinforcements are placed in Korea on the south map edge.
6.8 Mongolian Placement
Mongolian reinforcements are placed in any friendly occupied city in Mongolia.
6.9 Coalition Placement
Coalition ground reinforcements are placed anywhere in any base unit of the side they are on, or in their off-map base. See the Air rule for Coalition air placement.
6.10 Hyperwar and WMD Strikes
Strikes are placed in the owning player's Hyperwar/WMD holding box, off map.
6.11 Incidental Requirements
Scenarios will list which units are placed in the reinforcement pool. In any case, reinforcement units must be entered onto the map (or off map area) on the turn it is drawn or enters from the turn track. If all hexes eligible for the entry of a reinforcement unit are occupied by enemy units, that reinforcement may not be entered into play, and is returned to the pool of available reinforcement units.
6.12 Eliminated Units
When any of the following unit types are eliminated, place them in the Reorganization box:
- Corps
- Armored divisions
- Mechanized divisions
- Infantry divisions
- Armor/Mech Brigades
Note: These must be types which can be either broken down or built up, per the reorganization rule. They are available for reorganization on a future turn.
Logistics units, however, are always placed in the available box. This is regardless if they are removed from the map by being expended for supply, or eliminated in combat.
Expended Hyperwar markers are returned to the Reinforcement Pool.
All other types of units, when eliminated, are out of play permanently. Expended WMD markers are out of play permanently.
6.13 Unit Availability Limits
The number of each type of unit and Strikes in the game's counter-mix is a deliberate design limit. You may not mobilize more of any given type than have been presented within the counter-mix. You may create more function markers as needed, however, since these are not units but informational pieces.
7.0 Reorganization
7.1 Breaking Down and Combining
During the Reorganization Phases, players may exchange certain corps with divisions or brigades (depending on the army) and vice versa. Breaking down corps, as well as combining smaller units to form corps, is termed "reorganization." The Corps Components Table indicates which type of units may be broken down or combined to become what kind of unit.
Generally, Reorganization may occur only during the Reorganization Phase (see 4.2). But, see the combat rules for a special exception.
7.2 Breaking Down
To break down a corps, remove the unit from the map and replace it with the number and type of divisions or brigades indicated on the table. You may do that voluntarily only during the Reorganization Phases of your own player turn (you may also have to do it involuntarily as the result of battle in a Combat Phase, or due to supply attrition).
Units removed from the map due to breaking down immediately become available for all game actions, such as reinforcement or future reorganization.
7.3 Combining
The combining of units may occur only during your own side's Reorganization Phase. The units to be combined must be in the same hex at the moment of combination. To do so, remove the component units from the map and then replace them in the same hex with an appropriate corps unit, as indicated by the table.
7.4 Reorganization Restrictions
Only Russian and Chinese units may ever reorganize. Units that break down or combine must be of the same specified type(s) of their own nationality.
A corps may break down into divisions and those divisions then may be used in that same phase to build other corps. However, certain corps do not have breakdown units. Thus, they may never reorganize. Furthermore, certain divisions/brigades may not be built into corps (such as airborne divisions).
7.5 Hyperwar Loss
Hyperwar capable corps may have component units which are not Hyperwar capable. In such a case, those broken down units lose their Hyperwar capability until combined into a Hyperwar unit again.
8.0 Land Movement
8.1 Movement Phase(s)
Each player can potentially conduct up to two movement phases per turn. During the First Movement Phase, the moving player may move as many or as few of his own units as he desires.
8.2 Movement Allowances
Movement must be via a series of connected hexes. Each unit can be moved in any direction or combination of directions within the hex grid. Railroad, amphibious and airmobile movement are explained separately.
8.3 Hyperwar Movement
During a friendly Follow-on Movement Phase, Hyperwar capable units may move. These are units with the Hyperwar symbol, or which have been given temporary Hyperwar ability via the expenditure of Strikes. Each Hyperwar Strike allows one unit to move. These units can be anywhere on the map, and can be of any size.
Example: A player expending two Hyperwar markers could move, say, one corps and one Logistics unit that aren't otherwise Hyperwar capable.
8.4 General Movement Procedure
Each unit is moved one at a time, tracing a path of contiguous hexes through the hex grid. As each unit enters a hex, it expends one or more movement points (MP) from its printed movement allowance (MA). Different types of units have differing MA and are affected differently by different hex terrain. Consult the Terrain Effects Chart (TEC) printed on the mapsheet to see the MP cost of each terrain.
8.5 Movement Restrictions/Prohibitions
A player may move his unit only during friendly movement phases. Once you have moved a unit, you may not move it again that phase (unless your opponent agrees to allow it for some reason). Unused movement points may not be accumulated from phase to phase or turn-to-turn, nor may they be transferred from unit to unit.
A unit may expend all or some of its MP before coming to a halt during any friendly movement phase. Unused movement points may not be accumulated from phase to phase or turn-to-turn, nor may they in any way be transferred from unit to unit.
Exception: Advance and retreat after combat are not regular movement and therefore don't consume MP (see sections 11.0 & 12.0).
8.6 Movement Limitation
A unit may move only once in a particular movement phase. For example, a player could not move the same unit twice during a Second Impulse by expending an additional Hyperwar Strike.
8.7 Minimum Movement
All units may generally move a minimum of one hex per friendly movement phase by expending all their available movement points at the very start of that move. Units may not ever, however, move directly from one enemy zone of control to another enemy zone of control (see 8.8 below), nor may they ever enter an enemy occupied hex or one containing prohibited terrain.
8.8 Zones of Control
Units must stop all their movement for that phase when they first enter an enemy zone of control (known as an EZOC); see section 10.0.
Exception: Airborne and special forces units may ignore EZOC in some cases (see 10.5).
8.9 Effects of Terrain on Movement
A moving unit must expend one MP to enter a clear terrain hex. To enter other types of terrain hexes a unit must expend more than one MP, depending on the type of terrain (see the Terrain Effects Chart, otherwise known as the TEC). If a unit is crossing a hexside that is printed with some type of hexside terrain (like a river), an additional MP cost (in addition to the cost to enter that hexagon's terrain) will be required.
8.10 Prohibited Terrain
Some types of terrain is listed on the Terrain Effects Chart (TEC) as "Prohibited". That type of hex is completely forbidden to most units, unless a special exception is noted on the TEC or mentioned in the rules. Some kinds of special movement (like aircraft or airborne) movement supersede this prohibition.
8.11 Road & Railroad Movement
Roads include all hexes with road symbols. Additionally, all "railroads" are considered to have roads running along them. Units moving via roads pay one (1) MP per hex, regardless of other terrain in that hex. All such movement must be via contiguous road and/or railroad hexes.
Roads may be used regardless of a moving unit's supply state and, if a railroad is used as a road, regardless of which side controls that railroad.
8.12 Trains
Units can use special railroad movement. Such units must start a friendly First Movement Phase in a city containing a rail line. You can move it up to an unlimited number of contiguous railroad hexes (it may end its movement on a city or non-city hex). The converse also holds. A unit may start its movement in any non-city railroad hex and move any number of contiguous railroad hexes, but in such a case it must end its movement in a city (with a connected rail line).
Rail movement does not cost any movement points. However, the unit may not conduct any other movement during that same movement phase. Any number of units may use rail movement during a turn within the restrictions, below.
8.13 Railroad Movement Restrictions
A unit moving by rail cannot begin the move in an enemy ZOC, nor enter one as it moves via trains. Furthermore, units may not use railroad hexes in enemy countries for the purposes of rail movement (although they are still useable for road movement per 8.11 normally). Units may use neutral country railroads only if that country becomes an ally.
Units may use railroad movement only during their own side's First Movement Phase.
8.14 Russian Off-Map Rail Movement
The rail line running from Irkutsk to the edge of the map is considered connected to Tynda. The Russian player (only) may use off map rail line to conduct rail movement (and trace rail supply). In all cases, however, units must always end their rail movement on the map.
9.0 Ground Unit Stacking
9.1 Stacking Defined
Having more than one friendly unit in a hex at the same time is called "stacking". All ground combat and support units count for stacking unless otherwise specified. Air and Hyperwar Strikes are governed by other stacking rules (see 17.0 and 18.0).
9.2 Stacking Limit
Generally, a player can stack up to two friendly corps sized (XXX) units in each hex. However, city hexes allow a player to stack up to three friendly corps sized unit in each home or Allied city hex (but not in any city hex in a foreign country, even if captured).
Example: The Russians could stack up to three units in Vladivostok, but the Chinese, if they captured Vladivostok, could stack only two.
In a "Complex 2" or Desert type of hex, a player only stack up to one corps sized (XXX) unit.
Note: All non-corps ground units count as one third (1/3) of a corps. This is regardless of their printed size symbol.
In any case, players may stack units in any order they want in a hex, and rearrange them at any time during their own turn.
9.3 Stacking Exceptions
Stacking limits do not apply as a unit is moving. Friendly units may move through hexes that are already stacked up to the stacking limit at no extra cost or penalty. There's no limit to the number of friendly units that may enter and pass through a single hex during a phase. Stacking is only enforced at the end of each movement and combat phase (friendly or enemy).
Hyperwar, WMD and Air Strikes don't count for ground stacking; See sections 17.0 and 18.0.
Reinforcements may be over-stacked when initially deployed onto the map, but you would have to restore stacking limits by the end of the ensuing movement phase.
If, however, at the end of any friendly or enemy movement or combat phase a hex is found to be over-stacked, any excess units must be eliminated by the owning player (of his choice).
9.4 Stacking Prohibition
A friendly unit may never enter a hex containing enemy units (with the exceptions noted under airborne and air movement; see section 16.0).
9.5 Right of Inspection
A player may only examine a stack of enemy units per the Fog of War rule (19.0). However, a player is entitled to know the type of terrain that exists in the hex of any enemy stack.
10.0 Zones of Control (ZOC)
10.1 ZOC Defined
The six hexes immediately surrounding a ground unit's hex constitute its zone of control (ZOC). ZOC affect enemy movement, combat and supply radius, as well as other game functions per specific rules.
All land units exert ZOC at all times, regardless of the phase or player turn or their supply status. ZOC extend into all terrain and across all hexsides.
ZOC are not negated by the presence of units in such hexes, enemy or friendly. ZOC do not extend across neutral border hexsides; neutral units do not exert ZOC (although the instant that a neutral country becomes belligerent, ZOC rules applies).
Exception: Air, airmobile and amphibious movement ignores enemy ZOC. Air units, Hyperwar, WMD and Air Strikes never exert ZOC.
ZOC are never negated by the presence of units in such hexes, enemy or friendly, but ZOC does not extend across a neutral border hexside (although the instant that a neautral country becomes belligerent, ZOC applies).
All land units of both sides exert ZOC at all times, regardless of the phase or player turn or their supply status.
Transcriber's note: the printed section 10.1 contains the two sentences above on ZOC not being negated and on all land units exerting ZOC a second time, in slightly different wording ("neautral" is printed as such). They are transcribed as printed.
10.2 Multiple ZOC
Both friendly and enemy units may exert ZOC into the same hexes at the same time. There are no additional effects if more than one unit, friendly and/or enemy, projects its ZOC into the same hex at the same time. If a friendly unit is in an EZOC, the enemy unit projecting that EZOC is also in the ZOC being projected by that friendly unit. The two units (or stacks) are equally and mutually affected.
10.3 Effects on Movement
Units must stop moving when they first enter an EZOC. They may move no farther during that movement phase. However, units may exit EZOC due to combat results that require a retreat or pursuit, if all enemy units exerting ZOC in a particular situation are eliminated, or as a disengagement (see 10.4).
10.4 Disengagement From EZOC
Disengagement is the act of moving out of an EZOC. To do so, the exiting unit must enter a hex that contains no EZOC. Such units may then enter another EZOC later during the same move, but only if the first hex they enter is not an EZOC hex. Disengagement is only permitted at the start of a unit's movement.
Note: It costs no extra movement points for a unit to disengage.
10.5 ZOC Effects on Combat
During a friendly combat phase, all friendly units in an enemy ZOC must attack all enemy units which exert EZOC on those units. This is explained in more detail under the combat rule.
After attacking an enemy hex, units may advance after combat (and pursue) into or through EZOC; EZOC never blocks advance after combat, nor inflicts a penalty. See 13.0 and 14.0.
10.6 EZOC Effects on Supply
A supply radius terminates in the first enemy ZOC into which it is traced. See 15.0.
11.0 Combat
11.1 Combat Defined
Combat is mandatory for ground units in enemy zones of control. The phasing player (the player whose turn it is) is termed the attacker; the non-phasing player (the other player) is termed the defender, regardless of the overall strategic situation. Combat is resolved on the Combat Results Table (CRT).
Designer's Note: Mandatory attacks are designed into this game system because of the range and lethality of modern weapons. If you are close enough to engage, the enemy will engage you. This is true for units even into terrain which they could not normally enter. Units could engage using long range weapons, missiles, helicopter gunships, etc., not otherwise portrayed in the game.
Units must attack in any combat phase in which they find themselves in EZOC. This is true regardless of their Hyperwar status, or if they moved in the second movement phase.
Designer's Note: This means that units may find themselves in unanticipated situations in a follow-on combat phase, so players should plan their movements and attacks carefully.
Units in EZOC must attack even if they cannot otherwise move across the hexside or into the hex occupied by the unit exerting the EZOC. The defender receives the normal terrain bonus in all cases, regardless.
11.2 Combat Procedure
To resolve combat, follow the steps outlined below:
1) Attack Declaration. The attacker declares which attacking units will be attacking which defending units (see 11.3).
Note: Each unit can attack or be attacked only once per combat phase. Each player has two combat phases per turn, so it is possible for a unit to be attacked twice during the same turn (just not in the same combat phase).
A unit that is attacked may not avoid combat; it must be included when determining a combat ratio.
2) CRT Determination. The attacker chooses one of the two Combat Results Tables (CRT) for the resolution of each combat (Standard or High-Tech). The Standard CRT can always be used. To use the High-Tech CRT, however, the attacking player must have at least one Hyperwar-capable unit participating in that attack (see below).
3) Maximum Attack Supply Determination. If any attacking units are within the supply radius of friendly logistics units, the attacker may declare Maximum Attack Supply. This will double those attacking units' combat strength. See 15.4).
4) Determine the Combat Ratio. Total the combat strength of all attacking units for that particular combat (including any doubling for Maximum Attack Supply).
Next, total the defense strength of all defending units which are the target of the attack.
Then, divide the attacker's strength by the defender's strength and multiply by 100. This gives a percentile ratio, which is the column on the chosen CRT to use for combat.
After determining which column on the CRT is to be used, scroll to a column left and/or right as required by the type of terrain in the combat hex or other conditions (see 11.9). This is called a "shift". All applicable shifts must be applied. Total the attacker's shifts (to the right), subtract from them the defender's shifts (to the left), and apply the difference. This will determine the final column on the CRT be used to resolve that attack.
Note: An attacking force can include (or even be entirely comprised of) units with attack factors of zero. If all attacking unit have a zero attack factor, then the combat is resolved on the leftward-most column of the CRT. Units with zero attack factors do count as divisional equivalents for extraction of losses (see below).
5) Combat Execution. After determining the appropriate CRT column, roll one six-sided die. Cross index the die roll result with that column; This will give a Combat Result.
Finally, apply the combat result as listed under rule 12.0.
Example: 12 factors attacking 10 would be 12 / 10 x 100 = 120%. The starting column would be 100-149%. Let's say the attacker had two shifts to the right, and the defender one to the left; this would be a cumulative shift of plus one, so the final column would be 150-199%.
11.3 Which Units Attack
The attacking player declares which of his units that are adjacent to enemy units will be attacking which specific defending units. He does this at the beginning of each combat phase to ensure that all adjacent units are, in fact, being attacked.
The attacker may resolve all of his combats in any order he desires, but all attacking units in the ZOC of enemy units must attack, and all enemy units in friendly ZOC must be attacked.
11.4 Multi-Unit & Multi-Hex Combat
A defending hex may be attacked from as many as six adjacent hexes. Conversely, units in a single attacking hex may attack all six surrounding hexes.
If an attacking unit is in the EZOC of more than one enemy unit, it must attack all those enemy units (unless they are engaged by other attacking units).
Units in two or more different hexes may combine their combat strengths and attack a single hex, provided that all the attacking units are adjacent to all of the defending units.
Attacks may potentially involve any number of attacking or defending units. For an attack to be resolved as a single combat, however, all the attacking units must be adjacent to all the defending units, with the possible further addition of ranged barraging artillery and helicopters.
11.5 Diversionary Attacks
When making a series of attacks, a player may allocate his attacking units in any way he desires, even if some attacks are made at poor odds while other attacks are made at more advantageous odds. This tactic is called a diversionary attack.
Note: Air units may conduct diversionary attacks (see 17.5).
11.6 Combat Strength Unity
A unit's attack and defense strengths are always unitary. A unit's combat strength may not be divided among different combats on attack or defense, or otherwise shared with or borrowed by other units. However, units that are stacked in the same hex may combine their combat strengths during an attack, and must combine their combat strengths when defending. When attacking, it is permissible for each unit to conduct its own separate attack (against different enemy hexes), provided that every unit that is within an EZOC is attacking any adjacent enemy hex.
As mentioned, units defending in the same hex must be attacked as a single combined total; they may not be attacked separately.
11.7 High-Tech CRT
All attacks are normally resolved using the Standard CRT, although an attacking player may (but is never required to) declare the attack to be resolved on the High-Tech CRT instead, provided that the following conditions apply:
-
At least one of the attacking units is a Hyperwar-capable unit, or…
-
By expending one Hyperwar Strike to use the High-Tech CRT.
Note: Only the attacker may make this choice, never the defender.
11.8 Combat Shifts
"Shifts" refer to changing the calculated CRT odds after figuring the total attack strength and defense strength of combating units. Shifts to the right favor the attacker; shifts to the left favor the defender. If a combat has both attacking and defending shifts, then subtract the defending from the attacking and use the final difference.
Example: One shift to the right minus two to the left equals one to the left.
The following conditions will apply shifts, as explained:
Concentric Attack Bonus. During any battle, if the involved attacking units or their ZOC are in or immediately adjacent to all six hexes surrounding a defending hex, shift the attack one column to the right. All concentric units must actually be attacking the defending hex; the presence of units which may be attacking other hexes does not apply.
Defensive Terrain Shifts. Defending units may benefit from the terrain in the hex they occupy (or that run along that hex's sides, such as rivers). Terrain in hexes occupied by attacking units have no effect on combat.
The effect of terrain on combat is reflected by column shifts on the CRT. The Terrain Effects Chart (printed on the map) lists which terrain applies shifts. Note, however, that terrain shifts are not cumulative; if there's more than one type of terrain shift applicable, only the single best one (in favor of the defender) applies.
Note: A defending hex receives the benefit for defending behind hexside terrain (such as a river) only if all attacking units are attacking across the hexside.
Exception: When all defending units are in desert terrain, the attack is shifted one to the right (in favor of the attacker). However, if all defending units are defending behind a river when in desert terrain, they instead get the river defense benefit.
12.0 Combat Results
12.1 Explanations
The results of all combat outcomes are printed next to the CRT. They must be executed in the order listed.
Example: Supposing a Russian force, which includes a combined arms corps plus a mech brigade, receives a DP (Defender Panic) result. First, the mechanized brigade would be eliminated; then the combined arms corps would be broken down into its component brigades, which would then conduct panic retreats.
12.2 Unit Eliminations
The choice of which units are to be eliminated to satisfy a combat result is generally up to the owning player. In cases where "half" the units in a force are to be eliminated, and there are an odd number of units, round up remainders.
Note: If the Hyperwar CRT is chosen, there is no requirement that the first unit eliminated must be Hyperwar-capable.
12.3 Breaking Down for Combat Losses
A player may break down corps in order to extract combat losses.
Example: The attacking force consists of one corps. A result of Mobile Defense is rolled. The attacker breaks down the corps into three brigades, eliminates one, and then advances with the other two.
Corps Without Breakdowns. Corps which do not have breakdown units (e.g., North Korean corps) are eliminated if forced to break down in combat.
12.4 Air Units
See the Air Combat rule, below (17.0), for the effects of combat upon air units.
13.0 Retreat
13.1 Retreat Defined
When a combat result requires a player's units be retreated, the designated player must immediately move those units the indicated number of hexes away from their starting hex (where combat occurred). If the combat result doesn't specifically designate one player to conduct a retreat, the player owning the retreating units conducts the retreat.
Retreat is not normal movement; it's counted in terms of hexes, not MP, and units may always retreat the number of hexes indicated regardless of their printed MA (movement allowances).
Stacked units may be retreated together or separately; the retreating player's choice.
13.2 Panic
If a combat result calls for a Panic, then for each unit affected, the owning player must roll one separate die, and then retreat that unit that number of hexes away from the starting hex (where combat occurred).
13.3 Retreat Restrictions
Retreat (of any type) is subject to the following restrictions. If a unit is unable to retreat within these restrictions it's eliminated in place.
a) Units may not retreat into hexes containing enemy units or EZOC.
b) Units may not advance nor retreat after combat off the map or into terrain or across hexsides that they can't normally enter.
Exception: Units may retreat into an off map area if they are retreating via a map edge from which they could normally enter that base; in this case, the retreat immediately ends in the off map area.
c) Units may retreat into and through hexes containing friendly units, which does not affect the units being retreated. Nevertheless, retreating units must be within stacking limits at the end of the combat phase.
d) A retreating unit must terminate its retreat the indicated number of hexes away from its starting hex (where combat occurred). If it cannot, and can only retreat a portion of the number of the hexes called for, it is eliminated instead (in the last hex into which it was able to retreat). No hex along a retreat path may be entered more than once by a given retreating unit. In other words, there's no doubling back.
e) No unit may ever be purposefully retreated into a hex that would cause it to be eliminated or over-stacked, nor may it retreat into any EZOC.
f) "0" movement factor units may never retreat, and are eliminated when required to retreat (except when defending in a city; see 13.4).
13.4 Cities and Retreats
Units defending in or attacking out of city hexes may, at the option of the owning player, ignore retreat results. Units that retreat into a city may cease their retreat in that hex if the owning player desires, regardless of the length of the actual retreat required by the combat result.
13.5 Corps Retreat Exemption
At the owning player's option, a corps-sized unit which must retreat due to an "AR", "DR" or "MD" combat result may instead be broken down into its component units and remain in the hex. The retreat is negated for that corps, but not for non-corps units in that same hex, if any. This does not apply to other results which might generate a retreat, however.
14.0 Pursuit (Advance After Combat)
14.1 Pursuit Defined
"Pursuit" is a special form of movement that may occur after combat. Pursuit is what is called "advance after combat" in other wargames.
14.2 Pursuit Procedure
If a combat result allows a player to conduct pursuit, he may immediately move some, none or all eligible units involved in that attack one hex. The hex advanced into must be one in which defending enemy units occupied.
14.3 Pursuit Limits
Pursuit is limited to one hex, and only in the hex where the combat occurred. However, only units with an attack factor of at least "1" and a movement allowance of at least "1" may pursue.
14.4 Special Pursuit
Certain results call for a Special Pursuit. In this case, units eligible to advance after combat can, after completing the first hex of the advance (per 14.4), then move one more hex (for a maximum of a two hex advance) in any direction, provided that the second hex is a legal enterable hex. A unit attacking into or across prohibited terrain may never pursue.
Any kind of pursuit may ignore EZOC, but may not ever enter hexes containing enemy units or prohibited terrain. In all cases, stacking limits must be observed in the hex being entered as a result of pursuit.
15.0 Logistics
15.1 Logistics Units
Logistics units are used to enhance movement and attack capabilities of combat ground units.
15.2 Supply Radius
Each Logistics unit has a "supply radius" number printed on it. This is the number of hexes from that Logistics unit friendly units can be supported--this is termed the "supply radius". Supply radius is traced from the Logistics unit to supported unit. That tracing is counted in terms of hexes, not MP. (For example, tracing through rough is the same as tracing through clear terrain, etc; the Terrain Effects Chart provides exceptions.)
Supply radius is blocked by the presence of enemy units in a hex, as well as terrain prohibited to land unit movement. Also, a supply radius may be traced into but not through enemy ZOC (in other words, the line of supply terminates within the first EZOC hex). Friendly units do not negate enemy ZOC for tracing supply radius.
See also the Air, Amphibious and Airmobile rules for special supply radius situations.
15.3 Offensive Supply
A unit is in offensive supply if it can trace a supply line to a Logistics unit and the Logistics unit is then expended.
15.4 Logistics Supply
A player may use an individual Logistics unit for one of three purposes. Upon use, that Logistics unit is immediately expended and removed from the map; return it to the Logistics units available box on the map.
Note: aside from the functions stated in this rule, units do not otherwise require Logistic unit support to move, attack, etc. Also, Logistics units can be used as location to place reinforcements without being eliminated (see 6.0).
a) Forced March. The Logistics unit is expended at the start of any Movement Phase. In doing so, it doubles the movement allowance of all friendly ground units within the supply radius of that Logistics unit's hex (per 15.2).
Note: Logistics units may use Forced March themselves, but another Logistics unit (within radius) would first have to be expended to allow for the moving Logistics unit's Forced Marching.
b) Maximum Attack Supply. The Logistics unit is expended at the start of any friendly Combat Phase. In doing so, it doubles the attack strength of all attacking ground units within supply radius of that Logistics unit (per 15.2). (If units involved in different attacks are within supply radius, then they are all doubled.)
Note: Second Impulse Supply (Hyperwar). You can use Logistics units to support operations of Hyperwar-capable units in a Second Impulse (no Hyperwar Strike is required to "activate" the Logistics unit).
15.5 Coordinated Logistics
There may be situations in which it would require more than one Logistics unit to provide supply to different units during the same attack. For example, if one unit was within radius of Logistics unit "A" while a second unit was not within its radius, but was within radius of Logistics unit "B".
15.6 Logistics Restrictions
A player must declare which Logistics units he will utilize at the start of the phase in which they are to be expended. They are expended at the start of the phase before any other action takes place.
Hence, a mobile Logistics Unit could not move and then provide Forced March support; a unit utilizing Forced March would have to be within supply radius before it moved. A mobile Logistics unit could move and then provide Maximum Attack Supply support in the ensuing Combat Phase. All units to be supported for combat would have to be within supply radius at the start of the Combat Phase.
15.7 Complex 2 Movement
Logistics units may never enter "Complex 2" type hexes. However, their radius may be traced through them without effect.
16.0 Airpower
16.1 Airpower Defined
Airpower involves two general types of units: Air Bases and Air Strikes.
16.2 Air Base Units
Air Base units represent the airfields, command and control, and ground support ordnance for Air Strikes. They can launch Air Strikes. Each Air Base unit is printed with a (parenthesized) number, which is the number of air units which can be based on it.
Note: Airbases are ground units, and they otherwise follow the rules for ground units.
Airbase Movement. Airbases move like other land units. Any air units with them move along with them. This even includes rail movement. However, an airbase that moves cannot launch Air Strikes or support airborne moves (see 23.0) during the immediately ensuing Air Phase, nor may they conduct Interception in the ensuing enemy Air Phase.
Note: To indicate this, flip the air unit over, then flip it back up at the end of the ensuing enemy Air Phase.
16.3 Air Operations
Each air unit is printed with an attack, defense and range value. Air units may perform actions at various points during the Sequence of Play turn (see 4.0):
-
Air Phase. During the Air Phase, the phasing player may launch friendly air units from Air Bases and fly them to any hexes within their ranges (see 16.4).
-
Interception Phase. The non-phasing player may now launch and fly air units for Interception missions (see 18.0).
-
Combat Phase. Phasing air units attack enemy ground and air units in the hexes they now occupy. Also, non-phasing Air units add their defense strength to the defense of friendly units in the hexes they occupy (see 17.0).
-
Mutual Air Return Sub-Phase. Both players must now move air units which are currently flying missions to friendly bases (landing the air units).
Note: There is no separate air-to-air combat phase; all air combat is part of the general Combat phase of the Sequence of Play.
16.4 Air Range
An air unit can fly up to a number of hexes equal to its printed range. Range is counted from the Air Base unit (but not including the Air Base hex) from where it was launched to the target hex, counting the hex into which the air unit flew to conduct an attack.
16.5 Flying Procedure
Air units that are launched move across the map, paying one point of their range for every hex entered. They may move over any types of terrain, friendly and enemy units (including air) and ZOC. They may not fly over neutral countries.
Air units remain over their target hexes until the Mutual Air Return phase when they must move back to a friendly Air Base (unless eliminated in combat). Air units may return to any friendly Air base, not necessarily the ones from which they flew missions.
16.6 Air Unit Stacking
A player may stack (base) a number of air units at an air base equal to its basing capacity (see 16.2). This does not count against ground unit stacking.
A player may have a maximum of two air units flying a mission over a hex. This is in addition to friendly or enemy ground or units in that hex. (That is, each player could have two air units in a hex.)
Example: A player could have two Chinese air units, two Russian air units, and two ground corps in the same hex.
Air units have no ZOC, and do not affect units on the ground other than by engaging in combat against them).
16.7 Air Transfer
A player can move an air unit from one friendly air base to another friendly air base during a friendly Air Phase. Such air units can move up to triple their range. The units land at the completion of the Air Phase and thus can not engage combat.
16.8 Coalition Air
If the Coalition air unit enters play, it is considered based off of the map. It may fly in the friendly Air and Interception Phase missions, launching and landing on any all sea hex. It may not be attacked by enemy forces while on an all sea hex. It may change its "base" hex at the end of each mission.
The Coalition Air unit may stack in addition to the normal two air units per mission limit.
17.0 Air Combat Operations
17.1 Air Attacks
Air attacks are executed per the same general procedure as ground combat, with the following differences:
-
Air combat is always conducted within a hex. Air units may never attack into adjacent hexes.
-
The attack strength is equal to the attack strength of all attacking air units plus any ground units that are also attacking.
-
The defense strength is equal to the total defense strength of all defending ground units plus the defense strength of all intercepting air units, if any.
-
If there are no enemy air units involved in a combat hex, then friendly air units are never affected by combat.
-
If there are enemy air units involved in a combat, then friendly air units are affected by certain combat results (as explained on the Combat Results Table).
Note: Air units never retreat or pursue.
- Ground units attacked by Interdiction (see below) ignore all retreat and advance results.
17.2 Air Attack Procedure
All air unit combat occurs during the Combat phase. Air units engage in combat in two general ways:
Ground Support: Phasing air units fly into hexes containing enemy air units which are also being attacked by friendly ground units. The air units' attack strength are added to the attack strength of the friendly attacking ground units.
Non-phasing air units present in hexes containing friendly ground units being attacked by enemy ground and/or air units add their defense strength to the defense strength of the friendly defending ground units.
Interdiction: Phasing air units conduct Interdiction to attack enemy ground units without the participation of friendly ground units (that is, air units are the only attackers). Interdiction can not be conducted by Intercepting air units.
Combat is resolved per (11.2), except that air units are only affected when specifically called for by combat results.
17.3 Hyperwar Air Operations
All air units may conduct operations during the Initial Impulse. However, only Hyperwar capable air units may be launched during the Follow-On Impulse. This applies both to the phasing and non-phasing (intercepting) player. (Remember, Hyperwar capable units are those with the + symbol, or other units for which a player has expended a Hyperwar marker).
17.4 Maximum Attack Supply for Air Operations
A Logistics Unit may provide Maximum Attack Supply for all friendly Air Bases to which it can trace a Supply Radius (15.0) at the start of a friendly Air Phase. This doubles the attack strength of all friendly air units flying from those Air Bases.
Logistics Units can not be used to double Air Unit range. Also, the non-phasing player can not use them for Interception.
Note: a Logistics Unit may be used to Force March an Air Base via ground movement, carrying with it any air units based on it.
17.5 Diversionary Attacks
Air units qualify for the purposes of making diversionary attacks (see 11.5).
17.6 Air Bases in Combat
If any Air Base is destroyed for any reason, then any air units based on it are also eliminated.
Air Bases cannot retreat, and if forced to do so, are eliminated (along with any air units based there, if any).
17.7 On the Tarmac
Air units which are based on Air Bases do not contribute to the defense of their own hex on the ground. They only contribute to the defense if flying interception missions.
18.0 Interception & Air-to-Air Combat
18.1 Air Interception
Air Units can fly Interception missions during the friendly Interception Phase. This occurs during enemy impulses. All friendly Air Units may fly Interception in an Initial Impulse. Only Hyperwar-capable Air Units may fly interception during a Follow-On Impulse. Launch the Intercepting Air Units and fly them to any hexes within range containing friendly units.
18.2 Defensive Support
Interception missions can be flown into hexes containing friendly units which potentially be attacked by enemy ground and/or air forces. There is no requirement for phasing Air Units to be in a hex in order for Interception to be flown into it. The Intercepting Air Units add their defensive strength to the defense of friendly ground units under attack (see 17.2).
Note: There is no separate interception combat, per se. Rather, the intercepting air units add their defense strength to the defense strength of friendly ground units in the target hex (this reflects the integration of ground based air defenses, as well as the defensive effects of airpower against enemy helicopters not otherwise shown in the game).
18.3 Pure Air to Air Combat
The Phasing Player can, during a friendly Air Phase, fly Air Units into hexes containing no enemy units. In the ensuing Interception Phase, the other player can fly Intercepting Air Units into those hexes. The phasing Air Units attack the Intercepting Air Units in the ensuing Combat Phase. Apply only combat results which specifically affect air units.
19.0 Fog of War
19.1 Examining Enemy Stacks
A player can examine enemy stacks only under the following circumstances:
19.2 Combat
After all attacks have been declared, but before any are resolved, both sides can examine all units involved in those combats. (A player can not reorganize attacks once enemy stacks have been revealed--this may lead to adverse combat situations!)
19.3 Reconnaissance
A player can examine an enemy stack at any time: (a) a friendly Hyperwar ground unit is adjacent to it; (b) a friendly Hyperwar air unit is flying a mission in a hex in or adjacent to it; (c) by expending one Hyperwar marker during any phase of a friendly Impulse, one enemy stack anywhere on the map may be examined.
20.0 Off Map Areas
20.1 Off-Map Areas Defined
Each player is provided with an Off-Map Area base. The Chinese base is adjacent to all west and south map edges within China (but not Mongolia). The Russian base is adjacent to all west map edges within Russia.
20.2 Function
Players may stack an unlimited number of units in an Off Map Area. The Russian Off-Map Area includes an airbase. The Chinese Off-Map Area includes an airbase and a port. Off Map airbases can base an unlimited number of air units.
Note: Rail lines and roads are assumed to run into and out of the Off Map Areas from the map edge.
Units may move on or off the map to an Off-Map Area via any form of movement which they could otherwise make. Units must cease movement when they enter an Off-Map Area. When entering the map from an Off-Map Area, they pay normal movement costs. The Off-Map Area is considered to be one hex off of the map edge.
Air Movement. Air movement to an Off-Map Area is allowed from any on-map bases, and vice versa.
Chinese Marines. Chinese marine units (not Russian) may use amphibious movement to and from their own Off-Map Area.
Restriction. Units may never enter or attack into an enemy Off-Map Area. Air units which fly out of an Off-Map Area may do so only to conduct an Air Transfer mission; they may not conduct combat missions from any Off-Map Area.
21.0 Crossing Borders
21.1 Neutrality
Generally, a player may move units anywhere on the map if otherwise legal. However, these neutrality exceptions apply as follows:
a) If Mongolia is neutral, units may not enter Mongolia.
b) If North Korea is neutral, units may not enter North Korea.
c) Units may never enter an enemy Off-Map Area.
Additionally, a supply radius may not be traced into a neutral country.
21.2 Belligerency
The Coalition, Mongolia and North Korea can enter play as a result of outcomes on the Scenario Contingencies charts (see the Scenario rule).
22.0 Victory Conditions
22.1 Victory Points
Players gain and record Victory Points (VP) throughout the game. VP are used to determine the final victory. Use pencil and paper to record the VP.
At the end of the game, players check their Victory Points (VP), depending on the various conditions achieved. Consult the Victory Points Chart, and simply subtract the lower total from the higher to get the degree of victory. Note that VP indicated as "Immediately" are awarded as of the moment they occur. VP indicated as "End of Scenario" are not awarded until the scenario has ended. VP awarded for a specific situation can not be lost. (For example: if the Chinese occupy Vladivostok and the Russians later recapture it, the Chinese do not lose those VP).
Victory Points Chart
Immediately (both players gain)
- Each enemy SSM unit eliminated: 4 VP
- Each enemy Hyperwar-capable unit eliminated: 3 VP
- Each enemy non-Hyperwar air, airborne, SOF, or marine division/brigade eliminated: 2 VP
- Each enemy armored division/brigade eliminated: 2 VP
- Other unit types eliminated: 0 VP
- Russian combat unit occupies Beijing (first time): 25 VP
- Russian unit occupies enemy Critical Economic City (first time): 10 VP
End of Game (Chinese gain)
- Chinese unit occupies Irkutsk, Vladivostok: 20 VP
- Chinese unit occupies other Russian cities: 10 VP
- Chinese units occupy all Pipeline hexes: 30 VP
End of Game (Russians gain)
- Russian unit currently occupies Beijing: 20 VP (per each hex)
- Russian unit occupies Chinese economic cities/town: 5 VP
- Russian units occupy all Pipeline hexes: 20 VP
End of Game (if these countries are belligerent)
- Enemy unit occupies Mongolian cities: 5 VP
- Enemy unit occupies Pyongyang: 10 VP
- Enemy unit occupies other North Korea cities: 5 VP
Note: The VP for eliminating an enemy unit only applies to the listed unit. If a corps is destroyed, then count up the VP for its eliminated component units.
22.2 Final VP Level of Victory
After tallying the total net VP from both sides, determine the level of victory as indicated by the following scale:
- 0-25: Draw (both sides go into economic disintegration and lose the war).
- 26-50: Tactical Victory (you gain significant economic and geographical concessions).
- 51-75: Operational Victory (you control all of Manchuria and eastern Siberia).
- 76 or more: Strategic Victory (you now dominate the Far East).
22.3 Automatic Victory
During the Victory Check Phase of every game turn, players check to see if one of them has won a "Sudden Death Strategic Victory." If a player has satisfied the sudden death victory condition, the game ends and he wins immediately in that way. A Sudden Death Victory is defined as follows:
A player's units occupy all Russian and Chinese cities on the map. Also, if either Mongolia or North Korea is in play, all of those cities must be occupied as well.
23.0 Airmobile Operations
23.1 Airmobile Units
Units with an airmobile symbol (the small aircraft) may conduct airmobile movement. This can be during either friendly impulse, depending on Hyperwar qualification (8.3).
Errata: Russian special forces brigades should be printed as airmobile qualified.
23.2 Airmobile Procedure
Airmobile movement is conducted in the friendly Movement phase. The unit must start in a friendly Air Base. It can move a number of hexes up to its movement factor in the same manner as Air Movement (16.0)--they pay only one movement point per hex, ignore enemy ZOC, etc. However, the destination hex may not be enemy occupied, nor a terrain hex that is prohibited to ground movement.
Conversely, an airmobile unit may start in a hex not containing an Air Base and move a number of hexes up to its movement factor (per above), ending the move in a friendly Air Base.
Note: An Air Base used to facilitate airborne operations may not move during that same Movement phase. Such Air Base units may support air operations normally in that turn. Each Air Base may facilitate one airborne move per phase (either as a start of finish hex). Also, Airmobile movement may not be conducted in an Interception phase.
Airmobile units may move via normal land movement, using their printed movement factor and paying the normal terrain costs. This does not require Air Base support per above.
23.3 Airmobile Supply
Airmobile units can not double their movement via Forced March. They can double their attack factor via Maximum Attack Supply. Logistics Units expended for this can trace supply radius either to the launching Air Base, or the landing hex (See 15.4).
24.0 Amphibious Operations
24.1 Amphibious Capability
Players may use amphibious movement to move certain types of land units from one coastal hex to another coastal hex. The following units are amphibious qualified: Marines and Special Operations Forces.
24.2 Amphibious Procedure
Each player may make a maximum of one amphibious movement per friendly Movement Phase. The unit must begin that movement phase in a port hex. Move it to any coastal hex. Conversely, the unit may begin on any coastal hex and then move to any friendly occupied port.
24.3 Amphibious Landing
This occurs if the landing hex does not contain an enemy unit (even if in an enemy ZOC). The landing unit attacks normally in the ensuing combat phase, however. The normal combat rules apply.
24.4 Amphibious Assault
This occurs if the destination hex contains an enemy unit. During the ensuing friendly combat phase, combat must be resolved by the amphibious assaulting unit. This uses the normal combat procedure (the unit is considered attacking from an all-sea hex adjacent to the enemy occupied hex). If the combat result that clears the defending hex of all enemy units, then the amphibious assault unit lands in that hex (and no further combat or pursuit ensues). If the attack fails to clear the defending hex, then the assaulting unit is eliminated.
24.5 Amphibious Supply
A unit making an amphibious landing or assault can be in maximum attack supply by expending one Logistics Unit which can trace supply radius to an embarking port. Units making an amphibious landing can draw supply normally from Logistics Units which can trace supply radius to them.
24.5 Lakes
(Numbered 24.5 in the printed rules, as in the source.)
Amphibious units can cross lakes by starting their movement adjacent to those hexes and then moving across them. This consumes their movement for the entire phase. This is in addition to amphibious operations, above.
Also, if the only units attacking across lake or river hexsides are amphibious, the defensive benefit of that hexside is negated.
25.0 Other Special Units
25.1 Mountain Units
Mountain units pay reduced movement costs to enter certain types of terrain; see the TEC.
25.2 Special Operations Forces (SOF)
SOF units have airmobile (23.0), amphibious (24.0) and mountain (25.1) capabilities. SOF ignore enemy ZOC (SOF project ZOC normally).
Exception: SOF may not ignore the ZOC of enemy "security" type units.
26.0 Logistics Units
26.1 Logistic Unit Status
Logistics units are printed on the front with their "mobile" side and on the back with non-mobile "logistics base" side. A player may flip friendly Logistics units from one side to the other during the friendly Reorganization Phase. That Logistics unit may not provide logistics support until the start of that player's next turn. Rotate the unit 45 degrees (or use some other mnemonic).
Note: During initial setup, a player can choose to deploy Logistics units on either side.
A Logistics unit is a static unit when on its "base" side. It is a mobile unit when on its mobile side.
26.2 Reinforcements and Bases
Reinforcements may be entered on friendly bases (printed as "bot"; read as "but", not mobile logistics units) during friendly mobilization phases (see 6.0).
27.0 Weapons of Mass Destruction (Optional Rule)
27.1 WMD
Both players can launch WMD (Weapons of Mass Destruction) from friendly special weapons units and airbases. This is done during any friendly combat phase prior to ground and air attacks. WMD may be launched against hexes adjacent to friendly units, but does not count as a diversionary attack. Surviving units in those hexes are attacked normally.
If during a Second Combat Phase, this does not require expending a Hyperwar strike.
Note: This does not require the flying of air units; the WMD are being launched by missiles or aircraft not otherwise shown in the game.
27.2 Range and Strength
When a player declares a WMD attack, the distance from the base or special weapons unit launching the attack determines the strength of the attack:
- 1-6 hexes: 3
- 7-12 hexes: 2
- 13 or more hexes: 1
The attacking player may combine more than one WMD in the same attack, adding their collective values. However, no more than one WMD attack may be made against a particular hex per phase. Nevertheless, a player may launch as many WMD attacks as he has available units/airbases to launch them.
27.3 WMD Attack Procedure
The attacking player must first designate the special weapons unit or airbase that will be launching the attack. Then, he must announce his intended target hex. Finally, he totals the WMD strength (see 27.2) being launched.
Once the attack is underway, the owning player rolls one die and consults the Strategic Warfare Table. The results of that attack are explained below the Strategic Warfare Table.
27.4 Contamination
If a result on the Strategic Warfare Table is a "Contamination", place a Contamination marker in the target hex. This has the following effects:
a) Units using ground and railroad movement must stop when they enter that hex.
b) No supply of any kind may be traced into or through that hex.
c) Units may not retreat or pursue into the hex.
d) The defender receives no shift advantage for any terrain in that hex (or any hexside advantage).
e) No reinforcements may arrive in that hex, if otherwise eligible.
Note: An already-contaminated hex is not further affected by additional contamination.
27.5 Decontamination
You can remove a Contamination marker in a friendly Mobilization phase by having a friendly Logistics unit in the hex. Expend the unit and remove the Contamination marker.
28.0 Scenario Contingencies
Prior to initial deployment (3.0) each player rolls one die and cross indexes the result with the outcomes on his Scenario Contingency table (on the map). This may cause various neutral powers to become belligerents.
Errata: On the Russian Contingencies table, North Korea becomes a Russian ally on a die roll of "1"; Mongolia becomes a Russian ally on a die roll of "2-3".
Transcriber's note: The Contingency tables themselves are printed on the game map and are not in the rules document. The scenario set-ups described under "Scenarios" in the printed contents are not included in the rules text supplied, so no scenario set-ups are transcribed here.