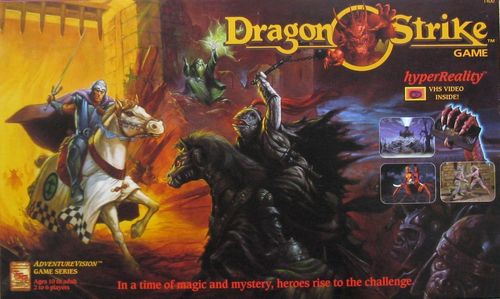
Dragon Strike
Dragon Strike Rulebook
Table of Contents
Table of Contents
- Introduction
- Assembly
- Getting Started
- How to Play
- Moving
- Doors
- Action 1: Attack
- Action 2: Cast a Spell
- Sight, Reach & Allies
- Action 3: Search for Treasure
- Action 4: Find and Disarm Traps
- Action 5: Find Secret Passages
- Action 6: Question a Monster
- Action 7: Perform a Feat
- Special Terrain
- Darkfyre
- Appendix A: Guide to Markers
- Appendix B: Reading a Hero Card
- Appendix C: Reading a Monster Card
- Appendix D: Expanding Play
- Guide to Symbols
- Rules in Brief
Introduction
Welcome to the Dragon Strike game! You are about to enter an ancient realm of magic and mystery. Beware, for it is filled with monsters and traps. You can play a bold hero who tries to rid the land of these perils. Or you can become the Dragon Master—the player who holds the key to the kingdom, controlling a fierce dragon and all the other creatures who try to strike down the heroes.
Tip: Play the videotape before you read further. You don't need the tape to learn these rules, but by watching you'll see many of the dangers and thrills that heroes face during a Dragon Strike game.
Note: Minor differences may exist between actual game parts and those shown in the video.
Contents
- VHS Video Cassette
- 2 Game Boards (printed on both sides)
- Instruction Book
- Adventure Book
- Map Book
- 6 Hero Cards (warrior, wizard, male thief, female thief, elf, dwarf)
- 110 Playing Cards
- 30 Hero Spell Cards
- 10 Teraptus Spell Cards
- 38 Magical Treasure Cards
- 12 Trap Cards
- 10 Monster Cards
- 5 Sneak Attack Cards
- 5 Reference Cards
- 24 Plastic Figures
- 6 Heroes
- 1 Dragon (Darkfyre)
- 1 Evil Wizard (Teraptus)
- 1 Manscorpion
- 1 Fire Elemental
- 1 Troll
- 3 Orcs
- 4 Bugbears
- 1 Giant
- 2 Gargoyles
- 3 Death Knights
- Dragon Master Screen
- 24 Plastic Clips
Summary of Play
-
One player takes the role of the Dragon Master. He or she controls the dragon and all the other monsters in the kingdom, attempting to defeat the heroes.
-
Each of the other players controls a hero—a mighty warrior, crafty wizard, noble thief, bold elf, or even a stubborn dwarf. Heroes solve mysteries, slay monsters, and try to rid the kingdom of evil.
-
The heroes must work as a team to succeed; they win or lose together.
-
Every time you play the Dragon Strike game, a new story—or adventure—unfolds. An adventure represents a single session of play. This box contains 16 adventures in all. Each describes a different goal that the heroes must accomplish to win. For example, the heroes' goal may be something like this: "Defeat the evil wizard."
Each adventure also features a different setting. (The Dragon Strike game includes four settings in all: castle, valley, cavern, and city.) For example, to defeat the evil wizard, the heroes must enter his castle—and battle the monsters lurking within.
-
Only the Dragon Master knows where the dangers (and treasures!) lie during an adventure. Each adventure has two parts: (1) a description (see the Adventure Book), plus (2) a map (see the Map Book). Using both parts as a guide, the Dragon Master describes the setting as heroes explore it. For example, if a hero peeks into a room in the castle, the Dragon Master checks the adventure map to find out which monsters are lurking there. Then the Dragon Master puts those monsters on the board—so the hero player can see what's in the room, too. The Adventure Book explains how the monsters react to the hero. (For example, one monster might yell, "Go away or we'll eat you!")
Important: The adventure maps and text are "top secret"—only the Dragon Master should see them.
How to Win
Heroes win (as a team) if they accomplish the adventure goal, and then all of them escape the game board alive.
(Optional rule: Heroes also win if they kill the dragon—whether or not they accomplish the goal or all survive.)
Otherwise, the Dragon Master wins.
Assembly
Figures
-
Gently flex or twist each of the 24 plastic figures to remove it from the surrounding framework. Discard the framework.
-
Fit the dragon's wing into place. (No glue is required.)
-
Fit the manscorpion's legs into place. (No glue is required.)
Clips
-
Gently slide 1 plastic clip onto each of the Hero Cards as shown.
-
Use the same technique to place 14 clips on the Dragon Master Screen—one clip for each monster shown. Position clips below the highest number in each list, like this: "GARGOYLE #1" with the clip positioned below "3", above "1" and "0" on the hit-point track.
-
Set remaining clips aside, within easy reach. You'll use them during play.
Doors
-
Remove door pieces from the cardboard sheet. Place each door in a small plastic base as shown.
-
Leave other cardboard pieces in the sheet until you need them during play.
Hero Cards
- If you'd like your Hero Cards to stand up during play, use the large plastic bases, as shown below. Fold bottom along score line for snug fit.
After Play: Leave clips in place on the Hero Cards and on the Dragon Master Screen. Store the doors beneath the cardboard platform in the game box. Use plastic sandwich bags to store spare clips and other small pieces.
Getting Started
1. Choose the Dragon Master
The Dragon Master plays the most important role in the game. Remember, he or she controls all the monsters, including the dragon. When each adventure begins, only the Dragon Master knows where the monsters, traps, and treasures lie. As the heroes explore a setting, the Dragon Master reveals what they discover.
Since you're reading these rules now, maybe you should be the Dragon Master. Review this entire booklet before sitting down to play. Take a look at the Adventure Book and the Map Book, too. Then you can teach the other players the game, or let them review these instructions themselves.
Remember: Only the Dragon Master should see the Adventure Book and the Map Book. Keep these secret from the other players!
2. The Dragon Master Gets Ready
-
Choose an adventure from the Adventure Book. (For your first game, pick one marked "Easy.")
-
Open the Map Book so only the page for your adventure shows. Carefully press the book so it lies flat.
Important: As the Dragon Master, you must review both the adventure text and map before play begins. You may want to do this before gathering the other players.
-
On a table or flat surface, spread out the board matching the adventure's setting: castle, valley, cavern, or city.
-
Put the Dragon Master Screen between you and the board, with rules facing you.
-
Place the adventure map behind the screen, so other players can't see it.
-
Sort playing cards like this (or ask another player to do so):
- First-Level Hero Spells (12 cards)
- Second-Level Hero Spells (12 cards)
- Third-Level Hero Spells (6 cards)
- Sneak Attacks (5 cards)
- Teraptus Spells (10 cards)
- Magical Treasure (38 cards)
- Traps (12 cards)
- Monsters (10 cards)
- Hero Reference (5 cards)
-
Put all the Hero Spells, Sneak Attack Cards, and Reference Cards beside the board for now (hero players will use them for their setup).
3. The Heroes Get Ready
-
Every player (except the Dragon Master) chooses a Hero Card: warrior, wizard, thief, elf, or dwarf. The youngest player chooses first. There are two thieves; either can be a hero (but not both).
Tip: A successful group usually includes a wizard and a warrior.
-
Make sure your Hero Card has a clip at the top of the Hit Point Track, as shown above.
-
Take the figure matching your hero.
-
Take the Reference Card for your hero.
-
The wizard player briefly reviews the Hero Spell Cards and chooses:
- 4 cards marked "First Level"
- 3 cards marked "Second Level"
- 2 cards marked "Third Level"
Note: The Dragon Master may be picking spells for the evil wizard. Keep your own choices secret, so you don't "tip your hand" to the enemy. All first- and second-level spells have duplicates; you may choose both cards if you wish.
-
The elf player reviews the remaining Hero Spell Cards and chooses:
- 2 cards marked "First Level"
- 1 card marked "Second Level"
Set leftover Spell Cards aside, out of play.
The Adventure Begins!
How to Play
Turn Sequence
The player to the left of the Dragon Master goes first. Play continues to the left (clockwise).
After every hero has had a turn, the Dragon Master plays. Every monster on the game board can take a "turn" when the Dragon Master plays—the Dragon Master controls them all, one at a time, in any order.
As soon as everyone has had a turn, one round of play has ended.
Passing: If you wish to do nothing during your turn, just say, "pass." (You may also skip any portion of your turn.)
Tip: The warrior player often sits to the Dragon Master's left, to take the front line in battle. If disputes about seating arise, have each hero player roll the black die. High roll gets first choice. (Reroll ties.)
A Hero's Turn
Each turn, a hero can:
- move, then perform one action —or—
- perform one action, then move.
Actions include:
- attack
- cast a spell (wizard and elf only)
- search for treasure
- find and disarm traps
- search for secret passages
- question a monster
- perform a Feat of Strength or Dexterity
For wizards and elves, casting a spell is most important. For everybody else, attacking is the most common action. (For example, you might move and then attack—or attack and run away!)
The upcoming pages describe each action in detail.
The Dragon Master's Turn
As the Dragon Master, you can move any or all monsters on the game board during your turn.
A monster's turn is simple. It can:
- move, then attack —or—
- attack, then move.
Only the evil wizard does more—he can cast spells instead of attacking.
Using the Time Track: At the end of your turn as Dragon Master, move the Hourglass Marker one space on the Time Track, toward the picture of the red dragon. When the marker reaches the picture, the dragon enters the game board!
Things to Remember
-
Hero to Dragon Master's left plays first. Play proceeds to left.
-
Dragon Master plays last. Every monster out on the board can "take a turn" when the Dragon Master plays.
-
A hero's turn: Move, then perform an action. Or perform an action, then move. See list of actions at left.
-
A monster's turn: Move, then attack. Or attack, then move. Evil wizard can cast spell instead of attacking.
Tip: The Dragon Master Screen summarizes all important game rules.
Moving
Every monster and hero has a Speed (see Hero and Monster Cards). Speed equals the maximum number of spaces that a monster or hero can move each turn. A figure can move fewer spaces than its Speed allows, or not at all, however. A figure can move in any direction—even diagonally.
Restrictions
- No one can pass through walls or closed doors.
- No one can move through a space containing an enemy. That means monsters can't walk through spaces containing heroes, and vice versa. (You can move through a space containing a friend, however.)
- No one can stop in a space that already contains another figure. Only one figure can occupy a space at a time.
Wall blocks diagonal move. (Squares on diagonal path don't touch.)
Flying and Hovering
Some monsters fly. Some heroes can fly, too—if they have the right spell or magical treasure. Flying figures can soar right over an enemy's square (but they still can't stop there).
When a flying figure is done moving, the controlling player must state whether the figure is hovering above the ground or has landed. If the figure is hovering, put a Wing Marker beneath it on the board.
While a figure is hovering, two rules apply:
- No one can pass through a hovering figure's square—the square is still blocked or "guarded."
- Attacks from air to ground—and vice versa—are long-range (see page 13 for details).
(Elf needs a long-range weapon (or spell) to hit the hovering gargoyle.)
Leaving the Board
Anyone who moves off the game board (or beyond the squares marked on the Dragon Master's map) is out of the adventure. Figures cannot reenter the board.
Triggering Traps
Some squares on the board are trapped. (The Dragon Master's adventure map shows where traps are hidden.) If your hero steps into such a square, the trap is sprung! Draw a card from the Trap Deck at once. Follow the card's instructions. Then discard the trap, face up.
The bad news: If the trap causes harm, your hero's turn is over. (Otherwise, continue your turn.)
The good news: Once a trap has been triggered, it disappears. No one can trigger the same trap twice.
Note: Monsters never trigger traps—even if they step on one.
Hero's Tip: A wise hero finds and disarms traps before they're triggered. (That's a hero action; see page 17.)
Doors
No one can pass through a closed door. Opening a door is simple—that's why it does NOT count as an action.
Anytime during your turn, if your figure is in a space touching a closed door, you can try to open it. Just say that you wish to do so. The Dragon Master checks the adventure map to see whether the door is locked. If it's NOT locked, you automatically open the door.
Opening a door doesn't stop or slow a figure. You can approach a door, open it, and then keep moving if your Speed allows it.
Dragon Master's Note: As soon as a hero opens a door, you must interrupt that player's turn for a moment. Place a Door Marker on the board, and turn it sideways to show the door is open.
The hero can automatically see what's on the other side. Check your adventure map. Put ALL monsters and treasure chests for that room (or area) on the game board at once. (Do NOT reveal traps or secret passages, however.)
After you have finished setting the board, let the player continue his or her turn normally.
This door can't be closed, because the monster is next to it.
Closing Doors
Closing a door is a good way to trap monsters on the other side. A hero can automatically close a door IF:
- the hero is in a space touching the door, and
- no monster is in a space touching the door. (The monster prevents the door from closing!)
This is NOT an action. A figure can close a door and keep on moving.
What if a Door is Locked?
A hero can open a locked door by performing a Feat (see page 20). That's an action. The Dragon Master's adventure map shows which doors are locked. Heroes won't know if a door is locked until they try to open it.
Can Monsters Open and Close Doors?
Besides heroes, only the evil wizard and the dragon can open or close doors. The evil wizard uses the same rules as heroes, but he can't perform a Feat to break a lock. In contrast, the dragon can break any lock automatically (see page 24 for more on the dragon).
Action 1: Attack
Both heroes and monsters use these basic rules when attacking:
- Get into position—your figure must be next to the enemy. Diagonal attacks are allowed.
- Roll your Attack Die. (Heroes: See "Attack" on your Hero Card. Dragon Master: See "Attack" on the monster's card or on your screen.)
- Compare the number rolled to the target's Armor Class. (See "Armor Class" on Hero Card, Monster Card, or screen.)
- If the attack roll is equal or greater than the target's Armor Class, the attack succeeds! The target loses 1 Hit Point.
- If the attack roll is lower, the attack misses. (Nothing happens.)
Example: The warrior below can attack either the orc or the bugbear. He chooses the bugbear. The bugbear's Armor Class is 5. That means the warrior must roll a 5 or higher with his Attack Die to hit this monster.
The warrior's roll is 7—a success! The bugbear loses 1 Hit Point. To record the loss, the Dragon Master slides the clip downward on that monster's Hit Point Track (on the screen).
Multiple Attacks
Some monsters can attack more than once in a turn. Their Monster Cards list a die for each attack, with a "+" between them.
All of these attacks must be targeted against the same hero. Each successful attack (or die roll) causes the target to lose 1 Hit Point.
Example: The manscorpion has a sword in each hand, plus a stinger on his tail. He can attack once with each per turn, for a total of three attacks against a single hero. Here's how the manscorpion's Attack is listed:
d8 sword + d8 sword + d10 sting
Long-Range Attacks
Some monsters and heroes can make long-range attacks—striking an enemy who is two or more squares distant. These attacks represent something thrown (such as the giant's boulders) or fired (such as the elf's bow). Note that an attacker can make either a basic (short-range) attack or a long-range attack—not both.
Example: Each turn, the giant can throw a boulder at a hero far away, or punch an enemy close by:
d12 fist (or d10 boulder, long-range)
The following rules apply to long-range attacks:
- At least one square must separate the attacker from the target.
- The attacker must be able to see the target. (See page 15 for details.)
- The attacker must have a clear shot. That means no other figure—friend or foe—can stand between the attacker and the target. (Otherwise, the attacker would hit that figure instead!)
- As usual, diagonal attacks are allowed.
Note: If one figure is airborne (attacker or target), no space between them is required. Attacks from ground to air (or vice versa) are always long-range.
Sneak Attacks
During setup, a thief gets 5 cards labeled "Sneak Attack." A thief player can discard one of these cards when making an attack. This allows the thief to use the black Attack Die (the most powerful) instead of the blue one. When the cards are gone, so are these special attacks.
Dying
A monster who runs out of Hit Points is dead. So is a hero, unless he or she immediately uses a magical treasure that restores Hit Points.
A dead hero is out of the game. A dead monster remains on the board for two rounds, face down. (This gives heroes a chance to search its body for treasure.) After that time is up, the Dragon Master removes the dead monster from the board.
Action 2: Cast a Spell
Only two heroes cast spells: the wizard and the elf. One monster is a spellcaster, too: the evil wizard Teraptus. Teraptus does not take part in every adventure, however.
Each spell is described on a card. All spellcasters choose these cards during setup (see "Getting Started"). Some spells are helpful; you can cast them on yourself or a friend. Others are attacks. Either way, casting a spell is easy: just follow the card's instructions.
To cast a spell on a target, you must first be able to see it (see page 15). Unless the Spell Card states otherwise, you must also have a clear shot. That means no figure can stand between you and the target. (Otherwise you'd hit that figure instead.)
No spell can be cast twice. After its magical effects end, a spell is gone forever (discard it).
Area Effects
Some spells affect a "target space" plus every surrounding space. Walls and closed doors can reduce the number of squares affected. (These barriers block magical effects just as they block regular attacks.)
Web spell spreads to all adjacent spaces.
Save vs. Magic
Often, the target of a magical attack can try to dodge or resist—or "save vs. magic." (See Spell Cards for details. "Vs." stands for "versus.") Every hero and monster has a die for saves vs. magic. Roll this die if you're trying to fend off an enemy's spell. A "6" or better equals success.
Sight, Reach & Allies
What Can I See?
Whether you're a hero or a monster, what you can see is important.
- If you can't see a target, you can't attack it or cast spells at it.
- Outside a room or building, monsters do not appear on the board until a hero can see them (which means the monsters can also see the hero!). Only monsters on the board can act.
Trace an imaginary line from the middle of the square you're in to the middle of the target square (the square you wish to see). If nothing blocks the line, you can see the target—no matter how far away it is. These things always block the line of sight:
- a wall (even if it has windows)
- a closed door
- a boulder
- a forest
You can only see as far as the first barrier. You do not have to measure sight using the exact middle of the squares; the center area is fine. When in doubt, call the line of sight clear.
Heroes and monsters do NOT block the line of sight. They do, however, block the path of spells and long-range attacks.
(The elf can see the evil wizard, but he cannot attack him. The elf does not have a "clear shot.")
What Can I Reach?
Sometimes it's important to know what a figure can reach. For example, many Feats involve holding an object that is not listed among a hero's equipment. And some adventures require the heroes to locate a special treasure and carry it off the game board.
If something is in a space next to your hero, or in the same space, you can automatically reach it.
Friends and Allies
Every hero is considered an ally (a friend) of the other heroes. Every other figure on the board is an enemy, with two exceptions:
- The charm spell lets the wizard or elf turn a monster into an ally.
- Some adventures include a figure who is friendly toward the heroes—like the dwarf in the videotape.
In the second case, the Dragon Master decides which hero player controls the ally. No player can control more than one ally at a time, however.
An ally moves and acts just before the Dragon Master's turn.
Action 3: Search for Treasure
Only heroes can search for treasure. It may be hidden in one of two places:
- on a monster
- in a treasure chest
Searching either place counts as a separate action. Success is almost guaranteed! Here's how it works.
First, your hero must be next to the chest or monster. Diagonal searches are allowed.
Second, tell the Dragon Master where you're searching for treasure. The Dragon Master checks the adventure map to see whether you've found anything.
- If NO treasure lies at that location, the Dragon Master simply tells you so.
- If a "random" treasure lies in the place you've searched, then draw a card from the Treasure Deck.
- If the adventure describes a special treasure for the place you've searched, then you receive that treasure.
If anyone searches the same location again, they'll find nothing. (One search reveals all.)
Dragon Master's Tip: After a chest has been searched, remove it from the board.
Searching a Monster
A monster cannot be searched for treasure unless it is dead, asleep, or tied up. As long as it's "alive and kicking," no monster will let a hero search it.
Opening a Trapped Chest
Watch out! You may trigger a trap while searching a chest for treasure. If that happens, you must draw a Trap Card and do what it says at once. The bad news: If the trap harms you, your turn is over. (You can try another search later, however.) The good news: A trap can only be triggered once—after that, it's gone.
Only the Dragon Master knows whether a chest is trapped. (The adventure map shows all traps.) For heroes, it pays to be cautious—you may want to look for traps on a chest before you look for treasure (see page 17).
Special Hiding Places
Sometimes treasure is out of sight, in a special hiding place. Such treasure is found when a hero searches for hidden passages. (The Adventure Book has details.)
How Do I Use This Treasure?
To use a magical treasure, just follow the instructions on the card. Some items work only for certain heroes. If you draw a card you can't use (or don't want), you can give it to another hero. That hero can offer a "trade" in return, if you'd like. No item can be used more than once per round of play, however. (For example, if you use a magic wand and then give it to a friend, the wand won't work again until the next round.)
Action 4: Find and Disarm Traps
The Dragon Master's adventure map shows where all traps are hidden. (They may be in squares or on treasure chests.) To avoid triggering a trap by accident, a hero can look for traps during his or her turn, and disarm any traps that are found.
A hero can perform three kinds of trap searches. Each is a separate action:
- Search an adjacent treasure chest.
- Search a room (or building) you are IN.
- Search every space you can SEE, up to 3 spaces away. (Page 15 explains sight rules.)
Here's how it works:
- Tell the Dragon Master where your hero is searching. Do not move your figure on the board. (Imagine that your hero searches the location, then quickly returns to the spot you're in.)
- Roll the die shown beside "Find & Disarm Traps" on your Hero Card.
- If the roll is 6 or higher, you've found and disarmed all traps in the location searched! Those traps are gone forever.
- If the roll is 5 or lower, you have failed to locate a trap. If there's a trap in the place you just searched, it can still be triggered.
Action 5: Find Secret Passages
Some adventures include secret doors or entries—passageways that can't be seen right away on the board. Except the dragon, no figure can use these passages until a hero discovers them.
A hero can search for passages in two ways. Each is an action:
- Search a room or building you're IN.
- Search every square you can see, up to 3 squares away. (Page 15 explains sight rules.)
Here's how it works:
- Tell the Dragon Master which area you are searching. Do NOT move your figure. (Just imagine that your hero wanders around, searching, then quickly returns to the same space.)
- Roll the die pictured beside "Find Secret Passages" on your Hero Card.
- A roll of 6 or higher means success! If there are passages to be found, you've found all of them in the area searched. The Dragon Master must place a door on the board to represent each one. For the rest of the adventure, the door works just like a normal door. (Note: If there are no secret doors in the area searched, the Dragon Master simply tells you so.)
- If the roll is 5 or lower, you've failed to locate any secret passages.
Beware: If you search a space that contains a trap, you automatically trigger it! Draw a card from the Trap Deck. The Dragon Master must announce the trap's location. If the trap harms you, your turn is over.
Action 6: Question a Monster
The Adventure Book tells the Dragon Master whether a monster has anything to say to the heroes.
- Some monsters have valuable information that can help heroes win the adventure.
- Other monsters will leave the setting peacefully, provided the heroes promise not to attack.
In either case, the heroes won't discover this information until someone asks questions.
Questioning a monster is a hero's action. The hero can ask up to four questions. (Option: Limit conversation to one minute. Use a watch with a second hand to track time.)
The Dragon Master plays the role of the monster, answering just as the monster would answer. (The Adventure Book offers guidelines.) Since heroes can ask anything, the Dragon Master may have to make up answers. Unless the adventure states otherwise, the monster must answer truthfully. "I don't know" is an acceptable response. So is "Who cares? I'm hungry!" (assuming the monster just wants to fight). If the monster has nothing to say, the Dragon Master can even answer all questions with a grunt.
Action 7: Perform a Feat
Does your hero want to climb a cliff? Kick open a locked door? Bend an iron bar—or even a few game rules? These and other actions are possible with a Feat of Dexterity or Strength.
Every hero has a Strength and a Dexterity feature (see Hero Cards). These allow a hero to attempt something bold or unusual that requires either brawn or a nimble body. For example, climbing a cliff is a Feat of Dexterity. And breaking through a locked door is a Feat of Strength. As with most other actions, success is not guaranteed . . .
If your hero attempts a Feat, roll the die shown on your Hero Card for the feature being used. If the result is a 6 or higher, you've succeeded!
If the roll is 5 or lower, the action fails completely—as if you've done nothing at all. If you haven't moved, you can still do so. On your next turn, you can try the Feat again if you wish.
Some common Feats of Dexterity:
- Climb a cliff or rock wall
- Aim and throw a lightweight object (such as a cup, grappling hook, or rock)
- Swing (on a rope or vine)
- Leap a distance equaling up to half your Speed (across a stream, for example)
- Sneak past a sleeping monster without waking it
- Pass through a monster's space (jump over a short guy, crawl through a big guy's legs . . .)
- Pick a lock (thief only)
- Search a live monster for treasure (thief only)
Some common Feats of Strength:
- Push, pull, or throw a heavy object (such as a boulder, or any monster except the dragon or giant) a distance of 1 square
- Lift a heavy object (such as the castle gate)
- Kick a locked door to force it open
- Bend something hard or strong (such as metal bars)
- Break something solid (such as a lock)
You can invent other Feats, too. (The heroes' success may depend on it!) The list is as endless as your imagination—within the following limits:
-
A Feat must involve either Dexterity (nimble hands or body) or brute Strength. If the Feat is not listed above, the Dragon Master decides which feature applies.
-
During a turn, a hero cannot move farther than his or her Speed allows.
For example, the warrior's Speed is 6. That means he can "leap" 3 squares. If he leaps first (an action), he can still move up to 3 squares farther. But if he moves 6 squares and then wants to leap, he can't—the Feat is impossible.
-
A Feat cannot take the place of a direct attack, causing an enemy to lose Hit Points. It can, however, harm the enemy indirectly. For example, the hero might push a monster into harm's way—or even off the board.
-
A Feat must be a single action. For example, a hero can't swing from a rope with one hand and throw a rock with the other. That's two Feats.
-
If a Feat involves an object, the object must be "in play." These are always in play: monsters and other pieces on the board, equipment on a Hero Card, and treasure. Unless the Adventure Book states otherwise, objects painted on the board are not in play.
-
The Feat must seem possible. For example, kicking down a door is a common Feat of Strength. But kicking down a wall doesn't make sense! The Dragon Master decides whether a Feat is possible. If a player can explain how the Feat might work, however, the Dragon Master MUST let the hero try. The Dragon Master cannot reject a Feat unless it truly seems ridiculous.
A Thief's Feats
Thieves can perform two Feats that no one else can: picking a lock, and searching a live monster for treasure. Both require Dexterity. The thief must be next to the monster or lock.
Special Terrain
This section describes unusual features in each setting that can hinder movement, sight, or both. Don't worry about special terrain rules unless they apply to the setting at hand.
Portcullis
The iron gate near the castle entrance is called a portcullis ("port CULL iss"). It blocks movement and normal attacks, but it does not block spells or the line of sight. A hero can raise or lower the portcullis with a Feat of Strength. A hero can also climb over the portcullis with a Feat of Dexterity.
Stairs
Two towers in the castle have stairs. The Adventure Book explains when these stairs are "in play." Otherwise, you can ignore them. (There's no basement or second floor.)
Water
A stream flows across the valley. When a figure (monster or hero) steps into any blue water space, it must stop, regardless of its Speed. In other words, a hero wading downstream can move just 1 space per turn. To avoid wet feet, a hero can leap across the stream (Feat of Dexterity).
The fountain in the city has water spaces, too; anyone entering one must stop. The wall around the fountain does not block movement or the line of sight.
Sidebar: Flying and Terrain
Monsters and heroes who fly have it easy: they can glide over forests, boulders, water, cliffs—even over the castle's portcullis. These barriers don't even slow a character in flight. Nor do they block an airborne figure's line of sight. Exception: An airborne figure still can't see through an adjacent forest square.
Boulders
Five boulders are scattered across the valley. Just like a rock wall, a boulder blocks movement and sight. A boulder can be moved with a Feat of Strength, however. It can also be lifted with a levitation spell.
Tip: To show how a boulder has been moved, put a Boulder Marker on the board. If the boulder has been lifted into the air, use a Wing Marker, too.
(The wizard has lifted this boulder with a levitation spell.)
Forest
The valley has forest squares. It's tough to move through a tangled woods. That's why each forest square counts double when you enter it, like two spaces instead of one. (Take note: If you can move just one more space in a turn, you cannot enter a forest square.)
The forest also hinders sight. You can peer into any adjacent forest square, but you cannot see through it to the squares beyond.
Cliffs
The valley and the cavern have cliff spaces (between dotted lines). No figure can stop in one of these spaces. To cross a cliff space—climbing up or down—a hero must perform a successful Feat of Dexterity.
Remember, no hero can exceed his or her Speed in any turn, with or without a successful Feat. Like any Feat, crossing a cliff is an action. But this action "moves" the hero 2 spaces.
Line of Sight: Cliffs do not block the line of sight with one exception:
- If the line of sight crosses a cliff, it ENDS in the first square upon the edge.
In other words, if you're looking up at a cliff, you can see someone standing at the edge, but not beyond. (Likewise, that "someone" can see you.)
(Warrior can see both orcs, but not the gargoyle.)
Climbing Cliffs
(1) The warrior starts his turn at the base of a cliff. A successful Feat lets him climb it—moving him 2 spaces as shown. This is his ACTION. (2) The warrior can still MOVE up to 4 more spaces (for a total of 6). Remember: No hero can exceed his or her Speed in a turn—even with a Feat. The warrior's Speed is 6.
(1) This time, the warrior must MOVE to reach the cliff. (If he's planning to climb it, he can move no more than 4 squares first.) (2) A successful Feat lets the warrior climb to the top of the cliff, as shown. This is his ACTION. (If he had failed the Feat, he'd just stay at the base.) The warrior above can't continue moving—he used his MOVE to reach the cliff.
Darkfyre
Every hero fears the dragon. That's not cowardice—it's common sense! Darkfyre is fast (his Speed is 12). And he's hard to hit (his Armor Class is 8). But more importantly, Darkfyre has powers that other monsters lack:
- He can open and close an adjacent door—even if it's locked or a figure is next to it.
- He can open a secret door—but then the door must appear on the board.
- He can breathe fire, torching up to 10 squares with his blast!
Here's how the breath attack works:
- Darkfyre targets his breath at a space lying 2 or 3 squares away, burning every space in between. Diagonal attacks are allowed. To measure distance, always count from Darkfyre's head (the front half of his figure).
- A fireball instantly explodes in the target space, burning that space and every space that touches it.
- Every figure struck by the flames must roll its "Save vs. Magic" die—including a monster! Those who fail (rolling 5 or less) lose 2 Hit Points. Those who succeed (rolling 6 or higher) lose 1 Hit Point instead.
But that's not all. Instead of the breath attack, Darkfyre can target an adjacent hero with three regular attacks each turn:
d10 claw + d10 claw + d12 bite
Moving
Darkfyre can fly, with a Speed of 12. Because his figure covers two squares instead of one, his movement differs from a hero's:
- When counting the squares in Darkfyre's move, only the front of the plastic base (his head) matters.
- When the front of the figure has finished movement, the rear can swing into any position. There's one exception: Darkfyre can't end up lying across a barrier (such as wall, a closed door, or a boulder).
(1) Head moves 3 spaces. (2) Tail swings into any position shown.
Appendix A: Guide to Markers
The Dragon Strike game includes 43 cardboard pieces. Some have different fronts and backs, as noted here.
10 Doors Put one on the board and turn it sideways to mark an open door.
1 Carriage Use as directed in an adventure. Back shows damaged carriage.
4 Treasure Chests Put one on the board when a hero looks into a room or building that contains a treasure chest—or when a hero first sees the chest. After the chest has been opened, remove the marker from play.
1 Hourglass Marker Put this on the Time Track when play starts, to count the rounds before the dragon's arrival.
2 Charm Markers Place one beneath a monster that is under a charm spell.
2 Darkness Markers Place one in the central space (target) struck by a darkness spell.
2 Web Markers Place one in the central space (target) struck by a web spell.
2 Invisibility Markers Place this under a figure who is invisible.
4 Wing Markers Place one under a hero or monster in midair.
6 Fire Markers with varying backs:
- 2 Smoke
- 1 Extinguished Campfire
- 2 Water
- 1 Grass
Use these as directed in an adventure.
3 Boulder Markers (front). Use these when a hero moves a boulder. Backs are as follows:
- 3 Tunnel/Cave
1 Rubble Marker Marks a blocked passage or entrance. On the back:
- 1 Pit
1 Water Marker Shows that the bridge has washed out. Note: Extra water appears on the back of fire markers.
Special Treasures
These represent special items that the heroes must find in some adventures.
1 Seal (front) and 1 Magic Flute (back)
3 Scepter Parts (fronts) with backs as follows: Sunstone, Pouch, Crystal Ball
Appendix B: Reading a Hero Card
Every hero has several features in common. Where dice are concerned, "bigger" is always better:
- The blue die (8-sided, or "d8") is weakest.
- The white die (10-sided, or "d10") is average.
- The black die (12-sided, or "d12") is toughest. It represents the greatest strength, willpower, or skill.
Speed. Equals the maximum number of spaces the hero can move each turn. All heroes except the dwarf have a Speed of 6. (The dwarf's Speed is 4.)
Armor Class. Ranges from 4 to 8. This number measures a hero's ability to withstand physical attacks. It's based on armor worn, as well as dodging skill.
Hit Points. Ranges from 4 to 8. This is the number of wounds a hero can sustain before dying. (Each time your hero suffers a hit, lower the clip on your Hero Card so it marks the number of points remaining.)
Attack. Shows which die to roll when your hero is attacking. The Attack Die reflects the deadliness of your weapon, as well as your skill in using it.
Save vs. Magic. Shows which die to roll when an enemy casts a spell upon your hero. The "bigger" the die, the better your chances of resisting the spell.
Find/Disarm Traps. Shows which die to roll when your hero attempts to locate and disarm traps.
Find Secret Passages. Shows which die to roll when your hero looks for secret passages—such as a door in a castle wall, or a cave entrance behind a tangle of brush.
Strength. Roll this die when your hero performs a Feat of Strength—such as lifting a boulder.
Dexterity. Roll this die when your hero performs a Feat of Dexterity—such as leaping a moat.
Equipment. A list of the equipment you're carrying—excluding weapons, armor, and clothes. All equipment is "in play." (You can use it if you wish.)
Example — Warrior:
- Speed: 6 spaces
- Attack: d12 (sword)
- Armor Class: 6 (chain mail)
- Save vs. Magic: d8
- Find/Disarm Traps: d8
- Find Secret Passages: d8
- Feat of Dexterity: d8
- Feat of Strength: d12
- Equipment: Sacks, rope, food, mirror, metal spike
- A roll equal to or better than your target's Armor Class equals success!
- A roll of 6 or better equals success!
Appendix C: Reading a Monster Card
When your hero meets a monster during an adventure, you and other hero players can look at its Monster Card.
Monsters can't do many of the things heroes can, so their list of features is shorter. These features work just like the heroes' own.
Speed. Equals the maximum number of squares that the monster can move each turn. Most monsters are slower than the heroes, but some are faster (especially those who fly).
Attack. Shows which die the Dragon Master rolls when the monster attacks.
Multiple Attacks: Some monsters can attack more than once in a turn. In that case, the Monster Card lists one die for each attack, with a "+" in between. All attacks must be targeted against the SAME hero.
Long-Range Attacks: An attack marked "long-range" can strike an enemy who is two or more squares distant. The monster can make either a normal or a long-range attack each turn; it can't do both.
Notes include any special attacks or defenses the monster has—such as the troll's ability to heal itself.
In addition, notes often explain how smart the monster is and whether it talks. This helps the Dragon Master play the monster's "role" when the heroes ask questions. Dumb monsters usually say dumb things and can be easily fooled. Smart monsters say clever things and are difficult to fool.
Example — Giant:
- Hit Points: 6
- Speed: 8
- Attack: d12 fist (or d10 boulder, long-range)
- Armor Class: 7
- Save vs. Magic: d8
- Notes: This towering creature stands over 10 feet tall. He packs quite a punch, but he favors another attack: crushing his opponents by throwing boulders or stone blocks. Giants are pretty dumb, but they can talk. (Favorite phrases: Me crush you like bug! Rrraargh!)
Example — Troll:
- Hit Points: 3
- Speed: 6
- Attack: d10 bite
- Armor Class: 6
- Save vs. Magic: d8
- Notes: Trolls are wart-covered creatures that like to hide under bridges. They heal very quickly. (In fact, they can even regrow severed limbs!) Each turn, after moving and attacking, a troll automatically regains 1 Hit Point it has lost. A dead troll can't recover Hit Points, however.
Appendix D: Expanding Play
With 16 complete adventures, the Dragon Strike game offers many hours of play. Adventures are even replayable; the Dragon Master just picks a new strategy during setup. And if you're an experienced Dragon Master, you can create your own adventures for the Dragon Strike game. Here's how.
-
First, think of a story. What problem will the heroes face? Who's behind it? And what must the heroes do to win? For example, must they find an object? Slay a villain? Or both?
-
Choose the setting: castle, cavern, valley, or city. You'll find blank maps at the back of this book. Photocopy the setting you've chosen.
-
Now decide where the monsters, traps, treasures, and secret passages lie. Which doors and chests are locked? Do any of the monsters have a random treasure? Record your decisions on the photocopy. Mark each monster's placement with a two-letter abbreviation. For example, if a bugbear is in a given space, write "BB" in that space on your map, and circle it.
Try not to overwhelm the heroes with too many monsters. Add up the Hit Points for the monsters in a single room or area. As a general rule, the total should not be more than half the total Hit Points of the heroes (as a group). Also, make sure you can match each monster on your map with an actual figure, one for one. For example, you have two gargoyle figures. So don't put three gargoyles in your adventure.
-
For an average adventure, heroes start with two Treasure Cards each. Add or subtract cards depending on how tough your adventure is.
-
Write a short introduction describing the heroes' goal. Also write down any clues that an important monster might provide if questioned.
-
Where should the Hourglass Marker start? To decide, think through your adventure, imagining the heroes move as fast as they can and do everything right. Count the turns as you go. Then add 5 turns to the total. The result represents a pretty good starting point on the Time Track. This formula isn't perfect, however. If you think your adventure is tough, but you want to keep it short, then give each hero at least one extra Treasure Card.
-
Is there a quick trigger for Darkfyre's arrival? Remember, the dragon always appears immediately if the heroes attack one another. If you've created a special ally for the heroes, Darkfyre should also arrive if the heroes harm that ally.
Painting Your Figures
To make your game unique, you can paint the plastic figures using bottled, water-based acrylics. (See painting suggestions on the box bottom.) First, be sure to wash your figures thoroughly with warm, soapy water. Rinse well. This preparation helps make sure your paints adhere. If you wish, cement loose parts (such as the dragon's wing) into place.
When you're ready to paint, start with a flat primer coat. (White is a good foundation for bright colors, while a black or a gray primer works well for darker color schemes.) Let the primer dry thoroughly. Then paint solid areas, starting with the "lowest" layers first (like clothes, or large areas of exposed skin). Let dry. Add surface detail (like highlights or designs on armor) last. A clear acrylic spray with a matte finish will help seal and protect your masterpiece.
Buy your painting supplies from a local hobby store if you can. They have the right paints for the job—and usually they'll offer friendly advice, too.
Guide to Symbols
- Dwarf Hero
- Elf Hero
- Thief Hero
- Warrior Hero
- Wizard Hero
- Dragon (Darkfyre)
- Fire Elemental
- Manscorpion
- Evil Wizard (Teraptus)
- Troll
- Orc
- Bugbear
- Giant
- Gargoyle
- Death Knight
- Trap
- Treasure Chest
- Door Marker
- Secret Passage
- Lock
- Random Treasure (Drawn from Treasure Deck)
- "Start" Arrow. Marks a starting position for heroes (see Map Book). If a map shows more than one "start," hero players must choose a position before the adventure begins. All heroes start in the same location (they're a team).
Rules in Brief
(Quick-reference summary printed on the Instruction Book.)
How to Win
- Heroes win (as a team) if they achieve the adventure goal and all of them escape the game board alive. (Option: Heroes also win if they kill the dragon—whether or not they accomplish the goal or all survive.)
- Otherwise, the Dragon Master wins.
Who Plays When
Hero to left of Dragon Master plays first. Play proceeds to the left. Dragon Master plays last—controlling ANY or ALL monsters that are out on the board.
A Monster's Turn
- Move, then attack. Or attack, then move. Teraptus (evil wizard) can cast a spell instead of attacking.
A Hero's Turn
- Move, then perform one action. Or perform one action, then move.
Hero Actions
- Attack
- Cast a Spell (wizard and elf only)
- Search for Treasure (automatic success if treasure is present) . . . in a treasure chest or on a dead, captive, or sleeping monster
- Find and Disarm Traps★ . . . on a treasure chest or in a room or in any space you can see, up to 3 spaces away
- Search for Secret Passages★ . . . in a room or in any space you can see, up to 3 spaces away
- Question a Monster (4 questions max.)
- Perform a Feat of Strength or Dexterity★
★ Roll the die shown on your Hero Card. A "6" or higher equals success!
How to Attack
- Roll your Attack Die.
- Compare the number rolled to the enemy's Armor Class:
- If the roll is equal or higher, the attack succeeds. Target loses 1 Hit Point. When a target has 0 Hit Points, it's dead.
- If the roll is lower, the attack fails.
Basic Attack: Attacker must be next to target. Long-Range Attack: Attacker must see target and have clear shot. At least 1 square must separate attacker and target (unless either figure is in air).
Note: Diagonal moves and attacks are allowed.