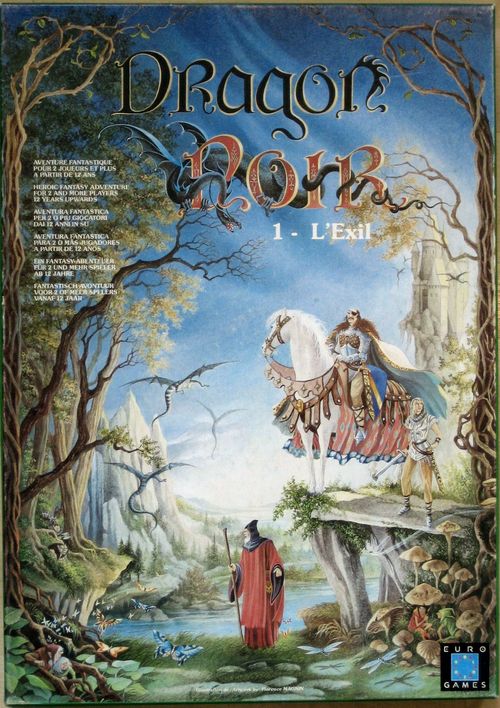
Dragon Noir 1: L'Exil
Dragon Noir 1: L'Exil Rulebook
Table of Contents
Table of Contents
Introduction
Don't be frightened if the rules seem a little long to you: most of them are very easy to remember because they are directly inspired by reality. They explain, for example, that to get into the saddle you must be next to your horse, or that to enter a house you are better off going through the door... Read them quickly and start playing the first scenario right away. During the game you can use the various sheets supplied with the game. If you get stuck on a precise point, consult the detailed contents list at the back of this booklet.
Game Components
The DRAGON NOIR box contains:
- 2 surface maps: the Watermill (Le Moulin à Eau) and the Arena (L'Enclos).
- 2 underground maps: the Dragon's Lake (Le Lac du Dragon) and the Dwarves' Cavern (La Caverne des Nains).
- 1 sheet of pre-cut counters representing the characters of the adventure.
- 3 sheets of magic terrain (to be cut out).
- a rules booklet and a booklet telling the story and the scenarios.
- 2 wizard sheets (one for Zacharie and one for Shaman).
- 1 sheet explaining how to use the characters of the game.
- 2 game sheets with firing and combat tables.
- 2 character distribution sheets.
- a 10-sided die (numbered 0 to 9, the 0 counting as 10).
The Maps
They are of two types:
- The surface maps. Each side is identified by a number. To form varied playing surfaces, they can be joined either along the width or along the length. They are compatible with all the maps of the medieval series games.
- The underground maps. For these maps, side X of one goes with side X of another; the same for side Y. Across the width, the arrows must point in the same direction. These maps are compatible with the 6 maps (the underground passages) of L'Epreuve, the second episode of Dragon Noir.
At the start of each scenario there is a small diagram that indicates the exact layout of the playing surface, as well as the sides through which the various characters enter (see the scenario booklet).
The Magic Terrain
Three sheets to be cut out are supplied with the game. They are used for the magic spells that affect the terrain. Their use is explained in the Magic section. Here is the list of the different types of terrain:
- Trees: There are 6 small trees, 4 medium and 3 large (respectively 1, 3 and 7 hexes).
- Crevasses: There are 11 small, 2 medium and 2 large (respectively 2, 4 and 6 hexes).
- Underground entrances: There are 3 one-hex entrances and 2 two-hex entrances.
- Galleries: There are 5 straight one-hex galleries and 2 two-hex ones, 5 curved one-hex galleries and 2 crossings.
- Houses: There are two small houses, one medium and one large (respectively 4, 5 and 7 hexes).
- Broken wall: There are 6 broken walls (one hex).
- Bridges: There are 4 small bridges (1 water hex) and 2 large bridges (2 water hexes).
- Springs: There are 4 small springs, 2 medium and 2 large (respectively 2, 4 and 6 hexes).
- Towers: There are 2 towers (7 hexes).
The Counters
In DRAGON NOIR, each counter represents a character and each game turn represents a very short span of real time: a few tens of seconds at most. Just enough time to shoot an arrow, strike a sword blow and cover a few metres.
The width of a hexagon equals two metres, enough space for a character on foot to wield his weapon but not for a horseman, still less for a dragon! This is why a mounted character occupies two hexes.
Each character on foot is represented by two counters printed on both sides. As a general rule, the first shows on one side the character in full health and on the other the character stunned. The second counter shows the same character when he has been wounded or... killed. Characters who have a mount are represented by four counters: two represent them on foot and two others mounted. On the back of the counters representing them mounted, there is the drawing of the horse without rider or of the dead horse. This is explained in more detail on the small "Use of the counters" sheet supplied with the game.
Three numbers appear on each counter:
- a black number: it represents the character's attack strength. Its value is determined by the length and weight of the weapon, the skill of the man who uses it and his physical condition.
- a blue number: it represents the character's movement potential, in other words the number of movement points he can spend each game turn. Its value is determined by the mode of transport - on foot or mounted -, the weight of the armour and the physical condition of the character.
- a red number: it represents the character's defence strength. Its value is determined by the character's skill at parrying and dodging blows, as well as by his physical condition. Characters in armour and barded horses have their red number circled.
Playing a Game
The players first choose one of the scenarios offered. If they wish to play the whole campaign, they play the scenarios in chronological order. Before starting the game, they must lay out the playing surface in the manner indicated and select the characters present in the scenario.
The game itself consists of a succession of game turns giving the initiative alternately to one side or the other. In turn, each player thus has his characters shoot, move and fight. When there are several players on each side, the characters of one side shoot, move and fight at the same time. As we will see, a player can also intervene during his opponent's turn through defensive fire.
Organisation of the Game Turn
Each game turn proceeds as follows:
Player A's turn
- OFFENSIVE FIRE: all the archers and crossbowmen of side A may shoot, except those who are in contact with an enemy character.
- MOVEMENT AND DEFENSIVE FIRE: all the characters of side A may move, except the crossbowmen who have just shot. During the movements of the characters of side A, player B may make defensive shots with shooters who are not in contact with the enemy.
- COMBAT: all the characters of side A in contact with enemy characters may attack.
- STUNNED CHARACTERS: all the characters of side A who were stunned during the previous game turn are put back on their feet (the counters concerned are turned over). During player A's turn, each of the wizards has the right to cast one spell and one counterspell.
Player B's turn
Player B's turn proceeds exactly in the same way as player A's, but this time it is side B that has the initiative and plays in place of side A. Player A may intervene in sequence 2 by defensive fire. Each of the wizards again has the right to cast one spell and one counterspell. When sequence 4 is finished, a new game turn begins and player A starts again at sequence 1.
N.B. It is important to respect the order of the sequences carefully. A new sequence can begin only if the previous one is finished.
Shooting with a Bow or Crossbow
Three missile weapons are present in this game: the short bow, the long bow and the crossbow. Only Laberne, Jon and the Elves have long bows. Each character can shoot only once per shooting sequence, but it is possible to shoot several times at the same target with different shooters.
Each weapon has its own characteristics that influence its use: power, rate of fire, range and handiness. These characteristics are summarised in the Rate of Fire & Movement table on the game sheet.
Remember that a character cannot shoot if he is on a hex adjacent to an enemy character at the moment of the shot. He is considered to be busy fighting hand to hand. This does not apply if the enemy character is not in a position to attack the hex occupied by the shooter (see Combat Restrictions). Laberne and Jon cannot shoot when they are mounted because they have long bows. Arlon can shoot when mounted but he is obliged to dismount to reload his crossbow.
N.B. A wounded shooter can continue to shoot even if he is shown without his bow or with a damaged weapon.
Line of Fire
A character can shoot at an enemy character as long as there is a clear line of fire between the shooter's hex and his target. The line of fire consists of an imaginary straight line drawn from the centre of the shooter's hexagon to the centre of the target's hexagon. If this line of fire crosses a hex containing either a character or a type of terrain other than flat terrain, the shot is subject to the restrictions explained further on (see Shooting Restrictions).
Resolution of Shots
Even though it is above all the die that determines the result of a shot with a bow or crossbow, there are nevertheless several factors that can modify the shooting conditions. Look at the game sheet. On this sheet, to the left of the table showing the terrain types, are all the tables used to resolve shots. The first indicates the possible modifications to make to the number obtained on the die according to the range of the shot and the shooter's state of health. The next two tables each correspond to a category of target: on foot or mounted. Depending on the case, one therefore refers to one of the two tables, in the column corresponding to the weapon used.
The die is rolled once. One then follows horizontally the line of the number obtained after modifications. In the column corresponding to the target's cover - none, light, medium or strong - one has the result of the shot: A, B, C, D, E or F. The meaning of the results is given with each table. The cover provided by each type of terrain is indicated in the central table.
N.B. Note that the shooter adds 1 point to the die result when the targeted character is in armour (defence potential circled).
Defensive Fire
Unlike offensive fire, which is carried out against motionless characters, defensive fire takes place while the enemy is moving. The player making defensive shots can thus interrupt at any moment the movement of a character on a precise hex and decide to shoot at him with one or several shooters. It is not possible to make a defensive shot against a character who has not yet started to move, unless the opposing player does not intend to move him during his turn.
Warning! To be able to make a defensive shot, a long-bow archer must not have moved during his turn; a crossbowman must have neither moved nor shot during his turn (see the Rate of Fire & Movement table on the game sheet).
Shooting Restrictions and Cover
(In alphabetical order)
Trees. If there are trees or tree branches between the shooter and his target, the shot is impossible. It is possible, however, to shoot at a character on a tree hex as long as the line of fire crosses no other tree hex. A character on a tree hex benefits from light cover.
Brush. It is possible to shoot into and through brush hexes. A character benefits from light cover if he is on a brush hex.
Horsemen. A mounted character occupies two hexes. If the two hexes do not offer the same cover, he is considered to always benefit from the strongest cover. Example: a mounted character who occupies a flat-terrain hex and a brush hex benefits from light cover.
Crevasses. Crevasse hexes never block the line of fire.
Dragons. It is impossible to shoot at an adult Black Dragon (Dragon Noir) because its skin is harder than chain mail. The Dwarf Dragon (Baby Dragon) can be hit by shots. The calculation is made as for a mounted character without armour.
Houses
Shots through windows. a) From the inside: a character in a building can shoot outside only from a window hex. The line of fire then starts from the middle of the outer edge of the window and not from the centre of the hexagon. b) From the outside: a character located outside can shoot through a window only if the target is immediately behind the window. The line of fire must be able to reach the centre of the window hex, otherwise the shot is impossible. Special case: a shooter posted on the hex adjacent to the edge of the window can shoot inside the building. His field of fire is however limited to only the hexes that form the room. His line of fire starts from the middle of the inner edge of the window.
Shots through doors. A character located outside or inside a building can shoot through a door as long as his line of fire is not blocked by a portion of wall. The line of fire is calculated normally. However, when a character shoots from a door hex, his line of fire starts from the middle of the opening and not from the centre of the hexagon.
Cover: characters inside a building benefit from medium cover when shot at through a door or a window.
Walls. Walls block the line of fire. A character behind a wall without an opening benefits from total cover. It is therefore impossible to shoot at him.
Characters. If the line of fire of a crossbowman passes through a hex occupied by a standing character - man or animal -, the shot is impossible. On the other hand, stunned or dead characters do not block the line of fire. Archers can shoot over other characters provided the target is at medium or long range. Exceptions: 1) a character on a water hex never blocks the line of fire (see River); 2) when a shooter located on a slope cannot see a character located below, he can shoot over freely (see Slope); 3) when mounted, Arlon can shoot over a friendly character adjacent to him. See also the optional rule proposed at the end of the booklet: Errare humanum est...
Bridges. A bridge never blocks a line of fire. However, when a line of fire crosses a bridge, characters in the water benefit from medium cover.
Prison. When a line of fire crosses the bars of a cell, the target benefits from light cover, unless the shooter is on a hex adjacent to the bars. For the rest, see Houses.
River. A character on a water hex never blocks a line of fire. He cannot shoot and benefits from light cover (see also: Bridges).
Springs: see River.
Underground passages. Because of the lack of light (the characters have only torches), shots are impossible underground if the target is more than 5 hexes from the shooter. The line of fire is calculated normally. As long as the shot is possible, the target benefits from no cover, whatever the terrain he is on. A character located on an underground entrance hex benefits from medium cover.
Slope. Slope hexes do not block the line of fire as long as it does not pass over the top of the slope. When the line of fire passes over the top of a slope, the shot is possible only if the character below is at least as far from the slope hex as the character located above. If he is closer, no shot is possible between them because they cannot see each other. Exception: the shot is possible when the character below is on the slope hex itself. He can then shoot but can also be shot at, because he is considered to be halfway up the slope. A character on a slope hex benefits from medium cover when the line of fire passes over the top of the slope.
Towers. When a character on a tower aims at an outside target, his line of fire starts from the middle of the side chosen for shooting and not from the centre of the hexagon. Within a radius of 8 hexes, the shooter no longer has to take into account characters or other obstacles located below. Brush and slope hexes no longer offer any cover within the indicated radius. Warning! Trees, houses and other towers continue to block the line of fire. When shot at from outside, a character located at the top of a tower benefits from strong cover if he is behind the rampart and from total cover if he is in the centre of the tower.
Movement
Each character has a number of movement points printed on the counter that represents him (blue number). Each hex crossed makes him spend a number of movement points corresponding to the difficulty of the terrain (see the terrain types table on the game sheet). Each turn, a player can move all or some of his characters, using all or part of each one's movement potential. Unused movement points cannot be transferred from one character to another, nor kept in reserve for later turns.
Movement Restrictions
-
Characters cannot pass through hexes containing enemy characters, unless these are stunned or dead. Crossing hexes containing friendly characters, on the other hand, poses no problem.
-
Mounted characters cannot pass through a tree hex, a house interior hex, a water hex or an underground entrance hex. Under certain conditions, a horseman can jump over a water hex (see further on). Horses without a rider and held by the bridle can cross tree hexes. If they have no barding, they can also cross water hexes.
-
Characters in armour and horses with barding can never pass through a water hex. Ford hexes (white stones in the water) can however be used by characters on foot with or without armour, but not by horses.
-
The hexes of a bridge are not accessible from a water hex and vice versa.
-
No character can be on a crevasse hex. Under certain conditions, a horseman can jump over a crevasse hex (see further on).
-
Walls are impassable. To enter a building, a character must be on foot and go through a door or a window.
-
Hexes containing three dead men or one dead horse cost one movement point more than their normal cost. A hex becomes impassable if it contains six dead characters or two dead horses (or three characters and a dead horse).
N.B. Certain characters have special powers that allow them to break some of the rules set out here (see Special Powers).
How to Clear a Hex That Has Become Impassable
Two characters on foot can move three dead men or one dead horse by one hex. The two characters can do nothing else during their turn: neither move, nor shoot, nor fight. If the corpses are thrown into the water, they are considered to sink, and the counters representing them are removed from the map.
How to Carry a Stunned Character
A character on foot who passes through a hex where a stunned character is can carry him on his back, but the movement points he has left are then halved (rounding down if necessary). At the end of the movement, he sets the stunned character down on one of the hexes next to his own.
Infiltration of Enemy Lines
When a character crosses, during his movement, a hex adjacent to an enemy in a position to attack, the player concerned must roll the die and consult the corresponding table on the game sheet. This rule applies only to hexes crossed. A character who ends his movement on a hex adjacent to the enemy does not cause a die roll.
Movement Particular to Mounted Characters
The arrow drawn on the counters of mounted characters indicates the general direction of movement. To advance onto the hex towards which the arrow points or one of the two adjacent hexes, the horseman spends his movement points normally. On the other hand, as soon as the horseman turns his horse more sharply, he spends 1, 2 or 3 points more than the normal cost of the hex, as shown in the diagram (not reproduced here).
The numbers on the hexes indicate the cost of each of them relative to the horseman's initial position. A horseman who performs a complete half-turn on the spot spends 3 movement points.
Mounting and Dismounting
To be able to mount a horse, a character must be on one of the hexes adjacent to the horse. Neither the horseman nor the horse may be adjacent to an enemy in a position to attack. The counters of the rider on foot and of the horse are then replaced by the single counter representing the same horseman mounted. Only horsemen can mount horses belonging to other characters. When a character dismounts, the counter representing him mounted is turned over and the counter of the horseman on foot is placed on an adjacent free hex. There is no particular restriction on dismounting.
To mount or dismount, a light horseman (without armour) spends 2 movement points and a heavy horseman (in armour) spends 3. These points are deducted from the movement potential indicated on the counter before the character mounts or dismounts. The remaining movement points can be used as follows:
- if the character mounts, the points remaining to the character on foot are multiplied by two and this gives the potential remaining to him mounted.
- if the character dismounts, the points remaining to the mounted character are divided by two and this gives the potential remaining to him on foot. If this character is wounded, divide by four.
In both cases, round down if necessary. (Special case: for Thrug, instead of dividing by 2 or 4, divide by 4 or 8.)
Example: Laberne covers 4 hexes mounted, then dismounts. He therefore has a potential of 15 minus 6 = 9 points left. This potential is divided by 2, which gives 4.5, rounded down to 4. Laberne still has 4 movement points after dismounting. Another example: wounded Grast covers 6 hexes mounted, then dismounts. He has 12 minus 9 = 3 points left. Divided by 4, this gives less than 1. He therefore ends his movement next to his horse, without going any further.
How to Jump over a Water Hex or a Crevasse
A mounted character can try to jump over a water hex or a crevasse hex. At the moment of the jump, the player concerned rolls the die and consults the corresponding table on the game sheet. The result applies immediately.
Horses without Riders
Horses that have no rider remain motionless until they are mounted or led by the bridle. To lead a horse by the bridle, it is enough to make a character, even a wounded one, pass through one of the hexes adjacent to those of the horse. The character can continue on his way, followed from then on by the horse, which is treated as a simple extension of the counter leading it.
A horse without a rider remains under the control of the same player as long as he has a living, non-stunned character in the immediate vicinity of the horse. Otherwise, the horse belongs to the first player who takes control of it. A mounted character holding another horse by the bridle automatically loses control of the latter if he is involved in a combat. A character on foot can lead up to three horses by the bridle. A mounted character can lead only one.
Stacking of Counters
During the game, it is possible to move characters through hexes containing a friendly character, a stunned character or a dead character. But, at the end of each movement sequence, only one living character must remain per hex. Exception: on underground entrance hexes, there may be two characters on the same hex. One is above the entrance and the other in the entrance itself. They are placed one on top of the other, in that order. These characters cannot fight each other.
Combat
When two or more characters are on adjacent hexes, they can fight each other. Every combat is optional. The decision to attack belongs to the player whose turn it is. His characters will thus be called the attackers. On the following turn, they will defend against the opposing attackers. Each character can make only one attack per turn, but a defender can be attacked several times by different attackers.
To resolve a combat, the attacker's strength (black number) is divided by the defence strength of the attacked character (red number). This gives a strength ratio that corresponds to a column of possible results in the appropriate Combat Table. The attacker then only has to roll the die to learn the exact result of the combat in progress. On the game sheet there are two Combat Tables: one is used to resolve combats against mounted characters, the other against characters on foot.
When calculating a strength ratio, the number obtained is rounded if necessary in favour of the defender. Thus, an attacker of strength 8 against a defender of strength 3 gives a strength ratio of 2.3 to 1, which is rounded to 2 to 1 (2-1). Attacks at less than 1 to 1 are impossible.
Effect of Terrain on Combat
The strength ratio of a combat can be modified by the nature of the terrain on which each of the characters involved stands. As can be seen in the terrain types table (see game sheet), a terrain can influence a combat in three ways: it can be neutral (0), or favour the character on it (+), or put him at a disadvantage (-).
Depending on the terrain each one occupies, the initial strength ratio may therefore have to be modified by shifting the column of possible results to the left or to the right. This is explained by the table located above the two Combat Tables on the same sheet.
A mounted character is considered to be on the least advantageous terrain of the two hexes he occupies.
Multiple Combat
When a character is on a hex adjacent to several opponents, he can choose to fight some of them, all of them or none. If he decides to attack several, he must add their defence points into a single overall factor, which he then compares with his attack points.
When two (or more) characters decide to attack an enemy character, they can attack him individually or else add their attack points into a single overall factor, which is compared with the defender's strength. If they attack together, they are also entitled to shift the strength ratio thus obtained one column to the right (see example below). This rule applies against a mounted character only if he is attacked by several horsemen.
When the result of a combat indicates that one of the attackers or defenders has been stunned or wounded, it is the player of the side concerned who decides which of his characters takes the blow. On the other hand, the result "attacker retreats" or "defender retreats" applies to all the characters who took part in the attack or the defence.
If the attackers decide to attack together and they are on different terrains, it is the least advantageous terrain that will be taken into account to compare it with the one occupied by the defender. Example: suppose two characters attack an enemy at 4 to 1 (4-1). If one is on a (0) terrain and the other on a (-) terrain, both attackers will be considered to be on a (-) terrain. If the defender is on a (0) terrain, the strength ratio must be shifted one column to the left (4-1 becomes 3-1). But as they are attacking together, they are entitled to shift the strength ratio one column to the right. The combat will therefore be resolved at 4-1, the number of attackers counterbalancing the disadvantage of the terrain.
Combat against a Defender in Armour
When a character attacks a defender in armour (defence strength circled), he adds 1 point to the number obtained on the die. It is this modified number that will indicate the result of the combat. If there are several defenders and they are not all in armour, this rule does not apply.
Advance after Combat
If, following a combat, the attackers or the defenders had to retreat (or if one of them was stunned or killed), the victorious player may advance one of his characters by 2 hexes if he is on foot and by 3 hexes if he is mounted. The first hex crossed must necessarily be one of the hexes evacuated by the enemy (or the hex of the stunned or killed character). The advance after combat is not compulsory but it must be carried out immediately, without waiting for the resolution of the other combats in progress.
Only a character involved in the combat can benefit from the advance after combat. The movement points used during the advance after combat do not prevent the character concerned from moving normally during his game turn.
Important: the advance after combat must take into account the stacking and infiltration of enemy lines rules. However, in the latter case, an enemy character adjacent to the hex crossed causes a die roll only if he is not engaged at that moment in a combat, in attack or in defence. It does not matter whether the combat has already taken place or not.
Combat Restrictions
As a general rule, any combat is impossible when the attacker cannot go onto the hex he is attacking. Examples: a character in armour cannot attack a character in the water; a horseman cannot attack a character on a tree hex.
Shooting and Combat Involving Horses
When a horseman is unhorsed following a combat or a shot, the appropriate counter - horseman stunned, wounded or dead - is placed by the player to whom he belongs on one of the hexes adjacent to his horse. If all the adjacent hexes are occupied, a friendly character is shifted by one hex to make room for the unhorsed horseman. If he is entirely surrounded by enemies, an unhorsed horseman is automatically dead. The horse stays in place and must be represented alone (dead or alive depending on the result indicated).
If a player decides to attack a horse without a rider, he resolves the combat or the shot as if he were dealing with a mounted character. However, the results C, D, E or F for shots, and E, F, G or H for combats, cause the death of the horse. Note that horses have different defence potentials depending on their temperament and equipment. A barded horse is considered to be a character in armour both for shots and for combats.
Dragon Noir
Dragon Noir and Movement
The counter that represents the Black Dragon occupies five hexes. It is easily positioned by making the head of the counter coincide with a hexagon. Unlike mounted characters, the dragon can move in all directions, without spending additional movement points. To calculate its movement, the hex located at the centre of the cross formed by the counter is used as the base. When it moves, the dragon pushes aside any other character in its path. It can therefore never be blocked. The infiltration of enemy lines rule does not apply to the dragon. On the other hand, it applies to characters passing near the monster.
Dragon Noir in Combat
The body of the Black Dragon is divided into five parts. The head, the two front legs and the tail each have an attack potential and a defence potential. The body proper has only a defence potential. It is possible to attack each part of the body separately, from the adjacent free hexes, exactly as for any other character. However, to kill the dragon, it is necessary to wound the central part three times.
As long as the dragon is in full health, the central part of its body can be attacked only from two hexes. However, as soon as the head, the tail or one of the front legs receives a second wound, it no longer has any defence potential. A character can then temporarily occupy the hex to attack the central part, alone or with other characters. At the end of the combat, if the dragon is not dead, the character must reposition himself on an adjacent hex. The number of hexes from which it is possible to attack the vital centre of the beast is thus progressively increased.
The table used to fight the Black Dragon is the one for combats against characters on foot. The results D, E and F become "Dragon wounded". When the Black Dragon attacks, the appropriate combat table is used. The results are applied normally. However, in attack as in defence, the dragon never retreats (results that make it retreat are ignored). It can, on the other hand, be wounded.
The dragon benefits from a shift of the strength ratio of one column to the right when it attacks a character with two parts of its body. Example: the head and a front leg, or the tail and a front leg.
Special Powers
List of the other characters having special powers.
Baby Dragon or Dwarf Dragon
When it moves or fights, it ignores the infiltration of enemy lines rule. As far as shots are concerned, it is considered to be a mounted character without armour. The results D, E and F become "Dragon wounded". The other results have no effect. As far as combats are concerned, it obeys the same rules as the Black Dragon. However, unlike the latter, it retreats normally, in attack as in defence.
Crazy Ork
As soon as he suffers a wounded or stunned result during a shot or a combat, Crazy Ork goes berserk. The counter representing him in good health is then replaced by the counter that represents him stronger. As soon as he has gone mad, the results "Defender stunned" and "Attacker retreats" or "Defender retreats" are no longer applied to him. It is only by wounding him a further time that one succeeds in killing him.
The Elves
Excellent shots, the four Elves systematically subtract one point from the die when they shoot. In combat, tree hexes are considered for them as advantageous terrain (+), the opposite of other characters.
The Gargoyles
They are spectres. They appear when called by a wizard. They can fly short distances (5 hexes maximum) and pass over level 1 obstacles. It is impossible to stun them, wound them, still less kill them. They can, on the other hand, be made to retreat. In shots and combats, all the results "stunned", "wounded" or "killed" are turned into a simple retreat. They remain only 4 game turns before dematerialising again (*).
The Goblins
They spend only 2 movement points to cross a water hex. They can pass freely from a water hex to a bridge hex and vice versa.
The Living Deads
They are spectres. They have the same powers as the Gargoyles as regards shots and combats. They move, however, normally. They remain 2 complete game turns before dematerialising again (*).
(*) The player turn during which they appear counts as half a turn.
Lucifer & the Wardogs
They are dogs. They ignore the infiltration of enemy lines rule when they move. In shots and combats, "stunned" results are turned into a simple retreat. A single wound is enough to kill them. In combat, if Godiva is attacked, one is obliged to add Lucifer's defence potential to that of his mistress if the dog is on a hex adjacent to the young woman.
The Dwarves
The Dwarves are very close-knit. When they attack together, the strength ratio obtained is shifted one column to the right for each dwarf present in the combat.
The Trolls
They can never be stunned. Any "stunned" result is turned into a simple retreat. They must be wounded three times to be killed.
Zed
A specialist in thrusting weapons, Zed dips his weapons in curare. Any enemy character wounded in a combat in which Zed takes part dies instantly of his wounds. Thus, any "wounded" result is equal to "killed".
Magic
In L'EXIL, only Zacharie and Shaman have the quality of wizard. They are first-level wizards. Magic spells are divided into three main categories:
- personal spells, which the wizard applies to himself;
- spells on others, which affect other characters, whether or not they belong to the same side as the wizard;
- spells on the environment, which affect the terrain on which the action takes place.
A last category, somewhat particular, brings together pure magic spells not falling into the preceding ones, notably those that make spectres appear such as the Living Deads or the Gargoyles. You will find the complete list of spells on the back of the wizard sheets supplied with the game.
Each time a wizard casts a spell, he spends a certain number of Energy Points (EP; "PE" in the French text). Depending on the wizard's level, he has more or fewer energy points (available EP = Level x 100). Thus, a first-level wizard has 100 energy points. Beyond this number, he can no longer cast spells. When a wizard is wounded, the number of energy points he has left is divided by two (rounded down). If he heals, the EP he has left are multiplied by two.
A spell does not succeed automatically. For each spell, the wizard must roll the 10-sided die (0=10).
- for a spell that requires 1 to 10 energy points, he must roll more than 1 on the die to succeed.
- for a spell that requires 11 to 20 EP, he must roll more than 2 on the die to succeed.
- for a spell that requires 21 to 30 EP, he must roll more than 3 to succeed, etc.
Depending on his level, a wizard acquires a bonus that is added to the die result. The size of this bonus is equal to the level reached: level 1 / +1 on the die, level 2 / +2 on the die, etc. In other words, Zacharie or Shaman are sure to succeed with spells requiring no more than 10 energy points. They need in fact to roll at least 2 on the die, and they have a bonus of 1 point.
On each of a player's turns, each wizard can cast one spell and possibly counter another. The moment of casting the spell is decided freely by each player. However, if two enemy wizards want to cast a spell affecting the same character or the same hex, it is the one with the most energy points in reserve who wins the initiative. The other wizard always has the possibility of countering the spell that has just been cast. The counter must be announced before the wizard who cast the spell has rolled the die. In this case, it is the wizard who countered who rolls the die to find out whether his counter succeeds, as for a normal spell. A counterspell costs double the energy points of the spell cast. If the counter succeeds, the spell is not applied. If the counter fails, the wizard who cast the spell rolls the die in his turn to find out whether he succeeds. It may happen that a counterspell fails against a spell that also fails. Whatever the final result, both wizards spend the corresponding energy points (each player subtracts the points in question from the energy point reserve of his wizard on the magic sheet).
The radius of action within which a spell can be applied depends on the level of the wizard casting it. For a first-level wizard, this radius is 10 hexes from the hex he occupies (that hex does not count in the 10 hexes). A wizard can try to cast a spell affecting a character or a hex located beyond his radius of action. But, in that case, he has a penalty on the die of one point per hex beyond the limit. It is possible to try to counter a spell in the same way, by calculating the distance between the countering wizard and the character or hex targeted by the spell.
N.B. When a spell affects several hexes, it is always the hex farthest from the wizard that is taken into account for the calculations.
Optional Rule
Errare humanum est
There is often great confusion during combats. To simulate this, each time a shooter botches his shot (result "shot missed"), the player concerned rolls the die a second time to find out whether he has not wounded by mistake a character located nearby. If he rolls a number of [illegible in the scan; reads "1 ... 0" - possibly "1 to 10"], the projectile has ended its course in one of the 6 hexes around the target and wounds any character found there. Characters in armour are not wounded but must immediately retreat 2 hexes. It is obvious that if the line of fire is blocked by an obstacle, the character cannot be hit.
N.B. Before rolling the die, a number is assigned to the 6 hexes around the target. For mounted characters, the part of the counter containing the small black arrow is taken as the centre.