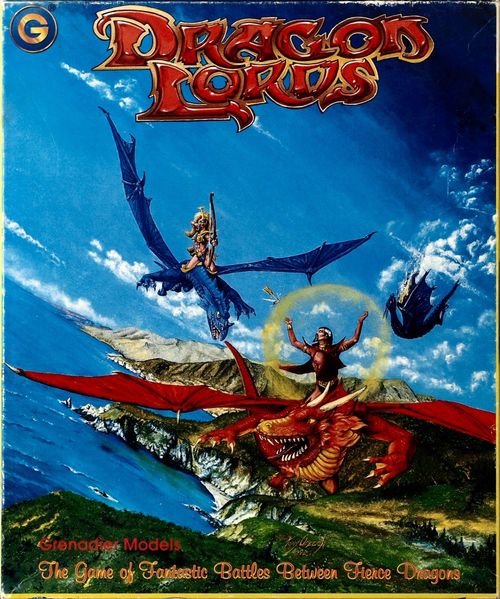
Dragon Lords
Dragon Lords Rulebook
Table of Contents
Table of Contents
How to Win
There are two basic types of Dragon Lords games: the free-for-all and the team game. In the free-for-all, it's every dragon for itself and the object is to control the last dragon on the board. In the team game, dragons take sides and face off against each other and the object is to destroy all of the dragons on the opposing team.
Components
Dragon Lords includes:
- 18 metal dragon and rider parts, including 6 dragon bodies, 6 sets of dragon wings and 6 dragon riders.
- 6 plastic stands to put the dragons on.
- 6 full-color map sheets overlaid by a hexagonal grid.
- A set of 70 counters: 10 for each of the 6 altitude levels and 10 to mark when two dragons are engaged in combat.
- 2 quick reference sheets for use during play.
- 4 dice.
- This rulebook.
Dice
You need 4 standard six-sided dice to play Dragon Lords. Another name for a six-sided die is d6. Throughout the game, the notation #d6 is used to tell you how many dice to throw and add together for the result. "Roll 3d6" means roll three dice and add them together. Sometimes the notation will be followed by a modifier. "Roll 2d6+2" means roll two dice, add them together and then add two for the final result.
About This Rulebook
This first part of this rulebook (up through page 14) covers exactly how to play a basic Dragon Lords game. The second part (pages 15 through 29) introduces the advanced Dragon Lords rules, as well as some innovative optional rules which make for even more exciting and realistic play.
The third part (pages 30 through 35) features a number of ready-made dragons, all set to be used in your games. The last section (pages 36 through 40) includes a detailed example of play and news about current and upcoming Dragon Lords support products. Plus, there's a blank play sheet and a game log, both of which you can photocopy for your personal use.
Figures
The rulebook's figures panel illustrates the wing sizes (Tiny, Small, Medium, Large, Huge) and body weights (Very Light, Light, Average, Heavy, Very Heavy) used on the play sheet.
The Play Sheet
The heart of Dragon Lords is the play sheet. It contains all the information you need to know about a particular dragon in order to use it in a game. This rulebook contains several ready-made dragons (pages 30-35), all set to go for your games, plus guidelines for how to design dragons of your own. Although dragons may differ a lot, they can all be represented on a Dragon Lords play sheet.
To get a better idea of how a play sheet works, let's take a look at one that's been filled out.
Name: The name of the dragon goes here.
Body Weight: A dragon's body weight ranges as follows: Very Light, Light, Average, Heavy and Very Heavy. The heavier the dragon is, the more body damage it can take, but a heavier dragon is less maneuverable and has a higher minimum speed.
Wing Size: The wings of a dragon are ranged like the body: Tiny, Small, Medium, Large and Huge. The larger the wings, the more maneuverable the dragon is. Larger wings can also absorb more damage and give the dragon a greater maximum speed.
Breath Weapon: Each dragon has one of the five different types of breath weapons. They are, in order of increasing deadliness: Cold, Lightning, Flame, Ice and Magma.
Tooth and Claw (T & C) Sharpness: The sharpness of the dragon's teeth and claws is also ranged: Blunt, Dull, Sharp, Jagged and Razor Sharp. The sharper its claws, the more damage the dragon can inflict in a fight.
Maneuverability Rating: Abbreviated as MR, a dragon's maneuverability rating is determined by the relationship of its body weight to its wing size, and it tells how well that dragon can fight and fly. The lighter and faster the dragon is, the higher its maneuverability rating. This rating ranges alphabetically from A (most maneuverable) to I (least maneuverable).
Close Combat Modifier: This number is figured from the dragon's maneuverability rating. It ranges from 1 to 9 and affects how the dragon will do in a fight, also known as close combat. The higher the number, the better the dragon's chance to hit its opponent.
Breath Damage: The damage the dragon's breath weapon does is listed here. It's determined by a die roll which is unique to each type of breath weapon. The damage dice range from 2d6 to 4d6.
Tooth and Claw (T & C) Damage: The damage the dragon's teeth and claws can do in close combat is listed here. Just as with breath weapons, the damage dice range from 2d6 to 4d6.
Minimum Speed: This is the minimum number of movement points the dragon must spend each turn simply to stay aloft. This number is determined by the dragon's body weight. The heavier the dragon, the harder it has to work to remain in the air.
Maximum Speed: This is the maximum number of movement points the dragon can spend each turn. This number is determined by its wing size. The larger its wings, the faster the dragon can fly.
Maneuver Diagram: The effects of the dragon's ability to turn (i.e. its maneuverability rating) are noted here. The letter at the top of the diagram is the dragon's maneuverability rating. The numbers in the other hexes indicate the cost in movement points to turn toward that hex facing.
Direction Template and Damage Allocation Table: These reference charts are located here for your convenience while playing a game. You'll learn more about how to use them later.
Dragon Damage Tracks: This rough likeness of a dragon is divided into five sections: Head, Body, Tail, Left Wing and Right Wing. Each section is filled with a number of circles, and each unmarked circle signifies a point of damage that the dragon can sustain in that section of its body.
Dragons start the game with a certain number of damage points in each section. The exact amount is determined by the dragon's body weight and its wing size. As the dragon takes damage, the points are ticked away. As each section is reduced by over one-half of its starting amount, the dragon becomes a less effective fighter. The line in each section designates the halfway point.
Getting Started
Dragon Lords is a fast-moving game, and to help simulate and keep track of all of the action going on, each turn is divided into 6 separate phases. All players go through each phase together before going on to the next. Once you're done with the sixth phase, a new turn begins with the first phase again. The game ends when one team or player has won the game, usually by completely destroying the opposition.
First, the players decide how fast they want their dragons to move this turn and record this on their game logs (see below). Then they roll to see who goes first and move their dragons in turn. Dragons next to each other can, at this point, engage each other in close combat. Next, the players secretly record which opponent dragons their dragons will be breathing at. Breath combat is then resolved. Finally, dragons in close combat fight it out.
If no one has won yet, the present turn ends and the next begins. The game continues until one player or team wins. Once you've read over these rules, check out the Example of Play on pages 36 and 37.
Setting Up
In order to play Dragon Lords, you need a play sheet, a game log, a set of altitude counters (from Very High to Very Low; Ground counters are only used with the advanced rules), an Engaged counter and a pencil for each player.
First, choose a scenario from page 14 to play and pick a dragon to play with. Each scenario provides dragons to use and outlines victory conditions. Next, each player copies down their dragon's statistics onto a play sheet. Then they each choose a figure to use during the game.
Have each player roll 2d6. In the order of the dice rolls, lowest to highest, each player places his or her dragon in a hex along any edge of the map. Players then secretly choose altitude markers and reveal them at the same time, placing them next to their dragons. Players can record any speed they wish within their minimum and maximum speeds for the first turn. Now, it's time to start playing!
The Game Log
The game log is used to keep track of your dragon's actions. At the beginning of the game, each player takes a copy of it. Blank logs are found on the inside of this book's back cover. At certain times during the game, you must record on your log what you want your dragon to do in the game before it actually does it. The log is divided into a number of columns, into which you can record the necessary information on a turn-by-turn basis.
Turn #: This designates the current turn.
Speed: Record the speed your dragon will be flying this turn here.
Initiative: This is the order in which the players perform their actions. Record your initiative roll here.
Breath Target: In this spot, you'll record which dragon you want your dragon to breathe at this turn.
(Tinted sections of the log are only used with the advanced rules.)
The Game
Sequence of Play
Each turn is divided into 6 phases. All players play each phase simultaneously. When the last phase is completed, players begin a new turn with the first phase. The six phases are as follows:
- Initiative
- Record Speed
- Movement
- Record Breath Target
- Breath Combat
- Close Combat
1. Initiative
Each player rolls 2d6 and records the result in the initiative column on his or her game log for the current turn. This number determines the movement order. Players with lower numbers move before players with higher ones.
Your initiative roll is not secret. You must let everyone know what your initiative number is. Remember to keep your speed a secret until your move!
2. Record Speed
Secretly record on your game log how fast your dragon will fly during this turn. The dragon must move exactly its recorded speed in the course of its move, so choose carefully. The speed recorded must meet certain restrictions:
- The speed must be within the minimum and maximum speed allowances listed on your play sheet.
- The speed can't be more than 3 points faster than you moved last turn. If you used 6 movement points last turn, you cannot record more than 9 this turn. You can record a number as low as you like, right down to your minimum speed.
A dragon can fly at speeds of 10 or more for a maximum of three consecutive turns. Its speed must drop down below 10 on the fourth consecutive turn.
- Once a speeding dragon slows to a speed below 10, it must spend two turns at speed 9 or less for every turn it spent at a speed at or above 10. For example, a dragon that flew at speed 12 for three turns must then spend six turns at a speed of 9 or less.
3. Movement
During the movement phase, the dragons fly about the board, jockeying for the best position from which they can hurl their breath weapons at their foes. Alternatively, they can engage each other in close combat and duke it out in mid-air.
Movement Order
Players move in the order of their initiative rolls, from lowest to highest. In case of a tie, the players involved roll 2d6 again to figure the movement order of that group. For example, all players who rolled 2's during the initiative phase must roll 2d6 to see who moves first among the 2's. Then all players who rolled 3's roll off and move, etc., until all players have moved. Roll off as many times as is necessary.
Because combat takes place after moving, it's sometimes best to move last. This gives you the widest choice of opponents to attack as well as the best opportunity to avoid their counterattacks.
Movement Points
Your dragon has a number of movement points corresponding exactly to the speed you recorded during the record speed phase. If you recorded 8 as your dragon's speed, it must spend 8 movement points during its move.
Sharing Hexes
A dragon may not ever begin or end its move in the same hex as another dragon. It may move freely through as many occupied hexes as it likes; it just can't stop in any of them.
Facing
All dragons must at all times face toward a single, distinct hexside, never a corner of the hex. When a dragon flies, it moves in a straight line from the hex it is in to the hex it is facing. A dragon may change which hex side it is facing by turning within a hex.
Moving Forward
A dragon may move directly forward into the hex it is facing at a cost of 1 movement point.
Turning
A dragon may turn to face any other hexside by paying the cost indicated on its maneuver diagram. For example, a dragon with maneuver diagram E spends 1 point to turn 60°, 3 points to turn 120° and 5 points to turn 180°.
A dragon cannot turn more than 180° at once or turn twice in a row. It must move forward at least once before it may turn again.
Example: A dragon with a maneuverability rating of E and a current speed of 10 is about to move. It moves 2 hexes forward, spending 2 points. Then it turns 60° (one hexside) to the right, spending an additional 1 point. It moves forward 2 hexes (2 more points) and finishes its move by turning 180° (three hexsides), spending its final five points. The dragon has spent all (2+1+2+5=10) of its movement points. Its move is over.
A turn "defaults back to zero" when a move ends. This means that a dragon that ends its move with a turn may make another turn in that hex at the beginning of its next movement phase. For example, a dragon that finishes its move by turning 120° to the left could start its next move by turning 60° to the right or even another 120° to the left.
Movement Point Costs
| Maneuver | Cost |
|---|---|
| Fly Forward | 1 Point |
| Fly Forward and Climb | 2 Points |
| Fly Forward and Dive | 0 Points |
Turning Costs
| MR | 60° Turn | 120° Turn | 180° Turn |
|---|---|---|---|
| A | 0 | 1 | 3 |
| B | 0 | 2 | 4 |
| C | 0 | 3 | 5 |
| D | 1 | 2 | 4 |
| E | 1 | 3 | 5 |
| F | 1 | 4 | 6 |
| G | 2 | 3 |
Movement and Altitude
A dragon may change its altitude by climbing or diving at any time while moving 1 hex straight forward. A dragon may climb and dive in the same turn. When a dragon changes its altitude, be sure to switch its altitude marker as well so that everyone can instantly tell just how high or low your dragon is flying.
How to Climb: To climb, move your dragon forward 1 hex and declare that you are climbing. This costs 2 movement points. A dragon may climb as many times in a turn as allowed by its movement points and may even climb several times in a row. It can only climb 1 altitude level at a time. No dragon can climb higher than Very High altitude.
You must move forward each time you climb. You may not move 1 hex and climb more than 1 altitude.
Example: A dragon with a speed of 9 is at Very Low altitude and wants to climb to Very High as quickly as possible. It starts by moving 1 hex straight forward and declaring that it is climbing to Low altitude. This costs 2 points. It does this 3 more times, moving from Low to Medium to High to Very High, paying 2 points each time. The dragon is now at Very High altitude and has spent 8 movement points to get there. It is 4 hexes forward from its original position, and may now use its remaining movement point in whatever way it likes.
Diving: To dive, move your dragon forward 1 hex and declare that you are diving. Due to the momentum gained during a dive, this costs 0 points and is essentially a free move. A dragon may dive as many times as it likes during its move and may even dive multiple times in sequence. It can only dive one altitude level at a time. A dragon may not dive lower than Very Low altitude.
You must move forward each time you dive. You may not move 1 hex and dive more than 1 altitude.
Example: The dragon in the example above now decides to dive from Very High to Very Low altitude as quickly as possible. This requires 4 separate dives, each at a cost of 0 points. When the move is complete, the dragon is now eight hexes forward from where it began its move (four from the climb and four from the dive) and still has its 1 remaining movement point.
Engaging in Close Combat
In order to strike at another dragon during the close combat phase, a dragon must first engage its intended victim, locking the two in tooth and claw combat. Any dragon may engage another as long as the following restrictions are met:
- The attacking dragon must finish its move in a hex adjacent to the target dragon, and be facing it.
- The attacking dragon must be at the same altitude as the target dragon.
- The dragons may not be at Very Low altitude. They will lose altitude during the fight, and crashing into the ground is not allowed.
- The target dragon must have already moved this phase.
If these conditions are met, the dragons are now engaged in combat. Place an Engaged marker next to them. Only two dragons may be engaged in any one fight. No other dragon may engage a pair of fighting dragons.
Note that engaging a dragon is entirely optional. You could be in a hex next to a dragon without engaging it if, for instance, you want to get off a breath shot at it at Very Short range! Only if you meet all the above requirements and place an Engaged marker are you actually engaged in close combat with the other dragon.
4. Record Breath Target
If you want to use a breath weapon against another dragon this turn, you must at this time write down the name of that dragon (or, if you like, its player) under Breath Target on your game log for this turn. Once you write down the target, you must use your breath weapon on that dragon.
Dragons engaged in close combat may not breathe on other dragons. They are too engrossed in fighting each other to be able to target and attack any other dragon. Also, dragons not involved in close combat may not breathe on dragons that are engaged in close combat. There's just too much going on to be able to target just one of the engaged dragons and not hurt the other.
If you don't wish to use your breath weapon this turn, or if you simply don't have an available target, simply write None or X in your log. Remember, you may not change your mind later in the turn.
5. Breath Combat
All breath combat takes place simultaneously. This means that, although players take turns to resolve their attacks, all dragons are actually breathing at the same time. Because of this, a dragon that is killed or wounded by a successful attack still gets to make its own attack.
A dragon can only breathe at a target in its arc of fire and within 6 hexes. All dragons have an arc of fire (see below) which covers the 180° arc the dragon is facing. Targets in hexes to the left and right sides of the arc are harder to hit than those directly in front of the dragon. Targets farther away are harder to hit than closer ones.
A dragon may breathe on targets at different altitudes, but a dragon's neck can only bend so far up or down. If the horizontal distance to the target is less than the vertical distance, the dragon may not breathe on it. E.g., if there's a 3 step altitude difference between the attacker and the target and the attacking dragon is less than 3 hexes away from the defender, the attacker may not breathe at the target because the target is too high or low.
Dragon Arc of Fire (hexes in front of the dragon, shown on page 10):
- Dark Hexes: no modifier to the target number.
- Grey Hexes: +1 to target number.
- Light Hexes: +3 to target number.
Attack Resolution
Start with the base number 8 and modify this number appropriately, using the To-Hit Modifiers Table below. Note the Grey Area and the Light Area refer to those parts of the dragon's arc of fire as shown on page 10. To figure out the range from your dragon to its target, use The Range Key below.
Roll 2d6. If the result is equal to or higher than your final modified target number, you hit your target. A roll of 2 always misses, and a roll of 12 always hits, even if the target number is 13 or more.
The Range Key
| Hexes Away | Range |
|---|---|
| 1 Hex | Very Short Range |
| 2 Hexes | Short Range |
| 3-4 Hexes | Medium Range |
| 5 Hexes | Long Range |
| 6 Hexes | Very Long Range |
To-Hit Modifiers Table
| Modifier Situation | Modifier |
|---|---|
| Target has Huge Wings | -1 |
| Target has Tiny Wings | +1 |
| Target is Very Light | +1 |
| Target is Very Heavy | -1 |
| Target is in Grey Area of Arc | +1 |
| Target is in Light Area of Arc | +3 |
| Target is at Very Long Range | +2 |
| Target is at Long Range | +1 |
| Target is at Short Range | -1 |
| Target is at Very Short Range | -2 |
| Attacker is on the Ground* | -1 |
| 2-3 Step Difference in Altitude |
* This modifier is only used with the advanced rules.
Damage
Once you've scored a hit, it's time to figure out what the hit did to your victim. First you need to determine where the dragon was hit. Draw an imaginary straight line from the center of the attacking dragon's hex to the center of the target dragon's hex. A straightedge or a piece of string may help here.
Then consult the direction template. Whichever hexside in the target hex the line crosses on the direction template is the direction the attack came from. If the line intersects two hexsides, the attacker gets to choose which of the two directions is hit.
Roll 2d6 and cross-reference that number with the direction the attack came from on the Damage Allocation Table. The result tells you where the victim was hit.
The Direction Template: Notice that the front facing of the dragon determines the facing of the template. The dragon always faces hex 1, no matter which direction it happens to be facing on the board.
| Hexside | Direction |
|---|---|
| 1 | Front |
| 2 | Front Right |
| 3 | Rear Right |
| 4 | Rear |
| 5 | Rear Left |
| 6 | Front Left |
Damage Allocation Table
| Roll (2d6) | F (1) | FR (2) | RR (3) | R (4) | RL (5) | FL (6) |
|---|---|---|---|---|---|---|
| 2 | H | T | H | T | H | T |
| 3 | H | RW | RW | T | LW | LW |
| 4 | H | H | T | T | T | H |
| 5 | B | B | B |
H: Head. B: Body. T: Tail. LW: Left Wing. RW: Right Wing.
Now roll your dragon's breath damage as indicated on your play sheet. This is the number of damage points the target must tick from the damage track of that body part. Deduct points from the top of the area downward. That way, when you cross the line in the middle you'll know that you've lost over half of the total amount of damage points in that section. This will have a drastic effect on your dragon's performance.
Dragon Damage and Defeat
As each body part is reduced to less than half of its original damage points, the dragon's performance deteriorates as shown on the Serious Damage Effects Table below. Note that each wing is a separate part. (The steps referred to can be found on page 26). Also, if any of a dragon's body part damage tracks is reduced to 0 points, the dragon crashes to the ground and is removed from play.
Serious Damage Effects Table
| Body Part Damaged | Effect |
|---|---|
| Head | -1 Step to Breath Weapon (Minimum Cold) |
| Body | -1 Step to Tooth and Claw (Minimum Blunt) |
| Each Wing | Maximum Speed Reduced by 2 |
| Tail | Maneuverability Rating Reduced by 2 Steps (Minimum I) |
Head: The breath weapon loses its effectiveness, and does damage as the next lowest breath damage. E.g. flame breath (3d6) now does damage as if it were lightning breath (2d6+2).
Body: Tooth and claw damage is affected in the same way as breath damage noted above.
Wing: As each wing is reduced to less than half damage, the dragon's maximum speed is reduced by 2.
Tail: The dragon's maneuverability rating is reduced by 2 steps. E.g. D becomes F, F becomes H, etc. This loss of maneuverability has no effect on your minimum or maximum speed. It does affect your close combat modifier, though. See Close Combat below.
6. Close Combat
Those dragons that engaged in close combat during the movement phase now resolve their battles. Each battle is resolved separately. Since close combats take place simultaneously, it really doesn't matter what order you resolve them in.
Close Combat Effects
When two dragons engage in close combat, they grapple with each other in a mid-air struggle while attempting to rend each other to bits. As might be expected, fighting like this in mid-air can drastically affect these dragons' flights.
First, both dragons automatically drop one altitude level. Remember, dragons cannot engage in close combat at Very Low altitude, so there is no danger of them crashing into the ground.
Next, both dragons subtract 2 from their current speed and note it on their game log. These are their new current speeds for this turn. During the next record speed phase, they may not select a speed that is greater than 3 above their newly modified current speed.
Remember that no dragon is ever allowed to move less than its minimum speed. If subtracting 2 from a dragon's speed would cause it to drop below its minimum speed, simply record the dragon's minimum speed on the game log instead.
Close Combat Ability Table
| Maneuverability Rating | Close Combat Modifier |
|---|---|
| A | 9 |
| B | 8 |
| C | 7 |
| D | 6 |
| E | 5 |
| F | 4 |
| G | 3 |
| H | 2 |
| I | 1 |
Close Combat Resolution
Both of the dragons involved in the close combat roll 2d6 and add the close combat modifiers listed on their respective play sheets to their own results. The highest modified result wins the combat. If the numbers are tied, the combat is a draw and neither dragon takes any damage. Do not reroll.
If the combat is not a draw, the player controlling the winning dragon then rolls 1d6 to determine where it hits its victim. The result tells you which column to use on the Damage Allocation Table (note the numbers along the top row of the table).
Roll 2d6 on the Damage Allocation Table, just as you would for breath combat. The result tells you where you hit the victim.
Roll the dice indicated by your dragon's tooth and claw damage to figure out how badly the victim has been hurt. The same damage rules apply as those for breath combat.
The winner of the combat also takes a little damage. Roll 1d6 and allocate that many points of damage anywhere on your dragon. You may split the points up or concentrate them on one area, as you like.
The loser now rolls 1d6 and consults the direction template. This is the direction (relative to its original facing) in which the losing dragon is now facing. The winning dragon may then turn to face any hexside it wishes. If the result of the combat was a draw, neither dragon's facing changes.
The combat is now complete. Remove the Engaged marker. The dragons are no longer engaged in close combat and may move and fight normally next turn.
Now, start a new turn with another initiative phase.
Endgame
The game continues on in this manner, phase after phase, turn after turn, blow after blow, until one side or player manages to fulfill its victory conditions as listed in the scenario description for the game being played. As soon as this happens, the game is over, and that side or player has won!
Congratulate each other and pack up the game, or better yet, pick a new scenario and play again!
Scenarios
Every time you and your friends sit down to play a game of Dragon Lords, you're actually setting up to play a scenario. A Dragon Lords scenario details just which dragons each player gets to use from those ready-made dragons listed on pages 30-35, how to set up the maps, where each dragon begins the game and what each side or player has to do to win the game.
There are two basic types of Dragon Lords scenarios: the free-for-all and the team game. All other scenarios, no matter how intricate they may be, are basically variations on these two types, each of which places certain unique demands upon the players that will affect their individual and collective styles of play. After playing these two scenarios through a few times, you'll be ready to move on to the advanced rules and from there to the advanced scenarios on page 23.
The Free-for-All
In the free-for-all game, the players get together and pick a single type of dragon from pages 30 through 32. In the game, each player gets to control one dragon of the exact same type, making it an even match. Alternatively, if the players like, they can agree to allow the use of either of the two dragons on page 30, as they are evenly matched to each other. Each player then copies the chosen dragon's statistics onto a play sheet and grabs a game log.
The maps are then laid out on the center of the table in the standard map layout (see the diagram on page 14). It doesn't matter which maps go where, as long as the hexes match up properly. The terrain shown on the ground below the grid does not affect play at all. Just lay the maps together face up, and start the game as described on page 6 under Setting Up.
In the free-for-all game, it's every dragon for itself. The objective is to destroy all of the other dragons while at the same time avoiding being personally destroyed. Temporary alliances can be forged between players to pool their forces against other dragons, but they usually will only last until their objective is achieved, if that long! The player with the last dragon in the air wins the game.
The Team Game
After playing the free-for-all for a while, you may see an advantage to forming a formal alliance with other dragons. Sure, you can't attack your teammates, and you have to share the victory, but it beats having to defend yourself from every quarter. Plus, you'll see that a little teamwork can go a long way toward being on the winning side.
Choosing dragons for a two-sided game works differently depending on how many players you have involved. If you have an even number of players, it's simple. Just do it the same way as for the free-for-all game. In games with an odd number of players, things become more complicated. If you have three players, two should each use a copy of Zippinchill (page 31) and the third should use Reaper (page 32). If there are five players, three should each use a copy of Lectronist or Kelvinight (page 30) while the other two each use a copy of Skyblazer (page 32). If there are seven players, four should each use a copy of Lectronist or Kelvinight (page 30) and the other three should use a copy of Thilindis (page 31).
Once the sides are set, lay the maps out in the standard layout. A player from each team rolls 2d6, and the high-rolling team gets to choose from which edge of the map its dragons enter the board. The other team's dragons will set up on the opposite edge. The high-rolling team places a dragon first, and the teams then alternate placing dragons until they're all on the board. The team that destroys all of the other team's dragons wins the game.
Advanced Rules
Once you've had a chance to play the basic version of Dragon Lords a few times, you'll be ready to move on to these advanced rules. They add some new and exciting dimensions to the game and make things more realistic than ever.
While reading through this section, you'll see that some rules are labeled optional. This means that all players must agree to use them before play begins. In one sense, all of the rules in this rulebook are optional. You should feel free to modify them to whatever you find is the most fun.
Advanced Sequence of Play
Using the advanced rules, each Dragon Lords turn is divided into 8 phases:
- Initiative
- Record Speed
- Movement
- Record Rider Actions
- Rider Actions
- Record Breath Target
- Breath Combat
- Close Combat
Advanced 1. Initiative
These initiative rules are optional. All players must agree to use them before the game begins. Otherwise, just use the standard initiative rules.
- If a dragon has an incredibly high or an abysmally low maneuverability rating, it may affect its initiative rolls. Check the Maneuverability Effect on Initiative Roll table below to see if there is a modifier to your dragon's initiative roll. If during the course of a battle a dragon sustains massive injuries to its tail resulting in a corresponding 2-step drop in its maneuverability rating, that dragon's initiative modifier may also be affected. Be sure to check the table again whenever such a reduction occurs.
- Your initiative roll may now be kept secret until it is your turn to move. You must divulge it immediately before moving.
Maneuverability Effect on Initiative Roll
| Maneuverability Rating | Modifier |
|---|---|
| A, B or C | +2 |
| D, E or F | 0 |
| G, H or I | -2 |
Advanced 2. Record Speed
Being on the Ground: In the advanced rules, it's possible, either by accident or design, for dragons to end up on the ground. If a dragon ended its turn on the ground last turn and it wants to remain on the ground this turn, the player must note ground or GR for its speed. For more about crawling around in the dirt, see On the Ground on page 17.
A dragon taking off this turn must record a speed of no less than its minimum speed plus 1 and no greater than 7. For more details about how to leave the ground, see Taking Off on page 17.
New Acceleration Allowances: This rule is optional. All players must agree to use it before the game begins.
The amount by which a dragon can accelerate in a turn is no longer fixed at only 3 points. It is instead determined by the size of the dragon's wings. Now, a dragon may record a speed that is as many points higher as is indicated for its wing size on the Advanced Acceleration Allowance table below.
Using the original rules, it would take the fastest dragon up to two full turns to work its way up from the "safe speed" of 9 to its highest allowable speed. This rule allows any dragon to be able to accelerate from 9 up to its maximum speed in a single turn.
For example, a dragon with Medium sized wings may record a speed up to 4 points higher than the previous turn, and a dragon with Huge wings will be able to accelerate an incredible 6 points!
Advanced Acceleration Allowance
| Dragon's Wing Size | Acceleration Allowance |
|---|---|
| Huge | 6 |
| Large | 5 |
| Medium | 4 |
| Small | 3 |
| Tiny | 2 |
Advanced 3. Movement
Banking: A dragon may bank, i.e. move forward at a 60° angle while retaining its facing, by spending points equal to twice its 60° turn cost, with a minimum of 1 point spent. So dragons with an MR of A, B or C spend 1 point to bank, dragons with an MR of D, E or F spend 2 points, and dragons with an MR of G, H or I spend 4 points.
A dragon may bank several times in a row, but for every two banks in sequence, the dragon's altitude drops by one level. However, a dragon may bank, move forward or turn, and then bank again with no altitude change.
A dragon can't bank twice in a row at Very Low altitude. This would cause the dragon to crash to the ground.
A dragon performs a banking maneuver at the cost of twice its 60° turn cost (minimum 1 point). If the dragon immediately banks again, it will lose 1 altitude step.
Turning Between Move Phases: This rule is optional. All players must agree to use it.
If a dragon ends its move by turning 60° or 120° in a hex, it may continue to turn in that hex at the beginning of the next movement phase. However, it may only turn in the same direction (left or right) as in the previous movement phase, and it must spend the balance of the points for the total turn. In other words, a turn does not "default back to zero" when its move ends. This allows for a much more realistic portrayal of turning from phase to phase.
Example: A dragon with maneuverability rating E finishes its move by entering a hex and turning 120° to the right, spending its remaining 3 movement points. In the next movement phase, the dragon wants to continue its turn to the right (it may not turn to the left). The dragon may only turn an additional 60° to the right for a total of 180° turned in that hex. The cost for turning this additional 60° is 2 points (not 1), which will bring the total movement points spent on the whole turn to 5 points, the normal cost to turn 180° with an E maneuverability rating.
Moving Earlier in the Phase: A dragon with a high initiative may, if it likes, move earlier in the phase. Simply announce your intention to move any time before you would normally. Once you commit to move early, you may not change your mind. If more than one player would like to move at a particular time, the one with the higher initiative roll moves first.
This rule does not pertain to rider actions. Riders must act in the original initiative order. See Rider Actions, page 18.
On the Ground
Crashing to the Ground: There are three different ways that a dragon can land involuntarily, i.e. crash. These are described below. When a dragon crashes, leave it in the same hex but replace its altitude marker with a Ground counter. A dragon may not purposely crash to the ground.
- When two dragons engage in close combat at Very Low altitude, the mandatory loss of altitude will cause the two dragons to crash to the ground before the combat has taken place. The combat will still occur, but only after you figure out the effects of the crash.
- If the mandatory two-step loss of speed in close combat brings a dragon's speed below its minimum speed, that dragon will crash to the ground after the close combat has been resolved. It does not matter if the crashing dragon won or lost the combat, or even what altitude the combat took place at. The other dragon does not crash, unless of course it has its own reason to have to do so.
- If a dragon is reduced to 0 damage points in its tail or either of its wings, it will crash to the ground as it can no longer fly. If its head or body are reduced to 0 damage points, the dragon has been killed.
If the dragon survives the fall, it may turn in that hex but it may not move from it. It may continue to breathe on dragons in the air from its grounded position as well as be attacked. It can also engage in close combat (see Fighting on the Ground below). Any additional damage to a tail or wing after that part has been reduced to 0 transfers to the body instead.
See page 22 for details on taking damage from crashing and more about how it affects close combat.
Landing: Landing is a special type of dive, but unlike other dives which cost 0 points, it costs 1 point due to the exertion involved in landing safely. A dragon may land on the ground from Very Low altitude by moving forward 1 hex and spending 1 point. This must be the dragon's last point, as its move ends there. The dragon's altitude is now Ground. Place a Ground counter next to it.
Moving on the Ground: When it comes time for a dragon on the ground to move, roll 1d6+3. The dragon can move up to this number of hexes along the ground. It can move part or all of this number, or it can opt to not move at all. Also, it may turn any number of times at no cost and with no restrictions.
Fighting on the Ground: A dragon on the ground may breathe at a dragon on the ground or in the air and vice versa. Close combat can happen between two dragons on the ground as well. No altitude or speed loss will occur, but the dragons will still change facing after the combat.
Taking Off: When taking off, a dragon leaps into the air at its minimum speed, ready to join the aerial battle. To simulate this powerful leap, a couple of exceptions are made to the standard flying and climbing rules.
A dragon taking off must record a speed of at least 1 point more than the dragon's minimum speed and no higher than 7. To take off, the dragon must climb to Very Low altitude and move a number of hexes in a straight line equal to its minimum speed. This always costs a number of movement points equal to its minimum speed plus 1. (That's 2 to climb and move ahead 1 hex, and the rest to move the remaining hexes forward). The dragon must make this straight ahead move at Very Low altitude before it may turn or climb. Once the dragon has made the required move, any additional movement points may be spent normally.
Example: A dragon on the ground with a minimum speed of 4 needs to climb to Very Low altitude and move 4 hexes forward to take off. This takes 5 points: 2 to climb and move forward a hex, and 3 to move the last 3 hexes forward.
4. Record Rider Actions
At this time, the riders each record their chosen action on their player's game log. This is just like recording the dragon's speed or its breath weapon target. Wizards must also record on their player's game log which spell they will cast during the upcoming rider actions phase.
5. Rider Actions
There are five types of riders in the game: the Lancer, the Javelin Thrower, the Archer, the Crossbow Shooter and the Wizard. During the rider actions phase, the riders may use whatever ability they happen to possess. The only exception to this is the Lancer, whose ability is used only during the close combat phase.
Rider actions are performed in the order of their dragon's initiative scores from lowest to highest, just like when the dragons are moving. A rider may perform its action even if its dragon is engaged in close combat. The rider may even attack the dragon its dragon is engaged with at medium range (see Rolling to Hit below).
The Rider Box: The rider box on your play sheet contains all the information you need to know about the rider on your dragon. Most of this information is taken from the Rider Abilities Table below.
- Rider Type: This tells you what sort of rider you have.
- Medium Range: The rider's ability's medium range.
- Medium Range Effects: The effect of the rider's ability at medium range is noted here.
- Long Range: The rider's ability's long range.
- Long Range Effects: The effect of the rider's ability at long range is noted here.
- Magic Points Remaining: This is used for the Wizard rider only. Each Wizard begins the game with 60 magic points. Tick off a circle for each point spent during the game.
Rider Abilities Table
| Rider Type | Medium Range | Medium Range Abilities | Long Range | Long Range Abilities |
|---|---|---|---|---|
| Lancer | Close Combat | +2 to Close Combat, +4 to Damage | None | None |
| Javelin Thrower | 1 Hex | 1d6+3 Damage | 2 Hexes | 1d6 Damage |
| Archer | 2 Hexes | 1d6+4 Damage | 4 Hexes | 1d6+1 Damage |
| Crossbow Shooter | 3 Hexes | 1d6+6 Damage | 6 Hexes | 1d6+3 Damage |
| Wizard | Special | Special | Special |
Rolling to Hit: Riders may shoot their weapons or cast their spells at any target within range. The attack is handled like a dragon's breath weapon attack. Riders have a full 360° arc of fire, shown on page 19. A rider may even shoot or cast spells while its dragon is engaged in close combat, either at its dragon's opponent or at any other target within range.
Most of the riders' abilities work only at medium or long ranges. The exception to this is the Wizard, who casts spells on its own dragon at short (not very short) range.
Ammunition: The Javelin Thrower, the Archer and the Crossbow Shooter all have an unlimited amount of ammunition. The Lancer needs no ammunition, and as was mentioned before, the Wizard has 60 spell points. For more about the Wizard's spells, see The Wizard's Spellbook, page 24.
Rider Damage: Whenever a dragon's body is hit in breath or close combat, roll 2d6 and total the dice. If the result is a 7, the rider has been hit instead of the dragon. Regardless of the amount of damage done, the rider is instantly killed. The dragon takes no damage from the attack and continues to fight on alone. Riders cannot be specifically targeted by an attack; only dragons can.
The Lancer: Although the Lancer is the only rider that cannot attack at range during the rider actions phase, it's an excellent rider to have for close combat situations. The Lancer adds +2 to the dragon's close combat roll and +4 points of damage in close combat.
The Wizard: The Wizard is a very powerful rider which has a number of spells to use during the game. To cast a spell, the Wizard must roll to hit just like the other riders. Wizards must roll to hit for every target and spell, even to cast a spell on their own dragons or allied dragons.
When the Wizard casts a spell on its own dragon, roll to hit the dragon at short (not very short) range, ignoring the dragon's wing and body sizes. Thus the Wizard must simply roll a 7 or more to cast a spell on its own dragon.
Each spell has a spell point cost associated with it. When a Wizard casts a spell, immediately deduct the cost of the spell from the Wizard's remaining magic points, marking off as many circles as the cost of the spell.
A Wizard must spend the magic points to cast the spell. If there aren't enough spell points, the spell cannot be cast. Once a Wizard's spell points are used up, they are gone and cannot be recovered for the rest of the game.
A Wizard can only try to cast one spell each turn. If a Wizard misses a target when rolling to hit, the spell fails and the points are lost.
Wizards have 60 magic points to spend. The Wizard's Spellbook section on page 24 details the effects of the Wizard's spells and how much each of them costs.
6. Record Breath Target (Advanced)
No advanced or optional rules apply to this phase. Use the original rules as they stand without any sort of modification.
7. Breath Combat (Advanced)
Advanced To-Hit Modifiers: There is a single new to-hit modifier for breath combat in the advanced rules. If the attacker is on the ground, it gets a -1 to its attack number. This is because, being on the ground, the attacker has a stable footing from which to launch its breath attack. (See the To-Hit Modifiers Table on page 11.)
Critical Hits (optional): This rule is optional. All players must agree to use it. It tends to make combat more deadly, so use it with caution.
Occasionally, in breath combat, a dragon is able to get in a lucky hit and strike a particularly vulnerable or tender spot on a target dragon. This score, which is called a critical hit, will do some additional and particularly nasty damage to its victim.
If, when breathing at an opponent, you roll an unmodified 12 on your 2d6, you have scored a critical hit. This can only happen if the modified to-hit number was 11 or less to begin with. Roll on the Critical Hit Table to determine exactly what has happened to the target and what additional damage it has sustained.
Critical hit results can add up. A dragon with a broken leg may sustain another broken leg. In the unlikely event of 4 broken legs, reroll. Also, in no case can any statistic be reduced below the lowest possible rating for that statistic. If this happens, simply reroll.
Critical Hit Table
| Roll | Effect |
|---|---|
| 2 | Killed! Remove dragon from play. |
| 3 | Triple damage to body! |
| 4 | Head shot! -1 step to breath weapon for remainder of game. |
| 5 | Leg broken! -1 step to tooth and claw damage for remainder of game. |
| 6 | Dazed! -2 to initiative roll for remainder of game. |
| 7 | Double damage to body! |
| 8 | Wing torn! -1 step to maneuver rating for remainder of game. |
| 9 | Rider thrown! The dragon loses its rider for remainder of game. If the dragon has no rider, a leg is broken instead! (See *5) |
| 10 | Head shot! -1 step to breath weapon for remainder of game. |
| 11 | Triple damage to body! |
| 12 |
*The "(See *5)" reference is printed as shown. The source does not identify a note labelled 5 elsewhere in the rulebook, so it is transcribed as printed.
Fumbles (optional): This rule is optional. All players must agree to use it. Fumbles are the other edge of the critical hits sword. If you use the rules for fumbles, you should also use the rules for critical hits. The opposite is not necessarily true, though. Many players like the idea of their dragons attacking each other with precise, telling blows, but balk at the notion that these clever creatures would accidentally injure themselves.
If you roll an unmodified 2 when rolling to hit with a breath weapon, your dragon has breathed on itself! If you have a rider, check for rider damage. Otherwise roll on the Fumble Table to determine how much damage the dragon did to itself and where.
Fumble Table
| Roll | Damage | Location |
|---|---|---|
| 2 | 3d6 | Body |
| 3 | 2d6 | Left Wing |
| 4 | 2d6 | Body |
| 5 | 1d6 | Body |
| 6 | 1d6 | Left Wing |
| 7 | 1d6 | Body |
| 8 | 1d6 | Right Wing |
| 9 | 1d6 | Body |
| 10 | 2d6 |
Multiple Hits (optional): This rule is optional. All players must agree to use it.
To reduce the effects of dragons ganging up on each other, a dragon is limited to suffering damage from up to 3 breath attacks per turn. A dragon may be breathed at any number of times; only those attacks that do damage apply to the three hit limit. After that, any other players that recorded that dragon as a target may not breathe on it, nor may they switch targets.
If this rule is used, keep in mind that more alert dragons will get in the first shots, so resolve all attacks in order of initiative. As always, all damage takes effect simultaneously.
8. Close Combat (Advanced)
Tactics (optional): Tactics are optional. All players must agree to use them.
Each dragon has six tactics it may use during close combat: Lunge, Slash, Bite, Tail Swing, Fake and Defend. Take a look at the play sheet. These six tactics are listed under the dragon likeness, each with 5 boxes after it. Under that is the Close Combat Tactics Result Table which is used to determine the effects of the tactics used.
Each time you're engaged in close combat, choose the tactic you will use for the fight and note it on your game log in the Combat Tactic column. Also, check off one of the appropriate boxes on your play sheet under Close Combat Tactics. You may only use each tactic five times during a game.
If in a particularly grueling game you manage to get into 30 close combats, thereby using all your tactics up, you may erase your check marks and start over with a fresh set of tactics.
Using Tactics: The dragon that instigated the close combat is referred to as the attacker. The other dragon is referred to as the defender.
At the beginning of the combat, both players secretly choose their tactics, complete the necessary recordkeeping and then reveal their choices simultaneously. Cross reference these choices on the Tactics Result Table. The attacker finds its tactic along the first column and lines that row up with its opponent's tactic found along the top of the table.
The result is the adjustment to the attacker's modified close combat score. Now, resolve the close combat as you would normally, including the tactical modifier for the attacker.
Two special tactics will allow the dragon to inflict greater damage or keep from getting hit:
The Lunge Tactic: If a dragon used a Lunge tactic and won the combat round, it inflicts an additional +1d6 points of damage due to the ferocity of the blow.
The Defend Tactic: If a dragon used a Defend tactic and won the combat round, no damage is inflicted on either dragon. The dragon is too busy defending to do any damage. This is the reason for the large bonus for defending.
Note that if both dragons use a Defend tactic, neither dragon can inflict damage, so no combat rolls are necessary. The altitude and speed of the dragons are still affected, however.
Close Combat Tactics Result Table (rows: attacker's tactic; columns: defender's tactic)
| Attacker \ Defender | Lunge | Slash | Bite | Tail Swing | Fake | Defend |
|---|---|---|---|---|---|---|
| Lunge | 0 | +1 | -1 | +2 | -2 | -4 |
| Slash | -1 | 0 | -2 | +1 | +2 | -4 |
| Bite | +1 | +2 | 0 | -2 | -1 | -4 |
| Tail Swing | -2 | -1 |
Crashing to the Ground (close combat): If two dragons at Very Low altitude engage, they will crash to the ground. A dragon reduced to a speed lower than its minimum speed will also crash. (See page 17 for more about how dragons can crash). Conduct the close combat as normal, but with the following additions:
- A crashing dragon must roll on the Rear column of the Damage Allocation Table. The body part rolled will take 1d6 points of crash damage for each altitude the dragon fell. A dragon falling from Very Low altitude would roll 1d6 for damage. A dragon falling from High altitude would roll 4d6 for damage.
- If the winner crashes, it must also roll for facing after the loser does. It doesn't get to choose its facing.
- If the dragon has a rider, roll 1d6. If the result is a 1, 2 or 3, the rider has been killed in the fall.
A dragon may take off again next turn if none of its damage tracks have been reduced to 0 points. If only a tail or wing track has been reduced to 0 points, it must stay where it's at. It may turn in the hex during the movement phase. If the head or body tracks are reduced to 0, the dragon has been killed.
Advanced Scenarios
Now that you know the advanced rules, it's time to play some advanced scenarios. In each of these scenarios, you should use all of the advanced rules and whichever of the optional rules that your group of players can agree upon.
The Free-for-All (Advanced)
This scenario is just the same as it is in the basic rules. This time, however, you've got the option of using any of the dragons on pages 30-35. Check page 14 for details.
The Team Game (Advanced)
Again, this is just the same sort of game as it is with the basic rules, but you can choose from any of the dragons. Check page 14 for specific information.
If you have uneven teams, try the following combinations. If you have three players, two use Tankerous (page 34) and the third uses Stalwyrm (page 35). If there are five players, three use Zippinchill (page 31) while the others use Slash or Blowderby (page 33). Alternatively, three players can use Tankerous (page 34) and the others use Ozonic (page 35). If seven are playing, four use Tankerous (page 34) and the other three use Fiercival (page 34).
Using Your Own Dragons
The rules on pages 26 and 27 detail just how to go about designing a dragon all your own. Dragons are designed using a special points system which makes dragons of equivalent point values equally matched. You can play any of the Dragon Lords scenarios in this book with dragons of your own making. You just have to make sure that the points are even.
In a free-for-all, this means that each player has the same number of points to work with. In a team game, this means that each team has an equal number of points, divided amongst the team members as each team sees fit. Further guidelines are offered in the Dragon Design section on the following pages.
Other Scenarios
There are other variations on the two basic scenarios that you can also try. For instance, if you have a large number of players, you can split up into three teams instead of two, or even more. Again, just make sure that each team has an equal number of points.
Or, once one side has won a team game, the survivors can duke it out to see which of those dragons can claim the whole of the victory for itself. This introduces another element of intrigue into the game, as players will be less willing to risk their dragons to save their teammates so that they can save them for the grand finale. The players must still keep in mind, however, that it's still likely that the team that stands united most strongly will win. For details about additional scenarios available from Grenadier, turn to page 38 to find out What's Next?
Wizard's Spellbook
The Wizard has 13 different spells to choose from. Any of these can be used on any given turn, but the Wizard may only cast one spell per turn. Once cast, each spell lasts until the beginning of the next rider actions phase.
The Spells
Distort Range: With this spell, the wizard may enable or force a dragon to alter the range by which it perceives its target by one step. This can cause medium range to seem like long range, short range to seem like very short range, etc. The affected dragon's to-hit roll is altered according to its new perception of reality.
Dull: The target of this spell suffers a temporary dulling of the teeth and claws for one turn. So, for example, Sharp claws will do damage like Blunt claws. No sharpness rating may be forced below Dull.
Fireball: The Wizard tosses a ball of magical fire at an opponent, inflicting 1d6+3 points of damage on any target it hits. Resolve damage as for a breath attack.
Force Shield: This spell will absorb 10 points of damage inflicted upon the target dragon before it fails. Any additional damage is inflicted as normal. At best, this spell still only lasts one turn.
Heal: This spell restores 1d6+3 damage points. The points may be allocated to one or many body parts.
Lethargy: This spell causes the target to drop two maneuverability steps during the next movement phase. So a dragon with a D maneuverability rating will suffer an F rating. Speed is not affected, only turning ability. No rating may be lower than I. (Transcriber's note: the scan's final letter in this line was hard to read; I is the lowest rating on the A to I scale and is used here.)
Lightning Bolt: The wizard throws a lightning bolt, inflicting 1d6 points of damage on any target it hits. Resolve damage as if it's a breath weapon attack.
Quicken: This spell allows a dragon to record a speed 5 points greater than its previous turn's speed during the next record speed phase. If the acceleration allowance rules are being used (see page 16), add +2 to the dragon's acceleration allowance. The dragon may even record a speed up to 2 greater than its maximum speed!
Saddlesore: This is the only spell which affects riders directly. The rider affected by this spell may do nothing during its next action phase. If the rider has not yet performed its action this turn, it loses it. If the rider has already performed an action this turn, it loses its action next turn instead.
Sharpen: The opposite of the Dull spell, this spell increases the sharpness of the target's teeth and claws by one step. Teeth and claws may never be sharper than Razor Sharp.
Slow: This spell forces a dragon to record a speed of only up to 2 greater than its minimum speed during the next record speed phase.
Spin: This spell enables the wizard to turn the target up to 120°. It does not matter how far the dragon turned during movement. If the optional turning rules are being used (see Turning Between Move Phases, page 16), being spun about does not affect the dragon's turning. For example, if a dragon turns 120° and a wizard spins it back 60°, the dragon has still only turned itself 120°, which is what counts.
Vigor: The opposite of the Lethargy spell, this spell enables the target to move next turn as if its maneuverability rating were 2 steps higher. No rating may be higher than A.
The Wizard's Spellbook
| Spell | Cost | Med. Range | Long Range | Effects |
|---|---|---|---|---|
| Distort Range | 3 | 3 | 6 | Alter perceived range by 1 step |
| Dull | 2 | 2 | 5 | T&C sharpness decreased by 1 step |
| Fireball | 1 | 2 | 4 | Inflicts 1d6+3 points of damage |
| Force Shield | 3 | 2 | 4 | Absorb up to 10 points of damage |
| Heal | 3 | 1 | 3 | Restores 1d6+3 points of damage |
Dragon Design
Designing your own dragons is both easy and a lot of fun. Each dragon is created using design points, or DPs. The number of DPs you get to play with is determined by the method you and your friends use to design your dragons. By spending design points on the various aspects of your dragons as listed on The Cost Table, you can form and shape your creation into exactly what you want.
The Single Dragon Method
This method of dragon design is used for games in which each player controls one dragon. To make things fair, all dragons are made up from the same number of design points. Although any number of points can be used, a mid-range number usually works best. If you are not using riders in your game, try 12 DPs for each player. If riders will be used, try 15 DPs.
The Legion Method
This method is used for games in which each player controls a number of allied dragons. The number of DPs each player gets is entirely open to the players' decision. Once the players agree upon a number, they then each create as many or as few dragons as they prefer with their allotted number of DPs. With 50 points, a player may, for example, create two 25-point dragons or five 10-point dragons. As a quick look at The Cost Table will show you, no dragon may cost less than 4 points or more than 25 points.
Step 1: Choose a Body and Wings
Take a look at the Maneuverability and Speed Table. Body weights are listed along the left hand column, and wing sizes are listed along the top row. The number just to the left of each body weight is the minimum speed required for a dragon with that weight. The numbers just below the wing sizes are the maximum speeds allowed for a dragon with those wings. If you cross-reference the body with the wings, you get the maneuverability rating for a dragon with those characteristics.
Now purchase your dragon's body and wings, keeping in mind how they will affect its performance.
The Cost Table
| Component | Option | Cost (DPs) |
|---|---|---|
| Body | Very Light | 1 |
| Body | Light | 2 |
| Body | Average | 3 |
| Body | Heavy | 4 |
| Body | Very Heavy | 5 |
| Wings | Tiny | 1 |
| Wings | Small | 2 |
| Wings | Medium | 3 |
| Wings | Large |
Step 2: Choose Weapons
Take a look at the Weapon Damage Table. It lists the dice you will roll for damage when you hit with these weapons. Now purchase your breath weapon and your tooth and claw weapons.
Step 3: Choose a Rider
You may want to refer to the Rider Abilities Table on page 18 if you wish to use a rider. Choose your riders carefully, as they can have a great impact on the game. You don't ever have to purchase a rider, but they're often worth the cost.
Turning Costs Table (same as page 8)
| MR | 60° Turn | 120° Turn | 180° Turn |
|---|---|---|---|
| A | 0 | 1 | 3 |
| B | 0 | 2 | 4 |
| C | 0 | 3 | 5 |
| D | 1 | 2 | 4 |
| E | 1 | 3 | 5 |
| F | 1 | 4 | 6 |
| G | 2 | 3 |
Weapon Damage Table
| Weapon | Damage |
|---|---|
| Cold (breath) | 2d6 |
| Lightning (breath) | 2d6+2 |
| Flame (breath) | 3d6 |
| Ice (breath) | 3d6+2 |
| Magma (breath) | 4d6 |
| Blunt (tooth and claw) | 2d6 |
| Dull (tooth and claw) | 2d6+2 |
| Sharp (tooth and claw) | 3d6 |
| Jagged (tooth and claw) | 3d6+2 |
| Razor Sharp (tooth and claw) | 4d6 |
Maneuverability and Speed Table
Columns are wing sizes (Huge, Large, Medium, Small, Tiny). Maximum speed: Huge 15, Large 14, Medium 13, Small 12, Tiny 11.
| Body (Min Speed) | Huge | Large | Medium | Small | Tiny |
|---|---|---|---|---|---|
| Very Light (1) | A | B | C | D | E |
| Light (2) | B | C | D | E | F |
| Average (3) | C | D | E | F | G |
| Heavy (4) | D | E | F | G | H |
| Very Heavy (5) |
Damage Points by Body Part and Size
| Part | Damage Points |
|---|---|
| All Heads | 30 pts. |
| All Tails | 30 pts. |
| Very Light body | 20 pts. |
| Light body | 30 pts. |
| Average body | 40 pts. |
| Heavy body | 50 pts. |
| Very Heavy body | 60 pts. |
| Tiny wing | 20 pts. per wing |
| Small wing | 25 pts. per wing |
| Medium wing | 30 pts. per wing |
| Large wing | 35 pts. per wing |
| Huge wing | 40 pts. per wing |
Step 4: Fill Out a Play Sheet
Now it's time to get the dragon down on paper. Use the Speed and Maneuverability Table to figure its minimum and maximum speeds and its maneuverability rating. Then use the Turning Costs Table to fill out its maneuver diagram and the Weapon Damage Table to find its weapons' damages. The allotted damage points by body part can be found on the Damage Point Table. Simply blacken out all the unused damage points on the dragon likeness, making sure to split them evenly across the lines. Leave odd points above the line.
Campaigns
Once you're familiar with Dragon Lords and have determined your favorite dragon types and methods of play, you may want to set up a Dragon Lords campaign. A campaign is a series of linked games in which you use the same dragons over and over again.
When playing a game in a campaign, you use the same rules that you would normally use for a single dragon game. It's just that now, if your dragon manages to win or simply survive a game, you can use it again in a later game. Your dragon will have learned from its experiences, and the outcome of the game will affect its reputation in the dragon community. If you are a skilled and sometimes lucky player, your dragon might become a legendary creature, the very name of which would cause lesser dragons to think twice about venturing against it.
How to Start
The players in the campaign must first agree upon the number of DPs that will be available to design each dragon and if the advanced rules or any of the optional rules will be used during the campaign. 15 DPs is a nice number to work with, but feel free to use whatever number of DPs you like, as long as you can get everyone to agree to it.
You can, if you wish, design several different dragons for the campaign and keep track of them all simultaneously.
The Campaign Points System
An ongoing campaign is strung together by the campaign points system. This straightforward system keeps track of how your dragon performed during each game it was involved in. The better your dragon performs, the more campaign points it will accumulate.
Campaign points are a double edged sword, however. If you perform poorly or act cowardly during a game, you will lose campaign points.
Simply keep a running tally of the number of damage points your dragon inflicts on other dragons during each campaign game. Certain bonuses and penalties can be applied to that tally as well. For a complete list, see the Campaign Point Modifiers table below.
Campaign Point Modifiers
| Event | Points |
|---|---|
| Each damage point inflicted | +1 point |
| Inflicting a critical hit | +10 points |
| Fumbling | -10 points |
| Rider is killed | -10 points |
| Yielding defeat if stuck on the ground | -10 points |
| Leaving the board | -25 points |
| Last dragon on the board | +50 points |
Living and Dying
The dragons involved in a campaign game do not have to fight to the death. If you feel that your dragon is not going to live too much longer if it sticks around, you may simply fly it off the map to escape the fray. Discretion is, after all, the better part of valor.
Also, if your dragon takes enough damage to its tail or wings to be grounded, yet survives the crash landing, you may yield defeat to insure that your precious dragon does not get killed. While this could still be construed as an act of cowardice, it is a bit more noble than running away and it really does allow your dragon to come back to fight another day.
A dragon that yields defeat is removed from the board immediately, as it can no longer affect the game.
Between games, surviving dragons heal and recover all lost damage points. Wizards also recover all spent magic points. If, during a game, your dragon meets its doom, it is out of the campaign permanently. You may create a new dragon to replace it, but that dragon starts back out at the bottom of the heap again, just like any other newly created dragon.
Rewards
Once a dragon has managed to accumulate a number of campaign points, it can trade these in for certain rewards. For each 100 campaign points the dragon has collected, it may choose one reward from the following list:
- The dragon's base to-hit number may be decreased by one point (e.g. from 8 to 7), down to a minimum of 5. This will make it easier for the dragon to hit its targets in breath combat.
- Similarly, the dragon's rider's base to-hit number may be decreased by 1 point, down to a minimum of 5.
- The dragon's close combat modifier may be increased by +1, up to a maximum of +4.
Once a dragon has taken as many rewards as it possibly can, it may still accumulate further campaign points but it may not take any additional rewards.
Losing Rewards
If a dragon's point tally drops below any 100 point mark, it must lose the reward it gained when it went above that mark. Losing experience through poor game play can drastically harm a dragon's performance.
If your point tally drops below 0, it does not directly harm dragon's abilities, but it must retain those negative campaign points and try to climb out of the hole. If the dragon can't ever seem to win, feel free to scrap it and start over with a fresh new dragon.
If a rider is killed, you may simply replace it with another rider of the same type at no point cost. Earned rewards that applied to the original rider's to-hit number still apply, however. After all, a reputable dragon has a more experienced group of riders to choose from!
Ready-Made Dragons
The following ready-made play sheets are printed on pages 30 to 35. Each entry gives the play sheet's printed values. Minimum and maximum speed, and the maneuverability rating for each body and wing combination, follow the Maneuverability and Speed Table on page 27.
Page 30
Lectronist (12 design points)
- Body weight: Heavy
- Wing size: Large
- Breath weapon: Lightning (breath damage 2d6+2)
- Tooth and claw sharpness: Dull (tooth and claw damage 2d6+2)
- Maneuverability rating: E
- Close combat modifier: 5
- Minimum speed 4, maximum speed 14
- Rider: None
Kelvinight (12 design points)
- Body weight: Light
- Wing size: Medium
- Breath weapon: Ice (breath damage 3d6+2)
- Tooth and claw sharpness: Sharp (tooth and claw damage 3d6)
- Maneuverability rating: D
- Close combat modifier: 6
- Minimum speed 2, maximum speed 13
- Rider: None
Page 31
Zippinchill (10 design points)
- Body weight: Very Light
- Wing size: Huge
- Breath weapon: Cold (breath damage 2d6)
- Tooth and claw sharpness: Sharp (tooth and claw damage 3d6)
- Maneuverability rating: A
- Close combat modifier: 9
- Minimum speed 1, maximum speed 15
- Rider: None
Thilindis (16 design points)
- Body weight: Heavy
- Wing size: Large
- Breath weapon: Ice (breath damage 3d6+2)
- Tooth and claw sharpness: Jagged (tooth and claw damage 3d6+2)
- Maneuverability rating: E
- Close combat modifier: 5
- Minimum speed 4, maximum speed 14
- Rider: None
Page 32
Reaper (20 design points)
- Body weight: Very Heavy
- Wing size: Huge
- Breath weapon: Magma (breath damage 4d6)
- Tooth and claw sharpness: Razor Sharp (tooth and claw damage 4d6)
- Maneuverability rating: E
- Close combat modifier: 5
- Minimum speed 5, maximum speed 15
- Rider: None
Skyblazer (18 design points)
- Body weight: Average
- Wing size: Huge
- Breath weapon: Magma (breath damage 4d6)
- Tooth and claw sharpness: Razor Sharp (tooth and claw damage 4d6)
- Maneuverability rating: C
- Close combat modifier: 7
- Minimum speed 3, maximum speed 15
- Rider: None
Page 33
Slash (15 design points)
- Body weight: Average
- Wing size: Medium
- Breath weapon: Flame (breath damage 3d6)
- Tooth and claw sharpness: Blunt (tooth and claw damage 2d6)
- Maneuverability rating: E
- Close combat modifier: 5
- Minimum speed 3, maximum speed 13
- Rider: Wizard (magic points 60; the wizard's spell effects are on pages 24-25)
Blowderby (15 design points)
- Body weight: Very Heavy
- Wing size: Small
- Breath weapon: Magma (breath damage 4d6)
- Tooth and claw sharpness: Blunt (tooth and claw damage 2d6)
- Maneuverability rating: H
- Close combat modifier: 2
- Minimum speed 5, maximum speed 12
- Rider: Javelin Thrower (medium range 1 hex, 1d6+3 damage; long range 2 hexes, 1d6 damage)
Page 34
Tankerous (12 design points)
- Body weight: Very Heavy
- Wing size: Tiny
- Breath weapon: Cold (breath damage 2d6)
- Tooth and claw sharpness: Jagged (tooth and claw damage 3d6+2)
- Maneuverability rating: I (printed as "1" on the sheet)
- Close combat modifier: 9 as printed on the sheet. Note: the MR-to-close-combat table on page 13 gives MR I a modifier of 1; the printed 9 does not match that table and is transcribed as printed. Verify against the original page before relying on it.
- Minimum speed 5, maximum speed 11
- Rider: Lancer (medium range: Close Combat, +2 to close combat and +4 to damage; long range: None)
Fiercival (16 design points)
- Body weight: Heavy
- Wing size: Small
- Breath weapon: Magma (breath damage 4d6)
- Tooth and claw sharpness: Dull (tooth and claw damage 2d6+2)
- Maneuverability rating: G
- Close combat modifier: 3
- Minimum speed 4, maximum speed 12
- Rider: Archer (medium range 2 hexes, 1d6+4 damage; long range 4 hexes, 1d6+1 damage)
Page 35
Ozonic (18 design points)
- Body weight: Very Heavy
- Wing size: Medium
- Breath weapon: Flame (breath damage 3d6)
- Tooth and claw sharpness: Sharp (tooth and claw damage 3d6)
- Maneuverability rating: G
- Close combat modifier: 3
- Minimum speed 5, maximum speed 13
- Rider: Crossbow Shooter (medium range 3 hexes, 1d6+6 damage; long range 6 hexes, 1d6+3 damage)
Stalwyrm (24 design points)
- Body weight: Very Heavy
- Wing size: printed as "Very Large" on the sheet, which is not a wing size used elsewhere in this rulebook (Tiny, Small, Medium, Large, Huge). The printed maneuverability rating E and maximum speed 15 match Huge wings, so the sheet is read here as Huge wings. Judgment call, disclosed.
- Breath weapon: Ice (breath damage 3d6+2)
- Tooth and claw sharpness: Razor Sharp (tooth and claw damage 4d6)
- Maneuverability rating: E
- Close combat modifier: 5
- Minimum speed 5, maximum speed 15
- Rider: Wizard (magic points 60)
Example of Play
When all's said and done, often the best way to teach is by example, so here we are. In this game, Nick and Michael each have one dragon and are playing each other in a free-for-all as described on page 14. They are not using any of the advanced or optional rules.
They agree on using the dragons shown on page 30, as they are evenly matched. Nick decides that he wants to try a fast dragon with deadly attacking powers, so he chooses the zippy Kelvinight. Michael opts for the strength and stamina of Lectronist.
Before the Game: Nick and Michael turn to page 30 and copy the statistics for their dragons onto blank play sheets. Then they each grab a blank log and arrange the maps in the center of their dining room table according to the standard map layout as shown on page 14.
Having assembled their dragon figures beforehand, Nick and Michael each pick out a figure that looks most like the dragon on his play sheet. They each roll 2d6. Nick gets a 7, and Michael gets an 11. Nick places his dragon on the map first. Michael then places Lectronist directly across the map from Kelvinight.
Nick and Michael then pick out the counters they'll need to play the game. They each take a set of altitude counters ranging from Very High to Very Low. Additionally, they each take an Engaged counter. They're not using the advanced rules, so they don't take Ground counters.
Now they turn their counters face down on the table and each secretly choose an altitude marker and hide it in their hand. Once they're both ready, they open their hands simultaneously, revealing that Lectronist is at Very High altitude, while Kelvinight is at Low. They set the counters down next to their dragons, and the game begins.
The First Turn
1. Initiative: Nick and Michael each roll 2d6. They both get an 8. They roll off. Nick gets a 9; Michael gets a 5. They each record their initiative rolls on their game logs. Nick writes 8/9, and Michael writes 8/5.
2. Record Speed: Since it's the first turn, the players can record any speed they like. Nick decides to move quickly and writes 13 on his game log. Playing more cautiously, Michael decides to only move the "safe speed" of 9.
3. Movement: Since Michael's initiative roll was lowest, he moves first. He moves Lectronist 9 hexes straight ahead. This uses up all of its 9 movement points. Nick then moves Kelvinight 7 hexes straight ahead. It then climbs 3 times in a row, using up its remaining 6 movement points and bringing itself up to Very High altitude. Nick changes its altitude marker accordingly.
Since there are still 12 empty hexes between the two dragons, no breath combat or close combat can take place, so Nick and Michael skip over the rest of the turn and start a new one.
The Second Turn
1. Initiative: Nick gets a 6; Michael gets a 7. They each record their initiative rolls on their game logs.
2. Record Speed: Throwing caution to the wind, Nick decides to record 13 again. Michael accelerates as fast as he can, which is up to 3 over his last turn's speed. He records 12.
3. Movement: Nick moves first. Kelvinight flies 1 hex straight ahead, then turns 180°. Then the dragon moves ahead 1 hex and turns 180° again. Then it zips 3 hexes forward. This puts it 3 hexes forward of his previous position.
Lectronist moves forward 1 hex and turns 60° to its left. Then it moves 4 hexes forward, turns 60° to its right, moves 4 more hexes forward and finishes with another 60° turn to the right.
4. Record Breath Target: The dragons have 4 empty hexes between them, making the range 5 hexes, well within the 6 hex limit. They are also both within each other's arc of fire, although Lectronist is in Kelvinight's grey hexes, while Kelvinight is in Lectronist's dark hexes. Since there are no other targets, Nick and Michael each record the other's dragon as his target.
5. Breath Combat: Lectronist and Kelvinight breathe at each other. Since all breath combat is resolved simultaneously, it doesn't matter who works out their attack first, but Nick and Michael agree to go in the order of the initiative rolls, so Nick breathes first.
Nick starts with the base number 8 and checks the To-Hit Modifiers Table. The only applicable modifier is that the target is in the grey area of his dragon's arc, so he needs to roll a (8+1=)9 or higher on 2d6. He gets a 7 and misses.
Now it's Michael's turn. He starts with the base number of 8 and checks the To-Hit Modifiers Table. No modifiers apply, so Michael just needs to roll an 8 or higher on 2d6. He gets an 8 and hits.
Drawing an imaginary line from the center of Lectronist's hex to the center of Kelvinight's hex, Michael checks the Direction Template and sees that Lectronist is attacking Kelvinight through its front right hexside. Next, he consults the Damage Allocation Table and rolls 2d6. He gets a 5. Kelvinight has been hit in the body.
Checking his play sheet, Michael sees that Lectronist has lightning breath and rolls 2d6+2 for damage. He rolls 7 and adds 2 to get 9. Nick marks 9 damage points off of the damage track on Kelvinight's body, starting at the upper left. This does not cross the half-way line, so Kelvinight suffers no additional penalties for now.
Since the dragons are not engaged in close combat, Nick and Michael skip that phase and start a new turn. The game will continue on in this way, turn after turn, until there is only one dragon left in the sky. It will take a combination of luck and skill, but one dragon will eventually emerge from the battle triumphant.
Omitted Material
The following printed pages are not transcribed: the "What's Next?" page (page 38), which is a publisher catalogue and product advertisement with ordering addresses, and the blank play sheet and blank game log (pages 39 and 40), which are photocopiable forms rather than rules. The credits and copyright block on page 2 is also omitted.