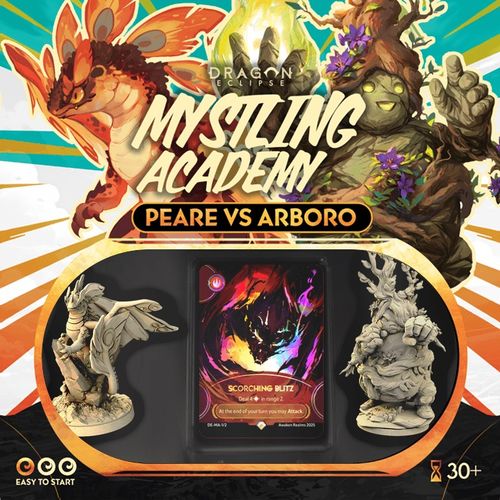
Dragon Eclipse: Mystling Academy – Peare vs Arboro
Dragon Eclipse: Mystling Academy – Peare vs Arboro Rulebook
Table of Contents
Table of Contents
Component List
Standard cards (PvP):
- 2 Stat cards (Arboro, Peare)
- 2 Ability cards (Arboro, Peare)
- 2 Element/Help cards (Earth, Fire)
- 2 Foil Action cards
- 30 Action cards
- 2 Arena cards
Standard cards (Solo):
- 2 Taming cards
- 2 Portrait cards
- 2 Enemy Ability cards
- 2 Tier cards
- 12 Enemy Attack cards
Tokens:
- 5 Universal tokens
- 16 "5" Damage tokens
- 14 "1" Damage tokens
- Card Slots tokens
- 20 Power markers
- 4 A/B tokens
Others:
- 2 miniatures (of Arboro and Peare)
- Arena map
Combat Setup
Setting up the Combat for a Mystling Academy duel is always done similarly, but modified a little by Arena cards.
Prepare the Arena
- Take the Arena map and place it PvP side up.
- Take two Card Slots tokens and place them — the side with power values visible — above and below the Arena.
- Place the Damage tokens and Power markers next to the Arena.
- Take out one random Arena card and place it next to the Arena, PvP side up. If the Arena card has "Setup" rules, resolve them now.
- Choose your color — white or black. To decide who goes first, toss a Universal token. The winner of the toss becomes the First Player.
- Choose the Mystling you are gonna battle with.
- The First Player — place your Mystling model in starting space I in the Arena.
- The second Player — place your Mystling model in starting space II or III.
Prepare your Mystling
- Take your Mystling Stat card, PvP side up, and Ability card and place them near the Arena, connected in order to create a Mystling sheet.
- Take an Element card matching your Mystling's Element. Set it aside, near the Mystling sheet, with the Bonus Actions side up. On the back of this card are help sections for Combat Order and Combat Tags.
- Take the preconstructed 16-card Action deck assigned to your Mystling and shuffle it. Place the Action decks face down, to the left of the Card Slots tokens.
- Draw Action cards one by one and place them face up in the numbered Card Slots to the right of the deck, starting from slot 4.
- Starting with the First Player, you may decide to perform a mulligan — take all cards from your Slots, put them aside, draw four new cards, and shuffle the previous ones back into the deck.
- The second Player gains 1 Power and places it on their Mystling sheet.
Combat Order and Combat Tags (Element/Help Card Reference)
Combat Order — Player turn:
- * You may use Bonus Actions.
- Choose a slot. Gain Power. Resolve the effect of the card. Then, discard that card.
- * You may use Bonus Actions.
- Slide cards. Refill empty slots.
- End your turn and proceed to the Opponent turn.
* Each Bonus Action can only be used once per turn.
Combat Tags:
- Attack — deal Attack equal to your Attack value in range 1. Reduce it by the opponent's Defense.
- Heal X — discard X Damage.
- Move — move by up to your Movement value in spaces.
- Trigger — once per turn. Resolve another card from your slots (do not gain Power from its slot) and discard it.
Your Mystling
To fully understand what you will be doing during Combat, it's important to first take a closer look at your Mystling. Each Mystling is represented by a miniature or standee, which moves across the Arena, and a Mystling sheet, which contains its unique stats and abilities.
The first choice you make is which Mystling will battle by your side, as your Mystling defines your playstyle. You will use its Action cards, Element, and Special Ability to gain Power, deal Damage, and outmaneuver your opponent.
Mystling Sheet Breakdown
A Mystling sheet is made up of two key components:
- Ability Card (left side)
- Stat Card (right side)
Together, they form your Mystling's full profile during Combat.
Note: Always use the PvP version of the Stat card. It has stats that differ from the solo version of Mystling Academy.
The Ability card shows:
- Mystling Name — the name of your Mystling.
- Special Ability Bonus Action — a unique, powerful effect that can be activated by spending Power. Each Mystling has its own Special Ability. It can be used once per turn.
- Upgrade Slot — this is where you put Action cards with Upgrades. Can store one Upgrade at a time.
The Stat card shows:
- Element — indicates your Mystling's Elemental type (e.g., Earth, Fire). This defines which Elemental Action cards it can include in its deck and which Elemental Bonus Action is available to it during Combat.
- Subelement — if a Mystling has a subtype Element, you may add Action cards from that Element to your deck, but no more than the number next to the small Elemental icon next to its main Element.
- Movement — determines how many spaces the Mystling can Move on the Arena when resolving Move effects.
- Willpower — reduces incoming Magic Damage.
- Defense — reduces Physical Damage from Attack. Does not protect against Magic Damage.
- Health — the total amount of Damage your Mystling can take before being defeated. In PvP, if a Mystling reaches 0 Health, they immediately lose the battle.
- Attack — base value used for resolving Attack effects. This is how much Physical Damage your Mystling deals; can be increased by card effects or Passives.
Understanding Cards
Action Card Anatomy
There are three card types:
- Elemental cards — with an Elemental icon, may only be used by Mystlings with corresponding Elements.
- Neutral cards — without any icons, they may be used by all Mystlings.
- Mystling cards — cards assigned to a specific Mystling. The name of the Mystling is written in the top right-hand corner of the card. These cards are also Elemental cards.
A card also shows:
- Card Name.
- Active Effect — most Action cards have effects that are resolved immediately. These effects are not distinguished by any additional frame.
- Passive Effect — some Action cards have effects that last as long as the cards are at the top of your discard pile. When a Passive card gets covered by another card, the Passive effect no longer applies. Cards that have Passive effects may still have Active effects. Passive effects are inside a frame.
- Set Number.
- Card Rarity — this icon determines how frequently a card can appear in decks: common, rare, ultra rare, legendary, mystling-specific.
Card Slots and Power Gain
Each Player has four Card Slots in front of them, numbered from 1 (leftmost) to 4 (rightmost). At the start of the battle, these Slots are filled with Action cards from your deck. During your turn, you will choose one of these Slots to resolve an Action card.
The amount of Power you gain from resolving an Action card depends on the Slot it was played from. This value is printed above each Slot on the Arena:
- Slot 1 — 1 Power
- Slot 2 — 2 Power
- Slot 3 — 2 Power
- Slot 4 — 3 Power
When you resolve a card from a Slot, gain the Power shown for that Slot before applying the card's effects. When gaining Power, put it on your Mystling sheet. Power is a resource that allows you to activate Bonus Actions and your Mystling's Special Ability.
You may hold up to a maximum of 10 Power at any time — if you would gain Power beyond this limit, the excess is lost.
Passive Effects
Some Action cards feature a Passive effect — an ongoing bonus that remains in play while that card is on top of your discard pile. Passive effects can provide a variety of benefits, such as increasing your Attack value or granting extra Movement.
Only the top card of your discard pile may provide a Passive effect. If a new card is discarded on top of it, the previous Passive effect immediately ends, and the new top card's Passive (if any) takes over.
Removing Cards from Play
Some card effects may instruct you to Remove a card from play. When this happens, place the card face-up in a separate area next to your Mystling sheet.
Once a card is removed from play, it cannot be recovered or used again for the rest of the Combat. Removing cards from play is often tied to Special Abilities or particularly powerful effects — removing a card permanently may open up new strategic opportunities or enable certain combos.
Deck Construction
For Mystling Academy purposes, decks are predefined, but there are some additional Action cards you can enhance your deck with. If you want to go back to the starting deck, here is a list for every Mystling:
- Arboro: Magnetism, Arboreal Path, Haste, Rooted Punch, Splintering Armor, Energetic Infusion, Plant Out, Terra Swirl, Spectral Blast, Arboreal Path, Guardian Stance, Rooted Punch, Haste, Grapple, According to Plan, Plant Out.
- Peare: Double Strike, Wings of Fire, Flamethrower, Kindling, Path of Power, Fiery Rage, Scorching Blitz, Channeling, Deliberate Strike, Focus, Flamethrower, Offensive Stance, Wings of Fire, Full Focus, Kindling, Path of Power.
Before entering combat, each player must prepare a legal Action deck for their Mystling. Your deck represents the techniques, Elemental powers, and signature moves your Mystling will use throughout the battle.
Deck construction rules ensure fair and balanced play while allowing space for customization and strategy. All rules below apply to PvP play unless stated otherwise.
Deck Size and Composition
- Your deck must contain exactly 16 Action cards.
- You may include no more than 1 Legendary card.
- You must include at least 3 and no more than 6 Mystling-specific cards — these are cards marked with your Mystling's name.
- All other cards must be Neutral or share the Mystling's Element.
Element Restrictions
Every Mystling is aligned with a specific Element (e.g. Earth, Fire, Air, Water). This Element determines which cards are legal for that Mystling.
- You may include any card that matches your Mystling's Element.
- You may not include Elemental cards from other Elements.
- Neutral cards (no Element icon) can be included in any deck.
- Mystling-specific cards count as both Elemental and restricted to specific Mystling.
Sub-elements and Future Builds
While this battle box includes only decks with a single Element, future expansions may introduce sub-elements.
If you want to include cards from the Mystling's sub-element in your deck, you may add as many as states the number next to the small Elemental icon, next to its main Element.
Turn Structure
In Mystling Academy, Players take turns alternately, starting with the First Player. Each Player's turn follows the same sequence of steps and is structured around managing your Action cards, spending Power, and positioning on the Arena.
A turn consists of the following five phases, performed in order:
1. Use Bonus Action(s) (optional)
At the beginning of your turn, you may spend Power to perform Bonus Actions. They are found on Elemental Help cards, Ability cards, and sometimes, even on Action cards or Arena effects. Bonus Actions found on Help cards are always available.
To use the Bonus Action you must spend the number of Power indicated to the left of the Bonus Action, then resolve its effect.
You may only use each Bonus Action once during your whole turn. E.g., if you used the Dash Bonus Action in step 1 of your turn, you cannot resolve it again during this or any other step. However, you may still use the Prepare Bonus Action if you haven't used it yet.
2. Resolving one Action card
This step is the main part of the Player's turn and is mandatory, even if you wouldn't do anything during resolving the card.
- Choose one Card Slot with a card in it. Note: You may choose any Slot, even if you cannot apply the effect of the card in it (e.g., the effect of the Action card is Attack, but there is no opponent in range 1).
- Gain Power equal to the number above that Slot.
- Resolve the effect of the card, from top to bottom, left to right. You must resolve all effects on the card unless you are unable to do so, or the effect states otherwise. Remember that card effects always overwrite the rules.
- Place the resolved card face up on top of the Action cards discard pile, to the right of the Card Slots.
You may only resolve one Action card per turn.
3. Use Bonus Action(s) (optional)
Follow the rules from step 1. Remember that each Bonus Action may only be used once per turn.
4. Draw cards
Slide all remaining Action cards to the right to fill any empty Slots. Then, draw new cards from your deck to fill the remaining empty Slots, starting from the rightmost available Slot.
Your Mystling should always have four Action cards slotted at the end of your turn. When you need to draw a card and your deck is empty, you must reshuffle. To do so, discard all your attached Upgrades, shuffle your discard pile and create a new deck.
5. End of Turn
Resolve any end of turn effects in an order of your choice. Discard 1 Condition token of each type, if you have any. Proceed to the Opponent's turn.
Combat Keywords
Every Mystling has their own way of fighting — some strike hard, others slip past defenses, some unleash raw elemental magic. Instead of writing out full instructions every time, the game uses simple terms like Attack, Move, or Trigger to keep cards clean and quick to read. Keywords on Action cards are written in bold.
Attack
When a card instructs you to Attack, your Mystling deals Physical Damage equal to its current Attack value to a valid target in range 1 (adjacent space). Some cards may allow you to modify this Damage or Attack multiple targets, e.g., "Attack +1" means that for the purpose of this Attack, your Mystling Attack value increases by 1.
Physical Damage is reduced by the target's Defense value (to a minimum of 0), and you deal the rest to the Enemy. If the resulting Damage is equal to or greater than the target's remaining Health, they are defeated.
Heal
When you Heal, you remove a number of Damage from your Mystling equal to the specified value. Healing cannot increase your Health beyond your maximum. If a card reads "Heal 3," you remove up to 3 Damage from your Mystling.
Move
When you Move, your Mystling may change its position on the Arena by a number of spaces equal to its Movement value. You move one space at a time, choosing the adjacent space for each step, up to the total allowed.
All movement is resolved during a single Move effect, but you may choose to move fewer spaces than the maximum. Some effects may temporarily increase or decrease your Movement. For example, if a card says "Move +1", treat your Movement value as one point higher for that Move.
Trigger
You may use Trigger once per turn. When a card includes the Trigger effect, it allows you to resolve an additional Action card from your Slots during the same turn.
To do this, choose another Action card from your Slots and resolve it immediately. You do not gain Power from its Slot. After resolving the Triggered card, discard it as normal. Then, finish resolving the original card that initiated the Trigger and discard it as well.
If multiple Trigger effects appear in the same turn, only the first one may be used. All additional Trigger effects are ignored.
Deal X in Range Y
Check whether the target Mystling is within the specified number of spaces from your Mystling. Then, reduce the Damage by their Willpower value (to a minimum of 0), and apply the Damage.
If the effect deals Damage multiple times you can choose the target for every Damage instance. The Willpower applies every time separately in those cases.
If the resulting Damage is equal to or greater than the target's remaining Health, they are defeated.
Range
This is not a keyword on its own, but it often modifies other keywords and effects. Many effects in the game refer to range, which determines the maximum number of spaces between your Mystling and the target of an effect. Range is always measured in spaces.
You may target any space within the specified range, including spaces that are closer than the maximum. Range is measured through all spaces — occupied or empty — and is not blocked by Mystlings, tokens, or terrain, unless a card or rule specifically states otherwise.
Example: spaces marked in green are within range 1 of a Mystling. All spaces marked in orange are within range 2. All spaces marked in red are within range 3. The space with the Mystling on it is considered to be within range 1, 2, and 3.
Bonus Actions
In addition to your Action card each turn, Mystlings can perform Bonus Actions to enhance their positioning, power, or momentum. They cost Power and can be used before or after resolving your Action card.
Each Mystling has access to Basic Bonus Actions, as well as unique Elemental and Special Ability options. Bonus Actions are powerful, but each one may only be used once per turn.
(Basic) Bonus Actions
These Actions are available to every Mystling, regardless of Element. You can find them on your Element/Help card.
- Dash — Spend 1 Power to Move your Mystling by the number of spaces defined by the Mystling's Movement value.
- Prepare — Spend 1 Power to discard one Action card - put one chosen Action card from the Slot onto the discard pile, face up. Do not gain any Power from the Slot and don't resolve the card effect. If it is possible, slide remaining cards to the right, so that they change a Slot to a higher numbered one, and draw one card into the rightmost Slot.
Elemental Bonus Action
Each Mystling's Element card provides access to a powerful Elemental Bonus Action unique to that Element. These Actions cost more Power.
You can only use the Elemental Bonus Action that matches your Mystling's main Element.
Special Ability Bonus Action
Each Mystling also has a unique Special Ability, shown on its Ability card. This is a powerful action that reflects the Mystling's personal style — a burst of speed, a field of flame, a piercing attack, or a trick that turns the tide.
- Special Abilities may be more expensive, depending on the Mystling, but they mostly result in more significant actions.
Special Abilities often combo well with specific card types or playstyles — learning when to spend Power is key to mastering your Mystling.
Arena
Mystling battles unfold on an Arena map, where movement, positioning, and environmental effects all play a key role in Combat. Understanding how to read the Arena and interact with its features is essential for strategic play.
Arena Maps
Arena maps are divided into a grid of spaces where Mystlings can Move. Some maps may include icons and I, II and III that are used during Combat Setup and may be checked by some Enemy Attack or Action card effects. These spaces do not have an effect on their own.
Arena Cards
Arena Cards add unique effects or conditions to a battle. Each Arena Card is a self-contained set of rules that modifies the standard Arena for the duration of a Combat encounter. These cards are used in every game and add new Terrain rules.
Arena cards consist of several elements:
- Name.
- Setup — additional Setup instructions.
- Rules and Bonus Actions — some Arena cards may have additional Rules, or even Bonus Actions available during Combat. Make sure to read them before starting and apply any setup rules if present.
Terrain and Arena Icons
Arena cards often instruct you to place Terrain on the Arena map, on the indicated spaces marked with specific icons. These elements may block spaces or apply additional effects based on the environment you're fighting in. Use the Universal tokens shown on the Arena card to represent each Terrain feature.
The use of the beneficial-terrain symbol typically indicates that the Terrain is beneficial to you, while the other symbol suggests the opposite. Specific Terrain effects are explained in the Rules section of the Arena card itself.
Other Combat Rules
Elemental Advantage
In Mystling Academy, Elements have natural relationships with one another. Some Action cards and Enemy Ability cards include Advantage icons, which trigger bonus effects when used against a Mystling of a specific Element.
You don't need to memorize the full Elemental advantage chart — these interactions are always listed directly on the card. When resolving a card with an Advantage icon, apply the additional effect only if the target's Element matches the one shown.
This rule also applies to sub-elements. For example, if an effect shows the Fire icon and the target has a Fire-Water Element, the advantage effect still applies.
For example, when you resolve the Flamethrower card and your opponent's Element is Air, you also resolve the Move action. Enemy Ability cards use Advantage icons the same way. If your Mystling's Element matches the icon shown, the Enemy applies the bonus effect against you.
Elemental Tokens
Some cards and abilities create or interact with Elemental tokens — special markers placed on the Arena or assigned to Mystlings. These tokens do not have inherent effects on their own, but they can be activated or referenced by Action cards, Bonus Actions, Special Abilities, or Enemy effects.
Elemental tokens are double-sided. Players can decide on which color side they prefer. In single Player game:
- The white side is used by the Player.
- The black side is used by Enemies.
Placing and Gaining Tokens
- When a Mystling gains a token, place it on their Mystling sheet.
- When a token is placed in the Arena, follow the range listed on the effect.
Placement Rules
- You: Choose any valid space within range.
- Enemy: Place the token as close to your Mystling as possible (including your space if allowed).
- Tokens may occupy the same space as a Mystling.
- Tokens cannot be placed on Terrain icons.
- Each space may contain one player token and one Enemy token at most.
Token Limit
Each Mystling has a token limit, shown in the top-right corner of their Stat card. This limit determines how many Elemental tokens that Mystling may place or gain.
- If you would gain a token beyond your limit, the gain is ignored.
- If you would place a token beyond your limit:
- You: Choose one of your existing tokens in the Arena and move it to the new space (can be the same space).
- Enemy: The Enemy moves the farthest black token toward your Mystling, within the effect's range.
Solo Mode
Combat Components
The description of the most important components used in Combat are below:
- Arena maps.
- Arena cards.
- Player's Mystling: Stat and Ability cards.
- Enemy Mystling: Stat and Enemy Ability cards.
Arena Maps
Arena maps can be found in the Arena book. Each Combat, in which you fight and try to Tame an Enemy, is played on an Arena map. While there are a few Arena maps, each Arena has spaces to which you and your Enemy can move. Some of the Arena spaces are marked with icons: I, and II (and III for 2 players) that are used during Combat Setup and may be checked by some Enemy Attack or Action card effects. These spaces do not have an effect on their own.
Each Arena has slots for the following components:
- Enemy sheet: place for two (or more) cards that create an Enemy sheet.
- Enemy deck: place for Enemy Attack cards, which you prepare before each Combat. To the right of that space, are five spaces for resolved Enemy cards.
- Enemy discard pile: place for discarded Enemy Attack cards.
- Arena card: place for an Arena card. Each Combat has its own Arena card, and the Adventure Journal indicates which one to prepare.
- Your deck: place for your deck.
- Action slots: four slots for your available Action cards.
- Your discard pile: place for your discarded Action cards.
Enemy Mystling
Your Enemy during Combat is represented by a standee in the Arena and an Enemy sheet that describes its abilities and statistics. An Ability card (sometimes more than one) and a Stat card create an Enemy sheet.
Note: Both Players and Enemies use Stat cards.
Some Enemies may have more than one Enemy Ability card. In such cases, place them next to each other. Some Enemies may also use cards with Summons. Summons are described in the Advanced Rules section of this rulebook (page 15 of the printed manual).
An Enemy sheet consists of several parts:
- Enemy name.
- Element.
- Enemy token limit: indicates how many Elemental tokens the Mystling can place/gain.
- Enemy Statistics: works in the same way as the Player's Mystling statistics.
- Enemy Passive: permanent ability of an Enemy that lasts throughout the Combat.
- Enemy effects: tells you what an Enemy can do during their activation. The Enemy resolves its action based on the current Enemy Attack card.
- Enemy Special Ability: an Enemy Special Ability resolved every few turns, after reaching the Special Ability token.
- Setup Special Ability: indicates in which Enemy slot you must place the Special Ability token.
- Setup Enemy deck: informs you which Enemy Attack cards you must use to create the Enemy deck at the start of Combat.
Combat setup
To setup a Combat, follow the steps below:
- Prepare the Arena: open the Arena book to the Arena map indicated by the Adventure Journal.
- Setup the Arena card: take the Arena card indicated by the Adventure Journal out from behind the Arena divider. If the Arena card has "Setup" rules, resolve them now.
- Prepare tokens and markers: place all damage tokens, Elemental tokens, Power markers, and condition tokens near the Arena so you can easily reach them.
- Prepare the Enemy:
- Assemble the corresponding Enemy standee and place it in space I in the Arena.
- Take all Enemy Ability, Stat, and Taming cards listed by the Adventure Journal from behind a divider with an Enemy name (e.g., the Golomo divider). Note: You will not always use a Taming card.
- Flip the Enemy Ability card to its B-side, then set up the Enemy for Combat (steps d-f) using the information there.
- Place a marker on a space of the Enemy track, indicated by the number on the Enemy Ability card next to "Special ability".
- Create an Enemy deck using Enemy Attack cards listed on the B-side of the Enemy Ability card. Shuffle these Enemy Attack cards and place them face up in the Enemy deck space.
- If the Enemy has "Additional setup" instructions, resolve them now.
- Flip the Enemy Ability card to the A-side and place both the Enemy stat card and Enemy Ability card in the Enemy sheet slot creating the Enemy sheet. Some Enemies may have an additional card for its Special Ability or its Summons. Place such cards near the Enemy sheet.
- If the Enemy has a Taming card, place it next to the Arena so that you can easily read it.
- Prepare your Mystling:
- Choose one of the Mystlings you chose for the Scenario. Place the chosen Mystling's standee in starting space II.
The rest remains the same as in the PvP mode.
Combat rules
Combat in Dragon Eclipse is played in turns. Turns are taken alternately, starting with the player. Combat ends with you losing, winning, or Taming the Enemy. It's worth noting that not all Enemies can be Tamed; the Adventure Journal provides information about whether the Enemy is valid for Taming or not.
Combat ends immediately when one of the following three conditions is fulfilled:
- LOSE: your Mystling has as many or more Damage than its Health.
- TAME: when you fulfill all Taming conditions from the Taming card.
- WIN: when the Enemy has as many or more Damage than its Health.
Golden Rules of Combat
- The effects on cards may overwrite some of the rules described in this rulebook. The rules on cards always take priority.
- When more than one effect takes place at the same time (e.g., at the start of your turn), you may decide which one to resolve first — you also decide for the Enemy's effects.
- When, during an Enemy turn, an effect leaves you with more than one option (e.g., the Enemy may move to two different spaces), you may decide which option to choose.
- Mystling standee can never be moved to or placed in a space with another Mystling standee.
- Treat the Enemy as your opponent for the purpose of all your effects. The Enemy treats you as the opponent for the purpose of its effects.
Enemy Turn
After the player's turn, it's time for the Enemy to act.
Enemies have several different effects that can be resolved based on their Enemy Ability card. The Enemy is going to resolve an effect matching the top Enemy Attack card that is always visible to the player.
Enemy Turn Order
During its turn, an Enemy resolves one of their effects. Every few turns, the Enemy resolves its Special Ability. To resolve an Enemy turn, follow the steps below.
-
Slide cards. Draw an Enemy Attack card: slide all Enemy Attack cards by one slot to the right (in rare cases, when you would need to slide the card from slot 5, place it on the discard pile instead). Then, take an Enemy Attack card from the top of the deck and place it in the 1st slot.
If the Enemy deck becomes empty at any moment:
- You gain 1 Fatigue and place it on the top of your discard pile — Fatigue cards are not removed after Combat. They are placed in your deck during a single Scenario and may be removed either by playing them during Combat or by various effects during the Adventure.
- If there are no more Fatigue cards available, gain 5 Damage instead.
- Reshuffle the Enemy Attack discard and create a new Enemy deck — do not discard Enemy Attack cards from the track.
-
Resolve the Enemy Attack card: check the Enemy Attack card in the 1st slot. Resolve the corresponding effect from the Enemy Ability card. Then, flip the resolved Enemy Attack card face down. When resolving the Enemy Attack, treat your Mystling as the "opponent".
-
Check and resolve Special Ability: if there is an Enemy Attack card above the Special Ability token, resolve the Enemy Special Ability and discard all Enemy Attack cards from the Enemy slots.
-
Enemy turn ends. Proceed to the Player's turn.
- Resolve end of turn effects in the order of your choice.
- Discard 1 Condition token of each type from the Enemy, if it has any.
- Start the Player's turn.
Enemy Keywords
Many keywords you use as a player are also used by the Enemy and they work in the same or similar way (e.g., Attack and Deal Damage). However, there are two keywords connected to movement that are specific to Enemies:
Retreat
- Enemy Retreat is resolved in a similar way to your Mystling's Move.
- During Retreat, the Enemy always moves to a space farthest from you (i.e., space that is the highest range from you), using the fewest number of possible moves.
- When an Enemy Retreats and they are already in the farthest reachable space, they don't move.
- If there are several spaces meeting these conditions, you may choose to which of those spaces the Enemy Retreats.
Rush
The Enemy's Rush is resolved in a similar way to your Mystling's Move.
During Rush, the Enemy always moves to a space closest to you (i.e., to end within range 1 of you if possible), using the lowest number of possible moves.
When an Enemy Rushes and they are within range 1 of you, they don't move.
If there are several spaces meeting these conditions, you may choose to which of those spaces the Enemy Rushes.
Example of Enemy Turn
It's the Enemy's turn. First, slide all Attack cards in Enemy Attack slots to the right, making space in slot 1 for a new card. Then place the top card of the Enemy Attack deck in slot 1 and compare its symbol to the Enemy Ability card. Then, resolve the corresponding effect.
For example, the effect is to "Place 1 Quake token in range 2. Attack. Rush." Resolve these effects from left to right, top to bottom. Place 1 Quake token in range 2 in the space closest to the player's Mystling. If there are two matching spaces, the player chooses where to place the token. Then, the effect says "Attack." If the Enemy is not in range 1 of the player's Mystling, the Attack has no effect.
The last part of the effect is "Rush." The Enemy moves toward the player's Mystling by a number of spaces equal to its Movement value. If there are multiple qualifying spaces, the player decides where the Enemy moves.
The Enemy Attack card is now resolved — flip it face down. If there is no Enemy Attack card above the Special Ability token, the Enemy does not resolve the Enemy Special Ability. The Enemy's turn ends.
End of Combat
Combat ends immediately when one of 3 conditions is fulfilled:
LOSE
If, at any moment, there are equal to or more Damage on your Mystling sheet than the Mystling's Health, you immediately Lose the Combat.
WIN
You may end Combat by defeating the Enemy. If at any moment there is equal to or more Damage on the Enemy sheet than its Health, and you didn't fulfill all Taming conditions, you Win the Combat.
For example, when you resolve a card with an effect: "Deal 2 in range 2. Heal 2." If the "Deal 2 in range 2" part of the effect fulfills the win condition, you must immediately end the Combat and cannot resolve the "Heal 2" effect.
TAME
Taming is more challenging than winning, but after you Tame an Enemy, it will join your ranks. However, if a Taming card wasn't placed during Combat Setup, the Enemy Mystling cannot be Tamed.
To Tame an Enemy, you must fulfill all conditions on its Taming card in the presented order (from the first to the last). This means that you cannot fulfill the third Taming condition if you haven't fulfilled the 1st and 2nd ones yet.
When you fulfill a condition, place a token in a slot next to it. Conditions remain fulfilled even if the game state changes (e.g., if the condition was to reduce the Enemy's Health, you fulfilled it, and it Healed, the condition remains fulfilled).
When you fulfill the last condition on the Taming card, you immediately Tame the Enemy, and Combat ends. This happens even if an Enemy has equal to or more Damage than its Health.
Conceding
We do not recommend it, but you can also decide to concede a fight at any time during the Combat. If you do, deal Damage to your Mystling so that their Damage equals their Health, and resolve the LOSE outcome. If you do concede you cannot continue the Combat, even if the instructions in the Script states otherwise.