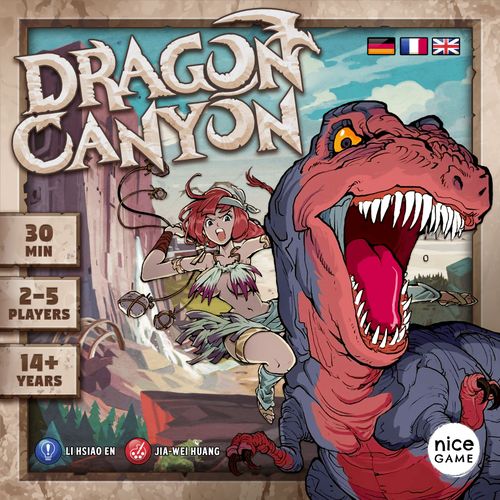
Dragon Canyon
Dragon Canyon Rulebook
Table of Contents
Table of Contents
Contents
- 2 Dice
- 16 Map tiles
- 80 Rage/Resource tokens
- 35 Hero cards and 5 Clan cards
- 31 Building cards
- 20 Glory cards
- 5 Playerboards
- 16 Automa cards
- 16 Mission cards
- 4 Dragon cards
- 4 Dragon standees
Setup
- Randomly place the map tiles as a 4x4 grid.
- Each player takes all 7 heroes of a color and a playerboard.
- Remove building cards depending on the number of players (see the table below).
- Put the Dragon standees, rage/resource tokens and glory/building cards within reach.
- Put the Dragon cards clearly visible next to the playing area. Use the Ancient Dragon for the first game.
Take the number of building cards shown below and add 3 Ancient Ruins. (Example: For a quick game with 3 people, take 5 Tribal Villages, 5 Cave Palaces, 5 Training Grounds and 8 Ancient Ruins.)
| Players | Quick game | Medium game | Long game |
|---|---|---|---|
| 1-2 | 4 | 5 | 6 |
| 3 | 5 | 6 | 7 |
| 4 | 4 | 5 | 6 |
Definitions
Building Card: Shows the buying price (resources paid from the stockpile), the victory points (VP) and the building effect. Each building card lists its VP for having 1, 2, 3 or 4 of that building.
Hero Card: Shows the hero's strength, its loot bag and two abilities. Each hero has 2 abilities: Tricks (yellow) or Passives (blue).
- Trick: is deliberately activated by the player.
- Passive: activates automatically when the described situation occurs.
Loot Bag: The resource which an enemy may gain by defeating the card (p.7). This resource is also collected by the card owner during a Harvest Festival (p.8).
Playerboard: Contains the Caravan (where resources are collected during the turn), the Stockpile (where resources are kept for buying buildings), and the Discard Pile.
Map Tiles
Resource tile: Put your heroes onto these tiles to gain the corresponding resource into your caravan during the gathering phase. Resource tiles show Bone, Wood, Stone or Meat.
Fortified Town: The strength of a hero on this tile is increased by 2. In addition, the Fortified Town improves the trading ratio of the occupying clan by 1 (see Trading, p.6).
Dragon Canyon: Allows players to activate Dragon effects, or even win the game early.
- When a hero enters the Dragon Canyon, they take all bone tokens on the canyon tile into their caravan.
- They may activate one of the available Dragons (by using its effect on the matching Dragon card).
- In each gathering phase, the occupying player adds a bone token to the Dragon Canyon.
- Once there are 3 bone tokens on it, the occupying player instantly wins the game!
Gameplay & Goal
During their turns, the players try to gain resources by gathering, harvesting or combat. With these resources they build buildings to increase their power and gain victory points.
The game ends immediately when a certain number of buildings have been bought. Then the victory points on buildings and glory cards are counted (see p.8).
A player consecutively occupying the Dragon Canyon for three turns instantly wins the game, no matter the score (see "Dragon Canyon" above).
Turn Sequence
Each player takes their turn clockwise. A turn consists of 5 phases:
- Store materials: Move all resource tokens from your caravan to your stockpile.
- Deploy hero: If your hand is empty, take all the cards from your discard pile onto your hand. Play a hero face-down onto an empty map tile. If you play it onto the Dragon Canyon, immediately activate its effect (p.5).
- Fight or Trick: The hero just played may do nothing (move onto the next phase) or be revealed to activate their Trick or initiate a Battle (p.7).
- Harvest Festival: In case 4 heroes form a row, initiate a Harvest Festival! (p.8)
- Gather resources: Gain the tile resource for each hero standing on a map tile with a resource symbol (wood, stone, meat or bone). Put these into your caravan. If you occupy the Dragon Canyon, put a bone resource onto it. If there are 3 bones there now, you immediately win the game!
Trading Resources and Buying Building Cards
Players may exchange a number of resources for other resources at any time during their turn. The ratio is determined by the number of controlled trade symbols (the Trade track on the playerboard: 1 trade symbol = 4:1, 2 = 3:1, 3 = 2:1, 4 = 1:1).
Players may also buy any amount of buildings at any point during their turn, by paying the resources from their stockpile and laying out the building in front of them.
Battle
When a hero card that has just been played is next to a hero card of a different color (horizontally or vertically, not diagonally), the player may initiate a battle. To do so, both heroes are revealed. Then the battle takes place in the following order:
- Beginning with the attacker, both players may decide whether they wish to use rage tokens.
- The two opposing players throw dice once and add the value to the strength of their hero.
- The higher value determines the winner. (Attacker wins ties.)
- The winning hero is flipped back face down. The beaten hero is discarded.
- Resolve the outcome:
- Attacker won: Take a Glory card, a resource of choice from the losing player's caravan and the losing hero's loot bag resource (from general supply).
- Defender won: Take the resource shown on the loot bag of the losing hero from the general supply.
- If the losing player has no more heroes left on the map, he gains a rage token.
Example (as printed): The Wildling (attacker, blue) has the passive Megalomania: the strength of the Wildling becomes 10 when he fights against the Dragonslayer. Blue's total is 10 + a die (3) = 13. The defending Dragonslayer (orange) uses 1 rage token (1 rage token = 2 strength): 2 (rage token) + a die (4) + 6 (Dragonslayer strength) = 12. Blue wins.
Exploding Dice
Whenever a player throws a 6, they may throw the dice again and add the value of the new throw to their total.
Example: Strength 10 + Exploding Dice (a 6, thrown again) + Additional Dice.
Hero Tricks
Instead of fighting, a hero trick may be executed. Tricks are described on the cards above the passive abilities and marked with a T. After a trick has been triggered, the hero card is turned face down again.
Hero tricks may sometimes lead to rule questions. More on this on the back of this manual or our FAQ page on: http://www.dragon-canyon.com
Harvest Festival
When there are 4 heroes in a row on the map, even diagonally, a Harvest Festival is triggered. Anytime this happens, resolve the following steps in order:
- All participating heroes are flipped face up.
- All participating players gain resources from the general supply:
- The hero resource (loot bag) of their participating heroes.
- The resource of each map tile under their participating heroes. (Fortified Town does not net resources; bones placed on the Dragon Canyon are awarded to the occupying player.)
- All participating heroes are then put onto their corresponding discard piles of their clan.
- The player initiating the Harvest Festival gains a Glory card.
Ending the Game
The game ends when either 1-2 building piles are empty (2-3 players: 1 pile / 4-5 players: 2 piles) or when a third bone token has been put onto the Dragon Canyon.
If a player ends the game through the Dragon Canyon, they win the game. If the game ends through building cards, the point values of buildings and glory cards are summed up. The player with the most Victory Points (VP) wins! (In case of a tie, the player with the most resources in their caravan wins the game.)
VP values for Training Grounds, Cave Palaces and Tribal Villages always count towards a set bonus (1 Set = 4 cards). Each Ancient Ruin is 4 VP times the amount of different building types the player owns. (Example: 3 Training Grounds and 2 Ancient Ruins are 30 + 4 * 2 * 2 = 46 VP.)
Glory cards count as 3 VP per card. The player with the most Glory cards gains a bonus of 10 additional VP.
Variants
Thanks to our backers there are a variety of possibilities to expand and customize the game experience of Dragon Canyon.
The Clans
The five clans (Hunters, Gatherers, Rogues, Barbarians and Shamans) try to wrest control of the Dragon Canyon for themselves, and use their unique abilities to their advantage.
Choose your clan and put their clan card next to your playerboard. The special ability of the clan will then be at your disposal for the whole game.
- Hunters (Soul of the Triceratops): Gain +1 strength for each adjacent occupied tile beyond the first.
- Gatherers (Soul of the Brontosaurus): When you are part of a Harvest Festival, take your participating heroes back onto your hand.
- Rogues (Soul of the Raptor): You may exchange your hero with a hero from your hand after winning a battle.
- Barbarians (Soul of the T-Rex): Gain a rage token every time you control a fortified city. You may use rage tokens as any resource from your stockpile.
- Shamans (Soul of the Pterodactyl): Your 1s also explode.
The Dragons
Besides the Ancient Dragon, three other powerful Dragons influence the events around the Canyon, that they call their home. They provide a variety of tactical possibilities. (We recommend using the Ancient Dragon for the first few games.)
- Decide at the beginning of the game which Dragon you wish to use and then put the corresponding Dragon cards clearly visible next to the playing area.
- When a player enters the Dragon Canyon, he may now choose which of the available Dragons to activate.
Fair Ending
Additional rule: At the end of the game, the remaining players of a round may store materials and buy buildings once more, instead of ending the game immediately.
Tactical Game
Additional rule: The Dragon Canyon may only be entered if the majority of adjacent tiles are controlled. The Dino Knight may still enter the tile with "Leap Attack".
Automa (Virtual Players)
In Dragon Canyon you may simulate virtual players with the help of the Automa deck. To use one or more virtual players (= Automa), set up the material for those additional players. Place the hero cards of each Automa as a draw pile next to their playerboard. Additionally, place the Automa deck next to the playing area (one Automa deck is enough to simulate any desired number of virtual players).
Whenever a virtual player takes his turn, do the following:
- Move all resources of the Automa from her caravan to her stockpile. If there are 4 or more resources in the stockpile at this point, she buys buildings. To do so, remove 4 resources for each building and then draw a card of the Automa deck. Add the building from the "purchase" section to the area of the Automa. Repeat until the stockpile of the Automa has less than 4 resources.
- Check if the Automa can initiate a Harvest Festival. If yes, place the topmost card of the Automa's hero pile onto the corresponding map tile. If there is more than one possibility, choose the tile that generates the least resources for the human player/s. Perform the Harvest Festival as usual and then continue with 5.
- If no Harvest Festival was triggered, draw the topmost card of the Automa deck and put the topmost card of the hero deck onto the tile that is shown in the "Movement"-section of the Automa card (if this position is already occupied, reveal further Automa cards until a free tile is shown in the "Movement"-section).
- If the freshly placed Automa card is next to the card of another player (see Tiebreaker, p.11), reveal another Automa card and check the "Action" section:
- a) Battle: Reveal an Automa card and use the number shown in the "Strength" section, instead of a die roll. Otherwise continue the battle according to the normal rules.
- b) Dragon: The Ancient Dragon is placed on the adjacent enemy. All bones on the Dragon Canyon are placed into the caravan of the Automa.
- Gathering phase: The Automa gathers resources just like a normal player through her heroes on map tiles. Then her turn is ended.
Attacking the Automa: If a hero of the Automa is attacked, reveal an Automa card and use its strength, instead of a die roll (add it to the strength of the revealed unit).
Resource priority: Whenever the Automa can choose a resource, she will use the following priority list: First Bones, then stone, then food and then wood.
Hero abilities: Only use the passive hero effects for the Automa, in which no decision has to be made. In case the player plays the Dragon onto the Automa, check her card to determine whether the Dragonslayer was hit or not.
Rage tokens: Automas gather rage tokens as normal. Those are always used at the next possible opportunity.
Building effects: The building effects are identical to other players. In the case of the Cave Palace, a random card is selected.
Refill deck: Whenever there are no more cards in a deck (Automa or hero cards), create a new deck from the discarded cards of the corresponding discard pile.
Automa Tiebreak
When the Automa has a choice between multiple placement or attack options, draw a new Automa card and then follow the tiebreaker arrow according to the following pattern. Begin in the direction of the arrow and move clockwise or anti-clockwise as indicated on the card, until a fitting target has been found.
Automa Difficulty
To adjust the difficulty, change the rate at which buildings are purchased (in step 1).
| Difficulty | Resources |
|---|---|
| Easy | 5 per building |
| Normal | 4 per building |
| Hard | 3 per building |
Solo Mode
To play a game in solo mode, set up the playing area for 2 players and prepare everything for the Automa. Then randomly draw 3 mission cards. The Automa begins the game.
Mission cards: During the game you have to check whether you have fulfilled any of the missions. To remember, you may put any token on the cards that demand more than one action in the game. At the end of the game the consequences for the corresponding successes or failures are carried out. The end result may be heavily impacted by this!
Game end: The game end may only be triggered by emptying a building pile (Victory through the Dragon Canyon is not possible). Bones on the Dragon Canyon are worth 3 points for whoever occupies the tile. Having 5 or more of your own cards on the map is worth 10 points. Sum up your points and the points of the Automa. If you have more points, you win the game!
Difficulty:
- To decrease the difficulty, you may:
- Throw 2 dice and choose the higher one.
- Only use mission cards that have positive effects.
- To increase the difficulty, you may:
- Only use mission cards that have negative effects.
- Only win the game after successfully fulfilling all missions.
- Up the bonus for the most glory cards from 10 to 20.
Mini FAQ
Q: Do Rage tokens stack? A: Yes!
Q: How do I get Rage tokens? A: Rage tokens are only awarded when a player loses his last hero on the map due to a battle, not during a Harvest Festival.
Q: Can I trigger a Harvest Festival with a Trick? A: Yes, the Illusionist may trigger a Harvest Festival for the player who uses her trick!
Q: When can I use the Dragon Slayer Passive? A: The Dragon Slayer may be revealed at any point to ignore the effects of a Dragon (only for himself).
Q: Does the Skyrider get tile resources? A: The Skyrider gains resources when gathering, despite using his trick.
Q: In what order do I handle Dragon effects? A: Dragon effects are calculated in the following order and priority: Ancient Dragon > Forest Dragon > Undead Dragon > Celestial Dragon.
Reminders
- Resources always go into the caravan first.
- Resources can only be taken from the caravan.
- Exception to that rule is the Wildling, who raids the stockpile.
- Only resources from your stockpile can be used to buy buildings.
- Exploding dice!
- Do not forget to use your building abilities during the game!
DIY
Our brave heroes have discovered a new breed of armored dragon! It's up to you to name it and figure out its unique ability! (Standee not included.)