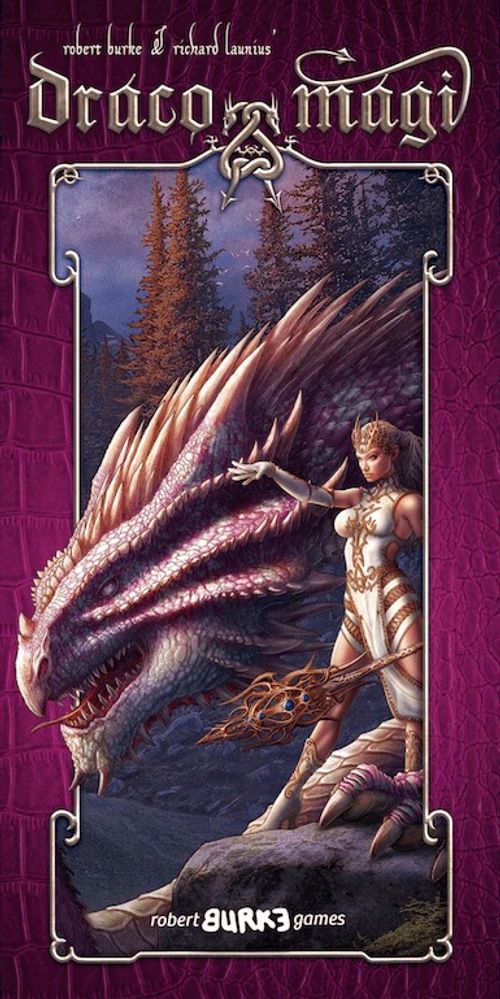
Draco Magi
Draco Magi Rulebook
Table of Contents
Table of Contents
Object of the Game
Players take on the roles of dragon mage acolytes seeking magical gems in a contest to become the Dragon King or Queen. The gem printed on a battlefield card is awarded to the player who wins the battlefield, this is done by taking the battlefield card after a melee victory. A player wins the game immediately after gaining one of the following:
- 3 gems of different colors
- 3 gems of the same color
- 4 gems of any color
When one of these goals is achieved, the game ends and the player achieving the goal is crowned as Draco Magi.
Components
The following components are included in Draco Magi:
- 18 Double Sided Battlefield Cards
- 40 Battle Cards
- 18 Advanced Battle Cards
- 64 Dragon Cards
- First Player Marker
- This Rulebook
- Card Index Sheet
Battlefield Card Anatomy
A battlefield card shows a battlefield name, the gem awarded for winning it, and a battlefield modifier describing bonuses or penalties that apply there.
Setup
Follow these 6 steps to prepare for the contest:
-
Separate the Cards into Decks: Gold dragon deck, Green dragon deck, Gold battle deck, Green battle deck, Battlefield deck, and Advanced battle deck. Note: Battle decks can be separated by the border color on the card face (green, gold, red) while dragon decks can be separated by the green or gold dragon illustrations on the card backs. The orientation of the battlefield cards does not matter.
-
First Player: The older player takes the first player marker and chooses a color: green or gold. That player also takes the dragon deck and battle deck for the color chosen. The other player takes the opposite color dragon and battle decks. Neither player should have any red-bordered advanced battle cards yet. Note: You may choose a first player randomly instead of using player age.
-
Advanced Battle Deck: Shuffle the advanced battle deck (battle cards with a red border on the face). Place this deck off to one side where there will be easy access for both players, leaving room for the battlefields in the center of the playing area.
-
Battlefield Deck: Shuffle the battlefield deck and draw three battlefield cards from the bottom of the deck. Place them in a row, length-wise, in the middle of the table between the two players. Place the remaining battlefield cards off to one side. Cards drawn from the battlefield deck are always drawn from the bottom. Note: Since all battlefields are two-sided and may become flipped by dragons during play, battlefields are placed in the same orientation as they are drawn.
-
Dragon & Battle Decks: Players shuffle their dragon and battle decks separately and place them face down within reach.
-
Advanced Battle Draft: Each player will start out with unique battle skills drawn from the advanced battle deck. Each player draws three advanced battle cards and examines them. Players choose one card to keep, one card to give to their opponent, and one card to discard. After each player has chosen:
Playing the Game
Draco Magi is played in a series of rounds. Each round is divided into five phases.
Phase 1 – Scrying Pool
The first player draws battlefield cards from the bottom of the battlefield deck and places them in a line in the center of the playing area until there are exactly three battlefield cards in play. Note: On the first turn of the game, the Scrying Pool phase is skipped as it has been performed in the game setup.
Phase 2 – Summon Dragons
Players draw cards from their dragon deck until they each have 8 dragon cards in hand. If you run out of dragon cards before you draw up to 8, shuffle your dragon discard pile and continue drawing.
Dragon Card Anatomy
Each dragon card shows a dragon name, a metallic dragon indicator (for metallic-type dragons), a dragon ability with its description, a melee icon (the number of cards a player can draw before melee combat if they have this dragon at the battlefield), a ranged attack icon (the number of cards an attacking player can draw when making a ranged attack with this dragon), and a shield icon (the number of cards the defender may draw when targeted by a ranged attack).
Phase 3 – Command Dragons
Starting with the first player, the players take turns placing one dragon card at a time to a battlefield. Players may choose any battlefield they wish. However, when placing dragons, the following rules apply:
- Dragon Placement: Players may only place dragons on their side of the battlefield. When placing a dragon to a battlefield, you must place the new dragon on top of any dragon(s) that you have previously placed at that battlefield. Leave enough space at the top of each card you are placing over to keep the melee values visible.
- Dragon Limit: A player may never have more than three dragons on their side of any battlefield.
- Ranged Attack: If you play a dragon that has a ranged attack, you may immediately choose to attack the opponent's topmost dragon at the same battlefield. If there is no opposing dragon, or if the top dragon on the opposing side of the battlefield is immune to ranged attacks, there can be no ranged attack. A player may choose not to attack with or defend against a ranged attack.
To resolve a ranged attack, perform the following steps:
- After placing a dragon with a ranged ability and announcing a ranged attack, draw and reveal a number of battle cards equal to your dragon's ranged attack value.
- Add up the number of "successes" in the ranged attack section, located at the top, left hand side of the revealed battle cards.
- The defender draws a number of battle cards equal to the shield value of the dragon being attacked.
- Add up the number of "successes" in the shield section, located at the top, right hand side of the defender's revealed battle cards.
- If the number of attack successes exceeds the number of shield successes, the attacker wins and the defender must discard the attacked dragon, removing it from the battlefield and placing it in his dragon discard pile off to the side. If the number of shield successes equals or exceeds the number of ranged attack successes, the target dragon is not defeated and remains at the battlefield. The attacking dragon remains at the battlefield whether or not the ranged attack was successful.
Note: If the attacker has no successful ranged hits the defender is not required to draw battle cards, but may do so if they choose. A defender may stop drawing battle cards once a ranged attack is successfully defended, or they may continue to draw up to their dragon's shield value. Both players should discard all battle cards after they are played to their battle card discard pile.
Battlefield Bonus and Penalties: Players should read the scroll notes on each battlefield before placing their dragons, as each battlefield has specific bonuses or penalties affecting certain dragon types. Be sure to keep this in mind when placing your dragons!
End of Phase: When a player has placed all of her dragons, or when she has placed the maximum number of dragons to her side of the battlefields (9 total), the player must pass. When both players have passed, the command dragon phase ends. If players hold additional dragon cards at this time, they place them face down until Phase 5 (Nightfall). Note: Players may not pass before they are done placing dragons.
Phase 4 – Dragon Melee
The first player selects a battlefield to resolve and players compete using melee battle at that battlefield. The following steps are used to resolve melee combat at each battlefield:
Battle Card Anatomy
Each battle card shows colored borders (identifying the card as Green, Gold, or Advanced/Red), a card identifier (identifying Red, Gold, and Advanced cards for the colorblind), a ranged attack icon (each starburst icon on the left side of the card equals one ranged attack hit), a shield icon (each starburst icon on the right side of the card equals one successful defense of a ranged attack), a melee icon and its ability description, and combo icons (Sun, Moon, or Star) used for creating combos during melee attacks.
Step 1 – Draw Battle Cards: Players draw a hand of battle cards from their respective battle decks equal to the sum of the melee values shown on the dragon cards in play on their side of the chosen battlefield (the number at the top of each dragon card). If your battle deck is exhausted, reshuffle your battle card discard pile and continue drawing.
Step 2 – Attack: The first player plays a battle card or a battle card combo from their hand and announces the melee attack(s) found on the bottom half of the card. Note: Some cards provide options. The player announces which option, if any, will be used as the card is played.
- No Attack Cards: If an attacking player has run out of battle cards or cannot attack, the attack passes to the opponent.
- Melee Combos: Multiple cards may be played at once (as an attack combo) if the symbols on the top edge of the battle cards match (Sun / Moon / Star). Note: Each card has two of the same combo symbol only out of consideration for right-handed and left-handed players. You must match the symbols on different cards to activate a combo.
The following rules apply to Melee Combos:
- Any number of battle cards may be played as a melee attack combo providing they all share the same combo symbol.
- Combo symbols only need to match when attacking, NOT when defending.
- Battle cards without a Sun, Moon, or Star symbol on the top of the card may not be played as part of a combo.
Step 3 – Defend: The defending player must defend against each attack with the same type of card (e.g.: Defend a Bite with a Bite, a Claw with a Claw, a Magic with a Magic, etc.) or he may defend against any number of cards with a single Flight card.
The following rules apply to defending against melee attacks:
- If the attacker played multiple cards in a combo attack, the defender must respond with a defense that matches each attack played or defend all with a single Flight card. For example, when attacked with one Claw card and one Bite you must defend with one Claw and one Bite, or one Flight.
- If the defender cannot match the card(s) played in an attack (or use Flight) that player must discard one dragon from their side of the battlefield for each attack that could not be defended, always starting with the topmost dragon and working down. Note: Lose a dragon for each undefended attack, not necessarily each undefended card. For example, if you cannot defend a "Bite Twice" card you lose two dragons. If you defend a "Bite Twice" with one Bite, you lose one dragon.
- If the defender has no battle cards remaining in hand, that player may draw one random battle card from the top of her battle deck in an attempt to defend an attack or attack combo. Note: A player without battle cards remaining could only completely defend against a melee combo if they are fortunate enough to draw a Flight card.
Step 4 – Defender Becomes Attacker: After an attack has been made and defended, regardless of the outcome of the attack, the defender becomes the attacker. Repeat Steps 2 – 4 of the melee phase until one of the following occurs:
- Only one player has dragons remaining at the battlefield. At this point, the player with the dragons wins the battle.
- The defender has no battle cards remaining in hand and the attacker has more dragons at the battlefield. At this point the attacker wins the battle.
- Neither player can play an attack battle card, in which case, the battle is over. The player with the most dragons at the battlefield wins the battle. If the number of dragon cards on each side is tied, this battlefield and all dragons located here remain for the next round.
Note: No melee takes place at a frozen battlefield.
Step 5 – Battlefield Resolution: When melee has ended, resolve the battlefield with the following steps:
- The first player marker is passed to the other player. Note: The marker must pass whether you win, lose, tie or resolve a frozen battlefield.
- If the battlefield was won, the winning player takes the battlefield card, and all dragons from both sides of the battlefield are placed in their respective discard piles. Note: A player may not flip over a battlefield card once it is won. The player who won the battlefield card gains the associated gem printed on the top side card.
- If the battle remains tied, the battlefield and all dragons placed there remain for the next round of play.
- If frozen, move the Polar dragon from covering the battlefield card to become the topmost dragon on the side of the player who played it. All dragons at a frozen battlefield remain for the next round. Note: You must still resolve a frozen battlefield by passing the first player marker.
- Any battle cards remaining in your hand after a battlefield is resolved must be discarded to your battle card discard pile.
- The player with the first player marker picks the next battlefield to resolve or if all three battlefields have been resolved, advance to Phase 5 (Nightfall).
Note: When a player uses Retreat or Reinforce, he may not use the special ability of the Polar dragon or any ability that is a ranged attack ability. He may only use the special ability of the following dragons: Battle, Black, Brass, Bronze, Purple and Undead.
Phase 5 – Nightfall
- Any player that has dragon cards remaining in hand may keep any number of them and discard the rest.
- Each player draws one new advanced battle card and adds it to their battle deck.
- Each player reshuffles their battle decks, being sure to include discards and the new advanced battle card.
- The players start a new round beginning with Phase 1 (Scrying Pool).
Repeat until there is a winner.
Optional Asymmetrical Variant
Draco Magi is designed to be played by two players using all the cards that come in the box. However, you may play the game asymmetrically by letting players choose the dragons they want in their arsenal. This variant plays exactly the same way, but with the following dragon deck assembly rules:
- Each player's dragon deck must include all of their Red, Green, Black, Purple, Silver, Brass, Bronze and Gold dragons.
- Each player builds the rest of their dragon deck by choosing a set number of their remaining dragons. The number of additional dragons should be decided by the players or tournament officials. Only one of each additional dragon type is allowed per dragon deck. Players may pick these dragons secretly, openly or randomly.
For example, if the players agree to 4 additional dragon types, the Gold player might choose to add the Battle, Polar, Undead and Rainbow dragons, while the Green player might add the Blue, Lava, Clockwork and Bloodhorn dragons. Both players must add the same number of additional dragon types, while the specific dragons chosen can be different or the same.
Playing Area Layout
The playing area diagram in the rulebook numbers its zones as follows:
- Battlefield Deck
- Battlefield Card Play Areas
- Advanced Battle Card Deck
- First Player Token
- Battle Decks
- Dragon Card Play Area
- Dragon Decks