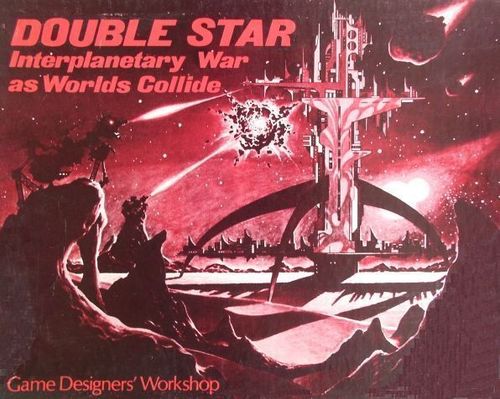
Double Star
Double Star Rulebook
Table of Contents
Table of Contents
1. Game Components
Double Star includes, as basic components, a game map protraying a binary star system, a set of die-cut counters representing ships, population, and other forces, a set of rules and charts which govern play, and a single die.
The Map: The game map is a two-dimensional portrayal of the planetary systems of a binary star. The hexagonal grid overlaying the map serves much the same purpose as a square grid in chess: it precisely defines where forces are and how they may move. The fringes of the map show several charts. One surface chart (for each of the two planetary systems) contains representations of the surfaces of the worlds orbiting the star, and a task force composition chart provides boxes for the creation of star fleets during the course of the game. A turn record chart allows players to chart the passage of time. And a scale block presents the game scale while reminding players of the direction of orbital rotation.
The Counters: The two sheets of die-cut counters provide the 480 individual markers which represent the various forces in use during the game. The counter format example on the charts shows the types of counters provided, and indicates the meanings of abbreviations and numerical factors.
The Rules: This rules booklet contains the rules which govern play of the game.
The Die: A single die (one dice) is included with this game, and it is used when consulting some combat tables. Its purpose is that of a randomizer—when used, a player cannot predict exactly what result will be obtained. Proper attention can indicate what will probably occur, but the randomizing element prevents absolute foreknowledge of the results of an action. As the game is played, it will become apparent that Double Star is a game of strategy and skill, not one of chance.
2. Turn Sequence
Double Star is played in a series of continuing game-turns, each representing two weeks of time (fourteen Terran days). Each game-turn consists of two distinct player-turns (one for each of the two sides in the game) and an interim phase which allows for planetary orbital movement and for production.
Each player-turn is identical; it consists of two phases: movement and combat. The term phasing player refers to the player whose current player-turn it is. A player-turn proceeds as shown below:
- Movement Phase. The phasing player may move his forces on the map in any directions desired, provided such movement conforms to the restrictions of the movement rules. Forces which may be moved includes ships (and task forces) and cargos aboard such ships. Worlds, and planetoids cannot move in this phase.
- Combat Phase. Both players may attack enemy forces present in the same hex with their own. Such combat continues until one side breaks off combat, or is destroyed, or until both sides can no longer make effective attacks.
After each player has had one player-turn, an interim phase occurs to allow for planetary movement. The planets on the map move only in alternate interim phases (monthly, not every two weeks); the turn record chart is shaded on alternate turns to mark when orbital movement does occur. Free planetoids (being moved by the players by using power plants) move once per interim phase. (The printed text reads "being being moved"; the duplicated word is omitted here.)
The interim phase also allows for industrial production by both players. Each player commits his industry to production of specific forces and places them on the turn record chart at the proper future turn. Any forces on the turn record chart during the interim phase of the current turn are considered produced, and should be moved from the chart to the map surface for use in play.
3. Stacking
Counters are placed in hexagonal cells on the map and move from hexagon to hexagon over the course of the game. More than one counter may be placed in a single hex using a process called stacking.
For the purposes of stacking, there are two types of hexagon (or hex): space hexes and world surface hexes. Each affects stacking differently. In addition, the formation of task forces is considered to be a type of stacking.
Surface Hexes— The two system boxes contain representations of the surfaces of worlds in the Epsilon Cetus system. Two sizes of bodies are represented: large worlds, called planets or worlds, and small bodies called moons or planetoids.
The hexes within these diagrams allow counters to be placed at various locations on the spherical bodies. For planets the central hex (labelled P in the diagram) is the polar hex; counters which are face up are at the north pole, while counters which are face down are at the south pole. Counters in the six surrounding hexes (all labelled E in the diagram) occupy positions on the equator of the world (face up or face down placement here has no meaning). For planetoids, counters which are face up occupy the northern hemisphere, while those which are face down occupy the southern hemisphere.
Counters may be placed in the hexes of world and planetoid surfaces subject to the following restrictions:
- No counters may be placed in blue surface hexes (which represent oceans).
- Population counters may not be placed on a planetoid unless a base is present, and no more than five points of population may be supported by one base (planetoids do not have breathable atmospheres).
- Ship counters may only land at a base. Newly-produced ship counters may be present at an industry counter until the first time they take off.
- The surface stacking limits table indicates the maximum numbers of counters allowed per surface hex (note polar or planetoid hexes may count as two hexes).
- No surface hex may contain forces belonging to more than one side.
Surface Stacking Limits
| Counter Type | Maximum |
|---|---|
| Planetary Defense | 3 |
| Industry | 3 |
| Base | 1 |
| Power Plant | 10 |
| Population | any* |
| Ships | any† |
*Restricted to five points per base on a planetoid surface. †Must be present at a base. Newly produced ships may be at an industry marker.
Moons: The moons shown on the planetary surface charts are tied to their planets with lines representing gravitational attraction. Ordinarily, the moon counters are kept each in the proper moon location on the chart. When (or if) a moon is pulled from orbit and moved through the use of power plants, the counter is shifted to the space hexes of the map.
Space Hexes— The central area of the map consists of space hexes. Any space hex may contain any number of ship counters. Transport ships may be carrying power plants, bases, or orbital fighters as cargo. World or planetoid counters may also be present in space hexes.
Facing: Ships and free planetoids (being moved by the expenditure of power plants) have a facing which affects their movement. Each such counter must be faced toward a specific hex side at all times. The top of the counter is always construed as the face or front of the unit, and indicates the direction in which the unit is moving.
Ships may be grouped in task forces for convenience in movement and for greater tactical strength. All ships in a
task force have the same facing, represented by the facing of the task force ship marker.
4. Movement
Four different types of movement are possible in Double Star—ship movement through space, orbital movement of worlds along the marked orbital paths, free planetoid movement, and surface movement.
Ship Movement Through Space— Each ship counter is marked with a movement factor (the rightmost of the three printed factors). This factor indicates the number of movement points which the ship may expend in each of its movement phases.
The movement points belonging to a ship indicate its potential for movement. The ship is not required to move to the full extent of its factor. However, if all movement points are not used, the points may not be accumulated or transferred to other ships.
Effects of Facing: When a ship moves, for each movement point spent, it may only move forward, either into the hex which it faces, or into one of the adjacent hexes to its right or left. If a hex to the right or left is entered, the ship alters its facing to the direction in which it is now travelling.
A ship which does not move at all in a movement phase may instead alter its facing to any hex side desired.
For example, the ship in the diagram is initially facing in direction 1. It may enter hexes A, B, or C by expending one movement point. If it enters hex A, it is then facing in direction 6.
[Movement Diagram: a hex grid showing a ship facing direction 1, with hexes A, B and C adjacent to it, and a 4-2-2 counter in one hex. Directions are numbered 1 to 6 around the ship.]
Landings: A ship in space which enters a hex containing a world or a planetoid may land on that body by expending one movement point. If there is more than one body (such as a world, or one or more moons), the ship may select which body to land on, provided a base is present at the landing site. Landings are not possible at enemy bases.
Take-offs: A ship on a world or planetoid may take-off by expending one movement point. It is then in space in the same hex with the world or planetoid, and may assume any facing. It may then continue to expend movement points normally.
Orbital Operations: Ship counters in a space hex with a world or planetoid orbit that body. When the body moves, the ships move with it without any movement point expenditure (this movement is mandatory for all ships). Thus, orbital fighters, which have no movement points, remain with the world they orbit.
Cargo Transport: Fighting transport and ordinary transport ships may carry cargos through space. Each such ship may carry one power plant, or one base, or one planetary defense counter. The cargo is picked up at the industry site of its production by a ship present on the surface at any time during the movement phase. A cargo may be discharged by a ship which is present at a base at any time during the movement phase. There is no cost in movement points for this procedure.
Exception: A ship carrying a base as a cargo may land anywhere in order to place the base base [sic: "base base" as printed] in an otherwise unoccupied hex.
Orbital Movement of Planets and Moons— Worlds normally move in orbital paths around their central star. Such worlds are represented by counters showing their names, which correspond to named orbital paths. Such movement occurs in alternate interim phases; the counter moves one hex in the direction of spin noted on the map.
Moons are gravitationally tied to specific planets, and follow them unless interfered with. Such moon or planetoid counters are placed in the world surface chart corresponding to their letters until they break, and are considered to be in the same hex as the planet they are tied to.
Free Planetoid Movement— Those world and moon counters which have a small disc (as opposed to the large disc) may be pulled from orbit and flown to other locations.
Breaking Orbit: During the interim phase, any player with at least one power plant on a planetoid may expend the power plant (remove the counter from the map) and break orbit. The planetoid marker is then removed from the world surface chart and placed on the map (if it is not already there). It may assume any facing. Note on paper separately that the planetoid is travelling with a speed of one; it moves one hex in the direction it faces in every (not every alternate) interim phase.
Movement: A free planetoid moves in every interim phase. It moves in the direction it faces at its recorded speed. It must move; it has no choice or option. A player may expend a power plant in order to accelerate or decelerate the planetoid, or to alter its direction. Speed changes should be noted on paper. Such changes occur before the planetoid moves normally. Expending a power plant will:
- Increase its speed by one, with facing remaining the same; or
- Alter its facing one hex side, with speed remaining the same (a free planetoid with speed zero may assume any facing); or
- Reduce its speed by one with facing remaining the same (speed may be reduced to zero).
Assumption of Orbit: A free planetoid with a speed of one and facing along a printed orbital path may assume that orbit by spending one power plant. It then moves in alternate (shaded) interim phases as any ordinary world.
A free planetoid may also be placed in orbit around a world by assuming a printed orbit in the same hex as a body already present.
Impact: A free planetoid which enters a hex containing a world or moon may impact that body by expending one power plant. The impact, however, does not take place until the combat phase of
the player who owns the body being impacted.
Gravitational Ties: K'un and K'an both have moons which are gravitationally tied to them. If either is broken from orbit, their moons' gravitational ties are broken, and they continue in the normal orbital path.
Surface Movement— Industry and population counters on world surfaces may not be moved. Planetary defense and base counters which appear as new production may be moved from their hex of appearance to any other hex on the world surface, or transported as cargo to another world. Once emplaced, however, they may not be moved. Power plants may always be moved to anywhere on a surface, and may be moved through space as cargo at any time prior to their expenditure.
Movement Summary
(Sidebar box printed beside the movement rules.)
- Ships: use their movement factor.
- Planets (large disc): orbit only.
- Planetoids (small disc): may break orbit and change speed by expending power plants.
- Industry: may not move.
- Population: may not move.
- Planetary Defense: new production may be moved to position on world surface, or as cargo.
- Bases: new production may be moved to position on world surface or as cargo.
5. Task Forces
Ordinarily, stacks of ships are simply placed on the map during the course of the game. To represent the effects of command control, and to ease handling, however, a limited number of task forces may be produced and used.
Each command ship counter may form around it a task force of any number of other ships. The command ship remains on the map, while the other ships in the task force are removed from the map as they join up, and are placed in the fleet composition chart on the map edge.
Joining or Leaving Task Forces: Ships may freely join a task force at any time by simply moving into the task force hex. They may leave the task force by transferring the ship counter back to the map and leaving the hex.
Effects: The component ships of a task force can all train together, and may all use any formations available to the task force. The command ship of a task force is automatically shielded from attacks unless all other ships in the task force are disrupted or destroyed. See rule 6, Combat and rule 7, Training.
A task force which has undergone training and has acquired formations may use them with any members of the task force. But, the formations belong to the command ships and remain with the task force; they do not leave with ships leaving the task force. They may be used by ships joining the task force.
Task forcing also allows greater convenience in stacking.
6. Combat
Opposing forces which are present in the same hex may engage in attacks against their opponents. Such attacks are called combat, and include space combat, planetary bombardment, planetary defense, and planetoid impact.
Sequencing: A single hex may contain as much as several worlds, several planetoids, and several ships. Each single hex with combat is resolved completely, using the sequence below. The players then turn their attention to the next hex until all combat is resolved.
- Formation Assumption: Ships may assume any allowed formation, and may designate back-up formations.
- Ship-to-Ship Combat: Each ship (or task force, depending on formation) may fire at a target. Such firing is generally simultaneous, with losses noted only after all ships have fired. If neither side has broken-off, this step is repeated. If one side is destroyed, or if neither side may no longer make effective attacks, then play proceeds to planetary defense fire.
- Planetary Defense Fire: Each planetary defense unit may now fire twice, selecting targets to receive the attacks.
- Surface Strikes: Any ships which have survived ship-to-ship combat without breaking off, and which have not been destroyed by planetary defense fire, may now attack targets on a surface. Robotic ships self-destruct while doing so; other ships attack from space.
Free planetoids which are intended to impact a surface do so at this time, provided they have survived planetary defense fires.
Formations— Ships from task forces may assume formations in the combat phase. The ability to assume a specific formation is represented by a formation counter, which task forces may acquire as a result of training.
There are five types of formations: cone, wedge, cylinder, globe, and scattered. Whenever ships are in a formation other than scattered, they attack as one unit, generally with a better attack and defense. Scattered is a default formation assumed whenever ships are not in another formation.
Cone: Ships attack using the sum of all attack factors present. Each ship defends with its defense factor plus one point for each additional ship in the formation. A cone formation must contain at least four ships or automatically becomes scattered.
Wedge: Ships attack using the factor of the best ship present, plus one point for each additional unscreened ship present. Each ship defends with its defense factor plus one point for each additional unscreened ship present.
A wedge formation can be used to screen ships, preventing them from being attacked. Any number of ships may be screened, but they may not be used in either attack or defense, nor may they be shifted from the screen to the formation. When a wedge formation is broken (a combat result), all ships become scattered.
A wedge formation must contain at least four unscreened ships or it automatically becomes scattered.
Cylinder: Ships attack with the sum of all unscreened attack factors present. Each ship defends with its defense factor plus one point for each additional unscreened ship present.
As in the wedge formation, the cylinder can screen ships. At the beginning of any combat round, however, ships may be transferred from the formation to the screened group, or from the screened group to the formation.
A cylinder formation must contain at least six unscreened ships or it automatically becomes scattered.
Globe: Ships attack using a factor equal to all attack factors present. In addition, the globe is allowed a first fire against its target in each combat round. Each ship defends with its defense factor plus one point for each additional ship in the formation.
When the globe is assumed, ships must first maneuver into position; for the first combat round of globe formation, all ships are treated as if they were in scattered formation. On the second and subsequent combat rounds, the normal effects of globe apply.
A globe formation must contain at least eight ships, and it must have at least three ships more than its target formation, or it automatically becomes scattered.
Scattered: By default, any ship not in any other formation is in scattered formation. Such ships attack with their individual attack factor and defend with their individual defense factor. Each ship in scattered formation is considered to be independent, without regard to or connection with any other formation.
Assuming a Formation: Each player may place the ships from a task force in one or more formations, dividing the ships present into groups and placing formation counters on the groups. Any extra formation counters may be used to designate back-up formations in the event that a formation is broken. The topmost counter indicates the formation which the ships are in. When a combat result of formation broken occurs, the formation counter is removed. If another (back-up) formation counter is present beneath it, the new formation (which may be identical to the formation just broken) is assumed. After formations have been declared, the attention of the players shifts to combat itself.
Ship-to-Ship Combat— There are two sides to combat—the phasing player, called the attacker, and his opponent, called the defender. The attacker selects one target for each of his formations and scattered single ships. Each formation attacks as a unit, and may only fire once. Targets are individual enemy ships (in formations or not). The attacks are then resolved using the ship-to-ship combat results table. But, before any results are actually implemented, the defenders forces are allowed to counter-attack. The defender designates targets for each of his formations and scattered single ships, subject only to the restriction that no ship in a formation attacked by an enemy globe may select a target not in that globe. After attacks and counter-attacks are resolved, losses from the procedure are implemented— disrupted ships are inverted to show their status and are removed from formations, eliminated ships are removed from play, and broken formations are scattered or reformed.
(Transcriber's note: the scan of this sentence is hard to read; the wording above is the reading of the printed text, with "status and are removed from formations" supplied where the scan's punctuation is ambiguous.)
First Fire By Globes: When a formed globe fires it fires before its target, and the results of its fire are implemented immediately, before the target fires. This does not apply to globes belonging to the defender.
Attack Procedure: When ship-to-ship combat occurs, the firing ship (or formation) determines its attack factor based on the attack factor printed leftmost on the counter plus the influence of the current formation), and the target determines its defense factor (based on its central printed defense factor plus the influence of its current formation). The defense factor is then subtracted from the attack factor to determine the attack superiority. Attacks are not permitted if the attack factor is less than the defense factor.
The ship-to-ship combat results table is consulted. One die is rolled, and the die roll is cross-indexed with the attack superiority. At the intersection of the die roll result row and the attack superiority column is a result, which is implemented against the target.
Combat results may be no effect, target ship disrupted, target ship eliminated, or target ship's formation broken. These results are more fully explained under the table itself.
Ending Ship-to-Ship Combat: Firing continues until one side breaks off, or is completely destroyed, or until neither side is capable of making effective attacks. A side which cannot achieve any combat result better than no effect (assuming the best possible die roll) can no longer make effective attacks.
A side may elect to break off combat by so stating. The opponents forces may then make one round of attacks, without the withdrawing player making any counter-attacks. Ships which survive at the end of this procedure then move to an adjacent hex, which may not be a planet or planetoid which does not contain a friendly base.
Planetary Defense Fire— Ships which are in the same hex as a world or planetoid may indicate the specific world surface hex which they intend to attack. If there is no intention to attack, the ships do not approach close enough to be in range of planetary defense fires, and are not subject to them. Any ship attacking a world surface hex which contains (or is adjacent to) a planetary defense unit is within range and may be a target of such fire.
Planetary defense units may each fire twice against enemy ships or free planetoids (two shots against one target, or one shot against each of two targets). The defending player consults the planetary defense table and rolls one die. The die roll is then applied to the table to determine the effect, if any. The possible results on the table include target eliminated, target disrupted, and no effect. These results are more fully explained under the table.
Surface Strikes— Ships and free planetoids which survive planetary defense fires may then proceed to attack world or planetary surfaces. Each ship attacks independently, consulting the surface strike table. One die is rolled, and the result is applied to the table, cross-indexing the die-roll result with the ship's attack factor. Robotic fighters do not actually attack, instead they dive to their destruction; their effect is out of proportion to their attack factors, so each adds two to its die roll before consulting the table.
Free planetoids attack in a special manner: their impact is devastating. First, the scatter diagram is used to determine if the planetoid actually hits where targeted, or if it hits in an adjacent world surface hex. An impacting free planetoid completely destroys everything in the hex it strikes, and damages adjacent world surface hexes. The results are fully explained under the scatter table.
7. Training
Training is the process whereby task forces acquire the ability to execute formations. In essence, for every month that a task force spends in space (training, even if en route to a battle), it may acquire one formation counter. At the same time, there is a chance that it may lose a formation counter. As a result, the level of current training for a task force may fluctuate.
Increases: A task force is considered to be in training at all times, but such training achieves a marked improvement only intermittently. Each month (in the interim phase, shaded, the same phase in which orbital movement occurs) there is a chance that training will result in one additional formation counter for a task force. Within the outermost orbit of a task force's home system, a formation counter is received on a die roll of 3 or greater; beyond that orbit, the additional formation is received on a roll of 5 or 6.
Decreases: While training continues constantly, expertise is also lost as more mundane matters (primarily maintenance and administration) may take precedence, resulting in a lowered training level. Each month (at the same time that training increases may occur), there is a chance that a task force will lose one of its formation counters. Such a loss occurs on a roll of 6.
A task force in a hex containing a base can depend on the base to perform much of its maintenance and administration. A task force in such a hex in the interim phase does not roll to determine if it loses a formation.
Formation Training
| Task Force Within Outermost Orbit | Task Force Beyond Outermost Orbit | |
|---|---|---|
| One Formation Gained on | 3+ | 5+ |
| One Formation Lost on | 6 | 6 |
Maximums and Minimums: It is possible for a task force to have no formation counters. A task force may have a maximum of six formation counters at any one time.
When: Each player rolls for the loss and gain in each shaded interim phase. If a formation is received, it is drawn randomly from the pool of remaining formation counters; if a formation is lost, the owing player may select which formation is lost.
Battle Losses: Any combat result of formation broken also means that the task force loses that formation counter. A battle situation in which the number of ships falls below the minimum number required for a formation also results in the loss of the formation counter.
8. Production
Each game scenario allocates a budget to each side for use in the acquisition of military equipment. Before the game begins, the player determines the manner in which he will spend his budget, and when such production will become available.
Initial Forces: Using the budget allocated, each player selects those forces which he feels will best achieve his goals. Any unused portion of the budget may be put aside as a contingency fund.
Subsequent Production: Additional forces may be produced using the budget allocated in the scenario. Items without a specified production time may not be produced in this manner.
The Contingency Fund: Excess budget in the contingency fund may be used for the conversion of cruisers to replace destroyed command ships, or for emergency production of fighters or power plants. Emergency production allows the manufacture of power plants or robot or orbital fighters in four turns at double cost. Conversion of battle cruisers or cruisers requires the appropriate ship at a base, and the expenditure of four budget points; the conversion takes place in any interim phase. Conversion to a command ship can only take place to replace a command ship which has been lost during the game.
Production Costs: Budget points are used to procure production. The cost of any single ship is the value of its attack factor. Thus, a command ship costs eight points.
The following items have the following costs:
| Item | Cost |
|---|---|
| Base | 4 points |
| Planetary Defense | 8 points |
| Power Plant | 3 points |
Production Time: Given the short length of the game-turns, very little industrial production is possible during the course of the game itself. Instead, the major portion of all industrial production will occur before the game begins. Only the small subsequent production and contingency fund production occurs during the game itself.
Only fighters (robotic and orbital), and power plants may be produced during the game. Such production takes a period of 6 game-turns.
Industry: Each side has three industry counters which must be placed on a world (large disc) surface which has at least 10 points of population. All three may be placed in the same world surface hex, or may be distributed to several hexes.
Remaining items (ships, bases, planetary defenses, power plants) are purchased as the scenario begins.
9. Setting Up the Game
Although the scenarios call for varying ship strength, much of the basic game set-up is the same in each scenario. Before selecting a scenario, lay the game map out on a table or floor. It may be necessary to tape or back-fold the map in order to make it lie flat.
Each player should take the counters representing the worlds of his opponent and place them on the map, anywhere on the orbital paths marked. Planetoids and moons should be placed on the world surface charts in the correct locations. The placement of worlds by the opposing player gives each side control of the planetary positions without giving undue advantage to either player.
Population: Each population point represents 1 million persons. Each non-blank world (large disc) hex may contain any number of population points; any planetoid (small disc) hex may contain up to five points per base (two bases, one inverted) may conceivably be present. Bases may be placed at this time, but must be purchased with budget funds.
Islamic population is 1445 points.
Chinese population is 1262 points.
10. Scenarios
The following three scenarios describe three alternative methods in which the two rival cultures of the Epsilon Cetus system could begin their battle for dominance. Players should select one scenario for their game.
Sneak Attack— The Chinese culture, having decided to resort to violence to resolve its dispute, has prepared a plan for a pre-emptive attack on the Islamic system. The Islamic forces, although stronger, lie in a state of unpreparedness.
The Islamic Budget is 180 points. The subsequent production budget is 40 points.
The Chinese budget is 200 points. The subsequent production budget is 10 points.
The Chinese player sets up and moves first.
Game Length: The game lasts for 12 turns after the Chinese player crosses the outermost Islamic orbit line, or to a total of 48 turns, whichever occurs first.
Victory: The Chinese player must establish a base in the Kou (An-Nur) system in any (large disc) world, and wins if he does so. The Islamic player must stop him, and wins if he does.
Armageddon— Each side has determined that the other must be completely destroyed in a war to the death. After a period of arms build-up, the war begins.
The Islamic budget is 280 points, plus a subsequent production budget of 30 points.
The Chinese budget is 300 points, with no subsequent production budget.
The Islamic player sets up first and moves first.
(The following paragraphs continue the Armageddon scenario on the back cover of the rulebook.)
Game Length: There is no game length limit. It continues until victory conditions are met.
Victory: There are three levels of victory—strategic, tactical, and stalemate.
A player wins a strategic victory by completely destroying all three of the enemy's industry counters and reducing the enemy's population to less than 200 million, while retaining at least one industry counter and a population of at least 400 million.
A player wins a tactical victory by reducing enemy population to less than 200 million while retaining a population of at least 400 million.
Stalemate occurs if neither player achieves tactical or strategic victory. Players may declare stalemate at any time in order to end the game.
Raid— Each side has (simultaneously) determined that a single bold strike against the enemy is necessary for both strategic advantage and home-front morale.
The budget for each side is 100 points, with a subsequent production budget of 60 points.
Game Length: 36 turns. The Chinese sets up and moves first.
Special Rule: Each side secretly designates, after examining the forces set up on the map, one enemy world with at least one industry counter. This designation should be written down and kept concealed.
Victory: A player wins if he successfully destroys at least one enemy industry counter on the indicated enemy world, while preventing the enemy from destroying any industry counters on the world which he indicated.
If both sides lose the indicated industry marker, or if neither side loses any industry counters, then the game ends in stalemate.
Revised Chart (Combat and Surface Tables)
The following tables are printed on the separate "Double Star, Revised Chart" sheet and are referred to throughout the rules above.
Ship-to-Ship Combat Results Table
Attacking factor minus defending factor (attack superiority) across; die roll down.
| Die Roll | 0 | +1 | +2 | +4 | +8 | +16 | +32 | +64 | +128 |
|---|---|---|---|---|---|---|---|---|---|
| 1 | – | – | – | – | – | – | D | D | E |
| 2 | – | – | – | – | – | D | D | E | E |
| 3 | – |
Attacks at an attack superiority less than zero are no effect; attacks at an attack superiority of greater than +128 are treated as +128.
Explanation of Combat Results:
- – = No Effect. The target is not harmed in any way.
- D = Target Disrupted. It is inverted to show its status, and remains so until the end of the current player-turn. It is removed from any formation which it is in, and may not attack. It continues to defend normally.
- E = Target Eliminated. It is removed from play for the remainder of the game.
- B = Formation Broken. The target is eliminated, and the formation (if any) which it was in is broken. All ships in that formation are in scattered formation if a back-up formation is not available.
Planetary Defense Fire Table
| Die Roll | Ship (Def=4-) | Ship (Def=5+) | Robot | Planetoid |
|---|---|---|---|---|
| 1 | Elim | Elim | Elim | Elim |
| 2 | Elim | Elim | Elim | Elim |
| 3 | Elim | Disrupt | Elim | – |
| 4 | Disrupt | – | – | – |
| 5 | – | – | – | – |
Explanation of Combat Results:
- – = No Effect. The target is not harmed in any way.
- Disrupt = Target Disrupted. The target is disrupted and may not continue its attack. It recovers fully at the end of the current combat phase.
- Elim = Target Eliminated. The target is destroyed, and is removed from play for the remainder of the game.
Effects of Battle Formations
| Formation | Formation Attacks With | Formation Defends With | Minimum Ships |
|---|---|---|---|
| Scattered | Ship Attack Factor | Ship Defense Factor | One |
| Cone | Sum of all Ship Attack Factors in the formation | Ship Defense Factor plus one for each additional ship in the formation | Four |
| Wedge | Best Ship Attack Factor plus one for each additional unscreened ship in the formation | Ship Defense Factor plus one for each additional unscreened ship in the formation | Four * |
| Cylinder | Sum of all unscreened ships in the formation | Ship Defense Factor plus one for each additional ship in the formation | Six * |
| Globe | Sum of all Ship Attack Factors in the formation | Ship Defense Factor plus for each additional ship in the formation | Eight † |
Notes: Screened ships may not be attacked. Zero attack factor ships (transports) may not count as additional ships for increased attack or defense factors, but may be used to meet minimum ship requirements for a formation.
* Plus any screened ships.
† And at least three more than the target formation.
A globe formation performs as a scattered formation for the first round of its existence.
Surface Strike Table (By Ships)
Ship printed attack factor across (2, 4, 8, 12, 16); die roll down.
| Die Roll | 2 | 4 | 8 | 12 | 16 |
|---|---|---|---|---|---|
| 1 | p -1 | p -2 | p -3 | p -4 | p -5 |
| 2 | p -2 | p -4 | p -6 | p -8 | p -10 |
| 3 | des | des | des | des | des |
| 4 | – | – | des | des | des |
| 5 |
Explanation of Combat Results:
- p -x = The surface hex loses the number of population points indicated.
- des = The surface hex loses one planetary defense, power plant, ship, or base. The lost item is chosen by the attacker.
- industry = The surface hex loses one industry marker.
Scatter Diagram (For Impacting Planetoids)
After an impacting planetoid has designated the hex which it will impact, roll one die. If the result is greater than 4 then the planetoid will not hit the target hex. If the target body is a small disc, then the planetoid misses entirely. If the target is a large disc, then it will hit an adjacent hex. Roll one die, consult the appropriate polar (target hex labelled P) or equatorial (target hex labelled E) diagram, and impact the planetoid in the numbered adjacent hex indicated. For an equatorial strike, a result of 1 affects the polar counters which are face-up, while a result of 6 affects face-down polar counters. Everything in an impacted hex is destroyed. Items in adjacent hexes survive on a roll of 3 or greater. Impacting planetoids are destroyed.
Polar diagram (target hex P, surrounded by hexes numbered 1 through 6 clockwise from the top): roll 1 = top, 2 = upper right, 3 = lower right, 4 = bottom, 5 = lower left, 6 = upper left.
Equatorial diagram (target hex E): the adjacent hexes are numbered 1/6 (top), 2/5 (lower left), 3/4 (lower right), with E at the bottom centre; a single die roll of 1 or 6 falls in the top hex, 2 or 5 in the lower-left hex, and 3 or 4 in the lower-right hex.
Counter Identification Chart
Printed on the second side of the "Double Star, Revised Chart" sheet. Each entry lists the counter as shown in the Chinese and Islamic colour versions; the icons are not reproduced here.
- World: Also called planet or large body. Each is named and has a corresponding world surface chart.
- Planetoid: Also called moon or small body. Each is named or lettered, and has a corresponding world surface chart.
- Industry: Source of production.
- Base: Allows landing of ships. Required for presence of population on small bodies. Costs 4 points.
- Power Plant: Expended to move a small body. Costs 3 points.
- Planetary Defense: Allowed to fire twice in against attacking ships or small bodies. Costs 8. May not move once placed.
- Population Marker: One point represents one million persons. May not be on small bodies without a base, or in ocean areas.
- Formation Marker: Denotes the formations which a task force is capable of assuming.
- Command Ship: Costs 8 points. Allows formation of task forces during the game. (Attack-Movement-Defense factors 8-8-2.)
- Orbital Fighters: Costs 2 points. May not leave the hex containing the world on which it was produced. (2-1-0.)
- Robot Fighter: Costs 2 points. Self-destructs in surface strikes, but uses the Surface Strike Table with a die modifier of -2. (2-1-3.)
- Battleship: Costs 16 points. (16-8-2.)
Counter Format Example
- Typical ship counter: ship silhouette, type, abbreviation, attack factor, movement factor, and defense factor.
- Command ship counter: ship silhouette, task force number, ship type, attack factor, movement factor, and defense factor.
Color Codes
Industry, worlds and planetoids are black counters with white or colored markings. Command ships are colored counters with white markings. Bases, planetary defenses, population, and ship counters are colored with black markings. Formation markers are white with black printing.