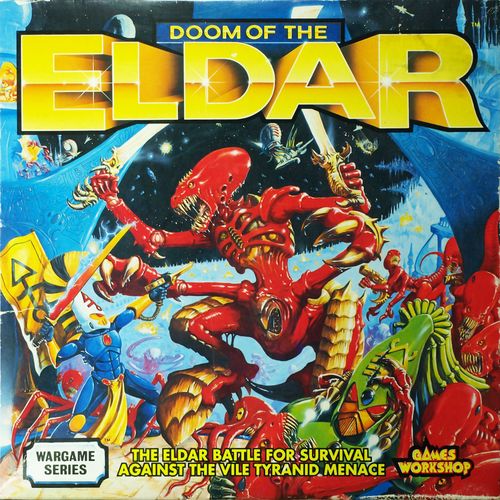
Doom of the Eldar
Doom of the Eldar Rulebook
Table of Contents
Table of Contents
Summary of Play
Doom of the Eldar is a two player wargame that recreates the Tyranid's attack on Iyanden Craftworld. The game starts just as the first Tyranid Hive Swarms are picked up on the Eldar's scanners. As the game progresses more and more Tyranid Swarms will arrive. Neither player can be sure how large the Tyranid assault will be or how long it will last. If Iyanden can hold out long enough, however, the Tyranid Hive Swarms will stop coming and, once the Eldar player has wiped out any Tyranids remaining on the map, each player can count up their victory points to see who has won. The number of victory points the Eldar player gets is determined by the size of the Tyranid assault, while the number of victory points scored by the Tyranids is determined by the amount of damage that they cause to the Craftworld. The two players' victory points totals are compared and the side that scored highest is the winner.
Before you start to play, it's a good idea to read through these rules at least once so you get some idea of how the game works. The rules aren't complicated, and reading them won't take very long. If you've played Battle For Armageddon or Horus Heresy you will find that the rules for Doom of the Eldar are very similar. However, there are a number of important differences, so you should still read the rulebook carefully.
Components
The Counters
The spacecraft, ground forces and important characters that took part in the campaign are represented by a number of different sized and shaped counters.
The Eldar counters come in three different shapes. The oblong counters are Eldar spacecraft. The number on the counter is the spacecraft's deep space combat value. The hexagonal-shaped counters represent Eldar ground forces. The two numbers on the counter are the force's attack value (the first number) and defence value (the second number). The triangle-shaped counters are special counters. Special rules apply to these counters which are explained on the back of the reference sheet. Finally there are the square-shaped fortified/devastated area counters which are used to show the condition of different areas on board the Craftworld.
All of the Tyranid counters are round and printed on both sides. One side shows a Hive Swarm, which is used while the Tyranids are travelling through space. The number on this side of the counter (which is always a '10') is the Swarm's deep space combat value. The other side shows a Horde, and this side is used when the Tyranids reach the Craftworld. The two numbers on the Horde side of the counter are the Horde's attack value (the first number) and the Horde's defence value (the second number). If the counter has the word special printed under its combat value then certain special rules apply to the counter which are explained on the back of the reference sheet. As long as the counter is in space only the Tyranid player is allowed to examine it to see what is on the Horde side of the counter.
The Game Board and Charts
The game board shows a map of Iyanden Craftworld and the area of deep space surrounding it. It is divided into a number of different sized spaces to help regulate movement. In addition to the board and counters the game includes a reference sheet, Wave Assault Track, and Warp Gate template.
Setting Up
Clear a space on a table and set up the board. One player takes the Eldar counters, the Warp Gate template, and the Wave Assault Track. The other player takes all the Tyranid counters.
The Eldar player sets up first. All of the counters with a green background represent reinforcements sent from other Craftworlds to aid Iyanden. All of these counters go on the Warp Gate template at the start of the game. The counters printed on a blue background represent Yriel and his followers. Yriel will only come to the aid of Iyanden if the Shrine of Asuryan is devastated, so place him, the raider ships and his followers to one side for the time being.
All of the remaining Eldar counters must be set up on the map. Eldar spacecraft must be set up in space. Eldar ground forces, the Ghost Warriors, and the Avatar must be set up on the Craftworld (but see the rules for stacking below). The Farseer may be setup in space or on the Craftworld. Next the Eldar player must place one Fortified Area counter in each Craftworld area. Finally the Eldar player places the Assault Marker in the '0' box on the Wave Assault Track.
Meanwhile, the Tyranid player should sort out the Protoid counters that have a combat value of 12-12 and 24-24 and put them to one side until they are needed (they are easy to pick out because they are a little bit bigger than the other Tyranid counters). All of the remaining Tyranid counters are put in the box lid so that only the Hive Swarm side is showing, and are then shuffled. During the game the Tyranid player will draw his counters at random from the box lid to add to the map. As his counters are eliminated they are returned to the box and shuffled back in. In this way the Tyranid player will never be sure what Hordes he will be receiving as reinforcements from turn to turn (and neither will the Eldars!).
Stacking
The number of counters a player may have in a Craftworld area is limited to three. This is called the stacking limit as it is the maximum number of counters you may stack one on top of the other in a Craftworld area. There is no stacking limit in space, so each player may have any number of counters in a Deep Space area. The Eldar player must obey the stacking limit rules when he sets up his counters.
IMPORTANT: The following counters do not count towards the stacking limit for an area and may be included in addition to any three other counters: the Avatar, the Ghost Warriors, the Farseer, the Hive Mind, Fortified/Devastated area counters.
The Sequence of Play
Doom of the Eldar is played in a series of game turns, each of which is divided into six phases. All activities may only take place in the correct phase and each phase must be finished before the next can be started. What you do in each phase is described below and explained in the rules that follow.
- TYRANID REINFORCEMENT PHASE. The Tyranid player rolls 2D6 and adds their scores together to see how many reinforcement Swarms he receives this turn. If the Tyranid player rolls a double there is a chance that the Assault has ended.
- TYRANID MOVEMENT PHASE. The Tyranid player may move any counters he has on the map, including the reinforcements he has just received.
- TYRANID COMBAT PHASE. Any combats caused by the Tyranid player's moves must now be resolved.
- ELDAR SPECIAL ACTIONS PHASE. The Eldar player is allowed to make one special action with each intact area on the Craftworld, and may convert Eldar Guardian counters in spacecraft or vice-versa. If the Shrine of Asuryan has been devastated then Yriel and his Raiders will arrive in this phase.
- ELDAR MOVEMENT PHASE. The Eldar player may move any face-up counters he has on the map.
- ELDAR COMBAT PHASE. Any combats caused by the Eldar player's moves must now be resolved.
Tyranid Reinforcement Phase
At the start of this phase the Tyranid player rolls two dice and adds their scores together. The result is the number of reinforcement counters he receives for the turn (unless he rolls a double - see below). Tyranid reinforcements are drawn at random from the box lid. If there are not enough counters in the lid then the Tyranid player may take as many as there are available and loses any remainder. To find out where each counter appears, the Tyranid player rolls a dice and places the counter - Hive Swarm face-up - in the deep space area with the corresponding sector number. Note that the Tyranid player rolls separately for each counter.
The Wave Assault Track
The Eldar player must keep track of the number of Tyranid reinforcements by moving the Assault Marker along the Wave Assault Track. For example, on the first turn of a game the Tyranid player rolls a total of '10' for his number of reinforcements. The Eldar player moves the Assault Marker to the box marked '10' on the Wave Assault Track. On the second turn the Eldar player [sic] rolls a total of '7' for his number of reinforcements. The Eldar player moves the marker an extra seven spaces along the Wave Assault Track to the box marked '17'.
Ending the Assault - Rolling Doubles
If the Tyranid player rolls a double for his number of reinforcements, then the Eldar player must immediately check the Wave Assault Track to see if the Tyranid assault is over. If the double is listed to the left of the row with the Assault Marker, then the Assault is over. Carrying on the previous example (with the marker in the 17 box), if the Tyranid player rolled a double 1 then the assault would be over. If he rolled any other double the assault would continue.
If the assault continues, then the Tyranid player takes his reinforcements as normal. If the assault ends, then the Assault Marker is flipped to its 'Assault Over' side and the Tyranid player is not allowed to take any more reinforcements for the remainder of the game, including the turn when the double was rolled. Ignore the Tyranid Reinforcement phase in all further turns once the assault has finished. The game continues even though the assault is over, and only ends when there are no Tyranid counters remaining on the map. When all of the Tyranids are wiped out the winner of the game is determined as described below (see Winning the Game).
IMPORTANT: Any Tyranid counters that are destroyed during the game are removed from the map and returned to the box lid, and may be drawn as reinforcements again on future turns. Thus each Tyranid counter may be used several times over the course of the game. However, the number of Tyranids in the Hive fleet are not limitless, so if the Assault Marker reaches the '89' box on the Wave Assault Track, then it automatically flips over and the assault ends even if the Tyranid player has not yet rolled a double.
Movement
In the Movement phase you are allowed to move any or all of your counters. You may move as many of your counters as you wish: all, some or none. The number of areas a counter may move depends on its type, as shown on the table below:
| Counter | Movement |
|---|---|
| Eldar Special Counters | Any number of areas per turn. |
| The Tyranid Hive Mind | Any number of areas per turn. |
| Eldar Space Craft | Three areas per turn. |
| All other counters | One area per turn. |
Counters are moved one at a time, and you must finish one counter's move before you move another one. Once you have started to move another counter, you may not change a previous move, no matter how much you want to! A counter may be moved in any direction or combination of directions.
Movement Restrictions
If a counter enters an area occupied by an enemy counter of any type then it must end its move in that space and fight the enemy counter(s) in the ensuing Combat phase. A counter that starts its move in an area that also contains enemy counters is allowed to move out of the area, but it will have to stop moving if it enters a new area with any enemy counters.
Eldar spacecraft may not move onto Craftworld areas, and Eldar ground forces, the Avatar and the Ghost Warriors are not allowed to move into deep space areas. The Farseer may move into any area on the map.
Tyranid Hive Swarms may move into any area. However, when they enter the Craftworld the counter must be immediately flipped over to reveal the Horde side of the counter. Horde counters can move freely about the Craftworld, but are not allowed to move into deep space areas.
Revealing Tyranid Horde Counters
As noted above, Horde counters must be flipped over and revealed once they reach the Craftworld. With the exception of the Spore Mine and the Hive Mind, Swarm counters may not be revealed in a deep space area. Until the Horde is revealed only the Tyranid player is allowed to examine the counter to see what is on the Horde side. Once a Horde has been revealed it may not be flipped back to its Hive Swarm side.
Stacking & Movement
The Craftworld stacking limit only applies at the end of the Movement phase. For example, a player is allowed to move a counter through an area which already has three counters in it, or to move a counter into an area with three counters, and then move one of those counters out. However, if an area ends up with more than three counters in it at the end of the Movement phase, the player must eliminate one or more counters to bring the stack within 'legal' limits.
VERY IMPORTANT: The stacking limit for an area applies to each player's counters separately, so it is possible for both players to have up to three counters in the same area.
Example of Movement
The Eldar Spacecraft move two areas as shown in the diagrams (not reproduced). Note that although Eldar spacecraft are allowed to move three areas, they must stop when they enter an area where there is a Tyranid counter. You may not skip or 'hop' over areas as you move.
The Combat Phase
In the Combat phase you must attack any enemy counters that are in the same area as one or more of your own counters. All of the counters in an area must take part in the combat against all of the enemy counters. Combats may be resolved in any order, but you must finish one attack before you are allowed to move on to the next one. There are two types of combat: Deep Space combat, which takes place in deep space areas, and Craftworld combat, which takes place on the Craftworld.
Deep Space Combat
Deep Space combats are resolved by using the Deep Space Combat Results Table printed on the reference sheet. To resolve each attack you must follow this simple 5-step procedure:
- The Eldar player adds up his counter's combat value. The total determines which column is used on the Combat Results Table. For example, if the Eldar's combat value were 17, then the attack would be resolved on the 15-19 column on the Deep Space Combat Results Table.
- The Eldar player rolls a D6 and the score is cross-referenced with the Eldar ship's combat value to determine how many Tyranid counters are destroyed. Look up the result under the Combat Results Table and follow the instructions there.
- Any surviving Tyranid counters may now fire back. The Tyranid player adds up his counters' combat value, rolls a D6 and the score is cross-referenced with the Tyranid's combat value to determine how many Eldar ships are destroyed.
- The Eldar player now has the option to retreat one area. If the Eldar decide to retreat then all of the Eldar counters are immediately moved one area and the combat is over. Retreating counters may not enter a Craftworld area or an area that contains one or more Tyranid counters. If all adjacent areas are prohibited then the Eldar may not retreat.
- If the Eldar decide not to retreat then another round of Deep Space combat is fought (starting at step 1 above). This carries on until either the Eldar retreat, or until only one player has any counters left.
Note that the Eldar always fire first in Deep Space combat (even in the Tyranid player's turn), and that only the Eldar are allowed to retreat. These two factors represent the superior range of the weapons carried on the Eldar spacecraft, and the Eldar ships' vastly superior speed and manoeuvrability compared to the Tyranid Hive ships.
Craftworld Combat
Craftworld combats are resolved by using the Craftworld Combat Results Table printed on the reference sheet. To resolve each attack you must follow this simple 5-step procedure:
- The attacker adds up his counters' attack value.
- The defender adds up his counters' defence value.
- The two are converted to a ratio by dividing the attacker's total by the defender's total, and rounding any fractions down. The ratio determines which column is looked up on the Combat Results Table. For example, if the attacker's combat value was 10 and the defender's combat value was 5, the odds would be 10 divided 5, or, 2-1. If the attacker had 9 points to the defender's 5, the odds would be 9 divided by 5, which comes to 1 and a bit to 1, which would be rounded down to 1-1.
- The attacker rolls a D6 and the score is cross-referenced with the odds ratio to determine the outcome of the battle.
- Look up the result under the Combat Results Table and follow the instructions there.
Note that, unlike Deep Space Combat, there is only ever one round of Craftworld Combat per area. This represents the fact that combat within the winding corridors and built up areas of the Craftworld is bitter and prolonged compared to the swirling, lightning fast battles that take place in deep space.
Destroyed Units
In many places in these rules, but most notably on the Combat Results Tables, you will be told that one or more counters have been destroyed. When there is a choice, the Eldar player decides which Eldar counters are eliminated and the Tyranid player decides which Tyranid counters are eliminated. The only exception to this is during Deep Space Combat, where casualties on Tyranid Hive Swarm counters always start with the top counter in the stack and work down through the stack one by one.
Eliminated Tyranid counters are returned to the box lid, Hive Swarm side face-up. Eldar casualties are placed in the appropriate Destroyed Counters Box on the Wave Assault Track.
Dice Re-rolls
The Farseer and the Hive Mind counters entitle the player to a re-roll if they are involved in a battle. A re-roll may be used to re-roll the dice, but the player must accept the second dice roll and may not choose to go back to the first result if the second one is even worse! If both players are entitled to a re-roll in the same battle, then the re-rolls cancel out and the dice may not be rerolled by either player. In Deep Space Combat a reroll entitles the player to force a reroll of his own and/or his opponent's dice roll in each and every round of combat.
Fortified and Wrecked Areas
At the start of the game a Fortified Area counter is placed in each area on the Craftworld to show the defensive preparations the Eldar have undertaken to resist the Tyranid assault. Fortification counters do not count towards the stacking limit for the area and may be included in addition to up to three Eldar ground forces counters. As long as the fortifications remain intact then the defence value of all Eldar counters in the area is doubled. Note that only the defence value is doubled, the attack value remains the same.
Fortifications may not be chosen as a casualty to satisfy any losses called for by the Combat Results Table, and can only be eliminated if they are left on their own in an area at the end of the Combat phase with one or more Tyranid counters (apart from the Hive Mind). Flip the counter over to its devastated area side if this happens to show that the Tyranids have captured and wrecked the area. Devastated areas cannot be repaired over the course of the game, and the counter is not flipped back over if the Eldar recapture the area. Each Devastated Area is worth 1 victory point to the Tyranid player at the end of the game.
Example of Deep Space Combat
Three Eldar spacecraft engage two Tyranid Swarms. The Eldar fire first. They have a combined combat value of 16 points, and the Eldar player rolls a '4', so their fire destroys one of the Tyranid Swarms. The destroyed counter is returned to the box lid by the Tyranid player, and it may be drawn again as a Tyranid reinforcement on a future turn.
The single remaining Swarm returns fire. It has a combat value of 10, and the Tyranid player rolls a '6', which destroys one of the Eldar counters. The Eldar player decides to lose the Nightwing Squadron, as it has the lowest combat value. The Eldar player places the Nightwing Squadron in the Destroyed Eldar Space Craft box on the Tyranid Assault Force Track.
The Eldar player decides not to retreat, so another round of combat is fought. The Eldar's combined combat value has been reduced to 12 points, but the Eldar player rolls a '4' which wipes out the remaining Hive Swarm and ends the battle.
Example of Craftworld Combat
The Eldar player is launching a counter-attack with three Aspect Warrior counters led by the Avatar against a Tyranid Horde and a Genestealer Horde. The Tyranid's defence value is 12+8=20, while the combat value of the three Aspect Warriors is 6+6+6=18. The Avatar doubles the combat value of any Aspect Warriors that he is stacked with, which gives the Eldar a modified combat value of 36 points. 20 divided by 36 is 1 and a bit to 1, which rounds down to 1-1 odds. [sic: the figures as printed; the attacker's 36 should be divided by the defender's 20.]
The Eldar player rolls the D6 and gets a '5', which is cross-referenced with the 1-1 column on the Craftworld combat results table, and gives a result of 'DD' or 'Defender Defeated'. This means that the Tyranid player must lose a counter, and he decides to lose the Genestealer Horde. He returns the eliminated counter to the box lid, Hive Swarm side face-up, so that it can be drawn as a reinforcement on a future turn. This ends the combat, as there can only be one round of combat per area on the Craftworld. However, the Tyranid Horde will have to attack the Aspect Warriors in the combat phase of the Tyranid player's turn, unless it leaves the area in the Tyranid player's movement phase.
Eldar Special Actions Phase
In the Special Actions phase the Eldar player is allowed to take one special action with each non-devastated area on the Craftworld. The special actions that each area can carry out are listed on the reference sheet, at the back of this book. Areas that have been devastated lose their special action for the rest of the game.
Converting Guardians to Spacecraft
The crew of Eldar spacecraft are made up of Guardian Warriors, and so the two can swap roles quickly and easily. To represent this ability the Eldar player may choose to convert Guardian counters into Spacecraft counters, and vice-versa, in the Special Actions phase.
To convert a Guardian into a Spacecraft, remove the Guardian counter from the map and place it in the Destroyed Ground Forces box on the Wave Assault Track, and then take a spacecraft from the Destroyed Space Craft box and place it on the map in a Deep Space area adjacent to the location that had been occupied by the Guardian counter.
To convert a Spacecraft into a Guardian, remove the Spacecraft counter from the map and place it in the Destroyed Space Craft box on the Wave Assault Track, and then take a Guardian from the Destroyed Ground Forces box and place it on the map in a Craftworld area adjacent to the location that had been occupied by the Spacecraft counter.
Yriel's Raiders
Yriel came to the aid of Iyanden after the Shrine of Asuryan had been despoiled by the Tyranids. To represent this, if the Shrine Area is devastated, the Eldar player may take Yriel and his three Raider ships as reinforcements in his next Special Actions phase. Keep the Raider ground forces to one side for the moment. Yriel arrives in a randomly chosen Deep Space Area, using the same system for placing Tyranid Hive Swarm counters. However, only roll once to see which location Yriel and all of his ships arrive in. The Raider spacecraft may be converted to Raider Ground Force counters using the rules for converting Guardians into Spacecraft described above.
Ending the Game
The game ends once the Tyranid assault is over and there are no more Tyranid counters on the map, or at the end of any turn in which every area on the Craftworld has been devastated. When the game ends, each player adds up the number of victory points they have scored. The player with the most victory points is the winner. If both players have exactly the same number of victory points then the game is a draw.
Eldar Victory Points
The Eldar player's victory points are shown on the Wave Assault Track, to the right of the row that contains the Assault Over counter. For example, if the Tyranid assault had consisted of 45 Hive Swarm counters, then, the Eldar player would score 4 victory points.
Tyranid Victory Points
The Tyranid player scores 1 victory point for each area on the Craftworld that is devastated, 1 victory point if the Wraithguard have been destroyed, and 1 victory point if the Avatar has been destroyed.
IMPORTANT: On the reference sheet it states that the Tyranid player earns 1VP for destroying the Ghost Warriors. This is a mistake, and should state that the Tyranid player earns 1VP for destroying the Wraithguard (Ghost Warriors is another name used by the Eldar to describe the Wraithguard).
Counters
There are 22 round Tyranid Hive Swarm counters, on the reverse of each is a Tyranid Horde. There are 30 hexagonal Eldar ground forces counters, 18 rectangular Eldar spacecraft counters and 4 special counters. (The rulebook gives background descriptions of each counter type, which are omitted here. Combat values are listed in the counter list below.) Rules for the special counters, as stated in the main rules: the Hive Mind cannot be attacked or destroyed by direct action, and a Hive Mind counter may be revealed in a deep space area; the Spore Mine may also be revealed in a deep space area; the Avatar doubles the combat value of any Aspect Warriors that he is stacked with; the Farseer and the Hive Mind entitle the player to a dice re-roll (see Dice Re-rolls).
Disclosure: the "special" counter rules the manual says are printed on the back of the reference sheet (Protoid, Spore Mine, Fleshstealer, Hive Mind, Avatar, Farseer, Yriel, Wraithguard and so on) are not present in this scan, so no further special-counter rules are transcribed.
Doom of the Eldar Counter List
Your copy of Doom of the Eldar should contain the following 83 counters (the numbers in brackets are the counter's combat values):
Eldar Ground Forces
- 1 x Exarch (12-8)
- 5 x Aspect Warriors (6-4)
- 8 x Guardians (4-4)
- 1 x Phantom Titan (12-12)
- 4 x Falcon Grav-Tanks (5-5)
- 1 x Tempest Grav-Tanks (7-5)
- 1 x Deathstalker Grav-Tanks (6-6)
- 1 x Alaitoc Scouts (4-4)
- 1 x Eldar Knights (9-5)
- 1 x Harlequins (8-8)
- 1 x Ulthwe Black Guard (5-4)
- 1 x Saim-Hann Wild Riders (5-3)
- 1 x Biel-Tan Dire Avengers (5-5)
- 3 x Raiders (5-4)
Eldar Spacecraft
- 1 x Ghostdragon (8)
- 4 x Wraithship (6)
- 4 x Shadowhunter (5)
- 4 x Nightwing Squadron (4)
- 1 x Raider Ghostdragon (8)
- 2 x Raider Wraithship (6)
Eldar Special Counters
- 1 x Avatar (special)
- 1 x Farseer (special)
- 1 x Yriel (special)
- 1 x Wraithguard (24-24)
Tyranid Hive Swarm Counters
- 22 x Hive Swarm (10)
Tyranid Horde Counters (reverse of Swarms)
- 1 x Hive Mind (special)
- 1 x Hive Tyrant (18-18)
- 1 x Screamer Killer (16-16)
- 1 x Genestealer Patriarch (14-14)
- 1 x Fleshstealer (special)
- 1 x Spore Mine (special)
- 3 x Protoid (special)
- 4 x Tyranid Horde (12-12)
- 4 x Genestealer Horde (12-8)
- 4 x Hunter Slayers (9-6)
- 3 x Razorwings (7-7)
Other Counters
- 1 x Assault Marker
- 9 x Fortified/Devastated Area
Reference Sheet
Sequence of Play
- Tyranid Reinforcement Phase
- Tyranid Movement Phase
- Tyranid Combat Phase
- Eldar Special Actions Phase
- Eldar Movement Phase
- Eldar Combat Phase
Movement Allowances
All Eldar Special Counters & the Tyranid Hive Mind: Any number of areas per turn.
Eldar Space Craft: Three areas per turn.
All other Counters: One area per turn.
Tyranid Victory Points
| Event | Victory points |
|---|---|
| Per Area Devastated | 1 vp |
| Wraithguard Destroyed | 1 vp |
| Avatar Killed | 1 vp |
Craftworld Combat Results Table
Combat ratio (Attacker-Defender), cross-referenced with the D6 roll:
| D6 | 1-3 | 1-2 | 1-1 | 2-1 | 3-1 |
|---|---|---|---|---|---|
| 1 | AA | AA | AA | AD | BC |
| 2 | AA | AD | AD | BC | BC |
| 3 | AD | AD | BC | BC | DD |
| 4 | AD | BC | BC | DD | DD |
| 5 |
- AA Attacker Annihilated. All the attacking counters are destroyed.
- AD Attacker Defeated. One attacking counter is destroyed.
- BC Bloody Conflict. Both sides lose one counter.
- DD Defender Defeated. One defending counter is destroyed.
- DA Defender Annihilated. All defending counters are destroyed.
Deep Space Combat Results Table
Attacker's combat value, cross-referenced with the D6 roll. Entries give the number of counters destroyed (blank = none).
| D6 | 0-4 | 5-9 | 10-14 | 15-19 | 20-29 | 30-39 | 40-49 | 50-59 | 60+ |
|---|---|---|---|---|---|---|---|---|---|
| 1 | 1 | 1 | 1 | 2 | |||||
| 2 | 1 | 1 | 1 | 2 | 2 | ||||
| 3 |
Eldar Special Actions Chart
The Spear of Light, Fortress of Tears, and Fortress of the Red Moon: Roll a D6 for each area; on a roll of '6' the area fires a barrage of plasma torpedoes that destroy one Tyranid Hive Swarm anywhere on the map. The Eldar player may choose which Swarm is destroyed. Barrages may not be fired at Tyranid counters that are on board the Craftworld.
Forge of Lost Souls, and Forge of the Singers: Roll a D6 for each area; on a roll of 4, 5 or 6 the Eldar player may take one counter from the Destroyed Eldar Space Craft box and return it to play in any deep space area adjacent to the forge where it was repaired.
Shrine of Asuryan: The Eldar player may pick any Deep Space Area on the map and examine the Horde side of all of the Tyranid counters in it. He must then return the stack to the map the correct way up. If the Shrine is devastated by the Tyranids then Yriel and his Raiders will arrive on the map in the next Special Actions Phase (see the main rules for details of how and when Yriel arrives).
The Forests of Silence: Roll a D6; on a roll of 4, 5 or 6 the Eldar player may take a Guardian or Aspect Warrior counter from the Destroyed Eldar Ground Forces box and place it on any area on the Craftworld.
Gate of Dreams, and Gate of Nightmares: Roll a D6 for each Gate; on a roll of '6' the Eldar player may take one counter from the Warp Gate template and place it in any area of the Craftworld.