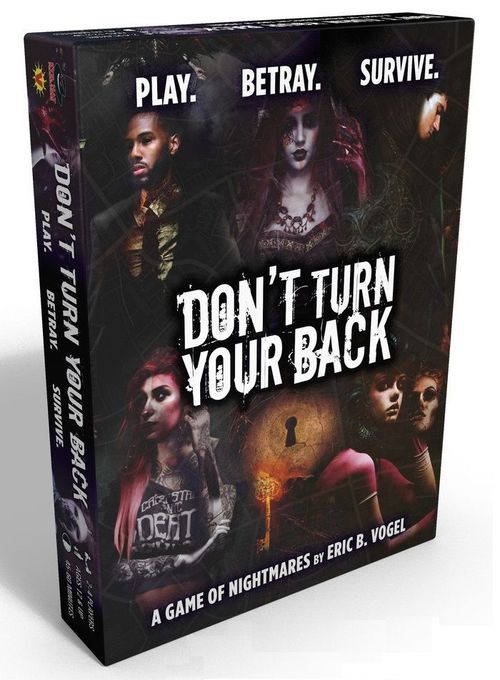
Don't Turn Your Back
Don't Turn Your Back Rulebook
Table of Contents
Table of Contents
Setup
- Place the city board face-up in the middle of the table.
- Remove the First Admonishment card from the District 13 Law deck, and shuffle the rest. In a 2- or 4-player game, deal 7 Law cards at random. In a 3-player game, deal 8 Law cards at random; players should not look at the unused card(s). Place these cards face-down on the Law space in District 13, and place the First Admonishment card on top, face-up.
- Each player takes a player board, a starting deck of Favor cards, an Acquisition deck, and a Candle tally marker of the same color. All players put their Candle tally marker on the "START" space of the Candle tally.
- Each player separates her starting cards (cards labeled "START" in the upper right corner) from her Acquisition deck (the rest of her cards).
- Each player shuffles her Acquisition deck, places it face-down in the space designated "Acquisition deck" on her player board, and then turns 6 cards from this deck face-up, to the right of her player board. This is the player's available Acquisition card row, representing the Nightmares she can influence.
- Each player then shuffles her starting cards and places them face-down in the space designated "Favor deck" on her player board. This is her draw deck, representing favors owed to her from the Nightmares of the Mad City.
- Each player draws a hand of 4 cards from her Favor deck.
- The player who has been awake the longest goes first, and takes the starting player ("You Go First") card.
Turn Sequence
Turns in Don't Turn Your Back have 4 phases:
- Phase 1: Place Cards
- Phase 2: Acquire Influence
- Phase 3: Score
- Phase 4: Clean Up and Draw Up
Phase 1: Place Cards
This phase will involve several rounds of card play. In each round, in turn order beginning with the starting player, each player may play 1 card from her hand onto an open space on one of the Districts. This card represents a Nightmare, who is repaying the player a favor by acting on her behalf. Each card specifies along the lower left edge which Districts it may access. The same card may have different uses depending upon where it is placed. In a 3-player game, do not use the spaces marked with a "4" and in a 2-player game, do not use the spaces marked with either a "4" or a "3-4."
District 13 / High School / City Slumbering / Wax Kingdom: When cards are played in District 13, the High School, the City Slumbering, or the Wax Kingdom, their effect is based on their Pain value; usually, the higher the Pain number, the more effective that card will be. Such is the stuff of Nightmares! The effect of cards played in these Districts will be resolved in the Acquire Influence and Score phases.
High School: When players play cards into the High School, they must always play onto the open space that is closest to the start space.
Wax Kingdom: Make sure you understand how cards played into the Wax Kingdom (see Game End and Winning) affect scoring at the end of the game—it will hurt your score if you play too few or too many into the Wax Kingdom.
All cards that can be played in the Bizarre Bazaar have text effects, which become active only when the cards are played on a Bazaar space. These represent services that the Nightmares can perform or procure for you. Cards played in the Bizarre Bazaar mostly have immediate effects, which are resolved as soon as the card is played; a few cards have effects that will occur in later rounds or phases.
Whenever a text effect causes a player to discard cards, they are placed in that player's discard pile.
Whenever an effect causes a player to draw cards, they are drawn from that player's Favor deck. If a player needs to draw cards, and her draw deck has been exhausted, she then reshuffles her Favor discard pile and places it face-down to become a new draw deck.
When cards occupy all the spaces in a District, then no more cards can be played into that District.
Some Bazaar cards (Smothered Folk, Clockwork Lieutenant, Lady In Hating, The Tacks Man, The Wax King, and Mother When) have Attack effects which can adversely impact one or more other players. These effects can be blocked if the target player(s) has a defender card already in the Bazaar when the Attack is played (Paperboy, City Desk Editor). Attacks which lower a player's score cannot reduce her score below 0.
Other cards (Face Merchant) may have a special effect in the Bizarre Bazaar that happens in a later round. These are marked so players take notice as it is likely to influence their choices.
Players continue playing 1 card at a time into open spaces on the District boards until each of them runs out of cards, has no open spaces they can legally play cards onto, or chooses to pass.
Once a player has passed, she may not subsequently play cards, even if another player's actions have created new options for her. When all players have passed, Phase 1 of the turn is complete.
Phase 2: Acquire Influence
The Pain value of cards played into the City Slumbering turn into points of Cost, which players can use to acquire as many new cards as they can afford from their available Acquisition card row. The Cost of new cards is in the upper right corner of the card. Some cards also give players additional points from the City Slumbering when they are played in the Bizarre Bazaar (Faceless, Dream Dealer).
Whenever a player acquires a card, that card is placed in the player's Favor discard pile. This card now represents a favor owed to her by a Nightmare. As a player acquires more influence over Nightmares, her Favor deck will increase.
A new card is immediately turned face-up from the player's Acquisition deck and placed face-up in her available Acquisition card row. If a player's Acquisition deck is exhausted when she needs to refill her Acquisition row, she reshuffles her Acquisition discard pile (if any) and turns it face-down to become the new Acquisition deck.
Note: The Harvester's Bazaar effect causes a card to be acquired during the Place Cards phase. The Harvester causes the player to move all cards from her Acquisition row to her Acquisition discard, draw 6 new cards for the Acquisition row, and immediately acquire a card of Cost 2 or 3. The Harvester's effect thus creates an Acquisition discard pile, separate from the player's Favor discard pile. This space is marked on the player board.
Phase 3: Score
Players first score the High School and then District 13.
High School: the player with the highest total Pain value scores 1 Candle for each point of Pain on her own cards played in the High School. Ties are broken in favor of the tied player with a card closest to the start space of the High School board. The other players in the High School get 1 Candle for each card they played into the High School. After scoring, count the number of cards held in the High School by the player with the most cards played there, and remove that many cards from the left end of the High School, beginning with the start space. Shift any remaining cards in the High School to the start end of the board. These cards will remain in the High School during the next turn.
Example — High School math: Blue has 4 Pain and WINS = 4 Candles. Orange has 3 Pain, 1 card = 1 Candle. Teal has 2 Pain, 1 card = 1 Candle. Blue won with two cards. The two leftmost cards are removed and returned to their players.
District 13: awards Candles and other benefits based on the conditions specified on the Law card for that turn. There is usually a reward for having the highest total Pain value on cards played into District 13. Sometimes there are rewards for players who come in 2nd, for tied players, or for all players who play in District 13. Occasionally, the Law condition creates penalties (again, a player's score cannot drop below 0).
After the benefits are awarded for District 13, discard the current Law card, and turn a new Law card face-up for the next turn.
Phase 4: Clean Up and Draw Up
Wax Kingdom: you can trade your influence over a Nightmare for increased favor in the court of the Wax King! Cards played in the Wax Kingdom are transferred to the face-down Encased pile. These cards have been permanently removed from the player's decks, but will help players compete for an endgame Candle bonus (see Game End and Winning).
Players then remove their played cards from the Bazaar, District 13, City Slumbering, and return them to their discard piles. Cards left in the High School after the Scoring phase remain until the next Scoring phase. If players have any unplaced cards left in their hands, they may choose either to keep or discard these. They then draw their hands up to 4 cards. The starting player card passes to the player on the left of the current starting player, and the next turn begins.
Game End & Winning
The game ends at the end of the 8th turn (or 9th turn in a 3-player game); this is the turn on which the final Law card is scored, so don't worry about counting turns, the Law deck will do that for you.
First, players should remove their Start cards from their decks. (Start cards do not contribute towards the player's endgame bonus.)
Next, the cards in the Encased pile of the Wax Kingdom are turned face-up and the Pain values on them are tallied for each player. How much Pain a player Encased in the Wax Kingdom has will determine how many bonus points she will score for the cards still in her deck. In other words, you don't score points for the cards that you Encased, but the amount of Pain you Encased affects how you score the cards you've retained.
The player with the highest total Pain value in the Wax Kingdom scores 1 Candle for every point of Cost on the cards (not Start cards) in her deck.
The player with the 2nd-highest total Pain value in the Wax Kingdom scores 1 Candle for every point of Pain on the cards (not Start cards) in her deck.
The player with the 3rd-highest total Pain scores 2 Candles for every card (not Start cards) in her deck.
The player(s) with the 4th-highest total Pain scores 1 Candle for every card (not Start cards) in her deck.
If two players tie for one level of scoring, they both receive the benefit of the next lower level of scoring (e.g. if two players tie for 1st Place, they both score the 2nd Place bonus, and the player with the next lowest score gets the 3rd Place bonus).
The player with the most Candles is the winner. In the event of a tie, the tied player with the highest total Cost value of cards in her deck is the winner.
What you've Encased determines how you score your bonus (but you don't score those cards). Start cards and remaining Acquisition deck cards don't count (remove them). Score bonus Candles using those Favor cards that remain in your deck (draw, hand, & Favor discard).
Bazaar — Services Provided by Your Nightmares
Blind Knight: Allows you to move a card from your hand or discard pile directly to the Encased pile in the Wax Kingdom (not to the Wax Kingdom play spaces), and score 1 Candle for each Pain on the card you Encased. You can use this effect even if the Wax Kingdom spaces are all occupied, and you can use this effect to Encase cards that cannot normally be played in the Wax Kingdom.
City Desk Editor: Lets you score 3 Candles, and makes you immune to other player's Attack effects for the rest of this turn.
Cleaner: Lets you draw 1 card, and score 1 Candle.
Clockwork Lieutenant: Lets you Attack another player by discarding any 1 card from a District 13 space and then moving the Clockwork Lieutenant card to the vacated District 13 space. The discarded card goes into the target player's discard pile. You cannot use this Attack effect on any player who has already played the Paperboy or City Desk Editor this turn.
Devilish Advocate: While the Devilish Advocate card is in the Bazaar, your total Pain in the High School and District 13 are both increased by 1 when each of those Districts is scored. However, this does not count as having a card played in either District for scoring purposes.
Dream Dealer: Provides 2 additional points of Cost when it is played in the Bizarre Bazaar; it can also be played directly in the City Slumbering for 2 points.
Faceless: When you play Faceless in the Bizarre Bazaar, it gives you 1 additional point of Cost from the City Slumbering. It can also be played directly in the City Slumbering.
Face Merchant: Lets you draw 1 card immediately. On a later round in the same turn you may discard the Face Merchant and play a different Bazaar-capable card onto the vacated space. The Face Merchant is useful if you want to ensure that you can play a Bizarre Bazaar card late in the turn.
Fortune Taker: Lets you draw 4 cards from your Favor deck. You must choose 2 of these cards to discard, and 2 to add to your hand.
Harvester: When you activate your Harvester cards, discard the 6 cards in your Acquisition row—moving them to your Acquisition discard pile (not your Favor discard pile). Turn 6 new cards face-up to form a new Acquisition row, and immediately choose 1 card of Cost 2 or 3 to acquire—placing this card in your Favor discard pile. Refill the Acquisition row to 6 cards, as after any acquisition. If your Acquisition deck runs out, shuffle your Acquisition discard pile and place it face-down as a new Acquisition deck.
Head of the Class: As an Attack, Head of the Class forces all other players to discard 1 card which can be played in the High School from their hands. If a player has no High School cards in her hand when this Attack is made, she must reveal her hand to the attacking player to show this.
Lady In Hating: Lets you Attack another player by discarding any 1 card from a High School space and then moving the Lady In Hating card to the vacated High School space. The discarded card goes into the target player's discard pile. You cannot use this Attack effect on any player who has already played the Paperboy or City Desk Editor this turn.
Mother When: Lets you score 4 Candles. As an Attack, she forces all other players to discard 1 card. Players who have already played the Paperboy or City Desk Editor this turn do not have to discard.
Paperboy: Lets you draw 2 cards, and makes you immune to other players' Attack effects for the rest of this turn.
Shameful: Lets you draw 2 cards.
Smothered Folk: Lets you Attack another player by moving one of their cards from a Wax Kingdom space to the target player's discard pile. Your Smothered Folk card then moves from the Bizarre Bazaar to the vacated space in the Wax Kingdom. Since this means the Smothered Folk card will be Encased at the end of the turn, this attack can normally only be done once. The high Pain value of the Smothered Folk card makes it valuable to Encase. You cannot use this attack effect on any player who has already played the Paperboy or City Desk Editor this turn.
The Tacks Man: As an Attack, he reduces the other player's scores by 2 Candles. Players who have already played the Paperboy or City Desk Editor this turn do not lose 2 Candles. In addition, you turn over the top card of your Favor deck and place it immediately onto a legal, open space in any District except the Bazaar. If there is no legal place to play this card, it is added to your hand.
The Wax King: Lets you draw 2 cards and score 2 Candles. As an Attack, he forces all other players to discard down to a hand of 3 cards. Players who have already played the Paperboy or City Desk Editor this turn do not have to discard. The Wax King also has a high Pain value, and it can be useful to Encase him in the Wax Kingdom near the end of the game.
Laws of District 13
The 13th Admonishment: The player with the most Pain in District 13 can acquire any 1 card from their available Acquisition card row without paying its Cost, and place it on top of her Favor deck. If there is a tie for 1st Place, then all players tied for 1st score 3 Candles and do not get to acquire a card.
The Bass-Ward Act: The player with the most Pain in District 13 scores 4 Candles. If there is a tie for 1st Place, all tied players score 5 Candles. 2nd Place scores 6 Candles. If there is a tie for 2nd Place, all tied players score 7 Candles.
The First Admonishment: This card should always be at the top of the Law deck at the beginning of the game. The player with the most Pain in District 13 scores 6 Candles. If there is a tie for 1st Place, then all players tied for 1st score 4 Candles. All other players with cards in District 13 this turn score 3 Candles.
Have Us A Corpus: All players with at least 1 card in District 13 can acquire any 1 of the cheapest cards currently in their available Acquisition card row, without paying its Cost, and place that card on top of their Favor deck.
The Inclusion Act: Each player scores Candles according to how much Pain she has played in District 13 this turn, on the scale indicated on the card.
The Law of Averageness: Any players who haven't played any cards in District 13 this turn lose 4 Candles.
The Lie Your Ground Law: The player with the most Pain in District 13 scores 2 Candles for every 1 Pain she has on card she has played in District 13 this turn. If there is a tie for 1st Place, then all players tied for 1st score 3 Candles. All other players with cards in District 13 this turn score 2 Candles.
No Child Left Bedside: All players with 1 or more cards in District 13 this turn score 10 Candles, minus 3 for each rival player with cards in District 13 this turn: so 2 players would score 7 each, 3 would score 4 each, and 4 would score 1 each.
The Sawtooth Act: The player with the most Pain in District 13 scores 7 Candles. If there is a tie for 1st Place, then all tied players lose 1 Candle. All other players with cards in District 13 this turn lose 2 Candles.
The Somnambulation Act: The player with the most Pain in District 13 scores 4 Candles for each card she has played in District 13 this turn. If there is a tie for 1st Place, all players tied for 1st score 3 Candles for each card they have played in District 13 this turn. All other players with cards in District 13 this turn score 2 Candles.
The Statute of Elimination: The player with the most Pain in District 13 scores 8 Candles. If there is a tie for 1st Place, all tied players tied for 1st Place score 6 Candles and 2nd Place still scores. The 2nd Place player scores 5 Candles. If there is a tie for 2nd Place, all players tied for 2nd Place score 4 Candles.
The Wax Rebate: The player with the most Pain in District 13 may go through the Encased pile and remove any 2 cards. These cards are removed from play for the duration of the game. All other players in District 13 this turn each score 2 Candles. If there is a tie for the most, no cards are removed, and all players in District 13 score 2 Candles.
The Wax Tax: The player with the most Pain in District 13 takes any 1 card from her available Acquisition card row and puts it into the Encased pile face-down. If there is a tie for 1st Place, all tied players put any 1 card from their available cards into the Encased pile.
A Guide to the Mad City
Down a lonely alleyway, under a starless sky, lies a city that never was, yet is: the Mad City, where Nightmares walk the streets, and a good night's sleep can get you killed.
Every now and then, the Awake — chronic insomniacs from our world, the City Slumbering—break through the barriers of normal human perception and cross over to the Mad City, becoming trapped there, gaining abilities fuelled by madness and exhaustion. Most of the Awake live a short, phantasmagorical, frantic life in the Mad City, before it quite literally eats them alive. However, there are those rare few who manage to master the city, and even find a way to escape…
The City Slumbering
"So, you want me to go harvesting dreams from the slumbering, do you? Well, I'll cut you... in for a share."
Nightmares journey to the City Slumbering, bringing Pain to the sleeping to harvest their darkest dreams. You may trade your share of dreams to gain influence over one or more Nightmares — but like most dreams, they only last the night, so use them while you can.
Short of a few special services offered in the Bazaar, this is the only way to grow your influence over the Nightmares of the Mad City. Keep an eye out for acquisitions that will play well to your strategy, and harvest wisely. Nightmares with high Pain values that can be played here will expand your influence quite rapidly indeed. It is important to acquire new and more powerful cards, especially in the early part of the game. It can be risky to forego this in favor of scoring points in the short term.
The Bizarre Bazaar
"Ah yes, the bazaar of the bizarre, where anything can be bartered and everything is for sale. An excellent place to retain services not readily available elsewhere."
Some Nightmares have special contacts or are themselves able to provide particular services under the peculiar conditions of the Bizarre Bazaar. Use your influence to deploy them there and reap the benefits. And remember, this is a limited time offer — if you don't act fast, the opportunities found here will elude you.
The Bazaar tends to see a lot of bustle during play. Many Nightmares wish to ply their services here, but there's only so much room to go around. Play your defenses early, and reserve a spot with a Face Merchant if you can. And remember, a Nightmare that lets you draw cards extends the number of rounds you have to play in a turn — a potent service indeed. Often the Bazaar is the first District to fill with player cards, so be careful not to get shut out!
District 13
"Don't step outside the law in District 13. The penalties are... severe."
Law and order changes at the whim of the Nightmares in District 13. Those who can navigate what passes for a legal system in the Mad City can reap great rewards from it here. Make your case, and use your influence carefully, but watch out for the loopholes — they have a tendency to form nooses.
Make sure to read the Law that's in effect each turn and look for an opportunity to exploit it. The court only hears so many cases at a time, so deploy your Nightmares quickly if a Law offers something you need.
The High School
"Welcome to Mother When's Finishing School for Bad Little Boys and Girls! You do look like a naughty one. Do you need to be finished?"
With instruction occurring under the watchful eye of Mother When, who some say is an incarnation of Death Itself, it is particularly difficult to exert influence here without committing to a longer-term campaign. Favors done for the Wax King here have a tendency to hold a Nightmare back until school lets out.
You can score quite a number of Candles if you play this one cleverly. High-value cards played further back from the head of the class can stay in residence for multiple turns, scoring each turn as they move forward. But mind your Pain tally — those who don't go for the throat simply don't live up to their potential. Concentrating on scoring in the High School or District 13, while Encasing the cards for the other in the Wax Kingdom can be good strategy. However, it can be risky to totally eliminate your ability to play in any District.
Wax Kingdom
"Currying favor with me directly, are you? A bold choice, and potentially fruitless. We shall see what comes of it."
Here you may pay tribute to the Wax King himself! Pass your influence over a Nightmare to the Wax King instead of keeping it for your own use, but do so carefully — whether or not he values it highly enough won't be revealed until the final bell tolls.
The Wax Kingdom gives you an opportunity to convert underperformers into a greater advantage in the endgame. Encase Start cards once you've acquired influence over superior Nightmares. Make sure you understand how your Encased cards will affect scoring in the endgame! While placing well here can win the game for you, it's no guarantee; all the same, ignore the Kingdom at your peril. Those who don't play the Wax King's game are often crushed beneath its machinations. At the same time, if you Encase too many of your most valuable Nightmares in order to get the best bonus, you'll have few cards left in your deck to score with the Wax Kingdom bonus at the end of the game!