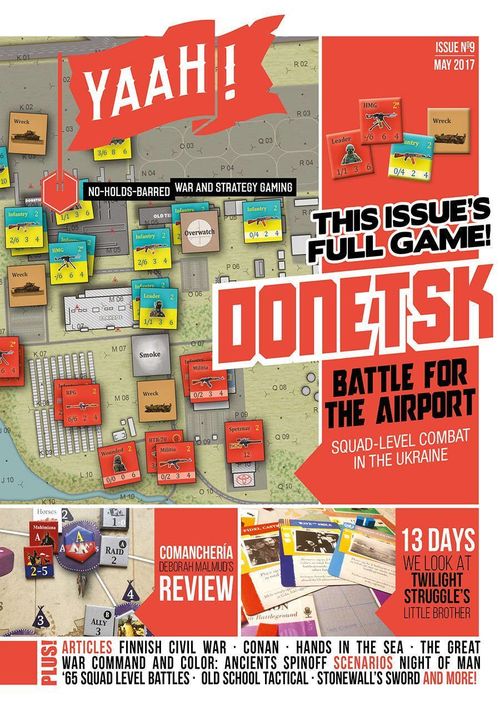
Donetsk: Battle for The Airport
Donetsk: Battle for The Airport Rulebook
Table of Contents
Table of Contents
1. Components and General Rules
Map and Scale
The map covers the Donetsk airport and the nearby towns. The top of the map is oriented north. Each hex is approximately 150 metres across. Each turn represents a span of 10 minutes. Counters represent infantry units of 8–15 men, heavy weapons, leader groups of 3–5 men, and single tanks / APCs / trucks.
Counters
There are two types of counters. Some counters depict the combat units, vehicles and leader teams of each side. Others are used to track information, unit status and administrative matters.
Units are classified as heavy and light targets. Infantry, heavy weapons and leaders are light targets. Tanks and APCs are heavy targets. Trucks are light targets.
Units have the following characteristics: attack strength (against heavy / light targets), attack range, morale (staying power), manoeuvrability (upper right corner), and some have special abilities. Blue counters with yellow markings represent the Ukrainian government forces; red counters represent the forces of the DNR / separatists and the Russian government forces supporting them. The movement allowance of foot units is marked in yellow; the movement allowance of vehicles is black. Vehicles capable of carrying troops have their movement allowance enclosed in a circle. A vehicle's carrying capacity, the number of infantry units it can transport, is shown by rifle symbols above the picture. In addition to infantry units, an APC / truck can carry one leader or one heavy weapon.
Foot units
Infantry / Militia
Leaders / heavy weapons
Vehicle counters
Note: trucks are the same kind of vehicle as APCs, except that they can carry three infantry units.
Dice
The game uses three dice: one 1D4, used to determine initiative, and two six-sided dice (1D6 / 2D6), used to determine hits and fire support.
Hex Capacity
Each side may place up to three infantry units and two vehicles in a single hex. An infantry unit loaded into a transport is not counted. Heavy weapons, leaders and markers are not counted.
Units may pass through occupied hexes, but may not stop in them. The limit is checked at the end of the turn. Enemy units may also occupy an overcrowded hex, and the limit is counted separately for each side.
Rounding
When calculating movement and fire, all fractional values are dropped; only whole numbers are used.
2. Sequence of Play
Each turn is divided into two stages (phases): the Initiative phase and the Action phase. During the Initiative phase, the player removes smoke and suppression markers from his units, resolves the fire support expected from the previous turn and plans the fire support for the current turn, and finally determines the initiative for the current turn.
During the Action phase, the players take turns activating their units and carrying out actions, beginning with the current initiative player. These alternating activations continue until all units have been activated. A player may not skip an activation: a player must mark a unit as activated regardless of whether it moved or fired.
2.1. Initiative Phase
- Remove all smoke markers;
- Remove all suppression markers;
- Resolve the fire support carried over from the previous turn. The Ukrainian player resolves first; the results are applied simultaneously;
- Plan and check the fire support for the current turn. The Ukrainian player plans first; the results are applied simultaneously;
- Determine the initiative player for this turn.
2.2. Action Phase
- The initiative player activates a unit;
- The non-initiative player activates a unit;
- The opponents activate units in turn until no units remain to be activated on either side. An activation may not be skipped: at least one unit must be activated, even if the unit takes no action.
3. Initiative
In each scenario, each side has an Initiative and a Resolve. These values are used to determine the motivation and offensive capability of each side. During the Initiative phase, each player rolls 1D4 and adds the result to his Initiative level. The two resulting values are then compared. The side with the higher value is designated the initiative player.
3.1. Lowering Initiative
The Initiative level of each side may decrease during play as a result of losses, so that the sides waver in their will to fight. Each loss of a unit (not a weakening) lowers the value by 1. Use the game turn track and each side's markers to show each player's Initiative value.
3.2. Wavering
Each side is assigned a Wavering level by the scenario.
When a side's Initiative level falls to its Wavering level, the units of that side no longer conduct offensive actions that risk their lives. In game terms, units that are not activated by a leader's command may not move toward an enemy unit within their line of sight. They may not move into an adjacent hex or into the same hex as an enemy unit. If an enemy unit is adjacent or in the same hex, the unit must spend its next activation moving away from that enemy. If it cannot do so without approaching other enemy units within its line of sight, the unit surrenders: it is removed from play, counts as a casualty, and lowers the Initiative level.
3.3. Broken
If the Initiative level is reduced to zero, that side's will to fight is broken and that player loses.
4. Activation
When a player moves on to activating units, the player may choose to activate a leader and several units, or any single unit.
4.1. Leader Activation
If a player chooses to activate a leader, the leader activates any units located with it in the same hex or in an adjacent hex. This includes other leaders, who may activate adjacent units in turn, and this may continue along a chain of activation through whole groups. The player must declare which units will be activated together with the leader before carrying out any actions. Leaders located in a transport may also activate units. Only units activated by a leader may move into an enemy hex. Suppressed leaders may not activate.
Units activated together with a leader must carry out their actions simultaneously. The player must finish all of his actions with one unit before beginning actions with another. The exception to this rule is units activated together with a leader that begin the activation stacked together: they may combine their fire when attacking an enemy light target (see the fire rules). The activated leader is not required to perform the same actions. Units may be activated only once, after which they are marked with a marker or turned 90 degrees.
4.2. Unit Actions
When a unit is activated, it may carry out one of the following actions:
- move its full movement allowance;
- fire at enemy units at full attack strength;
- move up to half of its movement and fire at half attack strength;
- go on overwatch.
5. Movement
When a unit is activated to move, the player moves his unit from hex to hex, pausing so that the other player can check, and resolve overwatch if it is possible, continuing until the player has spent all of his movement points.
5.1. Terrain
Each type of terrain has a movement cost for foot units and for vehicles, as listed on the Terrain Effects chart. A unit spends movement points when entering each new hex, equal to the cost of that terrain. If a unit does not have enough points, it may not enter the hex. There is no minimum move as in other games. Units may not enter terrain that is marked as prohibited for that type of unit (foot / vehicle) on the terrain chart.
If a hex contains several types of terrain, the unit must pay the movement cost of the one that gives it the greatest protection. A unit may not enter a hex whose terrain is prohibited to its unit type.
Example: vehicles are forbidden to enter hexes of terminal, parking or control tower.
5.2. Road Movement
Road movement is carried out when a vehicle moves from hex to hex connected by a road. When moving along a road, the unit spends the cost of the road. When using road movement, a vehicle still receives the best defensive terrain modifier available in the hex if it is attacked. Note that roads are the only way for vehicles to cross wooded streams and other rough terrain that is normally forbidden to enter.
5.3. Transport
Some vehicles are marked as transports. They are infantry fighting vehicles that can be used to carry infantry units. Infantry fighting vehicles may carry one infantry unit (marked by the rifle symbol) plus one leader / heavy weapon. Trucks may carry three infantry units (marked by the rifle symbol) plus one leader / heavy weapon.
During the activation of an infantry unit, it may board a transport located in the same hex, paying the cost of one movement point. After boarding a transport, the infantry unit is placed under the corresponding vehicle counter, and may not carry out any actions until it has been unloaded. Unloading takes place during the activation of the vehicle, at the cost of one movement point of the vehicle. Passengers are unloaded into the same hex as the transport. If a transport unit is destroyed while carrying passengers, the passengers are destroyed too.
5.4. Movement of Suppressed Units
Units that are suppressed by enemy fire may either remain in the same hex or withdraw from an enemy unit within their line of sight, but only into hexes with an equal or greater defensive value than their current location, if they remain within enemy line of sight.
5.5. Hexes Occupied by the Enemy
When activated by a leader, units may enter hexes that contain enemy units. Units may leave hexes containing enemy units at any time. Moving units individually pass through the return fire of the enemy units in the hex (see 6.10 Return Fire).
6. Combat Fire
6.1. Line of Sight
For a unit to make a fire attack, the enemy unit must be within line of sight. The attack must be declared before the line of sight is checked. If the target is blocked, the attack is not resolved. Line of sight is determined by drawing a straight line between the centre point of the attacker's hex and the centre point of the target's hex. If at any point between the attacker and the target the line of sight crosses any part of a sight-blocking terrain feature (buildings, woods, etc.) according to the Terrain Effects chart, the attack is blocked. Terrain in the attacker's or the target's hex never blocks line of sight. Units always have line of sight to targets within their own hex and in adjacent hexes.
6.2. Resolving Fire
If the firing units are not in a hex with the leader who activates them, all fire attacks are single attacks against one defending unit. Troops loaded into vehicles may not fire until they have been unloaded. Once line of sight has been checked, compare the modified attack factor of the attacking unit with the modified defence factor of the defending unit. The attack and defence modifiers are listed on separate tables. All attack and defence modifiers are added together. Subtract the final defence value from the final attack value and consult the Combat Results table. Find the differential column matching the attack / defence differential, then roll 2D6 to determine the result.
6.3. Leader Activates a Fire Group
If several units (infantry and vehicles) in the same hex are activated by a leader in that same hex, they may combine their light fire values against one enemy light unit. Combined attacks may not be used for overwatch fire. Heavy targets are never subjected to combined attacks. A leader may coordinate only one combined fire group per activation; however, he may also activate additional units to carry out regular moves and individual fire attacks. The leader of an activated fire group is subject to possible sniper attacks.
6.4. Snipers
In the dense industrial and urban environment, snipers present a constant threat. Each time a leader directs an attack of a fire group that includes more than one other friendly unit (for example, one leader and two or more combat units), an initial roll of 11 or 12 triggers a sniper attack.
When a sniper is activated, the leader's team that directed the attack immediately flips to its wounded side. If it was already wounded, it is eliminated. After the effect on the leader has been resolved, all other units in the hex are immediately suppressed.
6.5. Fire Restrictions
Players may target any enemy units in the target hex, except leaders. A leader may be attacked only if it is the only unit in the hex. If another unit is present, it is assumed that they form a larger target and that the leader is busy coordinating the troops. Units may fire into hexes containing units of their own side without penalty.
When attacking heavy targets, units use their heavy attack factor. When attacking light targets, the light attack factors are used. Units that do not have a heavy or light attack factor may not attack enemy units of that type.
6.6. Combat Results
The Combat Results table has four possible results:
- no effect ( - )
- suppressed (P)
- takes losses (X)
- eliminated (XX)
When a unit is suppressed by fire, it immediately loses overwatch status upon receiving a suppression marker. Infantry units that take losses are flipped to the light side, to reflect growing losses and wavering will to fight. In addition, they are marked with a suppression marker (that is, they are suppressed) and lose overwatch status. Any militia counter that is in a hex with a unit that takes losses or is eliminated will be suppressed automatically. Infantry units that take losses a second time are removed from play, since they have either suffered too many casualties or lost too much cohesion to continue as an effective combat force. A heavy weapons team has no reduced side and is removed from play immediately. A vehicle that takes losses is flipped to its damaged side. Whenever a unit is eliminated, the side's Initiative is reduced by one.
6.7. Leader Casualties
A leader is wounded if its team takes losses. A wounded leader may no longer direct fire groups, and when it makes group activations, it may activate only units in its own hex, not in adjacent hexes. If a wounded leader's team takes losses again, it is eliminated. Whenever a unit is eliminated, the side's Initiative is reduced by one.
6.8. Suppression Effect
The ability of a suppressed unit to move and fight is strongly restricted. It may remain in its current hex, withdraw from enemy units, or, if it begins its turn outside the enemy's line of sight, it may not enter the enemy's line of sight, as described in detail earlier. It may not fire at all (its overwatch or reaction status is removed). During the Initiative phase, all suppression markers are removed. A unit that is already suppressed and is suppressed again suffers no additional harmful effects. Suppressions do not accumulate. A suppressed leader may not activate other units (see 5.0), but may still call in fire support (see 8.0). A suppressed vehicle may still be used to call in fire support.
Note: the cross-references "5.0" and "8.0" are printed this way in the source translation; fire support is described in section 7.
6.9. Overwatch
A unit that spends its entire activation on overwatch is marked with an "overwatch" marker. It may then fire during the activation of an enemy unit. It may fire at full strength in response to any enemy movement or fire attack within its line of sight. It may fire at any moment during the movement of an enemy unit within its line of sight, or immediately after an enemy fire attack in its line of sight has been resolved. A group attack by a leader is not permitted for overwatch fire: each unit must attack individually.
The overwatch status remains until the unit fires or suffers a side effect of combat. After acting, the unit is marked as having moved. If a unit on overwatch and an enemy counter move into its hex, it may fire at full strength rather than at half, as with defensive fire.
Units may also be placed on overwatch at the start of a scenario. This represents prepared defences. Units that begin the game on overwatch may not be activated during the first turn of the scenario. It is important to weigh the advantages and disadvantages of prepared fire positions against tactical flexibility when setting up units.
6.10. Defensive Fire
Each time a unit moves into or out of a hex containing enemy units, it is subjected to one defensive attack from ONE enemy unit in that hex, at half strength, that has not previously carried out defensive fire. Previously activated / acted units have the right to carry out reaction fire, but suppressed units do not. If several units are activated together by a leader, they still move one unit at a time, and each unit is subjected to fire individually when moving into or out of an enemy hex.
Resolve the fire as if it had taken place in the same hex in which the enemy was located. Note that the half attack strength is then doubled again because of fire in the same hex. If the enemy unit is in overwatch status, its attack strength is not halved before doubling when it fires. The unit then loses its overwatch status. After the corresponding unit has resolved its return fire, mark it with a marker to show that it may not carry out return fire again. The firing enemy unit still has the right to be activated this turn, if it has not already been activated.
If defensive fire results in suppression or losses, and the moving unit is trying to enter an enemy hex, it "rolls back" and returns to its previous hex. If a moving unit leaves an enemy hex, it continues its movement to its destination.
Note that it is possible to move into and out of an enemy hex in the same turn, provided that the moving unit has enough movement points and is not adversely affected by an enemy fire attack.
7. Fire Support
Fire support is a general term that covers all off-board assets, including mortars, field artillery, self-propelled howitzers, multiple rocket launchers, helicopters and aircraft.
7.1. Availability of Fire Support
Each scenario specifies what fire support, if any, each side has as part of its forces. The available fire support assets are represented by markers, which are used to build and resolve attacks on the map. Each fire support asset in a scenario specifies the type of equipment, the number of available barrages, the attack strength, the availability of smoke, and a reliability number. Place the corresponding fire support markers to one side, where they will be readily available during play.
Each asset may call a barrage only once per turn. Once an asset has used up all of its barrages, it may not be used again in the game. For example, during a scenario there may be four barrages available from a howitzer battery, but only one of these barrages may be called per turn. Players may use paper and pencil, or additional fire support markers of the same type on the turn track, to track barrage usage.
7.2. Placing Fire Support
Fire support is built during the Initiative phase of each turn. Each player places any fire support markers they wish to use on target hexes. For a hex to be designated as the target of a fire support barrage, a suitable unit must be a spotter. Spotters are limited to leaders and armoured vehicles (APC / tank). Each spotter may establish only one fire support counter, and the impact location must be within the line of sight of the spotter.
After all fire support has been placed, the players roll dice for each attack to see whether it arrives this turn or at the start of the next turn. Roll 1D6; on a result equal to or less than the reliability number of the fire support, it strikes immediately. On any other result, the fire support marker remains on the game map until it is resolved during the Initiative phase of the next turn.
7.3. Resolving Fire Support
When fire support is resolved, there is a chance that the fire support may scatter from the target hex. Roll 1D6; on a result of 5 or 6 for rockets / MRLs, or 6 for ordinary artillery and air strikes, the fire scatters. Resolve the scatter: first roll 1D6 to determine the direction of scatter (1 is north, then clockwise 2–6). Then roll 1D6 again on the distance scatter table to determine how many hexes it scatters in that direction. Fire support attacks can never be combined. If two barrages are aimed at the same hex, the result is resolved separately for each.
There are two possible types of fire support ammunition: high explosive and smoke. When resolving a high explosive fire support attack, resolve it like any other combat fire, except that it attacks all units – enemy and friendly – and leaders in the target hex and in each adjacent hex individually. The strength of the fire support is halved when attacking heavy targets. The strength of the fire support is halved for adjacent hexes. These modifiers are cumulative, so for heavy targets in an adjacent hex the fire support strength is halved twice, and fractions are dropped.
When attacking multi-storey buildings, such as airport terminals, fire support attacks are considered to hit the upper floor at full strength, and the hex/floor directly below at half strength, as if it were an adjacent hex. Adjacent upper floors of the building are also attacked at half strength. Hexes that are below and beside are not attacked.
7.4. Smoke
When firing smoke, carry out the scatter determination as before, then place the smoke counter on the final target hex. Smoke blocks all line of sight for infantry units through the hex in which it lies, and reduces any fire into that smoke hex. Most modern combat vehicles are equipped with some optical equipment that allows them to see at least partially through smoke screens. Vehicles may fire through one smoke hex at half strength, but may not fire through more than one smoke hex. Smoke does not halve the strength of fire support. Smoke is removed at the start of the next turn during the Initiative phase.
8. Special Units
8.1. Wrecks
Each time a vehicle unit takes losses, it is removed and flipped to its wreck side. Any vehicle counter entering a hex containing a wreck using the road must immediately stop its movement when it moves along a roadway blocked by a destroyed vehicle. Eligible units may go around the wreck and use another terrain in the hex (unless prohibited) to avoid the blocked road. They must pay the full cost of moving into the other terrain in this hex, and into the next hex they enter. Wrecks cannot be cleared and are not counted when counting units in a hex; a single wreck marker indicates any number of destroyed vehicles and blocks the roadway in the hex.
8.2. Heavy Weapons
To fire, heavy weapons must be set up, such as anti-tank guided missiles and automatic grenade launchers, marked with an * on the reverse side. These weapons may never move and fire during the same activation. They may either move at full movement allowance or fire during an activation, but not both. These weapons also may not fire at enemy units in the same hex, because they are not manoeuvrable or agile enough for close combat, and in some cases (for example, ATGMs) have minimum ranges.
9. Special Terrain – Multi-Storey Buildings
The two main terminal buildings, the parking garage and the control tower at the airport are large multi-storey buildings. These hexes are marked with a red triangle in the centre of the hex and are subject to special rules. These buildings receive higher defensive modifiers – as listed on the Terrain Effects chart – than regular built-up urban terrain, to reflect the resilience with which they withstood heavy bombardment, and the size and complexity of structures that provided many possible cover and firing positions.
9.1. Movement Effects
These buildings, and only these buildings, have upper levels. A unit may move to an upper level as a normal movement action, paying the usual terrain cost. Place an upper-level marker under the unit occupying the upper level and above the units on the lower level. For all game purposes, the levels directly above and below are considered adjacent hexes. Units may never move into a new hex and a new floor in a single move; they must first move up or down and then from side to side.
9.2. Fire Support Detection Effects
Leader teams that occupy the upper floors of the new terminal building or the control tower may direct fire support onto any point on the map. They may also be spotted from any point on the map for the purposes of fire support attacks. These exceptions to the normal line of sight rules apply ONLY to detection for fire support and NOT to direct fire. These high points were excellent vantage points on the battlefield and were often used to coordinate fire support.
9.3. Fire Support Resolution Effects
As previously detailed (7.3), fire support attacks that hit the upper level of these buildings hit with their full attack value, and those that hit the lower floor and the adjacent upper floor hit at half the attack value.
10. Scenarios
A side is considered to control a hex if its units are currently the only ones occupying it, or were the last to occupy it. If units of both sides occupy the same hex, it is considered contested / uncontrolled. For multi-level hexes, both levels must be controlled, or one level must be controlled and the other must be empty.
10.1. The First Battle for Donetsk Airport, 26 May 2014
On the night towards 25 May, the terminal buildings of the airport were occupied by separatist forces of the Donetsk People's Republic, made up of about 200 local militiamen and foreign volunteers of the "Vostok" battalion, who placed observation teams and guards on the roofs and upper floors. These troops were transported by truck and were equipped with light small arms, and had no heavy or specialised anti-aircraft systems.
After the militants ignored an ultimatum from the Kiev government to leave the airport, the authorities attacked. Paratroopers of the 3rd Special Purpose Regiment attacked with direct air support from Su-25 fighters and Mi-24 attack helicopters. The speed and ferocity of the attack caught the separatists by surprise. They did not expect the government to fire on the airport buildings, fearing to damage them, and had left most of their heavy weapons in Donetsk. The separatists were driven out of the airport after heavy losses. About 40–50 fighters were killed in the fighting, many of them when an RPG struck a truck fleeing to Donetsk. Ukrainian forces suffered no losses.
Separatists / Donetsk People's Republic (DNR): elements of the "Vostok" battalion and local militia: Initiative: 8; Wavering points: 3; Set up first, anywhere within or within 3 hexes of the new and old terminal:
- 6x militia (local residents);
- 3x infantry units (foreign volunteers);
- 1x RPG;
- 1x heavy machine gun;
- 3x leaders;
- 1x truck.
UKRAINIAN ARMY AND SPECIAL FORCES: Elements of the 3rd Special Purpose Regiment: Initiative: 9; Wavering points: 3; Set up second, everywhere along the western and northern edges of the map:
- 6x infantry units;
- 3x leaders;
- 6x BTR-80;
- 4x Mi-24 helicopter strikes (strength: 16, smoke not available), reliability: 3;
- 4x Su-25 air strikes (strength: 16, smoke not available), reliability: 3.
Victory condition: the side that scores more VP wins.
- Control of each hex of the new / old terminal is worth 2 VP (at the start of the game the old / new terminal are controlled by the DNR);
- Each enemy infantry unit destroyed: 1 VP;
- Each DNR unit crossing hex column x10 after turn 5: 1 VP.
Number of turns: 8
Special rules: none
Notes: This is a good scenario for learning the basic game rules (fire support, fire groups, clearing operations). The DNR must hold on to some part of the terminals until the end of the game. Will they withdraw to make the Ukrainians pursue them, or concentrate on fire support? Will they try to inflict losses on the Ukrainians during their approach, or dig in in the terminals and make them come after them? Will they try to evacuate after the 5th turn? The Ukrainians lack infantry to clear the terminals without preparatory fire support and BTR fire range. How long will the Ukrainians weaken the DNR with fire, and when will they send infantry on the clearing operation? What is the better approach – quickly across the airfield, or more slowly through the more built-up terrain under cover, to minimise losses?
10.2. The Second Battle for Donetsk Airport, Open Actions (28 September 2014)
After a summer of sporadic shelling and random fire, the DNR launched a major offensive. Having learned the lessons of defeat in the spring, the separatist forces mobilised more heavy weapons, from looted stocks in government-held territory and supplied by the Russians. They included a number of T-64 and T-72 tanks, as well as BM-21 "Grad" rocket launcher vehicles. At this stage of the conflict, Russian-supplied air defence systems negated Ukraine's air superiority.
Fighting was intense on 28 September, when the separatists advanced north from the city outskirts and into the outlying areas of the airport. Nine Ukrainian soldiers were killed, more than twenty were wounded, and one BTR destroyed a separatist tank. The separatists also suffered an undisclosed number of casualties, probably in the tens. Both sides made active use of artillery, and the shelling began to have its first serious effect on the airport grounds. By 1 October the DNR forces had seized a number of large buildings, which they would subsequently use as bridgeheads and concealed approaches for attacks on the terminals.
UKRAINIAN ARMY AND SPECIAL FORCES: Initiative: 10 Wavering points: 4 Set up first anywhere north of the line of hexes 10, which includes the river (4 hexes from the southern side):
- 9x infantry units;
- 1x heavy machine gun;
- 2x RPG;
- 3x leaders;
- 3x BTR-80;
- 1x Konkurs ATGM;
- 1x T-64BM;
- 4x howitzer barrages (strength: 12, smoke available), reliability: 5
SEPARATISTS / DONETSK PEOPLE'S REPUBLIC (DNR): Initiative: 11 Wavering points: 4 Set up everywhere along the southern edge of the map:
- 6x militia;
- 6x infantry units;
- 1x heavy machine gun;
- 2x RPG;
- 1x recoilless gun;
- 4x leaders;
- 1x T-64BV;
- 1x T-72B3;
- 3x BM-21 barrages (strength: 16, smoke not available), reliability: 4;
- 3x howitzer barrages (strength: 12, smoke available), reliability: 4.
Victory conditions:
- DNR victory: the DNR controls 8 or more building hexes on the airport grounds (within the boundaries NE=W4, NW=K4, SW=K10, SE=W10) at the end of the scenario;
- Draw: the DNR controls 4–7 building hexes on the airport grounds at the end of the scenario;
- Ukrainian victory: the DNR controls fewer than 4 building hexes on the airport grounds at the end of the scenario.
Special rules: none
Number of turns: 8
10.3. Counterattack (November 2014)
Throughout October, because of heavy shelling, damage to the buildings held by the positions, and constant infiltration from the seized outbuildings, the Ukrainians withdrew from the old terminal to the better-protected new terminal. Both buildings began to crumble, and the tarmac was strewn with wrecked armoured vehicles. The battle for the airport became purely symbolic, as the objects were damaged and useless.
The recently seized old terminal provided an ideal bridgehead for DNR attacks on Ukrainian positions in the new terminal, and probing attacks became a daily reality. During November the Ukrainian army conducted a series of concentrated attacks to try to recapture the old terminal and retain a foothold there, which would deprive the DNR forces of a concealed approach. These back-and-forth offensive operations continued through December and even in the final weeks of the siege in January.
UKRAINIAN MECHANISED AND AIRBORNE FORCES: Initiative: 12 Wavering points: 4 Set up anywhere north of row 7 and west of row F:
- 9x infantry units;
- 1x heavy machine gun;
- 2x RPG;
- 1x AGS-17;
- 4x leaders;
- 2x T-64BM;
- 2x BM-21 barrages (strength: 16, smoke not available), reliability: 4;
- 4x howitzer barrages (strength: 12, smoke available), reliability: 5.
SEPARATISTS / DONETSK PEOPLE'S REPUBLIC (DNR): Initiative: 10 Wavering points: 3 Set up east of row N and south of row 8:
- 3x militia;
- 3x infantry units;
- 1x heavy machine gun;
- 1x RPG;
- 1x recoilless gun;
- 3x leaders;
- 1x BTR-80;
- 1x T-72B3;
- 1x T-64BV;
- 2x BM-21 barrages (strength: 16, smoke not available), reliability: 4.
Victory conditions:
- Ukrainian victory: the Ukrainians control all 3 hexes of the old terminal at the end of the scenario;
- Draw: the Ukrainians control at least 1 hex of the old terminal at the end of the scenario;
- DNR victory: the DNR retains control of all 3 hexes of the old terminal at the end of the scenario.
Special rules: the Ukrainian player automatically has the initiative on the first turn.
Number of turns: 6
10.4. Final Assault (January 2015)
In the first weeks of January, the Ukrainian soldiers were completely cut off inside the new terminal. The control tower collapsed on 13 January, depriving them of critical observation of patrols and artillery. The DNR also moved forces to fight for the neighbouring town of Peski, in the hope of depriving the Ukrainians of access to their besieged troops at the airport. The Ukrainians could only resupply the troops and evacuate casualties along the "road of life", which ran from Peski through approach roads to the far end of the highway. They then drove across the runway in their vehicles to park under the passenger gates before withdrawing. All of this took place under continuous fire.
On 14 January the DNR carried out a major assault on the new terminal, seizing control of a third of the building and inflicting serious damage on the Ukrainian positions. On 17 and 18 January the Ukrainians began a counterattack with troops and a full tank company from Peski. This killed at least 15 DNR personnel and restored control of the new terminal to the Ukrainians.
The final assault took place over two days and began on the 19th, when the DNR succeeded in penetrating the upper floors of the terminal building, driving the Ukrainian troops down to the lower floors. Explosive devices were then detonated, dropping sections of the second floor onto the Ukrainian positions, which led to heavy casualties. Further fighting and extensive destruction of the floors took place on the 20th. By the 21st the Ukrainian forces were finally forced to evacuate, and the airport was under full DNR control. In the last two days of fighting, more than 40 Ukrainian soldiers were killed, and dozens were wounded and evacuated or taken prisoner.
Many combatants claimed that these final attacks and demolitions were carried out by Russian special forces after Moscow grew tired of the separatists' failure to gain control of the airport. Observers reported Russian accents and military jargon in radio traffic, and an increased presence of T-72B3 and purportedly T-90 tanks in the area. The airport was also shelled by 240 mm "Tyulpan" self-propelled mortars, which were not in the Ukrainian arsenal.
This scenario represents some of the brutal fighting that took place on 19 and 20 January and led to the final withdrawal of the Ukrainian forces. The Ukrainians start with their infantry garrison and receive scant armour and mechanised reinforcement from the western edge of the board to help them evacuate.
UKRAINIAN MECHANISED AND AIRBORNE FORCES: Elements of the 3rd Battalion of the 80th Air Assault Brigade and the 90th Separate Airborne Battalion of the 81st Air Assault Brigade: Initiative: 11 Wavering points: 3 Set up: anywhere in the new terminal, the car park and the building cluster i3, j4.
- 6x infantry units;
- 2x RPG;
- 1x AGS-17;
- 1x heavy machine gun;
- 1x Konkurs ATGM;
- 3x leaders;
- 2x BM-21 barrages (strength: 16, smoke not available), reliability: 4;
- 4x howitzer barrages (strength: 12, smoke available), reliability: 5.
Reinforcement (evacuation group): arrives from the western edge of the map onto the runway on turn 3:
- 2x T-64BM;
- 6x BTR-80;
- 3x infantry units;
- 1x leader.
SEPARATISTS / DONETSK PEOPLE'S REPUBLIC (DNR): Initiative: 12 Wavering points: 3 Set up anywhere outside the Ukrainian side's zone of control.
- 1x special forces demolition team (see special rules);
- 6x militia;
- 6x infantry units;
- 1x heavy machine gun;
- 2x RPG;
- 1x recoilless gun;
- 4x leaders;
- 3x T-64BV;
- 1x T-72B3;
- 3x BM-21 barrages (strength: 16, smoke not available), reliability: 4;
- 4x howitzer barrages (strength: 12, smoke available), reliability: 5.
Victory conditions:
- Ukrainian victory: the Ukrainians control at least 1 hex in the new terminal at the end of the scenario.
- Draw: the Ukrainians do not control any hexes in the new terminal at the end of the scenario, but evacuate at least three of the starting infantry units – not reinforcements from turn 3 – from the new terminal (see special rules).
- DNR victory: the DNR controls all hexes in the new terminal and does not allow the Ukrainians to evacuate three or more infantry units.
Number of turns: 8
Special rules:
- The control tower is destroyed; rough terrain, blocks line of sight.
- Special forces demolition team: may be placed anywhere on the upper floor of the new terminal building after the Ukrainian player has finished setting up. It automatically receives the first activation on turn 1. It attacks all units on the upper floor at strength 8, and attacks all units on the lower floor at strength 6. Remove the counter after use.
- Evacuation: to fulfil the evacuation victory condition, the Ukrainian player must bring the infantry units that start the game inside the new terminal (not reinforcements) to the western edge of the map. They must board one of the BTR-80s that arrives on turn 3, and then move to the western edge of the board without being destroyed.
11. Game Notes
Donetsk is unlike most tactical games of this level on the market. Firstly, it differs in scale: units are relatively small (squads, individual teams and vehicles) while hexes are relatively large (approx. 150 m). This was done to model the relative emptiness of modern combat compared with previous conflicts. Modern combat units move more slowly and more cautiously because of the increased range and lethality of modern weapons. These factors explain why the foot movement factor is low, and why there are no "close combat" rules such as those in tactical simulations of the earlier period of the conflict.
Secondly, although the battle has been called a "mini-Stalingrad", unlike the forces that took part in that decisive battle of the Second World War, the forces in these battles were very fragile. They could not sustain many setbacks and casualties before a side lost its aggressive spirit and its will to fight. The central game mechanic that depicts this, and which the player must manage, is initiative / wavering. Protecting your Initiative level is critical to preserving tactical options and chances of victory. Early on, the player with the highest Initiative usually gets the first activation – especially in close combat in the terminals, where the ability to fire first or to extract oneself from a bad situation before the other side can fire may be critical. Later, if your Initiative level falls to your Wavering level, your options become very limited. If attacking, the player is left with long-range fire in the hope of wearing down the defender. If defending, the other player may be more aggressive and it becomes very difficult to hold important objectives in the face of a determined attack. Therefore, being sensitive to casualties is crucial to winning.
Initiative can only decrease during a scenario through eliminated units. The obvious goal of the player is therefore to minimise his own losses, inflict losses on the enemy by manoeuvring and attacking / defending, and to meet the scenario's victory conditions. Managing the time allotted to a scenario can be a tight balancing act. A few bad mistakes and good enemy rolls can bring the battle to an end relatively quickly. Or spending too much time on long-range / preparatory enemy fire before attacking targets can cause the scenario time to run out.
Infantry units (with reduced sides) are somewhat resilient to losses, but once they are halved, the player must decide whether to keep them in the thick of the battle and risk losing them and falling in Initiative, or to pull them back from the main battle to a support role. Of course, the enemy player may deliberately target these halved units to eliminate them and reduce the enemy's Initiative level. If the enemy has a spotter on the upper floor of one of the terminal / tower hexes, there is nowhere on the field to hide from their fire support. Heavy weapons and vehicles are powerful and have no halved side, so the player must be careful when sending them into battle, since a single result eliminates them and reduces Initiative. The player's most powerful weapon is their fire support (artillery / aviation). High fire values combined with attacks on all units in the hex and adjacent hexes do a great deal of damage. If units are caught by enemy fire support in relatively open hexes, the consequences can be catastrophic. Moreover, if units are concentrated while preparing an attack, a single well-placed enemy fire support mission can ruin the attack. The player must struggle with the tension between concentrating for greater attack strength and the risk from enemy fire support, using concentration to inflict extensive damage. One of the safest places on the field from enemy fire support is adjacent to, or in the same hex as, enemy units, since fire support attacks both sides. The safest place from this point of view is on the lower floor of the terminal / car park / tower. Fire support attacks the upper floor at full strength, while the lower floor is treated as an adjacent hex, which halves the fire support. Ukrainian troops survived for several weeks in these places against enemy attacks. The main use of the upper floor is directing fire support, so the player should place a leader on the upper floor. If the player uses one of his precious fire support barrages to destroy an enemy leader team and prevent its actions, that is another decision the player must take. Finally, fire support is not unlimited.
As for the actual use of units, the most powerful way to use units is in fire groups with a leader against light targets. Especially when attacking good defensive terrain, this may be the only way to generate enough firepower against the enemy's light target defences while risking sniper fire. We have seen groups of such attacks immobilised for most of a scenario because they were not in the best defensive terrain, and the enemy kept them suppressed with judicious use of fire support. As for vehicles / heavy targets, their best use is either against other heavy targets – tank against tank or BTR – or to stand away from the main fighting in the terminals and provide light / concentrated fire support.
The game is a balancing act among numerous elements – minimising your losses, inflicting them on the enemy through effective use of fire support and manoeuvre / fire, and meeting the scenario's victory conditions – all within the time allotted. Good luck, and enjoy.
16. Reference Tables
The source numbers its reference tables 16.1–16.5; the numbering skips sections 12–15, as printed.
16.1 Terrain Effects
| Terrain | Foot movement | Vehicle movement | Foot protection | Vehicle protection | Blocks LOS |
|---|---|---|---|---|---|
| Wooded stream | 2 | prohibited | 0 | prohibited | no |
| All water hexes | prohibited | prohibited | 0 | 0 | no |
| Road / asphalt / car park | 1 | 1 | 0 | 0 | no |
| Open ground | 1 | 2 | 0 | 0 | no |
16.2 Fire Modifiers
| Modifier | Effect |
|---|---|
| Same hex | doubled |
| Normal range | normal |
| Beyond normal range, up to double range | halved |
| Defensive fire when entering / leaving a hex | halved, then doubled |
| If the target has overwatch status | normal / doubled |
| Fire during a single-unit activation (moving) | halved |
| Firing into a smoke hex | halved |
| Vehicle firing through a smoke hex | halved |
| Fire support against heavy targets | halved |
| Fire support against adjacent hexes | halved |
16.3 Combat Results
Rows are the 2D6 roll; columns are the attack / defence differential.
| 2D6 | -5 or less | -4 | -3 | -2 | -1 | 0 | +1 | +2 | +3 | +4 | +5 or more |
|---|---|---|---|---|---|---|---|---|---|---|---|
| 2 | P | X | X | X | X | X | X | X | X | X | XX |
| 3 | P | P | P | X | X | X | X |
16.4 Fire Support Scatter Distance
| 1D6 | Scatter distance |
|---|---|
| 1–2 | 1 hex |
| 3–5 | 2 hexes |
| 6 | 3 hexes |
16.5 Unit Actions When Suppressed
| Unit type | Activation | Movement | Fire combat | Fire support |
|---|---|---|---|---|
| Infantry units | only itself | may remain in the current hex, withdraw from enemy units in their line of sight, but only into a hex with an equal or better defensive modifier than their current hex if they remain in enemy line of sight; if they begin outside enemy line of sight, they may not enter enemy line of sight (6.4) | not permitted (normal, reaction or overwatch) | none |
| Leader | only itself; may not activate other units or form groups for combined fire | as infantry | not permitted (normal, reaction or overwatch) | may still direct fire support |
| Vehicle | only itself | as infantry | not permitted (normal, reaction or overwatch) | may still direct fire support |
Phase Summary
Initiative Phase (summary)
- Remove smoke
- Remove suppression
- Resolve delayed fire support
- Plan new fire support – Ukraine first
- Compare initiative
Action Phase (summary)
- The initiative player activates
- The non-initiative player activates