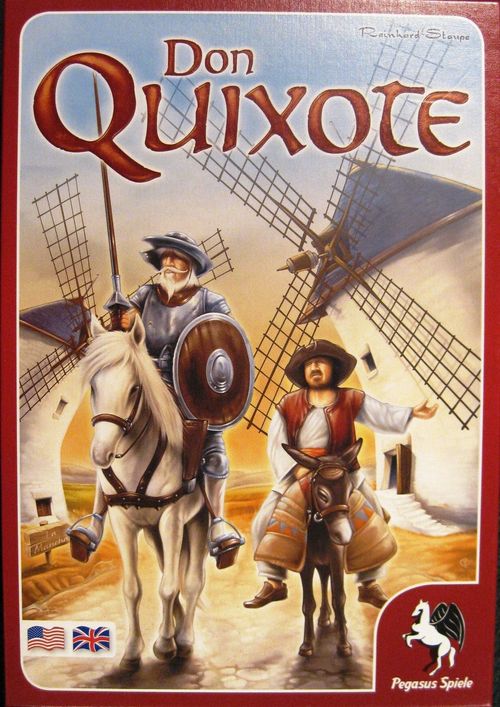
Don Quixote
Don Quixote Rulebook
Table of Contents
Table of Contents
Contents
- 4 Principalities (in 4 different colors)
- 1 scoreboard
- 4 scoring summaries (in 4 colors)
- 96 tiles (24 in each of the 4 colors)
- 4 tokens (in 4 colors)
- 24 position cards
Set Up
Each player receives 1 Principality, 1 scoring summary, and 1 set of 24 tiles, all of a matching color. The scoreboard is placed in the center of the table, and the tokens of all players' colors are placed on it on the castle between space 60 and space 1.
Shuffle all 24 position cards and place them as a deck face down next to the scoreboard. Turn over the top card of the deck: the letter and number on it correspond to a field in your Principalities. All players must place their 6-point castle tile on the given field.
Turn over a second card. This card determines the field on which everyone places his 4-point castle tile.
Note: There must be at least one field free between the two castles. They may not directly abut each other – including diagonally. If the luck of the draw places them next to each other, draw a new card for the 4-point castle and mix the previous one back into the deck.
Place your remaining 22 tiles face-down in front of you and shuffle them well.
Example: After each player has received a Principality, a scoring summary, and set of 24 tiles, Vanessa turns the top two position cards, revealing F1 then C2. All players put their 6-point castle face-up on F1 and their 4-point castle face-up on C2. Then all players turn their remaining 22 tiles face-down and shuffle them well.
Game Play
The game consists of 3 rounds. In the first round, each player places 9 tiles in his Principality, in the second round 7 tiles, and in the third round, the remaining 5 (+1) tiles. A score is calculated after every round.
The First Round
Each player turns 9 of his 22 tiles face-up at random. (This will ordinarily give each player a mix of tiles different from all other players' in the first round.)
Example: Vanessa turns over 9 tiles at random and plays the first round with them.
Now turn over the top position card in the deck. Each player picks any one of his 9 face-up tiles, and must place it on the field of his Principality given on the card. The piece may be rotated 180° before being placed. (See below for an exact description of how tiles may be placed.)
Example: The position card indicates that all players must place one of their face-up tiles on field G3. Vanessa decides to place one of her knight tiles. Before setting it on G3, she turns it 180°.
Turn over the next position card. You now have eight face-up tiles at your disposal, from which you can pick any one to play on the indicated field in the same manner as the first. Play continues in this fashion until you have placed all 9 face-up tiles on your Principalities. For each position card, the players may freely choose which tile to place, but once placed, a tile must not be moved.
After the 9th tile is played, the first of three scores is calculated. (An exact description of Scoring follows below.)
The Second Round
After the first score is determined, the second round ensues. Each player turns over 7 of his remaining 13 tiles at random.
Example: Vanessa turns over 7 more tiles at random. She plays the second round with them.
Play continues in the manner described above until all 7 tiles are laid, and at the end of the round, the second-round score is calculated.
The Third and Final Round
After calculating the second-round score, the third and final round ensues. Each player turns up 5 of his remaining 6 tiles at random. Then, all players turn over their last tile and place it aside. We recommend turning it 90° to clearly distinguish it from the others, as you must play this tile last.
Example: Vanessa first turns over 5 more tiles. She then places the sixth tile somewhat to the side and turns it 90°. She must place this tile in her Principality last.
As in the first two rounds, you place your first 5 tiles in the Principality as usual. As before, it's entirely up to you which tile you place when. Finally, you place the tile set aside on the last free field of your Principality. The third-round score follows.
The game is now over, and the player with the most points combined from all three rounds' scores wins.
Placing Tiles
You should attempt to structure your Principality in such a way that you create a well-connected road network. Of course, this isn't always possible. Consequently, some roads will lead nowhere or some fields will be isolated.
It is permitted (and will often occur) that roads not be connected to each other. But with some luck and skill, you'll be able to build a network of roads across many tiles connecting as many churches, windmills, knights, and the two castles as possible. (Under Scoring below, you'll learn how many points different connections earn.)
Please note the following things:
- Roads end at castles! Each castle has 2 road origins. The roads do not pass through the castles. The castles separate absolutely everything from everything else!
- Every tile has two halves! The halves are divided by a small mark in the middle of the cards' sides.
- Defense of the Realm: All knights which are placed on the edge of the Principality whose tile half is directly connected by road to the outermost edge of the Principality (that is, not via other tiles or the other half of the same tile) contribute to the Defense of the Realm, using the points on their shields. These knights do not need to be connected to each other.
Example: Here are a couple examples of connections in Vanessa's Principality after the first round:
- 2 knights (on B2 and D3) are connected with Vanessa's 4-point castle. These knights are not connected to each other, because they're separated by the castle.
- The 6-point castle is not connected to any knights.
- 2 windmills (on D2 and C3) are connected to each other. The windmill on B1 is separated from the other two by the castle.
- Vanessa's Principality has only 1 church which is not connected with anything at the moment.
- Only the two knights on D3 and G3 are contributing to the Defense of the Realm, with their shields worth 1 and 2 points, for a total of 3 points. The knights on B2 and G2 are not on the edge. The knight on H2 is on the edge, but his half-tile is not directly connected to the border of the Principality, its connection is via the other half of his tile.
Scoring
Each of the three scores is calculated in the same way. The only exception is a bonus for the most valuable group of connected knights that is only scored once in the third-round score.
The 6-point castle is worth 6 points in each score if you:
- connect it to at least one knight after the first round,
- connect it to at least two knights after the second round, and/or
- connect it to at least three knights after the third round.
The knights' shield-values don't matter here.
Score the 4-point castle exactly like the 6-point castle, it is just worth 4 points. It is absolutely permitted (and indeed very smart) to connect one or more knights to both the 6-Castle and the 4-Castle. Such knights count for both castles!
Churches are worth points when they're connected to other churches.
- A single church is worth no points.
- Exactly 2 churches connected to each other are worth 1 point per church, that is, 2 total points.
- For 3 or more churches connected to each other, you receive 2 points per church. (E.g., 12 points for 6 connected churches.)
If a player has several separate groups of churches, he receives points for each of these groups. (For a detailed example of scoring, see below.)
Windmills are worth points when they're connected to other windmills. Score them exactly like churches. (There are no points for connecting windmills and churches.)
A successful Defense of the Realm is worth 5 points in each scoring, if:
- in the first round, knights with a total value of at least 4 shield-points contribute to the Defense of the Realm,
- in the second round, knights with a total value of at least 8 shield-points contribute to the Defense of the Realm,
- in the third round, knights with a total value of at least 12 shield-points contribute to the Defense of the Realm.
Only after the third round, each player receives a one-time bonus for his most valuable group of connected knights. The group of knights must be connected to each other somehow by roads and must consist of at least two knights. (If no two knights are connected, you receive no points.) The number of points you receive is equal to the sum of the shield points of the knights of the group. (For a detailed example of scoring, see below.)
Keep track of your points with the tokens on the scoreboard. If anyone scores more than 60 points, just start counting from 1 again and add 60 to his total at the end. Whoever has the most points after the third scoring wins the game. (Don't forget the most-valuable knight group!) In the case of a tie, you have multiple winners.
Scoring Example
After the third round, Peter has completed his Principality. He received 6 points from the first-round score, and 18 from the second-round score. In total, he has 24 points.
In the third score which concludes the game, Peter receives the following points:
To receive the 6 points for his 6-point castle, Peter has to have connected three knights to his 6-point castle. He's only connected one knight with this castle, so he receives no points.
Peter has connected 4 knights to his 4-point castle, fulfilling the requirement for at least three knights, so he receives 4 points.
Peter has connected exactly 2 windmills with each other in the upper middle; that's worth 2 points (1 per windmill). Elsewhere, he has connected 5 windmills, giving him 10 points (5x2). He thus receives 12 total points for his windmills.
In order to receive 5 points for the Defense of the Realm after the third round, Peter needs to have 12 (total) shield-points worth of knights connected to the borders. Peter only has 3 points worth of knights contributing (one 2-point knight and one 1-point knight on the right-hand edge of his Principality). All the other knights are either not on the edge or not directly connected to it by road from their tile half. So Peter receives no points.
For his most valuable group of connected knights, the four knights in the left half of his Principality, Peter receives 9 points (2+3+1+3).
So, for his third-round score, Peter scores a total of 33 points. Adding them to the 24 points from the first two rounds gives Peter a final score of 57 points.
Solitaire
You can also play Don Quixote by yourself. No rule changes are necessary. Simply record your final result and then try to beat your personal high score.
A result of over 70 points is very good, over 85 is quite rare, and over 100 is absolutely incredible!