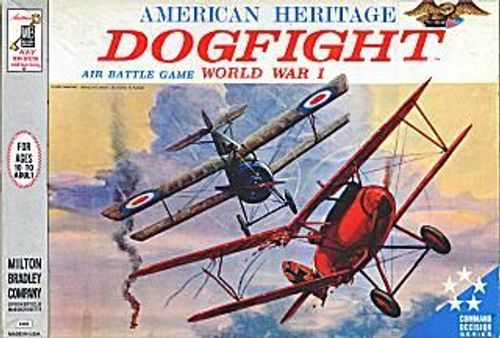
Dogfight
Dogfight Rulebook
Table of Contents
Table of Contents
Equipment in the Game
-
THE PLAYING BOARD represents a World War I battlefield with the front line trenches in the center. The space between trenches was called "No Man's Land" and is marked with a Double Black Line. Behind the German trenches are Red outline Squares, and in each corner in the rear are the two German airfields. Behind the American trenches are Blue outline Squares with two American airfields in the two corners. Each airfield holds one Squadron of 3 planes. The 3 squares containing pictures of grounded planes are the LANDING SQUARES. Squadrons are:
a) The AMERICAN 95th squadron is shown by a GREEN hangar roof with the "Kicking Mule" design. It will be called the GREEN squadron in the rules.
b) The AMERICAN 94th squadron is shown by a BLUE hangar roof with the "Hat in the Ring" design. It will be called the BLUE squadron in the rules.
c) The GERMAN JAGDSTAFFEL 11 is shown by a RED hangar roof with the black Maltese Cross design. It will be called the RED squadron in the rules.
d) The GERMAN JAGDSTAFFEL 10 is shown by a YELLOW hangar roof with the straight black Cross design. It will be called the YELLOW squadron in the rules.
Note: JAGDSTAFFEL — pronounced "YAG-staf-el," means "fighter squadron" in German.
Each American squadron has 3 GREEN camouflage planes. Each German squadron has 3 RED planes.
-
THE AIRPLANES are in the two small trays. The 6 GREEN camouflage planes are models of the American SPAD XIII. The 6 Red planes are models of the German FOKKER DVII. The TOP WINGS of each plane are also in the trays.
Assemble the Top Wings as follows:
a) Remove each wing from the runner by TWISTING around until it breaks off.
b) The Struts on the top wing will line up with the holes in the lower wing on the body of the plane. Squeeze the wings together (see the Diagram on platform in box) until the struts go ALL THE WAY THROUGH the holes and stick out underneath the bottom wing. Note that the top wing "cut-out" goes to the back, over the pilot.
c) The propellers are on a runner in the large tray. They are ALL ONE COLOR. Remove by TWISTING each around until it breaks off. Push it on to the front "nub" of the plane, which is the propeller shaft.
-
In the large tray are 4 PLASTIC STANDS, one each of Red, Yellow, Green and Blue. Each squadron gets ONE stand of it's own color.
During the game a plane is put "IN FLIGHT" by placing it on it's own squadron stand so that the square shaft fits into the square hole in the bottom of the plane's body.
-
There are 16 ANTI AIRCRAFT (A.A.) gun pieces in the large tray. Carefully break them apart. Each squadron gets 4 A.A. guns of it's OWN COLOR. The Red squadron gets 4 Red guns, Blue squadron gets 4 Blue guns, etc. On one side is a picture of a gun and on the reverse side a word, "Hit" or "Miss". On the board you will find 4 SQUARES surrounding the "Landing Squares" having a colored DOT in them. The Color matches the squadron color and shows where to put the A.A. gun pieces.
Before Starting the Game
-
Players decide what squadrons each will take.
a) For TWO PLAYERS, one plays the 2 German squadrons and one takes the 2 American squadrons.
b) For THREE PLAYERS, two act as partners against one player. The Two partners each take One Squadron of either German or American planes. The Third player plays the Two squadrons of the opposite side.
c) For FOUR PLAYERS, they play as 2 teams of 2 partners. One team takes the German side, and the other the American. Each player plays ONE squadron.
-
Place the Board between the players the Long Way so that the American player (or players) are near their squadrons and Facing the German player (or players) opposite. The Double Black line (NO MAN'S LAND) should run crossways between the opposing sides midway between the players.
-
Place one plane in each of the "LANDING SQUARES" of the squadron airfields. The GREEN planes are American and the RED planes are German.
-
Each player places ONE A.A. gun piece (Gun Side Up) on each DOT square around his airfield. ONLY DOT SQUARES ARE TO CONTAIN the A.A. GUNS. The color of the A.A. gun piece must match the color of the DOT. Only the "placing" player is to know which are "Hit" and which "Miss" guns. The A.A. guns are a defence for the grounded planes in the "landing squares". During the play of the game, the A.A. guns CANNOT be moved or changed.
AT THE START OF THE GAME, the SET UP should be as follows:
- 12 assembled Airplanes in the "landing squares" on the board.
- 16 A.A. guns, 4 of each color, in the "Dot" squares around the airfields.
- 4 stands, one of each color near each airfield.
- 4 "Packs" of squadron cards, 1 each on the matching hangars.
Illustrations Showing Examples of Moves
See "How to Move" Rule 7 below.
- A. Move of 3 — Plane goes in a straight line.
- B. Move of 5 — Plane turns 2 corners.
- C. Move of 5 — Plane turns 3 corners.
- D. Move of 4 — Plane returns to start square.
Basic Rules for 2 Players
(Each plays 2 squadrons — German or American)
The OBJECT of the game is to "Shoot Down" all of the opponent's planes. In each turn, a player puts his planes "IN FLIGHT", "MOVES" and "DOGFIGHTS" if he can, to "Shoot Down" his opponent's planes.
How to Move
Players alternate turns. Throw the dice to decide who goes first.
-
Each player, in his turn, may place ONE plane "In Flight" from EACH of his squadrons and MOVE them. Since a player has Two Squadrons, he is allowed 2 of his own planes "In Flight" at any time. He may place only ONE "In Flight" if he desires.
-
To put a plane "In Flight", place it on the plastic stand and put the stand on the "Landing Square" the plane came from. The color of the stand matches the Squadron color and identifies what squadron it belongs to. ONLY ONE plane from any squadron can be in flight at any one time.
-
Whenever a plane is put "In Flight", the player takes the 4 TOP CARDS from its squadron CARD PACK and places them in the "In Flight" OPENING in the CARD HOLDER. The owner of the plane may examine these cards, but they are not to be seen by his opponent. The use of these cards is explained later.
-
In his turn, the player throws the 2 dice. The spots on the dice determine the NUMBER OF SQUARES his planes must move. A plane moves from SQUARE TO SQUARE, Forward, Backwards or Sidewards, but not Diagonally. A player may turn corners during a move.
-
Only the "In Flight" planes (on a stand) can move. If a player has 2 planes "In Flight", he must move one plane the number of squares as shown on ONE die and the other plane as shown by the number on the OTHER die. For example, on a throw of 3 and 4, the player moves one plane 3 squares and the other, 4 squares. The player decides which moves 3 and which 4.
-
If a player has only 1 plane "In Flight", he may choose to move it EITHER of the Two numbers thrown on the dice. For example, on a throw of 3 and 4, he may move his one plane 3 or 4, but NOT 7.
-
A plane MUST MOVE ALL OF THE SQUARES shown on the dice. He CANNOT MOVE BACK and FORTH between the SAME TWO SQUARES DURING A MOVE. It is permitted for a plane to come onto the same square it started from as long as it used up all the spots on the dice, and did not move BACK and FORTH between any two squares next to each other. (See diagrams A, B, C, and D under "Before Starting the Game" above.)
-
A plane must complete the number of squares as thrown on the dice. It is not always possible to get to a certain square even when it is CLOSE.
-
At the END of the Move, the player must FACE the FRONT of the plane toward any of the adjoining 4 squares he chooses. It CANNOT be faced Diagonally. The direction it is facing is Important in Dogfighting. The Front of the plane is where the Propeller is. Plane's direction can not be changed after player's hand is removed from it.
Diagram I — the plane's Front, Front, Front and Front mark the four squares adjoining the plane's square (up, down, left and right); the plane may be faced toward any one of them, but never toward a diagonal square.
-
Only one plane may occupy one square at a time. Planes may NOT move through a square containing another plane, either his own or enemy plane.
Positions for Dogfight
-
A DOGFIGHT takes place whenever, at the END OF A PLAYER'S MOVE, he has placed one (or 2) planes in the NEXT SQUARE to an opponent's plane and has Faced his plane toward the opponent's plane. The square CANNOT BE ON A DIAGONAL. The ATTACKING plane is the one which just moved into the Dogfight position at the end of it's move. The DOGFIGHT must take place BEFORE the next player's move.
-
There are three attack positions possible for the "Dogfight". They are called "HEAD ON", "SIDE" or "TAIL" attack. (See Diagrams E, F, G and H under "Before Starting the Game" above.)
There is no DOGFIGHT unless one plane's front is facing an opponent's plane.
-
Two planes may attack one enemy plane at the same time. Also, 2 "Dogfights" involving 2 pairs of planes at different parts of the board are possible. Whenever 2 planes or 2 Dogfights are to take place, the player whose MOVE JUST ENDED decides which plane or Dogfight is to start first.
- E. "SIDE" ATTACK Left Side (American plane is attacking)
- F. "SIDE" ATTACK Right Side (American plane is attacking)
- G. "HEAD ON" ATTACK (American plane is attacking)
- H. "TAIL" ATTACK (American plane is attacking)
The Dogfight — Use of Cards
The SQUADRON CARDS are used for the "Dogfight". Each plane must use ONLY IT'S OWN "IN FLIGHT" cards which were drawn when the plane was first put on the stand. (See Rule 3 under "How to Move".) The attacking plane "Shoots" by playing a "Burst" card. The attacked plane defends, if possible, by playing the proper "defence" card in return. Once a card has been played, it goes into the DISCARD SECTION OF THE CARDHOLDER. As cards are used up in "Dogfighting", the plane must go back to its own airfield and LAND in an empty LANDING SQUARE. In a following Turn, when it goes back "IN FLIGHT," it gets NEW CARDS.
1. Card Play for Side Attack
(Diagrams E and F under "Before Starting the Game" above.)
a) Attacking plane "Shoots" by playing one "Burst" card of any value (1 to 5).
b) If the attacked plane has no "ROLL OUT" card, it is "SHOT DOWN" and removed from the game.
c) If the attacked plane has a "ROLL OUT" card, it can play it and is NOT "shot down", (Roll Out causes the attacker to miss).
The attacking plane can play only ONE CARD, a BURST card, if he has not shot down the opponent's plane with this, the DOGFIGHT IS OVER.
2. Card Play for "Head On" Attack
(Both planes may shoot.) (Diagram G under "Before Starting the Game" above.)
a) Attacking plane shoots first by playing his highest value "BURST" card. "5 BURSTS" is highest, "4 BURSTS" next and so on.
b) The attacked plane, in return, can CANCEL the "BURST" by playing one of his own "BURST" cards of EQUAL VALUE; OR, if he has one, he may play a "BURST" card of HIGHER VALUE and SHOOT DOWN the attacking plane.
c) If the attacked plane has NO "BURST" cards or only those of LOWER VALUE, he is Shot Down.
EXAMPLE OF "HEAD ON" Dogfight: A GREEN plane is facing HEAD ON to a RED plane. The GREEN plane plays a "4 BURSTS" card and the RED plane plays a "4 BURSTS" card. The cards cancel, neither plane is "Shot Down" and the DOGFIGHT IS OVER. If the RED plane had played a "5 BURSTS" card, the GREEN plane would be "Shot Down". If the RED plane had no "5 BURSTS" or "4 BURSTS" card, the RED would be "Shot Down".
3. Card Play for Tail Attack
(Diagram H under "Before Starting the Game" above.)
a) Attacking plane shoots first by playing a "BURST" card of any value.
b) If the attacked plane has no "LOOP" card, it is Shot Down.
c) If the attacked plane has a "LOOP" card, it can play it as a defence against the "Tail" attack. On playing a "LOOP" card, the Planes EXCHANGE squares so that the Attacked plane is now aiming at the TAIL of the previous ATTACKING plane.
d) After EXCHANGING squares, the TAIL plane can now play his own "BURST" card of any value at the opponent's plane.
e) Now the attacked plane must play a "LOOP" card, if he has one, to EXCHANGE positions AGAIN and shoot again. If he has no "LOOP" card, it is "Shot Down".
f) Playing a "LOOP" card when under TAIL ATTACK causes the "BURST" card to miss. After the EXCHANGE the TAIL PLANE can immediately shoot by playing a "BURST" card.
g) If the Tail plane has no "BURST" card, the Dogfight is over and neither plane is shot down.
h) If EXCHANGE of positions puts a plane under attack by another enemy plane, the original "Dogfight" must be completed before the new attack can begin.
For Example: A German plane is facing the TAIL of an American plane at the end of the German player's turn. The German plane plays a "BURST" card, in defence, the American plays a "LOOP" Card and EXCHANGES SQUARES with the German plane. The American now plays a "BURST" card. The German has no "LOOP" cards in his "In Flight" pack so he is shot down. However, if he had a "LOOP" card, the German could play it and exchange places again and play another "BURST" card to "shoot down" the American plane.
-
When a plane is "SHOT DOWN", it is removed from the game. The STAND is returned to the proper squadron airfield. The remaining IN FLIGHT CARDS of the "shot down" plane are placed in the DISCARD opening of the Card Holder.
-
When a plane has been ATTACKED but NOT SHOT DOWN, it must move in its turn according to the throw of the dice. It cannot just STAY in the same place and Dogfight without moving.
-
TO REPLACE OR RENEW "IN FLIGHT" cards, a plane must return to it's own airfield and LAND (See rule 11 under "How to Move"). After landing, all remaining unused IN FLIGHT cards can be discarded, OR any number may be left in the "IN FLIGHT" section of the CARD HOLDER. When the same or a new plane from that squadron is put IN FLIGHT again, enough new cards to make a total of 4 are taken from the unused cards of the squadron pack. When all cards have been taken, the DISCARDS are shuffled and the pile put FACE DOWN on the game board ready to use again. ALL the cards have to be drawn before shuffling the DISCARDS.
-
BEFORE a plane is ALLOWED to return to his AIRFIELD and LAND, it must have either been in a DOGFIGHT or AT LEAST, if not in a DOGFIGHT, have gone past the DOUBLE BLACK line in the center of the board (NO MAN'S LAND).
Summary of Card Play
A. The attacking plane always plays a BURST card.
B. The attacked plane can defend with the proper card as follows:
- for SIDE attack — play a ROLL OUT card.
- for HEAD ON attack — play the same or higher BURST card.
- for TAIL attack — play a LOOP card then EXCHANGE squares.
To Attack a Plane on the Ground
-
ALL planes may FLY OVER or STOP on an A.A. gun square. The guns do NOT shoot at a friendly plane.
-
If an enemy plane FLIES OVER OR STOPS on an A.A. square, the piece is IMMEDIATELY turned over and examined. If it is a "HIT", the enemy plane is SHOT DOWN and removed from the game. If a "MISS", nothing happens to the plane. The enemy may stay there or continue its move. Every A.A. gun which an enemy plane PASSES over or STOPS ON is examined for a HIT or MISS.
-
TO SHOOT AT A PLANE ON THE GROUND, the enemy plane "In Flight" must be "STOPPED" on the next square, but NOT DIAGONALLY, at the end of its move. He shoots by playing a "BURST" card of any value. THE PLANE ON THE GROUND HAS NO DEFENCE and is "Shot Down" and removed from the game. If the attacking plane stopped on an A.A. square with a "HIT" gun, it is shot down BEFORE it can shoot at the grounded plane.
Aces and Double Aces
-
A plane which has "shot down" ONE enemy plane, either in a Dogfight or on the ground, becomes an ACE. Note, THE PLANE ONLY becomes the ACE, not the player or its squadron.
-
To show an ACE, the plastic Insignia ("Cross" or "Circle") is placed over the stem of the STAND while that plane is "IN FLIGHT". The American planes take a red "Cross" to show victory over the German plane. The German plane uses the green "Circle" to show a victory. The Insignia ALWAYS STAYS WITH THAT PLANE, placed on the stand when IN FLIGHT, and placed under the plane when landed in a LANDING SQUARE. INSIGNIA CANNOT BE TRANSFERRED to another plane, even if the ACE is shot down.
-
If a plane shoots down 2 enemy planes it becomes a DOUBLE ACE, shown by 2 Insignia with that plane. This is the HIGHEST rank a plane may obtain regardless of more victories.
-
An ACE plane receives 6 CARDS, and a DOUBLE ACE 8 CARDS when they are put "IN FLIGHT".
-
While the insignia to show Victories is received as soon as the victory is made, the EXTRA CARDS are not given until the ACE plane has returned to the landing square and landed. The ACES receive their extra cards when they are put back "IN FLIGHT" again.
To End the Game
EACH PLAYER TAKES TURNS — Moving, Dogfighting or Attacking grounded planes until one player has lost all of his planes.
THE WINNER is the player who has SHOT DOWN all of the opponent's planes.
Special Rules for 3 or 4 Players
See Rules 1(a) and (b) under "Before Starting the Game" above. ALL RULES are the same as for Two Players except:
-
PARTNERS EACH throw the dice in their turn. Since each can have only ONE plane in the air, they must choose to move one or the other number on the dice. For example if the Blue player threw a 2 and 5 on the dice, he can move his plane 2 or 5 squares, not both.
-
The German partners (or player) each move, then "Dogfight" if they are in position — then the American partners (or player) each move and Dogfight at the end of their move.
-
If one partner has lost all of his planes, the other can give him one from his own squadron. If there is only one plane left on a side, the partner without a plane is out of the game.
Suggestions for Strategy
After you have learned how to play "DOGFIGHT", here are some hints for "STRATEGY". Although there is an element of "luck" in the game, the player who "plays his cards" correctly will usually win.
-
The Squadron Cards are designed so that the "HEAD ON" attack is the most dangerous position for an attacking plane. The "SIDE" attack is the safest, but also the easiest to defend. The "TAIL" attack is usually the most successful since there are fewer "LOOP" cards in each pack.
-
Try to keep track of the cards played to get a better idea of what position of attack would be most likely to succeed.
-
To attack a plane on the ground is quite risky because of the A.A. guns and also the long distance the plane must go to get back to the safety of his own squadron. However, it may be wise to try to eliminate an ACE plane while it is defenceless on the ground.
-
An ACE plane is valuable while it has it's full amount of "In Flight" cards (6 or 8), but as it uses them up in "Dogfighting", it becomes easier to "shoot down".
-
Proper position at the ends of the board can be helpful in strategy. For example, if a plane has no LOOP cards, it could line up its TAIL at the end of the board so no enemy can attack it from the rear.
-
Use the A.A. gun squares for defence while "In Flight", by lining up a weak position next to a "HIT" A.A. square. The attacking plane would be "shot down" by the A.A. gun if it tried to occupy that square for attack.