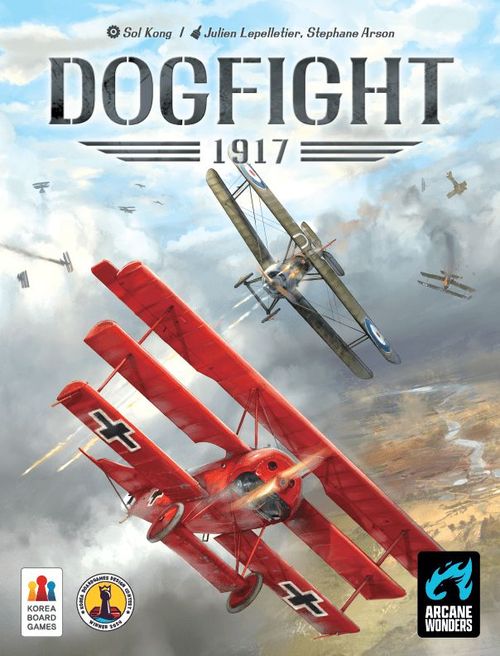
Dogfight: 1917
Dogfight: 1917 Rulebook
Table of Contents
Table of Contents
Objective
Shoot down the opponent before they can shoot you down!
Components
- 1 Battlefield Board
- 4 Fighters, 4 Fighter Boards (Fokker Dr.I / Sopwith Camel / Albatros D.III / SPAD S.XIII)
- 80 Flight Cards (20 per Fighter)
- 4 Pilot Cards (Manfred von Richthofen / Donald Roderick MacLaren / Erich Loewenhardt / René Fonck)
- 4 Reference Cards
- 2 Pilot Mentor Cards
- 8 Dice (4 Black, 4 White)
- 20 Tactical Tokens
Fighter Assembly Instructions
Assemble each Fighter so that its propeller aligns with the middle arrow on the base.
Setup
-
Place the Battlefield Board in the middle of the table, and place the Tactical Tokens nearby to form a general supply.
-
Each player takes 4 Dice and a Reference Card.
-
The player who has most recently seen an aircraft becomes the Starting Player.
-
Refer to the Basic Combination chart. Beginning with the Starting Player, each player chooses 1 Fighter and 1 Pilot.
Basic Combination
Side Fighter Pilot Central Powers Fokker Dr.I Manfred von Richthofen Central Powers Albatros D.III Erich Loewenhardt Entente Sopwith Camel Donald Roderick MacLaren Entente SPAD S.XIII René Fonck If this is your first game of Dogfight: 1917, we recommend using the Pilot Mentor Card instead of a Pilot Card. For planes, we recommend the Sopwith Camel for the Starting Player, and the Fokker Dr.I for the Second Player. Each player removes 2 Basic Maneuvers and 1 Evasive Climb from their Flight Cards and returns them to the box.
Battlefield Board & Fighter Orientation
During setup, rotate the Battlefield Board so that the rookie (the less experienced player) faces the rear of their Fighter. The direction and movement of the Fighters is fundamental to Dogfight: 1917, and this orientation helps new players better understand positioning and facing.
Card Anatomy
This section explains the core game elements and how they are used during play.
Fighter Board
Each player has a Fighter Board that tracks their Fighter, Pilot, and cards. It has: (1) Artwork, (2) Name, (3) Pilot Card Slot, (4) Fighter Special Action, (5) Deck, (6) Damage Pile, (7) Discard Pile.
Under Name (2), you can find useful information about the Fighter's advantages and notable characteristics.
Fighter Special Action (4) shows that Fighter's unique abilities which require Tactical Tokens to carry out.
Cards in your Deck (5) and Damage Pile (6) are always placed face-down. You may check how many cards there are in your Deck and Damage Pile, but you cannot view them face-up or change the card order around.
Cards in the Discard Pile (7) are placed face-up. You may look through these cards at any time.
Flight Cards
Flight Cards represent the actions your Fighter can take during combat. Each has (1) Type, (2) Name, (3) Artwork, (4) Effect.
You may use the Flight Cards in your hand during the Engagement Phase (see page 7), and their usage differs based on their type. Maneuver Cards can be used only once per Player turn, and Evasion Cards are used to respond to the opposing Player's Attacks. Tactic Cards can create special advantages.
Flight Card effects are always resolved from top to bottom, left to right. Unless an effect is marked as optional, the effect must be resolved. Used Flight Cards go in your Discard Pile.
- Conditional Effect: An additional effect that triggers only if its condition is met. The condition is checked once, after all other effects on the card have been resolved.
- Optional Effect: An additional effect you may choose to resolve. If you choose to resolve it, you must resolve the entire effect.
Pilot Card
Pilot Cards represent the abilities of the legendary WWI Pilots and are double-sided, with Side A and Side B. Each Pilot has their own unique Ongoing Effects and Special Action.
The Ongoing Effect is activated whenever its conditions are met.
The Special Action is a powerful one-time action, and/or changes the ongoing effect.
After using a Pilot's Special Action, flip the Pilot Card from Side A to Side B.
Gameplay
Beginning with the Starting Player, the players take turns one at a time. On your turn, resolve the following phases in order:
- Reconnaissance Phase
- Assessment Phase
- Engagement Phase
Important: At the end of your turn, if you have no cards remaining in your Deck, your Fighter crashes and you lose the game.
1. Reconnaissance Phase
Draw the top card from your Deck and add it to your Hand.
Crash Imminent: If you have no cards in your Deck at the start of this phase, skip the Reconnaissance Phase.
2. Assessment Phase
Before engaging with the opponent, assess your Hand and the state of your Fighter.
Tactical Improvisation (optional)
You may discard 1 card in your Hand to perform a Tactical Improvisation.
Tactical Improvisation:
- Collect 1 Tactical Token.
- Shuffle any number of cards from your Hand into your Deck.
- Draw the same number of cards from your Deck.
Stalling
At the end of the Assessment Phase, if you determine that you cannot perform a Maneuver Action this turn (see Maneuver, page 8), you must resolve one of the following effects:
- Immelmann Turn: If there are no spaces available for your Fighter to Advance into: Discard 1 card from your Hand. Rotate your Fighter 180 degrees.
- Blackout: If you have no Maneuver Cards in your Hand: Move the top card of your Deck to your Damage Pile. Advance your Fighter 1 space in the Frontal Direction.
Then skip the Engagement Phase and end your turn.
If you Stall during the Assessment Phase while having no cards remaining in your Deck, your Fighter crashes immediately.
3. Engagement Phase
During the Engagement Phase, you may perform actions in any order, following the rules below and on the following pages.
Available actions: Maneuver; Basic Attack; Fighter Special Action (see page 9); Pilot Special Action (see page 9); Play a Tactic Flight Card (see page 10); Tactical Actions (see page 10).
You must perform exactly one Maneuver Action during each Engagement Phase. You may perform other actions any number of times, as long as you meet their requirements. These additional actions are all optional.
Once you have completed all actions you wish or are able to perform, end your turn.
Basics of Flight Maneuvers
Direction
Each Fighter's position and facing are critical to gameplay.
Frontal Direction / Front: Of the six spaces surrounding a Fighter, the three spaces ahead of the Fighter's wings are the Front of the Fighter. These three spaces are called the Left (Port), Right (Starboard), and the space directly in front of its propeller is the Center.
Important: The direction the propeller is pointing is called the Frontal Direction and is always the Center position of the plane.
Rear: The three spaces behind the Fighter's wings are considered its Rear.
Important: A Fighter is vulnerable to Basic Attacks from the Rear, so careful positioning is essential.
Advance
An Advance moves a Fighter from its current space to an adjacent space. When advancing, the Fighter must move into one of the three Front spaces. Each time a Fighter Advances one space, immediately check and update its Frontal Direction.
Important: When a Fighter Advances to the left or right, the Frontal Direction of the Fighter also rotates 60 degrees accordingly so it always flies facing forward. This change in direction is not considered a Turn.
Example: The Fighter Advances 1 space right (starboard), it both moves into that space and rotates 60 degrees to face that direction. Note that the Frontal Direction of the Fighter has changed. Since it was advancing, however, that direction change is not considered a Turn.
A Fighter may Advance through a space occupied by another Fighter, but it may not end its movement on that space. Only one Fighter may occupy a space at a time. Passing through an occupied space still counts as Advancing 1 space, so the Fighter must have sufficient movement to move beyond it.
Turning
A Turn changes the direction a Fighter is facing without moving it to a different space. Each turn rotates the Fighter 60 degrees.
Remember: When Advancing to the left or right, the change in Frontal Direction is not considered a Turn.
Maneuver
Remember: You must perform exactly one Maneuver Action before the Engagement Phase ends.
To Maneuver:
- Play 1 Maneuver Flight Card from your Hand.
- Advance and/or Turn your Fighter according to the card's effects. Follow all instructions on the card in the order listed, resolving effects from top to bottom, left to right.
Example: Fokker Dr.I's Basic Maneuver. (a) Advance 1-2 spaces. (b) (optional) Turn once. (c) Conditional Effect: If you advanced to the right at least once, roll 1 die. If you roll 3 or more, (optional) turn once.
Key Concept: Dice Roll
Certain actions and effects require rolling one or more dice. After rolling, resolve the effect for each die individually. Never add dice results together unless explicitly instructed to do so!
Compare the dice results directly against the listed Difficulty. The number shown on the die symbol is included as a success. (For example, a Difficulty of 4 means 4 or more.)
Basic Attack
You may perform a Basic Attack only if both of the following conditions are met:
- Your Fighter's Frontal Direction is facing the Rear of the opposing Fighter.
- The opposing Fighter is within Basic Attack Range.
Basic Attack Range: The two spaces directly in front of your Fighter's Frontal Direction are within Basic Attack Range. Range 1 (adjacent space) has Difficulty 4; Range 2 has Difficulty 5.
A Basic Attack is resolved in the following order:
- Fire: Roll 2 dice and determine the Difficulty of the shot. The Difficulty for Basic Attacks is based on range. Place any dice that are equal to or higher than the Difficulty on the Gunsight closest to you on the Battlefield Board. At the end of the Fire step, the opposing player may attempt to Evade the attack (see Evasion, page 9).
- Damage: Deal damage to the opposing player equal to the number of dice on your Gunsight and then clear all the dice on your Gunsight. If there are no dice on your Gunsight, skip this step.
- Momentum: Advance your Fighter 1 space.
If, after Advancing, you are still facing the opposing Fighter's Rear and they are still within range, you may perform another Basic Attack.
Example: You perform a Basic Attack from Range 2 (Difficulty 5), and roll a 4 and a 6. Only the 6 is placed on the Gunsight since 4 is under the Difficulty. The opponent is unable to Evade, deal 1 damage, then Advance 1 space from your momentum.
Keyword: Damage
When your Fighter takes damage from an attack or effect, move a number of cards equal to the damage taken from your Deck to the Damage Pile. Cards moved to the Damage Pile are placed face-down. You may not look at the cards in the Damage Pile unless an effect specifically allows it. Likewise, you cannot look at the cards as you are placing them in the Damage Pile.
Evasion
If you are the target of an attack, you may attempt to Evade once per attack at the end of the opposing player's Fire step. To Evade:
- Play 1 Evasion Flight Card from your Hand, or
- Perform a Special Evasion Action, if available.
Then, roll dice according to the effect used to determine the result. For each die result that is equal to or higher than the Difficulty, remove 1 die from the attacker's Gunsight.
Evasive Movement: Some Evasion effects allow your Fighter to move (example, Dead Six). Any movement granted by an Evasion effect is resolved immediately after the attacker completes all steps of the attack, including damage and momentum.
Special Action
Fighters and Pilots each have unique Special Actions. These actions follow the same usage rules as Flight Cards unless stated otherwise.
Pilot Special Action: Perform the Pilot Special Action by flipping the pilot card to Side B. This action may only be used once, unless stated otherwise.
Fighter Special Action: Performing a Fighter Special Action requires Tactical Tokens to perform and the number of Tokens needed is indicated by the symbol(s) on the card. If a Fighter Special Action conflicts with another effect, the Fighter Special Action takes priority. Ignore the conflicting effect.
Special Attack
A Fighter Special Action with the Attack type is called a Special Attack.
You may perform a Special Attack if:
- Your Fighter's Frontal Direction is facing the opposing Fighter, and
- The opposing Fighter is within the Special Attack's listed range indicated by the numbers within the crosshairs.
Note: Unlike a Basic Attack, a Special Attack may target the opposing Fighter from the Front or Rear, unless stated otherwise. (Basic Attack - No; Special Attack - Yes, when the target is in front.)
Special Attack Procedure. Special Attacks are resolved in the following order:
- Fire: Roll dice according to the Special Attack's effect. Place each die that is equal to or higher than the Difficulty on your Gunsight. After the Fire step, the opposing player may attempt to Evade.
- Damage: Deal damage equal to the number of dice on the Gunsight x Special Attack's Damage Multiplier. Clear all dice from your Gunsight. If there are no dice on your Gunsight, skip this step.
Important Differences from Basic Attacks:
- Special Attacks do not have a Momentum step.
- Special Attacks may have a longer range than Basic Attacks.
Key Concept: Tactical Tokens
Tactical Tokens are resources required to perform Tactical Actions and Fighter Special Actions.
Tactical Position: Some spaces on the Battlefield Board show Tactical Token icons. These are called Tactical Positions. Anytime a Fighter ends its movement on a Tactical Position, immediately collect the number of Tactical Tokens shown on that space (1 or 2 Tokens). If the general supply runs out of Tactical Tokens, use any suitable replacement.
Tactical Action: Tactical Actions are actions that either cost or generate Tactical Tokens. You may perform Tactical Actions during the Engagement Phase, as long as you meet their requirements.
Available Tactical Actions:
- Play a Tactic Flight Card. Play a Tactic Flight Card from your Hand and resolve its effects.
- Focus (Cost: 1 Tactical Token). Reroll any number of your dice. Focus may be used when resolving any roll, including Evasion rolls. You may reroll dice multiple times, as long as you can pay the cost.
- Regroup (Cost: 2 Tactical Tokens). Shuffle your Discard Pile, then randomly select 2 cards from it without looking at them and add them to your Hand. Place all remaining cards from the Damage Pile into your Discard Pile, face-up.
- Emergency Repair (Cost: 3 Tactical Tokens). Look through the cards in your Damage Pile and choose up to 3 cards to shuffle into your Deck. Place all remaining cards from the Damage Pile into your Discard Pile, face-up.
Crashing
Fighter Down!
If, at the end of your turn, you have no cards remaining in your Deck, your Fighter immediately crashes and you lose the game! Your plane has suffered mechanical failure!
Remember: You may have zero cards in your Deck at the start of your turn (Crash Imminent), this only applies at the end of your turn.
Shot Down!
If you take damage that exceeds the number of cards remaining in your Deck, your Fighter is Shot Down. Your Fighter immediately crashes and you lose the game.
Example: You deal 4 damage to the opposing Fighter. That Fighter has only 3 cards remaining in their Deck. Because the damage exceeds the number of cards in their Deck, the opposing Fighter is immediately Shot Down and crashes, ending the game.
Game End
The game ends immediately when a Fighter crashes. The player whose Fighter survives wins and becomes a flying ace.
Fundamentals of Aerial Combat
The following tips are not rules, but general guidance for rookie pilots:
- Aggression is key. Position your Fighter so you can perform multiple attacks in a single turn. Aim to combo multiple Basic and/or Special Attacks on the same turn when possible.
- Control Tactical Positions on the Battlefield to maintain a steady supply of Tactical Tokens.
- If you are low on Tactical Tokens, use Tactical Improvisation to search for your Killer Instincts and regain momentum.
- Use your Pilot Abilities and Fighter Special Actions aggressively to counter the opponent.
Appendix
1. Variant Rules
Dogfight: 1917 includes several Variant Rules that adjust player count and Difficulty. Unless a Variant specifically states otherwise, all base game rules remain in effect. In games with 3-4 players, remove crashed Fighters from the Battlefield Board.
1.1 Draft Mode
Draft Mode steps outside of historical accuracy by allowing different Fighter and Pilot combinations.
Setup:
- The Starting Player chooses 1 Pilot Card.
- Proceed clockwise, with each player choosing 1 Pilot Card from the remaining cards.
- After all players have a Pilot Card, the last player to choose a Pilot selects 1 Fighter.
- Proceed in reverse, counterclockwise, order with each player choosing 1 Fighter from the remaining Fighters.
1.2 Daring Escape (2 Players)
Shot down behind enemy lines, an ace pilot risks everything on a desperate plan; steal an aging enemy aircraft and make a daring escape. But the moment the engine roars to life, a rookie pilot spots the breakout and races into a deadly pursuit. This variant is designed to level the playing field between a skilled pilot and a rookie.
Setup:
- The less experienced player becomes the Rookie.
- The Rookie chooses: Their own Fighter and Pilot, and the Fighter and Pilot used by the Ace.
- The Ace becomes the Starting Player.
- The Ace shuffles their Flight Cards to form a Deck, then removes the top 2 cards from the game without looking. For a greater challenge, the Ace may remove 2 additional cards without looking. Removed cards are returned to the box.
(The source numbers these steps 5, 6, 3, 4.)
1.3 Battle Royale (3-4 Players)
A free-for-all variant where the last remaining Fighter wins!
Setup: Beginning with the Starting Player and proceeding clockwise, players place their Fighters on the Battlefield Board following these rules:
- Fighters may only be placed on one of the six corner spaces.
- All Fighter's Frontal Directions must face the board's center space.
After setup distribute Tactical Tokens based on player order:
| 1st player | 2nd player | 3rd player | 4th player |
|---|---|---|---|
| 0 | 1 | 2 | 3 |
Gameplay Updates:
- Gameplay proceeds clockwise, beginning with the Starting Player, and includes all players.
- Spoils of War: If you shoot down an opposing Fighter, immediately collect 5 Tactical Tokens.
- Players whose Fighters have crashed are eliminated from the game.
Game End: The last player with a surviving Fighter wins and becomes the ace of aces!
1.4 Team Battle (4 Players)
A squadron-level battle where teamwork and coordination are key.
Setup:
- Divide players into two teams of two.
- Players take turns choosing Fighters and Pilots with the Starting Player (A) choosing first, then both players on the opposing side (B & D), and then finally the teammate of the Starting Player (C).
- Place the Fighters on the Battlefield Board as shown in the setup map (positions A, B, C, D).
Gameplay:
- The Starting Player (on space A) takes the first turn.
- Turns proceed alphabetically: A -> B -> C -> D, repeating as needed.
- Players whose Fighters have crashed do not take turns.
Game End: The game ends when both Fighters on a team have crashed. The team with at least one surviving Fighter wins the game!
1.5 Entente vs Central Powers (4 Players)
A team-based variant focused on protecting your squad's leader. Each team consists of a Leader and a Wingman with the objective to shoot down the opposing team's Leader.
Setup:
- Assign one team as the Entente and the other as the Central Powers.
- Each team chooses one player to be the Leader and one to be the Wingman.
- Each player takes the Fighter and Pilot combination shown below:
| Leader | Wingman | |
|---|---|---|
| Central Powers | (A) Fokker Dr.I & Manfred von Richthofen | (C) Albatros D.III & Erich Loewenhardt |
| Entente | (B) SPAD S.XIII & René Fonck | (D) Sopwith Camel & Donald Roderick MacLaren |
- Place the Fighters on the Battlefield Board using the Team Battle setup map above.
Gameplay: The Starting Player (on space A) takes the first turn. Play proceeds alphabetically: A -> B -> C -> D, repeating as needed.
If a Wingman Crashes: When a Wingman's Fighter crashes, that player is not eliminated and may rejoin the battle. Resolve the following steps immediately when a Wingman crashes:
- The crashed Wingman shuffles all cards from their Damage Pile and Discard Pile together to form a new Deck.
- The crashed Wingman's Leader immediately takes the next turn. (Turn order then resumes normally from the Leader).
On the crashed Wingman's next turn:
- During the Reconnaissance Phase, draw 3 cards instead of 1.
- Place the Wingman's Fighter on its original starting position, facing the same direction as during setup.
- Continue the turn starting with the Assessment Phase, playing normally from that point onward.
If You Shoot Down the Opposing Wingman: When you shoot down an opposing Wingman's Fighter:
- Your team's Leader shuffles up to 2 cards from the top of their Damage Pile into their Deck.
- Any remaining cards in the Damage Pile remain where they are.
Game End: The game ends immediately when either Leader's Fighter crashes. The team whose Leader survived wins the game!
2. Reference Guide
This section provides detailed explanations of Pilot Card Effects and how they are resolved during play. Unless otherwise stated, all effects follow the standard rules for timing, dice rolls, and card resolution.
2.1 Pilot Card Effects
2.1.1 Manfred von Richthofen
Ongoing Effect (Side A/Side B): The Red Baron
- If all dice rolled for an Evasion are equal to or higher than the Difficulty, collect 1 Tactical Token.
- After the Momentum step, roll 1 die: On a roll of 5 or more, (optional) Turn 2 times.
Pilot Special Action (Side A): The Flying Circus. Requirement: you must be exactly 1 space away from an opposing Fighter.
- Dead Six: Move your Fighter to one of the opposing Fighter's Rear spaces, facing the Fighter.
- Flip this card to side B.
2.1.2 Donald Roderick MacLaren
Ongoing Effect (Side A): Silent Pursuer
- The Difficulty of your Basic Attacks is reduced by 1.
- If all dice rolled for a Basic Attack are placed on your Gunsight, collect 1 Tactical Token.
Pilot Special Action (Side A): Northern Falcon
- Flip this card to Side B; the ongoing effect changes to Northern Falcon.
Ongoing Effect B: Northern Falcon
- Once per dice roll, you may reroll any number of dice.
- After your Maneuver Action, (optional) Turn once.
2.1.3 Erich Loewenhardt
Ongoing Effect (Side A): Heart of Iron
- If you choose not to Evade an attack, roll 1 die. On a roll of 3 or more, collect 1 Tactical Token.
- If you are 1 space away from the opposing Fighter after your Maneuver Action, (optional) Turn once.
Pilot Special Action (Side A): Smiling Beast
- Flip this card to side B; the ongoing effect changes to Smiling Beast.
Ongoing Effect (Side B): Smiling Beast
- The Difficulty of your Fighter Special Actions is reduced by 1.
- Roll 1 additional die when resolving your Fighter Special Actions.
2.1.4 René Fonck
Ongoing Effect (Side A): Aerial Sharpshooter
- Before performing a Basic Attack, roll 1 die. On a roll of 5 or more, roll 2 additional dice for that Basic Attack.
- If you place at least 1 die on your Gunsight during a Basic Attack from Range 2, collect 1 Tactical Token.
Pilot Special Action (Side A): Ace of Aces
- Flip this card to Side B; the ongoing effect changes to Ace of Aces.
Ongoing Effect (Side B): Ace of Aces. Your Basic Attack is modified as follows:
- Range is reduced to 1 only.
- You may target the opposing Fighter from the Front or Rear.
- Roll 2 Dice | Difficulty: 3 | Damage Multiplier: 1
- Momentum: Advance your Fighter 1 space after the attack.
2.1.5 Pilot Mentor: Pathfinder
Ongoing Effect: Marksmanship
- During setup, collect 2 Tactical Tokens (Side A).
- Roll 1 additional die for all Basic Attacks (Side A/Side B).
Pilot Special Action (Side A): Pioneer of the Sky
- Advance 0-2 spaces. (optional) Turn once.
- Flip this card to Side B.
2.2 Fighter Special Action & Flight Card Effects
2.2.1 Fokker Dr.I
Fighter Special Actions
| Type | Name | Requirements | Effect |
|---|---|---|---|
| Attack | Spandau Machine Guns | Range: 1-3, Cost: 2 Tactical Tokens | Roll 4 dice, Difficulty: 3, Damage Multiplier: 1 |
| Tactic | Slip-turn | Cost: 2 Tactical Tokens | Roll 1 die: If you roll 3 or more, turn 3 times, and (optional) Advance 1 space. |
Flight cards
| Type | Name | Effect | Conditional Effect |
|---|---|---|---|
| Maneuver | Basic Maneuver (x8) | Advance 1-2 spaces. (optional) Turn once. | If you Advanced to the right at least once, roll 1 die: If you roll 3 or more, (optional) turn once. |
| Maneuver | High-speed Maneuver (x3) | Advance 1-3 spaces. (optional) Turn once. | If you Advanced to the right at least once, roll 1 die: If you roll 3 or more, (optional) turn once. If you Advanced to the left at least once, roll 1 die: If you roll 2 or less, take 1 damage. If both conditions are met, roll only once to determine which effect resolves. |
| Maneuver | Turning Maneuver (x2) | Advance 1 space. (optional) Turn 2 times. | If you Advanced to the right at least once, roll 1 die: If you roll 3 or more, (optional) turn once. |
| Evasion | Evasive Climb (x3) | Roll 1 die, Difficulty: 3. Remove 1 die from opponent's Gunsight for each successful die. | On a roll of 6, perform Dead Six: Move your Fighter to 1 of your opponent's rear spaces, facing the opposing Fighter. |
| Evasion |
2.2.2 Sopwith Camel
Special actions
| Type | Name | Requirements | Effect |
|---|---|---|---|
| Attack | Vickers Machine Guns | Range: 1-3, Cost: 3 Tactical Tokens | Roll 3 dice, Difficulty: 4, Damage Multiplier: 2. |
| Attack | Lewis Guns | Range: 1-2, Cost: 2 Tactical Tokens | Roll 4 dice, Difficulty: 5. Randomly discard a card from your opponent's hand for each successful die (instead of dealing damage). |
Flight cards
| Type | Name | Effect | Conditional Effect |
|---|---|---|---|
| Maneuver | Basic Maneuver (x8) | Advance 1-2 spaces. (optional) Turn once. | If you Advanced in Frontal Direction exactly 1 space, roll 1 die: If you roll 4 or more, collect a Tactical Token. |
| Maneuver | High-speed Maneuver (x3) | Advance 1-3 spaces. (optional) Turn once. | If you Advanced to the right at least once, roll 1 die: If you roll 3 or more, (optional) resolve this card's effect one more time (except the Conditional Effect). |
| Maneuver | Turning Maneuver (x2) | Advance 1 space. (optional) Turn 2 times. | If you Advanced to the left at least once, roll 1 die. If you roll 3 or less, take 1 damage. |
| Evasion | Evasive Climb (x3) | Roll 2 dice, Difficulty: 4. Remove 1 die from opponent's Gunsight for each successful die. | On a roll of 6, perform Dead Six: Move your Fighter to 1 of your opponent's rear spaces, facing the opposing Fighter. |
| Evasion | Evasive Dive (x2) |
2.2.3 Albatros D.III
Special actions
| Type | Name | Requirements | Effect |
|---|---|---|---|
| Attack | Spandau Machine Guns | Range: 1-3, Cost: 2 Tactical Tokens | Roll 3 dice, Difficulty: 3, Damage Multiplier: 1. |
| Attack | Boom & Zoom | Range: 1-2, Cost: 2 Tactical Tokens | Roll 2 dice, Difficulty: 3, Damage Multiplier: 1. Conditional Effect: If you roll 3 or more, perform Dead Six: Move your Fighter to 1 of your opponent's rear spaces, facing the opposing Fighter. |
Flight cards
| Type | Name | Effect | Conditional Effect |
|---|---|---|---|
| Maneuver | Basic Maneuver (x8) | Advance 1-2 spaces. (optional) Turn once. | If you Advanced in the same direction exactly 2 spaces, roll 1 die. If you roll 4 or more, collect a Tactical Token. |
| Maneuver | High-speed Maneuver (x3) | Advance 1-3 spaces. (optional) Turn once. | If you Advanced in the same direction exactly 2 spaces, roll 1 die. If you roll 4 or more, collect a Tactical Token. |
| Maneuver | Turning Maneuver (x2) | Advance 1 space. (optional) Turn 2 times. | (none) |
| Evasion | Evasive Climb (x3) | Roll 2 dice, Difficulty: 3. Remove 1 die from opponent's Gunsight for each successful die. | If you rolled 5 or more, collect a Tactical Token. |
| Evasion | Evasive Dive (x2) | Roll 1 die, Difficulty: 3. Remove 1 die from opponent's Gunsight for each successful die. | If you rolled 5 or more, collect a Tactical Token. If you rolled 2 or less, take 1 damage. |
2.2.4 SPAD S.XIII
Special actions
| Type | Name | Requirements | Effect |
|---|---|---|---|
| Attack | Vickers Machine Guns | Range: 1-3, Cost: 3 Tactical Tokens | Roll 3 dice, Difficulty: 4, Damage Multiplier: 2. |
| Evasion | Steep Dive | Cost: 2 Tactical Tokens | Roll 1 die, Difficulty 2. Remove 1 die from opponent's Gunsight for each successful die. Conditional Effect: If you roll 5 or more, Dead Six: move your Fighter to 1 of your opponent's rear spaces, facing the opposing Fighter. |
Flight cards
| Type | Name | Effect | Conditional Effect |
|---|---|---|---|
| Maneuver | Basic Maneuver (x8) | Advance 1-2 spaces. (optional) Turn once. | If you advanced in Frontal Direction exactly 2 spaces, roll 1 die. If you roll 4 or more, (optional) resolve this card's effect one more time (except the Conditional Effect). |
| Maneuver | High-speed Maneuver (x3) | Advance 1-4 spaces. (optional) Turn once. | If you advanced 2 or less spaces, roll 1 die. If you roll 3 or less, take 1 damage. |
| Maneuver | Turning Maneuver (x2) | Advance 1 space. (optional) Turn 2 times. | (none) |
| Evasion | Evasive Climb (x3) | Roll 2 dice, Difficulty: 4. Remove 1 die from opponent's Gunsight for each successful die. | If you rolled 5 or more, collect a Tactical Token. |
| Evasion | Evasive Dive (x2) | Roll 2 dice, Difficulty: 3. Remove 1 die from opponent's Gunsight for each successful die. |