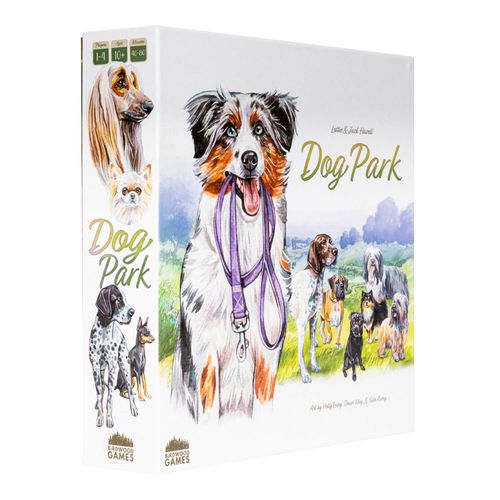
Dog Park
Dog Park Rulebook
Table of Contents
Table of Contents
Overview
Players are Dog Walkers recruiting 8 Dogs into their Kennel over 4 rounds. Each round, players have the opportunity to walk up to 3 of their Dogs through the Dog Park alongside their fellow players. In the Park, players will collect resources and earn Reputation. At the end of each round, players will earn Reputation for the Dogs they have walked and lose Reputation for any unwalked Dogs in their Kennel. The goal is to have the most Reputation at the end of the game. Players can build their Reputation by walking their Dogs, scoring in the Breed Expert awards, and completing their Objective.
Walker Wisdom: Keep an eye out for Walker Wisdom boxes for useful strategy and gameplay tips!
Components
- 1 Park Board
- 4 Offer Dials (1 per player)
- 4 Walkers (1 per player)
- 4 Reputation Markers (1 per player)
- 4 Lead Boards (1 per player)
- 1 100-page Scorepad
- 1 Auto Walker Die
- 1 Round Tracker
- 1st Walker Token
- 50 Walked Tokens
- 2 Reputation Tokens
- 1 Scout Token
- 1 Swap Token
- 1 Block Token
- 25 Ball Tokens
- 25 Stick Tokens
- 25 Treat Tokens
- 25 Toy Tokens
- 163 Dog Cards
- 8 Player Aids (4x Scoring/Resources, 4x Game Round)
- 11 Forecast Cards
- 7 Breed Expert Cards
- 16 Location Bonus Cards (8 Plentiful Park, 8 Rerouted Park)
- 10 Objective Cards (5 Experienced, 5 Standard)
- 4 Solo Objective Cards
Setup
-
Place the Park board centrally.
-
Shuffle the Forecast cards and place 1 card face up in each of the Forecast spaces at the top of the Park board. Return the remaining Forecast cards to the box. For less experienced players, you may choose to play without the Forecast for your first game. If you choose to do this, please leave these spaces empty and move on to the next step.
-
Shuffle the Breed Expert cards and, starting at the top, place 1 card face up in each of the Breed Expert award spaces.
-
Shuffle the Dog cards, place roughly half of the deck to the side of the Park board. Return the remaining cards to the box.
-
Starting from the left, fill the Field with the number of Dog cards as per the player count:
- Solo, 2-player, 3-player: 3 Dogs
- 4-player: 4 Dogs
-
Place all tokens by the Park board in reach of all players. There is no limit to the number of resources a player may have during the game. If any of the resources run out, use something else as a substitute.
-
Select and shuffle a Location Bonus card deck based on the player count and place it by the Park board.
- Solo, 2-player, 3-player: Rerouted Park
- 4-player: Plentiful Park
Return the unused deck to the box.
-
Reveal the top Location Bonus card. Place the tokens as indicated by the card on the Park board.
-
Place the round tracker on the round track at the top of the board.
You are now ready to play Dog Park!
Player Setup
Choose a colour for each player and give them the following components:
- A. Lead board
- B. Offer dial
- C. Walker
- D. Reputation marker (place all markers on Reputation space 5 on the Park board)
- E. 2 Sticks, 2 Balls, 1 Treat, and 1 Toy token
The space below each player's Lead board is their Kennel. Leave room for 2 rows of 4 Dog cards.
Auto Walker (2-player games)
In 2-player games, players must compete with an Auto Walker. This Auto Walker is getting in the other players' way and trying to hog all the best Dogs in the Field. The Auto Walker does not gain Reputation throughout or at the end of the game. However, they do recruit Dogs into their Kennel like other players.
Setup is the same, however for 2-player games, place the following components by the Park board:
- Walker (any of an unused player colour)
- Auto Walker die
These components will be used to represent the Auto Walker. During the game, the Auto Walker will always be the last player and never holds the First Walker token. Instead, it passes between the 2 human players.
Game Essentials
Breed Expert Awards
Reputation from the Breed Expert awards is won by the player who has the most of a certain breed category in their Kennel at the end of the game. If players tie for an award, they all claim the listed Reputation.
Location Bonus Cards
The Location Bonus cards add additional bonuses to the Park each round. They stay on the board for the duration of the round and are removed at the end of Home Time before a new Location Bonus card is revealed.
Location Bonuses are claimed in the same way and in addition to normal location rewards. When claimed, they are not removed from the board.
Players are able to choose the order in which they claim the bonus and reward.
Forecast Cards
The 4 Forecast cards on the board activate over the 4 rounds of the game. They offer bonuses and penalties for all players during the round in which they are active. They also act as a round tracker, as at the end of each round, that round's Forecast is flipped over. (See the Forecast cards index.)
Dog Card Overview
Each Dog card shows:
- Breed Category
- Dog Name
- Walking Cost
- Ability — Every Dog card has an ability. Abilities activate at 3 different points during the game: during SELECTION, when WALKING, and during FINAL SCORING. (See the Dog card index.)
Icon Reference
Resources
- 1 Stick
- 1 Ball
- 1 Treat
- 1 Toy
- 1 of Any Resource
- 1 Reputation — Used for bidding on Dogs and as victory points.
- Walked — Indicates that a Dog is being or has been walked.
- Block — Skip and do not count the Blocked space in the Park.
Actions
- Swap: To perform Swap, the player must swap one Dog from their Kennel with a Dog in the Field. Unless stated otherwise, all the Walked tokens on the Dog leaving the player's Kennel are discarded. The player does not place Walked tokens on the new Dog in their Kennel. Swap is always an optional action.
- Swap & Walked: Perform Swap as above, but the player places a Walked token on the new Dog in their Kennel. This Walked token can only be placed on the newly acquired dog.
- Scout: To perform Scout, the player must look at the top 2 cards of the Dog deck. This action is performed publicly. The Scouting player may then choose to replace a Dog in the Field with 1 of the Dog cards they have drawn. Any discarded Dog cards are placed to the side of the Park board.
Gameplay Overview
Dog Park is played over 4 rounds. Use the round tracker to mark your progress throughout the game. Each round is split into 4 phases: Recruitment, Selection, Walking, Home Time.
- Recruitment: players compete in 2 rounds of Offers to attract their most desired Dogs to their Kennel.
- Selection: players decide which Dogs to place on the Lead to walk that round.
- Walking: players journey through the Park.
- Home Time: players gain Reputation for walked Dogs, lose Reputation for unwalked Dogs, and the round ends.
Phase 1 - Recruitment
Stake your Reputation to fill your Kennel with your favourite Dogs, whilst keeping an eye on the Breed Expert awards, your Objective, and what your fellow Walkers are up to!
During this phase, players have two opportunities to out-Offer their opponents to recruit their desired Dogs from the Field into their Kennel. By the end of the game, all players will have recruited 8 Dogs each.
During Recruitment, players perform the following sequence:
- Players observe the Dogs in the Field and decide which Dog they wish to recruit into their Kennel. The Kennel is the space beneath players' Leads.
- In turn order (clockwise), players privately select a value on their Offer dials, ranging from 1-5, and place their Walker in a queue in the Field beneath their desired Dog.
- Players may change the value on their Offer dial up until they place their Walker in a queue.
- Players are allowed to place their Walker in a queue that already contains other Walkers.
- Once all Walkers are in a queue, all Offer dials are revealed simultaneously. The following then happens:
- If a player is unopposed, they deduct their Offer value from their Reputation on the Park board and place the Dog into their Kennel.
- If multiple players have Offered on the same Dog, the player with the highest Offer wins. The winning player deducts Reputation and gains the Dog as above. In the event of a tie, the player whose Walker is ahead in the queue is victorious.
- Any player(s) who placed an unsuccessful Offer will now, in turn order, pay 1 Reputation for 1 of the remaining available Dog(s).
If a player has 0 Reputation, they are unable to make an Offer. Instead, the other players Offer as normal and then in turn order the 0 Reputation player(s) selects from the leftover Dog(s) in the Field and places it into their Kennel.
Once this sequence is completed and all players have acquired a Dog, the Field is refilled. Players complete the sequence above again to recruit a second new Dog into their Kennel. Once all players have recruited 2 new Dogs, the Field is refilled again and the game moves on to the Selection phase.
Walker Wisdom: Offers are made with players' Reputation, so they must be placed wisely.
Recruitment (2-player Auto Walker)
In 2-player games, the Auto Walker places Offers alongside other players. The Auto Walker will always Offer on the Dog that's breed category is the highest valued in the Breed Expert awards. If there are multiple types of this Dog, they always Offer on the Dog furthest to the left.
After all other players have Offered, the Auto Walker is always placed in their desired Offer queue.
Offers are resolved as usual. If the Auto Walker is contested, a player rolls the Auto Walker's die. The result of this is the Auto Walker's Offer. Compare this result to the Offers of any opposing players and resolve as usual. In the event of all 3 players (both humans and Auto Walker) Offering on the same Dog, the Offer is resolved in the order of the Offer queue as per the standard rules.
Ensure the Auto Walker's Dog is placed into their Kennel, as they will be taken into account in the Breed Expert awards.
Phase 2 - Selection
Did someone say walkies? Set tails wagging by choosing which Dogs to walk through the Park. Make sure you're stocked up with your pups' favourite treats and toys and remember to keep an eye on the Forecast.
During this phase, players decide which of their recruited Dogs they will walk in the Park by placing them on the Lead. Players may walk up to 3 Dogs per round, and they may only walk Dogs that are in their Kennel.
To place a Dog on the Lead, players must:
- Pay the Dog's walking cost using resources from their personal supply. Return paid resources to the general supply.
- If a player is unable to pay 1 of the required resources, they can pay with any 2 resources instead. Players may only use the 2 for 1 exchange if they do not have any of the required resource in their supply.
- Once a Dog's walking cost has been paid, the player must place a Walked token on that same Dog.
Players must walk at least 1 Dog.
In the rare occurrence that a player cannot afford to pay any of their Dogs' walking costs, they sit out for the rest of the round. This player is given 1 Stick and 1 Ball to use in the following round. This player still loses Reputation during Home Time this round.
Walker Wisdom: Sequence matters in Selection. Some Dog abilities generate resources during this phase, which may enable you to pay the walking costs of other Dogs you place on the Lead this round.
Walker Wisdom: You can walk a Dog as many times as you'd like. But remember you'll lose 1 Reputation per round for each unwalked Dog in your Kennel.
In 2-player games there are no changes, the Auto Walker does not select any Dogs.
Phase 3 - Walking
It's time to stretch your legs with your Dogs in the Park. Let your pups socialise and look out for new Dogs to recruit. Do your best to follow your preferred route and avoid interference from your fellow Walkers!
During this phase, players walk the Dogs on their Lead through the Park represented by their Walker.
Starting with the player with the First Walker token, and continuing in a clockwise order, players take turns to perform 1 movement through the Park.
Players must obey the following movement rules:
- Players must move their Walker at least 1-4 spaces.
- Players cannot move their Walker backwards.
- If a player places their Walker on an unoccupied space, the player gains the location reward and possible Location Bonus.
- If the item on the location would cause the player's Dog ability(ies) to activate, the player can decide in which order to gain the resource(s), Reputation(s), and/or action(s).
- If a player places their Walker on a space already occupied by another Walker, they can only gain the location reward and any bonuses if they pay 1 Reputation.
- Once players reach the Park's path branch, they must choose and stay on one route.
When leaving the Park, players immediately claim a Leaving Bonus. When there is only 1 player left in the Park, this phase ends, the player is removed from the Park, and they lose 1 Reputation.
Walker Wisdom: Slower Walkers have more chance of collecting their desired resources, but they also run the risk of becoming the last Walker left in the Park and losing Reputation for their lateness.
Walking (2-player Auto Walker)
In 2-player games, once both human players have moved their Walkers, a player rolls the Auto Walker's die and moves the Auto Walker the corresponding number of spaces.
The Auto Walker does not gain the location reward and they keep no resources.
When the Auto Walker reaches the Park's path branch, the first player decides their route. When leaving the Park, the Auto Walker is placed on the topmost available Leaving Bonus (it does not claim the benefit).
If the Auto Walker is the last Walker in the Park, they are removed. As the Auto Walker does not track Reputation, they do not lose Reputation for being last.
Phase 4 - Home Time
Your Dogs are walked and it's time to take stock. You'll gain Reputation for the Dogs you've walked - but beware - unwalked Dogs in your Kennel are getting restless, which will cause you to lose Reputation.
In this phase, players gain Reputation for the Dogs they have on the Lead (players do not gain any Reputation for Dogs with Walked tokens in their Kennels). Each player performs the following steps:
- Gain 2 Reputation for each Dog on their Lead.
- Lose 1 Reputation for each Dog without a Walked token in their Kennel.
- Return the Dogs on the Lead to their Kennel.
- Return their Walker to their Lead.
Before the next round begins, the following happens:
- The current Forecast card is flipped over.
- Tokens from this round's Location Bonus card are returned to the general supply. A new Location Bonus card is revealed and new tokens are placed accordingly.
- The round tracker is moved onto the next round.
- The First Walker token is passed clockwise.
If this is the end of round 4, the game is over and enters final scoring.
Walker Wisdom: Keep an eye on upcoming Forecast cards for extra ways to earn Reputation and resources throughout the game.
In 2-player games the Auto Walker is returned to their Kennel during Home Time.
Final Scoring
The game ends at the conclusion of round 4.
Before scoring, players may assign resources to Dogs with resource-based FINAL SCORING abilities by placing resources from their supply onto relevant Dog cards. Once a player's resources have been assigned, these resources cannot be counted again in any other scoring condition.
Once all players have assigned resources, add together the following for each player:
- Park board Reputation
- Reputation from Dogs with FINAL SCORING abilities
- Reputation from won Breed Expert awards
- Reputation from completed Objective card
- 1 Reputation for every 5 remaining resources
The player with the most Reputation wins. If there is a tie, the player who won the highest valued Breed Expert award wins. If players are still tied, they share the victory.
In 2-player games, when calculating the Breed Expert awards, the Auto Walker's Kennel is taken into account. If the Auto Walker wins a Breed Expert award category outright, then no human players claim any Reputation for this award. If the Auto Walker ties with a human player in a Breed Expert award category, the tied human player receives the Reputation as is normal in ties.
Objective Cards
All Objectives can only be scored once. If a scenario occurs where a player has managed to meet the objective twice within the game, they would only score the stated Reputation on their Objective card once.
Solo Game Rules
In a solo game, you must compete with 2 Auto Walkers. These Auto Walkers will get in your way and try to hog all the best Dogs in the Field. The Auto Walkers do not gain Reputation throughout or at the end of the game. However, they do recruit Dogs into their Kennels like other players.
Setup is the same, however place the Auto Walker die and 2 Walkers of any unused player colours by the Park board. These represent the Auto Walkers.
Do not take an Objective card and instead select one of the Solo Objective cards. To win the solo game, you must complete the requirements stated on your Solo Objective. If you win the solo game, you can then calculate your score.
You keep the First Walker token, are always first player, and will always Offer and walk first. The turn order for the Auto Walkers is fixed.
Play the game as normal with these new rules:
Recruitment (Solo)
The Auto Walkers will never Offer on the same Dog as the other Auto Walker. The Auto Walkers will always Offer on the Dog whose breed category is the highest valued in the Breed Expert awards. If there are multiple types of this Dog, they always bid on the card furthest to the left.
After you have set your Offer dial and placed your Walker do the following:
- Place the first Auto Walker in their desired queue. Then place the second Auto Walker in their desired queue.
- Once all Walkers are in a queue, the recruitment of each Dog is resolved 1 at a time.
- If you are unopposed, deduct your Offer value from your Reputation on the Park board. Then place the Dog into your Kennel.
- If the Auto Walker is unopposed, place the Dog directly into their Kennel.
- If you and an Auto Walker have Offered on the same Dog, roll the Auto Walker die. The result of this is the Auto Walker's Offer. Compare this result to your opposing Offer and resolve as usual.
- If the Auto Walker out-Offers you, pay 1 Reputation for the remaining available Dog and place it into your Kennel.
Ensure the Auto Walkers' Dogs are placed into 2 Kennels (1 for each Auto Walker) as they will be taken into account in the Breed Expert awards.
Selection (Solo)
Auto Walkers do not select Dogs.
Walking (Solo)
Once you have entered the Park, roll the Auto Walker die and move the first Auto Walker the corresponding number of spaces. Repeat this for the second Auto Walker before taking your next turn and continue in this order.
- The Auto Walkers do not gain location rewards, and they keep no resources.
- When the Auto Walkers reach the Park's path branch, you decide their route.
- When leaving the Park, the Auto Walkers are placed on the topmost available Leaving Bonus (they do not claim the benefit).
- If an Auto Walker is the last Walker in the Park, they are removed. As the Auto Walkers do not track Reputation, they do not lose Reputation for being last.
Home Time (Solo)
The Auto Walkers are returned to their Kennel.
Final Scoring (Solo)
If you have not completed your Solo Objective, you lose the game. If you have completed your Solo Objective, you may enter final scoring as per the standard rules. Any resources used to meet your Solo Objective can be used in final scoring.
When allocating the Breed Expert awards remember the following:
- The Auto Walkers' Kennels are taken into account. If an Auto Walker wins a Breed Expert award category outright, then you cannot claim any Reputation for this award.
- If you tie with an Auto Walker in a Breed Expert award, you receive the Reputation as is normal in ties.
- If both Auto Walkers tie with each other in a Breed Expert award category, nothing happens.
To calculate your rating, add the star value on your Solo Objective to the star value below, depending on your total score. The maximum rating you can achieve is 10 stars.
Solo Ratings (Total Score → Star Value):
- 40 & below: -
- 41-47: 5
- 48-54: 6
- 55-61: 7
- 62+: 8
Rating meanings:
- 0-1: Let's go again
- 2: Better luck next time
- 3: More training required
- 4: Still an underdog
- 5: Middle of the pack
- 6: Not to be sniffed at
- 7: Rising star
- 8: Top dog
- 9: Super walker
- 10: Best in show
Variants
Packed Park (4 players)
- During setup, select the Rerouted Park Location Bonus card deck.
Gentle Walk (any player count), recommended for younger or less confident players
- During setup, select the Plentiful Park Location Bonus card deck.
- Each player starts with an additional Toy and Treat.
Predictable Forecast (any player count)
- During setup, select and shuffle Forecast cards 8, 9, 10, 11.
- Place these in the Forecast space on the Park board.
Index
Dog Abilities
- During SELECTION. Players must pay the Dog's walking cost and place them on their Lead before activating these abilities.
- When WALKING. These abilities activate when the Dog they belong to is on the Lead and the player's Walker is in the Park. If a player has multiple WALKING abilities that activate in a single movement, they may decide on the order of activation.
- During FINAL SCORING. These abilities activate at the end of the game to gain players' extra Reputation.
Ball Hog: The player may assign Balls to this Dog before final scoring by placing them on this Dog. The player gains 1 Reputation for each Ball on this Dog, up to 6 Reputation.
Crafty: When the player places this Dog on their Lead they may choose to discard 1 resource to gain up to 1 of the specified resource. The player cannot discard multiple to obtain multiple of the specified resource.
Eager: When the player places this Dog on their Lead they gain 1 of the specified resource.
Go Fetch!: This ability only activates once per movement, per Dog with this ability. The player can never gain more than 1 of the specified resource in a single activation from a single Dog.
Obedient: This ability only activates once per movement, per Dog with this ability. The player can never gain more than 1 Reputation in a single activation from a single Dog.
Pack Dog: If this Dog is in the player's Kennel during final scoring, gain 2 Reputation for each Dog of the specified breed category within their Kennel. The Dog with this ability is included in the count.
Playmate: This ability only activates once per movement, per Dog with this ability. The player can never perform the action more than 1 time in a single activation from a single Dog.
Raring to Go: The player gains 2 Reputation for each Walked token on this Dog. Any Walked tokens scored on this Dog are still eligible to meet Objective card requirements.
Search and Rescue: This ability only activates once per movement, per Dog with this ability.
Sociable: If this Dog is in a player's Kennel during final scoring, gain 1 Reputation for each different breed category represented in their Kennel. The Dog with this ability is included in the count.
Social Butterfly: When the player's Walker lands on a location that is occupied, they do not have to pay 1 Reputation to gain the location reward. This ability only activates once even if the player has multiple Dogs with this ability. Players never gain more than 1 of the location reward and any bonuses.
Stick Chaser: The player may assign Sticks to this Dog before final scoring by placing them on this Dog. The player gains 1 Reputation for each Stick on this Dog, up to 6 Reputation.
Toy Collector: The player may assign Toys to this Dog before final scoring by placing them on this Dog. The player gains 2 Reputation for each Toy on this Dog, up to 6 Reputation.
Treat Lover: The player may assign Treats to this Dog before final scoring by placing them on this Dog. The player gains 2 Reputation for each Treat on this Dog, up to 6 Reputation.
Forecast Cards
- For each GUNDOG that the player places on their Lead or that is in their Kennel, the player can gain 1 Location Bonus. The player can choose from any Location Bonus currently in the Park. If a player has multiple GUNDOGS they are able to choose multiple of the same Location Bonus. Players cannot choose Scout or Swap Location Bonuses.
- During Home Time, players gain 2 Reputation for each TERRIER in their Kennel or on their Lead.
- If a player places a PASTORAL Dog on their Lead, then the next Dog placed onto their Lead may be placed without paying its walking cost. Players must have capacity on the Lead.
- During Home Time, players gain 1 Reputation and 1 resource for each WORKING Dog in their Kennel or on their Lead.
- During Home Time, players gain 3 Reputation for each TOY Dog in their Kennel or on their Lead.
- For each HOUND that the player places on their Lead, they gain 2 Reputation.
- During the entire round, if the player places a UTILITY Dog into their Kennel, either in Recruitment or through Swap, they gain 1 resource and 1 Reputation. This gain is immediate, and the Dog does not have to be in the player's Kennel at the end of the round.
- During Home Time, players lose 2 Reputation per Dog instead of 1 Reputation for Dogs without a Walked token.
- During Home Time, players lose 0 Reputation per Dog instead of 1 Reputation for Dogs without a Walked token.
- During the entire round, whenever the player performs a Swap, they place a Walked token on the newly acquired Dog in their Kennel. The Leaving Bonus Swap is included - this would see the player gain 2 Reputation for the newly acquired Dog.
- Players may place 4 Dogs on their Lead during Selection, if they have the resources to do so. The 4th Dog is placed to the right of the Lead. This card cannot be placed in the 1st Forecast space. If it is drawn first, place it into the 2nd position and place the next forecast card in the 1st position.
Objective Cards
There are 2 types of Objectives:
- Standard: These are easier to achieve and are recommended for less experienced players.
- Experienced: Achieving these objectives will require more focus and planning.
- (Experienced): If the player has 4 Dogs of the same breed category in their Kennel during final scoring, they score 7 Reputation. Only for use in the 4 player game.
- (Experienced): If the player has 3 different Dogs in their Kennel who each have at least 2 Walked tokens on them during final scoring, they gain 7 Reputation.
- (Experienced): If the player has at least 10 Walked tokens across their Kennel during final scoring, they gain 7 Reputation. It does not matter how these Walked tokens are distributed across Dogs.
- (Experienced): In a 2/3-player game, if the player has won at least 4 Breed Expert awards, they gain 7 Reputation. In a 4-player game, if the player has won at least 3 Breed Expert awards, they gain 7 Reputation. Any awards where the victory is tied still count towards this Objective.
- (Experienced): If the player has 7 Dogs who each have at least 1 Walked token on them in their Kennel, they gain 7 Reputation.
- (Standard): If the player has 2 different Dogs in their Kennel who each have at least 2 Walked tokens on them during final scoring, they gain 3 Reputation.
- (Standard): If the player has 3 Dogs of the same breed category in their Kennel during final scoring, they gain 3 Reputation.
- (Standard): If the player has at least 1 Dog of 4 different breed categories within their Kennel during final scoring, they gain 3 Reputation.
- (Standard): In a 2/3-player game, if the player has won at least 3 Breed Expert awards, they gain 3 Reputation. In a 4-player game, if the player has won at least 2 Breed Expert awards, they gain 3 Reputation. Any awards where the victory is tied still counts towards this Objective.
FAQ
Can I walk a Dog more than once? Do I add a new Walked token every time? Yes. You may walk a Dog as many times as you are able to pay their walking cost. Add a new Walked token to the Dog every time you place it on your Lead. Remember: each unwalked Dog in your kennel will lose you 1 Reputation per round.
Do unwalked Dogs in my Kennel still count toward the Breed Expert awards, Forecast cards, FINAL SCORING abilities, and my Objective? Yes.
Can I change my Offer during Recruitment? A player can change their Offer up until they place their Walker in a queue. After this, they are unable to change their Offer or chosen Dog.
Can a Dog score across more than one FINAL SCORING ability? For example, if a player had one 'Pack Dog' ability and one 'Sociable' ability in their Kennel? Yes, Dogs can score across multiple abilities. For example, if you had a 'Pack Dog' ability that scores GUNDOGS and a 'Sociable' ability, a GUNDOG would score for both the 'Pack Dog' and could be used to count toward the 'Sociable ability'. Scoring multiple 'Pack Dog' abilities is also permitted.
Am I allowed to have multiple Dogs that have the same ability in my Kennel? Could I put them all on the Lead at the same time? Yes and yes.
What is the difference between a location reward and a Location Bonus? Location rewards are printed on the Park board. Location Bonuses are additional bonuses represented by tokens added and removed from the Park each round.
Is a player able to share a space with another player on the Leaving Bonus? No, these spaces are single player occupancy.
What is meant by winning a Breed Expert award 'outright'? To win a Breed Expert award 'outright', the player must have more Dogs in that Breed Expert category than any other player. The award cannot be tied.
Can the 'Go Fetch!' ability activate other 'Go Fetch!' abilities? Yes. In the case of a 'Go Fetch!' ability gaining a resource that activates another 'Go Fetch!' ability on the player's Lead, the second 'Go Fetch!' activates as normal. Remember: 'Go Fetch!' abilities can only activate once per movement, so once a 'Go Fetch!' ability has generated a resource, it cannot generate another resource on that player's turn.
Can Dogs with WALKING abilities activate on the Leaving Bonus? Yes.