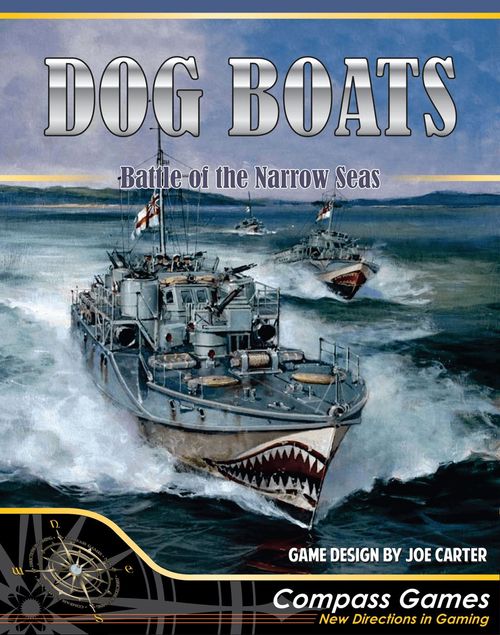
Dog Boats: Battle of the Narrow Seas
Dog Boats: Battle of the Narrow Seas Rulebook
Table of Contents
Table of Contents
- 2.0 Game Components
- 3.0 Set-Up and Gameplay
- 4.0 Game Basics
- 4.1 Object of the Game
- 4.2 Time Scale
- 4.3 Victory Conditions
- 4.4 Dog Boat Speed and Movement on Strategic Map
- 4.5 Time Spent in Assigned Offensive Patrol Zones
- 4.6 Combat Targeting and Gunfire
- 4.7 Dog Boat Movement and Speed Changes
- 4.8 Dog Boat Formation Rules
- 4.9 Dog Boat Abort Mission
- 4.10 Disabled or Sunk Dog Boats
- 4.11 Damaged / Sunk Dog Boats and Substitutions
- 5.0 Veteran Status and Crew Skill Levels
- 6.0 Medals
- 7.0 Game Counter Guide
- 8.0 Optional 2-Player Rules
- Understanding Game Play Terms in Dog Boats
- Designer's Notes
- Selected Bibliography
2.0 Game Components
Dog Boats includes the following equipment:
- a. Rule Book. This book contains the basic game concepts, plus the counter guide.
- b. Tables Books (Fairmile D MGB and Vosper 72' MTB). These two books contain all of the tables and rules used to play the game.
- c. Strategic Map Boards. These game boards represent the English Channel and North Sea, and are where Dog Boat squadron movement is tracked to and from the assigned Target Zones. Medals the player has been awarded may also be displayed here.
- d. Crewmen Placement Boards. These game boards represent the Top Deck and Interior sections of either your Fairmile D gun boat or your Vosper 72' torpedo boat. Crewmen, passengers, ordnance such as mines, torpedoes, depth charges, and certain damage counters are placed on these boards.
- e. Combat Boards. These game boards are where Dog Boat squadron surface combat with Kriegsmarine ships takes place. Enemy air patrol encounters also occur here.
- f. Dog Boat Damage Log Cards. These log cards are where you track any damage the Dog Boat squadron may sustain. The left-hand column represents Dog Boat #1 systems and components. The top right-hand section represents any damage Dog Boats #2-#4 may sustain during a mission. Each check box represents 1 damage point sustained. Dog Boat expended torpedoes, mines, and depth charges are also tracked here. One check box is marked off for each ordnance that is expended.
- g. Enemy Warship Status Sheet. This sheet is where you track any damage that is inflicted upon Luftwaffe Aircraft or Kriegsmarine Warships. Each check box represents 1 damage point.
- h. Enemy Merchant Ship Status Sheet. This sheet is where you track any damage that is inflicted upon Kriegsmarine merchant ships. Each check box represents 1 damage point.
3.0 Set-Up and Gameplay
3.1 Campaigns
There are a total of 3 game campaigns in Dog Boats: Short, Medium, and Long. The Short campaign starts on February 1st 1944, the Medium campaign starts on October 1st 1943, and the Long campaign starts on June 1st, 1943.
All 3 game campaigns end on June 1st 1944. At the end of each campaign, add your total Victory Points and check the final scoring on Table H (MTB) or I (MGB) in the Tables booklets.
3.2 New Campaign Game Set-up
When first starting a new game, decide which campaign you will play- Short, Medium, or Long (see Section 3.1 above).
Next, roll on the Crewmen Names Generator in either the Fairmile D or Vosper 72' Tables booklet for each Dog Boat crewman position and fill the names or nicknames in on the Crewmen Status sheet. Roll for all applicable Crewmen Special Skills (see Table I (MTB) or J (MGB)). Also write in the initial campaign start date of each crewman.
Next, check mark all 7 Dog Boats as 'available' on the Dog Boat Squadron Status sheet. If the Fairmile D is selected, decide if you will be a member of the 52nd (English Channel) or 54th flotilla (North Sea). This cannot be changed after starting.
3.3 Pre-Mission Set-up (Fairmile D example)
- At the beginning of each mission, roll 1D10 or 1D20 (depending on the month) one time on Table A-0 in the Tables book to determine the number of days until the next scheduled mission. If there are not at least 2 serviceable Dog Boats available, there is no mission this night. If a Dog Boat #1 crewman was KIA or discharged from service due to a Severe Wound on the previous mission, roll on Table J-1. If Dog Boat #2-#4 was sunk and a reserve boat is available, its crew must be replaced. Roll on Table J-2 to determine the new crew skill level.
- Next, roll on Table A-1 to determine the night's weather. If Bad weather, the mission is always Offensive Patrol. Depending on the mission weather, place the corresponding Combat board on the table.
- Next, roll on Table A-2 to determine mission type assigned for that night. Note that if it is an Offensive Patrol mission, there is a 50-60% chance of the mission abstractly being performed, with no enemy encounters or events occurring that night. If this occurs, the mission is not actually played through, but is still recorded on the Campaign log sheet as successfully being completed, meaning it still counts towards Dog Boat #1 crewmen Veteran status, plus Dog Boats #2-#4 crew skill increases. (see Rule book section 5.0)
- Next, roll on Table A-3 to determine the 4 assigned Red Zones for the night's mission.
- Next, place the Mission Target Zone counters in the 4 assigned Red Zones boxes on the Strategic Map board.
- Next, on the Strategic Map board, place the individual MGB counters in the Squadron boxes, the Sea State counter in its corresponding box, and the MGB Squadron counter in the gray 52nd Flotilla Base box. You are now ready to start the night's mission. Simply follow the tables in alphabetical and numerical order (unless otherwise noted). Don't forget that Dog Boats under repair may not participate in missions.
Note: Boat #1 is always present during a mission, as it is the Squadron Commander's boat. If the player has earned any medals, proudly display them in the corresponding Medals boxes on the Strategic Map board.
- Finally, upon returning to base, the mission ends. Go to Tables G (MTB) and H (MGB) to determine Dog Boat repair times, Victory Points awarded or lost, medals awarded, and Inquiry and Review if any Dog Boats were lost on the mission.
4.0 Game Basics
4.1 Object of the Game
As a squadron Commander serving in the Royal Navy during World War II, your primary goal is for you and your squadron mates to go on night patrols into enemy occupied zones and sink as many enemy ships as possible over a period of up to 12 months during 1943-1944, while at the same time striving to avoid losing too many Dog Boats.
4.2 Time Scale
- Turns: A turn takes place on the Strategic Map. The Dog Boat squadron may enter one new travel zone box each turn if not damaged. Each turn represents approximately 60 minutes of game time. Each mission represents one night (approximately 8-10 hours at sea).
- Combat Rounds: A combat round only occurs during engagements on the Combat mats. Each combat round represents approximately 1-5 minutes of game time.
4.3 Victory Conditions
Regardless of which campaign you choose, if you remain in command and survive long enough, the game always automatically ends on June 1st 1944. After this date, add up all of your Victory Points and go to Table H (MTB) or Table I (MGB) in the Tables books. There you can see your final campaign performance result.
4.4 Dog Boat Speed and Movement on Strategic Map
Dog Boat speed in each colored Zone on the Strategic Map board is always considered to be Medium (cruise speed) if undamaged, and Dog Boat movement into a new Map Zone may only be made once per turn. Dog Boats may only be at Idle speed on the Strategic Map if they are disabled or are attempting engine repairs. Dog Boats with 2 engines out, or ones that are being towed, always travel at Slow speed on the Strategic Map and must spend 2 turns in each zone.
For playability reasons, Dog Boats may not travel at Fast speed on the Strategic Map board. But if attacked by an Air Patrol and the aircraft is successfully spotted, the Dog Boat squadron may accelerate to Fast speed before the aircraft attacks. Once the air attack is resolved and the mission resumes, the Dog Boat squadron returns to Medium speed while travelling on the Strategic Map.
4.5 Time Spent in Assigned Offensive Patrol Zones
For regular Offensive Patrol missions, upon entering each assigned Red Zone on the Strategic Map board, the Dog Boat squadron may only spend a maximum of 1 turn in the zone searching for enemy convoys before traveling to the next assigned mission Red Zone, or having to return to base. The Dog Boat squadron may not spend more than 1 turn searching in each assigned mission Red Zone due to daylight eventually breaking.
For special missions, the mission must be performed first in the first assigned Red Zone. Depending on the special mission, the squadron may be required to return to base, or may proceed with a normal Offensive Patrol.
4.6 Combat Targeting and Gunfire
Unit order of attack during combat with enemy surface units is randomized. All units present have their unit designation counter placed in a draw cup, and then drawn one at a time. Each unit may fire in the order they are drawn. Once drawn, place the counter off to one side, resolve their attack, and then draw again, repeating the same process until all units have attacked. Any surface units that are sunk or evade during combat have their unit designation counter removed from the draw cup pool for the remainder of that combat encounter.
Each Dog Boat cannon may only fire each once per combat round (exceptions: If Dog Boat #1 gun crew is Veteran, 2 shots per combat round for that gun are possible. Dog Boats #2-#4 with Elite crews may also fire twice per combat round).
In order to streamline gameplay, Dog Boats does not track cannon ammunition. All enemy units are considered to always have enough ammunition to fire their guns during combat. However, the game does track individual Dog Boat torpedoes, mines, and depth charges. Once fired, the counters are removed from the Crewmen Placement board and the check boxes marked off on the Dog Boat Damage Log.
In Good weather, Dog Boats may fire Guns and Torpedoes at enemy surface units from Long, Medium, or Close Range Zones on the Combat Boards. In Poor weather, Dog Boats may only fire at enemy surface units from Medium or Close Range Zones. In Foggy or Bad weather, Dog Boats may only fire at enemy surface units from Close Range Zone.
Note: Vosper 72' boats may not attack E-boats or R-boats with Torpedoes due to their shallow drafts.
4.7 Dog Boat Movement and Speed Changes
During the first combat round, the Dog Boat squadron starts in the furthest Range Zone from the target(s). Placing the Dog Boat counter during the first combat round counts as one move. For example, if weather is Good and the Dog Boat squadron decides on Fast speed from the beginning, the Dog Boat counters are placed into the Long Range zone - counting as the first move, then immediately move into the Medium Range Zone (Fast speed is 2 moves per combat round). All detection checks and torpedo / rocket / gun combat each round begin only after all Dog Boats change speed and complete their moves.
Speed changes and movement into a different Range Zone on the Combat Boards may only be made once at the beginning of each combat round. When traveling at Slow speed on the Combat Boards, Dog Boats must spend 2 combat rounds in each Range Zone before entering a new Range Zone. Dog Boats may only move into one new Range Zone at the beginning of each combat round when traveling at Medium speed.
When traveling at Fast speed, Dog Boats may move into 1 or 2 new Range Zones each combat round. For example, a Dog Boat is traveling at Fast speed in the Long Range Zone. Starting with the next combat round, the Dog Boat may first move into the Medium Range Zone, then immediately move into the Close Range Zone. After entering the Close Range Zone, the player rolls on all combat tables as usual for that combat round (Dog Boat speed is considered Fast that entire combat round after the move is complete). If Dog Boat is traveling at Fast speed in the Medium Range Zone and is attempting to exit combat, the Dog Boat first enters the Long Range Zone and then must successfully evade before exiting combat. No more table rolls take place for that Dog Boat, as it is considered to have left the area.
Regardless of speed, Dog Boats always have the option to remain in the same Range Zone each combat round. Alternatively, depending on speed, they may enter a new Range Zone (or Zones) each combat round.
Slow Speed
Slow speed must spend 2 combat rounds in each Range Zone before entering a new Range Zone.
Fast Speed
Fast speed may move 2 Range Zones each Combat Round.
4.8 Dog Boat Formation Rules
During combat with enemy convoys, all Dog Boats in the squadron are expected to remain in formation (same Range Zone) except under the following conditions:
- Dog Boat becomes disabled and cannot move.
- Dog Boat is heavily damaged. Under this circumstance, the damaged Dog Boat may break formation and head for another Range Zone (presumably the longest Range), but must remain in that zone and may not exit combat if wanting to remain with the squadron after all combat / waves have ended. Dog Boats may only exit combat if aborting mission and leaving the squadron permanently. If doing so, damaged Dog Boats must spend at least 1 combat round in the Long Range Zone before exiting combat early and aborting mission.
As Dog Boat Squadron Commander, Dog Boat #1 may never exit combat and abort mission without the other Dog Boats. If Dog #1 exits combat and aborts mission, all Dog Boats must exit and abort together. Dog Boats #2-4 exiting combat and aborting mission without Dog Boat #1 may not rejoin formation later.
4.9 Dog Boat Abort Mission
A single Dog Boat may abort for whatever reason anytime during a mission. To abort mission during ship combat, the aborting Dog Boat must spend one or more combat rounds (depending on speed) in the longest Range Zone and successfully evade before leaving the combat area. Disabled Dog Boats may not exit the Combat boards during combat. Any Dog Boat #2-#4 which does successfully abort mission is immediately removed from the Dog Boat squadron for the remainder of that mission. As Dog Boat Squadron Commander, Dog Boat #1 may never abort mission alone if other Dog Boats are in formation. All Dog Boats must abort together. On the return trip, you must roll on all necessary tables in each Map Zone entered.
4.10 Disabled or Sunk Dog Boats
See Tables F-10 A-C in the Fairmile D Tables booklet and Tables E-10 A-C in the Vosper 72' Tables booklet.
4.11 Damaged / Sunk Dog Boats and Substitutions
Dog Boat #1 may be always be substituted for another Dog Boat during repairs back at base, or if sunk. In this case, Crew #1 will board the new Dog Boat #1 and the existing crew (#2-4) will sit out the mission. They return with the same crew skill level once given a new replacement boat.
For example, Dog Boat #1 sustains heavy damage, and upon returning to base, will be out of commission and under repair for 3 days. Let's also say that Dog Boats #2-#4 are undamaged and ready for the next assigned mission. Under situations such as this, the Commander may take command of Dog Boat #2, which now becomes reassigned as Dog Boat #1. At the same time, Dog Boat #1 now becomes Dog Boat #2, and will be under repair for 3 days. This way, if at least 2 Dog Boats are mission-ready, one will always be Dog Boat #1, allowing for missions to be performed.
4.12 Crewmen Severely Wounded / Killed in Action (KIA)
Any Dog Boat crewman that is either Severely Wounded or KIA during a mission may no longer perform his duties. Another crewman may take his place in this situation, but only under the following conditions:
- a. While any crewman may temporarily steer the Dog Boat from the Helmsman position, the XO always takes over first, followed by the Medic, if anything happens to the Helmsman. Negative table modifiers always apply.
- b. Gun crews can fire any Dog Boat cannon without penalty. If a Gun Crew is severly wounded or KIA, the DC Crew may man their cannon for the remainder of the mission if capable.
If any of the above conditions are met, move the Severely Wounded or KIA crew/crewman counter into a rest bed on the Dog Boat Crewmen Placement Board. Then place the Dog counter of the temporary replacement crew/crewman in the position box of the relevant crew/crewman.
Whenever the CO (the player) has become killed in action (KIA), the campaign game ends immediately, and a new campaign game is set-up (see 3.2).
4.13 Game Acronyms
This is a list of common acronyms used in game:
- CO = Commanding Officer
- DC = Depth Charge
- KIA = Killed in Action
- LW = Light Wound
- MGB = Motor Gun Boat
- MTB = Motor Torpedo Boat
- SW = Severe Wound
- VP = Victory Points
- XO = Executive Officer
5.0 Veteran Status and Crew Skill Levels
Dog Boat #1 crewmen earn Veteran status after 15 missions have been successfully performed. Veteran status gives bonuses in certain situations. Dog Boats #2-#4 crews increase their skill level (Green, Average, Veteran, and Elite) by one for every 5 enemy kills, or for every 15 missions successfully performed.
6.0 Medals
Medals may be earned throughout the game by several different means, and are always cherished keepsakes. If received, place the medal counter in the corresponding Medals box on the Strategic Map board for prominent display. Medals may also help the player avoid being relieved of command or court-martialed.
- Medal - Mentioned in Dispatches: Commander (player) is awarded this medal if the current Victory Point total is 401-800 points (Short Campaign), 601-1,200 points (Medium Campaign), or 801-1,600 points (Long Campaign). He is also be awarded this medal if he is ever wounded in combat.
- Medal - Distinguished Service Cross: Commander (player) is awarded this medal if the current Victory Point total is 801-1,600 points (Short Campaign), 1,201-2,400 points (Medium Campaign), or 1,601-3,200 points (Long Campaign).
- Medal - Distinguished Service Order: Commander (player) is awarded this medal if the current Victory Point total is 1,601-3,200 points (Short Campaign), 2,401-4,800 points (Medium Campaign), or 3,201-6,400 points (Long Campaign).
- Medal - Victoria Cross: Commander (player) is awarded this medal if the current Victory Point total is 3,201+ points (Short Campaign), 4,801+ points (Medium Campaign), or 6,401+ points (Long Campaign).
7.0 Game Counter Guide
These are the double-sided playing pieces that are used to track individual units, crewmen, and situations on the various game boards.
Air and Ordnance Counters
- Shadow Aircraft: Place this Luftwaffe aircraft counter on the Strategic Map board next to the MGB/MTB Squadron counter to designate that the squadron is being shadowed. Once shadowed, the enemy aircraft follows the squadron for the remainder of the mission, continuously reporting its position.
- Ju 88 Aircraft: Place this Luftwaffe aircraft counter on the Combat boards when enemy Air Patrols are encountered. Once the attacks are completed or unit is destroyed, remove the counter from the board.
- Beaufighter Aircraft: Place this RAF aircraft counter on the Combat boards when the Mistaken Identity random event occurs. Once the attacks are completed, remove the counter from the board.
- Firing: Place this counter next to the unit counter that is firing at a target (see Targeted counter) on the Combat Boards.
- Targeted: Place this counter next to the unit counter that is being targeted by the firing unit (see Firing counter) on the Combat Boards.
- Bombs/Rockets: Place this counter next to the attacking Patrol Aircraft counter on the Combat board if aircraft is making bomb or rocket attack. If aircraft is making gun strafing attack, no ordnance counter is used.
- Shore Guns: Place this enemy counter in the Shore Guns box on the Combat board. Shore Guns cannot be targeted by MGB/MTBs.
- Evade: Place these counters next to either the MGB/MTB Squadron counters, or the enemy Convoy counters as a visual reminder that they are attempting to evade combat.
- Ships: Place these enemy counters on the Combat boards when they are encountered. If a ship evades, remove the counter from the board. If a ship is sunk, remove as above, but keep it and its Crew Skill counter close by for VP calculations at end of mission.
(The printed text of this counter entry ends at this point in the rulebook; the sentence is incomplete in the source.)
Squadron and Map Counters
- MGB/MTB Squadron - Strategic Map Board: These counters represent either the Fairmile D gun boat or Vosper 72' torpedo boat squadron. Place them in either of the Flotilla Base boxes on the Strategic Map boards at the beginning of each mission. Move the counter through the colored zones to track the location of the squadron.
- MGB/MTB #1-#4 - Strategic Map Board: These counters represent individual MGB/MTB Dog Boats in the squadron. Depending on the number of Dog Boats assigned to the current mission, place them in the Dog Boat squadron boxes on the Strategic Map Board. If Dog Boats #2-#4 are either sunk, abandoned, separated from the squadron, or abort mission, immediately remove them from the board. Unless sunk or abandoned, the Dog Boat #1 counter always remains on the board throughout each mission. The white star on MGB/MTB #1 counter signifies this is the player's Boat (Commander).
- Sea State: Place this counter in the corresponding Sea State box on the Strategic Map Board according to the Sea State in the current Travel Zone.
- Mission Target Zone: Place these counters in the 4 assigned Red Zone boxes on the Strategic Map board.
- 2 Turns Per Zone: Place this counter next to the Dog Boat squadron counter on the Strategic Map Board as a visual reminder that 2 turns per zone are required for slow movement.
- Idle Speed / Slow Speed / Fast Speed: Depending on their speed, place these counters next to Dog Boat counters on the Combat board at the beginning of the first combat round. One counter represents the entire Dog Boat squadron speed (unless single Dog Boats are separated in different Range Zones on the board). If the Dog Boat squadron is moving at Medium Speed (default during regular combat), no Speed counter is used. The Slow Speed counter may also be used as a reminder on the Strategic Map Board that 2 turns are per zone are required.
- Unit Disabled: Place these counters next to any Dog Boat or enemy ships that become disabled on the Combat board.
Crewmen and Dog Boat Counters
- Veteran Dog Boat #1 Crewman: Place these counters next to Veteran Dog Boat Crewmen counters (15 or more successful missions) on the Crewmen Placement boards.
- Light Wound 1-2 / Severe Wound / Killed in Action: Place these counters next to any Dog Boat crewman or passenger counter on the MGB/MTB Crewmen Placement board that receive 1 or 2 Light Wounds, Severe Wound, or are Killed in Action (KIA). Three Light Wounds = Severe Wound. Light Wound + Severe Wound = KIA. 2 SW = KIA.
- Dog Boat #1 - Crewmen: Place these counters representing Dog Boat #1 crewmen in the corresponding crewmen box positions on the Crewmen Placement boards.
- Dog Boat MTB #1 Torpedoes: Place these counters in the Torp. 1 and Torp. 2 boxes on the Vosper 72' MTB Crewmen Placement board. Once a torpedo is either launched or becomes disabled, remove the counter from the board.
- Dog Boat MGB #1 - Mines: Place these 8 counters in the Mine 1 through Mine 8 boxes on the MGB Crewmen Placement board. Once a Mine is either dropped or becomes disabled, remove the counter from the board. Mines are only loaded for MGB Minelaying missions.
- Dog Boat #1 - Depth Charges (DC): Place these counters in the Depth Charge boxes on the MGB/MTB Crewmen Placement board before the start of each mission. Once a Depth Charge is either dropped or becomes disabled, remove the counter from the board. Depth Charges are always loaded, regardless of mission type.
- Dog Boat #1 - Fire Extinguishers: Place these counters in the red Fire Extinguisher boxes on the MGB/MTB Crewmen Placement board. Single use each. Remove each counter once used or destroyed.
- Dog Boat #1 - Components Inoperative: Place these counters in the corresponding Dog Boat sections on the MGB/MTB Crewmen Placement boards as visual reminders that the Dog Boat equipment is inoperative.
8.0 Optional 2-Player Rules
While Dog Boats: Battle of the Narrow Seas was designed primarily as a solitaire wargame, it may also be played with 2 players if the second player has their own copy of the game.
- To begin with, each player must have their own Crewmen Placement board, set of crewmen counters, Dog Boat Damage log, and Dog Boat #1 Crewmen Status sheet (second player treats it as Dog Boat #2). A single Strategic Map board, Combat board, Enemy Unit Status sheets, and Dog Boat squadron Status sheet may be shared between both players. For best results, divide up duties for tracking enemy unit damage during combat, rolling during enemy unit attacks, calculating Dog Boat repair times, etc. between both players. Final scoring and all actions of Boats #3 & #4 are handled identically to the solo mode.
Next, players must decide who will be the Squadron Commander (Dog Boat #1), and who will be the Dog Boat #2 Commander for the duration of the campaign game.
-
During gameplay, the squadron Commander (Dog Boat #1) makes most of the decisions for the other Dog Boats (including the player #2 boat), such as squadron speed, attack distance, aborting missions, etc. Both Dog Boat players may independently decide which enemy units they will attack each combat round by rolling on Dog Boat #1 Offensive Fire tables. The wirelesses of both Dog Boats #1 and #2 must be functional and the boats in formation for orders to be given from Dog Boat #1. Note that if Dog Boat #1 is either separated from the squadron or sunk, Dog Boat #2 player automatically takes command for the remainder of that mission. Also note that if Dog Boat #1 or #2 are separated from the squadron, or they voluntarily abort mission and leave formation, they must travel through each travel zone box on the map while returning to base, rolling on all necessary tables each turn.
-
During combat, both players roll on Dog Boat #1 Offensive Fire tables when attacking. For each hit to player-controlled Dog Boats #1 and #2, roll on Dog Boat Damage Tables E-1 or F-1. Also note that during combat, any table modifiers that reference Dog Boat #1 also apply to Dog Boat #2 during the second player's turn. Above all, remember that most tables which refer to Dog Boat #1 will also apply to Dog Boat #2 during a 2-player co-op game.
-
When VPs are earned, they are evenly distributed between both players, with the total score applied to the entire squadron. When medals are awarded, both players receive their own at the same time. But if the Squadron Commander (Dog Boat #1) is either relieved of command or KIA, player #2 becomes the new Squadron Commander (Dog Boat #1) for the remainder of the campaign game, and player #1 may enter the game again with a new boat and crew as player #2.
Understanding Game Play Terms in Dog Boats
The rulebook's illustrated examples of the Combat Board, Strategic Map and Crew Placement Board during play (pages 12-14 of the printed booklet) are photographs with captions only and are not reproduced.
Campaign
There are 3 possible campaign lengths to choose from: Short (starts February 1st, 1944 – 121 days), Medium (starts October 1st, 1943 – 244 days) or Long (starts June 1st, 1943 – 366 days). All campaigns end on June 1st, 1944. Victory points awarded and final scoring on Table I in the MGB Booklet or Table H in the MTB Booklet depend on the campaign length chosen.
Days
Months are made up of days and all missions are performed at night. Dates, enemy kills, and friendly losses are all recorded on the Campaign Log for each mission. For the sake of simplicity, the date remains the same for the entire mission. Example: July 1 mission, rolled 10 days for next mission, you would set out on July 11.
Mission
Missions occur at night. 50-60% of the time a mission does occur, it will be abstractly performed, meaning no enemy encounters or events occurred that night, and the player rolls for the next mission date. This abstraction was done to greatly speed up game play, while at the same time preserving realism. Note that missions abstractly performed are always considered successful and count towards Boat #1 Veteran status, plus Boats #2-#4 crew skill increase. There are two reasons a mission will not occur:
- Too many boats are repairing damage (Table G-1/G-2 for MGBs or Table F-1/F-2 for MTBs). You need a minimum of two available boats. (Case 3.3, Step 1)
- Your squadron mission is limited in due to weather (Table A-1/A-2 if MGB).
Due to these factors, you may perform a mission from a little as daily, to as much as one mission every 20 days.
Completing a Mission
Hopefully a mission ends with the Squadron having a successful patrol in one of their assigned Red Zones, and by retracing their steps through the Yellow and Green Zones and arrive back at base as the sun rises over the English Channel or the North Sea. In some cases, not all boats that go out on a mission will return. They may be sunk in combat, disabled due to combat, or become disabled due to combat, storms, or random events. What happens to those boats and their crews is covered in Tables F-10 A-C (for MGBs) or Tables E-10 A-C (for MTBs).
Once the boats return to base, the player will:
- Determine the status of any wounded crewmen members per Table F-9 (MGB) or Table E-9 (MTB). a. Replace any crewmen who were KIA, lost at sea, or sent home due to serious wounds (SW). b. Replacement crews are always available. c. Roll to see if the replacement crew has any experience. (Table J-1 for MGBs or Table I-1 for MTBs).
- Determine the status of damaged boats per Tables G-1 and G-2 (MGB) or Tables F-1 and F-2 (MTB). a. Repairs are started. If a boat or boats have suffered significant damage, they may not take part in mission until completely repaired. b. If the Engines, Radar, or Wireless are destroyed, were destroyed there may not be a replacement readily available per the notes in Tables G (MGB) or Table F (MTB). c. If there are not two boats available (fully repaired) for this evening's mission, there will not be a mission tonight. d. If any Boats were lost, the reserve boat for the Squadron replaces it. (Hopefully, you didn't lose more than one.) Roll on the Squadron Status sheet to replace any lost boats. If a boat is not readily available, your Squadron may not go out on the next mission due to the combination of unavailable boats and damaged boats. As the Squadron Commander, you must manage your resources while taking the battle to the Kriegsmarine.
- Determine Victory Points for that mission per Table H-1 (MGB) or Table G-1 (MTB). a. The total of Victory Points at the end of the Campaign chosen will determine how well you did.
- Determine if any Medals are awarded per Table H-2 (MGB) or Table G-2 (MTB).
- If any Boats were lost, there will be a Board of Inquiry per Table H-3 (MGB) or Table G-3 (MTB).
Zones
Each mission requires your squadron to travel a number of Green and Yellow Zones to and from your 4 assigned mission's Red Zones, Table A-3. For example, if your mission assignment is to patrol Red Zones 2-5, at the beginning of the mission, your Boat squadron would first start out in the your Base Zone. The squadron would then travel through all connecting Green and Yellow zones (one per game turn) until reaching the first of the 4 assigned Red Zones. Upon entering each assigned Red Zone, the squadron spends 1 game turn patrolling there. If an enemy encounter occurs, all relevant combat tables are rolled on. Once combat ends (or no encounter occurred), the squadron moves into the next connecting assigned Red Zone, also patrolling there for 1 turn. This is repeated until the squadron patrols all assigned Red Zones, at which time the squadron heads back to base, once again travelling through all connecting Yellow and Green Zones (one per turn) until finally reaching base, where the mission ends.
Example: North Sea Map, assigned to patrol Red Zones 2-5, the player would move from 54th flotilla white base to G1, G2, G3, Y1, R2, R3, R4, R5, Y4, Y3, G5/4/3/2/1, base
Note that a mission may be aborted at any time if the CO feels it necessary to do so, such as when boats become separated/damaged/sunk, or once all torpedoes have been launched. But remember that if a mission is aborted before all 4 assigned Red Zones are patrolled, or no ships were sunk, the mission is considered a failure and does not count towards Boat #1 crewmen Veteran status, or Boats #2-#4 crew skill increases.
Designer's Notes
With the success of Devil Boats and Schnell Boats, I decided to create a third game which focused on the topic of British World War II torpedo boats. With there being so little information on the subject, it was somewhat difficult to gather enough information and references in order to design and develop the game.
As far as I know, Dog Boats is the first solitaire tabletop wargame that focuses primarily on Royal Navy gun boats and torpedo boats, and I sincerely hope it will spike interest in this obscure, yet fascinating topic among players.
Featuring two playable boats, each of which will offer players a slightly different experience, it is my sincere hope that Dog Boats will both educate and entertain.
Owners of Devil Boats will notice some new features and additions in Dog Boats. For example, squadron Dog Boats #2-#4 will now each have their own crew skill level, which can improve over time. Campaign games are also much shorter than before, which can be completed in half the time. Finally, there are now draw cup counters for the new randomized unit order of attack rules, adding more uncertainty and tension during combat. These are but a few of the new features and additions included in the game.
In creating this game, I attempted to find a balance between historical accuracy and gameplay. Too much detail and gameplay gets bogged down, but not enough detail and players might quickly become bored. I feel that I have found a decent compromise by focusing most of the details on Dog Boat #1, which is of course the player's boat. By abstracting the damage models and other aspects of Dog Boats #2 to #4, I have attempted to keep the gameplay flowing as smoothly and quickly as possible without simplifying everything too much.
Another aspect I focused on to streamline the game was to integrate most of the rules into the various Tables books. By doing this, players will have most relevant information and rules conveniently located right in front of them wherever they are in the game, instead of having to frequently stop and check the Rules book, or worse yet, both memorize a bunch of complicated rules.
I hope everyone enjoys playing Dog Boats as much as I have had with creating it. And I'd like to give a very big thank you to all the playtesters, proofers, and everyone else who has offered their help and support with my game designs over the years. Good luck, stay safe, and God save the King! - Joe Carter
Selected Bibliography
Books:
- Dog Boats: A Complete Operational History by Lawrence Paterson (Seaforth)
- E-Boat vs MTB by Gordon Williamson (Osprey)
- Dog Boats in Action by David Krakow (Squadron Signal)
- The Battle of the Narrow Seas by Peter Scott
- Gunboat Command by Antony Hichens