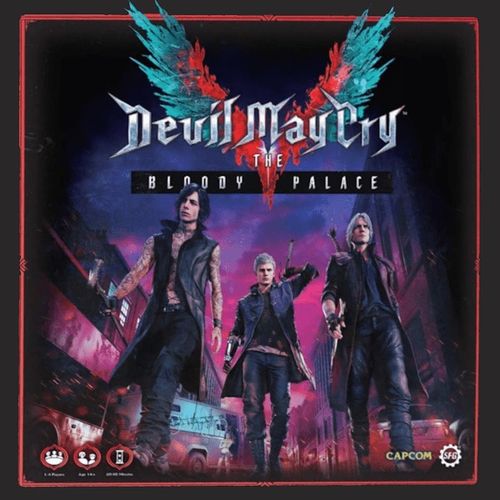
Devil May Cry: The Bloody Palace
Devil May Cry: The Bloody Palace Rulebook
Table of Contents
Table of Contents
Components
- Game board
- 20 Achievement cards
- 25 Bloody Palace cards
4 Hunters, each with the following components:
- Dante — Hunter card, Starting deck (27 cards), Upgrade deck (20 cards)
- Nero — Hunter card, Starting deck (27 cards), Upgrade deck (20 cards)
- Trish — Hunter card, Starting deck (27 cards), Upgrade deck (20 cards)
- V — Hunter card, Starting deck (27 cards), Upgrade deck (20 cards), plus the Shadow and Griffon models and the Shadow card
99 Tokens and Markers:
- 14 One damage tokens
- 14 Three damage tokens
- 9 Five damage tokens
- 4 Ten damage tokens
- 11 Stun tokens
- First Player token
- 8 Guard tokens
- 4 Style markers (one per Hunter)
- 27 Red/Green orb tokens
- 7 Five Red orb tokens
24 Enemies:
- 12 Empusa/Red Empusa — 2 Enemy cards, 2x 4 Behaviour cards
- 4 Hell Antenora — 1 Enemy card, 7 Behaviour cards
- 4 Scudo Angelo — 1 Enemy card, 7 Behaviour cards
- 1 Proto Angelo — 1 Enemy card, 7 Behaviour cards
- 1 Empusa Queen — 1 Enemy card, 7 Behaviour cards
- 1 Riot — 1 Enemy card, 7 Behaviour cards
- 1 Elder Geryon Knight — 1 Enemy card, 7 Behaviour cards
Overview
Devil May Cry™: The Bloody Palace sees one to four players taking control of a powerful Devil Hunter and dispatching wave after wave of increasingly powerful enemies. Defeat these enemies, and the Hunters can claim valuable orbs they can later spend to purchase new attacks and abilities for the next stage.
However, slaying demons isn't enough to win—style counts for everything! Players score style points by building impressive attack combos and claiming achievement cards. The player with the most style points at the end of the final stage is the winner.
For a single player game, the aim is to get to the end of the final stage with as many style points as possible!
Each Devil Hunter has their own deck of cards representing the different attack moves they can use. Every Hunter's deck is unique. Players take turns moving their Devil Hunters and having them fight the demons. A player might play cards to have their Hunter slash with their sword, shoot with their pistol, and so on. These cards can be linked together into a combo chain, allowing players to create devastatingly stylish flurries of attacks. But beware: being hit by an enemy attack removes a chain entirely and forces the Hunter to start all over again.
Setting Up
To set up for a game follow these steps. For help identifying the components, see the Components section above. For help identifying icons, see the Icon Reference at the end of this rulebook.
1. Game Board
Place the game board in the middle of the playing area, where the players can all reach it. Each player chooses a Hunter board and puts it in front of them, making sure they leave some space to the right for the cards they'll play during their turn.
2. Hunters
Each player chooses an available Hunter and gathers their corresponding Hunter model, Style marker and their 48 cards. Set up each model in one of the blue hexes in the centre of the game board; this can be done in any order the players choose. Place the Style markers on the track running around the edge of the game board on the square displaying '0'.
Randomly determine a First Player, and give them the First Player token. Each player then sets up their Hunter board as follows:
A. Place your Hunter card on the space in the top left. B. Take the 27 cards marked in the bottom right corner with the following icons: diamond suit for Dante, spade suit for Nero, heart suit for Trish, club suit for V. These cards are your Starting deck. C. Take the four cards from your Starting deck marked with your Hunter's Basic Attack icon in the bottom left corner (a fist icon showing your Hunter's basic attack). Place them in your Basic Attack area on your Hunter board. These cards are your Basic Attack cards. D. Shuffle the remaining Starting deck cards and place them face down on the deck space. E. Take the remaining 20 cards marked with the Upgrade icon in the bottom right corner. Place these cards face up next to your Hunter board. These cards are your Upgrade deck. F. Leave the discard space empty for now, this is where your discarded cards will be placed.
3. Bloody Palace Deck
Split the Bloody Palace cards into seven sets: 'Start', 'Boss', and Levels 1 to 5. Set aside the sets of Level cards specified in the table below for the number of players in this game. 'Start' cards are marked with a player count; set aside any that don't match the number of players in this game. There's only one 'Boss' card in this set—the Elder Geryon Knight—but expansions include other 'Boss' cards to add more variety to the final stage.
Shuffle each of the remaining sets of Bloody Palace cards and use them to create the Bloody Palace deck for the game as shown in the table below, according to the number of players and building from the bottom up. The resulting deck will consist of a 'Start' card at the top, a 'Boss' card at the bottom, and two other cards in between.
| 1 Player | 2 Players | 3 Players | 4 Players | |
|---|---|---|---|---|
| Deck Top | Start (1 player) | Start (2 players) | Start (3 players) | Start (4 players) |
| Level Card | Level 1 | Level 2 | Level 3 | Level 4 |
| Level Card | Level 2 | Level 3 | Level 4 | Level 5 |
| Deck Bottom | Boss | Boss | Boss | Boss |
| Set Aside | Levels 3, 4 and 5 | Levels 1, 4 and 5 | Levels 1, 2 and 5 | Levels 1, 2 and 3 |
Each row of the table represents one randomly drawn card from a particular set. When drawing a card and adding it to the deck, keep it face down so that the players can't see what awaits them in future stages.
4. Other Components
Put all remaining components near the game board, in reach of the players. Create a supply of red orbs, green orbs, and other tokens to use during the game.
Each player draws a hand of five cards from their deck. After looking at your cards, you may choose to reject your hand. If you do, shuffle it back into your deck and draw a new hand of five cards. You cannot reject the new hand.
5. Begin!
The player with the First Player token flips over the top card of the Bloody Palace deck and sets it up as detailed below.
Bloody Palace Cards
Each card in the Bloody Palace deck represents a new wave of enemies that the Hunters must defeat. A new Bloody Palace card is revealed each time a stage ends (when all enemies have been slain).
The cards feature the following information:
A. A list of the enemy models that are needed for this stage. B. A map showing where to set up these models on the game board. C. Instructions for dealing out Achievement cards, including how many, at the start of this stage.
When a card is revealed from the Bloody Palace deck, find the appropriate models and set them up as shown. Always place them so that they are facing the centre of the game board. For each enemy class find its Enemy card and Behaviour deck. Shuffle each Behaviour deck and place them near the game board.
If a Hunter is in a space where an enemy needs to be set up, the Hunter's player moves their model into an adjacent hex of their choice.
Remove any 'Challenging' Achievement cards from the Achievement deck before starting a new game. The Bloody Palace cards will tell you when to add these later on. Finally, shuffle the Achievement deck and deal the indicated number of Achievement cards face up next to the game board where all players can see them.
Then the first round begins.
Gameplay Basics
A game plays out across four stages, each of which is represented by a single Bloody Palace card. A stage starts when the Bloody Palace card is revealed and ends when there are no enemies left on the game board. At the end of the fourth and final stage, the player with the most style points is the winner.
Game Board
The game is played on a game board representing the fighting arena of the Bloody Palace. It is divided into a grid of hexes and has the following features:
1. Starting Area — The seven hexes at the centre of the game board are where the Hunters begin the game.
2. Reference Marks — There are two reference marks outside the edge of the hex grid. These are used to properly align the Bloody Palace card at the start of each stage and ensure that enemies are placed correctly.
3. Style Track — The style track runs around the edge of the game board and is used to count the total style points each player has scored. The track is divided into eight sections, each denoting a style rank:
- Unranked
- Dismal (D)
- Crazy (C)
- Badass (B)
- Apocalyptic (A)
- Savage (S)
- Sick Skills!! (SS)
- Smoking Sexy Style!!! (SSS)
Whenever a Hunter is knocked out, their score drops to the first space of the previous style rank. If their score is currently within the Unranked section, they drop to 0.
If player scores enough style points to lap the entire style track, they may continue to score style points as normal and are still considered to be within the SSS style rank.
Style Points
Around the edge of the game board is the style track, for keeping track of the players' style points. Each player starts with a style marker on the '0' space. Players can score style points in the following two ways, moving their marker one space along the track for each style point scored.
The two ways to score are:
- Claim combo chains during your turn, scoring style points based on the number of cards in the chain.
- Claim Achievement cards by fulfilling the criteria listed on the card. You can claim one of these cards each round, but you do not score points for them until the end of the final stage.
Player Decks
Each player has a deck of cards that is unique to their Hunter. You will draw cards from your deck to form a hand, and you will play cards from your hand to make attacks and gain special bonuses. When you discard a card place it face up in your discard pile, marked with the discard icon, on your Hunter board.
If you ever need to draw a card and your deck has run out, shuffle your discard pile to form a new deck and then carry on drawing.
Upgrade Decks — In addition to their Starting deck, each Hunter has an Upgrade deck. At the end of each stage, you will have the opportunity to purchase cards from your Upgrade deck, by spending red orbs, that will be added to your Starting deck or grant you an ongoing bonus. At the end of the game, remove any Upgrade cards from your Starting decks and return them to the Upgrade deck.
Each card is broken down into the following parts: Card Name, Hunter Name, Knock Back Icon, Stun Icon, Follow Up Icon, Hit Box (melee), Hit Box (ranged), Link In, Link Out, Basic Attack Icon, Discard Icon, Purchase Cost, Starting Deck Icon, and Hunter Icon.
Most of the cards in your deck are attack cards, which have a hit box and links. Any cards that are not attack cards will clearly state how and when they should be played.
Some parts of the card have special rules:
Link Icons — These can be found to the left and right of the hit box and are used to link cards together in your combo chain. The link icon to the left of the hit box is called the link in, while the icon to the right is the link out.
If a card has a link in, it can be played into your combo chain following a card that has a matching link out. For example, a card with a blue link in can be played to follow a card with a blue link out.
If a card has a link out, it can be followed in your combo chain by a card that has a matching link in. For example, a card with a blue link out can be followed by a card with a blue link in.
In addition to the coloured links, there are three special kinds of link: starting, wild, and blank.
- Starting Links — Some cards have a starting link which matches the link on your Hunter board. Basic Attack cards often have a starting link. Cards with a starting link are used to start new combo chains.
- Wild Links — Some cards have one or more wild links. These links match any colour. If a card has a wild link in and out, you can treat them as the same colour or different colours.
- Blank Links — Some cards have a blank link—this will be the same for both the link in and link out. They can be played to follow a link of any colour, including starting links, and their links are treated as being the same as the link out to their left.
Hit Box — This is presented in the middle of the card and shows how the attack deals damage. There are two types of hit box: melee and ranged. Melee attacks are made against adjacent enemies, while ranged attacks can target distant ones.
Knock Back, Stun and Follow Up Icons — These three icons are present on all cards, but they are sometimes faded out, meaning they are not active on that card. Each active icon shows an additional effect that the attack will have.
Basic Attack Icon — This denotes that the card is a Basic Attack. These are kept separate from your deck and cannot be discarded. They are always available as though they were in your hand.
Discard Icon — Cards can be discarded to block damage or move extra hexes during your turn. The number shows how much damage is blocked or how many hexes you can move when you discard it. Cards with a faded out discard icon cannot be discarded to block damage or move.
Purchase Cost — Cards in the Upgrade deck all have a purchase cost, showing the number of red orbs you must spend at the end of a stage to purchase the card.
Character Models
Each character in the game—whether Hunter or enemy—is represented on the game board by a model in its likeness. Each model is mounted on a hexagonal base, one face of which is marked as the front. Whenever a model is placed on the board its base must be aligned with the board's hexagonal grid.
Moving — During a round of play, characters have multiple opportunities to move around the game board. Whenever a character is allowed to move, the rules will say how many hexes they can move. Each move must take them into an adjacent, unoccupied hex—in other words, one which is touching the hex they are in and which does not already have a model in it. Some rules will allow a model to pass through occupied hexes, letting them move through other models; however, they cannot end their move in a hex that contains another model.
Sometimes a rule will state that a model must move towards or away from another model. A model moving towards another model must always reduce the number of hexes between the two models with every hex it moves. A model moving away from another model must always increase the number of hexes between the two models with every hex it moves.
Facing — The way a model is facing is important when playing the game, especially when a character makes an attack. Because of this, each character has a facing diagram on its card.
A character's facing diagram shows a representation of a portion of the game board, with the character in the centre. To make them easier to read, the diagrams are always oriented so that the character is facing the top; this doesn't change the way the model is placed on the game board.
The highlighted hexes of a character's facing diagram represent their front arc—the space where most of their melee attacks will land. A character's front arc does not have any general game rules directly associated with it, but some Hunter attack cards and enemy Behaviour cards reference it.
Some rules require you to see whether a hex is in front of a character—for example, when Nero opens fire with his handgun Blue Rose, he can only target enemies that are in front of him. Only a representative portion of what is in front of a character is shown on its facing diagram; in front of a character extends to the edges of the game board. Any hexes that are not in front of a character are considered to be behind it.
Large and Gigantic Models
Although most of the models in the game occupy one hex on the game board, other models—such as the Empusa Queen and the Proto Angelo—occupy three. These are called large models. There are also models that occupy seven hexes, such as the Elder Geryon Knight; these are gigantic models.
Large and gigantic models mostly work in the same way as regular-sized ones; they have their own facing diagram, which shows their front arc and which hexes are in front of them.
Due to their size, however, large and gigantic models move in a different way than other models do. For each hex that a large or gigantic model moves, it can either advance, turn, or pivot.
Advance — Pick one of the hexes which the large or gigantic model's base currently occupies and move it into an adjacent hex without changing the model's facing.
The model can move in any direction. It cannot move so that any part of its base enters an occupied hex.
Turn — Pick one of the hexes which the large or gigantic model's base currently occupies and rotate the model around that hex either clockwise or anticlockwise.
A model cannot turn so that any part of its base enters an occupied hex.
Pivot — Rotate the large or gigantic model to face any direction whilst occupying the same hexes.
Movement Example: Here is an example of an Empusa Queen making a five hex move. The first two are spent on advancing, the third is spent on turning, and the last two are also spent on advancing.
Orbs
Slain enemies drop a combination of red and green orbs, collectively referred to as orbs. Orbs are marked on the game board by red and green orb tokens, collectively referred to as orb tokens.
Whenever your Hunter slays an enemy, place the shown combination of orb tokens on the game board. A hex can contain any number of orb tokens.
When your Hunter moves into a hex that contains any orb tokens, you collect them all and place the orb tokens next to your Hunter board.
Orbs have different effects, depending on whether they are red or green.
Red Orbs — Any red orbs you collect are placed on your Hunter card. At the end of each stage—when all enemies on the game board have been slain—you will have the chance to spend any red orbs you have collected. Any red orbs you still have at the end of the game will add to your style score, 1 style point per red orb.
Green Orbs — When you collect a green orb, it is immediately returned to the supply of tokens. If your Hunter has any damage, you can remove up to 3 damage. If they don't, there are no further effects.
The First Player
Throughout the game, the First Player token will change hands, moving clockwise from player to player. The player currently holding this token is called the First Player.
When you're the First Player, you get to take the first turn in the round. Then, when all of the other players have taken their turns, you take control of the enemies, activating each one in turn to make them move and fight.
At the end of the round you'll pass the First Player token to the player on your left, making them the new First Player. In this way, gameplay flows around the game board: each player takes a turn, then the First Player controls the enemies, then the player to their left starts the next round.
Combo Chain Example
It's the start of your turn, and you have no cards in your combo chain. You play Rapid Swing, which has a starting link, placing it to the right of the matching link on your Hunter board. Then you resolve the attack.
You continue your turn by playing Blade Arc, which has a blue link in that matches the blue link out of Rapid Swing. Place it to the right of Rapid Swing, so their links connect. Then resolve Blade Arc.
You do not have any cards in your hand with a blue link in, but you do have High Roller. This has a starting link, so before you play it you claim your combo to clear it. You do not score any Combo points, as there were only two cards in the combo, but you do return Rapid Swing to your Basic Attacks area and discard Blade Arc. Your combo is now clear, so you play High Roller to start a new one.
Playing The Game
Round Sequence
Within each stage of Devil May Cry™: The Bloody Palace, the game cycles through a series of rounds. Each round consists of three Phases: the Hunter Phase, the Enemy Phase, and the End Phase.
In the Hunter Phase, you take turns moving and attacking with your Hunter by playing cards. Once during your turn you can claim your combo, scoring a number of style points and clearing it so that you can start a new combo. There is no limit to how many cards can be played, but you might want to save some cards to defend against enemy attacks.
In the Enemy Phase, the First Player activates all of the enemies on the game board, following a set of simple instructions. Hunters will come under attack and suffer damage, which they can block by discarding cards from their hand... if they have any left!
In the End Phase, players replenish their hand of cards and the First Player token is passed to the left.
Each player has the opportunity to claim a single Achievement card per round. These are mostly claimed during their turn in the Hunter Phase, but some might be claimed later in the round.
The Hunter Phase
In the Hunter phase, each player takes a turn with their Hunter, starting with the First Player and moving to the left. Once all players have had their turns, the Hunter Phase ends and the Enemy Phase begins.
On your turn, you can run once and make any number of attacks.
Running — When your Hunter runs, they can move up to the number of hexes shown in the Speed icon on their Hunter card. They can move in any direction, but each move must be into an adjacent hex. At the end of the move, choose a facing for your Hunter. Note that a Hunter does not have to move the full amount of its Speed—you could even use their run to turn on the spot.
Moving this quickly has a cost, though—you can run only once during your turn, and as soon as your run ends any remaining movement is lost. For example, if your Speed is 5 you could attack twice, then run five hexes, then attack again—but you could not run three hexes, attack, and then complete your run.
As described, Trish has Speed 5, so makes two attacks against the Empusa, moves 5 hexes and then attacks the Empusa Queen.
Collecting Orbs — Remember, if at any point your Hunter moves into a hex that contains one or more orb tokens, you immediately collect all of them.
Attacking — Your Hunter can attack any number of times in the turn, although the actual number of attacks is limited by the number of cards in your hand and in your Basic Attacks area.
To make an attack, play an attack card into the combo chain area to the right of your Hunter board, then resolve the effects of the card. You can play cards from your hand, or from the Basic Attacks area beneath your Hunter board. An attack card with a hit box can only be played if it will damage at least one enemy.
The card you play must have a link in that matches the link out of the furthest right card in your combo chain. If there are no cards in your chain, it must have a link in that matches the starting link out icon on your Hunter board—or a blank or wild link in.
Cards played into your combo chain stay where they are until you claim your combo or your Hunter suffers damage.
Stepping — Before or after attacking, you can discard one or more cards from your hand that have the Step icon in their bottom-left corner. This allows you to move up to the number of hexes shown in the icon and then choose a new facing. The number '3' in the icon shown, for example, means that discarding it allows you to move up to 3 hexes. Note that you do not have to move and could just discard a card with a Step icon to change facing.
Resolving Attack Cards
To resolve an attack, follow these steps in order. Steps 2, 3 and 4 are not always performed; they happen only if the attack has the relevant icon.
- Deal Damage — This is done differently for melee and ranged attacks.
- Stun Target(s)
- Knock Back Target(s)
- Follow
1a. Deal Damage—Melee Attacks — Melee attacks have a hit box made up of a small hex grid. The central hex represents your Hunter, who is assumed to be facing towards the top of the card. Each hex marked with a flame icon is a target hex. Any enemies in a target hex suffer the amount of damage shown in that hex on the hit box. Other Hunters are never hit by your attacks.
If a large or gigantic enemy is within multiple target hexes, it only suffers damage from one target hex chosen by the Hunter.
Melee Attack Example: In the attack below, Dante will hit the Riot and the Hell Antenora with his melee attack, but will not hit the Scudo Angelo.
1b. Deal Damage—Ranged Attacks — Ranged attacks have a simpler hit box. Ranged attacks target the closest enemy that is in front of your Hunter. If there are multiple enemies that are equally close, choose one to be the target.
The target enemy suffers the amount of damage shown in the hit box. Other models do not block your ranged attacks.
2. Stun Target(s) — If the attack has an active Stun icon, your attack stuns the target. Mark this by putting a Stun token next to the enemy on the game board. Some enemies will be stunned only if they have a certain number of Stun tokens. When this is the case, the required number of Stun tokens is specified in the enemy's special rules on their Enemy card.
Stunned enemies are not activated in the Enemy Phase of the turn they become stunned. Instead, its Stun tokens are removed. It will activate as normal in the following round.
3. Knock Back Target(s) — If the attack has an active Knock Back icon, your attack knocks back the target. If there are multiple targets, they are all knocked back.
Move the target 1 hex away from your Hunter. The enemy must be knocked back into one of the hexes indicated by the attack card's hit box. If it's not possible to knock the target back, it simply doesn't move.
4. Follow Target — Some attacks with a Knock Back icon also have a Follow icon. For these attacks, you can follow the target after knocking them back or slaying them.
Immediately after knocking your target back or slaying them, follow by moving into the hex they just vacated and turning to face them. If your attack knocks back more than one enemy, pick one of them to follow.
When following a large or gigantic enemy, the Hunter can move into any adjacent hex which has just been vacated by the enemy being followed.
Knock Back and Follow Example: Dante attacks using the Rebellion Cut Left card. He knocks back the Empusa into one of the indicated hexes, and then follows it by moving into the hex it previously occupied.
Claiming Your Combo — Once per turn, at any point, you can claim your combo. When you do this you score a number of style points as shown below, then clear your combo by returning any Basic Attack cards to the area beneath your Hunter board, and discarding any other cards.
| Cards | Score |
|---|---|
| 1 | 0 |
| 2 | 0 |
| 3 | 0 |
| 4 | 1 |
| 5 | 2 |
| 6 | 3 |
| 7 | 4 |
| 8 | 6 |
| 9 | 8 |
| 10+ | 10 |
Each deck contains a number of powerful combo finisher attacks. These cards do not have a link out, and usually instruct you to claim your combo immediately. This is in addition to the one time per turn that you are normally allowed to claim your combo—meaning you can potentially claim multiple combos in one turn.
Damaging Enemies — When you attack an enemy it will suffer damage. Enemies can suffer a certain amount of damage—shown by the Vitality icon on their Enemy card—before they are slain.
Track the amount of damage suffered by each enemy by placing damage tokens next to it on the game board. Keep these next to the enemy as it moves. There are tokens for 1, 3, 5 and 10 damage, and you can switch them out freely to track the appropriate number. For example, if an enemy has 1 damage and suffers 2 more, you can just replace the 1 token with a 3 token.
Once an enemy has suffered damage equal to its Vitality, it is slain. Remove it from the game board, along with any damage tokens that were next to it. Take a number of orb tokens as shown on the Enemy card and place them on the game board. At least one orb token must be placed in each hex the enemy was in, and any remaining orb tokens must be placed in adjacent hexes. Orb tokens must be spread as evenly as possible between all available hexes. An orb token can be placed in a hex containing an enemy—in which case it is placed beneath the model—or a Hunter—in which case they immediately collect it.
Ending Your Turn — You can end your turn at any point, and will eventually have to when you run out of attack cards. As soon as you do, the player to your left takes their turn. Once all players have taken one turn, the Hunter Phase is over and the Enemy Phase begins.
Slaying The Last Enemy — When the last enemy on the game board is slain, the current stage ends. Skip the Enemy Phase and resolve the End of Stage sequence.
The Enemy Phase
In the Enemy Phase, the First Player controls all of the enemies on the game board, following the instructions on their Enemy cards. Activate the enemies in the same order that they appear on the current Bloody Palace card: first activate all of the enemies of the first class listed, then activate all of the enemies of the second class, and so on until all enemies have acted. The First Player can choose the order in which the individual enemy models are activated within a given class.
Enemy Cards — Each enemy class has its own card, which is broken down as follows:
- Enemy Class — This gives the name of the enemy class along with a brief description. 2 & 3. Red and Green Orbs — These show the number of red and green orbs that the enemy drops when it is slain.
- Vitality — This shows the amount of damage an enemy can suffer before it is slain.
- Facing Diagram — This shows which hexes are in front of the model and which ones are in its front arc.
- Special Rules — These rules always apply to enemies of this class.
Behaviour Decks — In addition to an Enemy card, each enemy class has a Behaviour deck. This is shuffled at the start of the stage and placed next to the Enemy card. The First Player will draw a behaviour for each enemy on the game board unless instructed otherwise by their Enemy card. For example, one Behaviour card is drawn for Empusa enemies regardless of how many Empusa there are on the game board.
Each card gives instructions for how to resolve it. Some have hit boxes, which are resolved in the same way as a Hunter's attack. Once an enemy has finished moving, it turns to face the nearest Hunter. Turn it so that the Hunter is as close to the centre of the enemy's front arc as possible. If there's more than one equally close Hunter, the First Player can choose which one to face.
Once a card has been resolved, place it on the bottom of the deck.
Stunned Enemies — Remember, if an enemy is stunned, it does not activate in the Enemy Phase. Instead, its Stun tokens are removed. It will activate as normal in the following round.
Damaging Hunters — Most Behaviour cards will deal damage to one or more Hunters.
When your Hunter suffers damage, you can discard one or more cards from your hand that have a Block icon.
Blocking — When your Hunter is attacked, you can discard one or more cards from your hand that have the Block icon in their bottom left corner. This allows you to prevent an amount of damage up to the number shown in the icon. The number '2' in the icon shown, for example, means that discarding it allows you to block up to 2 damage.
If you do not discard enough cards to block all the damage, your Hunter suffers any damage that remains. Track the amount of damage your Hunter has taken by placing damage tokens on your Hunter card. When you suffer any amount of damage your combo chain is immediately cleared. Return all Basic Attack cards to the area beneath your Hunter board and discard any other cards.
Knocked Out — If your Hunter has damage tokens equal to their Vitality, they are knocked out.
Discard your hand and remove your model from the game board. In addition, move your Style marker to the first space of the previous rank. For example, if you are on the third space of Rank A, your marker moves back to the first space of Rank B. In the End Phase of this turn you'll draw cards as normal.
At the start of your next turn, place your Hunter anywhere on the game board that is not adjacent to an enemy, then take your turn normally.
If there are no Hunters on the game board during the Enemy Phase, skip straight to the End Phase.
End of Stage Sequence
As soon as the last enemy on the game board is slain, follow the steps here in order.
1. Pass First Player Token — The First Player token is passed to the player to the left of the player who slew the last enemy.
2. Purchase Upgrades — Each player can look through their Upgrade deck and spend their red orbs to purchase cards.
The number of orbs you must spend to purchase an Upgrade card is shown in the cost icon at the bottom right of the card.
When you purchase an Upgrade card, show it to the other players and return a number of their red orb tokens equal to its cost to the supply of tokens. Then add the Upgrade card to your discard pile, unless the card instructs you to place it next to your Hunter board. For example, the 'Get More Orbs' card, which each Hunter has in their Upgrade deck.
3. Reset Deck — Shuffle your discard pile back into your deck.
4. Start Next Stage — The First Player draws the top card of the Bloody Palace deck and resolves it.
The End Phase
This phase features three short steps which tie up the current round and set up for the next one. Follow these steps in order:
- Draw cards
- Special effects
- Pass First Player token
1. Draw Cards — Each player can choose to discard any number of cards from their hand. Then each player who has fewer than five cards in their hand draws cards from their deck until they have five in their hand. If your deck runs out, shuffle your discard pile to create a new deck.
2. Special Effects — Any other game effects that happen 'in the End Phase' are resolved now. If there is more than one effect, the First Player chooses the order they are resolved in.
3. Pass First Player Token — The First Player passes the First Player token to the player on their left. This ends the current round and signals the start of the next.
Achievement Cards
At the start of each stage, a number of Achievement cards will be dealt face up next to the game board.
Each player can claim up to one of these Achievement cards per round by fulfilling the criteria listed on the card. When you claim an Achievement card, put it face down next to your Hunter board. Once claimed, your Achievement cards are kept secret from the other players.
Each Achievement card is worth style points and will move your Style marker along the track at the end of the game. This means no one can be sure who is winning until the end of the game.
Ending the Game
Once the final card is revealed from the Bloody Palace deck, the final stage has begun. The Hunters will be facing off against something huge and terrifying!
The final stage proceeds exactly like the other stages except where noted below. Once the last enemy on the game board is slain, the game ends—move on to scoring to see which Hunter is crowned 'Monarch of the Bloody Palace'.
Boss Vitality — Boss enemies have a varying amount of Vitality depending on the numbers of players. Each Boss card will show four different Vitality values, the highest value is used for a four player game, the next highest is used for a three player game, and so on.
Demon Slayer — Before dealing Achievement cards for the final stage, remove all cards marked with the Demon Slayer icon from the Achievement deck and place the 'Demon Slayer' card on top of the Achievement deck.
Scoring — Starting with the First Player and going to the left, each player moves their Style marker one space around the track for each of their red orb tokens.
Then, in the same order, take turns revealing one of your face down Achievement cards and moving your Style marker the number of spaces shown on the card. As soon as all players have scored all their Achievement cards, scoring is over. The player with the highest style score is the winner! If there is a tie, break it with the following steps in order:
- Tied players count up the total red orb cost of all Upgrade cards they added to their deck. The player with the highest total wins. If there is still a tie, continue to the next step.
- The player with the least damage tokens on their Hunter card wins. If there is still a tie, continue to the next step.
- The player sitting to the right of the First Player wins.
After a single player game, make a note of your style score so that when you play again you can try to beat it!
Icon Reference
Combo Links
- Red Combo Link
- Green Combo Link
- Blue Combo Link
- Starting Link
- Wild Link
- Blank Link
Player Deck Icons
- Stun Icon
- Knock Back Icon
- Follow Up Icon
- Discard Icon (Step)
- Discard Icon (Block)
- Hunter Speed
- Hunter Vitality
- Purchase Cost
Hunter Icons
- Dante
- Nero
- Trish
- V
Basic Attack Icons — one for each Hunter.
Enemy Icons
- Boss
- Enemy Vitality
- Green orbs — Dropped on death
- Red orbs — Dropped on death
Hit Boxes
- Hit Box (melee)
- Hit Box (ranged)
- Enemy Hit Box (melee)
- Enemy Hit Box (ranged)