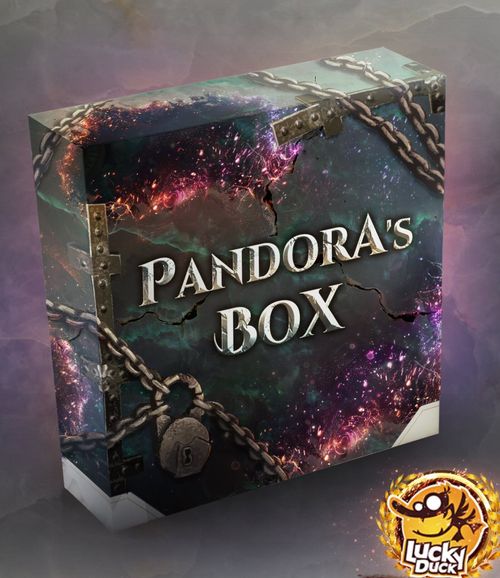
Divinus: Pandora's Box
Divinus: Pandora's Box Rulebook
Table of Contents
Table of Contents
Golden Rule
This rulebook contains only modifications to the rules of, and new rules added to, the base "Divinus" rulebook. When playing the Pandora's Box scenarios, follow the base "Divinus" rules, but any new rule in this rulebook replaces and overrides the corresponding rule in the base rulebook.
All players should be familiar with the base game rules before playing Pandora's Box.
The following components from the base game are required to play Pandora's Box:
- 1 Board (do not remove any stickers applied during the campaign).
- 1 First Player figure.
- 4 x 16 Player markers (number depends on player count).
- 78 Map tiles from the base game (do not remove any stickers applied during the campaign).
- 4 x 6 dice (number depends on player count).
- 5 God cards.
If the players do not own an additional set of "Divinus" dice, they will need to use the dice from the base game. Before starting play, REMOVE ALL stickers from the dice that will be used in Pandora's Box. At the start of each Pandora's Box scenario, each player must have a set of regular (sticker-free) "Divinus" dice.
Note: remove only the stickers from the dice, not the stickers from the board, the tiles or the boxes.
Components
- 5 Scenario boxes, one for each scenario. Each box contains the components needed for its scenario, and the first box also contains the artifacts (8 artifact tokens); each later box contains 3 artifacts.
- 5 Monster figures, one for each scenario.
- The Pandora's Box instruction (this rulebook).
Pandora's Box is played in the app. The app is the same one used for the base game and "Shadow of Yggdrasil". Pandora's Box requires the free app, which can be downloaded from the App Store or Google Play. Only one phone or tablet with the app installed is needed. The game cannot be played without the app. After installing and updating the app, an internet connection is not required during play.
Goal of the Game
Players take on the roles of demigods who perform missions in each scenario in order to win recognition and fame. Each demigod competes with the other demigods to win the favor of the gods and become a hero of the newly written legends. At the end of each scenario, the player with the most Favor wins and immortalizes their name in the annals of history.
Favor
In Pandora's Box scenarios there is only one kind of Favor: Greek Favor. As in the base game, the app tracks the Favor points each player gains in each scenario.
During Pandora's Box you will not encounter: Pantheon Favorites, Clashes of the Gods, or the extra dice that come from scenario rules (the Pantheon Dice and the Pythia Die).
Setup
-
Place the Board in the middle of the play area.
-
Set aside part of the Map tiles in the game box, depending on the player count:
- 2 players: set aside the Map tiles marked with the "3+" symbol and the "4" symbol.
- 3 players: set aside the Map tiles marked with the "4" symbol.
- 4 players: use all Map tiles.
-
Shuffle all remaining Map tiles marked with the first symbol (the gold-and-teal tile symbol shown in the printed instruction) and place them as a face-down stack in the matching place on the board.
-
Shuffle all remaining Map tiles marked with the second symbol (the blue diamond tile symbol shown in the printed instruction) and place them as a face-down stack in the matching place on the board.
-
Deal out 12 Map tiles to the Board as follows:
- Draw 6 tiles from the left stack (the first symbol) and place 1 face up on each of the spaces 1–6.
- Draw 6 tiles from the right stack (the second symbol) and place 1 face up on each of the spaces 7–12.
During Pandora's Box, ignore all Locations (do not scan them). If you wish, you may remove the Location stickers from the Map tiles. This does not affect play in these scenarios.
-
Open the app on your device, select the scenario you want to play from the "Standalone Scenarios" tab, choose "Start a new game", and then follow the on-screen instructions.
-
Before starting the first scenario, open the first scenario box (Box I).
-
Before starting play, each player chooses a color and takes 6 dice in that color. Each player then sets aside some of their dice in the box depending on the player count:
- 2 players: all 6 dice remain in the game.
- 3 players: each player sets aside 1 die (5 remain in the game).
- 4 players: each player sets aside 2 dice (4 remain in the game).
-
Each player rolls all of their dice. The turn order is decided by the rolls: the player with the lowest total becomes the first player and receives the First Player figure. The player with the next lowest result becomes the second player, and so on. If players tie, the tied players roll again to break the tie among themselves.
Each player then places their dice in front of themselves, keeping the results they rolled. These are their prepared dice. Players may use prepared dice to perform various actions.
During these scenarios, players do not use the Demigod boxes from the base game.
General Differences
God Cards
In Pandora's Box scenarios players will encounter only Greek gods. Each scenario has 2 new gods and 1 god from the base game "Divinus". Gods from one scenario do not reappear in later scenarios.
Pandora's Box has no Clash of the Gods.
Ties and two-player scoring for gods are resolved in the same way as in the base game (see page 23 of the base "Divinus" rulebook).
Map Tiles
In Pandora's Box scenarios players use Map tiles (with all the stickers already applied to them) from the base game "Divinus" campaign. Scanned Locations have no function in these scenarios and are to be ignored (or removed from the tiles, as you wish).
Stickers
In Pandora's Box scenarios players never apply new stickers to any game components.
Artifacts
Each scenario box contains artifacts that provide new abilities for use in that scenario. The first box contains 8 artifact tokens. Each subsequent box contains 3 artifacts.
Choosing Artifacts
Before each scenario, after the turn order has been determined, the players choose artifacts for the duration of the scenario.
- Each player must start the game with exactly 2 artifacts.
- Each player may use only their own artifacts.
- Players do not keep their artifacts after the scenario ends. After the game, return all artifacts to the appropriate scenario box.
Choosing artifacts in Scenario 1:
- Place the 8 artifacts from the first scenario box in the middle of the table, where all players can see them.
- Starting with the last player and going in reverse turn order, each player chooses their first artifact from those available.
- Then, in turn order starting with the first player, each player chooses their second artifact from those available.
Choosing artifacts in Scenarios 2 to 5:
Place 3 artifacts from the box of the scenario you are playing, and 8 artifacts from the first box, in the middle of the table. Players choose their first and then their second artifact as described above, from the 11 available artifacts. As before, each player will have exactly 2 artifacts to use during the scenario.
Instead, with the agreement of all players, a pool of available artifacts may be built from any combination of scenario boxes. Players may then choose their 2 artifacts as described above, draw them at random, or assign them in any other way agreed upon among the players.
Player Turns
In Pandora's Box scenarios players take turns in the same way as in the base "Divinus" game: clockwise, starting with the first player.
On your turn you must perform one Main Action (Explore or Rest), and you may perform one Demigod Action. In Pandora's Box, Demigod Actions appear only on certain artifacts, or in the special rules of individual scenarios.
Note: the following sections describe the scenarios and the game elements from the 5 Pandora's Box scenario boxes.
Scenario 1: Apollo's Revenge
Join Apollo, god of light and former patron of the Pythia, to help him take revenge on the mighty Cyclops!
Map Shape
The first tile that a player places on their map must go in the bottom-right corner, marked "S" in the printed illustration.
Each player must build their map as shown, forming an L shape from 16 Map tiles.
Example: the second tile on the map must be placed directly to the left of, or directly above, the starting tile.
Gods
First god: Apollo
Setup: each player places 1 of their Demigod markers on space "0" of the Apollo track.
Description: during the fight with the Cyclops, each player who refreshes any dice moves their marker forward 1 space on the Apollo track.
End of scenario: the player farthest along the Apollo track receives 2 Favor. The second player in order receives 1 Favor.
Second god: Hekate
End of scenario: each player counts how many Faction icons of each kind they have. Then each player works out the difference between their most numerous Faction and their least numerous Faction (which may be 0). The player with the smallest difference receives 2 Favor, and the player with the next smallest difference receives 1 Favor.
Example: Grześ has 4 Barbarian icons, 8 Greek icons and 2 Norse icons, so 8 – 2 = 6. Tomek has 6 Barbarian icons, 5 Norse icons and 5 Greek icons, so 6 – 5 = 1. Maks has 7 Barbarian icons, 4 Norse icons and 4 Greek icons, so 7 – 4 = 3. Tomek has the smallest difference (only 1), so he receives 2 Favor. Maks is second with a difference of 3, so he receives 1 Favor.
Base game god: Gaia
Gaia's scoring works the same as in the base game.
Missions
- Apollo's Despair: the first player who has Map tiles on all 8 marked spaces at the bottom-left corner of their map receives 1 Favor.
- Hekate's Blessing: the first player who has 2 or more Plains Areas with 1 or more Temples on their map (Temples may be consecrated or not) receives 1 Favor.
- Asclepius's Tomb: the first player who places a Map tile in the top-left corner of their map receives 1 Favor.
Artifacts
The artifacts of this scenario are the 8 artifacts from the first box. They are numbered as printed in the rulebook.
- 01 Golden Torch of Truth: a die showing 2 = a die showing 4. (The printed rulebook shows this effect as dice icons only, with no further wording.)
- 02 Purple Torch of Truth: a die showing 3 = a die showing 5. (Shown as dice icons only in the printed rulebook.)
- 03 Strophalos of Hekate: After you Rest, reroll any number of dice.
- 04 Panaceum: Demigod Action: use 1 die to Set all of your other prepared dice.
- 05 Staff of Asclepius: Demigod Action: use 1 die to swap any Map tile on the board with the top tile of the corresponding stack.
- 06 Arrow of Wrath: After an opponent takes a Rest action, Refresh 1 die.
- 07 Magic Book: After you Rest, Set 1 die.
- 08 Solar Bow: After you Overbuild, Refresh up to 2 dice.
Monster: Cyclops
Setup: each player places 1 of their Demigod markers on space "0" of the Cyclops track. Place the Cyclops figure on space 12 of the board, facing left along the line of spaces 3, 6 and 9.
Demigod Action + Main Action: fight the Cyclops
- Explore the Map tile on which the Cyclops stands. This tile costs 3 more.
- Move your Demigod marker 1 space on the Cyclops track.
- Each player refreshes up to 1 of their dice from each space in the direction the Cyclops is facing. If any space becomes empty, fill it with a new Map tile.
- Each player who refreshed 1 or more dice in step 3 moves their marker 1 space on the Apollo track.
- Move the Cyclops to any other Map tile on the board, and orient the Cyclops toward a line of spaces on which at least 1 Map tile lies.
If any Demigod marker reaches the last space of the Cyclops track, the monster is defeated! Remove the Cyclops from the board. Whether or not the Cyclops is defeated, at the end of the scenario each player receives all the Favor from space "0" up to the space holding their marker.
Example: a player on space 7 receives 1 + 1 + 2 + 2 = 6 Favor.
Track rewards (as printed on the track): spaces 1 and 3 give 1 Favor each, and spaces 5 and 7 give 2 Favor each.
End of scenario: the player farthest along the Cyclops track receives 2 additional Favor. The next player farthest along the track receives 1 Favor.
Scenario 2: Trial of Humility
Bow before the stern gaze of Nemesis, goddess of vengeance, and lead Narcissus through the trials she has prepared for him.
Map Shape and New Exploration Rules
Each player's map is contained in a 4 x 4 grid of tiles, as in the base game. However, when exploring, a player must place the new tile on their map so that it touches the other tiles only at corners, unless it is not possible to place it without touching another tile along an edge.
Exception: the fight with the Griffin allows a tile to be placed so that it touches other tiles along an edge.
Furthermore, if there is no free space where a tile would touch other tiles only at corners, the player may place it so that it touches other tiles along an edge.
Example: if you are not fighting the Griffin and are not overbuilding, then after exploring 8 tiles your map will look like a checkerboard of tiles (as shown in the printed rulebook: 8 tiles in a checkerboard pattern). From then on you may place tiles so that they touch along edges under the normal rules.
Moving and overbuilding
Moving tiles follows the base game rules (a tile may always be moved so that it touches other tiles along an edge). Overbuilt tiles function according to the normal base game rules.
Gods
First god: Nemesis
End of scenario: each player counts how many Faction icons of each kind they have. Then each player works out the difference between their most numerous Faction and their least numerous Faction (which may be 0). The player with the largest difference receives 2 Favor, and the player with the next largest difference receives 1 Favor.
Example: Grześ has 4 Barbarian icons, 8 Greek icons and 2 Norse icons, so 8 – 2 = 6. Tomek has 6 Barbarian icons, 5 Norse icons and 5 Greek icons, so 6 – 5 = 1. Maks has 7 Barbarian icons, 4 Norse icons and 4 Greek icons, so 7 – 4 = 3. Grześ has the largest difference (6) and receives 2 Favor. Maks is second with 3 and receives 1 Favor.
Second god: Hypnos
End of scenario: each player counts the Areas on the top half (the top 2 rows) of their map and the Areas on the bottom half (the bottom 2 rows). An Area that extends across both halves counts once in each half. Then each player works out the difference between their largest and smallest of these numbers. The player with the smallest difference receives 2 Favor, and the player with the next smallest difference receives 1 Favor.
Base game god: Poseidon
Poseidon's scoring works the same as in the base game.
Missions
- Proof of Piety: the first player who has 1 or more Temples (consecrated or not) in each 2 x 2 quarter of their map receives 2 Favor.
- Dreams of Despair: the first player who places seven tiles on their map in the indicated shape (which may be rotated) receives 1 Favor. (The shape is printed as a diagram on the mission card and is not written out in text.)
- Instructive Journey: the first player who has tiles in the 4 corners of their grid of tiles receives 1 Favor.
Artifacts
- 09 Swords of Judgment: shown in the printed rulebook as the icons "1 → 6". (No further wording is printed; the icons are reproduced as printed.)
- 10 Die of Arrogance: Demigod Action: reroll the die. On a 1–3, refresh 1 of your used dice. On a 4–5, nothing happens. On a 6, this die becomes used.
- Note from the printed French rulebook: the die remains available on 1–5 and becomes used only on a 6.
- 11 Wings of Sleep: Demigod Action: use 1 die to swap 2 tiles in the same row or the same column on the board.
Monster: Griffin
Setup: each player places 1 of their Demigod markers on space "0" of the Griffin track. The Griffin figure starts on space 12 of the board.
If the Griffin is on a Map tile, that tile cannot be explored.
Demigod Action: fight the Griffin
- Use one or more dice whose total value equals the number of the Griffin's space.
- Move the Griffin to any other Map tile on the board.
- Move your Demigod marker 1 space on the Griffin track.
- If your Main Action was to Explore, then after fighting the Griffin (but not before!) you may place the explored tile so that it touches other tiles along an edge.
Griffin track: if any Demigod marker reaches the last space of the Griffin track, the monster is defeated! Remove the Griffin from the board. Whether or not the Griffin is defeated, at the end of the scenario each player receives all the Favor from space "0" up to the space holding their marker.
Example: a player on space 7 receives 1 + 1 + 2 + 2 = 6 Favor.
Track rewards (as printed on the track): spaces 1 and 3 give 1 Favor each, and spaces 5 and 7 give 2 Favor each.
Scenario 3: Dirge of Riddles
May the songs of the Muses grant you the wisdom needed to save Thebes from the mysterious Sphinx, who will make you guess your own destiny!
Map Shape
The first map tile must be placed in the bottom-right corner. The map is built in the staircase shape shown in the printed diagram, with the starting space marked "S".
Gods
First god: Muses
End of scenario: each player counts their Areas (of any type) on which there is at least 1 Faction icon of each kind. The player with the largest number of such Areas receives 2 Favor. The second player in order receives 1 Favor.
Second god: Nike
End of scenario: the player with the fewest Faction icons (of all kinds) on the marked spaces of the map receives 2 Favor. The second player in order receives 1 Favor. (The marked spaces are shown as a printed diagram on the god card.)
Base game god: Hestia
Hestia's scoring works the same as in the base game.
Missions
- Hymn of Conquest: the first player who has a Map tile on each of the 5 marked spaces of the map receives 1 Favor. (The 5 spaces are shown as a printed diagram on the mission card.)
- Refreshing Silence: the first player who consecrates 2 Temples belonging to different Factions receives 1 Favor.
- Traveler's Song: the first player who has a Map tile on each of the 2 marked spaces of the map receives 1 Favor. (The 2 spaces are shown as a printed diagram on the mission card.)
Artifacts
- 12 Laurel of Conquest: Main Action: use any 3 dice to Explore any tile on the board.
- 13 Lyre of Calliope: Demigod Action: use 1 die to Reactivate another die.
- 14 Diadem of Clarity: use 2 dice showing the same value as a total value of 7, 9 or 11.
- Example: you may use 2 dice showing "3" to explore a Map tile on space 11.
Monster: Sphinx
Setup: the Sphinx figure starts on the Map tile on space 12 of the board. If the Sphinx is on a Map tile, that tile cannot be explored.
Demigod Action: answer the Sphinx's riddles
- Place 1 of your Demigod markers on the Sphinx card, to try to guess the result of a mission or of a god's objective. You may not bet on completed missions.
- Then choose 1 of the following:
- Use dice whose total value equals the number of the Sphinx's space, to move the Sphinx to any other Map tile on the board; or
- Use dice whose total value equals the number of any space containing a Map tile, to move the Sphinx to that Map tile.
If all spaces on the Sphinx card are covered, remove the Sphinx from the board immediately.
Using the Sphinx card, players try to predict which player will complete a mission and which player will win the first-place reward from a god. The card has 24 spaces for bets: 4 player colors x 6 missions and gods (the 3 missions M1, M2, M3 and the gods Muses, Nike and Hestia). Each player may place only 1 marker in each space, but each space may contain at most 2 markers (belonging to 2 different players). A player may place only 1 marker in each row of the card.
When a mission is completed or a god's scoring takes place, the first player who correctly guessed the result receives 2 Favor, and the second player who correctly guessed the result receives 1 Favor. The second player places their marker on top of the first player's marker.
Example: Filip thinks purple will complete the first mission, so he places his marker on the purple space in row M1. He is the first player to bet on that space, so from now on only one more player may bet that purple completes M1. Filip may no longer bet in row M1. Later Zosia also decides to bet that purple will complete M1. She places her marker on Filip's marker, to make clear that Filip was first on that space. Nobody else may bet on that space. Zosia may no longer bet in row M1. Other players (apart from Filip and Zosia) may still place their marker in that row to bet that someone else will complete M1 (but they may not bet on purple).
Scenario 4: Ariadne's Heart
Help Ariadne, abandoned by her beloved Theseus, to escape the Minotaur and flee the labyrinth!
Map Shape
The map has the shape of a 4 x 4 grid of spaces, as in the base game. However, each player must build their map in the order set by the path of spaces, starting from the space marked "S" in the printed illustration.
The first tile on the map must be marked with a Demigod marker. Fighting the Minotaur allows you to place a tile according to the normal base game rules, i.e. touching along an edge any tile in the map grid.
Gods
First god: Dionysus
End of scenario: the player with the largest number of Areas on the marked spaces receives 2 Favor. The second player in order receives 1 Favor.
Clarification (printed in a box): Areas that only partially extend onto the marked spaces also count for Dionysus's scoring. In other words, every Area that has at least 1 tile on a marked space counts.
(The marked spaces are shown as a printed diagram on the god card.)
Second god: Pan
End of scenario: each player counts their Areas that contain at least 1 Sacred Place. The player with the most such Areas receives 2 Favor, and the second player in order receives 1 Favor.
Base game god: Aphrodite
Aphrodite's scoring works the same as in the base game.
Missions
- Sanctuary in the Labyrinth: the first player who has a Map tile on each of the 4 marked spaces of the map receives 1 Favor. (The 4 spaces are shown as a printed diagram on the mission card.)
- Thread of Destiny: the first player who has a Map tile on each of the 4 marked spaces of the map receives 1 Favor. (The 4 spaces are shown as a printed diagram on the mission card.)
Artifacts
- 15 Chalice of Dionysus: Demigod Action: use 2 dice to refresh up to 3 dice.
- 16 Thread of Ariadne: Demigod Action: use 2 dice to Reactivate 2 dice.
- 17 Pan's Pipes: After consecrating any Temple, refresh 1 die.
Monster: Minotaur
Setup: the Minotaur figure starts on the board on space number 12. If the Minotaur is on a Map tile, that tile cannot be explored.
Demigod Action: fight the Minotaur
- Choose an available space in the Minotaur's labyrinth. The labyrinth space must not already hold a Demigod marker placed earlier, and the board space with the same number must have a Map tile on it and must not hold the Minotaur.
- Use dice whose total value equals the number of the chosen labyrinth space.
- Place 1 of your Demigod markers on the chosen space.
- Move the Minotaur to the board space with the same number.
If all spaces in the Minotaur's labyrinth hold a Demigod marker, remove the Minotaur from the board immediately.
Minotaur's labyrinth (numbers as printed on the monster card):
| Col 1 | Col 2 | Col 3 | Col 4 | Col 5 | |
|---|---|---|---|---|---|
| Row 1 | 1 | 2 | 3 | 4 | 5 |
| Row 2 | 6 | 7 | 9 | 5 | 1 |
| Row 3 | 5 | 11 | 12 | 10 | 3 |
| Row 4 | 2 | 6 | 8 | 7 | 4 |
| Row 5 | 1 | 4 | 3 | 2 | 6 |
(Row and column labels are added for reference only.)
End of scenario: each player receives Favor for each separate group of 3 or more of their markers in the Minotaur's labyrinth that touch each other along an edge:
- 3 Demigod markers = 1 Favor
- 4–5 Demigod markers = 2 Favor
- 6 or more Demigod markers = 3 Favor
A group may have any shape. Each of a player's groups must be a separate, maximal group of markers. For example, 8 markers arranged in a 2 x 4 block count as one group of 6+ markers (worth 3 Favor), not as two groups of 4 markers (worth 2 + 2 Favor).
Scenario 5: Medusa
Somehow Medusa has got under the skin of the goddess Keto, who sends you to slay the monster. There may, however, be another way to resolve the conflict.
Map Shape
The map has no upper-right quarter. Each player's first tile must be placed on one of the 12 available spaces.
(The map shape is shown as a printed diagram: a 4 x 4 grid with the top-right 2 x 2 quarter missing.)
Gods
First god: Keto
End of scenario: the player with the largest number of separate groups of their markers on the Medusa card, where the markers in each group touch each other along an edge, receives 2 Favor. The second player in order receives 1 Favor.
Second god: Iris
End of scenario: the player with the largest number of Areas that contain 3 or more Faction icons (of any kind) receives 2 Favor. The second player in order receives 1 Favor.
Base game god: Hermes
Hermes's scoring works the same as in the base game.
Missions
- Multicolored Scales: the first player who has a Map tile on each of the 4 marked spaces of the map receives 1 Favor. (The 4 spaces are shown as a printed diagram on the mission card.)
- Petrified Woman: the first player who has a Map tile on each of the 3 marked spaces of the map receives 1 Favor. (The 3 spaces are shown as a printed diagram on the mission card.)
Medusa's Lair (third mission):
The first player who completes a mission (either Multicolored Scales or Petrified Woman) must choose where Medusa's lair will be: on the top edge or on the right edge.
After both of the first two missions have been completed (in any order, by the same player or by different players), the app will give the details of the third mission, Medusa's Lair. The app instructs all players to extend their grid of map spaces by 2 new spaces at the top and 2 new spaces to the right.
Depending on the decision of the player who completed the first mission, the lair will be hidden on the 2 new top spaces (marked in red) or on the 2 new right spaces (marked in green).
- Medusa's Lair: the first player who has a Map tile on both of the newly marked spaces finds Medusa's lair and completes this mission, receiving 2 Favor.
Artifacts
- 18 Mirror Shield: Demigod Action: refresh up to 2 dice. The other players may refresh 1 die.
- 19 Olympian Blade: Demigod Action: use 1 die to move up to 2 tiles.
- 20 Helm of Invisibility: Demigod Action: use 1 die to move all dice on the board to the used dice area.
Monster: Medusa
Setup: the Medusa figure appears on the Map tile on space number 12. If Medusa is on a Map tile, that tile cannot be explored.
Demigod Action: fight Medusa
- Choose an available space on the Medusa card. The space on the card must not hold a Demigod marker placed earlier, and the board space with the same number must have a Map tile on it and must not hold Medusa (exception: space 13; see step 4).
- Use dice whose total value equals the number of the chosen space.
- Place 1 of your Demigod markers on the chosen space.
- Move Medusa to the board space with the same number. (If you chose space 13, you may move Medusa to any other Map tile on the board.)
Medusa card (numbers as printed):
| Col 1 | Col 2 | Col 3 | Col 4 | Col 5 | |
|---|---|---|---|---|---|
| Row 1 | 1 | 2 | 3 | 4 | 1 |
| Row 2 | 4 | 8 | 9 | 5 | 2 |
| Row 3 | 3 | 11 | 13 | 10 | 3 |
| Row 4 | 2 | 6 | 12 | 7 | 4 |
| Row 5 | 1 | 4 | 3 | 2 | 1 |
(Row and column labels are added for reference only.)
End of scenario: the player with the largest number of separate groups of their markers on the Medusa card, where the markers in each group touch each other along an edge, receives 3 Favor. The second player in order receives 2 Favor. In a four-player game, the third player in order receives 1 Favor. Ties and two-player scoring are resolved in the same way as for gods' scoring in the base game (see page 23 of the base "Divinus" rulebook).