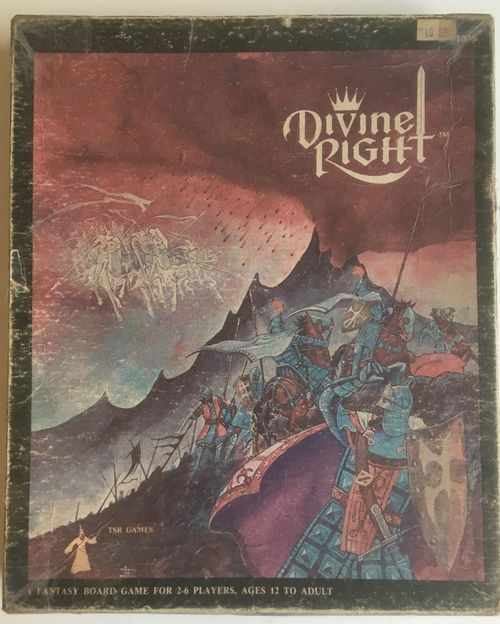
Divine Right
Divine Right Rulebook
Table of Contents
Table of Contents
Game Inventory
| Component | Quantity |
|---|---|
| Map Board | 1 |
| 6 Army Display Sheets | 6 |
| 14 Identity Cards | 14 |
| 600 Counters (two sheets) | 600 |
| 22 Personality Cards | 22 |
| 2 dice | 2 |
| 52 Diplomacy Cards | 52 |
| CD-ROM | 1 |
| 12 Envoy Personality Cards | 12 |
If any parts are missing, please check the CD-ROM for replacements or write to:
Right Stuf International Attn: Divine Right P.O. Box 71309 Des Moines, IA 50325
Basic Game
The Basic Game is the most streamlined version of Divine Right. The Magicians, Special Mercenaries, and Magic Devices provided in the counters, as well as the special qualities of the Scenic spaces, are not used in Basic play. Once players have mastered the basics of siege, movement, combat, and diplomacy, they will be ready to move onto the evolving complexity of the Intermediate and Advanced games. These rules introduce new material and modes of variant play.
In general, the rules of the Basic Game also apply to both the Intermediate and Advanced Games.
Rounding of fractions: any place in these rules where rounding is required require that fractions be rounded down, unless specifically stated otherwise.
Game Pieces
The multi-colored cardboard counters are the playing pieces (or chits) for Divine Right. In the Basic Game there are hero units and two types of combat units: armies and fleets. There are also a number of other unit types, including ambassadors, magical items and more.
The Coat of Arms and color identify each separate nation of Minaria. It appears on each type of unit belonging to that kingdom. All of a kingdom's forces are the same color. Mercenary units are black and white; each player should record the ID Letters of the mercenary armies and fleets he controls.
The Movement Allowance indicates the maximum number of movement points that a unit may expend in a single turn.
Terrain Bonus symbols mean the units moves faster than most through certain types of rough terrain. See Special Terrain Bonus.
Basic Game Units and Markers
- Monarch (hero) — Movement Rate, Coat of Arms, Monarch Symbol
- Regular Army Unit — Movement Rate, Coat of Arms, Starting Location, Terrain Bonus Symbol
- Regular Fleet Unit — Movement Rate, Coat of Arms, Starting Location
- Ambassador Marker
- Common Mercenary Army — Movement Rate, ID Letter, Mercenary Army Symbol
- Common Mercenary Fleet — Movement Rate, ID Letter, Mercenary Fleet Symbol
- Army Group Marker
- Plundered Castle Marker
- Randomizer Chit
- Queen Marker
Mercenaries
The mercenary armies and fleets shown above are the only ones used in the basic game. They are designated "common mercenaries" to distinguish them from the special mercenaries of the intermediate and advanced games. All common mercenaries begin the game off board in the "mercenary force pool". They are deployed on the board through random events. Common mercenaries that are eliminated for any reason are returned to the mercenary force pool.
Army Group Markers
Due to the difficulty of handling large stacks, the players may wish to use Army Group markers to represent unwieldy stacks on the map. Five marker counters are provided for each of six possible players.
An Army Group marker deployed on the board corresponds to a force of units stacked in the corresponding box on the player's Army Display Sheet. Any units that enter or exit the space containing the Army Group marker may subsequently be added to or subtracted from the stack on the sheet. Any units in the Display Sheet box may be placed into the space of the Army Group counter. There is no movement point cost for moving units to, or taking them from, the Display Sheet. Because some units move at different rates, it may be prudent to keep any slower-moving units on the map and the other, faster, units on the Display Sheet, otherwise the slow units could be inadvertently moved at the same rate as the faster units. A good rule to remember is that an Army Group Marker may move only as fast of the slowest unit in the off-map stack.
Queen Markers
Much of Divine Right refers to monarchs as male in nature, but all players have the choice of having either a male or female (as given on the Identity Card) as the monarch of their Kingdom. If a player decides to utilize a female monarch for his kingdom, the Queen marker is placed on the Kingdom's identity card to designate that the monarch in play is the Kingdom's female ruler. All bonuses listed on the kingdom's monarch unit apply whether the monarch is male or female.
In the basic game all non-player monarchs are assumed to be male, and there is no difference in the basic rules between male and female monarchs. Both of these points change in the advanced game.
The Game Map
The game map depicts the continent of Minaria. A hexagonal grid is superimposed upon this map to regulate movement and combat. In these rules the hexagons of the map are referred to as 'spaces' or 'hexes'. Each kingdom is outlined and colored to clearly define national boundaries. There are some areas that are 'unclaimed' and do not belong to any particular kingdom.
Terrain features such as mountains and hills are also represented with graphics and are explained in detail in the Terrain Effects Chart. Note that the deployment space for each kingdom's monarch is outlined in white. This space is also that kingdom's royal castle.
MAP ERRATA: Each castle should have a defensive value printed on the map. The following castles are missing these values: Aws Alzak – 4, Parros – 3, The Keep – 2, Zefnar – 3.
Also, the Dark River appears to run through a hexside as it leaves Muetar. This is incorrect; the river at that point is in the more southerly of the two hexes. It may be helpful to black out the blue portion of the river graphic in the more northerly hex.
The Cards
There are four types of cards used in Divine Right:
Identity Cards
Identity cards feature the country's king, queen, the name of the kingdom, the national coat of arms, the name of the Royal Castle, and the number of regular armies and fleets (if any) belonging to the kingdom. The Eaters of Wisdom, the Storm Riders and the Black Hand are not used in the Basic Game.
Personality Cards
Personality cards are paired with all non-player monarchs. Each card gives a brief profile of the monarch and lists what effects the monarch's personality will have on diplomacy, movement, combat, etc. Each is numbered.
ERRATA: Card number fourteen may be more easily understood as having the following effect: if the monarch's "kingdom of origin" is part of the alliance attempting to activate/deactivate the monarch, there is a +1 bonus to the diplomacy roll. If the monarch's "kingdom of origin" is part of another alliance, there is a -1 penalty to the diplomacy roll.
There is a misprint on Card number ten. It should indicate that this monarch may NOT lend a movement bonus to any unit.
Diplomacy Cards
There are two types of diplomacy cards: Diplomatic Ploy and Special Mercenary. The Diplomatic Ploy cards list special maneuvers, functions, and tricks of the diplomatic art, and confer bonuses to diplomacy rolls. The Special Mercenary cards show the name of a Special Mercenary and the location of their deployment. All Special Mercenary cards should be removed from the deck when playing the Basic Game.
Envoy Cards
These cards are not used in the basic game. See intermediate and advanced rules.
Game Setup
Spread the map on a table. Carefully separate the Diplomacy cards. Set aside the envoy and special mercenary Diplomacy cards, which are not used in the Basic Game. Next separate the 14 Identity cards and the 22 Personality cards. Go through the stack of Identity cards and remove the Storm Riders, the Eaters of Wisdom and the Black Hand; these are not used in the Basic Game. Shuffle the remaining Diplomacy cards and place them, face down, near the map. Shuffle the remaining Identity cards.
Each player draws one Identity card. The card drawn designates the home kingdom of that player. Players should note the color for the kingdom they have selected and gather the matching units (monarch, ambassador, armies, and fleets). Read the player monarch's Identity card carefully. It lists the number and type of units that belong in the kingdom's military (or 'force pool'). Players now place their armies and fleets on the map according to the starting locations printed on the unit counters. Monarchs always start in their kingdom's Royal Castle. (Royal Castles are castle spaces with a white outline and an asterisk.) The ambassador marker is placed on the player's Identity card. If the player wishes the kingdom's monarch to be female, place a Queen marker on the identity card.
Some kingdoms have special rules that can be beneficial to their troops. Players should check the rules section Special Rules for Select Kingdoms to see if any such rules apply to the kingdoms they have chosen. It may also help to read the historical notes pertaining to the kingdom in Geography and History of Minaria.
The Identity cards not chosen by the players represent "non-player monarchs." The units of these monarchs' kingdoms are not initially placed on the game board. For the remainder of the game, players will attempt to use Diplomacy to ally themselves with these monarchs and their forces in the struggle for control of Minaria. Shuffle the Personality cards and, without looking, place one card beneath each of the remaining Identity cards. Any unused Personality cards are placed face down on the table near the Diplomacy cards. The selected cards give each non-player monarch a distinct personality that is revealed later in the game when an ambassador visits the monarch.
The turn counter should be placed on the Turn Indicator at the bottom of the map for turn 1. After each complete game turn has been completed the counter should be moved forward. This will help players remember how many turns remain to the end of the game and keep track of diplomatic banishments.
One randomizer chit for each player (numbered 1-6) should be placed in a small container. Initial player order is determined by each player drawing a randomizer chit from an opaque container. The player with the lowest number goes first.
The game is ready to begin.
Victory
Victory is determined one of two ways:
A) Eliminate (capture or kill) all opposing player monarchs B) Accumulate the largest amount of Victory Points. The player who amasses the most points after 20 turns is the winner.
Victory Points are awarded as follows:
| Deed | Points |
|---|---|
| Plundering Enemy* Castle | 5 × castle's defense strength |
| Plundering Enemy* Royal Castle | 10 × castle's defense strength |
| Capturing Enemy Player monarch | 70 |
| Killing Enemy Player monarch | 70 |
| Killing Enemy Allied Monarch** | 40 |
| Capturing Enemy Allied Monarch | 30 |
*including those of enemy-allied non-player kingdoms **except by assassination. Assassinating a Non-Player Monarch gains a player no victory points at all.
Castle defense strengths are indicated on the board adjacent to each castle. A player plunders enemy castles by successfully besieging them. See Siege Phase, below, for the mechanics of this process.
In the Basic Game, the following castles do not exist and cannot be plundered: the Invisible School, the Tower of Zards, and the Keep.
Executing a Captured monarch (only possible in the case of non-player monarchs, and only if the captor has no castle in which to imprison him) gains no additional victory points. The points for capture are retained, however. If a non-player monarch is captured and then freed by their allies, or released by the captor, the victory points are still awarded to the captor.
If a player monarch is killed or captured, the player is eliminated, but retains any victory points he may have attained. See Fate of Player Kingdoms, below. The player might still win the game, despite being eliminated, if he has the most victory points out of all the players at the end of turn 20. An optional rule allows for a player to forfeit the victory points he has earned so far and re-enter the game. See the Optional Rules section at the end of this book.
Kingdoms
There are 13 kingdoms on the game board. The hexes that comprise each kingdom can be distinguished by being of the same color. Following is a complete roster of the kingdoms:
- Ghem (The Dwarves)
- Hothior
- Immer
- Mivior
- Muetar
- Neuth (The Elves)
- Pon
- Rombune
- Shuccasam
- The Trolls
- Zorn (The Goblins)
- Eaters of Wisdom
- Black Hand
All land hexes outside of the kingdoms are considered unclaimed spaces. Note that the Eaters of Wisdom and the Black Hand are not used in the basic game; the hexes of these kingdoms are considered unclaimed territory in the basic game.
Each player is allocated one kingdom at the start of the game. These are 'player kingdoms'. All the others are non-player kingdoms. A non-player kingdom is always either active (allied to a player kingdom) or inactive (neutral). Active kingdoms can be referred to as 'allied' kingdoms, the kingdom of the player who activated them is referred to as the non-player kingdom's 'player ally'.
Allied and Enemy Kingdoms
It is important to note that all of the player kingdoms in the game are mutually hostile. They are never considered "allied" for purposes of the rules, even if the players controlling the kingdoms are temporarily cooperating for some reason. An alliance consists of a player kingdom and all non-player kingdoms that the player has activated. Likewise, all kingdoms that are members of one player's alliance are hostile to all kingdoms that are members of other players' alliances.
A player's forces include the units of his own (player) kingdom, any mercenaries he has on the board, and the forces of any allied non-player kingdoms.
A player's forces may freely enter all hexes of all kingdoms in the player's alliance. Additionally, large portions of Minaria, such as the Banished Lands and the Blasted Heath are outside established kingdoms. No penalty is incurred for entering these 'unclaimed' areas. All unclaimed hexes are tinted a light brown color. A player's forces may even enter hexes of enemy kingdoms with no special prohibitions or penalties (i.e., no "declarations of war" or the like are required.)
Changing a Kingdom's Status
Random events and the diplomacy of players can activate a kingdom. A kingdom can be deactivated through random events, diplomacy, the death of its own monarch, the death of its player ally's monarch, and forced peace attempts. A non-player kingdom's status can change any number of times.
The details of attempting to change a non-player kingdom's status are described in the Random Events and Diplomacy rules sections. But whenever such an attempt succeeds, the procedures below are followed:
Activation of Kingdoms
When a kingdom is activated, the kingdom's monarch unit and all of its available combat units are set up on the playing map immediately. The kingdom's monarch is placed in the kingdom's royal castle, and each available combat unit is placed in the location specified on its counter. Available combat units consist of the kingdom's entire force pool if this is the first time the kingdom has been activated. If the kingdom is being re-activated, its available combat units are all of its units that were on the board at the time the kingdom was deactivated.
On the turn of deployment, units of a newly activated ally are limited in their actions. They may only move within their own kingdom, sea hexes, and into unclaimed "wasteland" hexes. They may only attack enemy units within their own kingdom. In subsequent game turns they may move and fight normally.
Deactivation of Kingdoms
When a kingdom is deactivated it leaves its current alliance and becomes inactive. The forces of a deactivated kingdom are removed from the map. The Identity card and the Personality card of the deactivated monarch remain together, and are returned to the pool of inactive non-player monarchs. Any of the kingdom's regular units eliminated while their monarch was active remain eliminated. Regulars may be replaced (via Random Events) only while a kingdom is active. Should the kingdom be re-activated later, only those regular units who were alive at the time of deactivation will be deployed on the board. The previously-eliminated units may be brought back as replacements once the kingdom is reactivated.
ONGOING SIEGES: A kingdom cannot be deactivated if one of its castles is currently besieged by another player who refuses to give up the siege. The decision to continue the siege or not is made the instant the possible deactivation comes about. If the siege is abandoned, the besieging units are displaced from the castle hex.
MERCENARIES AND DEACTIVATION: Common mercenaries within a deactivating kingdom are removed from the board unless stacked with a non-deactivating hero or combat unit. A common mercenary (regardless of location) is also removed from the board if all the regular combat units stacked with it deactivate. As always, common mercenaries removed from the board are returned to the mercenary force pool.
Confusion
Confusion is a special type of deactivation. If a monarch is killed, his kingdom deactivates and goes into a temporary state called Confusion while a new monarch is selected. Discard the deceased monarch's personality card and shuffle it into the deck of unused ones.
Confusion lasts for a number of turns equal to the result of a single die roll. The unit counter for the monarch is placed on the Turn Indicator Track according to the roll of the die. This represents the turn that the new monarch is crowned.
No ambassadors may work diplomacy with a kingdom during the period of Confusion. When a new monarch is crowned, draw a new Personality card and place it, face down, under the monarch's Identity card. He is now available for diplomacy.
EXAMPLE: A monarch is killed during game turn 7, and 4 is rolled on the die. In this case, place the monarch on the Turn Indicator Track with four blank spaces ahead. The kingdom will be in Confusion for the rest of turn 7, and for turns 8, 9, 10, and 11. On turn 12 a new monarch becomes available to ambassadors.
The restrictions given under Ongoing Sieges, above, apply to the imposition of confusion. If any besieger refuses to give up his siege(s), confusion does not occur, a new monarch is crowned immediately, (a new Personality card is drawn after the old one is shuffled into the deck) and the kingdom does not deactivate.
Forced Peace
During his diplomacy phase, a player who meets certain conditions may attempt to impose a forced peace on a non-player kingdom. If successful, the kingdom deactivates immediately and the monarch's Identity and Personality cards are returned to the pool of non-allied non-player monarchs. Roll one die to determine the number of turns the forced peace will last. Place the kingdom's monarch counter on the Turn Indicator Track the indicated number of turns in the future. During a Forced Peace ambassadors cannot perform any diplomatic actions upon a kingdom. In this respect it is similar to Confusion.
As with all deactivations, any enemy units that are in a kingdom that goes into forced peace have one Movement Phase in which to exit the kingdom (or be voluntarily eliminated) without Diplomatic Penalty.
The restrictions given under Ongoing Sieges, above, apply to the imposition of forced peace. If the besiegers will not quit their siege(s), the forced peace does not go into effect.
Inactive Kingdoms
While a player's forces may freely enter hexes of friendly and enemy kingdoms, if combat units or heroes of any type cross a border and enter the territory of an inactive (non-allied) kingdom, the violating player incurs a Diplomatic Penalty with that neutral kingdom.
A player attempting a Diplomacy Roll against a kingdom with which he has a Diplomatic Penalty receives a -1 penalty to his die roll. (See Diplomacy Phase, below). This penalty is imposed for the rest of the game. Once a non-allied kingdom has been violated, any subsequent violations of its territory by the same player do not result in further penalty. Active combat units within a kingdom that has been deactivated have their next Movement Phase to leave the kingdom or else incur the Diplomatic Penalty. Units that are unable to leave in time may be voluntarily eliminated to avoid the penalty.
Activation of Invaded Inactive Kingdoms
While a player willing to incur the diplomatic penalty may move his forces through hexes of an inactive kingdom, they may not enter non-plundered castle spaces of such a kingdom except to initiate a siege (see Siege Phase). If a player initiates a siege of an inactive kingdom's castle, the violated kingdom immediately activates and joins the alliance of another player monarch–randomly determine which one. Even a kingdom in Confusion or under a Forced Peace will activate under these circumstances. In the case of a kingdom in Confusion, a new monarch is immediately selected. Draw a personality card for him as usual.
Units of the kingdom that are to be deployed in the castle being besieged are deployed regardless of the siege. If any non-castle deployment space (including a plundered castle deployment space) is enemy occupied, the units scheduled to enter there may be placed in any space of the kingdom.
After the units of the violated kingdom are set up, the odds of the siege, or sieges, must be re-figured to determine if a state of siege still exists (see Sieges).
Fate of Player Kingdoms
A player is eliminated from the game if his player monarch is killed or captured. When this happens his player kingdom immediately becomes an inactive non-player kingdom in Confusion. All of the player's units are removed from play, including mercenaries. All kingdoms allied to the eliminated player are deactivated. The player's kingdom is thereafter treated in all ways as any other non-player kingdom.
An optional rule allows for the player to forfeit any victory points and re-enter the game as the head of a new kingdom. See the Optional Rules section at the end of these rules.
The Game Turn
Each game turn of Divine Right consists of player-order determination followed by one player turn for each player. Each player turn consists of five phases:
PHASE 1: Random Events — The player rolls two dice, consults the Random Events Table and performs the actions indicated by the dice roll.
PHASE 2: Diplomacy A) Draw a Diplomacy card - the card may be used or saved for later B) Pass or select one of the following actions:
- Attempt to activate any non-allied kingdom
- Attempt to deactivate any enemy-allied non-player monarch
- Attempt to assassinate any enemy-allied non-player monarch
- Duel an enemy ambassador C) Resolve any attempts by the player to Force Peace on enemy-allied kingdoms.
PHASE 3: Resolve Ongoing Sieges A) If the player has any previously declared sieges, he resolves them in any order desired according to the rules for siege combat. B) If the player has any castles under siege by enemy units, and has combat units in those castles, they may make Breakout Attacks to escape from the siege.
PHASE 4: Movement — The player may move as many of his units as he wishes including his own kingdom's units, units of allied kingdoms, and friendly mercenaries. Units are moved over the spaces expending one or more movement points per space. Units may be moved in any direction or combination of directions, up to their full printed movement allowance.
PHASE 5: Combat — The player declares which of his units will be initiating combat and what they will be attacking. All declared attacks are carried out in any order that the player chooses, although attacks entirely by or against units of a suddenly deactivated kingdom are cancelled.
After the first player has completed all phases, the next player begins his turn with Phase 1. This continues until all players have completed all five phases. At that time, the Turn Indicator is moved forward and the new game turn begins by the players drawing a new Player-Order Determination.
Player-Order Determination
For each game turn, the players randomly determine who is to have the first player turn, the second, the third, and so on. This draw holds only for the present game turn; the order will be changing from game turn to game turn. It is possible, therefore, for one player to be last player in one game turn and the first player in the next, in effect having two player turns in a row.
To perform Player-Order Determination, take the 10 counters numbered 1-10; these are the "randomizer chits." Count out one chit per player. At the beginning of each game turn, each player draws one randomizer chit. The player with the lowest number goes first, the one with the second lowest goes second, and so on. Players should keep their chits face up in front of them on the table.
Random Events Phase
Random events can bring additional troops to the field, raise storms to damage fleets, enter new allies into the fray, or even cause the untimely demise of an important ally. Two dice are rolled by the player and their total is referenced on the Random Events Table. The indicated event occurs immediately.
| Roll | Event | Result |
|---|---|---|
| 2 | Untimely Death | One of your allied non-player monarchs dies. Determine randomly who dies. |
| 3 | Storms | Lose one of your fleets that is not in a port. All heroes aboard an eliminated fleet are Shipwrecked (see Heroes, Shipwrecked Heroes). |
| 4 | Mutiny | Lose one friendly regular or mercenary unit. |
| 5 | Bad Omens | The regulars of one friendly kingdom, chosen at random, will not attack in regular or siege combat, or initiate a siege this game turn. They will move, defend, and maintain existing sieges normally. |
| 6 | Replacements | Bring two eliminated regular units back into play in their deployment spaces. |
| 7 | No Event | — |
| 8 | Reinforcements | Bring 2 common mercenary units into play in any friendly Castle hex (port hex if a fleet). |
If it is impossible to comply with the instructions as given (e.g., one does not have the type of unit one is required to lose), treat the result as "no event."
All gains and losses of units as a result of Random Events apply only to the player rolling the dice. Replacements and reinforcements may not be given to, nor losses taken from, another player or his allies.
When selecting a random kingdom of a certain sort for events 2 or 12, a fast method to select a kingdom is to place the ambassadors of all of the possible kingdoms in a cup and draw one blindly. Note that kingdoms in Confusion or Forced Peace can be selected for event 12.
The player always chooses which unit(s) to lose in the case of storms, mutiny, epidemic, or desertion. However, in the case of an epidemic, if a player's largest stack must be selected (i.e., none of his stacks contain 10 or more combat units) and the player does not have one stack larger than any other, the player randomly determines which stack will be reduced.
Replacements/Reinforcements
Reinforcements are common mercenaries (that is, not the Special Mercenaries of the intermediate game) which are added to the player's forces on the board. Reinforcements can only enter in an unbesieged friendly castle or, if a fleet, in an unbesieged friendly port (including castle-ports). Castles that have been plundered may be used by the occupying force (or the original owner, if currently unoccupied) for the deployment of mercenary reinforcements.
Replacements are previously eliminated regular units of a friendly active Kingdom that are returning to the map. A replacement must enter at the deployment site named on the counter. If that space is occupied by enemy units, or is under siege, that particular unit may not be chosen to re-enter the game at that time. (Note that this differs from the procedure for deploying a newly-activated kingdom's forces.) Castle spaces that have been plundered, but which are now free of enemy forces, may be used for deployment of replacement units.
All replacements and reinforcements may move and fight normally in the same player turn that they appear. The regular forces of a kingdom cannot exceed the total number given for them on the monarch's identity card, although mercenary units may supplement this total.
A player with no friendly ports may not bring in a fleet replacement or reinforcement.
Deployment of Common Mercenary Reinforcements
As long as both mercenary fleets and land armies remain undeployed, the player may choose either type to deploy as reinforcements–although if he has no ports he may not receive mercenary fleets.
If all mercenary units of one type are on the board, the player must enter a unit of the undeployed type. If he cannot deploy a unit of the type that remains (for instance, only fleets remain undeployed and he has no ports), he may instead 'steal' common mercenary units of the other type from another player's forces. If a player is due to receive a common mercenary unit and ALL common mercenaries are on the board, the player may 'steal' units of either type.
Players cannot 'steal' units currently under siege or fleets that are transporting enemy troops or heroes. In effect, having land units in transport protects the mercenary fleet unit from seizure.
Not all the units need to be deployed in the same space, but if the player has no available space for immediate deployment, no reinforcements are gained.
Diplomacy Phase
More than any other aspect of play good diplomacy will prove the key to victory. Diplomacy is defined as actions taking place between a player's ambassador and non-player monarchs (ambassadors of non-player monarchs are not used). Alliances are defined as existing between a player and any number of non-player monarchs. Temporary agreements between players are not alliances and have no enforcement rules.
Each player has one ambassador, which is kept off the board until the Diplomacy Phase. An ambassador represents not merely an individual, but the entire diplomatic apparatus of the player monarch.
Ambassadors do not move across the map; they are markers that are simply picked up and put down in the space where the diplomacy is to occur. The ambassador is removed from the map at the end of the Diplomacy Phase. The movement of ambassadors is in no way hindered by sieges or other activities engaged in by other units. Ambassadors are not heroes and never need to make a Hero Fate roll.
Diplomacy Cards
The Diplomacy cards list the maneuvers and tricks of the diplomatic art in Minaria. These are called diplomatic ploys and they grant bonuses to the diplomatic roll. The Special Mercenary Diplomacy cards are not used in the Basic Game.
Before conducting Diplomacy, the player draws one Diplomacy card, even if that player's ambassador is dead. Diplomacy cards may be accumulated, but not be traded or transferred between players. A player may retain no more than four Diplomacy cards at the end of a Diplomacy Phase. The player must discard any excess cards at that time. If all Diplomacy cards have been drawn, the discard pile is reshuffled and the deck turned face down for reuse.
Resolving Diplomacy
In a diplomacy phase an ambassador may perform any one of the following four diplomatic tasks:
- Attempt to Activate any one non-allied non-player monarch.
- Attempt to Deactivate an Enemy-allied non-player monarch.
- Attempt to Assassinate an Enemy-allied non-player monarch.
- Duel any one Enemy Ambassador
In addition to normal diplomacy, the player may attempt to send enemy-allied kingdoms into a state of Forced Peace. See Forced Peace at the end of this section.
Activation Attempts
To activate a non-allied, non-player kingdom, the ambassador is placed in the Royal Castle of that non-allied non-player monarch. If the kingdom's Royal Castle is occupied by enemy combat units, the ambassador may be placed anywhere in that kingdom.
The Personality card of the Kingdom's monarch is then read out loud. Certain personality cards give bonuses or penalties to various diplomatic ploys. The player then chooses whether or not to use a Diplomacy card to aid his efforts. If he uses one, it is shown to all the players. (In the Basic Game no more than one Diplomacy card may be played per Diplomacy Phase.) The player then rolls one die and adds any modifiers appropriate to the Monarch and/or the Diplomacy card used. This is the Diplomacy Roll. If the result is a 6 or greater after all bonuses have been added and penalties subtracted, the non-player monarch becomes an ally of the rolling player. This is called Activation–see Kingdoms, above. If a Diplomacy card was played, it is discarded. There is no restriction on the number of times a kingdom may be activated and deactivated.
Deactivation Attempts
Enemy-allied non-player monarchs may be persuaded to neutralize their current alliance (deactivate) in a manner similar to activation.
To deactivate a non-player kingdom, the player announces his intention and indicates which kingdom is the target of the deactivation diplomacy. The player with the ambassador may play one Diplomacy card. Finally, one die is rolled. If the modified result is a 7 or more, the monarch is deactivated and drops out of the enemy alliance. See the rules for Kingdoms, above, for the deactivation procedure. If a Diplomacy card was played, it is then discarded.
Note that a kingdom that currently has any castles under siege may not be deactivated unless all besiegers give up their sieges (see Kingdoms). Also, a player may not attempt to deactivate a kingdom whose monarch is held captive by another player's forces (see Prisoners).
Assassination Attempts
Only once during the entire game can each player attempt to assassinate an enemy-allied non-player monarch. The player's ambassador is placed on the intended victim. Diplomacy cards cannot be played.
One die is rolled for the ambassador and one for the victim. If the monarch rolls higher, the ambassador is killed. If the ambassador rolls higher, the monarch is assassinated. If the result is a tie, neither is killed.
A successful assassination deactivates the monarch and their forces (See Death of a Non-Player Monarch). However, no victory points are scored. After any unsuccessful assassination attempt, the ambassador (or his successors, if killed) is banished from the kingdom until the offended monarch dies.
Dueling an Enemy Ambassador
Once per game a player can have his ambassador duel with each of the other players' ambassadors. Regardless of who makes the challenge, ambassadors may duel each other only once. The ambassador counter is placed with the intended opponent. No Diplomacy cards may be played. Both players roll a die. The player with the lower roll loses and his ambassador is killed. If the result is a tie, both ambassadors are killed. An ambassador cannot refuse a challenge.
Death of an Ambassador
Even though ambassadors represent many individuals serving in distant capitals, the "death of an ambassador" signifies a diplomatic catastrophe that throws the whole service into temporary disarray. Two game turns must pass before diplomatic activity may resume normally. Place the dead ambassador on the Turn Indicator three game turns ahead to represent the two turns of inactivity (e.g., an ambassador killed in turn five cannot work diplomacy again until turn eight). Any banishments incurred by one ambassador are passed on to all successors, although the inactive turns are counted against the duration of these banishments.
Banishing Ambassadors
The play of certain Diplomacy cards (Black Magic, Threats, Blackmail, and Crass Bribes) causes the banishment of the ambassador if the Diplomacy Roll fails. While banished, the ambassador may not attempt any of the diplomatic functions upon the offended monarch or kingdom. The length of banishment is the number of turns equal to the modifying number on the Diplomacy card, plus one. Thus, if a player is unsuccessful with a +1 Threat, the ambassador would be banished from that kingdom for two full game turns. A side record of banishments should be kept.
Certain Personality cards may require the banishment of an ambassador for other reasons. If a player manages to incur both types of banishment at once, the terms of banishment are added together.
Forced Peace Attempts
During the Diplomacy Phase a player may use political coercion to Force a Peace on any enemy-allied kingdoms whose Royal Castle he has plundered and occupied or whose Monarch he holds prisoner (see Prisoners). A player who both occupies a kingdom's royal castle and holds its monarch prisoner is not entitled to two attempts per turn, however. Attempting to impose a forced peace does not require the player's ambassador, and is conducted after his ambassador's diplomatic activity for the turn is resolved. Player-kingdoms are not subject to Forced Peace attempts.
Roll one die for each kingdom on which the player is attempting to impose a Forced Peace. Diplomacy cards may not be used and Diplomatic Penalties do not modify a Forced Peace Roll.
If the result is 1-4, nothing happens. If the result is a 5 or 6, the attempt was successful and the kingdom goes into a Forced Peace. Roll another die. The resulting roll is the number of game turns the Forced Peace will last. (see Kingdoms, above, for the effects of a forced peace.)
If an occupying player so chooses, he may instead make a normal deactivation attempt on the kingdom with his ambassador. If this succeeds, the resultant deactivation is not considered Forced Peace. A player may not attempt to force peace on a monarch and attempt to deactivate him through normal diplomacy in the same turn. (Although the ambassador is free to perform other functions.)
Preventing a Forced Peace
As specified in the rules for Kingdoms, a kingdom with one or more castles currently under siege will not go into a forced peace unless the besiegers agree to immediately terminate their sieges. Also, a player may not attempt to Force Peace on a kingdom whose monarch is currently a captive of another player unless that player agrees to release the monarch.
Siege Phase
[Designer's Note: The siege rules in the 3rd Edition of DIVINE RIGHT differ in two major ways from earlier editions. First, it is no longer necessary to have a besieging fleet to lay siege to a castle-port. Second, the manner of conducting sieges has been altered in a major way. Each castle space is now considered two-spaces-in-one (i.e., a space "inside" the castle, and a space "outside" the castle). During sieges it is permissible for stacks which are enemy to one another to occupy the "inside" and "outside" of the castle spaces.
For players familiar with the earlier editions of DIVINE RIGHT, it is important to remember that the "zone of siege" procedure previously used has been replaced by the new system given below. Read the following rules carefully. Although the official rules mention a "zone of siege" and even show diagrams, they were included in error. Ignore them.]
The Siege Phase is the time to resolve siege situations that already exist. No new siege situations can be created in the Siege Phase. New sieges are created in the Movement Phase or in the Combat Phase (by means of advance after combat).
Enemy combat units cannot enter (inside) a castle/castle-port until after it has been besieged and plundered.
Declaring a Siege
To declare a siege of a castle, a player must occupy the space of an enemy castle. For him to be able to do this,
A) No defending units inside the castle space may be "outside" the castle. (See "Inside" and "Outside" Castles, below.)
B) The attacker must have a number of besieging combat units at least equal to the intrinsic defense strength of the castle plus the total number of combat units inside the castle.
The instant the conditions above are met and a player moves his stack into the enemy castle space (either by movement or advance after combat), he must declare that the castle is "under siege." Enemy combat units cannot enter an unplundered castle space (whether it contains enemy combat units or not) unless they are able to declare a valid siege.
It is not possible for a stack to Retreat into an enemy castle space and then declare a siege.
Heroes may always enter an enemy castle, even if it is currently occupied by enemy units (but see Hero Fate Roll).
"Inside" and "Outside" of Castles
Only one player can besiege a castle at a time. To besiege a castle, the castle space must be occupied by besieging units. It is possible that enemy combat units may be already within the enemy castle space; these units must be eliminated, driven "inside" the castle, or driven out of the castle space entirely before the friendly units may advance after combat to begin a siege. But remember, advance in this case is possible only if the advancing stack still has strength (after engaging in combat) great enough to meet the requirements necessary to declare a siege.
Enemy units defending the castle from "outside" are treated as ordinary land units (i.e., the presence of the castle has no effect). If the defending units are declared to be "inside" a castle's walls, they do not prevent enemy entry into the space. Such defending units should be inverted to show they're "inside the castle's walls." Units can be inverted only during the owning player's movement phase. All units which are uninverted are considered to be outside the castle.
There is no additional movement cost for moving into or out of a siege situation, but such a status change can only be made during the owning player's Movement Phase, or through a Retreat, Advance After Combat, or Displacement.
Intrinsic Defense Strength
All castles have a number printed on the space (e.g., 2, 3, 5) called the Intrinsic Defense. The intrinsic defense strength of a castle is only useful in defense against sieges. It may not be used to make an attack nor added to the strength of friendly units defending the space "outside" the castle.
CORRECTION: Some of the Castles on the map do not show an intrinsic defense strength. Their defense strengths are given in the map errata at the beginning of this booklet.
Effects of a Siege
Replacements and reinforcements may not enter or re-enter the game in a castle deployment space under siege. Combat units under siege may not move from the space unless they have made a breakout attack.
The siege continues until the besieging force successfully plunders the castle, becomes too weak to maintain a valid siege, or leaves the castle space through movement, displacement, or retreat. A besieging force that becomes too weak to maintain a siege is displaced at the end of the game turn. See below.
Resolving a Siege (Siege Attack)
Prior to resolving any siege attacks, the besieging player must point out all the Castles which will be attacked. If the player has any units (or heroes) stacked with besiegers that the player does not want to be part of the attack, they must be immediately displaced from the space before the Siege Roll is made. (CAUTION: the player must take care not to remove so many units that he no longer has sufficient strength to maintain the siege.) It is also possible to end the siege at this point by displacing one's entire besieging force from the castle space.
Displaced units are regarded as unused units and are able to be moved in the Movement Phase of the same turn. Any combat units that take part in siege attacks may not be moved in the Movement Phase.
Once any desired displacements are done, the player resolves siege combat for each besieged castle that he wishes to attack. All combat units that remain in a besieging stack must join in the attack. Roll one die:
| Roll | Result |
|---|---|
| 1 | The attack has failed. One besieging combat unit is eliminated. Further, besieging heroes must take a Hero Fate Roll. Captured besieging heroes are placed inside the castle's walls with the defenders. |
| 2-5 | Nothing happens. The siege may continue as long as the besieging forces are able to maintain the conditions of a siege. |
| 6 | The castle is taken and plundered. All combat units within the plundered castle are eliminated. All heroes in the castle must take a Hero Fate Roll. A Plundered marker is placed on the castle and the plunderer scores victory points. (This process represents taking a castle by its craven surrender, a clever stratagem, or through treachery from within. Taking a castle by storm is detailed in the Advanced game.) |
Units that have made a siege attack (successful or not) cannot move or attack during the same game turn.
The Siege Roll is NOT required. It is sometimes strategically wise for a besieger not to make such a roll, thus preserving the stack's options to engage in movement and/or combat in later phases. If no siege attack is made, the siege condition simply continues as before, except that the besieger has given up the possibility of plundering the castle in that particular Siege Phase.
Modifying the Siege Roll
The greater the attacking force, the better the attacker's chance of success. Divide the total number of attacking combat units inside the castle space by the total strength of all defending units plus the intrinsic defense strength of the castle. Drop any fractions and subtract one. The number remaining is added to the attacker's roll. However, a Natural Roll of 1 Is Always a Failed Attack.
EXAMPLE 1: 15 combat units besiege a castle with intrinsic defense strength of 4. The castle has 3 combat units inside, giving it a total strength of 7. Dividing 15 by 7 equals 2.14. Rounding 2.14 down and subtracting 1, leaves 1. Therefore, 1 is added to the attacker's Siege Roll. Hence, a roll of 5 or 6 would plunder the castle.
EXAMPLE 2: This time, the castle with an intrinsic defense of 4 has 4 combat units inside, giving it a total strength of 8, while the besieger again attacks with 15. (15/8 = 1.88). Dropping the fraction to 1 and subtracting 1 leaves zero. There is no addition to the roll.
EXAMPLE 3: If only 1 combat unit was inside the castle (with an intrinsic defense strength of 4) defending against 15, 2 would be added to the attacker's Siege Roll (15/5 = 3; 3-1 = 2).
Ending a Siege
Siege continues until the besieging force:
A) Becomes too weak to maintain a valid siege situation B) Voluntarily moves (or displaces) away from the space C) Retreats from combat from the space D) Is eliminated E) Plunders the castle
Once a castle is plundered, it remains plundered for the rest of the game. It cannot be besieged again, and units can no longer be considered "inside" of it. The hex can still serve as an entry point for replacements and reinforcements, however. Occupying a plundered castle hex with a combat unit makes the hex friendly for purposes of entering replacements and reinforcements. If unoccupied, the hex is considered friendly to its original owner.
Breakouts
Combat units attempting to leave a besieged castle must first make a breakout attempt by attacking all of the besieging enemy combat units in the castle space. The only exception to this is that besieged land units may freely come and go if the besieging force has no land units (i.e., is comprised entirely of fleets), and fleets may likewise enter and leave if the besieging force has no fleets.
Breakout combat is resolved in the besieged player's siege phase. The combat is otherwise resolved in the normal manner, except that all units, both land units and fleets, of the besieged and besieging forces are totaled into a single attacking strength and a single defending strength. (Normally fleets and armies do not fight one another–breakout combat is an exception.)
Win or lose, any surviving besieged units can then move out of the castle in the subsequent Movement Phase. It is not required for the player to move all his units from the besieged castle.
However, if enemy combat units and/or impassable terrain occupy all the spaces around the castle, the besieged units cannot exit the castle space. If they are unwilling or unable to exit the castle, they lose the right to do so until they have made another breakout attempt in a later turn.
Besieged units that attack their besiegers in the Siege Phase cannot attack during the Combat Phase of the same player turn.
Besieger Displacement
Before any siege attacks are resolved, the player may voluntarily displace units from his besieging stacks to adjacent hexes, thereby freeing those units for movement later in the player turn. He may also displace an entire besieging stack, thereby ending that siege. The displacement move itself is "free"; the displaced units have their entire movement allowance available to them during the subsequent movement phase.
The displaced units can attack normally in the combat phase, and may even enter a castle space and begin another siege. Note: besieging units that do not displace, but also do not make a siege attack are eligible to instead attack adjacent enemy units in the combat phase; they simply cannot move.
Should losses or the entry of a relieving force into a castle reduce the ratio of besiegers to besieged combat units (plus intrinsic defense strength) to less than 1 to 1, the besieger must displace his forces from the space at the end of the current game turn. Despite the reduction of forces, the siege condition continues to persist until the end of the game turn, except that a Siege Roll may not be taken.
Sometimes enemy units in one or more adjacent spaces will bar the displacement described above. In such cases, the displacing stack would displace the enemy units that are blocking its route. Each player determines the route of his own units' displacement, but the stack of displaced besiegers must lose a number of friendly combat units equal to the number of enemy combat units that it is displacing. (This represents losses taken by fleeing besiegers fighting their way out of encirclement.)
If the enemy units barring the stack's displacement are equal or greater in number than the stack of displaced besiegers, or if the displaced besiegers have no unobstructed route of displacement due to terrain or some other factor, they are not displaced but are instead eliminated. Any hero located in a totally eliminated stack must take a Hero Fate Roll.
A land unit may displace into a sea or lake hex only if an empty friendly fleet is available in the besieging forces to carry it. Displacing fleets may ignore land units in the space it displaces into. It is allowable for enemy land units and friendly fleet units to occupy the same coastal space after displacement. This should be corrected the next time that the player controlling the fleet moves.
Mixed-unit Siege Combat
In the Basic Game, fleets generally do not engage in combat with land units, and vice-versa. Siege situations are an exception to this. When calculating strengths for initiating or maintaining a siege, or for modifying the siege combat die roll, all combat units stacked in a castle space during the Siege Phase are treated as undistinguished strength points.
Fleets at Sieges
Fleets are not required in the besieging of a castle-port, but they may contribute their strength to both the defense of and attack against a castle-port.
Land units aboard fleets that are reinforcing a siege must debark into the besieged castle space to be considered as part of the besieging force. A besieged player's fleets can freely enter and exit besieged castle-ports and transport units into and out of besieged castle-ports, unless the besieger has at least one fleet in the besieging stack.
The freedom of fleets in sieges is only a factor of movement. A fleet cannot be deployed as a replacement or reinforcement in a besieged castle-port even if it is besieged only by land units. (And likewise in regard to land units when a castle-port is besieged only by fleets.)
Mixed-unit Combat During Relief
Because relief combat is fought in the Combat Phase, army and fleet units may not attack one another in the course of relief combat. Relieving land forces may attack only besieging land units, while relieving fleets may attack only besieging fleet units, unless the attack is amphibious (see Amphibious Attack).
EXAMPLE: A castle-port is besieged by two enemy fleets and six land combat units. A relieving force consisting of four fleets and two transported land units attacks. The attacker does not wish to conduct an Amphibious attack, so he fights with only his four fleets vs. the two enemy fleets (both the land units on the fleets and the enemy land unit are discounted). The combat is fought at odds of 2 to 1. After the attack, the two besieging fleets survive, as do three of the relieving fleets, and these three fleets now enter the besieged castle-port (along with the two transported land units). Although the two arriving land units have not yet fought, they may not initiate any further attacks during this game turn because the time for announcing new attacks has passed.
Instead of launching an ordinary combat as given above, it is possible that the relieving player may opt for the riskier Amphibious Attack. The procedure for carrying out both Relief attempts and Amphibious Attacks is given in the Combat Phase rules section.
Besieging Neutral Castles
If a player declares a siege against a neutral non-player castle, the kingdom in which the castle is located immediately becomes the ally of a randomly-determined enemy player. Deploy the kingdom's units immediately. This will usually mean that some units will be deployed in the very castle that is under siege, which is allowable. If this deployment increases the castle's defense value to the point where it is greater than the strength of the besiegers, the siege is no longer valid and the besieging units are immediately displaced from the castle.
Non-siege Attacks by Besiegers
Besiegers may attack adjacent enemy units outside the castle space without disrupting the siege. However, if the besieging stack has already participated in a siege attack, it may not attack in the Combat Phase. (Remember, a player may deliberately refrain from attacking in the Siege Phase.) If the combat results reduce the besieging force to less than the number of units needed to maintain the siege, they are displaced at the end of the game turn, ending the siege.
Movement Phase
During the Movement Phase, the player may move any (or none) of his units, in any direction or combination of directions. Only the current player may move units.
Units, or stacks of units, are moved together over contiguous spaces on the map. As each unit (or stack) enters a space, it expends points from its movement allowance as determined by the type of terrain in the space.
The movement allowance of a given unit is printed on the upper right corner of the counter. The movement allowance is the number of movement points it may expend in a single game turn.
Movement points cannot be saved from one turn to the next, nor may they be transferred from one unit to another. Movement allowances can be increased through Hero Movement Bonuses.
Stacking
All friendly combat units and heroes may stack together in the Basic Game. Friendly allied units from non-player kingdoms may stack with those of their allies and enter to defend a friendly castle. At any time, any player can examine the stacks of opposing players to determine their contents.
Movement and Terrain
Each type of space represents a particular terrain type. Each unit entering into a space must expend a certain number of movement points from its allowance. No unit may enter into a space unless it has sufficient movement points to pay all of the movement expenses for that space. All point costs listed below are per space.
Terrain effects are cumulative. For example, to enter a forested mountain space, the cost would be six movement points (2 for the Forest + 4 for the Mountain).
Special Terrain Bonuses
The increased cost of certain types of rough terrain may be reduced if the moving unit has the appropriate special terrain bonus. There are three types of bonuses, mountain, forest and swamp. The mountain bonus means the unit treats hills as clear terrain and treats mountains as having a cost of 3 movement points. The forest bonus allows the unit to treat forest hexes as clear terrain. The swamp bonus allows the unit to treat swamp hexes as clear terrain.
There are four ways that a unit may gain a special terrain bonus in the Basic Game:
A. It is a unit having one or more bonus symbols (forest, swamp, or a mountain) printed on the counter beneath its movement allowance. B. It is a unit led by a hero with such a symbol. C. It is a unit inside the kingdom of its origin. All units possess ALL terrain bonuses within their home kingdoms. D. It is a unit led by a hero who is traveling through the terrain spaces of his home kingdom.
Hero units may pass their movement bonuses on to land units they are leading, but a combat unit cannot transfer its bonuses to other combat units in their stack. A hero may "ride" a combat unit for the whole length of its unassisted movement, and in doing so benefit from any terrain bonuses the unit might have.
A unit's terrain bonus may negate all or part of the penalties for combined terrain. For example, a hill-forest space would cost a Zorn unit, or a mercenary led by the monarch of Zorn (which has both forest and mountain terrain bonuses), only 1 movement point.
Terrain Effects Chart
| Terrain | Movement Cost | Combat / Special Effect |
|---|---|---|
| Clear | 1 | — |
| Hills | 2 | Treated as clear terrain to units with mountain movement bonus. |
| Mountain | 4 | Cost is 3 points for units with mountain terrain bonus. +1 to the defender's combat roll if he occupies a mountain hex. |
| Mountain pass | 2 | A defender's combat strength is doubled in a mountain pass. |
| Forest | 2 | Treated as clear terrain to units with a forest movement bonus. There are two different map symbols for forests. |
| Swamp | 2 | Treated as clear terrain to units that possess a swamp movement bonus. |
| Open Sea or Lake | 1 | Only fleets may enter. Land units may be transported through such terrain by fleets. |
Castles
Castles with asterisks are royal Castles. Hostile units may not enter the space "outside" an unbesieged castle except to initiate a siege. Once a siege is initiated, units friendly to the besieger may enter and exit freely.
A friendly castle is any castle or port inside the boundaries of a kingdom belonging to the player monarch or to that monarch's allies. If plundered, the castle ceases to exist but the space still serves as an entry point for replacements and mercenary reinforcements. A plundered castle is considered friendly to its original owner for this purpose unless actually occupied by at least one enemy combat unit–in which case it is considered friendly to the occupying force. If a castle is plundered, it is considered simply a clear space for movement purposes. Also see Castle-Ports, below.
Scenic Spaces
Any named hex with a silhouette–other than a mountain pass or castle–is a scenic hex (castles can be distinguished by the defensive value in the hex, and mountain passes by the ×2 notation in the hex). Scenic hexes are treated as clear terrain in the basic game. Some scenic hexes have a dot at the top of the hex. When present, the dot indicates that the scenic hex is the entry location for a special mercenary in the intermediate and advanced games.
Rivers
Rivers that travel through the hexes are non-navigable and impassable to fleets. Land units pay an extra movement point to enter or leave such a hex unless moving "along" the river valley. This cost is over and above the cost of any other terrain in the hex.
Navigable Rivers
A navigable river is one that is exceptionally large and deep. They follow a path along the hexsides of the board rather than traveling through a path of single hexes the way most rivers do. Fleet units can move along navigable rivers; when doing so they are positioned in the actual hexes bordering the river. See Fleets and Navigable Rivers, below.
Land units are limited in their ability to cross navigable river hexsides. They may not attack land units across such a hexside. They may never retreat across such a hexside. They may only cross such a hexside during movement if they begin the movement phase next to the hexside to be crossed (they must stop to prepare a ferrying operation.) Even then, the crossing is accomplished with an extra cost of +2 movement points. Fleets may act to ferry land units across a navigable river. See Ferrying, below.
The only navigable river on the board is the River Deep and the first hex of the River Waning, connected to the River Deep. The exact beginning and end of the River Deep are as follows: The hex southeast of Castle Lapspell is a coastal hex, the Deep river commences east of that hex, running to its furthest inland hexes southwest of Pennol.
All other cases where one might question whether water forms a navigable river or a coastal hex are actually coastal hexes. Specifically:
- The hex southeast of Addat is a coastal hex.
- The Boom is a coastal hex.
- The hex to the northeast of Adeese is a coastal hex.
- Parros is not surrounded by a navigable river. It is an island surrounded by coastal hexes. See the Rombune section of Select Rules for Special Kingdoms.
- Lake Carth, to the west of Pennol, is a small sea.
Movement Restrictions
Land units may not cross all-sea hexsides. Fleets may not cross all-land hexsides. All ports are considered to be coastal spaces and may be entered by both fleets and land units. No unit may move or retreat off the map.
Enemy Units and Movement
Combat units cannot enter or stop in spaces already occupied by enemy combat units of their same type (land units / fleets). The only time this does not apply is in regard to sieges.
Land combat units can enter coastal hexes and hexes bounded by navigable rivers regardless of the presence of enemy fleets. If they stop in that hex the enemy fleet must leave during its next movement phase. However, land units may not cross a navigable river controlled by an enemy fleet (see Fleets and Navigable Rivers, below).
Fleets can enter coastal hexes and hexes bounded by navigable rivers regardless of the presence of enemy land units. They may not stop in a hex containing enemy land units, however.
A Hero can enter hexes containing enemy combat units, but must make a Hero Fate roll if he enters a hex occupied by an enemy land combat unit or crosses a navigable river hexside controlled by an enemy fleet.
Unlike many other games, units in Divine Right do not have 'zones of control' extending into adjacent hexes, except in the sense that fleets control all adjacent navigable river hex sides. This is due to the small size of the armies of the era. A strength point represents the equivalent of a thousand human soldiers and each space is about fifty miles across. Therefore, units may pass through spaces adjacent to enemy units without penalty or delay.
Fleet Movement
Fleets are seagoing combat units. They may enter all-sea spaces, coastal spaces, friendly ports, and spaces bordered by navigable river hexsides. A fleet in a port should be inverted to show that it is "inside" the port. Fleets expend 1 movement point per hex except when moving upstream in a navigable river, which costs 2 movement points per hex.
Fleets and Navigable Rivers
A fleet which ends its movement in a navigable river effectively controls all the navigable river hexsides of its hex. The river at that point is blockaded. Enemy land units may not cross such a controlled hexside. A hero unit may attempt to cross an enemy-controlled river hexside, but must take a Hero Fate Roll upon making the attempt. (Only one roll, even if enemy fleets occupy the hexes on both sides of the river.) Fleets moving in a river must stop upon entering a hex that shares an enemy-controlled hexside.
EXAMPLE: If a fleet is in hex B, it controls the river hexsides between B and E, and between B and F. If an enemy fleet were in hex A or D, it could move to hex E but would have to stop at that point. It could move to F on its next turn, but would again have to stop. The turn after that, it could freely proceed upriver.
A fleet may act as a ferry across a navigable river, in that way negating the existence of the river for friendly land units. A fleet acting as a ferry does not move, it merely allows land units to cross from one side of the river to the other without needing to stop or pay additional movement points (see Navigable Rivers, above). Any number of heroes may cross freely by fleet-ferry, but a stationary fleet may only ferry a number of combat units equal to its movement allowance.
EXAMPLE: A fleet with a movement allowance of 8 can negate the existence of the river for up to 8 combat units crossing the river over the top of the fleet, but not more.
If a fleet has had to move to reach the desired ferry-position, it may only ferry a number of combat units equal to the unspent movement allowance remaining to it.
For the purpose of ferrying land units, it does not matter on which side of the river the fleet is physically located. If approaching the river from the fleet side, the land units move over the fleet and to the opposite bank. If approaching from the other direction, they move from that bank into the fleet's space on the other side.
Transporting Troops
Fleets may transport land combat units and heroes by sea. Each fleet may carry one combat unit and any number of heroes. To transport a unit, the fleet moves into the coastal or port hex containing the unit to be transported and the unit embarks. The fleet may then continue movement. Debarking is the reverse of the embarkation process. Fleets may transport land units up and down navigable rivers; this is distinct from Ferrying, where the units merely use the fleet to cross the river.
A unit may not embark or debark in a coastal space that contains mountains. Units may not debark in an enemy castle-port unless they meet the requirements to besiege the port. The fleets transporting the units may be counted as part of the stack's strength for determining if a siege is possible.
Example: two fleets are transporting two land units. This stack may enter a hex containing a strength 4 enemy castle and initiate a siege. If land units are present "outside" the castle, this is not allowed. An amphibious attack would be the only way for the stack to directly enter such a hex (see Amphibious Attacks).
Embarking and debarking are accomplished at no movement-point cost to the fleet. A fleet may continue moving, embarking, and debarking land units until its own movement allowance is spent. Units transported by sea cannot move further during that turn.
Castle-Ports
Not all castles bordering water are castle-ports. A castle-port is indicated when the castle silhouette does not extend completely to the bottom of its hex. For instance Pennol, Muetar's royal castle, is not a port. Adeese, Schucassam's royal castle, is a castle-port.
The term castle-port is used when special attention needs to be drawn to the space's capacity for functioning as a port. All rules which pertain to castles also pertain to castle-ports.
Players without friendly ports cannot add fleet replacements or reinforcements. A plundered castle port is still considered a port, and can serve as an entry point for replacement fleets and mercenary fleets. If unoccupied, it is considered friendly to the original owner; if occupied by enemy units it is considered friendly to them.
Non-Castle Ports
Bartertown and Freeport are non-castle ports. These are small affairs. Each may shelter a single fleet from a Storm random event. Additional fleets in the port space are not protected. Mercenary fleet reinforcements may be entered into play at a friendly-controlled non-castle port.
Fleets and land units enter at the cost of one movement point. Land combat units may freely enter a non-castle port occupied solely by enemy fleets. Doing so makes the port friendly to the occupying land units (essentially, for control purposes, land combat units are superior to fleet units.) The enemy fleet is displaced from the space at the end of the Movement Phase.
Movement and Diplomacy
Moving heroes and combat units into neutral kingdoms has diplomatic repercussions. See The Diplomatic Penalty.
Ambassadors do not move across the map like units; they are markers that are simply picked up and put down in the space where diplomacy is to occur.
Combat Phase
Combat occurs between adjacent opposing units at the discretion of the current player. This player is considered the attacker and his opponent the defender, regardless of the overall strategic situation.
A player must predesignate all attacks he will make before resolving any of them, but declared attacks may be resolved in any order that the attacker chooses. The result of each attack is applied immediately after the attack is executed.
Making Attacks
A possible combat situation exists when the combat units of two different players are adjacent to one another and the terrain does not specifically forbid combat (e.g., units on opposite sides of a navigable river).
To resolve an attack, the attacker and the defender each roll one die. This is called the Combat Roll. The Combat Roll of both the attacker and defender can be modified by having superior numbers, or monarchs with special Personality cards that assist (or hinder) combat. The player with the highest Combat roll is the winner of the attack. The loser must remove the number of combat units equal to the difference between the two Combat Rolls.
When taking combat losses, the owner of the units always decides which units will be eliminated. Land units aboard eliminated fleets are also eliminated, but do not count against losses to be removed.
If all the defending units in a given space are eliminated, the attacker may advance some, all, or even none of the attacking units into the space vacated by the defender. Should an attacker be totally eliminated, the surviving defending units cannot advance into the vacated space.
Modifying the Combat Roll (Odds)
The strength of each combat unit in the Basic Game is 1. The strength of an attacking or defending force is thus the sum of the number of combat units involved. Combat Rolls may be modified depending on the relative strength of the attacker and defender:
The combat strength of both the attacking and defending units are totaled. The larger total is divided by the smaller total, and the result rounded off to get a simple ratio such as 3 to 1. The rounding is always in favor of the defender. This means that if the attacking force is larger, round the result down. If the attacking force is smaller, round the result up. Then simply add each player's ratio number (e.g., 3 or 1 in the case of a 3 to 1 odds ratio) to their respective combat roll.
EXAMPLE 1: 5 units attack 3. Dividing, 5/3 = odds of 1.66 to 1. Rounding 1.66 down (in favor the defender) yields 1. The ratio is 1 to 1. Add 1 to each of the player's die results. (Note: In a 1 to 1 situation, it is acceptable to ignore the modification and accept the straight roll. It will not affect the outcome.)
EXAMPLE 2: 7 units attack 3. Dividing, 7/3 = odds of 2.33 to 1. Rounding in favor of the defender yields 2 to 1. Add 2 to the attacker's roll result and add 1 to the defender's.
EXAMPLE 3: 8 units attack 9. Dividing the larger by the smaller number, we have 9/8=1.125 to 1. The fraction is rounded UP because the attacking force is smaller, meaning that one is added to the attacker's combat die roll and two is added to the defender's roll.
EXAMPLE 4: 2 units attack 3. Dividing the smaller number by the larger gives 3 to 2, or 1.5 to 1, which is again rounded up to yield modifiers of 2 for the defender and 1 for the attacker.
Ties
If the modified rolls of both players result in a tie, then both the attacker and defender must lose a number of combat units equal to the unmodified number rolled by the weaker player. In such a situation the player with more units is never required to lose more than twice the number of losses suffered by the smaller force.
EXAMPLE 1: A stack of 8 combat units attacks a stack of 4. It is a 2 to 1 attack. Each player rolls a combat die; the attacker rolls a 2 (which is modified, for odds, by +2 = 4) and the defender rolls a 3 (which is modified, for odds, by +1 = 4). The result is a tie. Because the player with the fewer forces has rolled an unmodified 3, each player would have to lose 3 units.
EXAMPLE 2: A stack of 6 combat units attacks a single enemy unit. It is a 6 to 1 attack. The attacker rolls a 1, and the defender rolls a 6. These results when modified (by +6 and +1 respectively) yield a tie of 7. The defender has only 1 unit to lose. However, because of the small size of the defender's casualties, the attacker need not lose 7 units but can instead lose a sum equal to the other player's actual losses ×2. In this case 1 × 2 means that the attacker loses 2 units.
Which Units May Attack?
Only those units belonging to the current player may attack. Units that have moved into an enemy castle and declared a siege during that turn's movement phase, or that have made a siege attack during that turn's Siege phase may not attack during the Combat Phase.
Land combat units that are aboard fleets may not participate in combat, unless a port is being attacked (see Amphibious Attacks). Replacements and reinforcements that entered during the Random Events Phase may attack in the same game turn that they enter. Units of a newly-activated kingdom may only attack units inside their home kingdom on the turn of activation. See Activation of Kingdoms.
Units may attack any (or all) enemy units adjacent to them, except those that are "inside" Castles, those forbidden by impassable terrain, or navigable river. Only those units directly adjacent to a given enemy stack may participate in an attack upon that stack.
If a stack attacks an enemy, all units in the stack must attack. However, just because opposing stacks are adjacent to one another does not mean that they must attack. Once a unit has participated in an attack upon an enemy combat unit it may not make any other attack for the duration of that Combat Phase. No combat unit may be attacked twice in the same player's Combat Phase.
EXAMPLE 1: A, B and C are friendly stacks. X, Y, and Z are enemy stacks. A and B may both attack X, or A may attack X alone. B may attack X alone, Y alone, or both X and Y together. C may only attack Z.
EXAMPLE 2: The units in stack A are enemies to stacks X, Y, and Z. Stack A could attack in one of several ways: 1) Not at all, 2) Attack only X, only Y, or only Z, 3) Attack any combination of two enemy-occupied spaces, or 4) Attack all three adjacent enemy-occupied spaces as a combined defending total.
Mixed-Type Combat
In the Basic Game, fleets and land units may only fight each other in a siege situation during the Siege Phase or during an Amphibious Attack. In all other cases, the presence of one type of unit is ignored by the other during combat even if they should occupy adjacent spaces. Even so, they cannot indefinitely occupy the same space. Fleets which find themselves in the same hex as enemy land units must leave as soon as possible, except in siege situations.
Effects of Terrain on Combat
Units defending in a mountain may add +1 to their combat roll. Units defending in a mountain pass have their combat strengths doubled. These combat bonuses are in addition to any other combat bonuses that may accrue to the defending player (e.g., those that come from heroes, etc.)
Land units may not attack across an all-sea or navigable river hexside, nor may fleets attack across an all-land hexside. Ordinary rivers have no effect upon combat.
Retreat Before Combat
After an attack has been declared and before the combat dice are rolled, the defender may attempt to retreat to avoid taking losses. The ability to retreat is determined by the type of combat unit trying to retreat:
| Type of Unit | Retreats on |
|---|---|
| Human (most kingdoms, mercenaries) | 4, 5, or 6 |
| Non-Human (Neuth, Ghem, Nithmere, Trolls) | 3, 4, 5, or 6 |
All fleets in the basic game are considered 'human' and retreat on a 4-6.
When a stack of units is attempting to retreat, test the type of unit with the least chance of success first; if it succeeds, all other units in the stack are assumed to have successfully made their required retreat roll. If it fails, it must stand and fight, although if other units are present with a better chance of retreating they may make their own roll to attempt a retreat.
A player cannot split up a force of similar-type units by retreating part of it. If any humans in a stack retreat, all of them must retreat. If any elves in a stack retreat, all elves present must retreat.
Hero units do not retreat unless at least one friendly combat unit does so. Heroes basically ride a combat unit away during its retreat.
EXAMPLE 1: Common mercenaries (always treated as humans) stacked with Elves from Neuth (non-humans) receive a roll of 5. Both groups may retreat before combat. If the player had rolled a 2, the humans would be forced to stand and fight. The Elves could still roll to retreat without the mercenaries, if their owner so desires.
EXAMPLE 2: A mixed stack of Elves and Dwarves attempt retreat from an enemy attack. A retreat roll of 2 is rolled. Neither the Elves nor the Dwarves may retreat from the combat situation. If the player had rolled a 3 he could retreat all of the elves, all of the dwarves, or the entire force.
Any units successfully retreating before combat must move to an adjacent space. All units of the same basic type (e.g., land or fleet unit) that retreat on a single roll must retreat to the same space. A stack with both land and sea combat units may choose to retreat to two different spaces, but must roll separate retreat rolls.
Units may not retreat into a space that contains an enemy combat unit, a non-plundered enemy or neutral castle (unless it is already besieged by friendly combat units), or into any space occupied by friendly units that are currently engaged in an unresolved attack that same player round.
If no space is available for a stack to retreat into, no retreat can take place regardless of the roll. The player may abort an intended retreat even after a successful retreat roll. For example, if Elves and Dwarves are stacked with human units and are able to retreat, while the humans' roll is an unsuccessful one, the player may opt to keep the Dwarves, Elves, and the humans together to face the attack at better odds. Conversely, either the Dwarves and/or Elves may retreat, while letting the humans stay to defend the space.
If, after a Retreat Before Combat, a unit or stack is still adjacent to the enemy units that were attacking it then the retreated unit(s) may still be attacked. No second Retreat Before Combat is allowed.
If, after a Retreat Before Combat, the retreated units are adjacent to a different enemy stack, one that has been declared to be attacking other defenders but whose attack has not yet been resolved, the attacker may choose to include the retreated units in the combat. Their strength is then added to the strength of the originally declared defenders in this second combat. The units may not retreat again, although the originally declared defenders against this new attack may still attempt to do so.
Advance After Combat
Attacking units may advance into a space occupied by a defending force that was entirely destroyed in combat. Attackers may also advance into a space that has been vacated by defenders who have performed Retreat Before Combat, although in that case note that the advance counts as the advancing units' attack for the turn.
Amphibious Attacks
A player may make an amphibious attack on a body of enemy combat units in a port space or "outside" the castle in a castle-port space. (The besiegers of a castle-port fall into the latter category.) But such landings are dangerous and should not be engaged in lightly.
In an amphibious attack the enemy units may be attacked from adjacent sea spaces by fleet units, either alone or in combination with any land units they are transporting. (This is an exception to the restriction on combat by transported land units, and the restriction on land units fighting fleets.)
All enemy land and sea units in the space (the ones "outside" the castle in the case of a castle port) defend against the attack. In addition, fleets "inside" a castle port can come "outside" to defend against the attack, if their owner desires. All losses to a mixed force of land and sea units in an amphibious attack can be divided between the two types of units however the owner desires.
Should the attacker lose an amphibious attack (e.g., take greater or equal losses), half, rounded down, of all the surviving attackers are then eliminated. This represents the difficulty of withdrawing safely from a failed amphibious situation. The attacker may apportion these losses as desired between land units and fleets.
In the case of units amphibiously assaulting a besieging force, the attacker may also add into the fray either the land or sea units "inside" the besieged castle. He may not add both, as these units are not really engaging in an amphibious attack themselves. Likewise, if things go badly they are not subject to the half-survivors-eliminated penalty of the previous paragraph. The attacker may not add in besieged units that made a 'break out' attack during the siege phase of the same turn.
Fleets from inside a castle-port that 'assist' an amphibious attack against their besiegers return inside the port after the battle. However, fleets that came out of a port or castle-port to defend against an amphibious attack remain "outside" the port after the battle.
After an amphibious attack all the survivors on both sides remain in place unless A) all defending land units were destroyed or retreated before combat or B) the attack was an effort to enter relieving forces into a siege. In the first case the attacker may advance into the hex, possibly initiating a siege if the defenders were "outside" of a castle-port. In the second case the surviving attackers may be immediately added to the besieged force. See Relieving Forces at Sieges, below.
EXAMPLE: Four besieging Mivioran land units are in the space of the Rombuni port of Thores but are "outside" it. The Rombuni fleet stops adjacent to the castle with four fleets and four land units. The Rombunis may attack the Mivioran units at 2 to 1 (8 vs 4) by means of amphibious landing. If they destroy all of the Mivioran units they may advance into the hex and be considered either inside or outside the port as they desire. If they do not destroy all of the Mivioran units they may nonetheless enter the castle as a 'relieving force'.
It is permissible to launch an "amphibious attack" against an empty castle-port hex for purposes of advancing after combat into the hex and laying siege to the place.
Relieving Forces at Sieges
Relieving forces may win the right to advance into the castle space and add themselves to the force "inside" the castle walls by moving adjacent to the besieging stack and attacking the besieging units in the Combat Phase. Any such attack is made during the besieged player's Combat Phase. Win or lose, the relieving force may then advance into the castle to join the besieged force.
A force of land units attempting to relieve a besieged castle-port only fights against the besieging land units, should the besieger have both land units and fleets present. If the besieger has only fleets, land units may freely enter the castle-port.
Likewise, a force of naval units may 'relieve' a friendly castle-port besieged by only land units by simply entering the port in the movement phase. They may transport land units and disembark them in the besieged castle as part of this movement. If the besiegers DO have fleets, however, the relieving fleets must fight them (and only them, not the besieging land units) in the combat phase to gain the right to enter the port. If the relieving fleets were transporting land units, they may be disembarked once the relieving fleets have entered the besieged castle-port.
Note: this is NOT an amphibious attack. The land units are merely cargo and do not participate in the combat resolution. If the player wants both the fleets and their transported land units to participate in the combat, he must make an amphibious attack as outlined in the previous rules section.
If the besieging forces include both land units and fleets, a player may launch two attacks on the hex, one by relieving land units against the besieging land units, and one by the relieving fleets against the besieging fleets. He must do so if he desires to have both land- and sea-borne units enter into the besieged castle. (Naturally, if the player conducts an amphibious attack that is a different matter–all the attackers fight all the defenders in one battle in that case. This provision covers situations where land units are attacking by land and sea units by sea.)
The defending forces inside the castle may participate in the 'relief' attack so long as they did not make a breakout attack during the preceding siege phase. Land units in the castle may join in the attack of relieving land units, and fleets in the castle may join in the attack of relieving fleets. Either type (but not both) may join in the case of an amphibious attack attempting to relieve them, as outlined in the rules given under Amphibious Attacks.
Heroes
In the Basic Game, all units representing individuals (as opposed to combat units which represent hundreds) are referred to as "heroes." Those that are eligible to lead troops are hero-leaders. All monarchs in Minaria, player and non-player, are hero-leaders. (In the Intermediate game there are some heroes who are not leaders.) Units led by a hero are granted the hero's movement allowance and terrain bonuses. Additionally, they are able to attack or defend with the aid of any combat bonuses granted by the monarch's Personality card.
Heroes, by themselves, have no combat strength, but some monarchs grant combat bonuses to accompanying combat units' combat resolution, if such bonuses are listed on the monarch's Personality card.
Heroes traveling alone can pass through a stack of enemy combat units, or even an enemy castle, but must take a Hero Fate Roll when so doing.
Hero Movement Bonus and Terrain Bonus
Monarch heroes may confer their own movement rate to a stack containing other heroes, his own regular units and/or mercenaries. They may not assist in the movement of regulars of other friendly kingdoms.
Some hero units have terrain bonuses on their counters (see Movement). All monarchs have mountain, forest, and swamp terrain bonuses when moving within their own kingdoms. These bonuses are likewise passed on to all units (except regulars of other kingdoms in the case of monarchs) which are in the hero's stack.
Units that are to receive these bonuses may not move independently in the same movement phase. Units that the player does not wish to have benefit from the hero's bonuses should be moved first. If a unit begins its move in concert with a hero, it may not split off from the hero's stack and move on its own. It may cease moving before the hero, but may move no further that turn.
If two or more heroes are in the same stack, only one of them may lead the unit for movement. If, for example, the monarch of Immer and the monarch of Neuth are in the same stack, each monarch can only move units of its own country, and any mercenaries that happen to be present. If mercenaries are present, they can only benefit from the movement bonuses of one of the leaders each turn.
EXAMPLE: A stack of one regular troop unit and one mercenary unit, both of which have a movement allowance of 5, is led by the monarch of the regular troops' kingdom. The entire stack gains the monarch's printed movement allowance of 7 and moves using all the terrain bonuses the leader possesses.
EXAMPLE: If the monarch of Ghem with one unit and the monarch of Muetar with 2 units are moving through hills, the one Ghem (Dwarven) combat unit and the king of Muetar may accompany the Ghem monarch, through up to 8 spaces of clear terrain and hills. Because the Muetaran monarch chooses not to lead, the Muetaran combat units are on their own and can move only 5 movement points, which would take them through just 2 hill spaces.
Units with their own terrain bonuses that use hero-assisted movement lose their normal bonuses. Thus a unit which is able to move through forest as clear terrain does not transfer this ability to the hero leading its stack and may not use its own forest-terrain bonus if it is benefitting from the hero's movement bonus. Multiple heroes may not combine movement enhancements in any way.
Note, however, that a hero may forego leading troops and instead be 'carried along' by them as they move, thus indirectly gaining the combat units' own terrain bonuses. Outside of a monarch's home kingdom, the terrain bonuses of other units may more than make up for losing the enhanced movement rate the monarch would confer were he leading the stack instead of being carried along by it.
Hero Combat Bonus
Various factors give a hero a Combat Bonus. In the Basic Game only a monarch with Personality card 16 has a Combat Bonus. Many more such bonuses are present in the intermediate and advanced games. When playing using those rules, only one hero (per side) may grant a bonus to the combat die roll. Combat Bonuses do not apply to Siege Resolution Rolls unless specifically stated in a hero's description. The hero granting the combat bonus is said to be leading the units in combat. A monarch may not lead regulars of another kingdom in combat. It is possible, though rare, for units to be led by one hero during movement and by another in an ensuing combat.
Hero Fate Roll
When a hero is in danger of being captured or killed, he must make a Hero Fate Roll. Whenever one of the following situations occurs, a die must be rolled for each threatened hero.
- One or more units in the hero's stack are lost in combat.
- The hero passes through a stack of enemy combat units alone.
- Enemy combat units land on or pass through a lone hero (referred to as a "search.")
- The hero begins his turn in an enemy stack and attempts to leave.
- A castle containing the hero falls to a siege.
- The hero attempts to enter or leave a besieged castle alone. (To enter/exit the space and the castle walls is a single roll, not one for the castle and one the enemy besiegers).
- The hero attempts to enter or leave any enemy or neutral castle.
- The hero is inside an enemy castle at the beginning of the owner's player turn.
- The fleet transporting the hero is shipwrecked.
- The hero attempts to cross a navigable river hexside controlled by enemy fleets.
A "lone hero" means that there are no friendly combat units stacked with the hero. Several heroes stacked together without friendly combat units as escorts are equally vulnerable. A lone hero in a non-friendly castle space is always considered to be "inside" the castle walls.
If a stack begins its turn stacked with an enemy hero, the player must have the units expend movement points equal to the terrain cost of the space in order to make a "search" and force a hero fate roll. Of course, this is only really a factor if the player wishes to then move the units elsewhere after the search is conducted. (Time is lost in the process of making a search).
Thus, if the space contains mountain terrain, at least one combat unit loses 4 movement points in conducting the search. (If the units were to use a friendly hero with a mountain terrain bonus to reduce the movement point cost of the hex to 3, then that hero must also expend movement points in the search.)
THE HERO FATE TABLE
| Roll | Result |
|---|---|
| 1 | Hero Killed |
| 2-5 | No Effect |
| 6 | Hero Captured |
Usually, a Hero Fate Roll can be forced on a hero only once per player turn. For example, if a hero's stack is eliminated in combat and the enemy advances on top of the hero, only one Hero Fate Roll is made. However, on that hero's next Movement Phase, another Hero Fate Roll must be made at the beginning of the hero's next turn (for beginning his player turn in a hex with enemy units.)
Only one Hero Fate Roll may be required of a given hero during each enemy player's movement. (For instance, an enemy player may not force seven rolls by separately moving seven combat units over a lone hero). However, a monarch that enters multiple hexes containing enemy units must make a hero fate die roll for each such hex he enters.
If a hero begins an enemy turn in an enemy castle, a Hero Fate Roll must be made for the hero at the start of the enemy player's Random Events Phase. A lone hero exiting a besieged castle and passing though a non-besieging enemy unit adjacent to it must undergo two Hero Fate rolls. In fact, there is no limit to the number of rolls that a hero must undergo for situations of his own making.
A lone hero may never be attacked. Aside from assassination (see Diplomacy), the only way heroes may be killed or captured is through the Hero Fate Roll.
Shipwrecked Heroes
A hero is either killed, captured, or shipwrecked if he is left without a friendly fleet in an all-sea space.
A Hero Fate roll is made. The hero dies on a 1, and is captured on a 6. On a 2-5 (and on a 6, if no attacking or searching enemy fleets are responsible for his plight), the hero is immediately placed on the Isle of Fright. The castaway must remain there until picked up by a friendly fleet that moves into the space. Enemy fleets may not capture a hero on the Isle of Fright, as there are too many caves in which to hide. In a similar manner, fleets may not unload combat units there because of the many dangerous reefs surrounding the island. Fleet movement into the Isle of Fright space is restricted to rescue attempts. Ambassadors may still work diplomacy upon a castaway monarch's kingdom, since a temporary regency is assumed. (Any modifications to the diplomacy roll imposed by the monarch's personality are ignored during this time.)
Until freed or rescued, a shipwreck causes the monarch's combat units to suffer a -1 modifier on all (offensive) Combat and Siege Rolls in which they make up more than 50% of the participating friendly force. A non-player monarch is automatically removed from his place of exile should his kingdom be deactivated or go into forced peace.
A hero castaway on an inland body of water is placed on the closest non-port river space, lake shore, or coastal space of the same body. If two spaces are equally close, decide randomly. A castaway will violate a neutral kingdom if he is cast upon its shore, unless he is eliminated voluntarily.
Death of a Monarch
If a non-player monarch is killed, his kingdom deactivates and goes into a form of Forced Peace called Confusion (see Confusion, above). Discard the deceased monarch's personality card and shuffle it into the deck of unused ones.
If a player monarch is killed, the player is out of the game and his kingdom becomes a non-player kingdom. See Fate of Player Kingdoms, above.
Capture of a Monarch
When a non-player monarch is captured, he is immediately placed in the nearest non-plundered, non-besieged castle controlled by the captor. If the captor has no such castle, there are two other options: 1) Execute the monarch immediately, or 2) Set the monarch free. In either case, the captor still gets the victory points for the capture (see Victory).
A captured hero may not be transferred from one prison castle to another, and is incapable of any offensive or defensive action. The captor does not need to keep a combat unit at the castle–the intrinsic defense factor of the castle constitutes a garrison.
If a monarch is a captive, the monarch's combat units suffer a -1 modification on the Combat Roll, should they make up more than half of the friendly units engaged in a combat situation.
There are only three ways to free an imprisoned monarch:
- Successful siege and plunder of the prison castle by the prisoner's own troops or allied troops.
- If the kingdom in which the prisoner is being held deactivates in any manner, the prisoner is released and placed in the nearest friendly castle.
- If the castle is plundered by units enemy to the captive, the captive is freed, but remains in place until his own next movement phase. Usually one or more Hero Fate rolls will be required to evade the new enemy.
Freeing a Prisoner
A captive who is voluntarily freed is placed in the nearest friendly castle. If no castle is friendly to the freed captive, he is placed with the nearest friendly combat unit. If there is no friendly combat unit, the owning player places the freed captive in any space that he desires.
Executing a Prisoner
Immediately upon capture, or in any of the captor's subsequent diplomacy phases, a prisoner may be executed. No additional victory points are awarded for such an execution, though the capturing player still gets the victory points for the capture. Additionally, the player executing a monarch incurs a permanent Diplomatic Penalty of -1 in the kingdom of the slain monarch.
Forcing Peace on a Prisoner
Forcing peace on a prisoner is similar to forcing peace on a kingdom due to the capture and occupation of its Royal Castle (see Forced Peace). Each and every game turn that a monarch is imprisoned, the jailor, during his Diplomacy Phase, may make a special roll to attempt to force the captured monarch into peace. This is also called the "Forced Peace roll."
A jailor may choose not to attempt to force peace on their prisoner, but instead attempt to work normal diplomacy on the captive with the ambassador. In this case Diplomacy cards and penalties do apply, but that is the only function that the ambassador may do that turn.
Only the jailor's ambassador may work diplomacy on a captured monarch. Deactivating a captive by using an ambassador is considered normal diplomacy and not considered Forced Peace.
Capture of a Player Monarch
If a player monarch is captured, essentially the same procedure is followed as if he had been killed. His kingdom becomes a non-player kingdom in confusion. All of his allies deactivate normally. When the former player kingdom comes out of confusion, its monarch is still the same 'person' as he was before, but in being captured and released he has lost sufficient standing among his fellow monarchs that he can no longer function as a player monarch. His is taken to be a lost cause, and not one worth championing. A personality card is drawn for the now non-player monarch when his kingdom comes out of confusion.
Special Rules for Select Kingdoms
The Trolls
Trolls have four separate locations on the map. They are a common but somewhat disorganized race. Trolls are regenerative; in addition to any replacements they may receive via Random Events, they may replace one eliminated regular unit (if any) at the beginning of each turn. The Troll is replaced at its original deployment space. If the deployment space is enemy-occupied, the regenerated units may not be brought into play that turn. Any Troll regulars lost through Random Events may not be regenerated in the same game turn.
The Trolls have the only kingdom without a Royal Castle. Use the scenic space of the Face as a Royal Castle for diplomacy purposes and mercenary placement. The Trollish monarch may enter play in any of the four scenic spaces of the Troll kingdom.
Zorn (The Goblins)
Most of the Goblins inhabit the kingdom of Zorn in the Nithmere Mountains. They are a tribal people dwelling in scattered goat pastures. Their units must be deployed on the mountain and pass spaces of Zorn; only one may be placed per space, and no two may be deployed in adjacent spaces. This rule must be followed both when setting up and when bringing in replacements.
Ghem (The Dwarves)
Dwarves, who own the kingdom of Ghem, have three widely separated locations determined by the availability of rich mines: Aws Noir, Aws Alzak, and Rosengg. Though separated, they are all related and will fight fiercely for a common cause.
Hothior
Due to the vulnerability of their capital city of Port Lork, the Hothiorans have engaged the best engineers to construct a heavy chain on a boom to prevent the entry of unwanted ships.
"The Boom," sometimes called "Boarhort's Boom" after the king who authorized it, is located in the scenic coastal space next to Port Lork. This space is considered part of Hothior and it is a diplomatic violation for an enemy unit to enter it. In enemy turns, the Boom is closed, forcing enemy fleets to stop in the Boom space for one turn before entering the space of Port Lork. The Boom is open to all fleets if Port Lork is under siege or enemy-occupied.
Rombune
Like Hothior, Rombune has gone to extraordinary lengths in late years to protect its vulnerable quarters by engineering. The Rombunis have exaggerated the gradual sinking of the hinterland around Parros with man-made canals. Now Parros is effectively surrounded by a large moat.
A land invasion is still possible, but more costly. Crossing the canal space sides of Parros costs a player 2 extra movement points, unless Parros is a friendly castle. Increase the combat roll of the stack defending outside the castle by +2, unless the invader attacks with the support of fleets (e.g., has sufficient fleets present to transport the attacking force, although no actual transport is done. This is not considered an amphibious assault.)
Shucassam
In the Basic Game the scenic space of the Obelisk is considered a wasteland space and not part of the kingdom of Shucassam.
Basic Game Optional Rules
Re-entry of Eliminated Players
If a player is eliminated, he can, with the unanimous consent of the other players, return to play as a new player monarch. He will start over at zero victory points and must randomly draw a new player monarch from the currently available neutral monarchs (including his former player kingdom). The player receives its full force pool for deployment, even if the kingdom currently has unreplaced losses from previous conflict. However, Plundered Castles remain plundered.
If there are no neutral monarchs available, the player randomly draws a nonplayer identity card from the player with the largest number of allies. As before, the kingdom's force pool is restored to its original starting strength. Any hostile units are displaced from the kingdom's deployment spaces to allow for normal deployment of the returning player's units.
If the player does not choose to re-enter the game, he keeps any victory points earned thus far. If he has the greatest number of victory points at the end of turn 20, the eliminated player monarch is the winner despite his death.
History and Geography of Minaria
The rulebook's background section outlines the world of Minaria: a continent shattered long ago by a magical catastrophe called the Cataclysm, which destroyed the ancient, highly civilized Lloroi Empire and plunged the land into a New Dark Age. Out of the ruins of that empire, eleven feudal kingdoms and two sorcerous principalities (the Eaters of Wisdom and the Black Hand) eventually rose along the western part of the continent. The "Recent History" portion of the section catches the reader up on developments in the fifteen years since the game's earlier edition: shifting river courses following an earthquake in Muetar, the rise of the port of Jipols as a Rombuni protectorate, new fleets built by Pon and Shucassam to contest the growing Sea of Zett, the loosening of old territorial claims by the Trolls, the Eaters of Wisdom, and the Black Hand, and the appearance of ominous rumors of a conquest-minded empire in the distant East.
Following the history, the rulebook profiles each of the thirteen kingdoms of Minaria in turn — the Black Hand, the sorcerous Eaters of Wisdom, the mining Dwarves of Ghem, the sandy, embattled coastal realm of Hothior, the fur-trading frontier kingdom of Immer, the maritime trading power of Mivior, the heavily militarized farming kingdom of Muetar, the forest Elves of Neuth, the mountain-bred kingdom of Pon, the pirate-descended monarchy of Rombune, the caravan tollgate kingdom of Shucassam, the nomadic Trolls of the wastelands, and the goblin tribes of Zorn — describing each people's origins, economy, and character. A closing section, "The Ancient Battlefields," describes four pre-Cataclysmic battle sites said to be haunted by the magic and spirits of the dead: the Field of the Laughing Dead, the Plain of Bones, the Wasted Dead, and the Unknown Army.