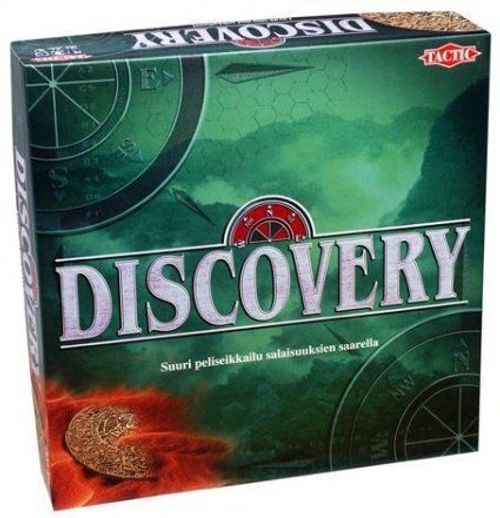
Discovery
Discovery Rulebook
Table of Contents
Table of Contents
- Game Contents
- Object of the Game
- Description of the Material
- Preparation for the Expedition
- On With the Adventure!
- Step One: Discovering Your Location
- Step Two: The Treasure Hunt
- End of the Adventure
- Advice to Beginners and Suggestions
- Reference Card: Special Markers – Terrain Markers – Equipment Cards
Game Contents
- (2) game boards representing the treasure island map
- (2) locator guides (2 transparent plastic overlays)
- (1) clue checker
- (28) 2-sided locator cards
- (2) equipment kits with (9) cards including: binoculars, a knife, a compass, a flashlight, a radio, a canteen, a rope, a first-aid bag, and a multi-use tool.
- (210) 2-sided terrain markers
- (2) erasable markers
- (1) rules of the game
Object of the Game
Be the first player to find the place where the treasure of the lost island is hidden.
Description of the Material
The Game Boards
In order to be able to easily follow the progress during the game, each player plays on his own game board. It represents the island where our adventurers will hunt for treasure. If you study the maps, you will notice that they are not completely identical. One has North at the top, and the other has North at the bottom. When facing each other, each of the players must be able to read their map in the same direction as their opponent in order to later orient themselves. The maps have no other differences.
The island is made up of five different types of terrain, represented by hexagonal spaces: The jungle, mountains, outback, plain and swamps (illustrations 8, 9, 10, 11, 12 on the reference card).
Some spaces have letter/number combinations that represent the checkpoints and/or the treasure sites.
Checkpoints
Eight checkpoints represented by forts are spread out over the island. It is here that you will find the clues leading you to the treasure.
Location of the checkpoints: A1, A2, A3, A4, A5, A6, B1, B2
These spaces are outlined on the treasure island maps in yellow.
Treasure Sites
There are 28 treasure sites. They are represented on the board by four different symbols:
- Water supply: B5, B6, C2, C4, D1, D2, D3, F3
- Cave: C1, C6, D4, D6, F1, F2
- Ruins: B3, B4, C3, C5, E5, F4, F5, F6
- Port: D5, E1, E2, E4, E6
The treasure is hidden at one of these sites. They are outlined on the island maps in red.
Locator Guides (the square transparent sheets that cover the maps)
These are used during the first part of the game to find out your location on the island, and possibly again if you get lost.
Using an erasable marker, mark the type of terrain you have crossed.
You can use symbols, codes or letters for each type of terrain encountered to help you remember your way, taking care in advance to line up the outline of your card with the edges of your locator guide.
You can at any time, by moving the locator guide on your game board, try to match the clues gathered (your route and the terrains you have crossed) with the various types of terrain on the island in order to find your location and thus be able to begin the hunt for the coveted treasure.
The Clue Checker and the Locator Cards
The locator cards are used to give clues and find out where the treasure is. Each game, one card is placed into the checker to establish where the treasure will be located.
The clue checker is used to uncover information given by locator maps. It is very simple to use: just pull out the tabs corresponding to the place you wish to visit (one letter and one number).
The Terrain Markers
Each terrain marker has two sides.
- The front represents one of the five types of terrain encountered on the island. Two additional special markers represent checkpoints and two others the treasure sites (illustrations: 1 Front/3 Back and 2 Front/3 Back).
- The back indicates what the adventurer will discover by moving onto this space. At the top right is the number of walking hours this move costs. The harder the terrain is to cross, the higher the number of walking hours. One turn equals 12 walking hours. With luck, you can also find shortcuts – see illustration five.
Certain terrain markers will have events that could delay your progress. On each of these markers is the number of turns you will be penalized if you don't have the required accessory.
Other events on the terrain markers are unstoppables, and let your opponent stop you and relocate you on the game board. See illustration 4.
| Type of terrain | Walking Hours |
|---|---|
| Plain | 1 – 3 hours |
| Jungle | 2 – 4 hours |
| Mountain | 3 – 5 hours |
| Swamp | 4 – 8 hours |
| Outback | 5 – 9 hours |
The Equipment Kit Cards
At the beginning of the game, each player chooses cards for a value of 24 points of equipment in order to acquire the material of his choice from the nine proposed accessories. Each player chooses from an identical set of cards.
Illustration 13 shows a rope card.
Each accessory protects you from one of the various obstacles and/or problems that you might encounter during your adventure.
- At the top right of each card, a number tells you the number of equipment points that the accessory costs. – See illustration 13.
- At the bottom left in one or more hexagons, the type of terrain is indicated where the accessory can be used and the number of times it can be used.
On the second hexagon, the penalty avoided is indicated (number of lost turns avoided or dangers sidestepped) – see illustration 13.
List of Accessories
| Accessory | Terrain(s) where the card can be used | Cost of the card |
|---|---|---|
| Rope | MOUNTAIN | 1 equipment point |
| Multiple use tool | SWAMP/OUTBACK | 2 equipment points |
| Canteen | PLAIN | 2 equipment points |
| Pair of binoculars | MOUNTAIN | 2 equipment points |
| Radio | SWAMP | 2 equipment points |
| Survival kit | MOUNTAIN/SWAMP | 3 equipment points |
| Compass | JUNGLE | 4 equipment points |
| Flashlight | JUNGLE/OUTBACK | 9 equipment points |
Remember to write down on a sheet of paper each time you use an accessory. When the number written on the accessory card is reached, the card is taken out for the rest of the game. You can also use a marker on the card itself to show what has been used already.
For example: illustration 13 – if the card is illustrated with a rope. This object protects you from a danger occurring in the mountain. In this case, the back of the terrain marker is illustrated with the number one on a red hand making a player lose a turn, if he does not have this card.
This means that you cannot go on to the next turn. However, if you have the rope card it will protect you from this small inconvenience!
Preparation for the Expedition
-
The two adventurers sit on each side of the game table so they are facing each other.
-
Each player takes a treasure island map, a locator guide and an erasable marker, then chooses a position on the map, corresponding to the start-off point of his opponent and puts a cross on the chosen hexagon. Careful! Don't show your map to your opponent as long as he has not figured out his position on the treasure island map. Each player tells the other the type of terrain where they have placed them ("Derk, you're in a Swamp…")
-
Each player chooses from his kit of accessory cards the material he wants to take with him on his expedition on the island. The rest of the cards will not be used in the game.
REMINDER: each player is authorized to have only 24 equipment points.
-
Shuffle the location finder cards, and draw one card to place in the clue checker. The card thus inserted will indicate where the treasure for this game is located. Turn over the clue checker and insert the card by placing it in the direction of the arrow. This way no one will know the location of the treasure before the game begins.
-
Sort the terrain markers according to type of terrain, then shuffle them and put them, with the numbered side hidden, in a stack on the table.
There are then four special markers: two markers represent the treasure on the front and the clue indicator on the back (illustrations two and three) and two other markers represent an arrow crossing on the front and the clue indicator on the back (illustrations one and three). Each player takes one marker of each type.
On With the Adventure!
The first adventurer that can indicate the direction of North in the piece where the players are located is designated to begin the game.
First of all, each player must try to find his initial position on the island. After he has found his location, he can then begin his treasure hunt.
Step One: Discovering Your Location
For moving on each turn, the players have a maximum of 12 walking hours. You can move in 6 directions and can make several moves, as long as you have not reached or exceeded 12 walking hours.
North, Northeast, Northwest, South, Southeast and Southwest (but never the directions East and West – looking at the maps will make this obvious).
How to Find Your Position and Move on the Locator Guide
On your first turn, you don't have any clues about your location, except the type of terrain on which your opponent placed you.
In order to find your location, you will indicate a direction (for example Northeast) to your opponent who will draw a marker matching the terrain on which the player has moved on and turns it over.
-
If the marker only indicates a number, the player subtracts this number from his initial number of hours (12). With each move, you must add the walking hour points indicated on the terrain marker and according to the code of your choice write the type of terrain crossed on the locator guide. Your opponent must also write the spaces that you cross on the island map.
As long as the player has walking hours, he can ask his opponent for a new direction.
-
If the marker indicates in addition to the number an event (see events) the player's turn ends, unless the player has the accessory card corresponding to the danger encountered. In this case, the player can continue to move. Illustration 13.
On the other hand, if he does not have the requested accessory, he will forego the number of turns indicated on the red hand of the terrain marker.
As soon as the player has reached or passed the 12 walking hours, the player's turn ends. The terrain markers are set aside, except the last one turned over. It will allow the player to find his location on his next turn. Note that if you exceed 12 hours with your last step you still move in to that hex. For example, if you have walked for 11 hours and then step into an Outback space with a number six on it, you still enter that Outback hex.
Note: The walking hours noted on this piece will not be taken into account for the next turn.
The other player's turn goes ahead in the same way.
After several days walking, you will be able to begin figuring out your initial position by moving the locator guide on your game board and by matching the clues gathered (journey and terrains crossed).
Shortcuts – Illustration Five
If you are lucky, you will find shortcuts (terrain markers illustrated with a red arrow). They will only cost you one walking hour!
Special Cases
The Sea
If your opponent is on a hexagon next to the sea during his turn and he wants to continue in a direction that leads him straight into the sea, yell "Sea!" to tell him that he can't keep going in that direction.
Crossing Your Own Path
If your opponent ever crosses his own path during the same walking day, you must put a second terrain marker on the first. The game continues normally.
Stepping into a Treasure Site or a Checkpoint
If your opponent steps into a checkpoint or a treasure site while trying to discover their location, show them one of the two special tiles you received at the beginning. A treasure site is designated by the treasure tile, and a checkpoint is designated by the "four arrows" marker. Stepping into either of these sites costs four hours of movement. Your opponent cannot check the contents of the site with the clue checker if they don't know which site they're on!
Events
There are a number of dangers in this crazy race to the treasure. Besides difficult weather conditions, accidental falls, and other obstacles, this island is full of wild animals. It is here that your equipment will be useful to you.
Most of the events will make you lose turns, but some can get you lost.
If you turn over a marker that says you have lost your way and that you don't have the accessory needed to protect you from this incident (illustrated on the terrain marker), your opponent can reposition you on any of the hexagons four spaces away, but in the direction of his choice from the place of the event. "Getting lost" is designated by the "four arrows" symbol with a question mark. See illustration six.
The incident forces you to immediately stop your turn.
On your next turn, you will start from the repositioning made by your opponent. You may need to use the locator guide again to reestablish your known position.
Another example: If you turn over a terrain marker illustration seven, this means that you are having a significant technical problem and that you will be held up for one turn in the swamp.
On the other hand, if you have the multi-use tool accessory in your equipment kit, this event won't affect you and you can continue playing if you still have walking hours.
IMPORTANT: Some events are unstoppable (no card allows you to avoid them). Illustration 4, they are easily recognizable since no accessory is represented on the marker.
After determining your starting position, check with your opponent, in order to begin the treasure hunt. But before, indicate your position on the island map, and the path you have traveled so you don't cross the same place twice.
Once you know your location, you can indicate your moves and those of your opponent directly on the map.
Step Two: The Treasure Hunt
After finding your position, you can start hunting for the treasure.
You will continue to move on the island just like before, which means you have a total of 12 walking hours per turn and by turning over a terrain marker matching the type of space that you wish to cross.
It goes without saying that if an event is specified on the terrain marker, you will be penalized if you don't have the necessary accessory.
There are 28 treasure sites, but it would take too much time to visit them all.
Accordingly, you must find the clues telling you about the treasure site. To do this, you must go to the checkpoints. Each checkpoint is indicated on the map by a fort symbol and a letter/number combination (A1, B2, etc.). These combinations represent the various spaces of the clue checker.
Each move over a checkpoint costs four walking hours plus seven walking hours to read the clue.
But be careful, only the first player who arrives at a checkpoint will be given the clue indicated on the locator map. This clue is the property of the first player who discovers it; the second does not have the right to know it.
To know the type of clue, you have to use the clue checker by pulling out the two tabs matching the fort's letter/number combination.
You can only get one clue per checkpoint, so you have to visit several of them in order to be able to find out the position of the treasure.
There are two types of clues:
- One indicates the type of terrain surrounding the treasure (the treasure can even be in the sea). There are six of these clues.
- The other reveals the site's symbol (cave, ruins, water supply, etc.) where the treasure is.
Note: there are seven clues in all, which means that there is always an empty clue checkpoint! This shows a question mark instead of a clue.
For example, if the treasure is located in B4, you can get one of the following clues at the checkpoint: outback, jungle, ruins or the swamp. This means that for this site, there are two clues per type of terrain (two for the swamp, two for the jungle, etc.)
The Treasure Sites
After you have collected enough clues and when you think you can discover the famous treasure, you have to move to the treasure site to check your assumption.
The treasure is located on one of the spaces shown in red on the game board.
Note: the treasure appears on one of the spaces of the clue checker thanks to the combination (one letter and one number) given by the treasure site space, indicating to the player that he has won.
Opening a treasure site is done in the same way as visiting a checkpoint. Four walking hours are needed to reach the site and seven walking hours are needed to read the locator map of the clue checker. And if the treasure is where you imagined – you win!
End of the Adventure
The winner of the game is the first adventurer to make the Treasure symbol appear in one of the spaces of the clue checker.
At the end of the game, the spaces of the boards can be easily erased using a damp sponge.
Advice to Beginners and Suggestions
- During the game, you should keep an eye on your opponent's journey (and yours, once your position has been determined) by indicating it on your treasure island map.
- Be careful! Don't show your map to your opponent as long as he has not figured out his position on the treasure island map.
- The shortest route is not necessarily the fastest one, due to the differences of terrain. Some are very difficult, and others are much more practical.
- You can choose an equipment kit for a certain type of terrain and try to follow these terrains as much as possible on your moves.
- If your opponent already has several clues, try to follow him in his moves and analyze his actions (opening of treasure sites, etc.).
- You can try to bluff your opponent, for example, by opening an empty treasure site.
Reference Card: Special Markers – Terrain Markers – Equipment Cards
- Special 2-sided marker cf. illustration 3. Checkpoint.
- Special 2-sided marker cf. illustration 3. Treasure site.
- Back of special markers 1 and 2.
- Terrain marker with the back showing an unstoppable event.
- Terrain marker with the back showing a shortcut.
- Terrain marker with back showing an event. The player is lost unless he has the equipment card of the knife.
- Terrain marker with back showing an event. The player loses a turn unless he has the multi-use tool equipment card.
- Terrain marker with mountain on the front.
- Terrain marker with jungle on the front.
- Terrain marker with swamp on the front.
- Terrain marker with outback mountain on the front.
- Terrain marker with plain on the front.
- Rope equipment card: number of points that the accessory costs; the player avoids losing a turn; the accessory will be used in the mountains and will only be used once. Terrain marker with mountain on the front and an event on the back: the player loses 1 turn if he does not have the rope equipment card.