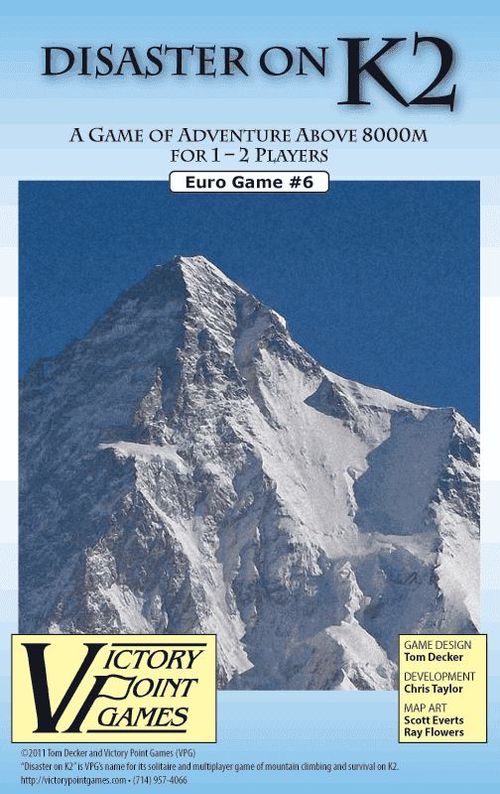
Disaster on K2
Disaster on K2 Rulebook
Table of Contents
Table of Contents
- [1.0] Background
- [2.0] Object of the Game
- [3.0] Game Components
- [4.0] Disaster on Everest Players
- [5.0] Game Set Up
- [6.0] Sequence of Play
- [7.0] Draw Event Token
- [8.0] Move Your Team
- [9.0] Movement Restrictions
- [10.0] End of Turn
- [11.0] Game End
- [12.0] Score Victory Points
- [13.0] Sherpa Goals
- [14.0] Advanced Game
- [15.0] Two-Player Rules
- [16.0] Campaign Game
- Player Aid Card: Victory Chart
- Player Aid Card: Guide Skills
- Player Aid Card: Climber Traits (Advanced Game Only)
- Player Aid Card: Event Token Results
- Player Aid Card: 2-Player Event Clarifications
[1.0] Background
As an internationally renowned expedition leader, you are anxious to gain prestige by leading a group of high profile climbers from your country to the top of the most difficult peak in the world, K2. While some of the climbers have been selected for their climbing abilities, others have been assigned to your team for various political reasons. Certainly if you can accomplish this feat, your name will go down as one of the greatest expedition leaders of all time and your fame and fortune will be assured.
[2.0] Object of the Game
Score points by delivering climbers successfully to the summit of K2 and safely back to High Camp before the game's end.
The game begins at midnight at High Camp on K2. You want to get as many of your climbers to the summit of K2 and back safely that day. Each turn, you will move climbers up toward the summit as quickly as possible and then back down again. However, at some point in the game, the deadly avalanche will collapse upon the Bottleneck, changing the rules drastically and forcing you to creatively find a way for your climbers to get back down before nightfall...or risk having them stranded in the "Death Zone" (8000m above sea level) overnight.
[3.0] Game Components
- 1 Game Board
- 8 Guide Markers
- 30 Event Tokens
- 10 Summit Markers
- 4 Blocked Ridge Markers
- 2 Preparations Markers
- 1 International Team Status Card (inside front cover)
- 20 round Climber Markers
- 2 round Prestige Markers
- 1 round Darkness Marker
- 1 round Flashlight Marker
- 4 round Secret Goal Markers
- 1 Player Aid Card
K2 Event Tokens are marked with a symbol.
Not included is one 6-sided die.
[4.0] Disaster on Everest Players
For those who have played Disaster on Everest, you will find many similarities in this game. Basically, the "game engine" is the same, while some of the specifics have been altered. Anyone not familiar with Disaster on Everest should skip this section and move onto [5.0] Game Set Up.
Disaster on K2 introduces new teams and Event Tokens. Teams consist of just one guide and five climbers (instead of two guides and six clients). Because of this, the movement options are slightly different and explained in detail below. You will also choose between two different guides. Clients are referred to as climbers on K2 because, unlike Disaster on Everest, everyone involved in climbing K2 has a strong mountaineering background.
Buying Event Tokens and blocking ridges operates in a similar fashion. However, instead of the Storm Track, Disaster on K2 features the Avalanche Track, and instead of it happening all at once, the avalanche takes 3 turns to collapse completely before darkness hits. In Disaster on K2, the Darkness Phase is similar to the Storm Phase.
There are new rules for navigating around and through the avalanche, but there is no Hillary Step on K2. There is a new option available during the Darkness Phase, [8.7] bivouacking.
Scoring and Victory Points are awarded similarly. Then there are Two-Player rules [15.0] which can be used to play Disaster on Everest as well. Section [16.0] contains rules on how to play a campaign game using both the Everest and K2 maps.
[5.0] Game Set Up
[5.1] International Team
The game begins with the selection of an International Team you wish to lead. The Team you select determines which guides and climbers you will control. (Teams: Serbia, Netherlands, Norway, South Korea.)
[5.2] Guides
You may choose one Guide to help you in your summit attempt. Your guide may either be a HAP (high altitude porter) from the local area or a Sherpa from Nepal as listed on your International Team Status Card. Your HAP will have two skills, but may not have the conditioning of the Sherpas and may be stalled at times by Events. Your Sherpa will have just one skill due to unfamiliarity with the mountain, but will also have a Secret Goal to achieve which will give you bonus points if accomplished.
Whether you choose to hire a HAP or Sherpa, this person will be referred to as your Guide throughout these rules and game. If you choose the HAP, then return the Sherpa Marker to the bag. It will not be used in the game. If you choose the Sherpa, return the HAP Marker and randomly select one Secret Goal Marker from among the four available and keep it face-down in front of you as a reminder. If your Sherpa achieves this goal, move the Marker to the Status Card to represent the completion of the goal.
[5.3] Climbers
Climbers are the high-profile individuals who have come to K2 with your Team and are relying on your leadership and your chosen guide to deliver them to the summit and back home safely.
Take your Climber Markers listed on the International Team Status Card for your chosen International Team and place them onto the High Camp space along with your chosen Guide. Do not stack any Markers in High Camp. Each climber has a movement point number and may have some letters under their names, which represent character traits. In the Basic Game, these character traits are not used.
[5.4] Prestige Track and the Darkness Track
Place the Prestige Marker on the 18 space on the Prestige Track on the Game Board. The Darkness Marker remains off the board until an Event Token has been placed over the 8th spot on the Avalanche Track.
[5.5] Event Tokens
Place the 30 Event Tokens into an opaque container to be drawn during the Draw Event Token step of each turn.
[6.0] Sequence of Play
There are two distinct phases in Disaster on K2 which affect the way your team is moved and some of the other rules as well. The first is the Daylight Phase. After the 8th space on the Avalanche Track is covered, the game moves into the Darkness Phase and uses a different set of rules for movement.
Regardless of the game's current phase, the three steps below are always followed each turn:
- Draw an Event Token
- Move Your Team
- End of Turn
When the Darkness Marker moves onto the Game End space, the game is over and the Game End steps are performed. Victory Points are then tallied and the final game results determined.
[7.0] Draw Event Token
Draw an Event Token randomly from the container with the Event Tokens. Blocked Ridge Markers are placed and then you have the option of using the Event by buying it with Prestige.
[7.1] Place the Blocked Ridge Markers
The Shoulder, Bottleneck (I, II, and III), Traverse, and Snowfields are considered ridge spaces in the game. The Summit is not considered a ridge space. Each ridge has a number or numbers shown near its space on the game board, representing when they become blocked. Look at the number in the lower left corner of the Event Token and place a Blocked Ridge Marker on the ridge space or spaces that contain that number.
[7.2] Buying Event Tokens
Events do not occur unless bought with Prestige. The cost for the event is the number in the upper right corner. If you want the event to occur, reduce your Prestige by the listed amount and follow the event instructions as described on the Player Aid. If you do not have enough Prestige left, you may not buy the event. Some of the Event Tokens have negative results, but you may choose to buy them just to slow down darkness or the avalanche from coming (see The Avalanche [7.3] below). Most events will have an immediate effect, but some may be held for later use. You may continue to purchase events during the Darkness Phase, if you still have the Prestige points left to do so. Set aside played Event Tokens. They are not returned to the opaque container until the end of the game [11.1]. There are three Event Tokens called "Darkness" that may not be purchased. These go directly onto the Avalanche Track (see [7.3] The Avalanche below).
[7.3] The Avalanche
If you do not buy the Event Token (i.e. you do not pay the Prestige and the event does not happen), then the token is placed on the Avalanche Track on the board. The first one goes on the 1, the second on the 2, and so on. When the 5th space is covered, a Blocked Ridge token is turned over to show its "Balcony Serac Collapse!" side (called an Avalanche Marker) and placed on the Bottleneck I space on the board. When the 7th space is covered, one is placed on the Bottleneck II space, and when the 8th space is covered, one is placed on the Bottleneck III space. This also signifies the end of the Daylight Phase of the game. At the end of the turn in which the 8th Avalanche space is covered, the Darkness Marker is placed on the 1 space on its track and the Darkness Phase begins. Event Tokens not purchased during the Darkness Phase still block ridges, but are set aside for the end.
Any climbers on spaces covered with an Avalanche Marker are immediately killed and their Markers placed onto the International Team Status Card. If a guide is present on that space, the guide may make a Noble Sacrifice (see [11.4] Noble Sacrifice) to save one climber on the same space. The climber is then moved to the next available higher space on the mountain and the Guide Marker is removed.
[7.4] Event Token Depletion
If at any time, there are no Event Tokens remaining in the container to draw, all previously set aside tokens are returned to the container. This will not include events removed from preparations, events on the Avalanche Track, ropes, or Event Tokens held by the player for later use.
[8.0] Move Your Team
Movement rules change depending on the phase of the game.
[8.1] Daylight Phase Movement
During each turn of the Daylight Phase, choose one of the three options below to move your guides and/or climbers:
a. Move your guide or b. Move up to all five climbers or c. Make preparations and move one climber
[8.2] Guide Movement
Guides can move forward/backward along the game board the number of spaces listed on their marker. They can help one climber at a time such that the climber moves as one with the guide (stack the Climber Marker on the Guide Marker to show this) up to two spaces. When the climber is "dropped off," remove the Climber Marker from the Guide Marker and turn it over to its back side to show that it may not be moved again this turn. The guide may continue to move and help climbers as long as they have the movement allowance to do so.
Example of one guide's move: Pemba the sherpa begins in a space with a climber and moves that climber two spaces ahead, drops the climber off and turns the marker over, then moves another space forward where another climber is waiting, picks up that climber and moves two more spaces forward. Two climbers will have moved two spaces ahead and Pemba will have moved five (5) spaces, his maximum allowable for the turn.
[8.3] Guide Movement Exceptions
Guides with the Strong trait may move two climbers at a time. A strong guide may pick up climbers during a move, but all climbers being moved together must be dropped off at the same time. Guides with the Fast trait may move climbers up to three spaces at a time. These traits will combine, such that a Strong and Fast guide can move two climbers up to three spaces at once.
[8.4] Climber Movement
Climbers move forward/backward as per their move allowance shown on their Climber Markers (the number in the middle of the marker). A climber who moves any part of his/her movement with a guide may not move in any other way that turn. Climbers ignore their own movement restrictions (and character traits in the Advanced Game) when traveling with a guide, even if they are beneficial. After a Climber Marker is moved, it is turned over onto its back side. You may turn a climber around and head back to High Camp at any time, even before reaching the Traverse Goal or K2 Summit.
[8.5] Preparations
For movement option (c), add the Preparations Marker to the Game Board on its "Prep 1 / 2" side or flip a previously placed marker to its "Prep Ready" side. When the preparations are ready, draw three Event Tokens instead of one during the Draw an Event Token step. Keep one as the drawn event for that turn, put one back into the container, and permanently remove one from the game, then roll the die. On a 1 or 2, the preparations are over and the marker is removed from the Game Board. You may make preparations again on later turns, should you choose. Otherwise, the Preparations Marker remains on the board and you may continue to use it until you roll a 1 or 2. After making preparations, you may then move one of your climbers, but not your guide.
[8.6] Darkness Phase Movement
During the Darkness Phase, everyone (guides and climbers) can move each turn. Guide Markers are always moved first. Guides lose all of their traits and their movement is reduced to just two spaces. A guide may still guide one climber those two spaces. After the guide moves, all climbers not moved by guides may move only one (1) space, unless their movement previously was 0, in which case it remains 0. A Climber Marker which was not moved by a guide, but which begins its movement in a space with a guide (after the guide moves), may be moved its full movement allowance as shown on the Marker.
Exception: Guides with the Resolute trait suffer no penalties during the impending darkness and keep their other trait as well. They move as if they could see in the dark and the temperature was not plummeting.
[8.7] Bivouacking
During the Darkness Phase, a climber or guide who is at the Snowfields or below may choose not to move and attempt to bivouac instead. Check the current Darkness turn and check the die roll for that turn required to create a successful bivouac. If successful, move that climber or guide to the LOST/BIVOUAC space on the game board. Once bivouacked, the climber or guide takes no further actions in the game.
[9.0] Movement Restrictions
[9.1] Ridges
Ridges may become blocked from the effects of an Event Token. When a ridge is blocked, climbers and guides may not move into or through the blocked ridge. A climber or guide already on the blocked ridge may move off of the ridge in either direction during the movement step.
Exceptions: Guides with the Expert Climber skill may guide their climbers through Blocked Ridge Markers, but may not end their movement or drop off climbers on that space. If they do not have enough movement to do this, then they cannot move through the space. This is also true for Advanced Climbers in the Advanced Game.
[9.2] Avalanche Spaces
When climbers or guides move onto a space with an Avalanche Marker on it, they can only descend. If more than one climber and/or guide arrive at the space at the same time, the player may choose in which order to have the climbers/guides descend. The descent of a guide leading a climber into an avalanche space may be resolved once, for both the climber and the guide, or the player may choose to have them resolved individually. If there is already a rope on the avalanche space, then the climber or guide may use the rope. If there is no rope, but the player holds a synthetic rope event token, then that token may be placed on the avalanche space and used by the climber/guide in that space. A synthetic rope may also be played on top of a frayed rope, as desired. If there is no rope or you elect not to use one, then the climber or guide must attempt to scale down the cliff.
When a synthetic rope is used, roll one die:
- 1 - 2: The rope frays and is turned over to its frayed side. The climber or guide is then moved to the space just below the Bottleneck I space and may not move further that turn.
- 3 or higher: The climber or guide moves to the space just below the Bottleneck I space and may not move further that turn. The rope remains intact.
When a frayed rope is used, roll one die:
- 1 - 2: The climber or guide falls and is removed from the game. Place the Marker on the Status Card to denote this. (The frayed rope remains in the space, however.)
- 3 or higher: The climber or guide moves to the space just below the Bottleneck I space and may not move further that turn. The rope is then removed from the game.
For scaling down, roll one die:
- 1 - 3: The climber or guide falls and is removed from the game. Place the Marker on the Status Card to denote this. (If the guide was leading a climber, both fall to their deaths. In this case, a Noble Sacrifice is not allowed. See the section [12.4] Noble Sacrifice below.)
- 4 - 5: The climber is placed in the LOST/BIVOUAC space on the board and no longer moves in the game. A guide alone or guiding a climber will move to the next space down. If it is another Avalanche space, then the Marker remains on that space and must be resolved next turn during the Movement Phase.
- 6 or higher: The guide or climber is moved to the next space down. If it is another Avalanche space, then the Marker remains on that space and must be resolved next turn during movement.
For all of these die rolls, a +3 die roll modifier is added when using a rope or scaling in the Bottleneck I space and a +1 die roll modifier is added from the Bottleneck II space.
Exception: Guides with the Expert Climber trait and climbers with the Advanced Climber skill receive a +2 die roll modifier for all of the above die rolls, in addition to modifiers from the Bottleneck I and II spaces. Expert Climber guides share this bonus with any climbers they are guiding as well.
[9.3] Getting Lost
During the Darkness Phase, when a climber traveling without a guide leaves the Shoulder, a die is rolled. On a roll of 1 or 2, that climber is placed in the LOST/BIVOUAC space on the board and cannot be moved again. Guides never get lost, nor do the climbers they are guiding (if any). Climbers leaving the Shoulder in the Darkness Phase as a result of the "Icy" Event must still roll to avoid becoming lost.
[9.4] Summit and Traverse Goals
When a climber moves to the space directly above the Traverse, place the back side of the Summit Marker (marked Traverse) on the International Team Status Card in their character box. All climbers who make it above the Traverse will earn 4 points if they survive but do not reach the Summit. When a climber reaches the Summit, they can immediately start down, even on the same turn if they still have movement points left to do so. When a climber makes the Summit, turn over their Traverse Marker to its Summit side. These climbers will now earn their full point value for climbing K2 if they survive! (Climbers who summit do not earn the additional points for reaching the Traverse, however.)
[10.0] End of Turn
Turn all of the Climber Markers back to their top side up in preparation for the next turn. Remove all Blocked Ridge markers in preparation for the next turn.
If the final Avalanche space was covered that turn, then darkness will start to fall and the temperature will begin to drop rapidly. All darkness rules for moving during the Darkness Phase will take effect starting next turn. Place the Darkness Turn Marker on the "1" space on the Darkness Track.
If the Darkness Turn Marker is already on the Darkness Track, move the Darkness Turn Marker one space forward. If the marker moves onto the Game End space, the game immediately ends.
[11.0] Game End
When the Darkness Turn Marker reaches the 8th space, marked "Game End", the game is immediately over.
[11.1] Create Token Pool
Climbers who are in the LOST/BIVOUAC box on the board or who are still on the mountain when the game ends must check to see if they were able to survive the night and will draw tokens to determine their fates. Tokens are not drawn for guides as they do not score. Place all of the Event Tokens back into the opaque container. If a Rope Token is drawn during this step, remove it from the game and draw a new token.
Exception: Purchased Chimney Tokens, the Luck Token, and all Rope Tokens remain in front of the player. Also, any tokens removed from Preparations remain out of the container.
[11.2] Resolve LOST and BIVOUACKED climbers
You first draw one token for each climber in the LOST/BIVOUAC box. Look at the back side of the token next to the word "Lost." If it reads FROZEN, then that climber was not able to survive the cold before a rescue could be mounted and has died on the mountain. If the result is LIVE, then the climber manages to survive and return to camp through either blind luck or sheer force of will. Return climbers who survive to High Camp. If a guide bivouacs, then the guide may make a Noble Sacrifice (see [11.4] below) for one climber in the box.
[11.3] Resolve Climbers above High Camp
Now draw tokens for the remaining climbers still above High Camp. Climbers on the way down who have passed (not on) The Shoulder ridge nearest the High Camp, draw a token and look next to the word "Near" for DIE or LIVE results. These spaces are marked in green. Climbers on The Shoulder to the avalanche spaces draw a token and check by the word "Medium." These spaces are marked in yellow. Climbers on the avalanche spaces through the Snowfield ridge (including the Snowfields space) draw a token and check by the word "Far." These spaces are marked in red. Anyone caught above the Snowfields toward the SUMMIT cannot possibly survive and dies immediately, with no chance of benefit from a guide (see below).
[11.4] Guide Noble Sacrifice
If a climber is on the same space at game's end as a guide, after drawing the token, if the result is DIE, the player may remove the guide instead. The guide may only be sacrificed in this way once, and for one climber only. The climber is considered to have survived then and does not draw another token.
[11.5] Climber Death
All climbers who DIE (including those LOST climbers who are FROZEN) are placed on their spaces on the International Team Status Card. Climbers who survive remain on their spaces.
Exception: Surviving LOST/BIVOUAC climbers are returned to High Camp.
[11.6] Climbers Not Supported
Climbers without a Traverse Marker or Summit Marker on their spaces on the International Team Status Card are also moved to their spaces on the International Team Status Card and will score negative points.
[12.0] Score Victory Points
After all climbers have been accounted for at the game's end and their Markers have been moved as needed, calculate your final score as per the following:
- Score 4 points for each surviving climber with the Traverse Marker on their space on the International Team Status Card.
- Score the full point value listed on the International Team Status Card for each surviving climber with the Summit Marker on their space on the International Team Status Card.
- Subtract the number of points shown on the International Team Status Card for each Climber Marker placed there without a Summit Marker (representing their death without summiting or failure to reach the top of the Traverse). Exception: Spaces with both a Climber Marker and a Summit Marker lose just four points. The climber goes out in a blaze of glory, having reached the summit before dying.
- Add 1 point for each climber at the High Camp space, including climbers who returned to High Camp after being lost or bivouacked.
- Add 1 point for each place remaining on the Prestige Chart (if any) that you have left.
- Add 2 points if you hold the Luck Event Token. You do not score these points if you played the Luck Token.
- Add any points earned from a Sherpa's Secret Goal.
After determining your score, consult the Victory Chart on the Player Aid to discover your level of success.
[13.0] Sherpa Goals
As per your guide selection [5.2], if you choose a sherpa, you will also select a Secret Goal for your sherpa to achieve. You will earn the points listed on the Secret Goal Marker upon completion of the goal. It is not necessary for the sherpa to survive to achieve the points, except in the case of "Back at Camp." Move the achieved Goal Marker to the International Team Status Card when the goal is achieved.
- Summit w/Climber - 10 points awarded as soon as the sherpa reaches the summit with a climber. It has been the sherpa's lifelong goal to reach the summit of K2.
- Do Not Summit - 14 points awarded at the end of the game if the sherpa never is moved onto the summit space. It is against the sherpa's beliefs to set foot upon the summit.
- Back at Camp - 14 points awarded at the end of the game if the sherpa is in the High Camp space at the game's end. A sherpa can survive from a successful bivouac to get back to High Camp. The sherpa has family back home and it is important to return back home with the earned salary.
- Bivouac - 12 points awarded if the sherpa successfully bivouacs on the mountain. It is important for future business and fame for this sherpa to show technical expertise.
[14.0] Advanced Game
It is recommended that players play the Basic Game at least once before trying the Advanced Game to gain an understanding of climber and guide movement.
[14.1] Climber Traits
In the Advanced Game climber traits come into play. Climber traits are listed on the Climber Markers and described further on the Player Aid Card. Some are positive and some are negative. Pushing and Tiring also first come into play during the Advanced Game.
[14.2] Pushing and Tiring
Climbers with the trait of Cautious tire after every solo move (i.e. not when they move with guides). When TIRED, move the Climber Marker just outside its current circle. During the End of Turn phase, move them back into the circle, but turn them over to their "moved" side so that they cannot be moved next turn. During the next End of Turn phase, their marker is flipped back over and they will be able to move again the next turn.
Climbers (only, never guides) can push themselves and move 1 extra space in a turn. This is true even during darkness turns. After a climber pushes, they become tired, just like a Cautious climber and follow the rules of tiring above.
A guide may "pick up" and carry a tired climber (who did not otherwise move that turn). When this happens, the climber is not tired in the following turn.
[14.3] Darkness Phase Movement
During the Darkness Phase, movement works exactly as it does in the Basic Game, except that character traits, pushing, and tiring all stay in effect. It is legal for climbers to Push during the darkness, if their traits allow them to do so.
[14.4] Ridges
In the Daylight Phase (only), Advanced Climbers may ignore Blocked Ridge Markers, as per their trait.
[14.5] Balcony II and Balcony III Collapses
Balcony II will not automatically collapse when the 7th Event Token is placed on the Avalanche Track. Instead, after the collapse on Balcony I, any Event Token with a 1 on it to block a ridge will collapse Balcony II as long as the Event is not purchased. If purchased, then it will not collapse. After Balcony II collapses, then Balcony III will collapse in similar fashion when an Event Token with a 2 on it is drawn and not purchased.
[14.6] Multinational Teams (Optional)
You may mix and match climbers and guides to make truly multinational teams to try to achieve better scores.
[15.0] Two-Player Rules
The following rules changes apply when playing Disaster on K2 or Disaster on Everest with two players:
[15.1] First Player
Before the game, choose one player to be the First Player. Use any of the unused markers to represent who is the current First Player. The First Player changes each turn, so that the Marker is passed to the other player during the End of Turn Phase each turn.
[15.2] Prestige
Each player begins with 14 Prestige instead of 18. Place Prestige Markers onto the 14 space of the Prestige Track. Prestige may go above 14 with a "Good Review" (Disaster on Everest only).
[15.3] Buying Event Tokens
The First Player draws the Event Token. The number in the upper right represents the starting bid with which the First Player may begin. Bidding continues until one player drops out, and then the other player pays the final amount of Prestige bid (by moving their marker down on the Prestige Track) and takes the action from the Event. If neither player chooses to bid on the Event, then it is placed on the Avalanche or Storm Track as per the normal rules.
Note that some events, which may have been bad in the solitaire game, may now be played on your opponent. For example, a "Broken Rope" event may be played on one of your opponent's climbers. Events which are good for "all climbers/clients" or "all guides" still apply to all climbers/clients or guides, from both players, for that turn. Check the Player Aid for further clarifications.
[15.4] Blocked Ridges
The number in the lower left is not used for blocked ridges (or for adding another client in the Hillary Step for Disaster on Everest). Instead a ridge becomes blocked as soon as 2 climbers (clients) end their movement on a ridge together. Guides do not count toward this limitation. As soon as a ridge becomes blocked in this way, place a Blocked Ridge Marker onto that space and proceed with the normal blocked ridge rules. A strong guide is allowed to drop off 2 climbers on a ridge already containing one climber, which will then block that ridge space with 3 climbers. Note: if a ridge becomes blocked, but there are no more Blocked Ridge Markers to place, then the player may remove any one Blocked Ridge Marker from another space to place onto that space. The player may choose not to block the new ridge at all and leave the Markers where they were.
Blocked Ridge Markers are not removed during the End of Turn Phase when playing a two player game. Blocked Ridge Markers are removed, however, as soon as there are fewer than two climbers on the ridge space. This happens immediately so that a ridge may be unblocked if one climber moves off, and then blocked again on that same turn if another climber moves onto the space with the remaining climber.
At the end of your movement, if there are blocked ridges consisting solely of your opponent's climbers, you may remove one of these blocked ridge markers.
A ridge can only become blocked when a climber ends his/her movement on a space with 1 or more other climbers. If a player begins a turn with a ridge containing 2 or more climbers, the ridge does not become blocked until another climber moves onto that space. A climber with a movement of 2 or more, may move up and down (or down and up) and end movement, intentionally to block a ridge.
Expert Climber guides and climbers with the Advanced Climber traits ignore Blocked Ridges as in the solitaire game.
[15.5] Movement
During the Movement Phase, the First Player moves all guides and climbers/clients first, before the other player.
[15.6] Preparations
Preparations work in a similar fashion except that players with preparations ready use them only when they are the first player. On their opponent's turn, preparations are not used.
[15.7] Victory
At the end of the game, the player with the most Victory Points wins the game. For ties, the player with the most Prestige Points wins the game. Further ties are left as mutual victories.
Players may choose to play a more cooperative game by trying to have both teams reach the level of Minor Success or better on the Victory Chart on the Player Aid.
[16.0] Campaign Game
Players may combine games in the series by playing one after the other to achieve greater glory.
[16.1] Resolving Game Component Differences
Use the rule set for each game you are playing completely and the Event Tokens for that game only. If you are short of climbers or clients, you may mix and match ones from other sets.
Example: If you play Disaster on K2 before Disaster on Everest, and two of your climbers die on K2, you may pick up two replacement ones, one new one (since Disaster on Everest requires 6 clients) and one new guide. If going from Disaster on Everest to Disaster on K2 and everyone survives, you'll need to remove one client and one guide for the journey to K2.
Guide skills match for all games and can be used in any of the games. Keep track of any specific changes from the rule set in play. Clients/climbers also match, matching any letters on their markers to the rule set in play. Note that only sherpas from Disaster on K2 will receive a secret goal. Sherpas coming from other games will not receive secret goals.
[16.2] Campaign Victory
Keep Summit markers on the Status Board as each client/climber summits each peak. At the completion of the game, each client/climber who has summited all the peaks scores the points shown multiplied by the number of peaks climbed. Use only these points and compare your score on the chart below.
Example: Joe Bob summits both Everest and K2. He is worth 10x2 = 20 points.
| Campaign score | Result |
|---|---|
| Less than 65 | Major Defeat |
| 65 - 74 | Minor Defeat |
| 75 - 84 | Draw |
| 85 - 99 | Minor Victory |
| 100+ | Major Victory |
Player Aid Card: Victory Chart
- 10 points or less (Major Defeat): Your home nation is disgraced by the deaths of your countrymen and your performance in guiding the team. It is hard for you to even show your face upon your return. It will be a long time before climbers from your country head out to K2 again. You certainly will not be among them.
- 11 - 19 (Defeat): You manage to avoid some climber deaths, but when the dust clears, you realize your country failed above all others to bring its climbers to safety. You are stripped of your group leader status, putting an end to your high-altitude climbing career.
- 20 - 26 (Minor Defeat): Although some fantastic stories of survival come out of the disaster, you are never quite the same. You decide it's best to move to a less dangerous profession.
- 27 - 33 (Draw): While other teams fold in the disaster, you manage just enough success to get another chance to represent your country as team leader. Somehow you know that you had better triumph on your next attempt, though.
- 34 - 41 (Minor Victory): Your clever team management allows for some of your country's climbers to summit, even in these most dangerous conditions. Your reputation as a smart and safe team leader survives and you continue on as team leader for other expeditions above 8000 meters.
- 42 - 49 (Victory): While teams from other countries collapse in ruin, yours and yours alone is noted for its safety and reverence for the mountain. Your team thrives and you, your guide, and your climbers become "The Champions of K2".
- 50+ (Major Victory): What more can be said. Books are written. Movies are produced. Your tale becomes one of the most incredible stories ever told. Your climbers all become instant heroes and you retire a very wealthy individual.
Player Aid Card: Guide Skills
- STRONG - Can guide 2 climbers during Daylight turns. During the Darkness Phase, can guide just 1 climber, just like the others (unless Resolute as well).
- RESOLUTE - Ignores normal darkness restrictions (i.e. during the Darkness Phase, guide and climbers being guided do not act as if darkness conditions are in effect).
- EXPERT CLIMBER - Can guide group past Blocked Ridge Markers, but cannot drop off or finish moving ON a blocked ridge. Receives a +2 bonus added to all "Rope" and "Scale" die rolls, even in the Darkness Phase.
- FAST - Can move a climber up to 3 spaces instead of the usual 2. During the Darkness Phase, can move a climber just 2 spaces (unless Resolute as well).
Player Aid Card: Climber Traits (Advanced Game Only)
- a - Advanced Climber - Ignore Blocked Ridge Markers for this climber only during the Daylight Phase.
- b - Bad Sense of Direction - Always gets Lost when descending at the Shoulder (must travel with guide to avoid getting Lost).
- c - Cautious - Must rest after every move for one full turn. Cannot PUSH.
- d - Dependent Climber - Cannot enter the Traverse Goal or SUMMIT space without a guide.
- e - Extra Equipment - Can never PUSH. When guiding this climber for any portion of their movement, guides reduce their overall movement allowance by 1.
- f - Fortitude - Can carry another climber for exactly one space, even during the Darkness Phase.
- g - Good Sense of Direction - This climber never gets Lost when descending, even when scaling. Treat Lost results as Success.
- h - Healer - A healer plus any climbers in the same space with that healer move up one category when deciding fates. "Near" automatically survives, "Medium" becomes "Near", and "Far" becomes "Medium."
- l - Lucky - May re-roll any bad roll against this individual character once per roll. Does not apply to choosing Fate Tokens at the end of the game.
- w - Will To Live - Climber left on mountain never dies when LOST or below the Bottleneck spaces. Above or in the Bottleneck, must draw as normal.
Player Aid Card: Event Token Results
Acute Mountain Sickness (x1)
The climber closest to the Summit (player's choice, if tied) gets Acute Mountain Sickness. Note this by placing this Event Token on that climber's space on the International Team Status Card. If that climber does not make it back to High Camp, during their survival check, return the Event Token to the container, and then determine their fate from one section worse on the token. (i.e. "Near" becomes "Medium"; "Far" is instant death). A climber with Acute Mt. Sickness is unable to bivouac.
Broken Rope (x3)
Choose any one climber who does not have a Summit or Traverse marker yet (if all climbers have markers, then treat this as No Event, but it still must be paid for with Prestige). Roll a die and use the following results:
- 1: The climber has fallen to their death.
- 2 - 4: The climber is injured and moves immediately back to High Camp.
- 5 - 6: No Effect
(The player aid prints die faces as an icon font whose glyphs are the shifted number keys: ! = 1, @ = 2, $ = 4, % = 5, ^ = 6.)
Chocolate Bars (x2)
Hold this Event Token. Your climbers (not guides or your opponent's if playing the 2-player game) have their movement ratings increased by one this turn when moving alone. This also applies to climbers with a movement of 0.
Darkness (x3)
This Event Token may not be purchased. Immediately move a "Darkness" Event Token to the next open spot on the Avalanche Track.
Flashlight (x1)
Place this marker on any one climber. You can move the Flashlight between climbers any time they share a space, even in passing, and it can be carried up or down the mountain. In the Darkness Phase, all climbers (not guides) who begin their movement in the space with the flashlight are allowed to move their full movement allowance (the number on their marker). The Flashlight may be carried down a rope.
HAP Stuck (x2)
All HAPs cannot move or make preparations this turn.
House's Chimney (x2)
Hold this Event Token. At the Game End, after all other survival checks have been made, roll 1 die for each surviving climber in the order listed on the International Team Status card. If a 1 is rolled, that climber slips and falls at House's Chimney on his/her way down the mountain (ending this event; no further rolls). The fallen climber dies and the Climber Marker is placed on his/her place on the International Team Status Card.
(The player aid prints the die face as the glyph "!", which is 1 in the same icon font.)
Icy (x3)
Everyone (including guides) on a ridge must move down the mountain (away from the summit) to the first non-ridge space below. Climbers who move down into an Avalanche Space as a result of "Icy" are immediately killed.
Luck (x1)
Hold this Event Token. Who says you can't buy a little luck? Play this token before any die roll to add two to the result. You may discard this token to draw a second fate token for one climber during the Game End. If you hold this token at the end of the game, earn two additional points.
Ridges Open (x4)
Hold this Event Token. When played (can be played immediately), remove all Blocked Ridge Markers (not Balcony Serac Collapse Markers) and do not place any this turn.
Sherpa Stamina (x1)
Hold this Event Token. On the turn played, any sherpas in the game add 3 to their movement rating and may guide climbers for one additional space (for this turn only).
Synthetic Rope (x4)
Hold this Event Token. Use the rope on spaces blocked by the avalanche on the way down the mountain. See section [9.2] Avalanche Spaces for more information.
Thick Snow (x3)
The movement rating for all climbers and guides is reduced by one for this turn.
Player Aid Card: 2-Player Event Clarifications
Clarifications for Disaster on K2 and Disaster on Everest:
- "Acute Mountain Sickness", "Broken Rope", and "Avalanche" may be played on an opponent's climbers or spaces.
- "Chocolate Bars" and "Energy Boost" apply to only the climbers of the player who purchased it.
- "Calm Wind", "HAP Stuck", "Icy", "Lost Signal", "Slowed" and "Thick Snow" apply to both players for that turn.
- "Khumbu Ice Field" and "House's Chimney" apply only to the player who purchased them.
- "Ridges Open" removes all ridges for that turn. No Blocked Ridges are placed for that turn. This applies for both players.
- "Synthetic Rope" Tokens can be used by either player once placed onto the game board.